Step 1: Creating your first landing page
Note: We're updating our help center to reflect the new Redwood experience. During the transition, some content reflects the previous version of the UI.
Now that you've created a form, you can present it to contacts via a landing page.
To build a landing page in Eloqua, you can:
- Create one from scratch.
- Use a template provided by your organization.
- Copy an existing landing page.
- Upload an HTML file.
For this tutorial, we will create one from scratch.
To create a landing page:
- Navigate to Assets
 , then click Landing Pages.
- Click Create a Landing Page.

The Template Chooser opens. If your organization has any templates, you can see them here.
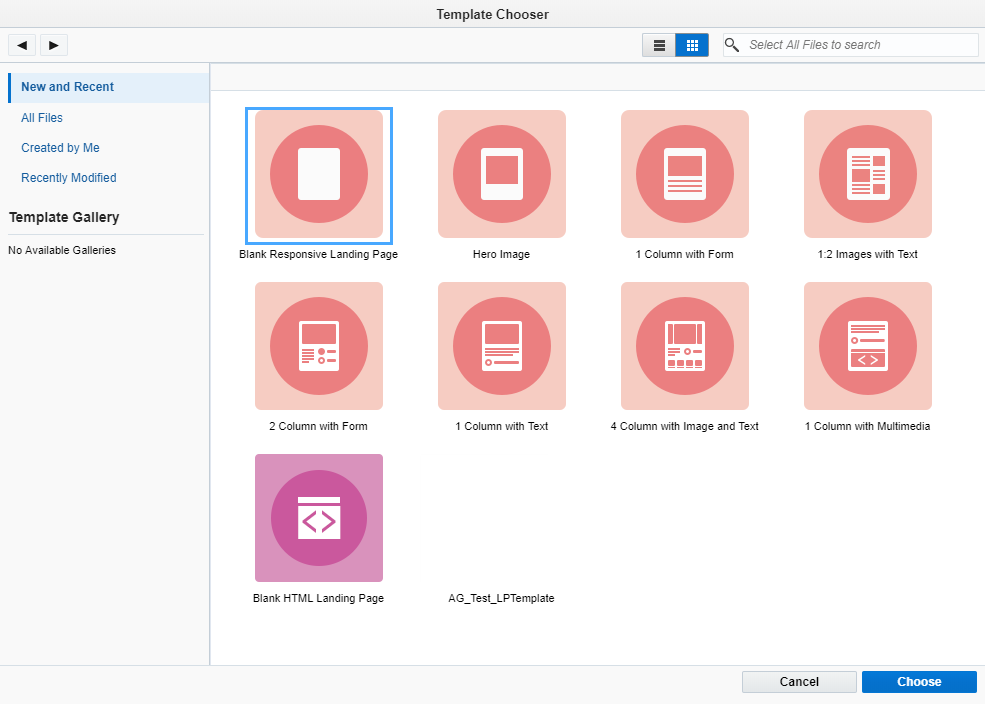
- Select Blank Responsive Landing Page, then click Choose.
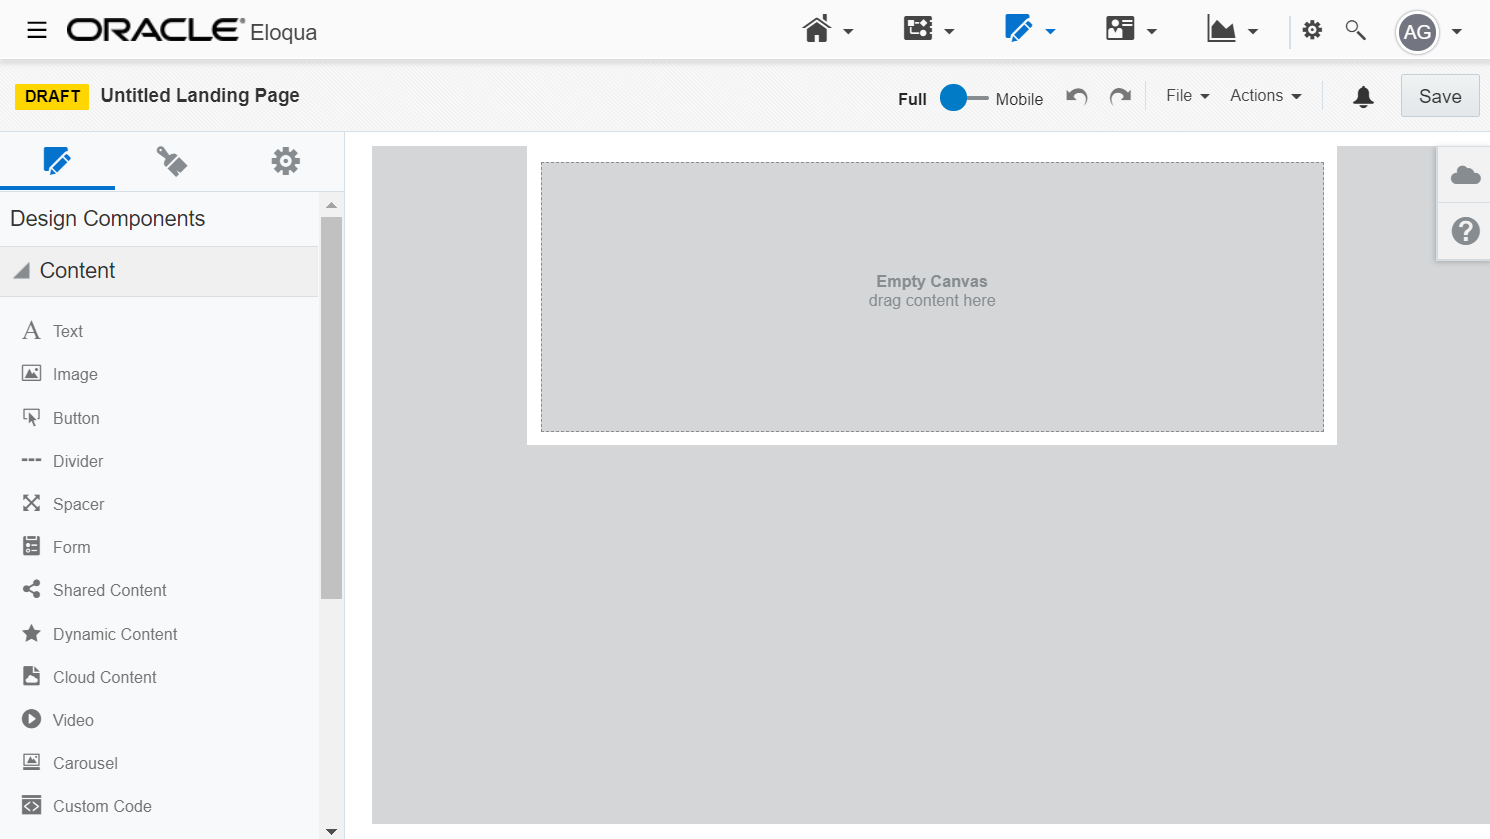
The Design Editor opens. The toolbar on the left provides standard elements to customize your landing page.
First, let's specify the microsite to host the form. We will change the size of the landing page.
- Click
 to open the Landing Page Settings panel.
 - Click the Microsite drop-down and select your microsite. The microsite is a mini section of your company's website. It can be dedicated to a campaign, to a product, or to whatever you wish. To learn more about microsites, see Microsites.
- Enter Welcome_Offer_Trial in the Vanity URL field. This is a friendly name for the landing page. The vanity URL must be unique. If X Invalid Vanity URL appears, the vanity URL is already in use.

- Click
 to open the Landing Page Style panel.
The Landing Page Style
settings allow you to edit the style and format of the landing page and the elements on the page. - Set the Canvas Width to 900.

Next, we'll add an image to the landing page.
- From the Design Components
 panel, drag and drop Image
  content block onto the canvas. Search for the image you want in the Image Chooser. In our case, we are searching for the our banner image.
- Double-click the image to add it to your landing page.
- From the Design Components panel, drag the Form
 content block to the desired layout cell.
 - Click Browse and search for the form you created earlier.

- Click Choose.
- With the form selected, you can move it. Click
 and drag the form content block to change its location in the landing page.
Here is how we positioned the form:

- With the form selected, change the font to Arial 14 px under General Properties.

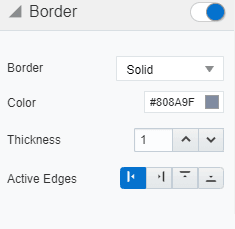
- With the form selected, enable the Border option. Use the following Borders settings:
- Select Solid from the drop-down.
- Click the color picker, then enter 808a9f.
- Set the border thickness to 1.
- Deselect all the options for Active Edges except Left
 .
.
Now, let's add text to our landing page.
- Drag the Text
 content block onto the canvas.
 - Click the text content block, then enter your text. Click and drag the form content block to change its location in the landing page.

- Select the text content block and use the toolbar to format the text.

Now, we are going to add a footer to the bottom of the page using shared content. Shared content is reusable content created by your organization and can be used in landing pages, emails, signatures, and so on.
- Drag the
 icon onto the canvas. Click Browse and search for the shared content in the Shared Content Chooser. In our case, we are searching for our standard footer.
- Click Choose.
- Click Save to save your landing page. Navigate to the folder you want to save the landing page in. Name the landing page DO NOT LAUNCH - Welcome Trial Download. Click Save.
- Click Actions then Preview... .
The Preview Landing Page dialog opens.
- Search and select a contact, then click Preview to preview the landing page.

- Switch between Desktop, Tablet, and Mobile view to see how your landing page will look on different devices.


Now, let's add the form we created earlier to the landing page.