Step 4: Configuring your dashboard
After adding your prompt and the analyses to your dashboard, you can now configure the dashboard's properties so that it provides the functionality you're looking for. You can configure things like background colors, section names, and other dashboard properties.
To configure your dashboard:
- Click
 Page Options > Edit Dashboard.
 - Hover your mouse over the label for Column 1, and click Properties > Column Properties.
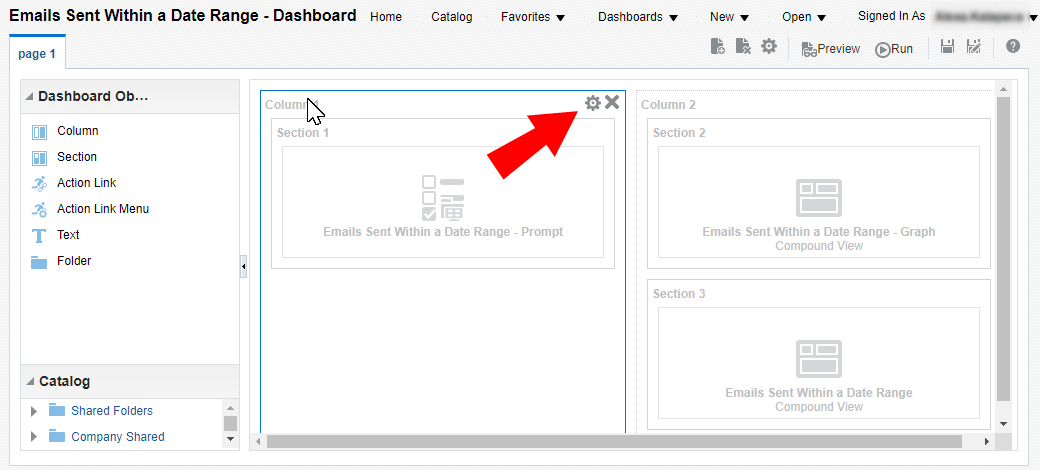
The Column Properties dialog opens.
- For Background Color, click
 .
. - Enter the code #99CCFF in the text box, then click OK.
- Click OK to close the Column Properties dialog.
- Hover your mouse over the Section 1 label, and click Properties > Rename.
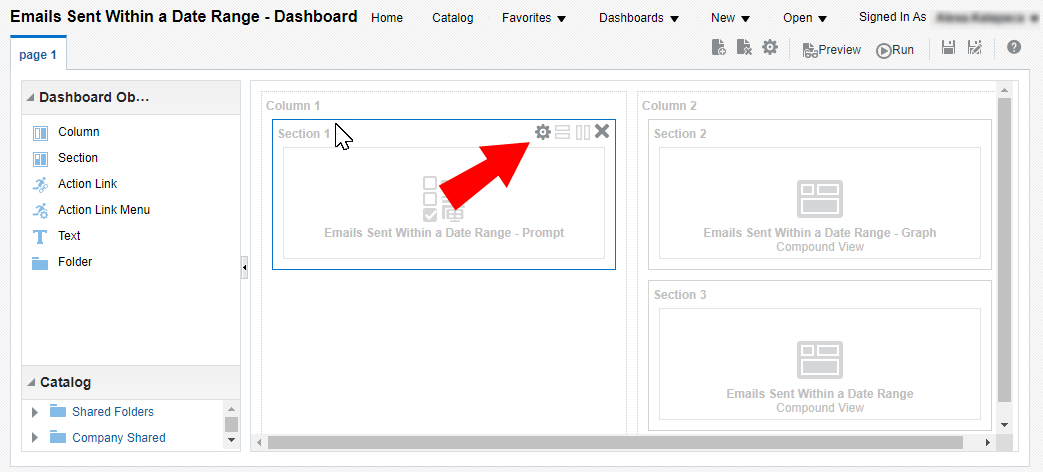
- Name the section Choose your filtering, then click OK.
- (Optional) Hover your mouse over your prompt, and click
 Properties > Scope > Page.
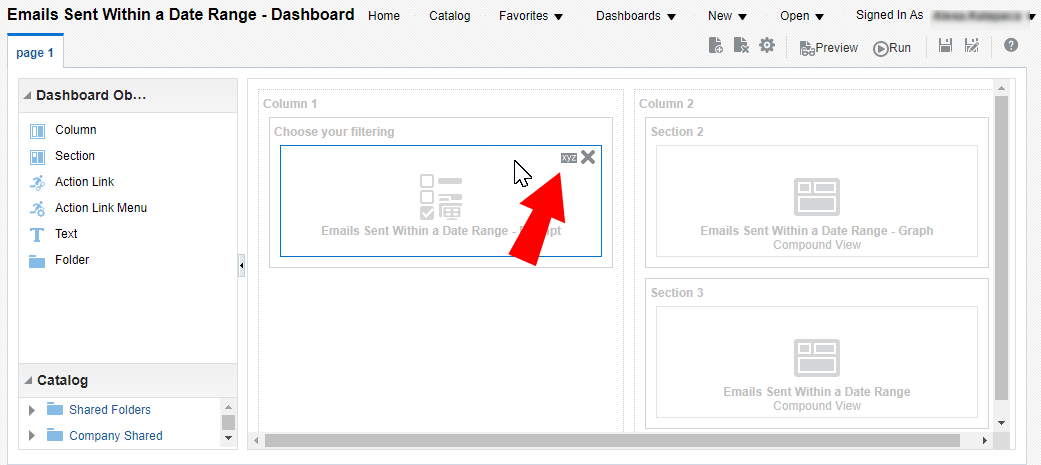
After making this selection, the prompt will now only display on this current page if you create more pages in your dashboard.
- Click Tools > Page Report Links...
The Report Links dialog lets you specify which links should display at the bottom of each analysis.
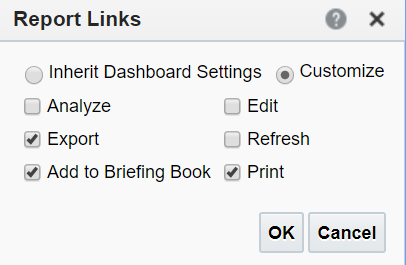
- Select Customize, then select Export, Print, and Add to Briefing Book:
- Export allows you to export the analysis in a variety of formats.
- Print opens the analysis in a printable format, either HTML or PDF depending on your selection.
- Add to Briefing Book adds the dashboard to a briefing book.
- Click OK.
- Click Tools and select Dashboard Properties.
The Dashboard Properties dialog opens.
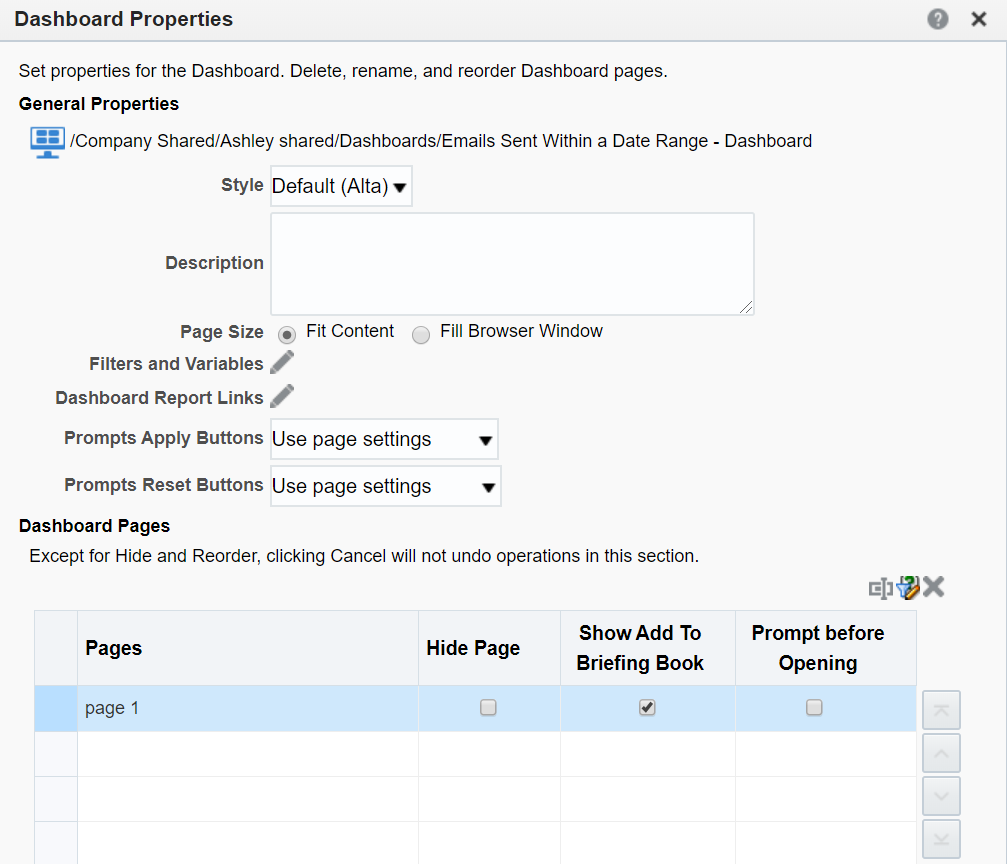
- From this dialog box, you can do the following:
- Change the Styles: Styles control how dashboards and results are formatted for display. The default is using the Alta styles.
- Add a description: Descriptions are displayed in the catalog.
- Add hidden prompts, filters, and variables.
- Rename, hide, reorder, set permissions for, and delete dashboard pages.
- Under Pages, click on your dashboard name. It should currently be named Page 1.
- Click
 and rename your dashboard to Dashboard Tutorial.
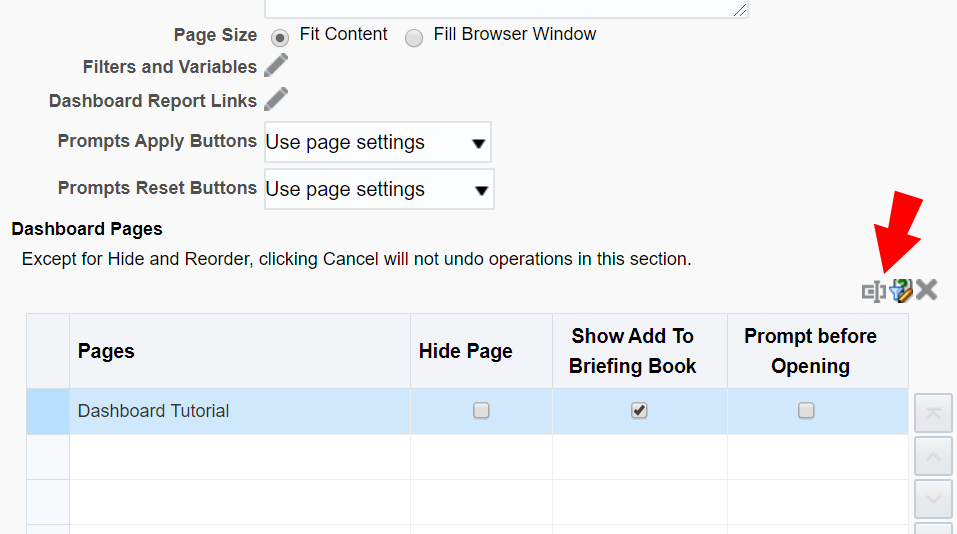
- Save and run the dashboard.