Creating the Get Opportunities auto synch to associate opportunities with contacts
For closed-loop reporting with Salesforce, you must create an auto synch to attribute revenue to a campaign. This is done by associating opportunities to Oracle Eloqua contacts. This auto synch runs after the Get Opportunities auto synch created earlier.
Before you begin:
- This task relates to setting up closed-loop reporting with Salesforce. Refer to Configuring auto synchs for closed-loop reporting for an overview of importing campaigns and opportunities to Oracle Eloqua.
- Before setting up a new auto synch, check to see if it already exists. If the auto synch does exist, you can use the steps below to help configure the auto synch.
Choosing the right contact association
Before setting up this Get Opportunity auto synch, you must determine how you want to associate an opportunity to a contact. For example, should an opportunity be associated with a primary contact that the sale was closed with or with all contacts associated with the opportunity in the CRM? Should the opportunity be associated with accounts and all contacts on the account?
The opportunity association can be tied to contacts in one of the following ways:
- Link to primary contact: Only the primary contact on the account is associated with the opportunity in Oracle Eloqua.
- Link to all contacts: All contacts that are part of the opportunity in Salesforce are associated with the opportunity in Oracle Eloqua.
- Link to account contacts: All contacts associated with the account are associated wit the opportunity in Oracle Eloqua.
The option you choose depends on your organization and how your business associates customers or prospects to opportunities. Some organizations associated an account to the opportunity with other associate the named contacts. For a short-term ROI approach, fewer contacts will provide better visibility into cause and effect. If Salesforce adoption or data management presents a challenge of inconsistent mapping of Contacts to Opportunities, option C may be the only choice. Whatever decision you make, it applies to all opportunities and closed-loop reports.
Configuring the Get Opportunities auto synch for opportunity association
To configure the Get Opportunities auto synch:
- Click Settings
 .
. - Click Integration under Platform Extensions.
- Click the Inbound tab.
- Click Create Data Source with External Call in the Create Data Sources menu. The External Call Wizard opens displaying step 1 of 8.
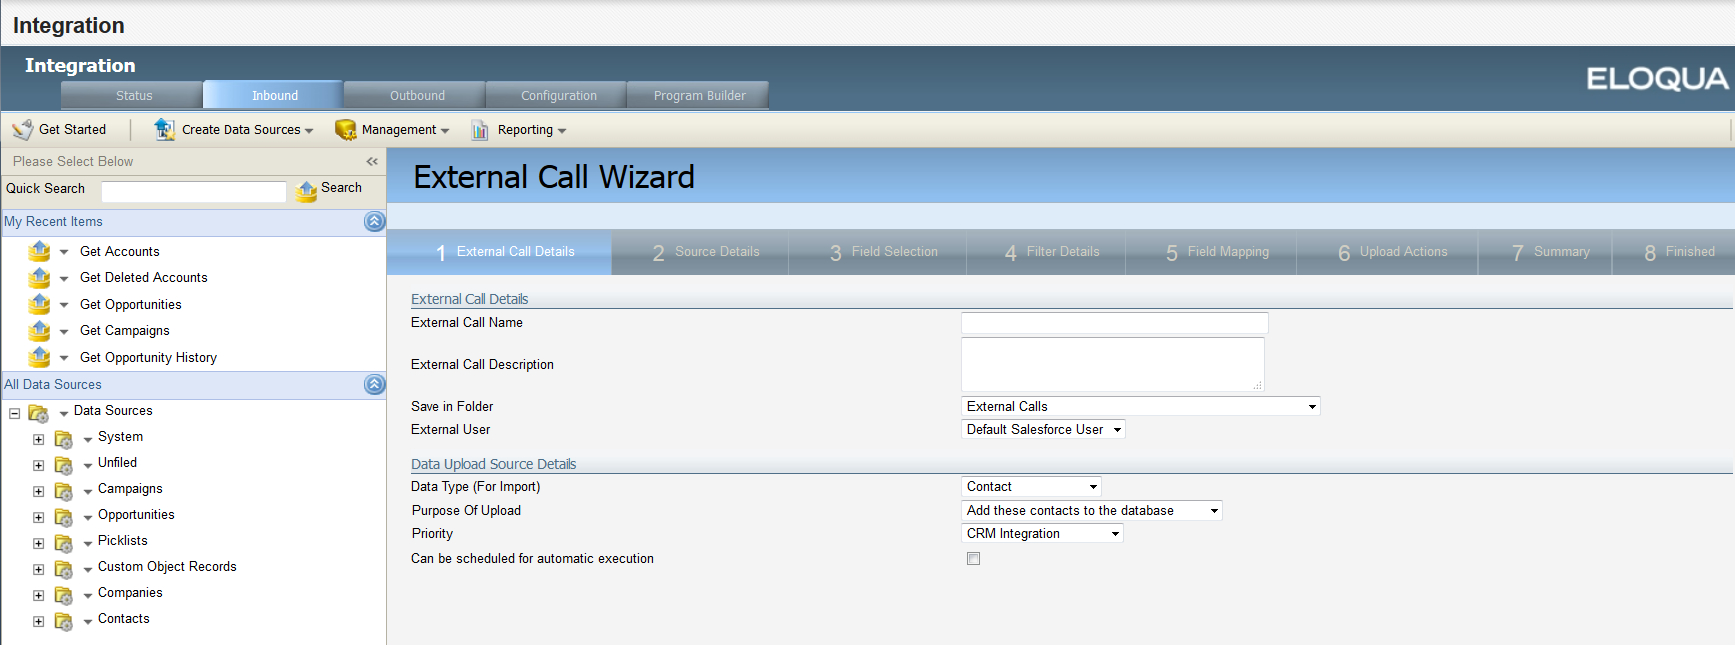
- Configure the settings in the External Call Details step.
Association Type Settings A. Link to primary contact
B. Link to all contacts
External Call Name: Get Opportunities and Link to Contacts
External Call Description: Get SFDC opportunities and link to contacts
Save in Folder: Retrieve Data - Opportunities
External User: Default Salesforce User
Data type (For Import): Retrieve Data - Opportunity
Purpose of Upload: Link these opportunities to contacts
Can be scheduled for automatic execution: Enable
C. Link to account contacts
External Call Name: Get Opportunities and Link to Accounts
External Call Description: Get SFDC opportunities and link to accounts
The remaining settings are the same as for the Link to primary contact external call (A), described in the first row.
-
Configure the settings in the Source Details step.
Association Type Settings A. Link to primary contact
B. Link to all contacts
Action: Retrieve
Entity: Opportunity Contact Role
Retrieve 18 character IDs: Enable if applicable (15 character IDs are typical when integrating with Oracle Eloqua)
Note: If you do enable this setting, you must ensure that all auto synchs are set up to retrieve 18 character IDs.
C. Link to account contacts
Action: Retrieve
Entity: Opportunity (Opportunity)
The remaining settings are the same as for the Link to primary contact external call (A) above.
- Configure the settings in the Field Selection step. Select the following Salesforce contact role fields.
Association Type Settings A. Link to primary contact
Contact ID Opportunity ID
Primary
B. Link to all contacts
Contact ID
Opportunity ID
C. Link to account contacts
Account ID
Opportunity ID
-
In the Filter Detailsstep, create following filter that looks for those opportunities created since the last import.
- Salesforce Opportunity Contact Role Fields: Last Modified Date
- Operator: Greater Than or Equal
- Expression: Click
 , then click Add Date. In the Add Date window, select Use the start date of the last successful upload
Note: If you have specified a Record Type ID, include a filter for it.
-
Configure the settings in the Field Mapping step to map the fields you selected in the Field Selection to the Oracle Eloqua fields.
Association Type Settings A. Link to primary contact
B. Link to all contacts
Uniquely Match on Eloqua Opportunity Field: Opportunity ID
Upload Source Field: Opportunity Contact Role: Opportunity ID
Perform a case-sensitive match: Enable
C. Link to account contacts
Uniquely Match on Eloqua Opportunity Field: Opportunity ID
Upload Source Field: Opportunity: Opportunity ID
Perform a case-sensitive match: Enable
- Configure the settings in the Upload Actions step.
Association Type Settings A. Link to primary contact
B. Link to all contacts
Source Field: Opportunity Contact Role: Contact ID
Field Name: SFDC Contact ID (This is the Oracle Eloqua contact field that stores the Salesforce contact ID.)
Case sensitive match: Enable
Is Primary Contact: Opportunity Contact Role: Primary
C. Link to account contacts
Source Field: Opportunity Contact Role: AccountID
Field Name: SFDC Account ID (This is the Oracle Eloqua account field that stores the Salesforce account ID.)
Case sensitive match: Enable
- In the Summary step, review the details. If no changes are required, use the following settings.
Association Type Settings A. Link to primary contact
B. Link to all contacts
Schedule automatic data imports using these settings: Enable
Auto Synch Name: Get Opportunities and Link to Contacts
Description: Get SFDC opportunities and link to contacts
Execute after: Get Opportunities
Send email on success: Optional
Send email on failure: Enable
C. Link to account contacts
Auto Synch Name: Get Opportunities and Link to Accounts
Description: Get SFDC opportunities and link to accounts
Execute after: Get Opportunities
Send email on success: Optional
Send email on failure: Enable
- Configure a schedule that matches the frequency of your Get Opportunities auto synch.
- Click Finish.
To verify that the auto synch was created, on the Inbound tab, click Management > Auto Synchs.
After you finish: Continue to Disabling auto synchs for closed-loop reporting