Embedding Profiler in Microsoft Dynamics 365
You can add Profiler to your Microsoft Dynamics 365 instance.
Prerequisites
- If you are using version 9 and above of Microsoft Dynamics 365, see Version 9 and above.
- A Microsoft Dynamics 365 instance and the permissions needed to customize it.
-
In Oracle Eloqua, build an allowlist of the domains that will be hosting embedded Profiler pages. Learn how to configure Profiler.
- Determine the Oracle Eloqua login URL you want to use. You can use the simplified login URL or a specific legacy URL based on the desired login method. Learn more. The steps below assume you are using the simplified login URL.
If you are using version 9 and above of Microsoft Dynamics 365, you will need to perform some steps differently:
- If Profiler is already embedded in your Microsoft Dynamics 365, you'll need to make the below changes, save them, then publish them.
- For step 13 in the Handler Properties window, make sure Pass execution context as first parameter is enabled.
- You'll need to use the simplified login URL code snippet for step 18:
loadProfiler(executionContext){
var newUrl = "https://login.eloqua.com/siteLogin?SiteName={CompanyName}&ReturnUrl=/apps/embed/salesTools/profiler?emailAddress=" + executionContext.getFormContext().getAttribute("emailaddress1").getValue();Xrm.Page.ui.controls.get("IFRAME_Profiler").setSrc(newUrl);
}
To embed Profiler in Microsoft Dynamics 365:
- Log in to Microsoft Dynamics 365 and navigate to Settings.
- In the Customization section, click Customizations.
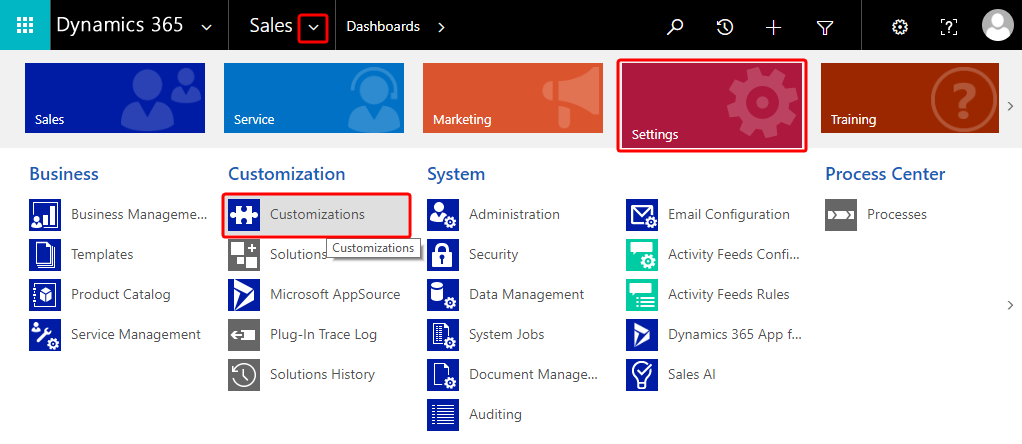
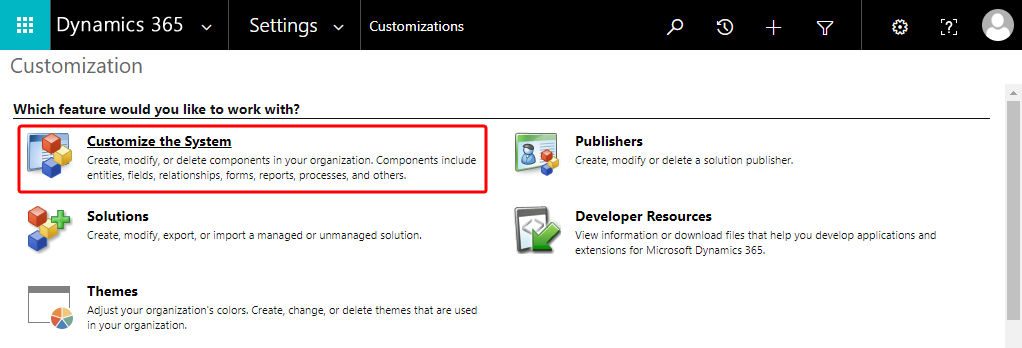
- On the Customization page, click Customize the System.
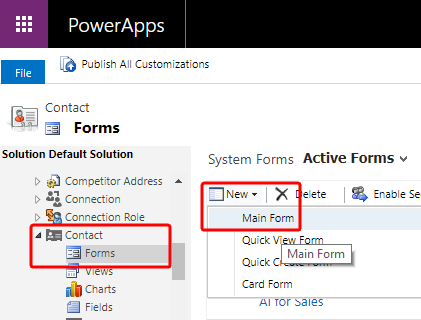
- On the PowerApps page, under Components, select Entities > Contact > Forms.
- Click New, then select the form you want to add Profiler to, such as Main Form.
- Click the Insert tab in the top menu.
- Add a One Column Tab select the new tab and click IFRAME to add an iframe to it.
The Add an IFRAME window is displayed.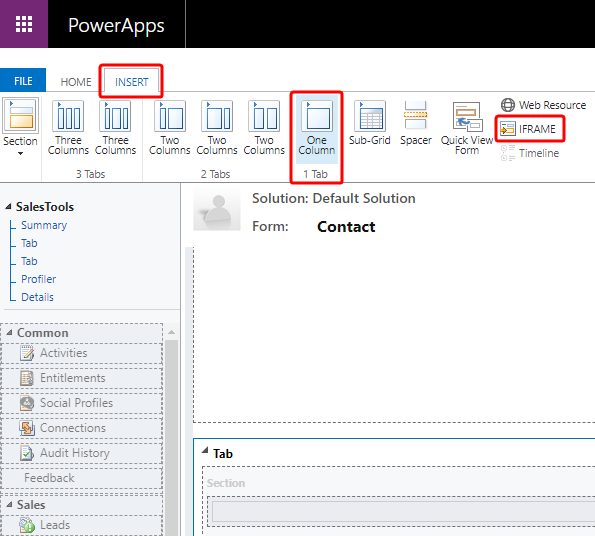
- Enter the following iframe values.
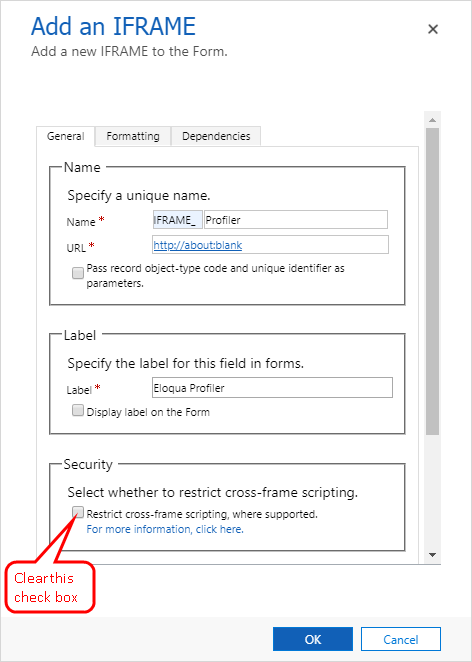
- Name: IFRAME_Profiler
- URL: http://about:blank
- Label: Eloqua Profiler
- In the Security section, clear the Restrict cross-frame scripting option.
- (Recommended) In the Row Layout section of the Formatting tab, increase the height by setting the number of rows to 20 so that Profiler will have enough room to display its information.
- On the Dependencies tab, add email as a dependent field.
- Click OK to close the Add an IFRAME window.
- On the Home tab, click Form Properties.
The Form Properties window is displayed.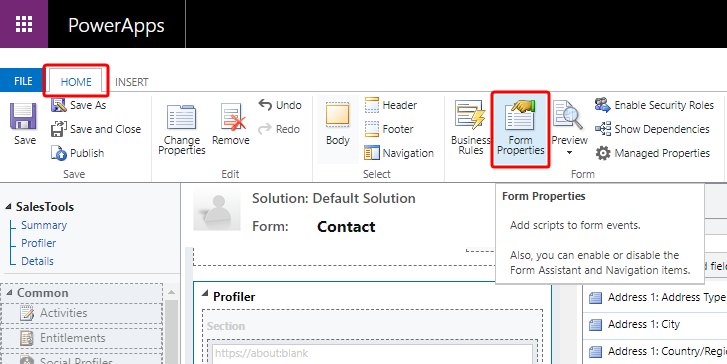
- Click Add. The Handler Properties window is displayed.
Important: If you are using Microsoft Dynamics 365 version 9 and above, see Version 9 and above for additional steps in the Handler Properties window.
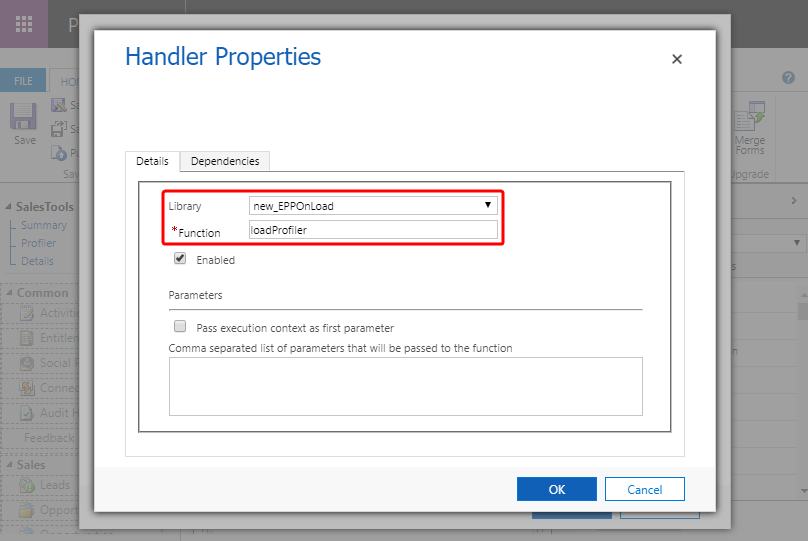
- From the Library list, select new_EPPOnLoad.
- In the Function box, enter loadProfiler and click OK.
- Double-click your new iframe. The IFRAME Properties window is displayed.
- On the Events tab, expand Form Libraries and double-click new_EPPOnLoad. The Edit Content window is displayed.
- Depending on your login type, copy and paste one of the following code snippets into the code editor:
Important: If you are using Microsoft Dynamics 365 version 9 and above, see Version 9 and above for the code snippets. Ignore the below code snippets for step 18.
function loadProfiler() {
var newUrl = https://login.eloqua.com/siteLogin?SiteName={CompanyName}&ReturnUrl=/apps/embed/salesTools/profiler?emailAddress=" + document.getElementById("{emailaddress1}").title;Xrm.Page.ui.controls.get("IFRAME_Profiler").setSrc(newUrl);
} -
Replace the
{emailaddress1}with the value in your Microsoft Dynamics 365 instance. For example, it can beemailaddress1,emailaddress1_d, oremailaddress1_i. To determine what is used in your Microsoft Dynamics 365 data, inspect an existing contact's email address with your browser's developer tools. For example, to find your value using Google Chrome:- Go to Sales > Contacts and click an existing contact.
- Pressing Ctrl+Shift+I to open developer tools.
- On the Elements tab, press Ctrl+F and search for emailaddress1.
- The value associated with the contact's email address field that is followed by
title="{emailAddress}"indicates the value you need to include. In the following example, the needed value is emailaddress1_d.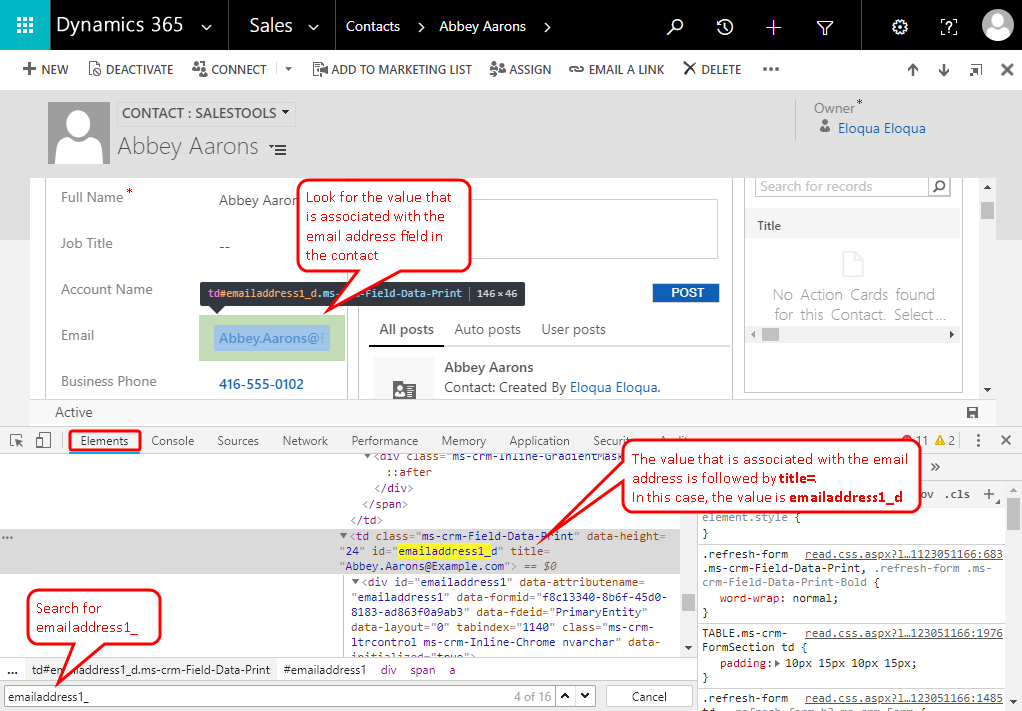 Example: If you chose autologin, your {LoginPrefix} is ELQA, and your {emailaddress1} value is
emailaddress1_d, your code should look something like this:function loadProfiler(){
var newUrl = "https://login.eloqua.com/autoLogin?LoginPrefix=ELQA&Url=/apps/embed/salesTools/profiler?emailAddress="+ document.getElementById("emailaddress1_d").title;Xrm.Page.ui.controls.get("IFRAME_Profiler").setSrc(newUrl);
}
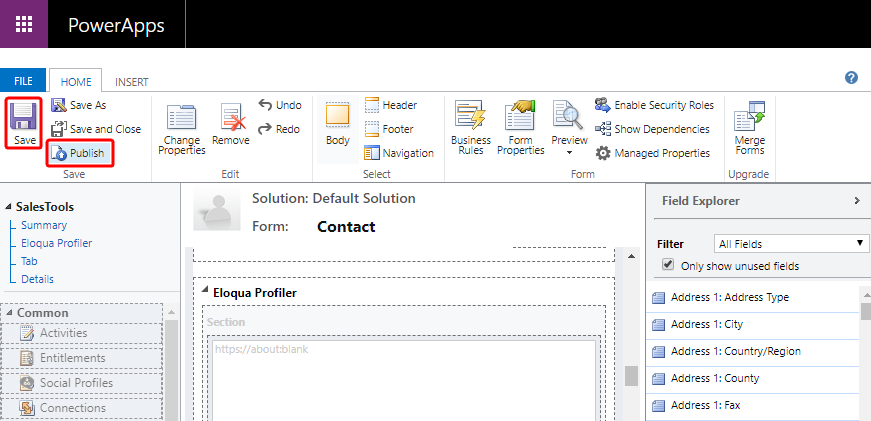
- Click OK to close the text editor.
- On the Home tab, click Save, click Publish, and then close the PowerApps window.
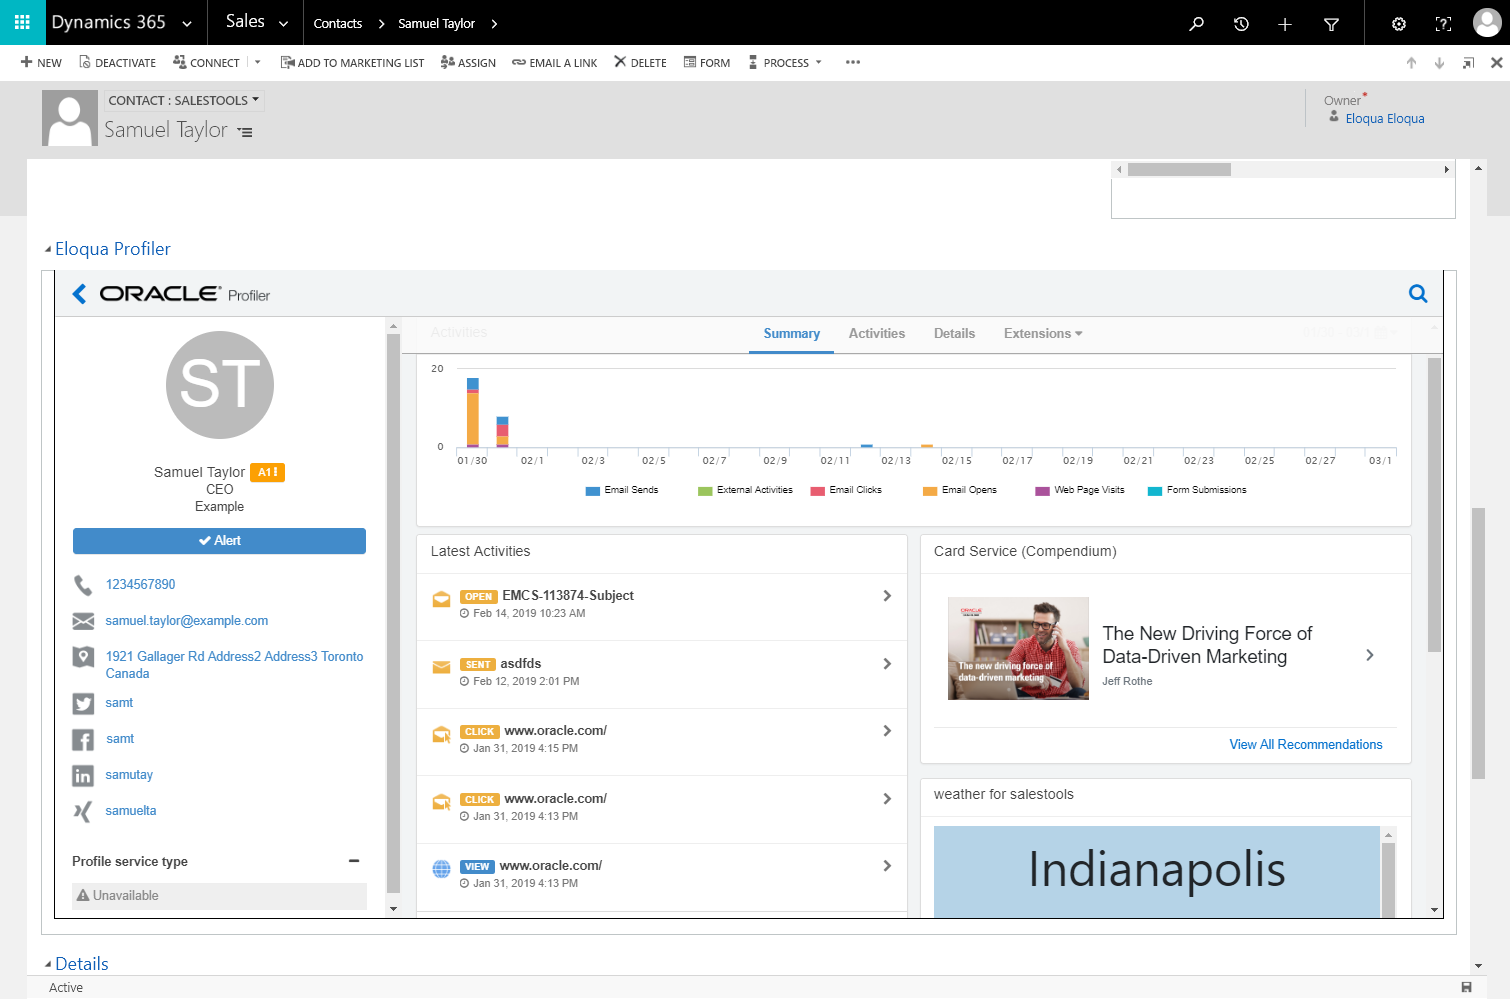
- Go to Contacts and open a contact that is known to exist in both Oracle Eloqua Profiler and Microsoft Dynamics 365 to test that your new Eloqua Profiler iframe is working. If you are prompted to authenticate, enter your Eloqua credentials. If there is a match based on the email address, the Profiler iframe should display information for the contact.
Important: If the IFRAME window appears blank, navigate to Settings > Administration > System Settings > General, and change the setting for Use legacy form rendering to Yes. Microsoft Dynamics will then correctly render the Profiler iframe.