Visual Editing
Web content templates include a simple markup that outlines a list of parameters for visual editing. This configuration is accessible on the Variables tab and can be customized according to business needs. Once a property is defined in the Variables tab, the visual editor identifies marked items and presents them on the Designed panel.
In this manner, you can configure your own set of parameters and CSS properties that are important for the specific content configuration.
Example 1
In the example below, we are working with Standart lightbox widget and are enhancing it by allowing customization of font-styles for the title message.
-
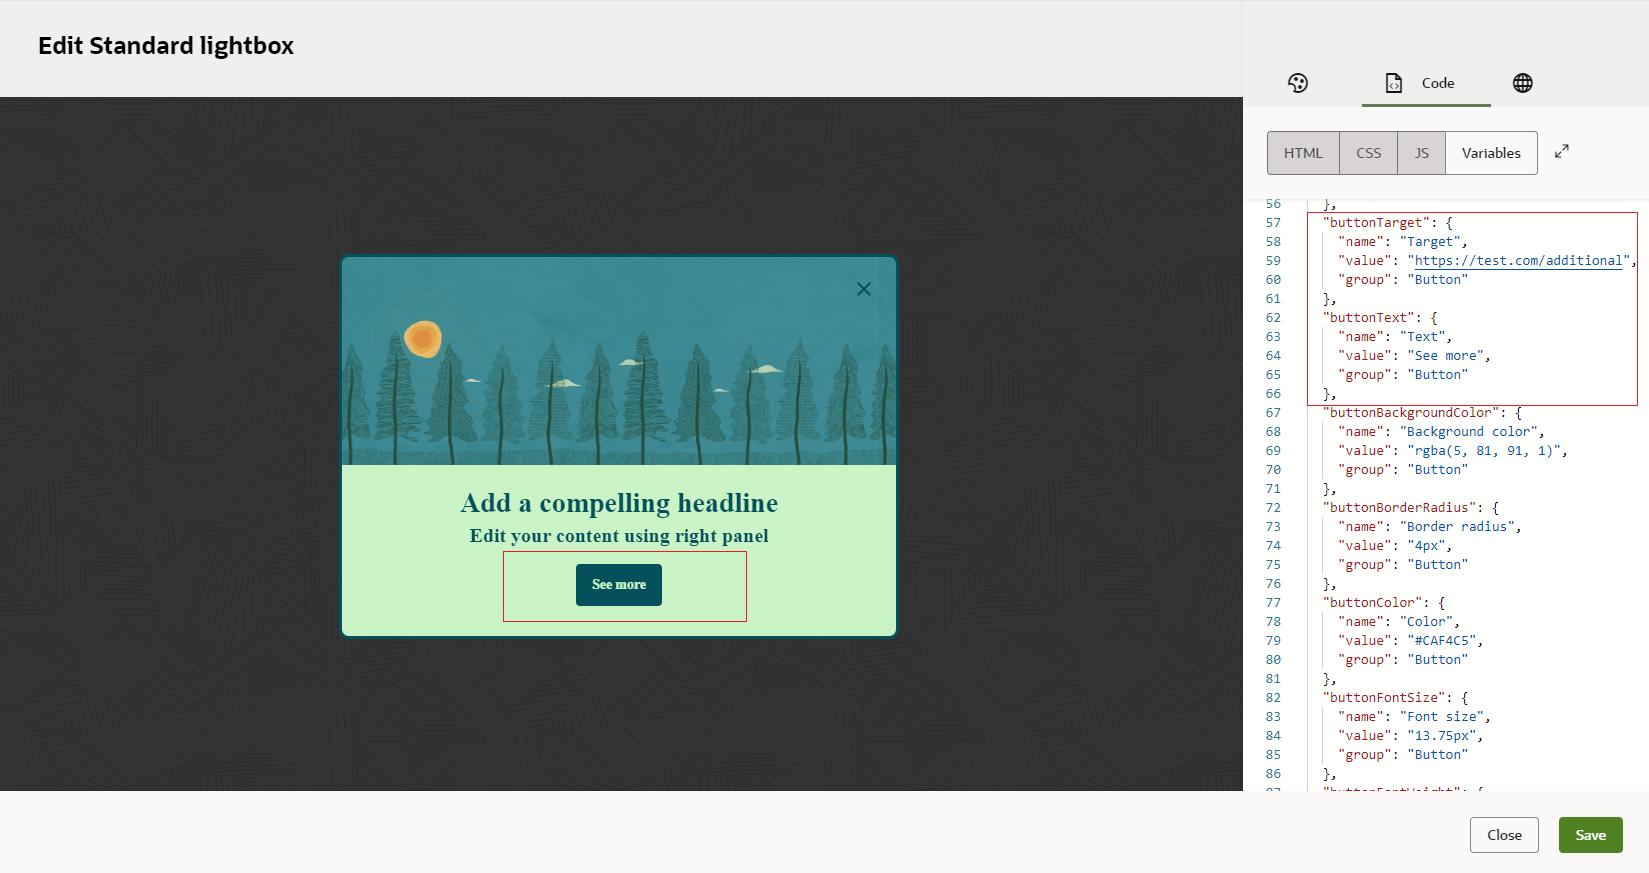
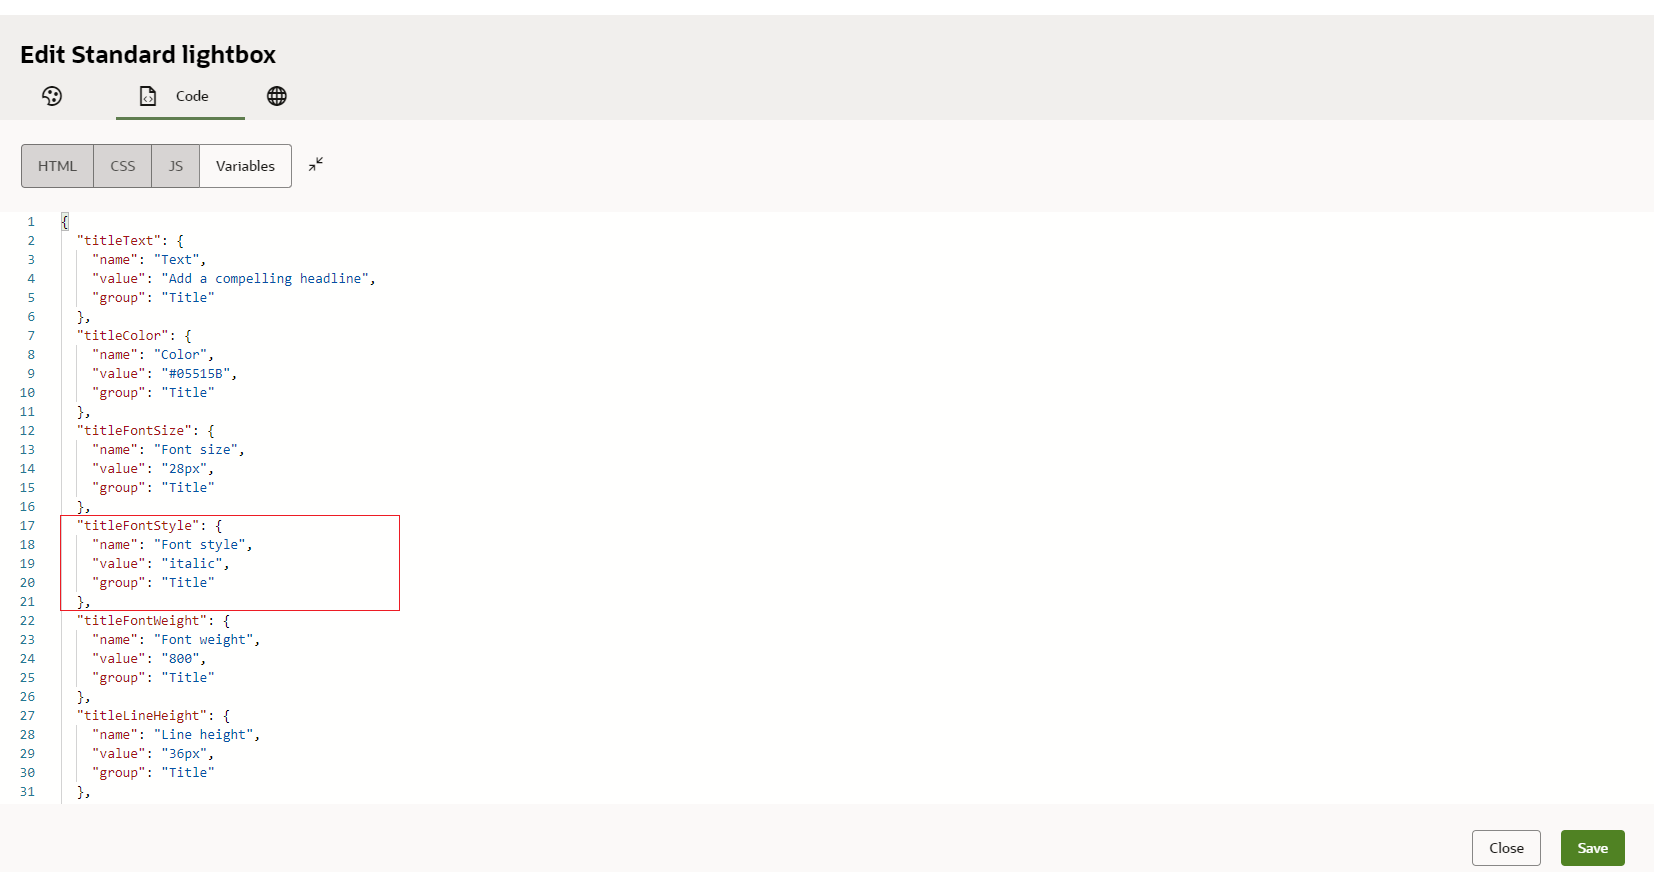
Add a new JSON object via the Variables panel:
"titleFontStyle": {
    "name": "Font style",
    "value": "italic",
    "group": "Title"
  }
-
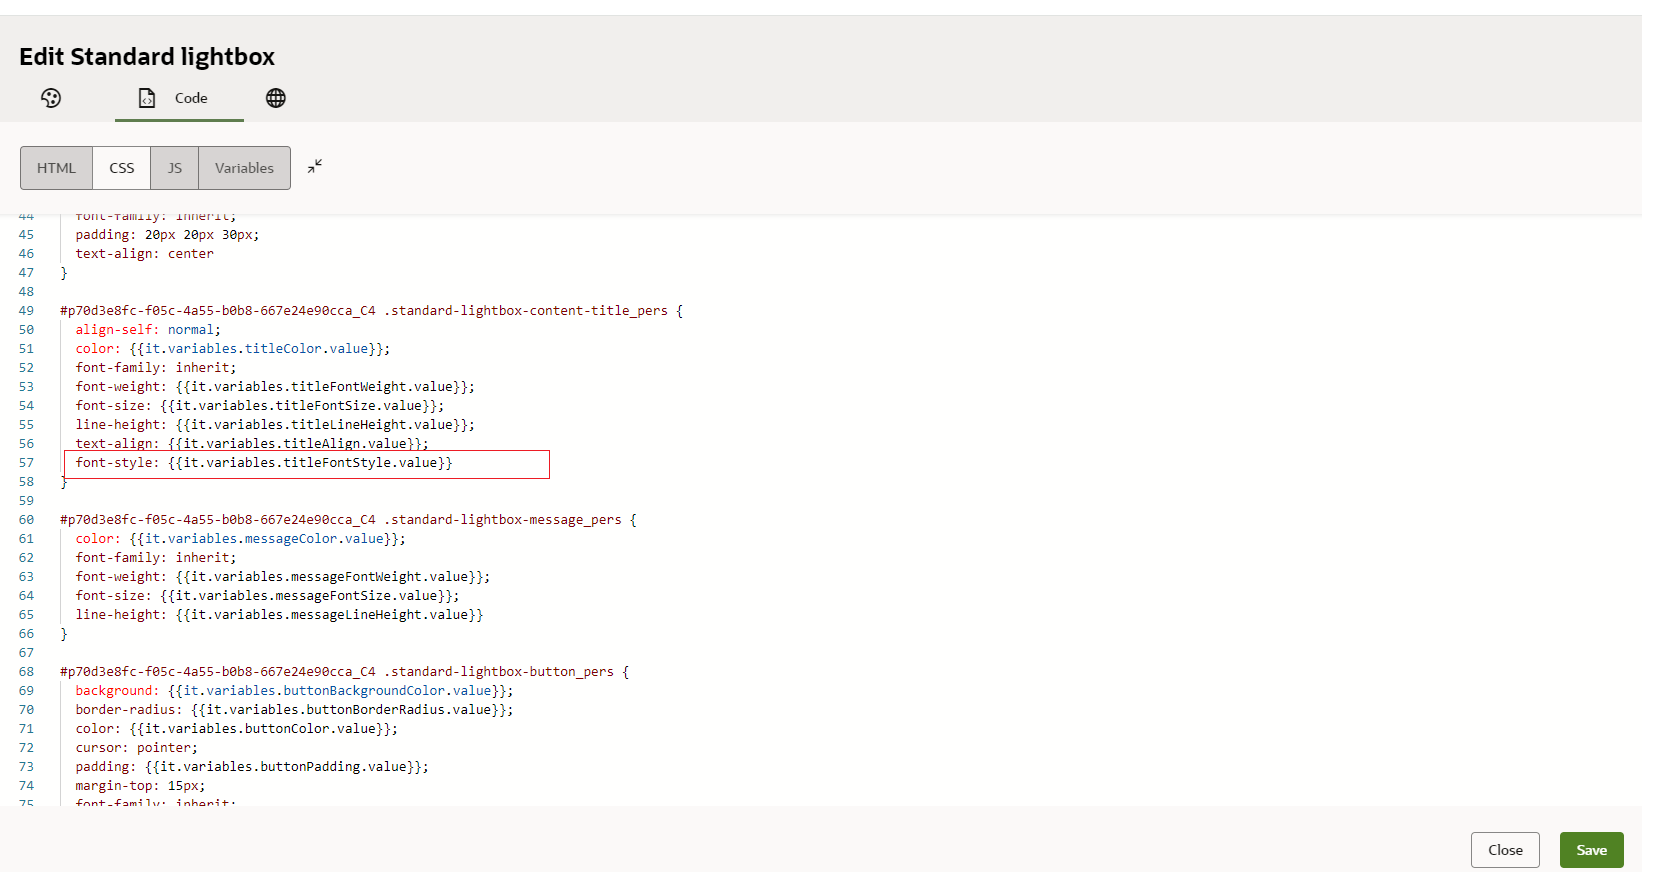
Find the following rules section in the CSS code:
.standard-lightbox-content-title_pers {}
-
Add
{{it.variables.titleFontStyle.value}}as the value for font-style rule as shown in this example:.standard-lightbox-content-title_pers { font-style: {{it.variables.titleFontStyle.value}} ; }
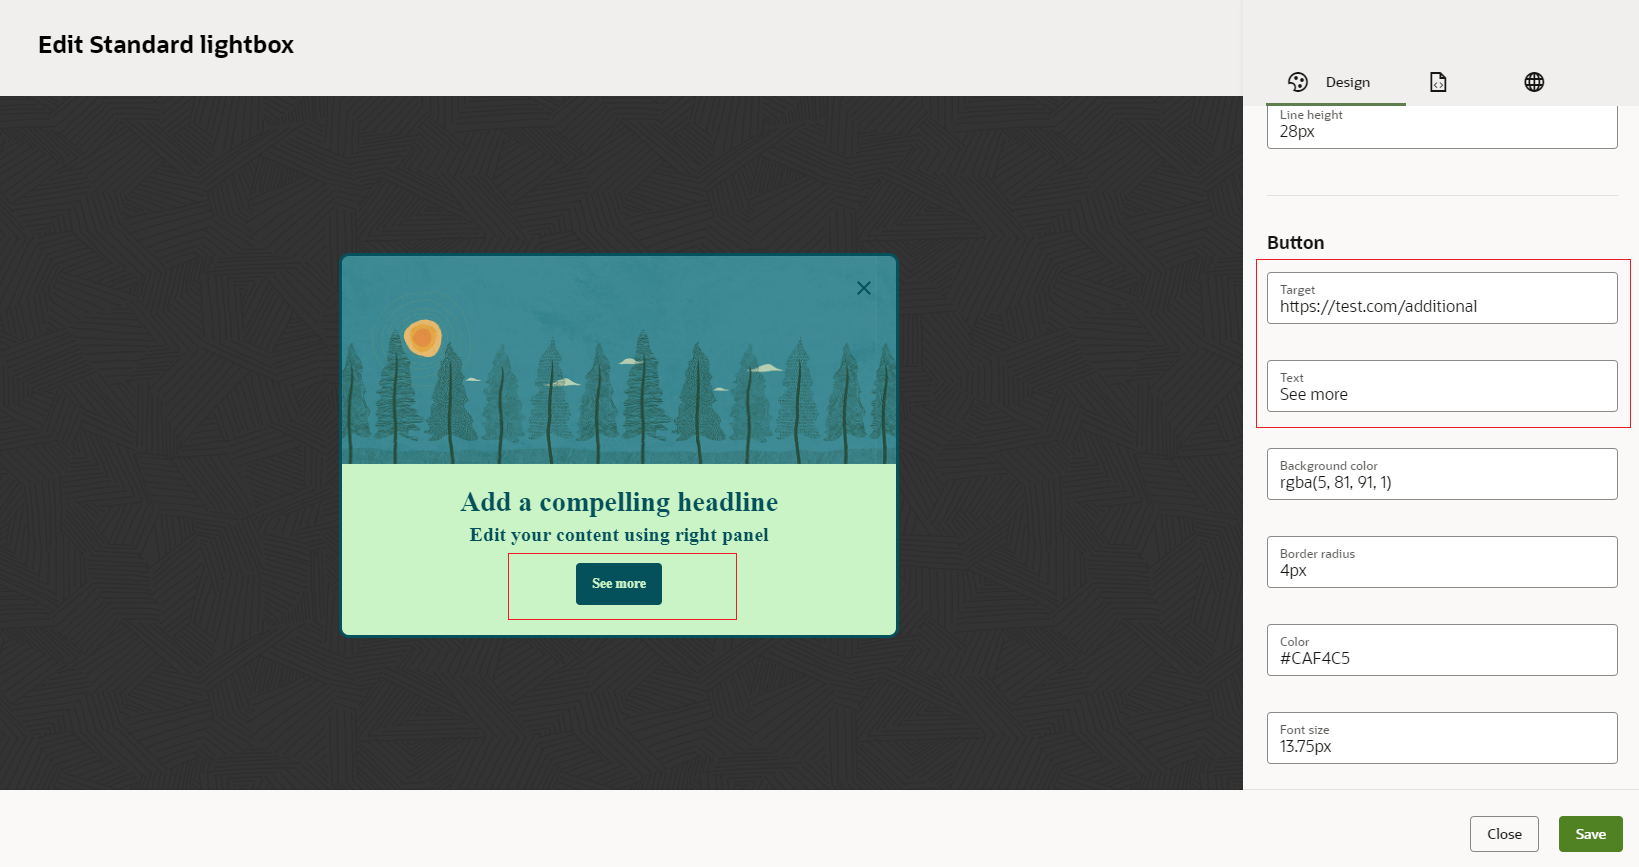
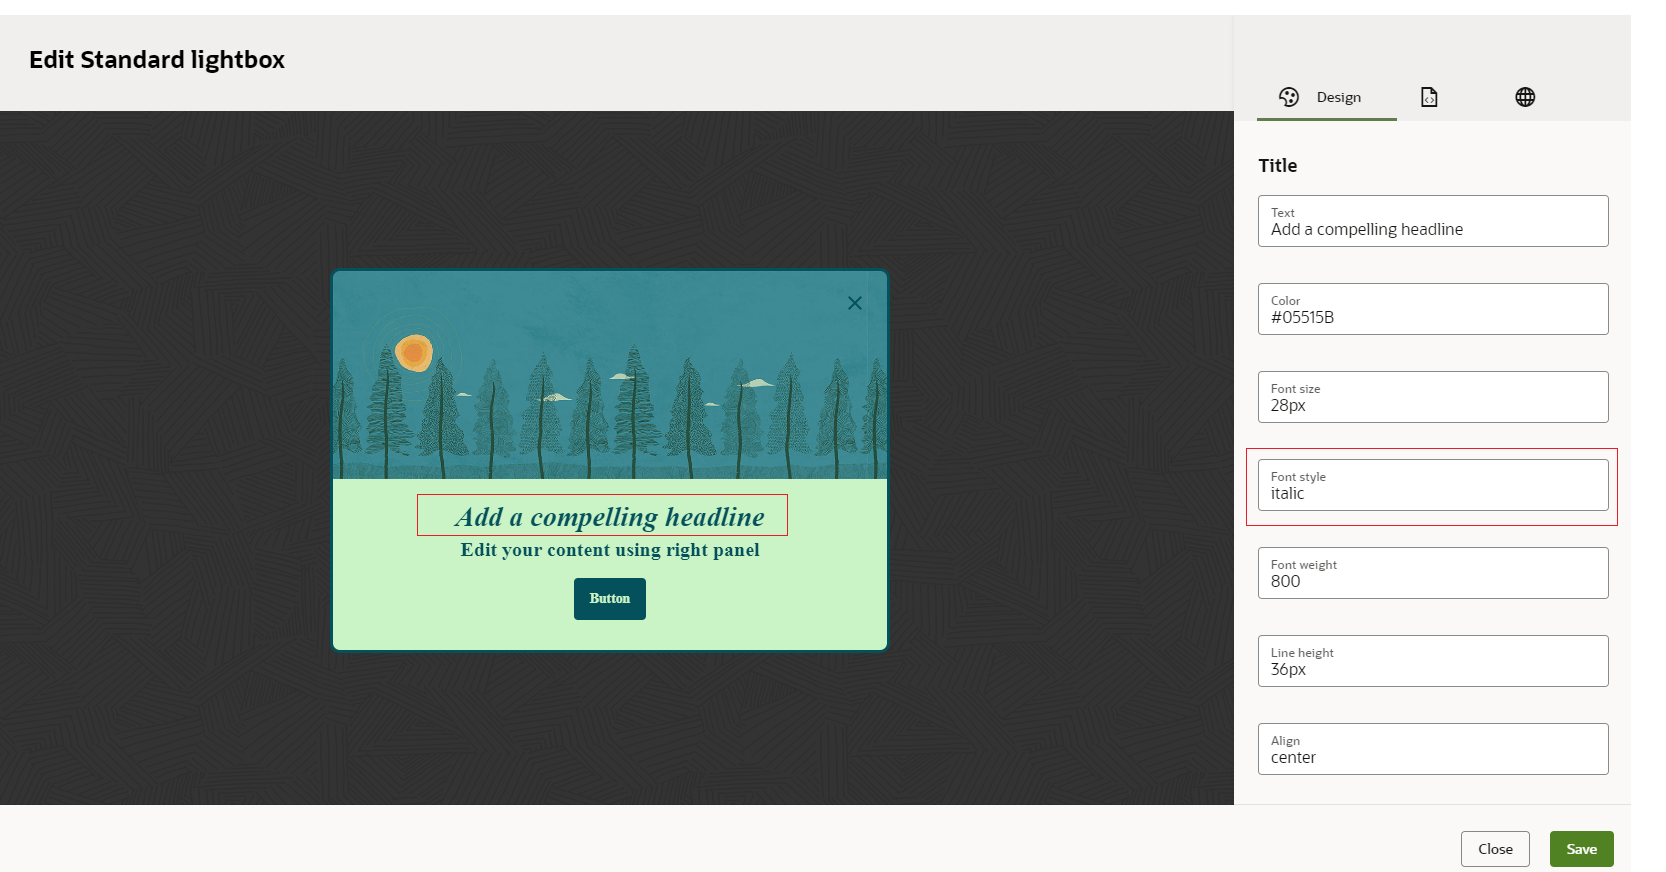
Now, when you navigate to the Design panel, you can see a new Font style property at the end of the Title group with a pre-defined value of 'italic'
Example 2
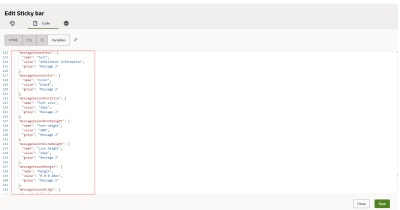
In this example, we are adding a new message at the bottom of the Sticky bar and configuring its properties.
-
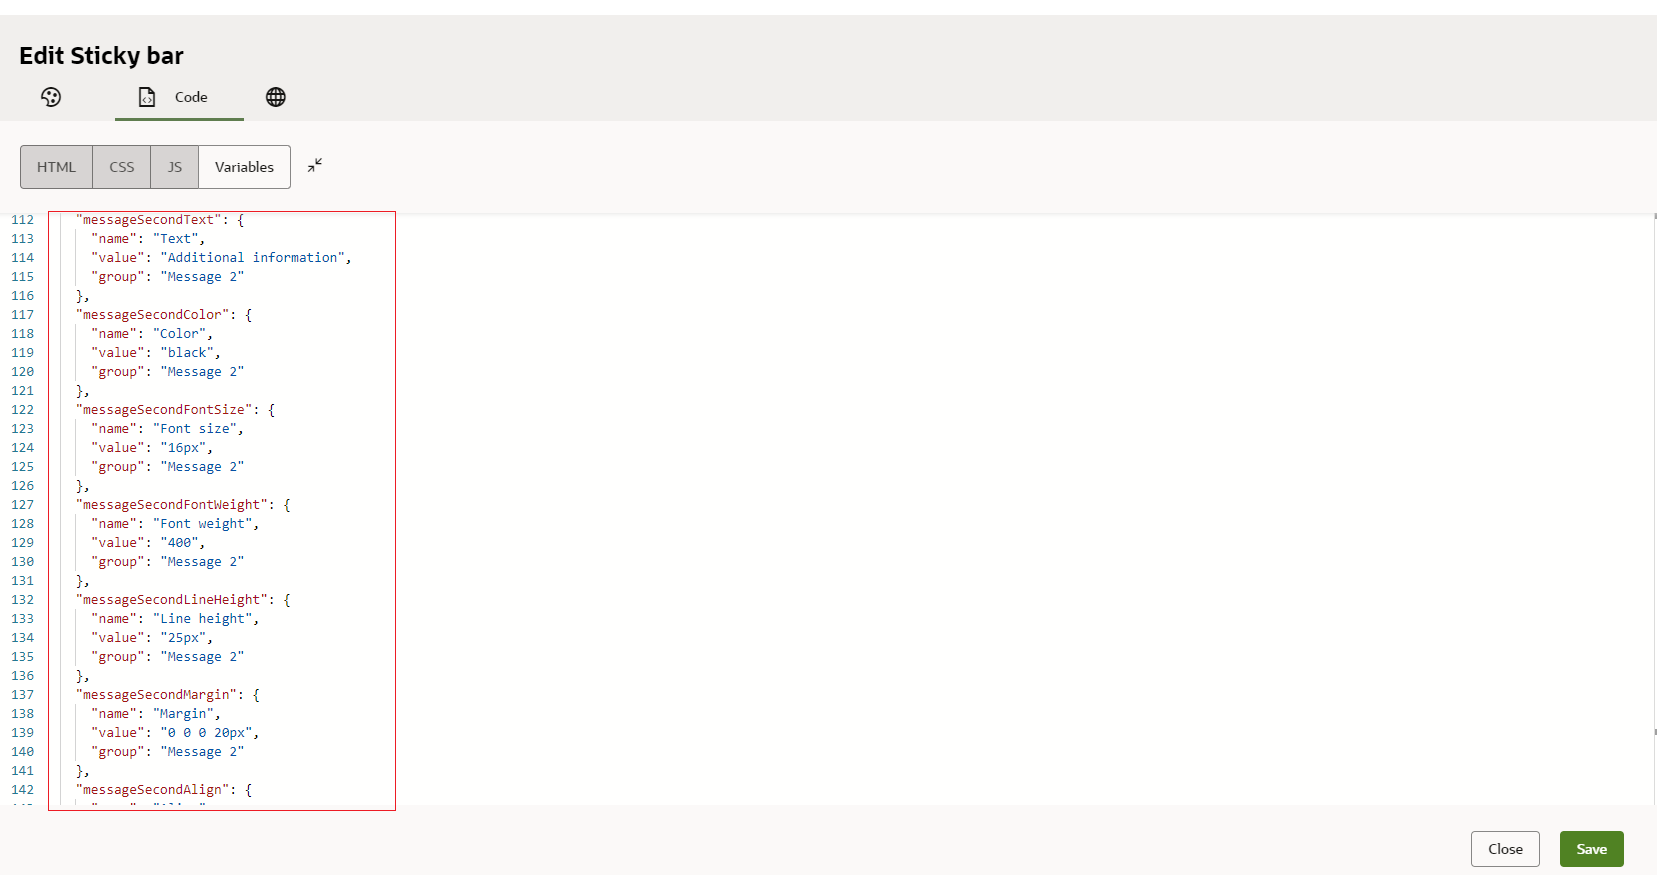
Enter all the required properties with their corresponding default values on the Variables panel and assign them to a new "Message 2" group:
-
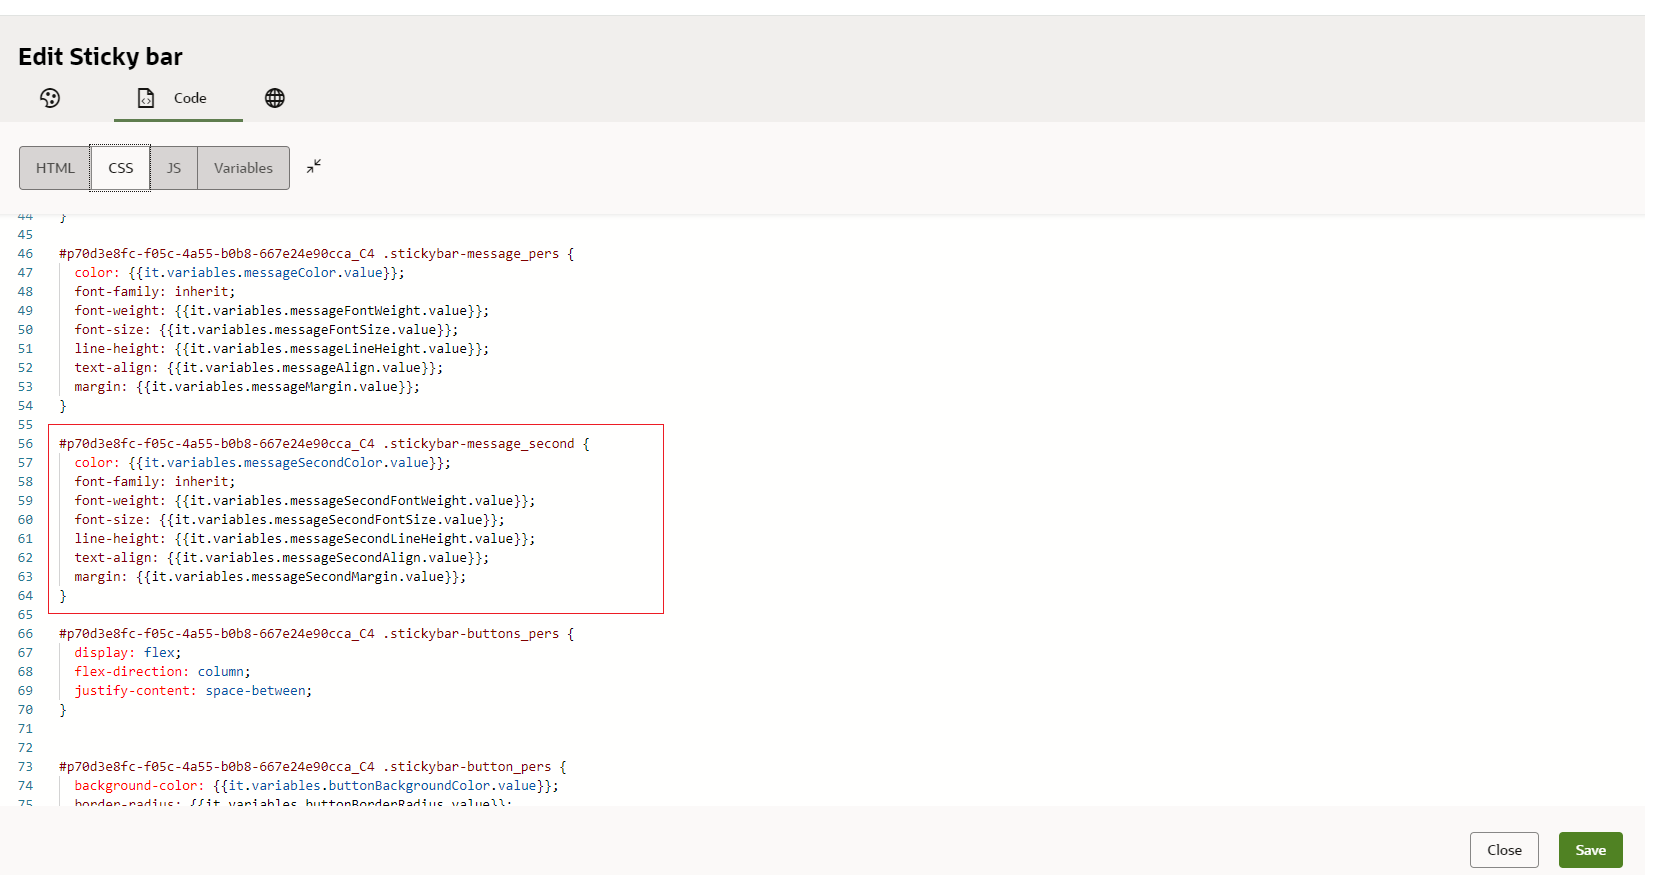
Add a new CSS class and specify the values you have set in the previous step:
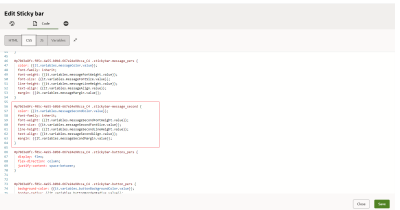
-
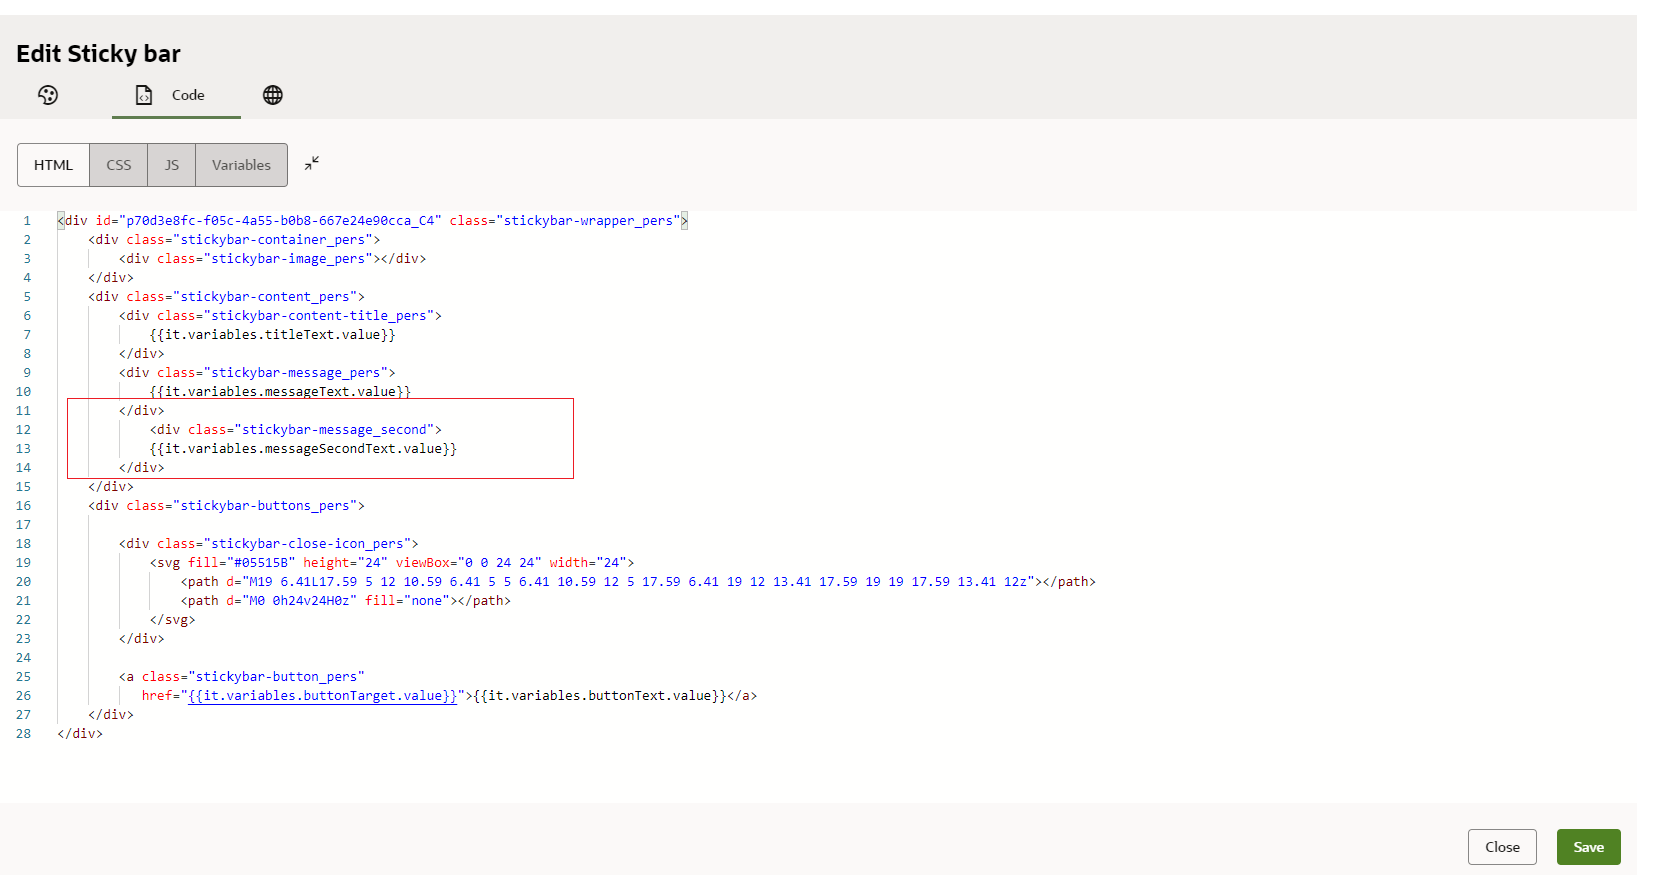
Add a new HTML object to the template:

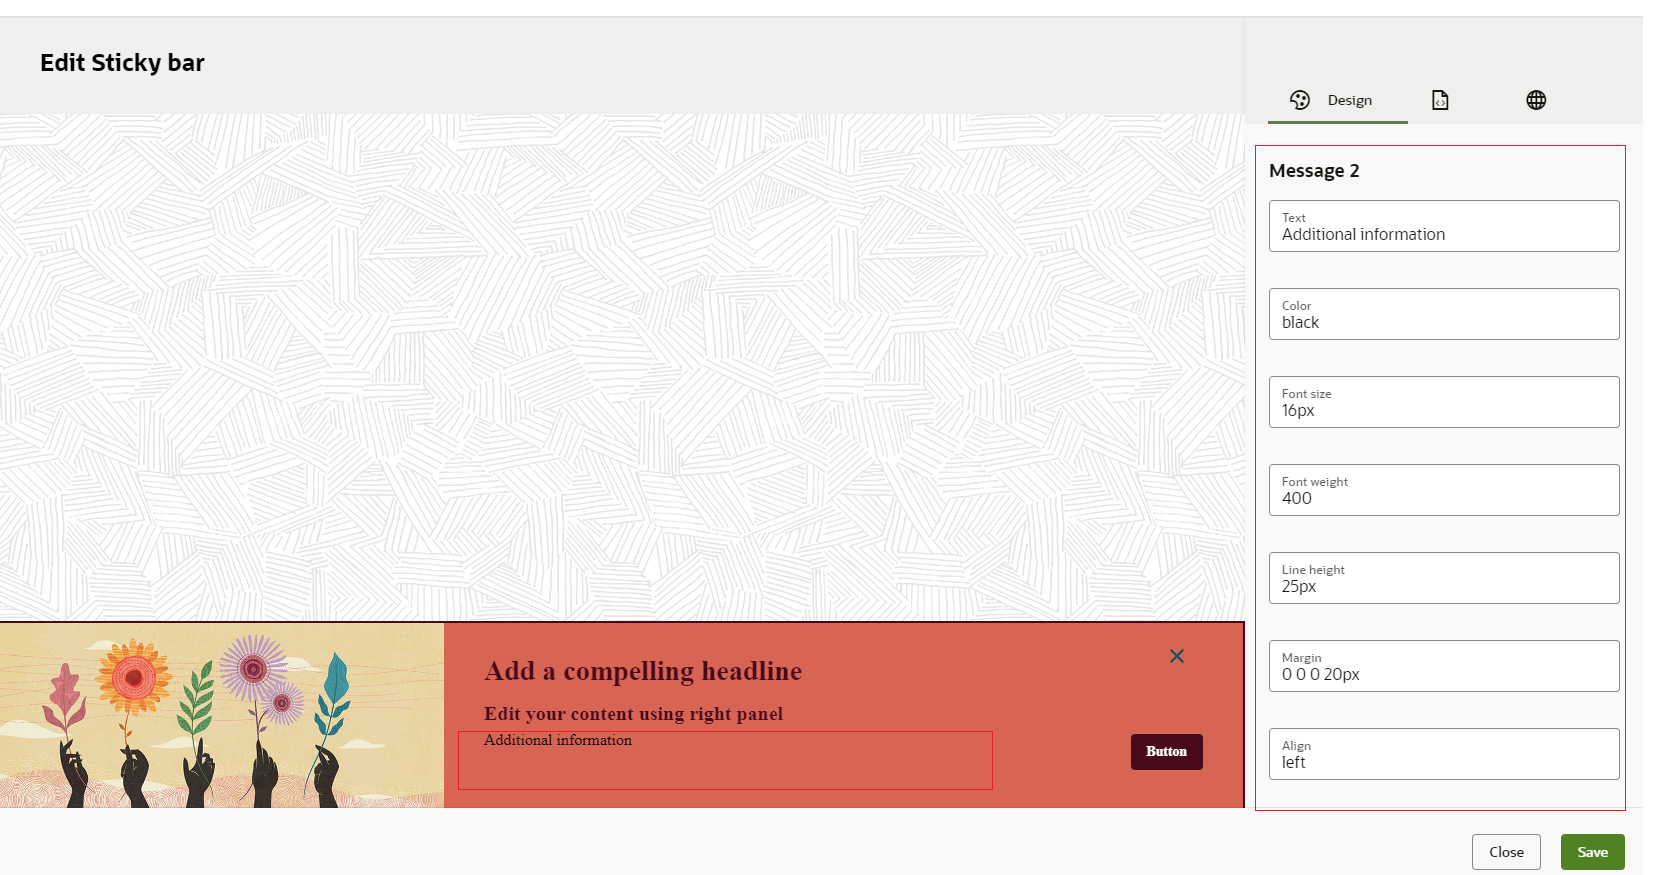
After performing these steps, a new Message 2 section will appear on the Design panel, and a new text object will be rendered in the Preview area:
Web Personalization Content Editing - Understand content editing capabilities