Web Personalization Content Editing
Web content templates
When designing your new content, you have to choose the type of personalization you need.

The following content templates are available by default in any personalization:
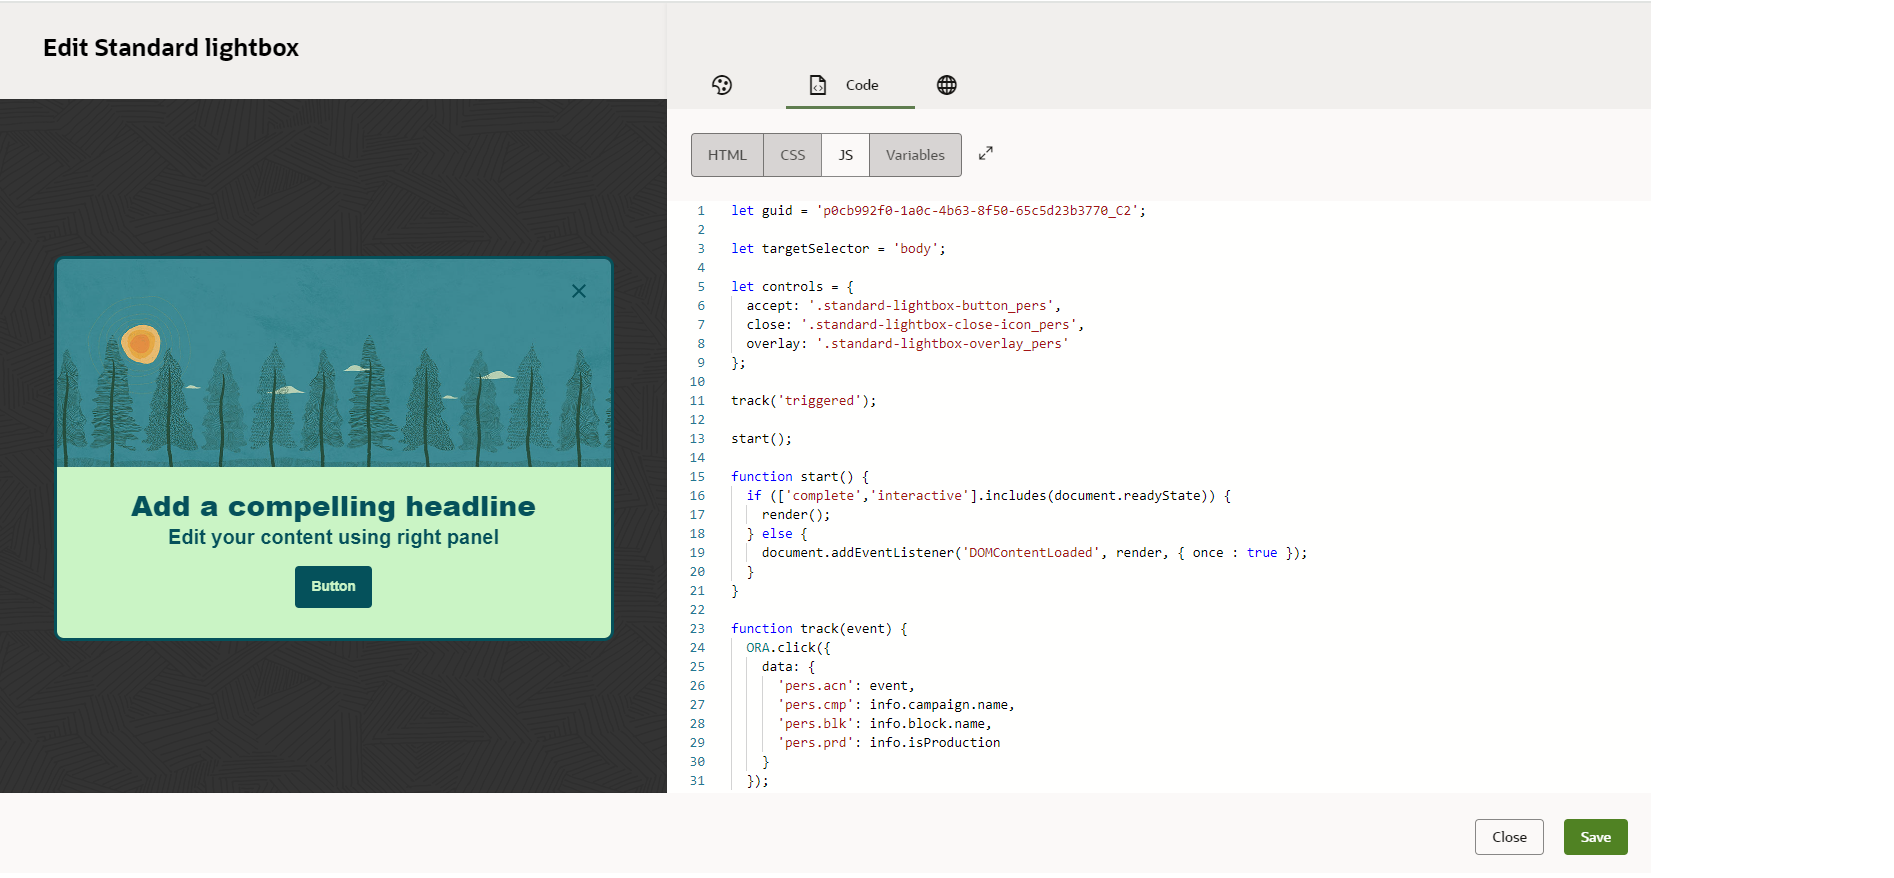
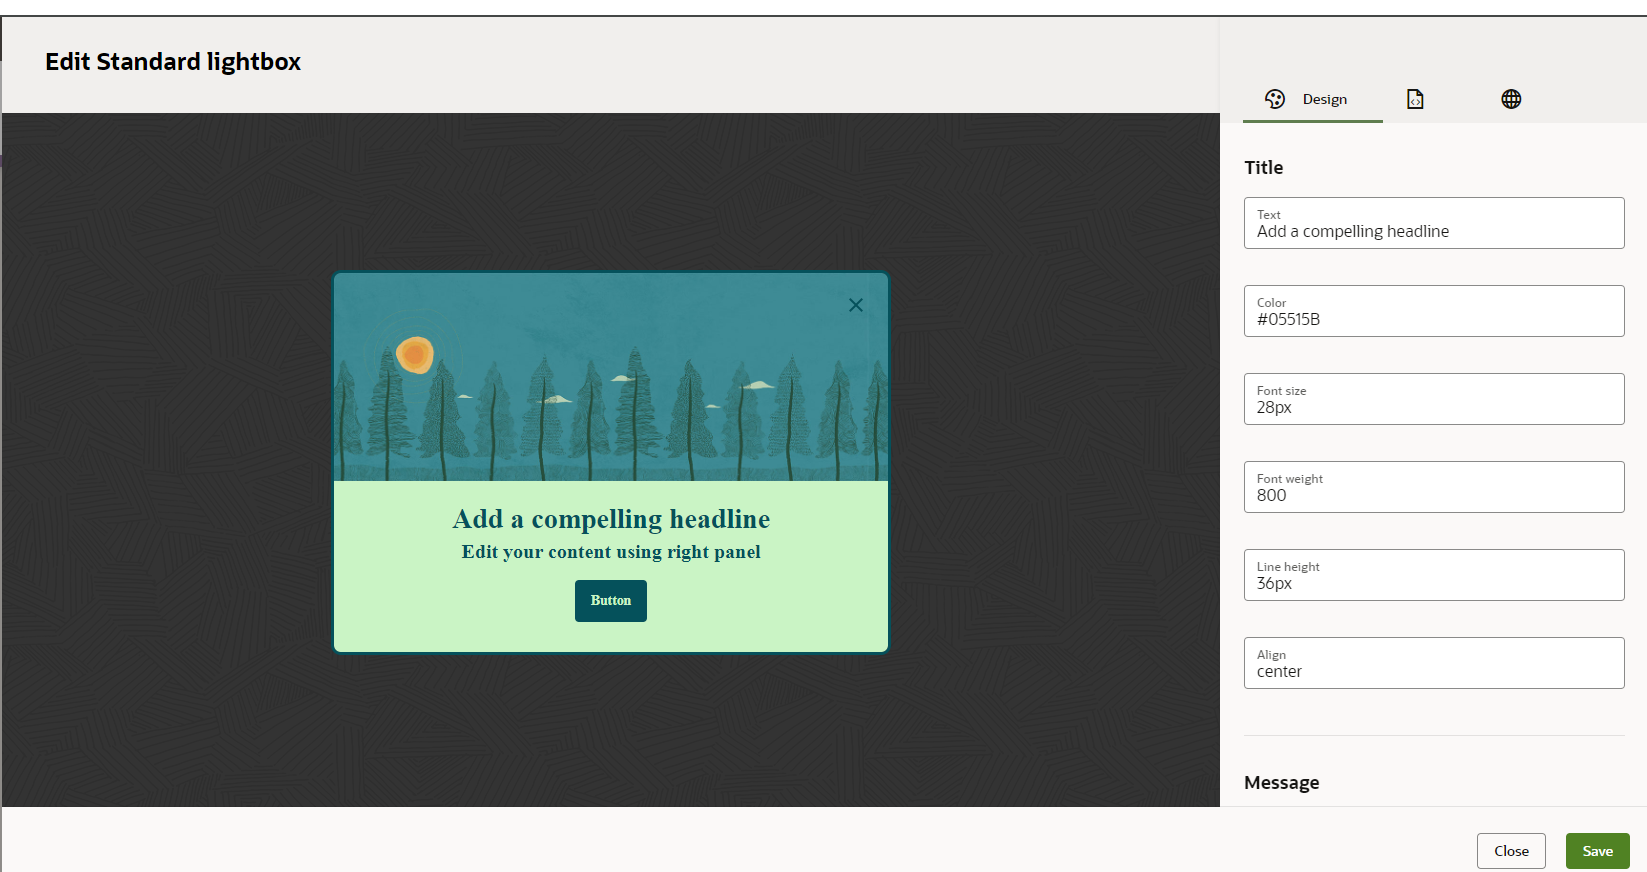
- Standard lightbox - a window overlay that overlays a site page and contains an image, text message, and a button;
- Image only lightbox - a lightbox containing an image and a link, without additional text;
- Sticky bar - a bar with a message that is positioned at the top or bottom of a page, that remains fixed as users scroll through the site;
- Custom code - a template with empty HTML, CSS, and JS that could be used to create any custom experience;
- Visual Editor - web page - a template that enables content creation and editing directly on your webpage using the visual editor tool;
- JSON - an empty JSON template to be run on any app.
Your also can extend that library with additional custom templates and use them for new content creation. Here is a step-by-step guide on adding new templates.
After selecting an appropriate template, it's opened in the Content Editor where you can:
- edit HTML, CSS or JavaScript code;
- customize the default set of template's properties;
- preview HTML, CSS;
- add personalization attributes;
- set locations to define where the code will be run.
For more details, refer to visual editing and content locations.
Content editing
Personalization supplies content directly into a web browser and runs it as soon as the preceding conditions (set in trigger and decision nodes) are met. A content node comprises of the following connected code blocks:
- HTML
- CSS
- JavaScript
Where the JavaScript code block is responsible for rendering the entire content node on a web page. The HTML and CSS code alone do not get onto a web page autonomously.
The instant content preview on the left reflects changes made to the HTML and CSS code. To focus on code editing, switch to the full-screen code editor and hide the preview by clicking the "expand" icon next to the JS tab.
There’s no post-processing applied to any of the code, so it’s just standard HTML, CSS, and JavaScript.
Content JavaScript
The main purpose for the JavaScript code is to render the associated HTML with CSS and capture the relevant Infinity Analytics events. To assist with that there are two auto-populated objects available in the JavaScript code:
The data object holds the HTML and CSS data of the Content as text:
|
Property |
Type |
Description |
|---|---|---|
|
data.html |
String |
Content HTML code |
|
data.css |
String |
Content CSS code |
The info object contains generic information on the personalization:
|
Property |
Type |
Description |
|---|---|---|
|
info.campaign.name |
String |
Personalization’s name as set in the Web Personalization UI |
|
info.block.name |
String |
Content node name |
|
info.isProduction |
Boolean |
Indicates if the personalization is served from the Production |
The JavaScript of default templates box consists of three fundamental sections:
- Content rendering. Performed by the
render()function. - Interactions with the content. Handled with
attachEvents()andonclick()functions. - Analytics. Captured by the
track()function.
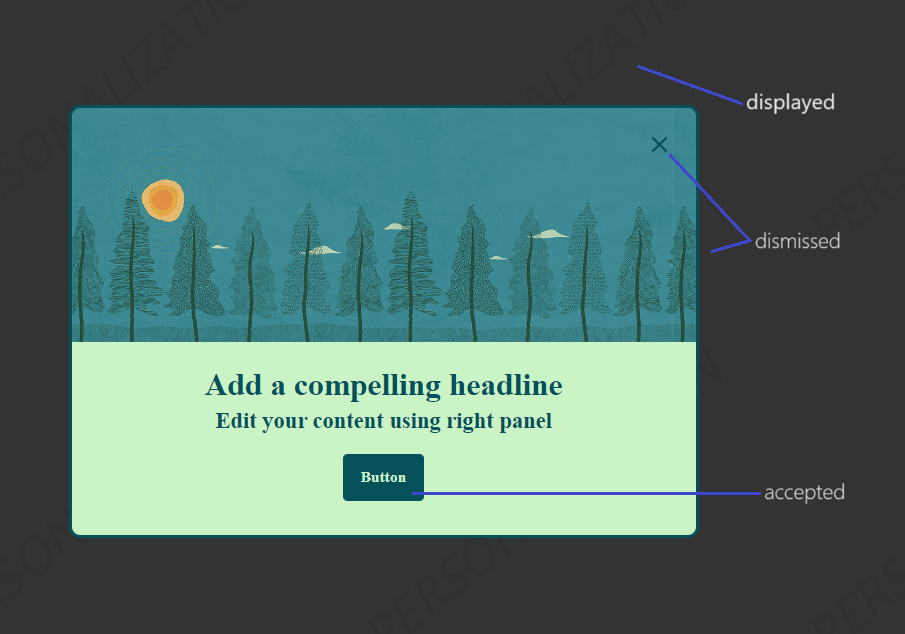
- displayed event parameter fires when the content shows up in the web browser.
- dismissed fires when the widget box is closed.
- accepted fires when the user proceeds with the offer.
- triggered fires whenever the content node is activated.
These events are captured into Analytics and also contribute to the visitor session, allowing personalization to utilize these events in subsequent triggers and decisions.
Web Personalization Canvas - Learn more on setting up a web personalization
Users Evaluation Scope - To learn more about personalization conditions
Content Locations - To learn about content locations
Visual Editing - To learn about visual editing capabilities
Custom Templates - To learn about building custom content templates
Personalization Attributes - To learn how to personalize using visitor information