QA Tool features
The QA Tool provides an easy way to test your campaign before it goes live on your website. With the QA Tool, you can preview experiences and validate metrics captured by a campaign prior to publishing them. You can also validate how live campaign content is displayed to visitors.
Get to know the QA tool
- Experience panel
- Timeline panel
- Site Info panel
- Campaign Info panel
- Change Settings panel
- Sandbox vs. Production
Experience panel
Use the Experience panel to preview the list of campaigns that are running on the current page. The Experience panel shows both the campaigns that you are included in, and the campaigns that you are excluded from.

Timeline panel
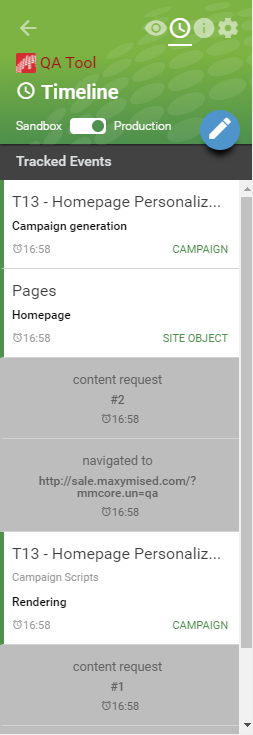
As you browse your site, the Timeline panel captures the events triggered for the web page that you are viewing, for example, error message, page URLs and actions. A common use for the timeline is to validate that actions are being recorded correctly for your campaign. When you browse the site any action that is triggered will appear in the timeline as an entry that looks like this:
Sample timeline for Production and Sandbox environments

Site Info panel
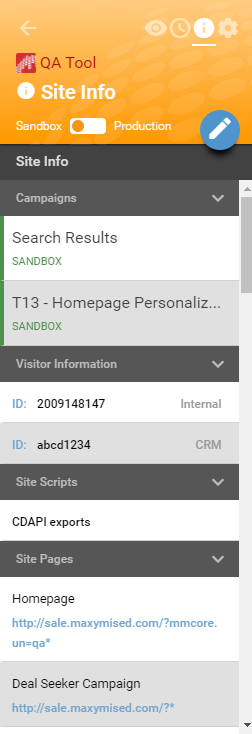
The Site Info panel displays information about site scripts and visitor data including IDs. This panel is useful for viewing site-level configuration and site-wide attributes such as your Maxymiser visitor ID.
Campaign Info panel
The Campaign Info panel displays information about campaign pages, scripts, actions or segments on a page.

Change Settings panel
You can use the Change Settings panel to change the position of the QA Tool on your screen and specify the list of items to display in the Timeline panel.

The following table describes the features on the Change Settings panel:
| Feature | Description |
|---|---|
| Position on Screen | Specify if you want to display the QA Tool on the left or right-hand side of your web page. You can also choose to show the minimized QA Tool on the top-left, bottom-left, top-right or bottom-right corner of the web page. |
| Filter Timeline | Specify the items you want to display in the Timeline panel. The QA Tool displays only actions and page URLs in the Timeline panel, unless you select the check box for the items you want to view. |
Change Experience panel
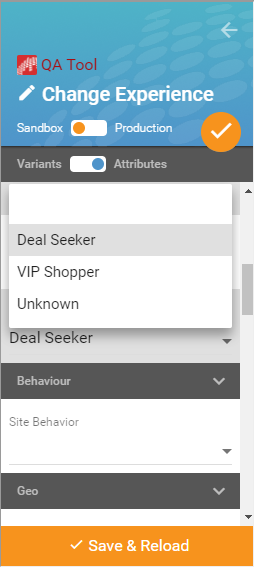
When the QA Tool is first loaded, you are automatically assigned an experience. You can change this experience and select the different variants that you want to preview.
When testing an MVT campaign, you might find it easier to use the preview all functionality to ensure that you cycle through all the different variant combinations.
When loading each experience, check for the following problems:
- Ensure each element does not interfere with another. Common issues include: shifted elements, overlapping, unintended word wrapping, misalignment, and blinking of elements on page load.
- If logging in to the website is possible, you should always check the test thoroughly, both logged in and logged out.
- Look closely at each element and ensure that it appears exactly as desired.

Override Attributes panel
When you first open QA Tool, it reads all of your attributes. If you need to simulate different attributes such as a different country, you can do this.
This is essential for campaigns with targeting. For example, you are a returning visitor but your campaign has content targeted only to new visitors in a New Visitor segment. Although the QA Tool identified you as a returning visitor, you can change the Behavior value to New Visitor (first 24 hours), so you are assigned to the New Visitor segment.
You may change any of the out-of-the-box or custom attributes except those in the Technology category, such as browser or device type. If you want to know how your campaign will behave on different devices or in different browsers, we recommend opening the site and the QA Tool on the relevant browser or device. The QA Tool opens on phones, tablets, and desktop devices, and in popular browsers such as Internet Explorer, Chrome, Firefox, and Safari.
Sandbox vs. Production
You can switch between the Sandbox and Production environments:
- Sandbox: The test environment where campaigns are created and configured. All campaigns are displayed in this environment, including campaigns that are not collecting data and those that are live in production.
- Production: The environment where visitors see campaign content.
The background color of the top panel changes based on the environment that you have selected: Sandbox is orange and Production is green.
Note: Switching between the two environments ends your session and deletes the information in the Timeline panel.