Manage Apps and Platforms
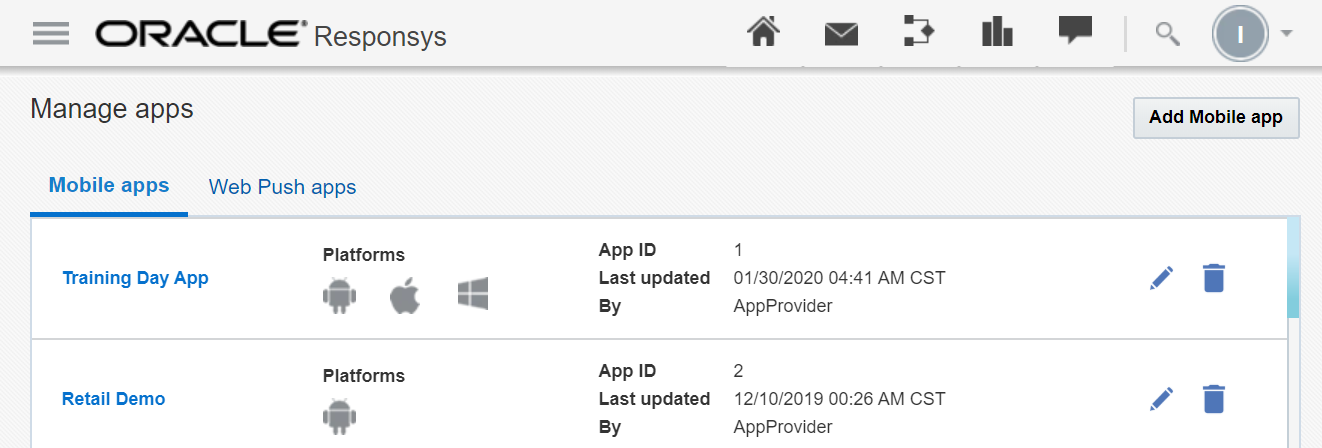
After you log in to the Mobile App Developer Console, the system displays the Manage Apps page, unless you do not have any mobile apps added to Responsys. You can use this page to add, update, and delete mobile app settings, and you can access each platform settings page for your app. The sections below provide the configuration steps you need, and they are applicable for all of the supported platforms.
Getting Started
If you do not have any mobile apps registered in Responsys, you are prompted to add an app when you log in:
[1] Click Get started by adding your app icon in the center of the page. The Add App dialog is displayed.
[2] From the Add Mobile App dialog, enter a unique name for your app.
-
App names are limited to 150 characters and can include all alphanumeric characters (A-Z, a-z, 0-9), spaces, and the keyboard characters
!-=@_[]{}. -
The Name field is highlighted with a red border if there is a problem with the name you enter; move your mouse cursor over the field to show the error message tooltip.
[3] Click the Add button. The General Information page for your app displays your app's name and the App ID. From here, you can return to the Manage Apps page by clicking the Back to manage apps link, or you can add one or more platforms for your app.
Adding an App from the Manage Apps Page
[1] From the Manage Apps page, click the Add Mobile app button. The Add App dialog is displayed.
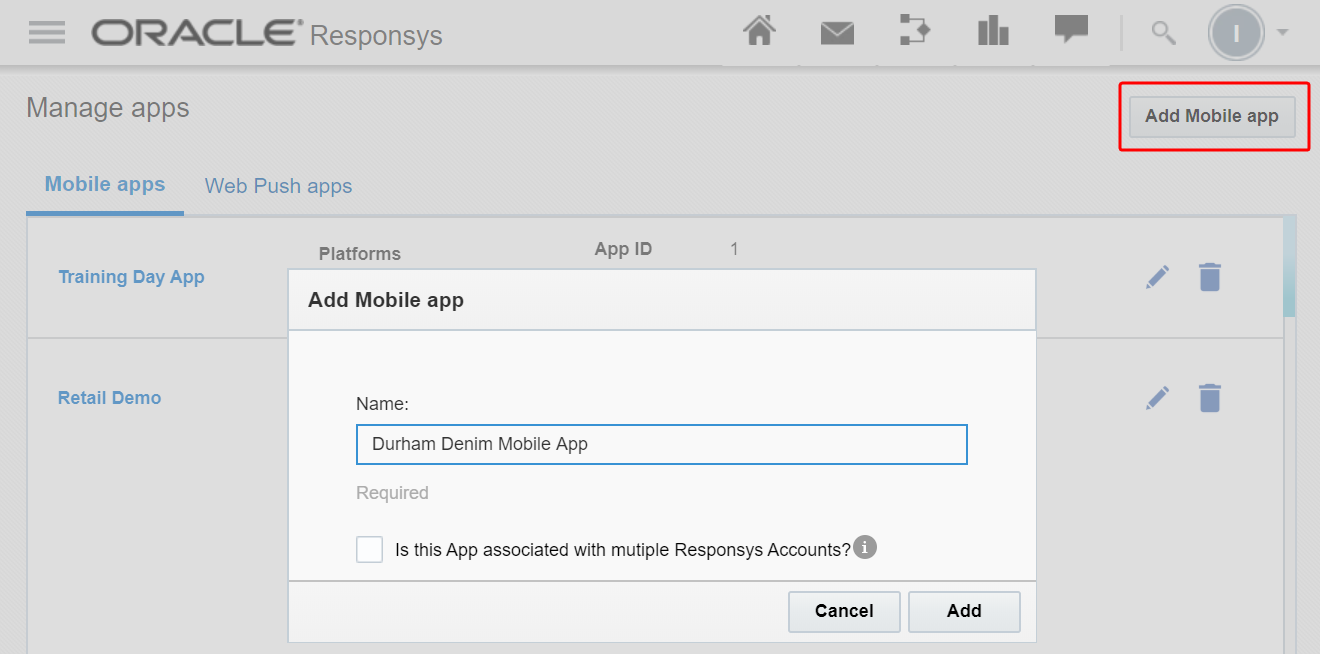
[2] From the Add app dialog, enter a unique name for your app.
-
App names are limited to 150 characters and can include all alphanumeric characters (A-Z, a-z, 0-9), spaces, and the keyboard characters
!-=@_[]{}. -
The Name field is highlighted with a red border if there is a problem with the name you enter; move your mouse cursor over the field to show the error message tooltip.
[3] Select whether or not the app will be used in multiple Responsys accounts. This feature is available under our Controlled Availability program. To request access to this feature, please contact your Customer Success Manager or log in to My Oracle Support and create a service request.
[4] Click Add. The General Information page for your app displays your app's name and the system-generated App ID. From here, you can return to the Manage Apps page by clicking the Back to manage apps link, or you can add one or more platforms for your app.
Adding a Platform for Your App
Responsys supports two different mobile app platforms:
- iOS - Development and Distribution
- Android
NOTE: Windows is not a supported platform in Responsys. The Windows button on this dialog will be removed in a future release.
[1] If you have not already opened your app's page from the Manage Apps, locate and click your app. Your app's General Information page is displayed.
[2] Click the Platform link on the left navigation bar. The Platform page is displayed.
[3] Click the Add Platform button. The Add Platform dialog displays your platform options.
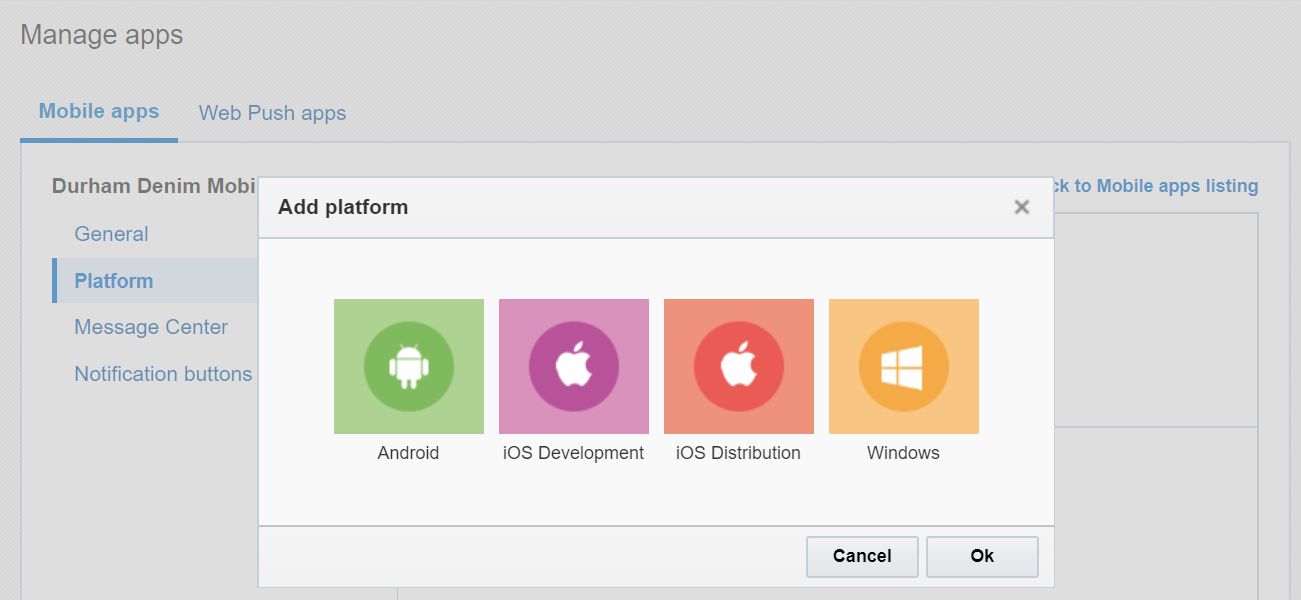
[4] Select an option, and then click OK.
[5] Depending on the platform you selected, you are prompted to add information:
-
Android: Title of your Google project, Google Project Number, Google API key for Google Cloud Messenger.
-
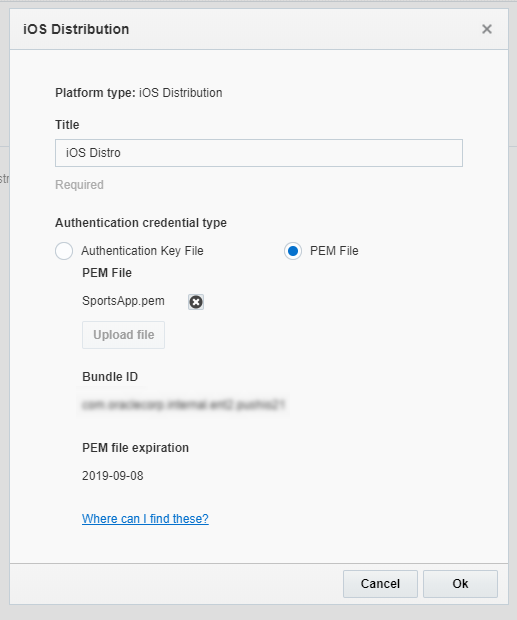
iOS Development: Title of your iOS project and you are prompted to upload your Authentication Key File or Development PEM file
-
iOS Distribution: Title of your iOS project and you are prompted to upload your Authentication Key File or Distribution PEM file
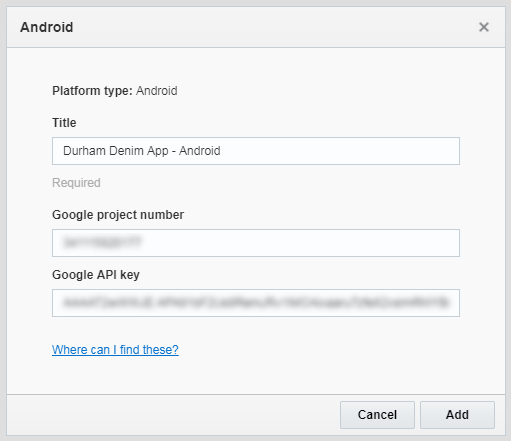
[6] After you have added the required information and files, click Add. The Platform page is displayed, which shows the platform, title, and API Key.
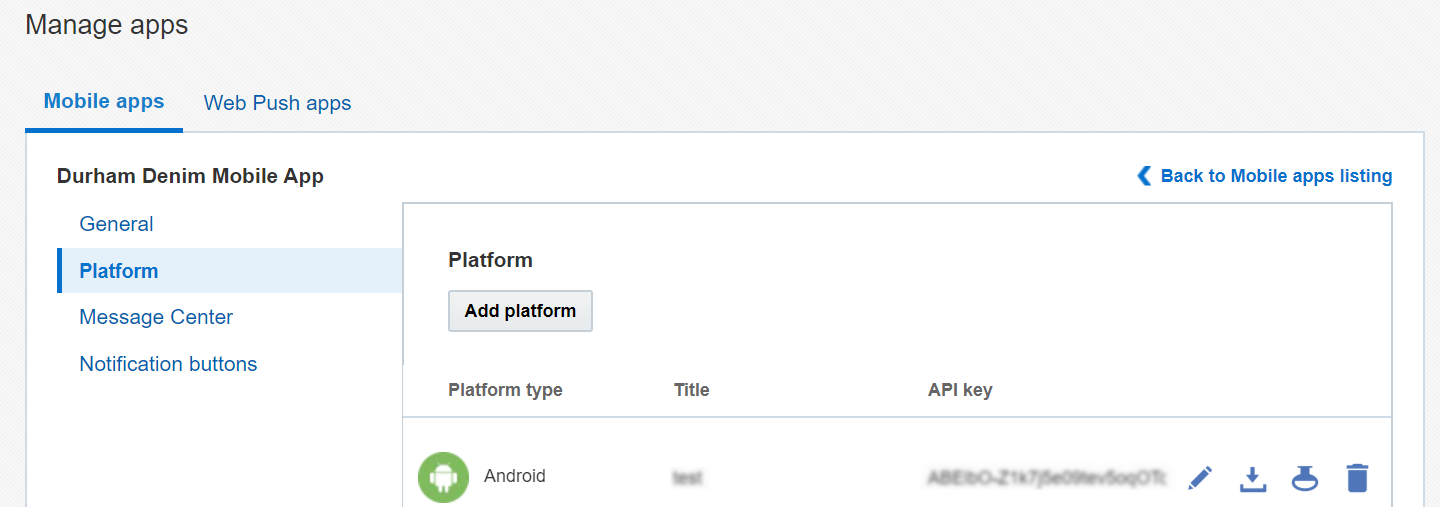
Once a platform has been created, the system generates a platform-specific API key. This key is used by Responsys for targeting each platform via the API.
Editing a Platform
You can edit a platform as needed; for example, you may need to edit a platform when you need to update an expired .PEM permissions file (iOS/OSX) or correct your platform credentials.
[1] From the Manage Apps page, click your app. Your app's General Information page is displayed.
[2] Click the Platform link on the left-side navigation bar. The Platform page is displayed.
[3] Click the Edit icon in the row of the platform that you need to edit. The edit dialog contains the same fields as you entered when you added the platform.

[4] Edit as needed, and click OK to save your changes, or click Cancel to close the dialog without saving your changes.
Downloading the Platform-specific pushio_config.json File and the SDK
You can download your platform-specific pushio_config.json file and PushIOManager SDK from the Mobile App Developer Console.
[1] From the Manage Apps page, click your app. Your app's General Information page is displayed.
[2] Click the Platform link on the left-side navigation bar. The Platform page is displayed.
[3] Locate the platform for which you want to download the files, and then click the Download button in its row. A menu list is displayed.
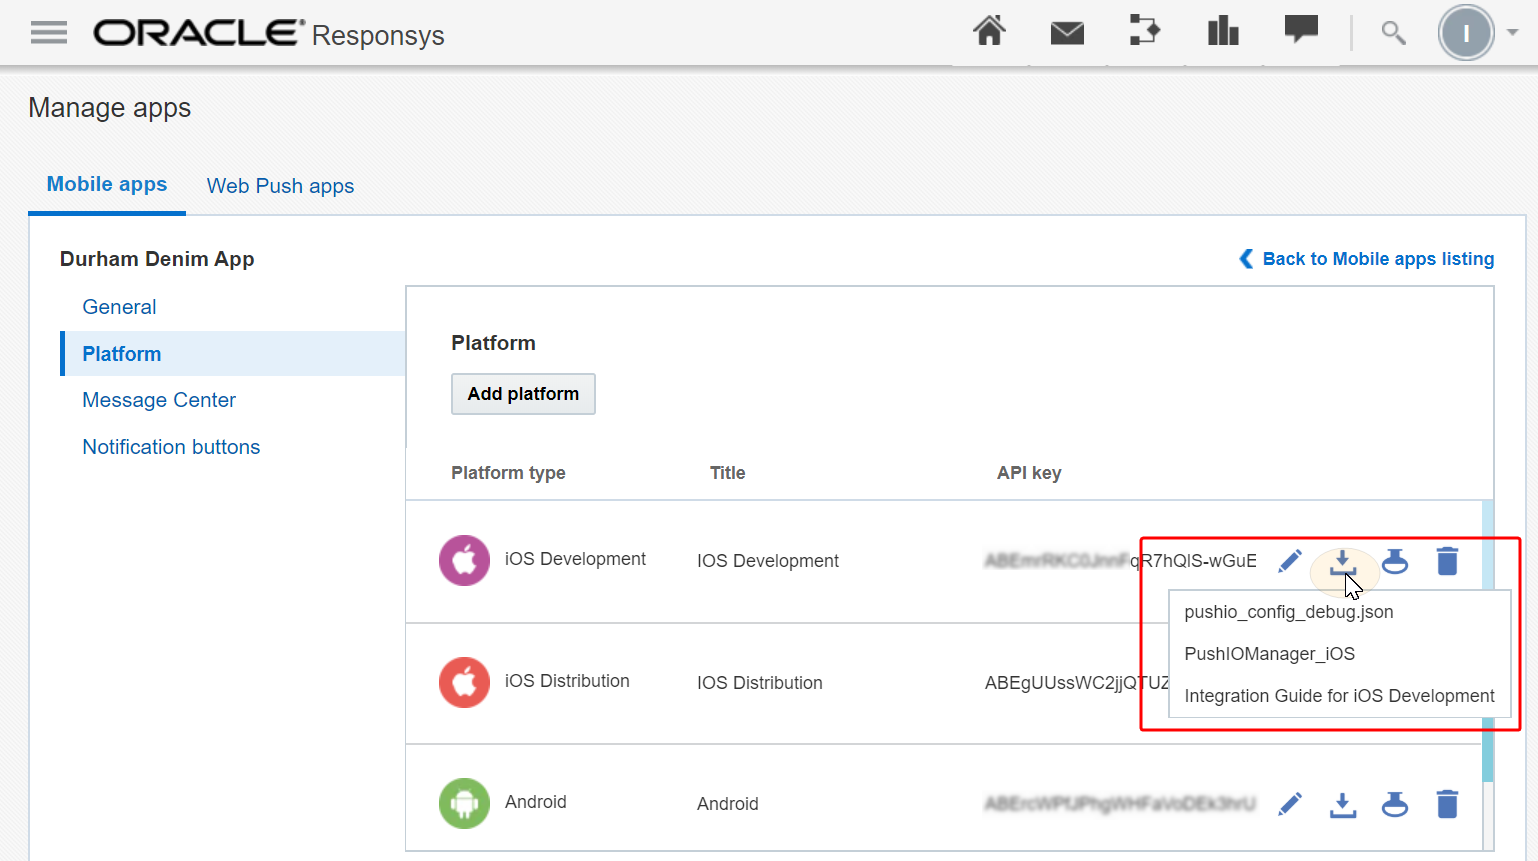
[4] Choose the item that you want to download. Repeat as needed.
-
pushio_config.json downloads the file containing the app credentials, which you use for developing your mobile app for the platform.
-
PushIOManager_X (where X is the platform identifier, for example, iOS) opens the PushIO SDK download in a separate page. From the download page, you can download the PushIO SDK for your platform.
-
The Integration Guide link opens this guide in a separate page, at the start of the selected platform's section (for example, the iOS section).
Managing Other Mobile App Settings
From your mobile app's page in the Mobile App Developer console, you can manage other mobile app settings for optional features if they are applicable for your mobile app. See the following sections for details.
Deleting Apps and Platforms
If you have the system role Mobile App Admin, you can delete apps and platforms from the system.
IMPORTANT - BEFORE DELETING: Check with Responsys Account Admins and Marketers before deleting an app or platform that has been set up for use in Mobile Push campaigns. App or platform deletions will impact Mobile Push campaigns that use the app or platform.
Deleting a Platform
If a platform is no longer applicable for your app, you can delete it.
NOTE: You cannot undo a platform delete action after the confirmation dialog.
[1] From the Manage Apps page, click the name of your app.
[2] On your app's page, click the Platform link in the left navigation bar.
[3] Locate the platform you wish to delete, and click the Delete icon.
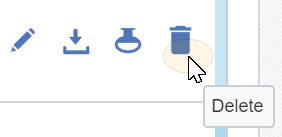
[4] A confirmation dialog is displayed, which asks if you are sure that you want to delete the selected platform and reminding you that you cannot undo the action. Click OK to delete the platform, or click Cancel if you choose to not delete the platform. A confirmation message informs you that the platform was deleted successfully.
Deleting an App
You can delete an app from the Manage apps page.
NOTE: You cannot undo an app delete action after the confirmation dialog.
[1] From the Manage Apps page, click the name of your app.
[2] A confirmation dialog is displayed, which asks if you are sure that you want to delete the selected app and reminding you that you cannot undo the action. Click OK to delete the app, or click Cancel if you choose to not delete the platform. A confirmation message informs you that the app was deleted successfully.
Managing an App for multiple Responsys accounts
You can associate one app with multiple Responsys accounts. This functionality allows app developers to
NOTES:
-
This feature is available under our Controlled Availability program. To request access to this feature, please contact your Customer Success Manager or log in to My Oracle Support and create a service request.
-
Your organization's mobile apps must be built with the 19B Responsys Push SDK (version 6.41.0) or greater.
[1] Add your App to each Responsys Account it needs to be associated with. Ensure that the same iOS and Android Credentials are configured for the App in each Account.
[2] Download the configuration files from each of your Responsys Accounts and bundle them with your App.
[3] Apps need to maintain a mapping of the Geography / Brand to the Account Configuration.
-
When an App User Installs the App: the App must use the Responsys Push SDK APIs to initialise the App configuration to a specific Geography / Brand, thereby tying the App to a Responsys Account
-
Whenever an App User switches the App Geography / Brand, the App must use the Responsys Push SDK APIs to re-configure the App to a new Geography / Brand, thereby dis-associating the App from the current Account and tying the App to a new Responsys Account