Generating a Distribution PEM
NOTE: For security reasons - never e-mail PEM files. Unauthorized PEM access can leave your app(s) vulnerable. Use of secure file transferring is preferred.
Distribution .PEM Overview:
- The previous guide showed you how to create a Development PEM for testing push notifications in the development/sandbox environment.
- But, what if you want to distribute the application to a co-worker? What if you’re ready to deploy to the App Store? This is where Distribution PEMs are necessary.
- Fortunately, once you’ve mastered the steps for creating Development PEMs, mastering Distribution PEMs is even easier.
NOTE: Xcode now requires that Development Provisioning Profiles be created and installed in the Organizer in order to run and distribute an Ad-Hoc build. In the past, you could simply create a production build without ever configuring development builds. Therefore, the Development .PEM Guide must be completed before sending Distribution Push Notifications.
Distribution .PEM - Step By Step Guide:
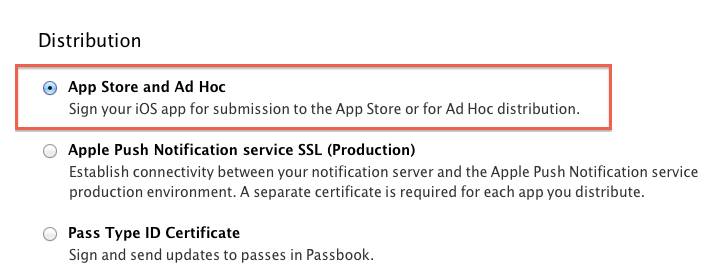
[1] To begin, start by creating permissions for Ad-Hoc Distribution or submission to the App Store.

In the Provisioning Portal, head to the Certificates Tab --> All --> and click the “+” sign in the top right corner of the screen --> Distribution (App Store and Ad-Hoc) --> Continue.
[2] Follow the Certificate Signing Request (CSR) instructions again. While it may seem tedious, regenerating a new CSR for each of these certificates is the best way to ensure that your certificates are being properly signed. Like in previous steps, download the certificate, install the certificate and verify that it has been installed properly in your keychain:

NOTE: Notice that I have added an iPhone Distribution Certificate to the Keychain rather than an iPhone Development Certificate generated in the previous guide.
[3] At this point, your application has received permissions for Development/Distribution builds and is currently enabled for Development Push Notifications. However, it still needs to be configured for Distribution Push Notifications:
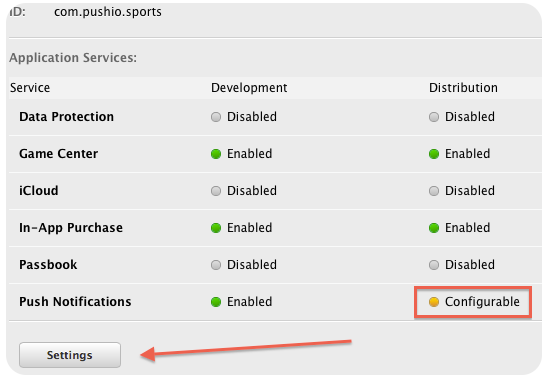
Head to the settings tab of your App ID and “Create Certificate” under the “Production SSL Certificate” section:
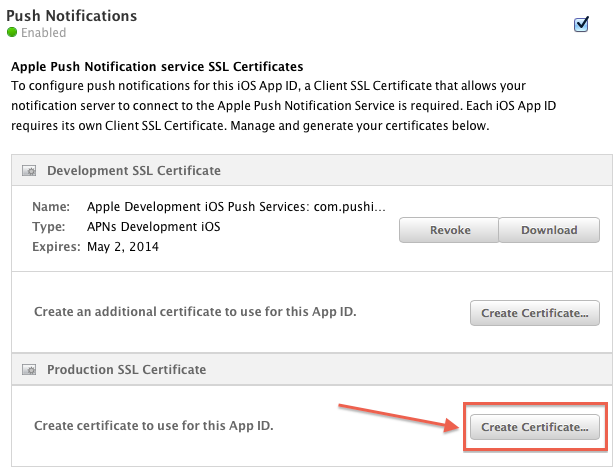
Just like in previous steps, regenerate the CSR file in the Keychain, upload the CSR file, and download and install the certificate that Apple creates for you. Verify in Keychain Access that these certificates have been properly installed:

At this point, you should have both Apple Development iOS Push Services and Apple Production iOS Push Services (Distribution) installed in the Keychain as well as iPhone Developer and iPhone Distribution permissions.
[4] Once the Apple Production iOS Push Services certificate has been added to the Keychain, export the file to the desktop in the form of a .p12 file and use the Terminal to generate a Distribution .PEM (in our example, "SportsApp", but substitute with a name appropriate for your app when you perform this step):
openssl pkcs12 -in Certificates.p12 -out SportsApp.pem -nodes -clcerts
[5] Just like in the Development PEM process, take your newly created Distribution .PEM and head to your application in the Mobile App Developer Console. On the Platforms tab, choose Edit on the iOS Distribution Platform row, and then upload your .PEM file. (If you are updating an expired .PEM file, you must first delete the old one before you can upload the new one.)
After a successful upload, you should see the Bundle ID and PEM file expiration date displayed:

Notice how the Bundle ID in the .PEM file matches the Bundle ID of our Xcode Project. Likewise, notice how this .PEM file reflects the Apple Production iOS Push Services and not Apple Development iOS Push Services.
[6] This concludes the tutorial for generating Distribution PEM files. You will also need to generate a Distribution Provisioning Profile on Apple’s Provisioning Portal like you did for your Development Build. Install the Distribution Provision and verify that it has been added to the library/device in Xcode’s Organizer window.