Understanding stage gates
Use stage gates to pause and send recipients through a program, for example when the specified number of entries is reached.
Stage gate can either open and send entries through automatically when the number of entries reaches the specified range, or remain closed until you take action.
When setting up a stage gate you must:
- Create two paths
Create an approve path for entries that are allowed to pass through, and a reject path for entries that are either not allowed to pass through or must pass through an alternative path. - Specify email addresses for notifications
The stage gate sends notifications and reminders when it requires attention, such as when you need to decide whether to send or hold entries.
About notifications and reminders
The stage gate sends notifications in the following cases:
- In automatic mode, when the number of entries does not fall within the specified range
- In manual mode, when the first batch of entries come in and after you take action on the previous notification
For example, when a batch of entries comes in, the stage gate holds the entries and sends a notification. If you do not take action and more entries come in, the stage gate holds all entries and does not send any further notifications. When you take action, the stage gate re-opens and another notification is sent the next time any entries come in. - In either mode, when the timeout period is reached
If no action is taken after the notice is sent, the stage gate sends reminders, with the frequency and at the time you specify, until the timeout period is reached.
About the timeout
If a response to a notification is not received within the specified timeout period, the stage gate sends the entries through the timeout path. You can select either the approve or reject path as the timeout path. The default timeout period is set by the Administrator in the Global Settings section on the Account Management page, but you can change it for each stage gate.
Closing the stage gate automatically
Use this option to automatically send entries through the approve path when the number of entries is within the specified range. You specify the minimum and maximum number of entries that can pass through.
When the number of entries is within the range, the entries pass through without a notification. If the number of entries is below the minimum number, the stage gate holds the entries until the minimum number is reached and sends a notification to the specified email address. When you receive the notification, you can send the held entries through manually. If the number of entries exceeds the maximum number, the gate holds the entries and sends a notification to the specified email address. You can then decide whether to send the entries through.
For example, assume you set a range of 500-1000 entries:
The first batch is 200 entries, which is below the minimum number, so the entries are held at the stage gate and a notification is sent. The second batch is 300 entries. Now, the total number of entries at the stage gate is 500, and all entries pass through without notification. The third batch is 1500 entries, which is above the maximum number. In this case, the gate holds all entries and sends a notification. Each time you receive a notification, you can decide whether to send the entries through.
To close the stage gate automatically:
- Right-click the stage gate and select Properties.
- Select Close gate when number of recipients are outside these thresholds, and enter the minimum and maximum number of recipients.
Closing the stage gate manually
Use this option if you want to decide whether to send the entries through, regardless of the number of entries.
With this option, a notification is sent to the specified email address(es) when a batch of entries arrive at the stage gate. You can then accept or reject the entries.
Note that if you do not take action, no further notifications are sent if more entries come in. For more information, see About notifications and reminders.
To close the gate manually:
- Right-click the stage gate and select Properties.
- Select Close gate manually.
Selecting paths
Regardless of whether the gate closes automatically or manually, you must specify which path to take for entries that are allowed to pass through and for those that are not. You must also select one of those paths as the timeout path.
To select the approve, reject, and time out paths:
- Right-click the stage gate and select Properties.
- In the Stage conditions section, select the Approve, Reject, and Time out paths.
- Optionally, to change the default time out, enter the number of days in Max response hold time number of days.
To specify email addresses for notifications:
The stage gate sends a notification and reminders when it requires attention.
- Right-click the stage gate and select Properties.
- In the Email notification section, specify the email addresses, reminder frequency, and reminder time.
You can specify multiple addresses, separated by commas or semicolons.
Approving or rejecting entries
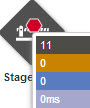
Use the Snapshot view of the Analyze tab to approve or reject entries that are held at the stage gate. Stage gates that require action are indicated by a red dot.
To approve or reject entries
- In the Snapshot view of the Analyze tab, right click the stage gate and select Properties.
The Enactments dialog opens.
- Select the action to take.
- Understanding Program
- Getting Started with Program
- Designing Programs
- Testing Programs
- Publishing Programs
- Analyzing Programs
- Program Best Practices