Designing Web Push campaigns
Important: This feature is currently released under our Controlled Availability program. To request access to this feature, please log in to My Oracle Support and create a service request.
In this step, you use the Web Push Message Designer to create and edit messages and set up campaign options. For a description of the Web Push Message Designer, see Web Push Message Designer Overview.
Tasks:
- Creating messages
- Adding an image
- Adding Notification buttons
- Selecting settings
- Previewing the message
- Using the toolbar buttons
Creating messages
To create a Web Push notification message: Type your message on the canvas.
Tip: You can include emojis in your notification message and personalize using the  toolbar button.
As you create your message, the right pane shows a Live View of how the message will appear on a device.
Note: This view does not show personalization and is only an approximation. To see an accurate preview, launch your Web Push campaign on a test device with the desired browser and operating system.
Adding an image
To add an image to your Web Push notification:
- Expand the Optional features drop-down.
- Select Big image.
- Enter the URL you would like the user to be taken to when the image is clicked.
Tip: You can also personalize the image URL.
Adding Notification buttons
Important: This feature is available to everyone who has Web Push enabled.
You can add notification buttons to campaigns that open a URL. The button labels and the links they direct to can be personalized.
To add or change Notification buttons:
- Expand the Optional features drop-down.
- Select Notification buttons. By default, two button fields will display. If you would like only one button to display, select
 to delete a button. If you deleted the second button and would like to add it again, click Add. However, you cannot add more than two buttons.
 - In the Button label field, enter a name for your button(s).
- In the Destination URL field, enter the URL you would like the user to be taken to when the notification button is clicked.
Selecting settings
Click Settings in the Web Push Message Designer to:
- Alert users with sound or vibration on receiving Web Push notification on mobile devices
- Keep notification on screen until user takes action
Previewing the message
As you are creating the message, the right pane of the Web Push Message Designer displays your text without personalization.
To preview the message with personalization, click Preview. The preview shows the message and all Web Push notification settings for the campaign.
Note: Currently the preview only displays for the first 25 members of the Web Push channel list.
Using the toolbar buttons
Use the toolbar buttons as shown below when creating or editing messages.
| To Do This | Use This Button | Notes |
|---|---|---|
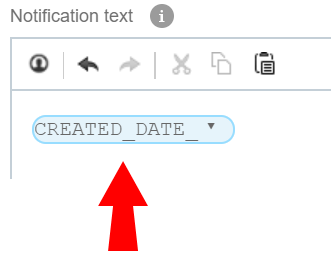
| Insert a personalization field |
|
With this button's classic user interface, when you click the button, the Insert Personalization dialog opens. Learn more about the new user interface.
With this button's new user interface, when you click the button, the personalization panel opens. Learn more about the classic user interface. Important: The new personalization token user interface simplifies the user experience for marketers.
|
| Undo the most recent action |

|
|
| Redo the most recent action |

|
|
| Cut the selection |

|
|
| Copy the selection |

|
|
| Paste the selection |

|
 .
.