Use Case: Customize the Netsuite Account Analysis Insights Subject Area
This use case explains how to customize the Netsuite Account Analysis Insights subject area by adding a custom field.
You can use custom fields in NetSuite to track company-specific information that NetSuite doesn't capture natively. You can report on these custom fields in Oracle NetSuite Analytics Warehouse, including within the Netsuite Account Analysis data application (NSAA) by adding fields in to the factory data model.
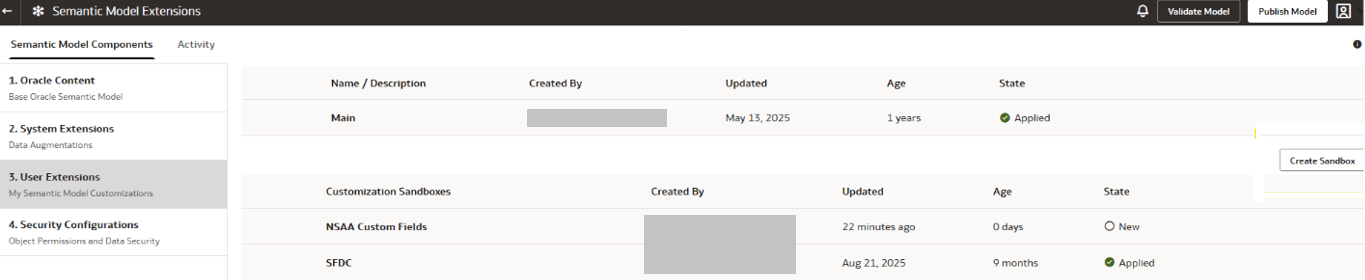
- Navigate to the Semantic Model Extensions page, click User Extensions, in the User Extensions region, for Customization Sandboxes, click Create Sandbox to create your customizations.
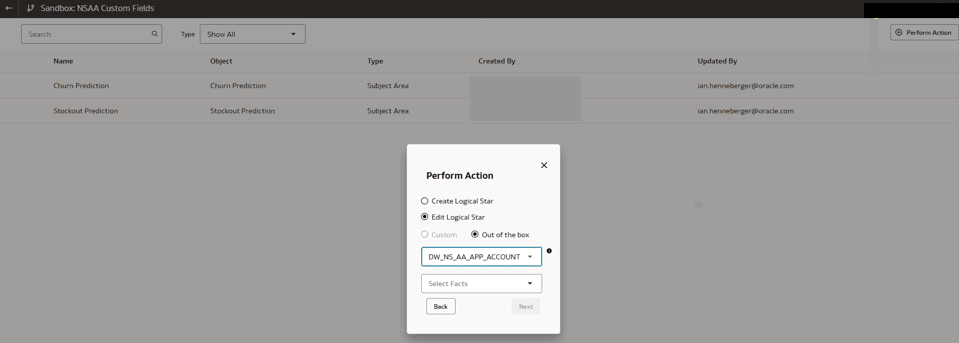
- In Perform Action, select Edit Logical Star, select Out of the Box, and then select DW_NS_AA_APP_ACCOUNT_ANALYSIS_F in Select Subject Area. Select Fact – Custom_TEMPLATE_DW_NS_AA_APP_ACCOUNT_ANALYSIS_F in Select Facts.
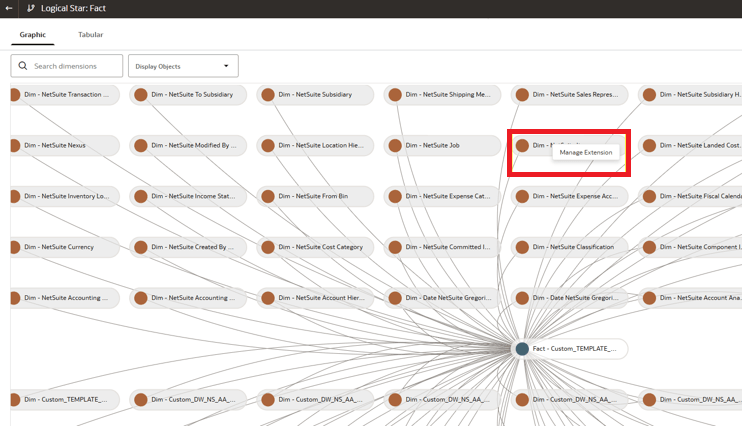
- Locate the dimension you want to add the custom field to, for example "Item dimension", right click, and select Manage Extension.
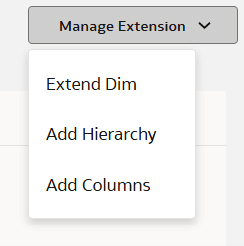
- On the sandbox page, from the Manage Extension drop down list, select Extend Dim.
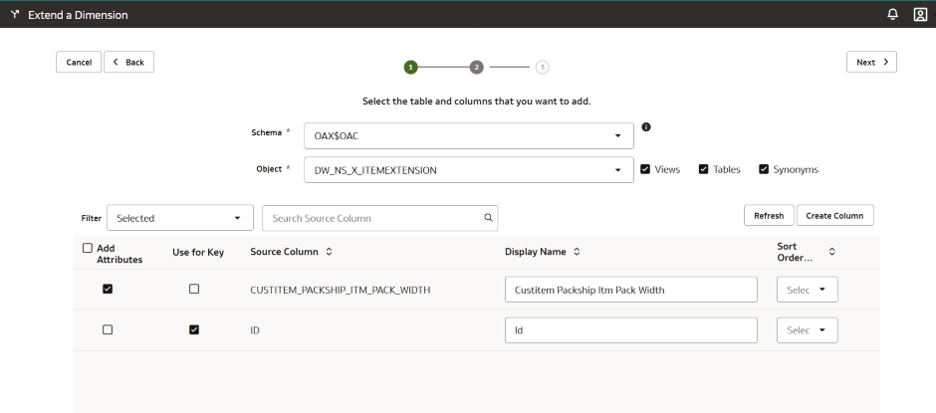
- Select the Add Attribute checkbox next to your custom field and Use for Key checkbox next to the ID. You can rename the field if you want. Click Next.
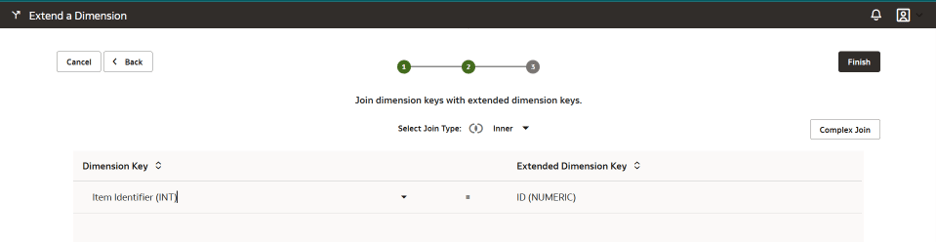
- Locate the base record’s ID (for example, Item Identifier) and click Next. If the system displays an error about data types not matching, you can ignore it.
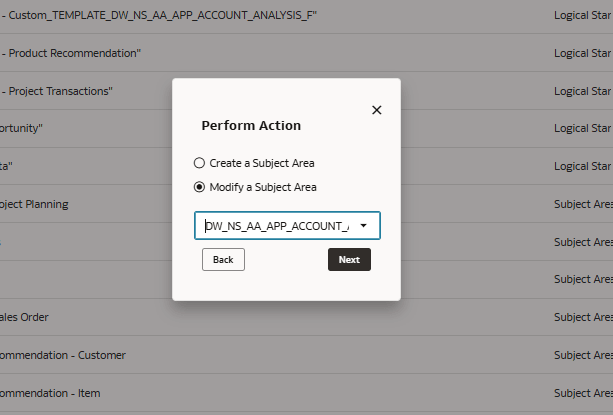
- Navigate to the applicable sandbox details page, click Perform Action, select Manage Subject Areas, select Modify a Subject Area and then select DW_NS_AA_APP_ACCOUNT_ANALYSIS_F.
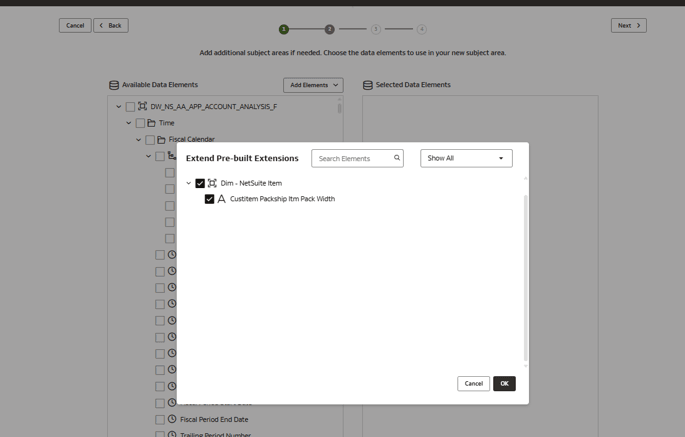
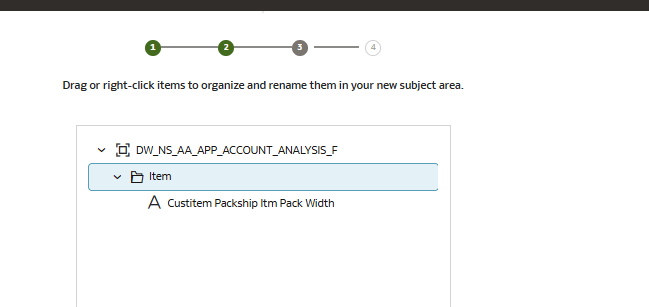
- In step 2 of the Modify a Subject Area wizard, click Add Elements, click Extend Pre-built Elements, select your custom field, and select the folder which corresponds to your record (for example, Item).
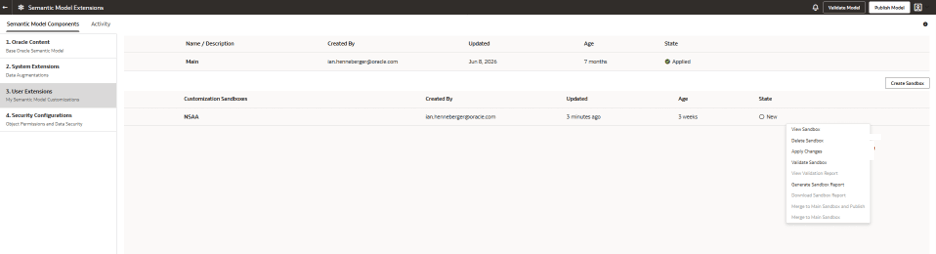
- Navigate to the Semantic Model Extensions page, hover over the applicable sandbox to view Actions, and then click Apply Changes.
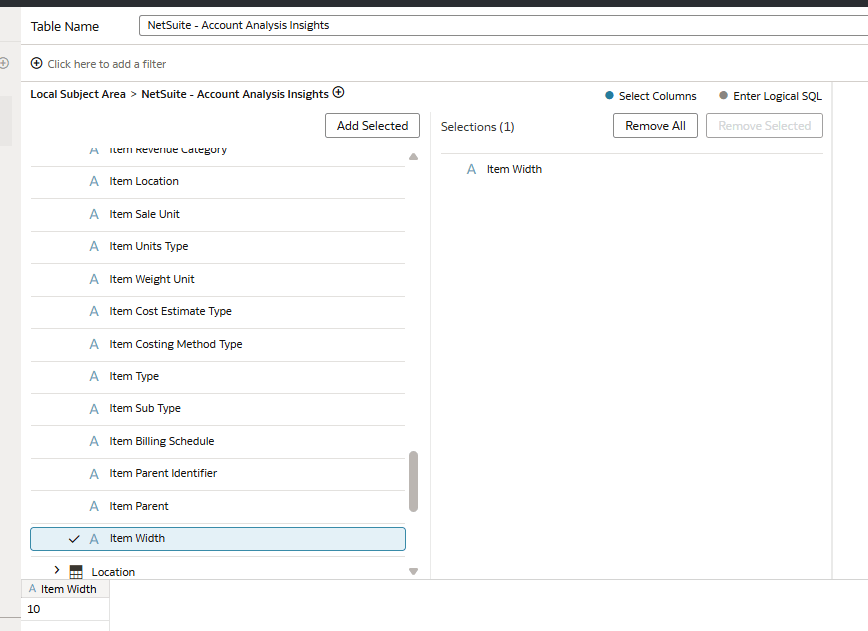
- Publish the model and verify in Oracle NetSuite Analytics Warehouse.
See Publish Model.