Registering OpenAir Exchange Manager With Microsoft Identity Platform
The steps described in this topic are provided for illustration purposes only. Refer to the vendor documentation for detailed instructions about integrating an application with Microsoft identity platform. See Quickstart: Register an application with the Microsoft identity platform and Quickstart: Configure a client application to access a web API on the Microsoft website for more information.
Before you can connect OpenAir Exchange Manager with Azure Active Directory, Exchange Online, or both, you must register OpenAir Exchange Manager with the Microsoft identity platform first. The Microsoft identity platform provides secure sign-in and authorization for OpenAir Exchange Manager to access Azure Active Directory or Exchange Online through the relevant Web APIs using OAuth 2.0.
To register OpenAir Exchange Manager with Microsoft identity platform
-
Sign in to the Azure portal.
-
If your account gives you access to more than one tenant, select the account you require in the top right corner.
-
Go to Azure Active Directory.
-
Click App registrations under Manage on the left pane.
The App registrations screen appears.
-
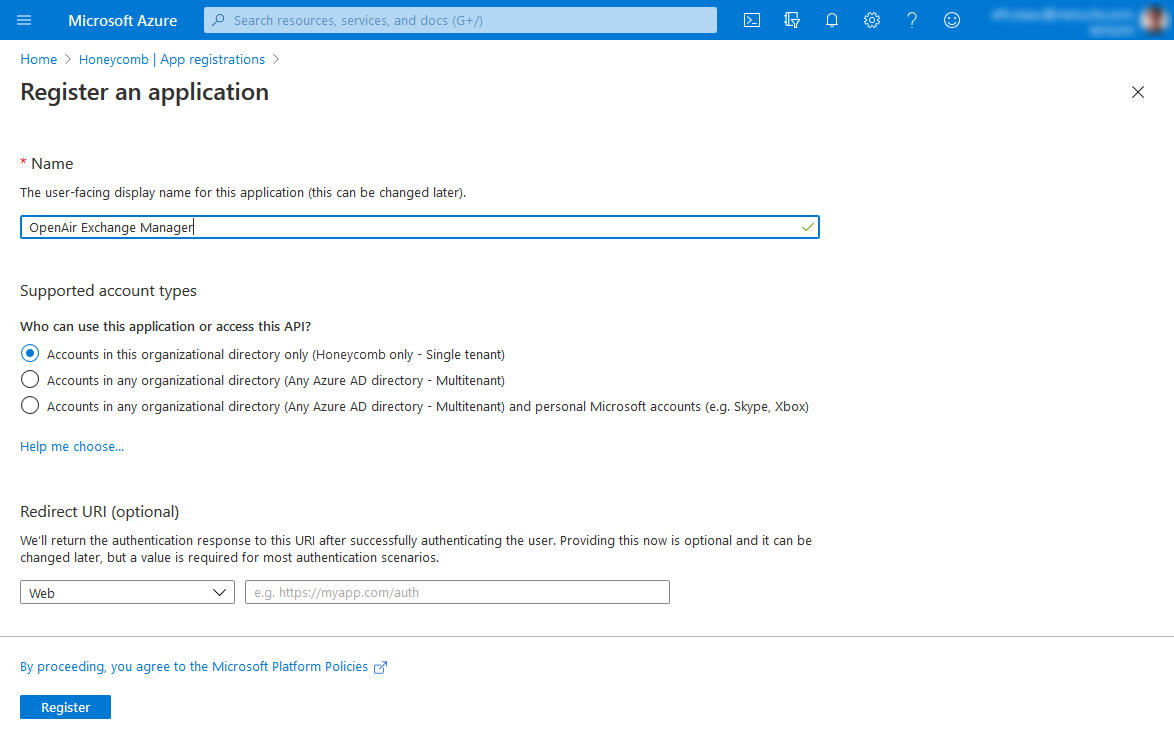
Click New registration. The Register an application screen appears.
-
Enter a Name for the application — for example “OpenAir Exchange Manager” — and select Accounts in this organizational directory only (<Your tenant name> only — Single tenant) under Supported account types.
-
Click Register.
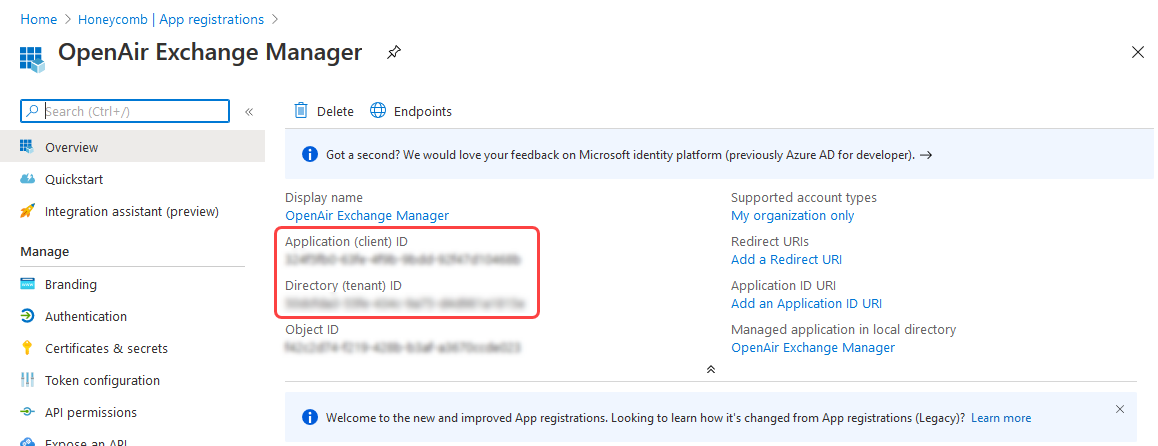
The Overview screen for your new app appears.
-
Copy the Application (client) ID and Directory (tenant) ID and store this information in a safe place. You will need this information when configuring OpenAir Exchange Manager. See Connecting OpenAir Exchange Manager with Azure Active Directory or Exchange Online.
-
Click API permissions under Manage on the left pane.
The API permissions screen appears.
-
Click Add a permission.
The Request API permissions screen appears.
-
Click Exchange under Supported legacy APIs, then click Application permissions, and check the full_access_as_app box under Select permissions.
-
Click Add permissions.
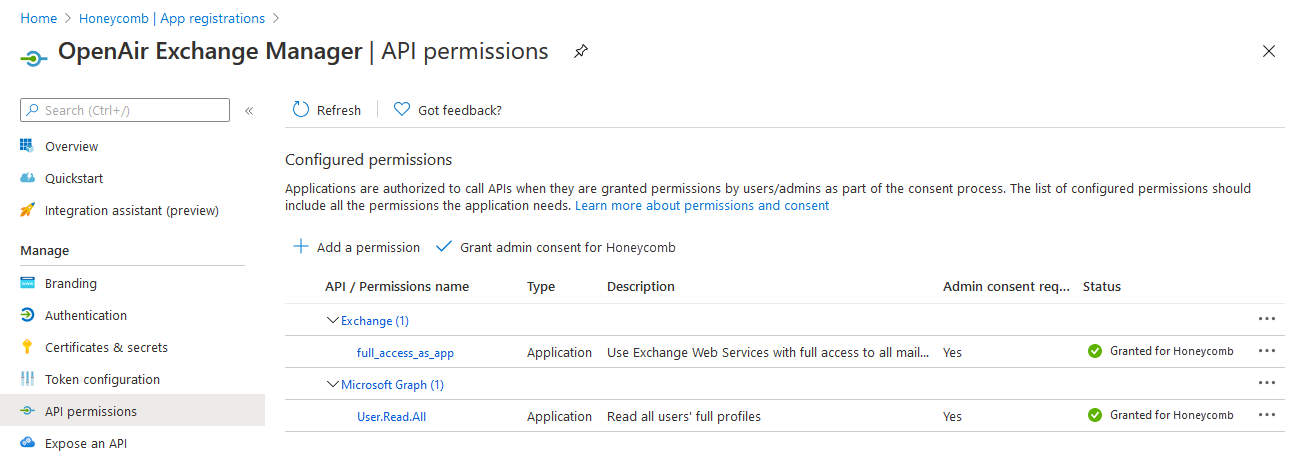
The API permissions screen appears and the application permission full_access_as_app for the Exchange API is included in the list of Configured permissions.
-
Click Add a permission, click Microsoft Graph under Commonly used APIs, click Application permissions, scroll to, and expand User permissions, check the User.Read.All box, and click Add permissions.
The API permissions screen appears and the application permission User.Read.All for the Microsoft Graph API is included in the list of Configured permissions.
-
Click Grant admin consent for <Your tenant name> and Accept on the consent prompt.
The API permissions screen shows the admin consent status for configured permissions as granted for <Your tenant name>.
Note:You must have administrator privileges to grant admin consent to the permissions configured for the application.
-
Click Certificates & secrets under Manage on the left pane.
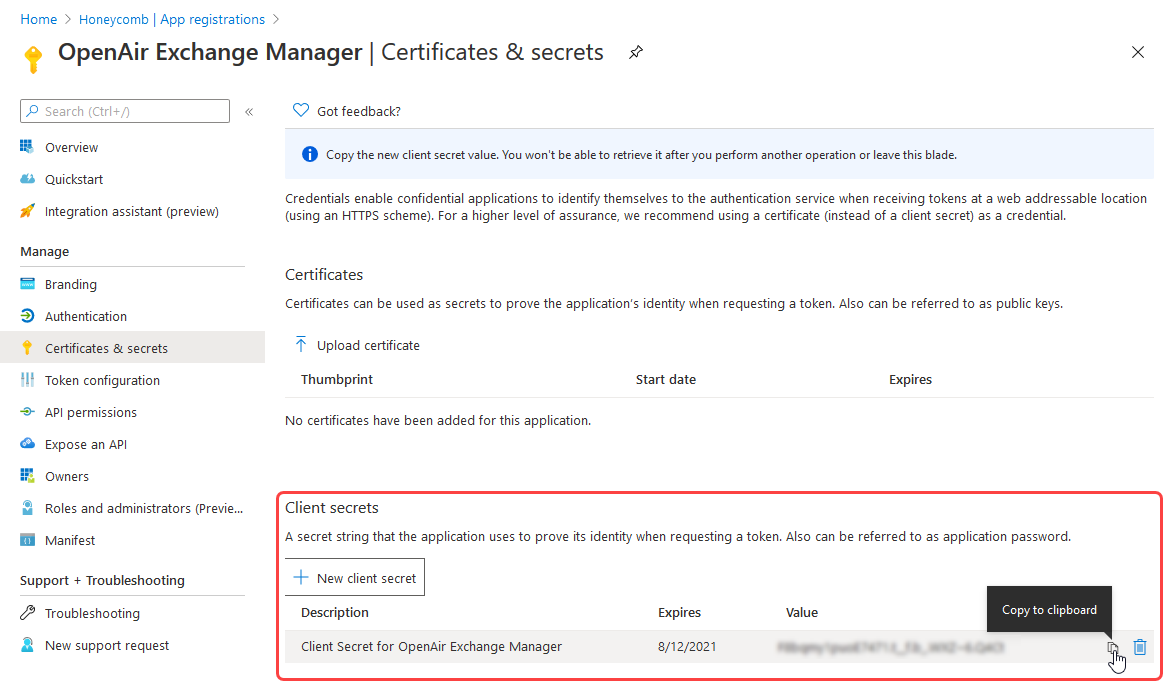
The Certificates & secrets screen appears.
-
Click New client secret.
The Add a client secret window appears.
-
Enter a Description and select when the client secret Expires, then click Add.
The Certificates & secrets screen shows the client secret you have added.
-
Copy the Client secret Value and store it in a safe place. You will need this information when configuring OpenAir Exchange Manager. See Connecting OpenAir Exchange Manager with Azure Active Directory or Exchange Online.