Billing
You can set up detailed billing rules on a project-specific basis. After you have created a billing rule and run it, SuiteProjects Pro creates charges based on the rule which can then be used in invoices.
Types of Billing Rules
There are five types of billing rules:
-
Time billing rule - These rules are applied to your employees' time entries which are associated with a project. Only approved time entries are used by this rule.
-
Expense item billing rule - These rules are applied to approved receipts associated with a project.
-
Fixed fee on date or milestone - Use these rules to create a fixed fee or repeating fixed fee for a project. This rule is useful for charging monthly flat rates to customers for work on a specific project.
-
Fixed fee on % complete - Use these rules to bill a certain amount when a project, project phase, or project task reaches a set percentage of completion.
-
Purchase item billing rule - Use these rules to bill purchases made through the Purchases module.
Billing Rule Forms
Use the Billing Rule form to set the parameters for your billing rules. Each billing rule type has its own form:
Time Billing Rule Fields
-
Currency - If your account uses multi-currency, use this list to select the currency you want the billing rule to be run with.
-
Date range - If needed, enter a start and end date for the time when the billing rule will be in effect. If milestones have been created for the project, you can also select one of these milestones rather than a date.
-
Billing rates - You can get billing rates from one of four places:
-
Employees - If you select Employees from the menu, you can override your employees' assigned billing rates for their timesheet time entries associated with a project. Select the employee from the lists, and enter the new billing rates. If you need more rows, select the number of rows from the '[Add rows]' list.
-
Rate cards - If you select Rate cards, you can choose to apply any rate card by selecting it from the "Rate card" list.
Note:If the rate card does not include a rate for a specific employee, that employee's default billing rate is used.
-
Services - If you select Services, you can override default service rates by selecting the service from the lists provided and entering the new billing rates. If you need more rows, select the number of rows from the "[Add rows]" list.
-
Job codes - If you select Job codes, you can override default rates by job code by selecting the job code from the lists provided and entering the new billing rates. If you need more rows, select the number of rows from the "[Add rows]" list.
The page refreshes when changing from one Billing rate option to another.
You can type a Billing rate multiplier to apply to Employee or Service rates which have not been overridden by the settings above.
-
-
Daily rate multiplier - Use these fields to enter rate multipliers which apply to specific days of the week. This setting affects all rates, including overridden ones.
-
Rounding rules - For employees' timesheet time entries which are associated with the project, you can round up the number of hours for billing purposes.
For example, if you bill by the day or half-day only, you could set up rules so that any time entries that are less than 4 hours are rounded up to 4 hours, and any time entries that are between 4 and 8 hours are rounded up to 8 hours.
For example, to bill by day or half-day, the rounding rules could be set up as follows:
-
Hours > is set to 0, Hours <= field is set to 4, Round to field is set to 4.
-
Hours > field is set to 4, Hours <= field is set to 8, Round to field is set to 8.
Rounding is done on the daily total of hours for the project in question only.
-
-
Billing rule filters - Use these filters to limit the billing rule to certain employees, time types, or services. To create a filter for a particular item, click on its '>Create' button. In the popup window, select the items you want from the 'Available items' list, click 'Add Selected >', and click OK.
-
Rule Cap - Set a cap to limit the total amount billed by the billing rule. Caps for time billing rules can be set by hours or by money.
You can also set whether a cap prompts you to adjust time entries to fit under the cap or prevent billing of time entries which exceed the cap:
-
Adjust time entries to fit under the cap - If selected, when billings by money or hours exceed the cap, the billing run will give you the option to create charges only up until the cap is reached, based on the dates or order of the time entries. If this option is not selected, and billings exceed the cap, no billing will be generated.
The cap limits the total amount billed by the rule. The next time you run billing, the cap will account for any existing charges created with this rule when it calculates whether time entries can be billed.
For example, if you set the cap to $6,000 and select this option, and the first set of charges created in the rule total $5,000, the next time you run project billing, you will only have the option to create charges for time entries up to a total of $1,000. If billing is later run and the next set of charges add up to $1,500, a total of $1,000 would be billed.
If the option was not selected, nothing would be billed. In either case, any remaining receipts, purchases, and time entries over the cap would not be billable.
When running billing with this option selected, the Description column will say 'Adjusted for cap' for transactions which have not been fully billed.
-
Do not bill time entries that exceed the cap - This rule affects billing when sequential billing rules exist. If selected, when the cap is reached, no further billing takes place. If this option is not selected, transactions exceeding the cap will pass to successive billing rules, if they exist, for further processing.
This option should not be used if, for example, you have a time billing rule at a $250 per hour rate up to a cap, and a second billing rule with a discount rate for time which exceeds the cap.
-
-
Time period cap - The time period cap limits the number of hours billed for the time period. Type the number of hours and select the time period from the list. Select 'Apply the cap on a per employee basis' to apply the cap separately to each employee (for example, each employee has their own 40-hour cap), rather than one cap for all employees (for example, all employees combined time must be under 180 hours).
-
Other Settings
-
Name - You can give the billing rule a name. If this field is cleared, a default name will be assigned. The default name has the following format: '[type] billing rule [#]. For example, a new expense item billing rule's default name would be 'Expense item billing rule 1'.
-
Billing rule position - With this option, set the order in which each rule will be applied when you run project billing.
For example, you may want a specific time billing rule to run first, then a second, more general time billing rule to any time entries not affected by the first rule.
Note:The position of billing rules is important. If a general rule (for example, one which is simply 'Bill expenses' or 'Bill time at the employee(s)' billing rate') is positioned before a more specific rule, the specific rule will never process time entries picked up by the previous rule.
-
Charge description - Enter a description of the billing rule, if desired. This description will be added to explanation of each billing rule in the "Rule" column of the "Billing rules" list for the project. It will also appear in the "Description/Notes" field of the item in the resulting invoice.
-
Charge stage - If you want charges created by the billing rule to be assigned a specific charge stage, choose the stage from this list.
-
Agreement - If you want charges created by the billing rule to be assigned to a specific agreement, choose the agreement from this list. The agreement must be associated with the project.
-
Customer PO - If you want charges created by the billing rule to be assigned to a specific customer purchase order, choose the purchase order from this list. The customer PO must be associated with the project.
-
Service - Associates a service to any charges created by the billing rule.
-
Use the selected service if the time entry does not have a service - If a time entry does not have a service, use this option to assign this time entry to a service. Select the service from the 'Service' list or lists.
-
Always use the selected service - This option always assigns time entries to a service selected from the 'Service' list or lists, overriding any other service choices.
-
Notes - Add a description for the billing rule in this field. The description will appear in lists.
-
Exclude time from archived timesheets - Select this option if you do not want time from archived timesheets to be included when running this billing rule.
-
Active billing rule - Clearing this option deactivates the billing rule. It is selected by default.
-
Expense Item Billing Rule Fields
-
Currency - If your account uses multi-currency, use this list to select the currency you want the billing rule to be run with.
-
Date range - If needed, enter a start and end date for the time when the billing rule will be in effect. If milestones have been created for the project, you can also select one of these milestones rather than a date.
-
Mark up/down - Use this setting to create billing rules which mark up or mark down expense items in receipts associated with a project. Enter a markup or markdown as a percentage of the cost, or as a fixed monetary amount. The markdown is applied on a per-unit basis.
Note:Enter a negative number for a markdown.
You can also select a Markup service. If you select a service in the list, the markup will create a separate flat rate charge assigned to that service.
-
Billing rule filters - Use these filters to limit the billing rule to certain expense items. To create a filter for a particular item, click on its '>Create' button. In the popup window, select the items you want from the 'Available items' list, click 'Add Selected >', and click OK.
-
Receipt maximums - Set maximums on a per-expense item basis in each billing rule. When the billing rule is run for a particular project, receipts which exceed the maximum will be reduced to the maximum amount specified.
-
Cap - Set a cap to limit the total amount billed by the billing rule. Expense billing rule caps are by money only.
You can also set whether a cap prompts you to adjust expenses to fit under the cap or prevent billing which exceed the cap:
-
Adjust receipts to fit under the cap - If selected, when billings exceed the cap, the billing run will give you the option to create charges only up until the cap is reached, based on the dates or order of the expenses. If this option is not selected, and billings exceed the cap, no billing will be generated.
The cap limits the total amount billed by the rule. The next time you run billing, the cap will account for any existing charges created with this rule when it calculates whether receipts can be billed.
For example, if you set the cap to $6,000 and select this option, and the first set of charges created in the rule total $5,000, the next time you run project billing, you will only have the option to create charges for time entries or receipts up to a total of $1,000. If billing is later run and the next set of charges add up to $1,500, a total of $1,000 would be billed.
If the option was not selected, nothing would be billed. In either case, any remaining receipts over the cap would not be billable.
When running billing with this option selected, the Description column will say 'Adjusted for cap' for transactions which have not been fully billed.
-
Do not bill receipts that exceed the cap - This rule affects billing when sequential billing rules exist. If selected, when the cap is reached, no further billing takes place. If this option is not selected, transactions exceeding the cap will pass to successive billing rules, if they exist, for further processing.
This option should not be used for situations when a certain amount of expenses are included in a fixed price billing and only expenses exceeding the cap are billed as incurred.
-
-
Other Settings
-
Name - You can give the billing rule a name. If this field is cleared, a default name will be assigned. The default name has the following format: '[type] billing rule [#]. For example, a new expense item billing rule's default name would be 'Expense item billing rule 1'.
-
Billing rule position - With this option, set the order in which each rule of a specific type (time or expense item) will be applied when you run project billing.
Note:The position of billing rules is important. If a general rule (for example, one which is simply 'Bill expenses' or 'Bill time at the employee(s)' billing rate') is positioned before a more specific rule, the specific rule will never process time entries picked up by the previous rule.
-
Charge description - Enter a description of the billing rule, if desired. This description will be added to explanation of each billing rule in the "Rule" column of the "Billing rules" list for the project. It will also appear in the "Description/Notes" field of the item in the resulting invoice.
-
Charge stage - If you want charges created by the billing rule to be assigned a specific charge stage, choose the stage from this list.
-
Agreement - If you want charges created by the billing rule to be assigned to a specific agreement, choose the agreement from this list. The agreement must be associated with the project.
-
Customer PO - If you want charges created by the billing rule to be assigned to a specific customer purchase order, choose the purchase order from this list. The customer PO must be associated with the project.
-
Service - Associates a service to any charges created by the billing rule.
-
Notes - Add a description for the billing rule in this field. The description will appear in lists.
-
Subtract GST/HST from receipt - If you are using the tax locations tax calculation method, select this option to subtract the GST and HST from the receipt total when the project billing is run.
-
Exclude non-reimbursable receipts - Select this option to exclude non-reimbursable receipts from the billing rule.
-
Exclude non-billable receipts - Select this option to exclude non-billable receipts from the billing rule. This option is selected by default.
-
Active billing rule - Clearing this option deactivates the billing rule. It is selected by default.
-
Fixed Fee on Date or Milestone Billing Rule Fields
-
Amount and Date or Milestone - Enter the amount for the fixed fee, and the date on which it should be billed. If milestones have been created for the project, you will be able to select one of these milestones rather than a date, if desired.
-
Repeat billing rule - You can create a rule with a repeating fixed fee.
For example, if you wanted to bill a customer a certain amount every month for work on a project, you could set up a fixed fee billing rule that will create a charge for the amount required every month. When you run project billing, the charges will be created with the dates specified by the billing rule and the intervals between any repeating fees - if the dates of the repeating fixed fees fall sometime in the future, they will not show up as billable items on the "Run billing" page until those dates are reached.
To create a repeating fixed fee:
-
Click on the >Create link to create a repeating fixed fee. The 'Repeat' dialog appears.
-
Select the frequency and the interval for the fee. The 'Repeat Every' interval will change to reflect the frequency selected.
-
Select an end date for the repeat fee or designate a specific number of repetitions.
-
Click OK.
-
-
Name - You can give the billing rule a name. If this field is cleared, a default name will be assigned. The default name has the following format: '[type] billing rule [#]. For example, a new expense item billing rule's default name would be 'Expense item billing rule 1'.
-
Charge description - Enter a description of the billing rule, if desired. This description will be added to explanation of each billing rule in the "Rule" column of the "Billing rules" list for the project. It will also appear in the "Description/Notes" field of the item in the resulting invoice.
-
Charge stage - If you want charges created by the billing rule to be assigned a specific charge stage, choose the stage from this list.
-
Agreement - If you want charges created by the billing rule to be assigned to a specific agreement, choose the agreement from this list. The agreement must be associated with the project.
-
Customer PO - If you want charges created by the billing rule to be assigned to a specific customer purchase order, choose the purchase order from this list. The customer PO must be associated with the project.
-
Service - Associates a service to any charges created by the billing rule.
-
Employee - To associate a charge to a specific employee, select the employee from this list.
-
Cost center - To associate a charge to a specific cost center, select the cost center from this list.
-
Notes - Add a description for the billing rule in this field. The description will appear in lists.
-
Active billing rule - Clearing this option deactivates the billing rule. It is selected by default.
Fixed Fee on Percent Complete Fields
-
Amount, % complete, and % complete threshold - Enter the amount for the fixed fee. If phases have been created for the project, you will be able to specify whether the % complete should be based on the project as a whole, or on a particular phase. Enter the % complete threshold. When the % complete of the project or phase is greater than the threshold entered, the amount of the billing rule will be created as a charge upon running of the billing rule.
-
Name - You can give the billing rule a name. If this field is cleared, a default name will be assigned. The default name has the following format: '[type] billing rule [#]. For example, a new expense item billing rule's default name would be 'Expense item billing rule 1'.
-
Charge description - Enter a description of the billing rule, if desired. This description will be added to explanation of each billing rule in the "Rule" column of the "Billing rules" list for the project. It will also appear in the "Description/Notes" field of the item in the resulting invoice.
-
Charge stage - If you want charges created by the billing rule to be assigned a specific charge stage, choose the stage from this list.
-
Agreement - If you want charges created by the billing rule to be assigned to a specific agreement, choose the agreement from this list. The agreement must be associated with the project.
-
Customer PO - If you want charges created by the billing rule to be assigned to a specific customer purchase order, choose the purchase order from this list. The customer PO must be associated with the project.
-
Service - Associates a service to any charges created by the billing rule.
-
Employee - To associate a charge to a specific employee, select the employee from this list.
-
Cost center - To associate a charge to a specific cost center, select the cost center from this list. This option is controlled by a switch. Contact SuiteProjects Pro Support to discuss enabling this feature.
-
Notes - Add a description for the billing rule in this field. The description will appear in lists.
-
Active billing rule - Clearing this option deactivates the billing rule. It is selected by default.
Purchase Item Billing Rule Fields
-
Currency - If your account uses multi-currency, use this list to select the currency you want the billing rule to be run with.
Note:When an expense billing rule generates a bill for a foreign currency expense in the same currency, the user-designated exchange rate will be used.
-
Date range - If needed, enter a start and end date for the time when the billing rule will be in effect. If milestones have been created for the project, you can also select one of these milestones rather than a date.
-
Mark up/down - Used with expense item billing rules and purchase item billing rules. Use this setting to create billing rules which mark up or mark down expense items in receipts or purchases associated with a project. Enter a markup or markdown as a percentage of the cost, or as a fixed monetary amount. The markdown is applied on a per-unit basis.
Note:Enter a negative number for a markdown.
You can also select a Markup service. If you select a service in the list, the markup will create a separate flat rate charge assigned to that service.
-
Billing rule filters - Use these filters to limit the billing rule to certain products. To create a filter for a particular item, click on its '>Create' button. In the popup window, select the items you want from the 'Available items' list, click 'Add Selected >', and click OK.
-
Cap - Set a cap to limit the total amount billed by the billing rule. Purchase item billing rule caps are by money only.
You can also set whether a cap prompts you to adjust receipts to fit under the cap or prevent billing of receipts which exceed the cap:
-
Adjust purchase items to fit under the cap - If selected, when billings by money exceed the cap, the billing run will give you the option to create charges only up until the cap is reached, based on the dates or order of the receipts or purchases. If this option is not selected, and billings exceed the cap, no billing will be generated.
The cap limits the total amount billed by the rule. The next time you run billing, the cap will account for any existing charges created with this rule when it calculates whether receipts or purchases can be billed.
For example, if you set the cap to $6,000 and select this option, and the first set of charges created in the rule total $5,000, the next time you run project billing, you will only have the option to create charges for time entries or receipts up to a total of $1,000. If billing is later run and the next set of charges add up to $1,500, a total of $1,000 would be billed.
If the option was not selected, nothing would be billed. In either case, any remaining receipts or purchases over the cap would not be billable.
When running billing with this option selected, the Description column will say 'Adjusted for cap' for transactions which have not been fully billed.
-
Do not bill purchase items that exceed the cap - This rule affects billing when sequential billing rules exist. If selected, when the cap is reached, no further billing takes place. If this option is not selected, transactions exceeding the cap will pass to successive billing rules, if they exist, for further processing.
This rule should also not be used for situations when a certain amount of expenses are included in a fixed price billing and only expenses exceeding the cap are billed as incurred.
-
-
Name - You can give the billing rule a name. If this field is cleared, a default name will be assigned. The default name has the following format: '[type] billing rule [#]. For example, a new expense item billing rule's default name would be 'Expense item billing rule 1'.
-
Billing rule position - Used with time and expense item billing rules. With this option, set the order in which each rule of a specific type (time or expense item) will be applied when you run project billing.
For example, you may want a specific time billing rule to run first, then a second, more general time billing rule to any time entries not affected by the first rule.
Note:The position of billing rules is important. If a general rule (for example, one which is simply 'Bill expenses' or 'Bill time at the employee(s)' billing rate') is positioned before a more specific rule, the specific rule will never process time entries picked up by the previous rule.
-
Charge description - Enter a description of the billing rule, if desired. This description will be added to explanation of each billing rule in the "Rule" column of the "Billing rules" list for the project. It will also appear in the "Description/Notes" field of the item in the resulting invoice.
-
Charge stage - If you want charges created by the billing rule to be assigned a specific charge stage, choose the stage from this list.
-
Customer PO - If you want charges created by the billing rule to be assigned to a specific customer purchase order, choose the purchase order from this list. The customer PO must be associated with the project.
-
Service - Associates a service to any charges created by the billing rule.
-
Notes - Add a description for the billing rule in this field. The description will appear in lists.
-
Active billing rule - Clearing this option deactivates the billing rule. It is selected by default.
-
Agreement - If you want charges created by the billing rule to be assigned to a specific agreement, choose the agreement from this list. The agreement must be associated with the project.
-
Exclude non-reimbursable receipts - Select this option to exclude non-reimbursable receipts from the billing rule.
-
Exclude non-billable receipts - Select this option to exclude non-billable receipts from the billing rule. This option is selected by default.
-
Mark up/down - Use this setting to create billing rules which mark up or mark down purchases associated with a project. Enter a markup or markdown as a percentage of the cost, or as a fixed monetary amount. The markdown is applied on a per-unit basis.
Note:Enter a negative number for a markdown.
You can also select a Markup service. If you select a service in the list, the markup will create a separate flat rate charge assigned to that service.
Creating, Editing, Copying, and Deleting Billing Rules
To create a billing rule:
-
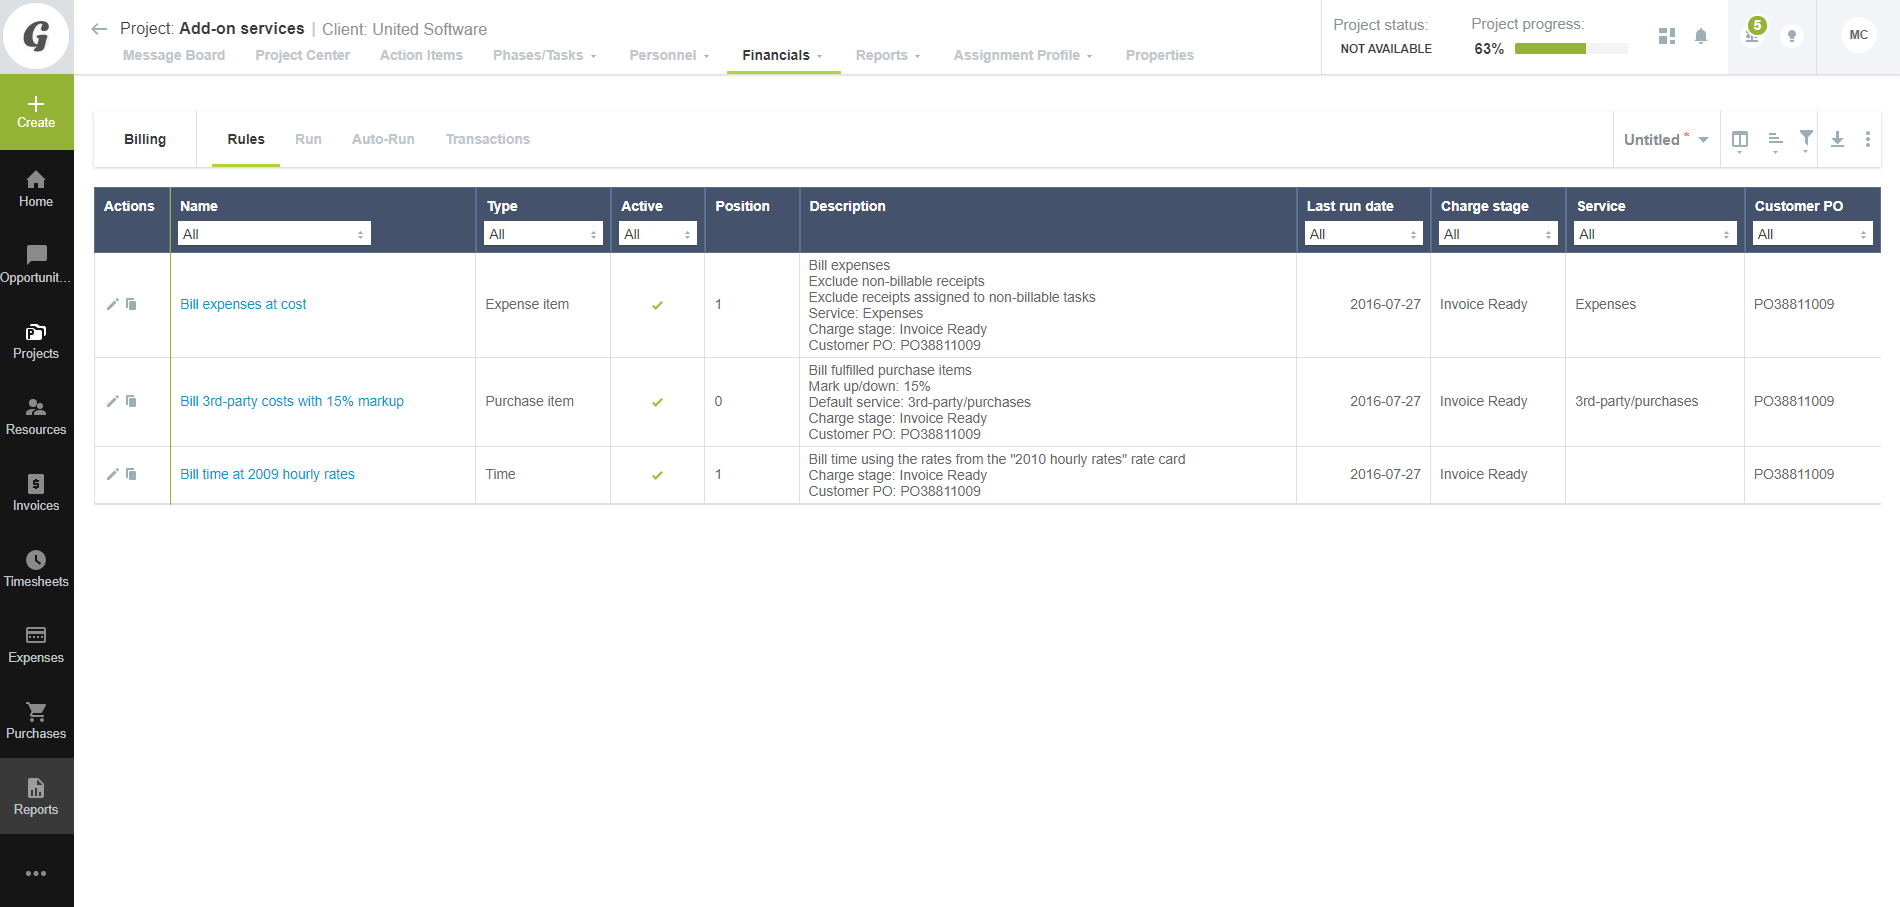
Go to Projects > Projects > [select a project] > Financials > Billing > Rules. A list of existing billing rules appears.
-
Click the Create button and click the type of billing rule you want to create under 'Billing rule'. A form for the selected billing rule appears.
-
Set the parameters for the billing rule, and click Save or Save & create another.
To edit a billing rule:
-
Go to Projects > Projects > [select a project] > Financials > Billing > Rules. A list of existing billing rules appears.
-
Click on the name of the billing rule that you want to edit. You can also click the Edit icon in the Action column of the list. The 'Billing rule' form appears.
-
Make your changes to the rule's form and click Save.
To copy a billing rule:
-
Go to Projects > Projects > [select a project] > Financials > Billing > Rules. A list of existing billing rules appears.
-
Click the Clone button in the Action column for the rule you want to copy. The billing rule will be duplicated and the copy's Billing Rule form will appear.
To delete a billing rule:
-
Go to Projects > Projects > [select a project] > Financials > Billing > Rules. A list of existing billing rules appears.
-
Click on the name of the billing rule that you want to delete. The 'Billing rule' form appears.
-
Click Delete at the top of the form.
You cannot delete a billing rule which has associated billing transactions or charges.
Running Billing Rules and Project Billing Transactions
When you run billing, a list of all billable items will be generated based on the billing rules you have set up for the project. From this list, you can select the items you want to turn into charges. These charges can then be used in invoices. The Project Billing Transactions report will also list those items which have been billed. If you subsequently edit one of these charges so that its cost is different from the original billable item, the Project Billing Transactions report will display the original total, the charge total, and the difference between the two. If you delete a charge, the record will still remain in the project billing transactions list, and list the charge total as '0'.
You must create at least one billing rule for the project before you can run billing.
To run a billing rule for one project:
-
Go to Projects > Projects > [select a project] > Financials > Billing and click the Run tab.
-
If desired, enter a Start date and End date for the billing run. Click Next.
Note:The Start and End dates default to the values you entered when you last ran billing for the project.
-
The list of available billable items appears. If no items are billable, a 'Nothing is currently billable for this project' message appears. To edit any items in the list, click the date of the billable item you want to change. Make any changes and click Save.
-
Select the items which you want to create charges for.
-
Click Create project billing transactions and charges at the bottom of the billable items list.
To run billing for multiple projects:
-
Go to Reports > Advanced and click 'Pending Billings' in the 'Projects' section.
-
Enter the parameters for the report in the Pending billings form.
-
Click Run the report. The Pending Billings report appears, and shows all projects which have billings to run.
-
Click the Tips button.
-
Click the Click here link to create the billings for the projects in the report.
Click the Transactions link to see the items which have been billed. The charges which have been generated can also be found at Invoices > Charges. You can run billing again by clicking the Click here link to run billing again. You can enter a new set of dates if necessary.
Deleting a Project Billing Transaction
To delete a project billing transaction, you must first delete the charges associated with it.
To delete project billing transactions and their associated charges:
-
Go to Invoices > Charges > [Select a type of charge].
-
Select the charges which you want to delete by selecting their check boxes in the 'Run an action' column. To select the entire list of transactions, check the box in the grey filter row.
-
Click the Run an action button at the top of the 'Run an action' column. The Actions dialog appears.
-
Select 'Delete the selected charges and associated project billing transactions' and click OK. The charges and their associated project billing transactions will be deleted.
Auto-Billing
SuiteProjects Pro includes three options for auto-billing which allow you to simplify your billing workflow:
-
Do not auto-bill - This is the default option. When selected, SuiteProjects Pro does not auto-bill.
-
Run a trial billing, do not create project billing transactions or charges - This option lets you test a billing run without creating billing items.
-
Run billing and create project billing transactions and charges - This option runs billing and creates billing items.
You can set default auto-billing options for project billing rules on an account-wide basis, eliminating a step for project managers when creating new projects.
To configure auto-billing defaults:
-
Go to Administration > Application Settings > Projects > Project Billing Defaults.
-
Set the options for whether to use auto-billing, trial billing, or full billing, set the auto-bill schedule, and select the employees to receive email notifications for the billing results.
-
Click Save.
These options will apply only to new projects and will not change the auto-bill settings for any existing projects. Cloned projects will use the auto-billing settings of the original project from which the copy was made, and not the default auto-billing settings.
To run a trial auto-billing:
-
Go to Projects > Projects > [select a project] > Financials > Billing > Auto-run.
-
Select the ' Run a trial billing, do not create project billing transactions or charges' option in the Auto-bill form.
-
In the 'Email the results of the auto-bill run to:' section of the form, select the employees who should receive the results of the trial billing in an e-mail message by clicking on the >Create or >Edit links, selecting the employees from the "Available items" list, and clicking the Add highlighted items > button to move them to the "Selected items" list.
-
Select 'Suppress the email if nothing is billable' to not send billing and recognition notification emails if no transactions are billable or recognizable.
-
In the 'Run auto-bill on:' section of the form, select the day and the time of the week that the trial billing will run. The e-mail messages with the results will be sent as soon as the trial has been run.
Note:Times are in Eastern Time (UTC -5:00 during Standard Time and UTC -4:00 during Daylight Saving Time)
-
Click Save.
To run auto-billing:
-
Go to Projects > Projects > [select a project] > Financials > Billing > Auto-run.
-
Select the ' Run billing and create project billing transactions and charges' option in the Auto-bill form.
-
In the 'Email the results of the auto-bill run to:' section of the form, select the employees who should receive the results of the billing in an e-mail message by clicking on the >Create or >Edit links, selecting the employees from the "Available items" list, and clicking the Add highlighted items > button to move them to the "Selected items" list.
-
Select 'Suppress the email if nothing is billable' to not send billing and recognition notification emails if no transactions are billable or recognizable.
-
In the 'Run auto-bill on:' section of the form, select the day and the time of the week that the billing will run. The e-mail messages with the results will be sent as soon as billing has been run.
Note:Times are in Eastern Time (UTC -5:00 during Standard Time and UTC -4:00 during Daylight Saving Time)
-
Click Save.