Project Status Summary (PSS)
Use Project Status Summaries to produce project status pages that summarize important project progress data. The project status summary can be customized and can be populated with information critical to your company internally or your customers externally.
Enabling Project Status Summaries
To enable Project Status Summaries, contact SuiteProjects Pro Support and ask them to enable the Project Status Summaries feature. After this feature is enabled for your account, you will need to assign View or Edit permissions to your roles. The available role settings are:
-
View Project status page
-
View and modify Project status page
Opening Project Status Summaries
There are three ways to go to the Project Status Summaries:
-
Point to any element which opens a project QuickView and click Status summary.
-
In any project QuickView, click the
 icon in the upper right corner.
 -
Go to Projects > Projects and select a project. In the Project Dashboard, click the
icon next to the project name.
Using Project Status Summaries
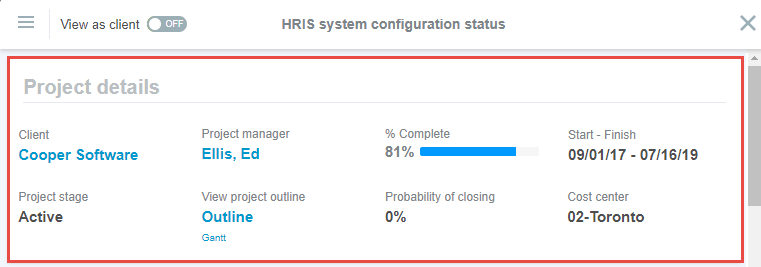
Each Project Status report can contain a header with basic information about the project. The default project header can be modified or deleted.
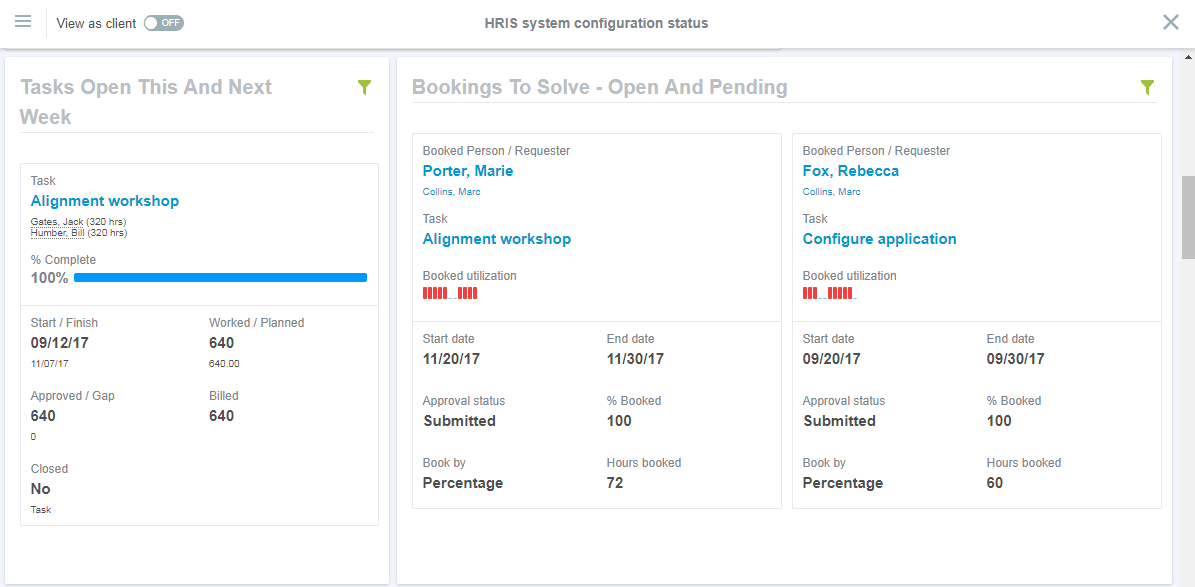
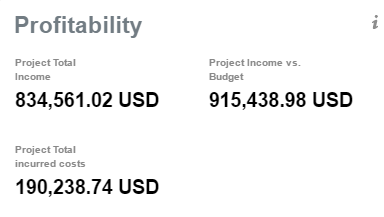
Below the header, you can add a series of portlets which show information about tasks, task assignments, bookings, and other project- and task-related information.
The PSS can display project status messages which are entered in a text box in HTML within the project properties form.

Editing Project Status Summary Layouts
To edit the Project Status Summary layout:
-
Click the Options
 icon and click Edit.
-
To add a new portlet, click the Add new portlet
 icon and select the type of portlet to add. Enter a Label and Description for the portlet. You can also select if the portlet is visible in Customer View.
If the portlet is a dynamic portlet, you can select up to three fields to sort individual portlet cards by. Drag the fields to change their order, or click the Remove
 icon to remove the field from the portlet. Click the Ascending order
  or Descending order
  icon to set the sorting order.Tip:
You should set a sorting order for the content of dynamic portlets; without a set order, portlet cards are ordered randomly.
Click Apply to add the portlet to the Project Status Summary.
Note:Some portlets require that you have the correct account settings or roles before they can be added to a Project Status Summary. If you are unable to add a desired portlet to your Project Status Summary, confirm with SuiteProjects Pro Support that you have all of the required features or roles to add the portlet. For example, to add the 'Bookings' and 'Task Assignments' portlets, the 'Enable approvals for Bookings' and 'Enable Task Assignment Lists' features must be set for your account by SuiteProjects Pro Support.
-
To add a field to a portlet, click the Add item
icon within the portlet and select the field to add. Enter a title for the field, or leave it blank to use the default title. Select an optional footnote for the field (footnotes can contain information from a data source or custom text which you enter yourself). You can also select if the field is visible in Customer View, and limit the field to particular roles. Click Apply to add the field to the portlet. -
To place an item in a portlet card header in a dynamic portlet card, drag the item from the card body to the card header.
Note:You can place multiple fields in a portlet card header.
-
To move a portlet, drag it to a new location in the Project Status Summary.
-
To edit an existing portlet, click the Edit portlet
 icon at the top of the portlet.
 -
To make a portlet visible or to hide a portlet in Customer View, click the Hidden
 or Visible
 icon at the top of the portlet. Alternatively, click the Edit portlet icon and select or clear the Visible in Customer View option.
 -
To delete a portlet, click the Delete this portlet
 icon.
icon. -
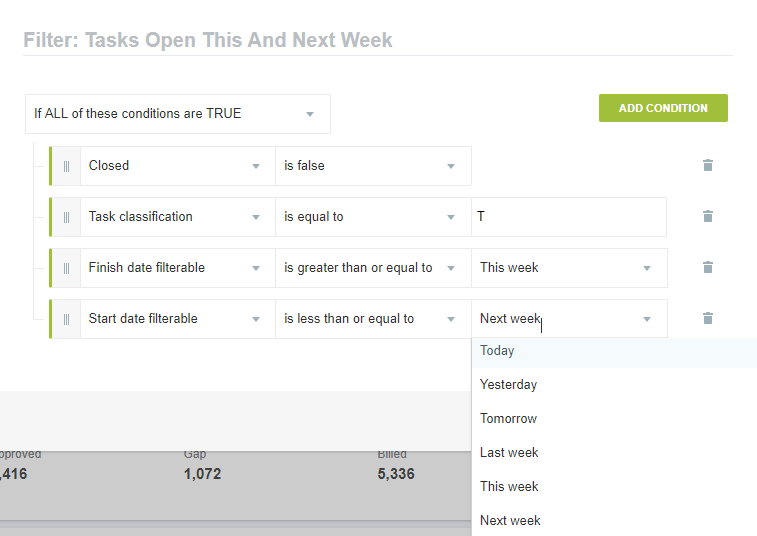
To add filters to a portlet, click the Define how cards are filtered
 icon. Click the Add Condition button to create conditions to filter by. Click Apply to apply the filter.Tip:
You should use filters in dynamic portlets to get the most targeted data.
Filters support relative and rolling date filters.
The available operands are:
Today
Yesterday
Tomorrow
Last week
This week
Next week
Last bi-week
This bi-week
Next bi-week
Last month
This month
Next month
Last semi-month
This semi-month
Next semi-month
Last quarter
This quarter
Next quarter
Last year
This year
Next year
A green filter icon indicates if filters are active in a portlet in View mode. You can also point to the filter icon to see if filters are active.
-
-
Click Save to save your Project Status Summary layout.
-
Click the Options
icon and click Exit editing mode or click the Close  icon to close the Project Status Summary.
Printing Project Status Summaries
To print a Project Status Summary:
-
Click the Options
icon and click Print. -
Set your printer settings and click Print.