Project Stages
Project stages classify projects based on your business requirements. See Creating a Project Stage.
After you create project stages, you can assign individual projects to the appropriate stage. See Changing the Project Stage for a Project.
You can create Proposed, Active, Closed, Lost, and Internal stages to classify projects, for example, where:
-
Proposed projects are projects which have not yet started and for which there are no signed contracts.
-
Active projects are projects for which you have signed paperwork and which are being worked by your resources.
-
Internal projects usually represents projects for which you want to track time and expenses, but are not customer related, such as training and documentation.
Project stages display as subtabs on the projects list. The All subtab lists projects in all project stages the user has access to. You can control the order in which the subtabs appear. See Reordering Project Stage Subtabs on the Projects List.
Creating a Project Stage
You can create project stages to classify projects based on your business requirements.
When creating a project stage, you can enable access to the project record functionality that is required at this particular stage. For example, you may want to have Billing and Recognition options available for projects in the Active stage, but not for projects in the Internal stage. Options include:
-
Dashboard - enables a project-specific message area and 1-click report location
-
Phases and Tasks - exposes links related to task management
-
Worksheet - provides ability to make updates across multiple tasks
-
Team - displays all employees either booked or assigned to the project along with their booked or assigned dates
-
Issues - enables issue tracking within the project
-
Budget - provides ability to enter funding budgets including change orders or types of budget values
-
Utilization - enables a graphical view of booked and assigned employee utilization for the project
-
Baseline - provides for the storage of project snapshot baselines for variance reporting
-
Booking grid - displays booking worksheet for entry of resource booking directly from the project
-
Pricing - enables the estimation feature for displaying gross/net revenue and estimated margins
-
Billing - provides ability to create and run billing rules for generating invoice charges and billing forecasts
-
Recognition - provides ability to create and run recognition rules for generating revenue transactions and forecasting revenue
-
Analysis - permits high level financial analysis of all costs and income
-
Overview - displays a standard status report for the project
To create a Project Stage:
-
Go to Administration > Application Settings > Projects > Project stages.
-
Click the Create button then New project stage.
The new project stage form appears.
-
Enter a name for the Project stage.
-
Check the Make this the default project stage for new projects box, if applicable. Only one project stage can be the default project stage. Checking this box will override any previous default project stage.
-
Under Options, check the boxes corresponding to the functionality and subtabs you want to make available on the project record when the project is in this project stage. A functionality or subtab will not be available to any users unless the corresponding box is checked.
-
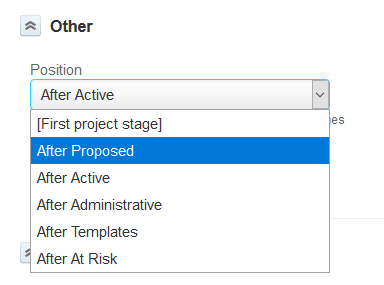
Select the relative Position for the subtab corresponding to this stage. See also Reordering Project Stage Subtabs on the Projects List.
-
Enter any Notes as required.
-
If standard email notifications controlled at the project stage level are enabled for your account, under Notifications check the boxes to control which events trigger notification email to be sent automatically and create a list of Employees to notify.
-
You can use filter sets to control access to projects at this stage. To do so, do the following:
-
Under the Filter sets form section, click Create.
-
Select the filter sets as appropriate. Employees who have this filter set as their active filter set cannot access projects in this stage.
-
Click OK.
Note:Project stages are one of the attributes you can use to control access using filter sets. Filter sets define what data the employee has permission to view or update. Depending on the filter set assigned to an employee, including any filter set applied when the employee views a particular SuiteProjects Pro module, the employee may not access all the project stages and all the projects at these stages. For more information about filter sets, see Filter Sets Overview
When you select filter sets on the project stage form, the selected filter sets do not allow the employee to view or modify information associated to projects in this project stage. For example, you should use filter sets to control who can access project records that are in a closed, cancelled or archived stage, both for performance reasons and to prevent employees from modifying these projects.
-
-
Click Save.
Changing the Project Stage for a Project
After you create a project stage, employees with the appropriate permissions and access privileges can progress a project to this project stage.
To change the project stage of a project:
-
Go to Projects > Projects > [Select a project] > Properties.
-
Select a Project stage from the dropdown list.
-
Click Save.
Reordering Project Stage Subtabs on the Projects List
Project stages display as subtabs on the projects list. You can change the order in which subtabs appear on the projects list at any time.
To reorder project stage subtabs on the projects list:
-
Go to Administration > Application Settings > Projects > Project stages.
-
For each project stage, to move the corresponding subtab relative to others, do the following:
-
Select the project stage.
-
Select the relative Position for the subtab corresponding to this stage.The relative position can be set to first project stage or after any other existing project stage.
-
Click Save.
-
Project Stage Use Case: Project Templates
Templates are predefined project structures that you can use to simplify project creation. Employees can copy a template when creating a project to have project information and associated records prepopulated. You can create a Templates project stage to classify all project templates used in your company.
To create a new project from a template:
-
Go to Projects.
-
Click the Create button then New, from another project.
-
Under Duplicate phases and tasks from this project, select the project template from the dropdown list.
-
Check the boxes for the elements of the project template you want to copy to the new project.
-
Enter any additional information as required.
-
Click Save.
By default, all projects are available for copying. To limit the number of projects that can be duplicated, create a custom checkbox field and associate it with Projects. The field name must be duplicate_from_project. You can use Use as project template as display name. After you create the custom field, check the box on the properties form for each project which can be used as the base for duplicate project. Then, only projects with this box checked are available to be duplicated. See Custom Fields and Custom Field Types.
To create a new project from an existing project, you can also go to the properties form of the project you want to copy and click the Tips button then Clone this project. Account administrators can control who can clone a project if the Clone Project Role Permission optional feature is enabled for your account.