Visual verification
Your company will need to have the 'Enable Visual Verification' package added to their Account.
In the Weekly View, you can access Visual Verification by clicking on the Actions button and going to the bottom of the list.
In the Multi-Location View, you can access Visual Verification by clicking the Verification button on the top bar.
When you click the Visual Verification button, a dialogue box will appear. By default, you'll see the list of all of the people with unverified punch photos. Visual Verification shows a photo per punch event and all must be verified.
When completing Visual Verification, you're looking for the exceptions (ie: the people that don't match their photo or have a bad uniform.)
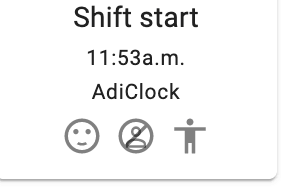
On each photo, there are three action icons:
-
Smiley Face: confirm the employee's name punching in matches the photo. You'll then be able to approve or edit/approve the timesheet as usual.
Note:You don' have to click this for each photo. See below for how to bulk verify those that match their photos.
-
Not Them: click this if the employee's name punching in doesn't match the photo. This won't let you approve the timesheet, so you don't pay an employee for work they didn't do.
-
Bad Uniform: the employee's name matches the punch, however, they have a bad uniform/ don;t meet uniform requirements. This will add a note to the timesheet and let you approve or edit/approve the timesheet.

When you've gone through and clicked the corresponding buttons on the exceptions (those that don't match their photo or have a bad uniform), you can then click the green Verify Visible button at the bottom of the box. Any photos with no actions on them will be marked with the Smiley Face and verified.
When the verification is complete, you can change the filtering in the dialogue box from 'Unverified' to 'All' to review the photos that have been verified. If you need to make a change, you can do it from this view. In this filtering, you can select 'In Progress' to only view those employees that have Shifts that are still in progress.
To ensure the accuracy of punches and to get the most out of insights in Workforce Management, you can complete the Visual Verification and approvals daily.
Tips and tricks
-
If Visual Verification is enabled, you won't see the 'thumbs up' on the Timesheet to approve until Visual Verification is complete. If you try and click the pencil icon to edit and approve, you'll receive a message that there are unchecked punch photos, and you won't be able to approve.
-
To open the Visual Verification dialogue box to a specific employee, you can click on that employee's Timesheet and under the Visual Verification section, click Edit.
-
If an employee has more than four unverified photos, you'll see a Next icon at the bottom of that employee's photos to tab to the next page of their punch photos.
-
You can search for a specific employee's punch photos in the search box at the top of the dialogue box.
-
If an employee doesn't have a profile picture set in Workforce Management, you can click on one of their Punch Photos in the Visual Verification dialogue box and set that as their profile picture. This will let you see their photo in the Verification view for easier identification and comparison. You'll then see their photo in the Employee List and the scheduling views.
Using AutoMatch + Visual Verification
If Visual Verification is enabled on your account, you'll need to ensure that:
You enable the 'only punches with verified visual verification' option in location settings. Otherwise, if this isn't done, automatch will still work regardless of if visual verification has been completed or not.
When this setting is enabled on the location configuration, all verification will need to be complete prior to clicking Automatch. If you click Automatch and Verification isn't complete, the Visual Verification will pop up, prompting you to finish Verification. When you complete the Visual Verification steps (Mark any exceptions then Verify Visible) you'll then be able to click the Automatch button to move forward with approvals.