Using Tag Substitution on Tabs and Categories
Tag substitution lets you display unique content by replacing the value of a custom tag with a different value you enter directly on tab and category records.
For example, the site manager who wants to hide search and navigation portlets on some tabs but not others uses custom tags to replace the HTML code in the site theme for those portlets. On each tab record where he wants to hide a portlet, he enters a different value for the portlet in the Tag Substitution subtab.
Web Site tags are not supported in SuiteCommerce Advanced websites.
Using tag substitution is a three-part process:
-
Create a custom tag. For more information, see Creating Custom Tags.
-
Add the custom tag to your templates. For more information, see Adding Tags to Templates.
-
Substitute the value for the tag on each tab. For more information, see Substituting Values on Tabs and Categories.
Adding Tags to Templates
After you have created a custom tag, you can add the tag to a field in a site theme template.
-
Go to Commerce > Site Builder > Appearance > Themes > New.
-
Click a subtab on the Web Site Theme page, and then add your custom tags in the appropriate fields.
For example, to hide certain portlets on certain tabs in a NetSuite website, replace the HTML in the appropriate fields on the Sidebars subtab with custom tags.
-
Click Save.
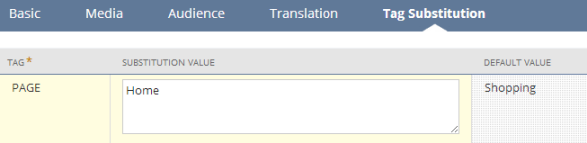
Substituting Values on Tabs and Categories
Next, the site manager substitutes different values on each tab where he wants to hide a portlet. Note that the steps below can also apply to category records where you want to substitute a value for a custom tag.
-
Go to Commerce > Site Builder > Content Management > Tabs or Commerce > Site Builder > Content Management > Categories.
-
Click Edit next to the tab or category where you want to use your new tag.
-
In the Tag field, select a custom tag.
-
In the Substitution Value field, enter to display a blank space on your site. Alternatively, you can enter HTML, or a different tag to display different content.
-
Click Add.
-
Click Save.
You can preview your site to see how your tag is working at Commerce > Websites > Preview Website.