Prepare to Provide NetSuite SP Metadata to Your IdP
After you turn on the SAML Single Sign-on feature, admins and users with the Set Up SAML Single Sign-on permission can view and edit the SAML Setup page in NetSuite. How you set up NetSuite as a service provider (SP) with your chosen identity provider (IdP) depends on which IdP you've picked. Before you start setting up SAML with your IdP, it's a good idea to grab some info from the SAML Setup page in NetSuite for safekeeping.
The person responsible for configuring SAML access to NetSuite on the IdP side should perform the following steps.
To copy the NetSuite SP metadata file and related URL:
-
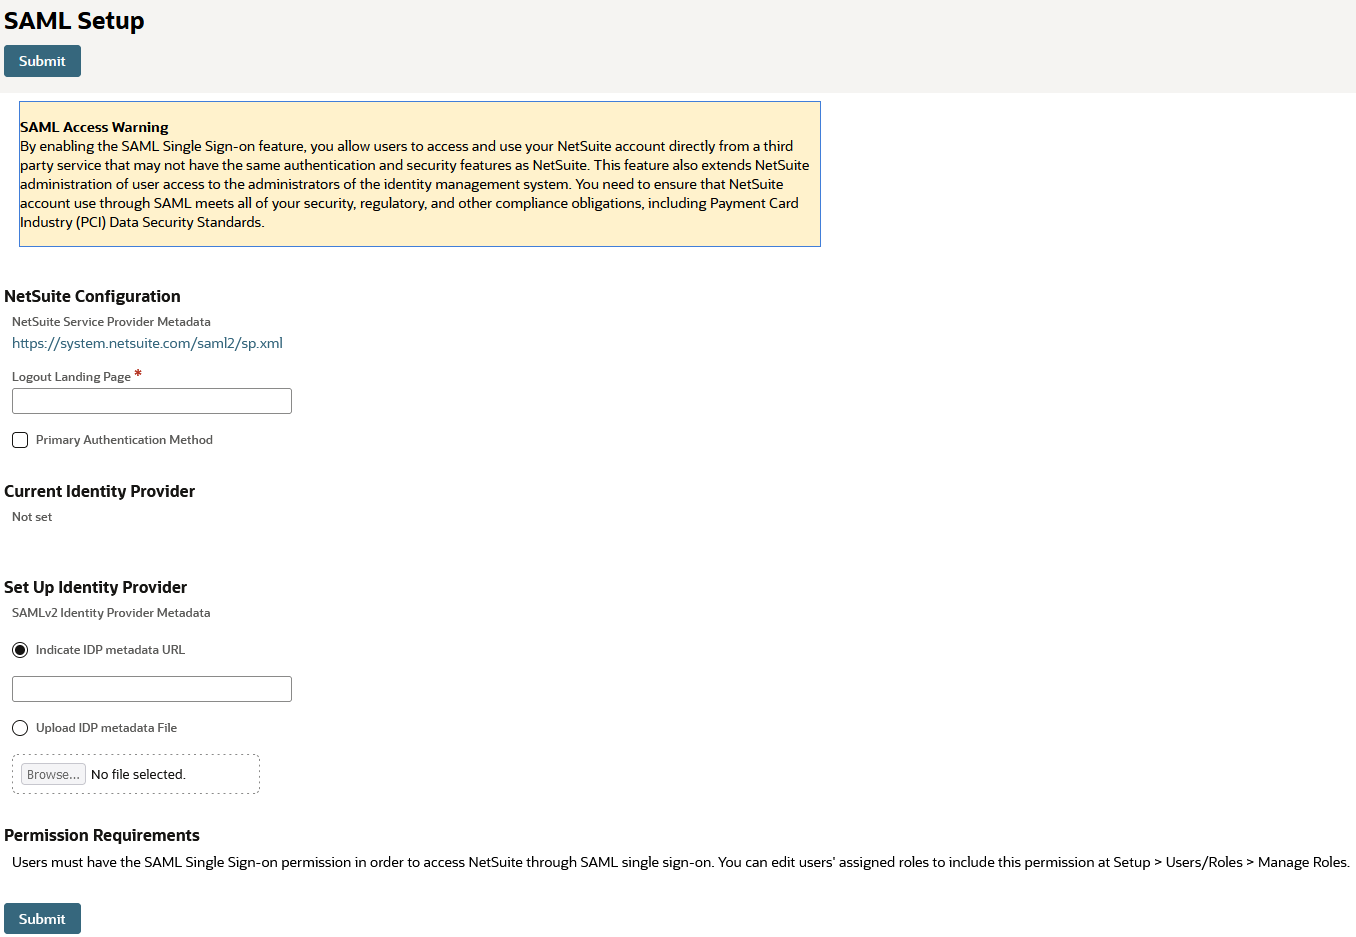
Go to Setup > Integration > SAML Single Sign-on.
-
Copy the URL shown in the NetSuite Service Provider Metadata field, and save it where you can retrieve it when necessary.
-
Click the link in the NetSuite Service Provider Metadata field, and download the SP metadata file to your computer.
As of May 2020, the default value for the location is set to the NetSuite system domain. You do not have to change the configuration if we move your account to a different data center location, or if you configure SAML SSO in multiple accounts in various data center locations.