Create Datasets Using SQL Queries
These topics explain how to create datasets using SQL queries.
Create Non-Standard SQL Datasets
In addition to creating datasets using basic SQL commands, you can create datasets using more complex commands.
Procedure Call
Use this query type to call a database procedure. For example, Oracle PL/SQL statements start with BEGIN. When you use this SQL data type, no metadata is displayed on the data model structure tab, therefore you can't modify the data structure or data fields. To construct your SQL with a procedure call enter the code directly in the text box or copy and paste from another SQL editor. You can't use the Query Builder to modify or build these types of queries.
Non-standard SQL
Use this query type to issue SQL statements that can include the following:
-
Cursor statements that return nested results sets
For example:
Ex:SELECT TO_CHAR(sysdate,'MM-DD-YYYY') CURRENT_DATE , CURSOR (SELECT d.order_id department_id, d.order_mode department_name , CURSOR (SELECT e.cust_first_name first_name, e.cust_last_name last_name, e.customer_id employee_id, e.date_of_birth hire_date FROM customers e WHERE e.customer_id IN (101,102) ) emp_cur FROM orders d WHERE d.customer_id IN (101,102) ) DEPT_CUR FROM dual -
Functions returning
REFcursorsFor example:
create or replace PACKAGE REF_CURSOR_TEST AS
  TYPE refcursor IS REF CURSOR;
  pCountry  VARCHAR2(10);
  pState   VARCHAR2(20);
  FUNCTION GET( pCountry IN VARCHAR2, pState   IN VARCHAR2) RETURN  REF_CURSOR_TEST.refcursor;
  END;
create or replace PACKAGE BODY REF_CURSOR_TEST AS FUNCTION GET( pCountry IN VARCHAR2, pState IN VARCHAR2) RETURN REF_CURSOR_TEST.refcursor IS l_cursor REF_CURSOR_TEST.refcursor; BEGIN IF ( pCountry = 'US' ) THEN OPEN l_cursor FOR SELECT TO_CHAR(sysdate,'MM-DD-YYYY') CURRENT_DATE , d.order_id department_id, d.order_mode department_name FROM orders d WHERE d.customer_id IN (101,102); ELSE OPEN l_cursor FOR SELECT * FROM EMPLOYEES; END IF; RETURN l_cursor; END GET; END REF_CURSOR_TEST;To use
REFcursor in Publisher:create SQL dataset with query as SELECT REF_CURSOR_TEST.GET(:PCNTRY,:PSTATE) AS CURDATA FROM DUAL
-
Anonymous blocks/Stored procedures
Publisher supports executing PL/SQL anonymous blocks. You can perform calculations in the PL/SQL block and return the result set. Publisher uses callable statements to execute anonymous blocks.
The requirements are:
-
The PL/SQL block must return a result set of type
REFcursor -
You must declare the out variable with the name,
xdo_cursor;. If you don't declare the name properly, the first bind variable is treated as an out variable type and binds withREFcursor -
Declare the data model parameter with name
xdo_cursor. This name is reserved for out variable type for procedure/anonymous blocks.
Example:
DECLARE type refcursor is REF CURSOR; xdo_cursor refcursor; empno number; BEGIN OPEN :xdo_cursor FOR SELECT * FROM EMPLOYEES E WHERE E.EMPLOYEE_ID = :P2; COMMIT; END; -
-
Conditional queries can be executed if you use an if-else expression. You can define multiple SQL queries in a single dataset, but only one query executes at run time depending on the expression value. The expression validates and returns a Boolean value. If the value is true, executes that section of the SQL query.
The limitations are:
-
The following syntax is supported to evaluate expressions:
$if{,$elseif{,$else{ -
The expression must return true, false
-
Only the following operators are supported:
== <= >= < >
Example: create sql dataset with following query $if{ (:P_MODE == PRODUCT) }$ SELECT PRODUCT_ID ,PRODUCT_NAME ,CATEGORY_ID ,SUPPLIER_ID ,PRODUCT_STATUS ,LIST_PRICE FROM PRODUCT_INFORMATION WHERE ROWNUM < 5 $elsif{(:P_MODE == ORDER )}$ SELECT ORDER_ID ,ORDER_DATE ,ORDER_MODE ,CUSTOMER_ID ,ORDER_TOTAL ,SALES_REP_ID FROM ORDERS WHERE ROWNUM < 5 $else{ SELECT PRODUCT_ID , WAREHOUSE_ID ,QUANTITY_ON_HAND FROM INVENTORIES WHERE ROWNUM < 5 }$ $endif$ -
When your dataset is created using non-standard SQL statements, no metadata is displayed on the data model structure tab, therefore you can't modify the data structure or data fields. You can't use Query Builder to modify or build these types of queries.
To define XML row tag for non-standard SQL dataset:
Use xmlRowTagName="" in data model definition to define XML row tag for non-standard SQL query dataset. This allows you to enter a valid tag name. If the attribute is empty, it defaults to ROW at runtime.
Dataset definition:
<dataSet name="Q1" type="simple">
	<sql dataSourceRef="bipdev4-demo" nsQuery="true"  xmlRowTagName="">
		,,
	</sql>
</dataset>
Use the SQL Query Builder
Use the Query Builder to build SQL queries without coding. The Query Builder enables you to search and filter database objects, select objects and columns, create relationships between objects, and view formatted query results with minimal SQL knowledge.
This section describes how to use the Query Builder and includes the following topics:
Overview of the Query Builder
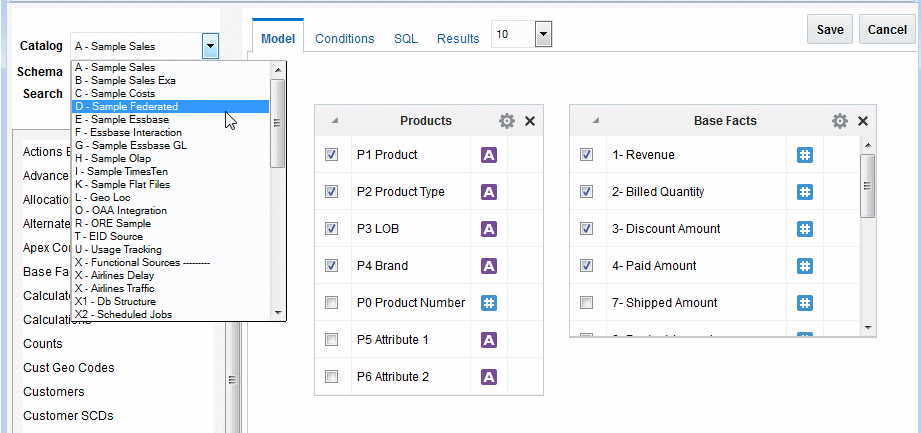
The Query Builder page is divided into an Object Selection pane and a design and output pane.
-
Object Selection pane contains a list of objects from which you can build queries. Only objects in the current schema are displayed.
-
Design and output pane consists of four tabs:
-
Model — Displays selected objects from the Object Selection pane.
-
Conditions — Enables you to apply conditions to your selected columns.
-
SQL — Displays the query.
-
Results — Displays the results of the query.
-
Build a Query Using Query Builder
You can build a query using Query Builder.
Supported Column Types
Columns of all types display as objects in the Design pane. You can't select more than 60 columns for each query.
| Supported Column Type | Restrictions |
|---|---|
| VARCHAR2, CHAR | NA |
| NUMBER | NA |
| DATE, TIMESTAMP | The TIMESTAMP WITH LOCAL TIMEZONE data type isn’t supported.
|
| Binary Large Object (BLOB) | The BLOB can be an image, text, or XML data. When you execute the query in the Query Builder, the BLOB doesn't display in the Results pane; however, the query is constructed correctly when saved to the data model editor. BLOB data isn't supported for an Oracle BI EE data source due to limitations of the BIJDBC driver.
Use an RTF template if you want to use a BLOB data column with an Image data type. |
| Character Large Object (CLOB) | Publisher doesn’t support querying of CLOB columns in an Oracle BI EE data source. |
Add Objects to the Design Pane
Select each object you want to add to the Design pane.
-
When you add an object, an icon representing the data type displays next to each column name.
-
When you select a column, it appears on the Conditions tab. The Show check box on the Conditions tab controls whether a column is included in query results. Be default, this check box is selected.
-
To select the first twenty columns, click the small icon in the upper left corner of the object and then select Check All.
-
You can also execute a query by pressing the CTRL + ENTER keys.
- Select an object.
- Select the check box for each column to include in your query.
- To execute the query and view results, select Results.
Remove or Hide Objects in the Design Pane
You can remove or hide objects in the Design pane of Query Builder.
- To remove an object, click Remove in the upper right corner of the object.
- To temporarily hide the columns within an object, click Show/Hide Columns.
Query Conditions
Conditions enable you to filter and identify the data you want to work with.
As you select columns within an object, you can specify conditions on the Conditions tab. You can modify the column alias, apply column conditions, sort columns, or apply functions.
| Condition Attribute | Description |
|---|---|
|
Condition |
The condition modifies the query's WHERE clause. When specifying a column condition, you must include the appropriate operator and operand. All standard SQL conditions are supported. For example: >=10 ='VA' IN (SELECT dept_no FROM dept) BETWEEN SYSDATE AND SYSDATE + 15 |
|
Function |
Specifies the functions. Available argument functions include:
|
|
Group By |
Specifies the columns to be used for grouping when an aggregate function is used. Only applicable for columns included in output. |
As you select columns and define conditions, Query Builder writes the SQL for you. To view the underlying SQL, select the SQL tab.
Create Relationships Between Objects
You can create relationships between objects by creating a join. A join identifies a relationship between two or more tables, views, or materialized views.
About Join Conditions
When you write a join query, you specify a condition that conveys a relationship between two objects. This condition is called a join condition.
A join condition specifies how the rows from one object combine with the rows from another object.
Query Builder supports inner, outer, left, and right joins.
-
An inner join, also called a simple join, returns the rows that satisfy the join condition.
-
An outer join extends the result of a simple join.
An outer join returns all rows that satisfy the join condition and returns some or all of those rows from one table for which no rows from the other satisfy the join condition.
Edit a Saved Query
In the the data model editor, after you save a query from the Query Builder, you can also use the Query Builder to edit the query.
If you've made modifications to the query, or didn't use the Query Builder to construct it, you might receive an error when you launch the Query Builder for editing the query. If the Query Builder can't parse the query, you can edit the statements directly in the text box.
You can't edit a customized or an advanced query by using Query Builder.
- In the the data model editor, under Data Sets, select the SQL dataset you want to edit.
- On the toolbar, click Edit Selected Dataset to launch the Edit Dataset dialog.
- Click Query Builder to load the query to the Query Builder.
- Edit the query and click Save.
Add a Bind Variable to a Query
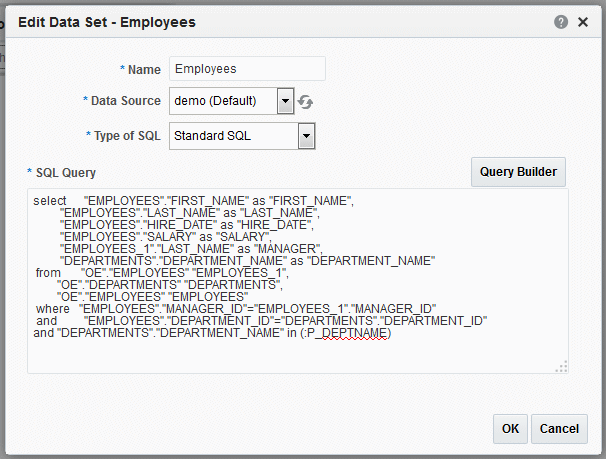
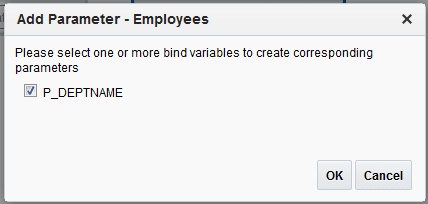
After you create a query, you can add a bind variable to the query to pass a parameter to limit the results.
For example, in the employee listing, you can choose a specific department.
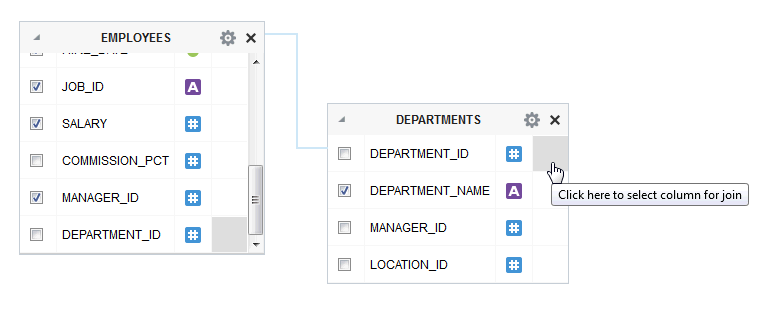
The image shows the columns in the department table.
Add Lexical References to SQL Queries
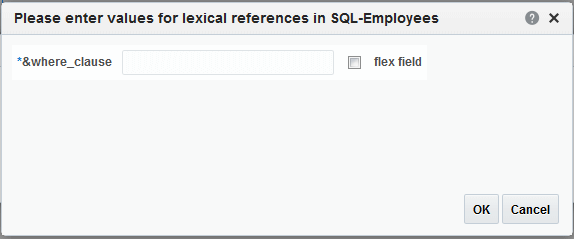
You can use lexical references in SQL queries to replace the clauses appearing after SELECT, FROM, WHERE, GROUP BY, ORDER BY, or HAVING.
Use a lexical reference when you want the parameter to replace multiple values at runtime. You can also use lexical references to include flexfields in your query. Lexical references are only supported in queries against applications in Fusion Applications Suite.
Create a lexical reference in the SQL query using the following syntax:
¶metername
About Defining SQL Queries Against the Oracle BI Server
Remember the following points when you define SQL queries against the Oracle BI Server.
-
When you create a SQL query against the Oracle BI Server using the SQL Data Editor or the Query Builder, logical SQL is generated, not physical SQL like other database sources.
-
Hierarchical columns aren't supported. The highest level is always returned.
-
Within a subject area, the join conditions between tables are already created; therefore you don't have to create joins in the Query Builder. The Query Builder doesn't expose the primary key.
You can link datasets using the data model editor's Create Link function. See Create Element-Level Links. For datasets created from the Oracle BI Server, there's a limit of two element-level links for a single data model.
-
In the Query Builder, the functions Sort Order and Group By shown on the Conditions tab aren't supported for queries against the Oracle BI Server. If you enter a Sort Order or select the Group By check box, the Query Builder constructs the SQL, and writes it to the Publisher SQL Query text box, but when you attempt to close the Dataset dialog, the query fails validation.
To apply grouping to the data retrieved by the SQL query, you can use the data model editor's Group by function instead. See Create Subgroups.
-
If you pass parameters to the Oracle BI Server and you choose Null Value Passed for Can Select All, make sure you handle the null value in your query.
Define SQL Queries Against the Oracle BI Server
When you launch the Query Builder against the Oracle BI Server, the Query Builder displays the subject areas from the catalog. You can drag the subject areas to the Query Builder workspace to display the columns. Select the columns to include in your data model.
Notes for Queries Against Oracle Fusion Cloud Applications Tables
Special considerations for Oracle Fusion Cloud Applications customers apply when writing queries against the Oracle Fusion Cloud Applications tables
-
You cannot return month name from
sysdateusingto_char(sysdate,"mon"). This function returns the month number. To display month name, use one of the following solutions:-
Format the date field in your layout using the following syntax:
<?format_date:fieldname;MASK)?> -
To display month name based on month number, use the following syntax in your layout:
<?xdoxslt:month_name(month, [abbreviate?], $_XDOLOCALE)?>where
monthis the numeric value of the month (January = 1) and[abbreviate?]is the value 0 for do not abbreviate or 1 for abbreviate.For example:
<?xdoxslt:month_name(1, 0, $_XDOLOCALE)?>returns January
-
To add an expression in the data model, use the following expression:
Format_date(date, format_String)For example:
SUBSTRING(FORMAT_DATE(G_1.SYSDATE,MEDIUM),0,3)returns Nov (when the current
SYSTDATEis November)
-
