Setting Form Grid Properties
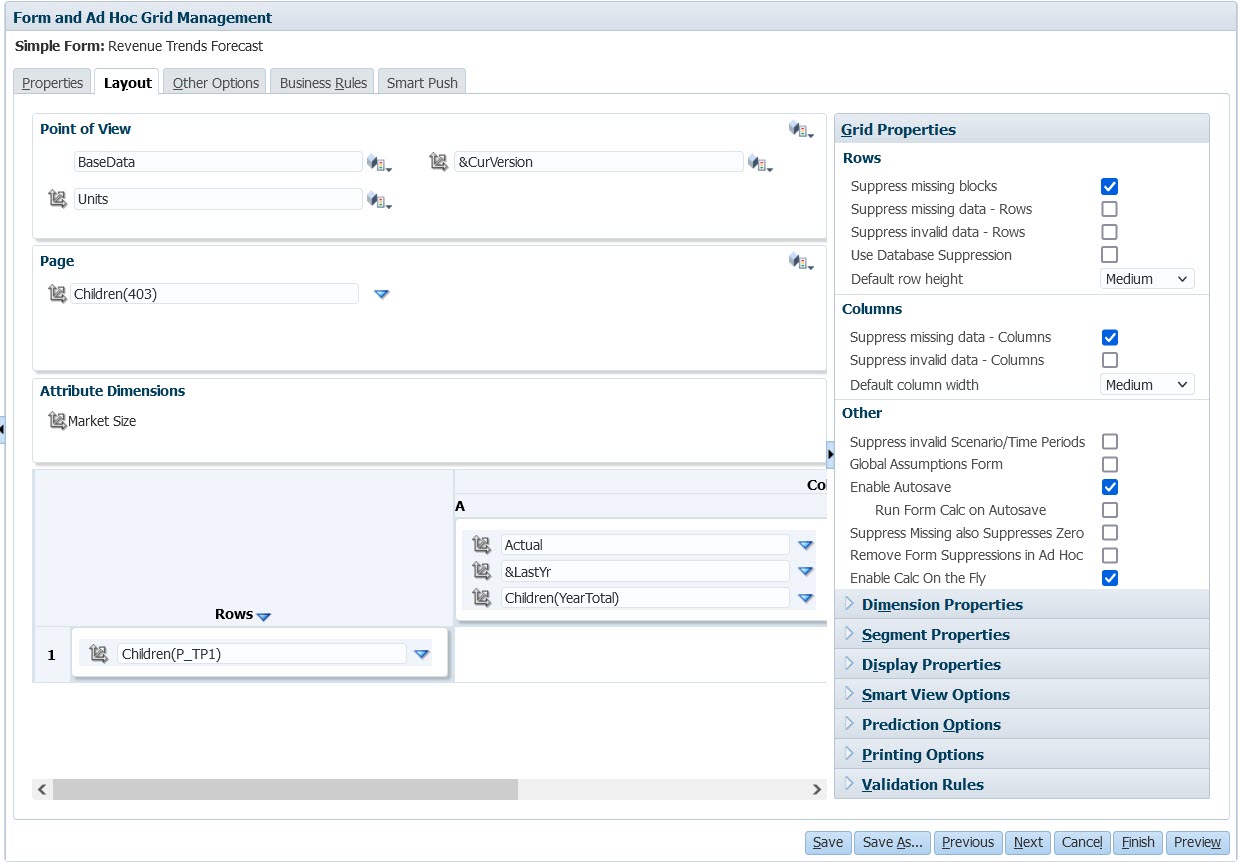
Grid properties define how rows and columns display.
To set grid properties:
-
Open the form, and then click Layout. See Selecting and Opening Forms and Folders.

-
In Grid Properties, set row and column properties as
follows:
Table 24-15 Form Grid Properties
Option Description Suppress missing blocks
On multiple rows: Greatly improves the efficiency of Suppress missing data. This option can degrade performance if no or few rows are suppressed. Test forms before and after using this setting to determine if performance is improved.
Note that if you use this option:
-
Some suppressed blocks may ignore Dynamic Calc members
-
Row members may not indent
Suppress missing data
Hide rows or columns without data. Clear to display "#MISSING" in cells when data is missing.
Suppress invalid data
Hide rows or columns with invalid data. Cells with invalid data are read-only.
Use Database Suppression
Applies row suppression at the Oracle Essbase level instead of at the business process level, which reduces the amount of data on the business process side and eliminates the impact on query thresholds.
Note: If you use this option and you have a formula column on the form that results in a #MISSING value, the row won't appear on the form because it will be suppressed in Essbase and won't be returned to the business process for formula evaluation.
Default row height
-
Medium: Row will have medium height
-
Size-to-Fit: Row will expand to fit data
-
Custom: Specify the number of pixels
Default column width
Specify the width in pixels:
-
Small: 50px
-
Medium: 100px
-
Large: 300px
-
Size-to-Fit: Column will expand to fit data
-
Custom: Specify the number of pixels
Suppress invalid Scenario/Time Periods
This option ties the form grid display to the start and end period for the scenario. If selected, it suppresses the display of time periods outside of the scenario time period range. Global Assumptions Form
To transfer global assumptions from a test to a production environment for a form, select Global Assumptions Form, and update it to store assumptions. See Designing Forms with Global Assumptions. Enable Autosave
This option lets users use successive undo actions with Ctrl+Z. It also automatically saves their changes when they navigate between cells. Note: For optimal performance, use only dense dimensions on rows and columns.
See About Autosave.
Run Form Calc on Autosave
Only available if Enable Autosave is selected. If Run Form Calc on Autosave is selected, dynamically calculated cells that depend on modified and saved values (for example, a row with a formula that calculates a percentage of an aggregated parent value) are updated and display on a green background. Suppress Missing also Suppresses Zero
When this option is selected along with the Suppress missing data option for forms, all rows or columns containing both #Missing and zeros are suppressed.
When selected, this setting overrides the runtime suppression selections made for suppressing missing data or zeroes in Oracle Smart View for Office.
Note: For Forms 2.0, filtering is not applied if the row or column has a combination of zeroes and #Missing.
Remove Form Suppressions in Ad Hoc
Select to allow Smart View users to perform ad hoc analysis on a form that has other suppression options specified. If there is missing data on the form, the base dimension members for the columns or rows are displayed on the ad hoc grid in Smart View. This allows users to continue ad hoc analysis on the form, even though suppression options were enabled in form design.
Note: Selecting this option does not override any suppression options users may have set in the Smart View Options dialog, Data Options tab. If the Remove Form Suppressions in Ad Hoc option is enabled for the form, and users see an error when performing ad hoc analysis on the form, then they should clear the suppression options in Smart View.
Enable Calc On the Fly
When you select this option, in Forms 2.0, when you hover over a cell with a member formula attached, you see the member formula associated with the cell and you can perform calc on the fly. Calc on the fly allows you to perform calculations without having to submit your changes.
-
- Click Save to continue, or Finish to save and close the form.