2Code Enforcement Activities for Public Users
The Public User Landing Page for Code Enforcement
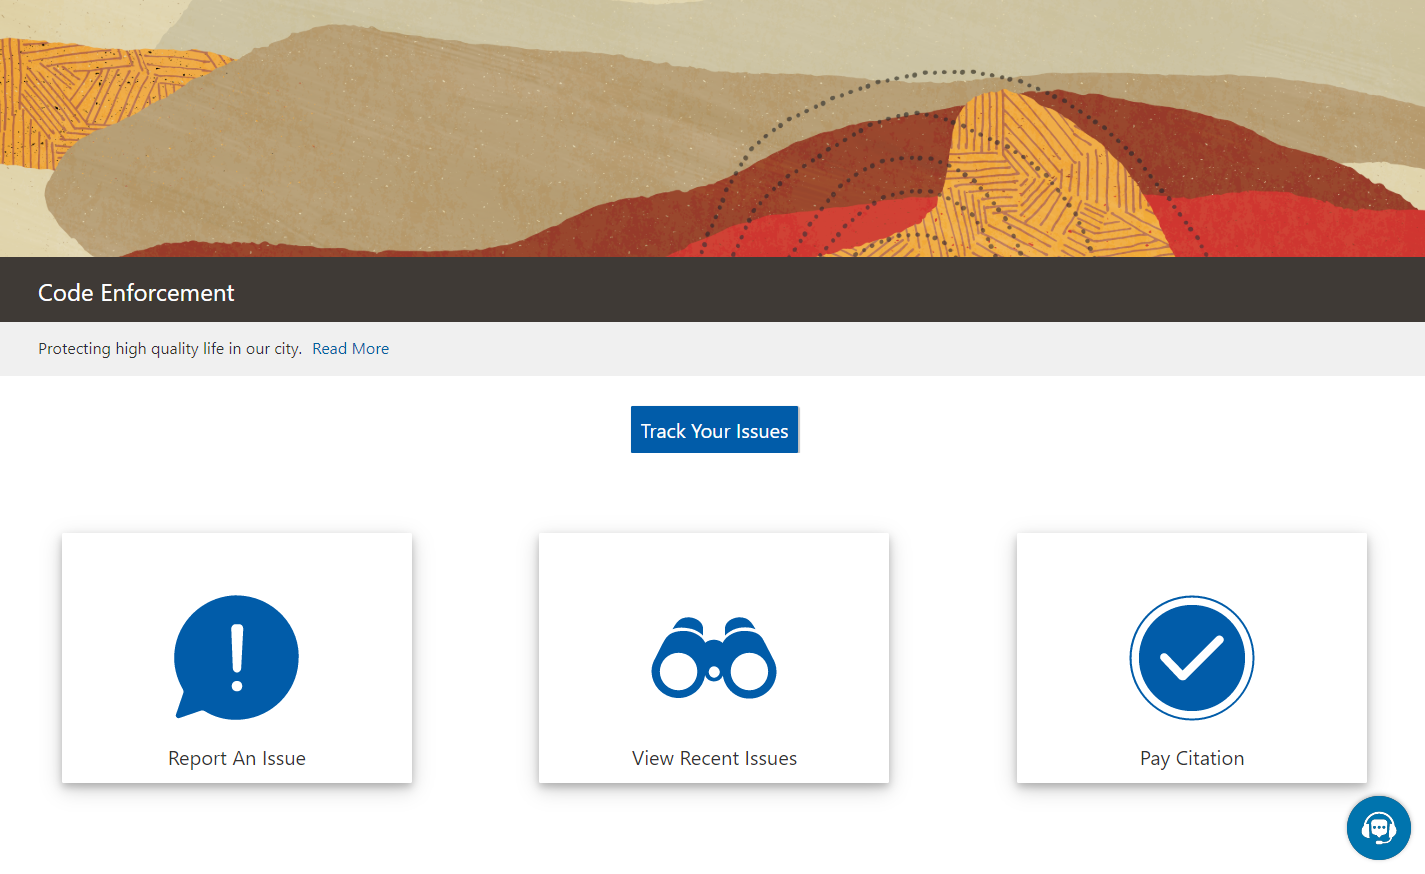
The public user landing page for code enforcement is the entry point for public users who want to report an issue, track issues that they reported, see recent issues in the agency’s jurisdiction, or pay a citation.
This example illustrates the public user landing page for code enforcement. In this example, a registered public user has signed in.
For information on configuring these elements of the welcome banner, see Setting Up Agency-Level Options for Code Enforcement.
On the landing page, public users have access to these actions:
| Tile or Button |
Who Can Use |
Description |
|---|---|---|
| Report an Issue |
Anonymous and registered users. |
Report an issue to the agency. During the reporting process, the public user identifies the type of issue, provides the issue location, describes the issue, and answers any additional questions that the agency has configured. See Reporting Issues. |
| Track Issues |
Registered users. This button is visible only after the user signs in. |
View status and other information about issues that the user reported while signed in. A user who reports an issue without signing in can’t track the issue. See Tracking Issues. |
| View Recent Issues |
Anonymous and registered users. |
View a map with markers that identify the locations of recent issues, or view a searchable list of the issues. |
| Pay Citation |
Registered users. Anonymous users are prompted to sign in before continuing. |
Make an online payment for a code enforcement citation. See Paying Citations. |
| Resolve an Issue |
Registered users. Anonymous users are prompted to sign in before continuing. |
Claim responsibility for an issue, and perform actions such as viewing notices or appealing a citation. See Resolving Issues. |
Reporting Issues
When reporting an issue, a public user identifies the type of issue, provides the issue location, describes the issue, and answers any additional questions that the agency has configured.
Here is a summary of the issue reporting process:
On the public user landing page, the user clicks the Report an Issue tile.
The Select an Issue Type page appears. It displays tiles for the agency’s issue types. Click the small chevron icon in the bottom right corner of a tile to flip the tile over and read a description of the issue type.
The user chooses the type of issue:
The user selects an issue type tile.
The page title changes to the name of the selected issue type (for example, Neighborhood Blight), and the page displays new tiles that represent issue subtypes. Again, the user can flip a tile over to read a description of the issue subtype.
The user selects an issue subtype tile.
If your agency’s configuration does not allow users to report cases anonymously, the user is prompted to sign in before continuing to the remaining steps.
After this point, the user navigates through the remaining steps using Next and Previous buttons. The user can’t go back to choose a different issue type or subtype. If the issue wasn’t properly classified, the user needs to cancel the report and start again. If an improperly classified report is submitted, agency staff can still assign a new issue type and subtype.
On the Provide the Location of the Issue step, the user identifies the location using a searchable map.
A crosshairs icon on the map shows the selected location. If location sharing is active, the user’s current location appears by default.
The user can search for an address or location, and the map adjusts to place the specified location in the crosshairs.
The user can pan and zoom the map to more precisely identify the issue location, and the search bar automatically displays the address or the coordinates of the location in the map crosshairs.
Sometimes the location on the map is identified using a range such as 100-120 Main Street. The user can update the address manually if necessary.
The user can additionally enter additional details about the location such as an apartment number or directions to a specific location at an address.
This information is optional if there is an address or location coordinates. When there is no address or location coordinates, additional address details are required.
If the location is outside of the agency’s boundary, a message instructs the user to change the location to one inside the agency’s limits.
The user will not be able to submit an issue with a location that is outside the agency’s boundary.
Click the Confirm Location button to navigate to the next page.
On the Tell Us What’s Going On step, the user describes the issue and optionally attaches photos, videos, audio files, or other attachments.
On the Just a Few More Questions step, the user answers any additional questions defined by the agency.
This step includes a Does this issue pose a health hazard or public safety risk? switch to indicate the urgency of the issue. Agencies can add additional questions as well.
On the Provide Contact Information step, the user verifies their name, email, and phone information or chooses to hide this information.
Default contact information comes from the user’s account. The user can keep these values, modify them, or turn on the Hide my contact information switch. Regardless of whether the user hides the information from agency staff, the information is never visible to the public.
Note: If the agency configures the system to require contact information from the person reporting the issue, the Hide my contact information switch is hidden and contact information is required. For information about this configuration option, see Setting Up Agency-Level Options for Code Enforcement.On the read-only Review step, the user reviews all of the issue information.
To make changes, the user can click the Edit button to make the Review page editable or use the Previous icon to return to earlier pages.
Note: The user can’t change the issue type or subtype after continuing past those steps.The user clicks Submit.
A confirmation message with the issue number appears.
Tracking Issues
Public users can view a list of issues that they reported, and they can see status and other information about the issue.
To view a list of issues that they reported, public users follow these steps:
The user clicks the Track Your Issues button on the code enforcement landing page. This button is visible only after the user signs in.
The Issues page appears.
The user reviews the following information for the issues on the list:
Page Element
Description
Issue ID
Displays two rows of information. The incident ID appears in the first row. The incident type and subtype appear in the second row.
Location
Displays the address for the issue.
Description
Displays the original issue description that was supplied by the person who reported the incident.
Status
Displays the incident status. These are the possible incident statuses:
Reported
Inspection
Compliance
Violation
Closed
Duplicate
Void
When an incident results in a notice of violation and the creation of a case, the incident status is based on the case status. So even though the public users do not have direct access to case data, the incident status conveys information about the overall status of the issue.
Note that incident statuses are less granular than case statuses. For example, if an incident is in Violation status, the corresponding case could be in any of several statuses such as Violation, Mandatory Abatement, or Citation.
Attachments
Displays an attachment icon. Clicking the icon opens a window with a carousel view of any photos, videos, or other attachments that were uploaded as part of the original issue report.Reported On
Displays the date that the issue was originally submitted.
-
To view details for a specific issue, the user clicks the issue to access the Issues page.
The Issues page has these sections:
A header that displays the incident ID, the issue type and subtype, and the incident status.
If the incident was reported with the wrong issue type and subtype, and agency staff corrected this information and rerouted the issue, then the original issue gets closed and replaced by a new correctly classified issue. In this situation, the header also displays the message Rerouted to issue <new incident ID>.
The public user doesn’t have access to the new incident, which was created by the staff member who rerouted the original incident.
A map that displays the issue location.
A Details section that shows the issue address, description, and whether the issue was reporting as posing a health hazard or public safety risk.
If the person who reported the issue supplied their name, email, and phone, then that information also appears.
An Attachments section that displays a carousel view of any photos, videos, or other attachments that were uploaded as part of the original issue report.
A History section that displays the incident’s status history. This section lists the current and previous statuses, along with the date that the status was applied and, if applicable, the reason for the status change.
To return to the issues list, the user clicks the Back icon in the header.
Viewing Recent Issues
Any public user, including anonymous users, can view your agency’s recent issues using the View Recent Issues tile on the code enforcement landing page. Users can view the issues on a map or in a list. Your agency defines which issues appear on the map.
Overview of Recent Issues
The recent issues that are visible to the public are cases, which represent verified violations. Incidents are not visible to the general public.
To define which cases appear on the View Recent Issues page, agencies use the Code Enforcement Options page to define the period that is considered “recent.” They also choose whether to show all cases that were reported within that time period or only cases that are still active.
Viewing Recent Issues
To view recent issues, public users follow these steps:
On the code enforcement landing page, the public user clicks the View Recent Issues tile.
The View Recent Issues page appears in map view.
The user can employ the search, zoom, and pan functionality of the map to show a specific area.
An address search bar appears in one corner of the map. This search centers the map on the specified location and shows markers for all issues in the display area.
A case number search field appears above the map. This search shows issue markers for any cases that match the search criteria and hides all other markers. Note that users cannot search using an incident ID, only a case ID.
Review the issues markers on the map.
Colored markers identify issue locations. A number on a marker represents the number of issues for that specific location. Markers without numbers have just one issue.
When the zoom level would normally cause location markers to overlap, the markers for the individual locations are combined into a cluster marker. Clusters appear as double circles, with a dark center and a lighter border. The number on the cluster marker represents the total number of issues for the included locations. As the user zooms in closer, individual location markers replace the cluster marker.
For more information, see Viewing Map Markers.
To view issue details, the user clicks an issue marker to open a pop-up panel with more information:
The issue ID (case ID) and the status appear in bold.
The issue description, reported date, and location also appear.
If the location has multiple issues, the user can see how many issues exists and which one is currently visible—for example, 1 of 3.Previous and Next controls enable the user to page through the issues.
A Zoom To link zooms the map while keeping the issue centered.
To toggle between the map view and a list view, the user clicks the List View and Map View icons.
The list displays the same information about each issue. It additionally displays the issue type and subtype.
Paying Citations
The code enforcement landing page for public users includes an option for paying citations.
To pay a citation, a public user follows these steps:
On the code enforcement landing page, the user clicks the Pay a Citation tile.
The user signs in if prompted.
On the Pay Citation page, the user enters the citation ID and clicks the Search icon.
Citation information, including the amount and the due date, appear on the page.
The user clicks the Pay button.
On the Checkout page, the user chooses a payment method and clicks the Make Payment button.
The user follow the instructions for the chosen payment method.
Resolving Issues
Registered public users can access their cases online to address code violations for which they are responsible. Users request access from the Resolve Issue page, view a summary of their cases, and initiate actions such as an appeal.
Requesting Access
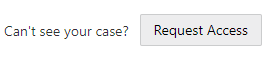
Registered public users use the case ID and access number provided by the code enforcement agency to submit a request for accessing their case online. Once the agency approves the request, the case is listed in the Resolve Issue page.
Here are the steps for a registered public user to request online access to a case:
On the registered public user landing page, the user clicks the Resolve an Issue tile.
If there are no cases available for online access, the Request Access to Your Case page is displayed.
On the Resolve Issue page, the user clicks the Request Access button.
On the Request Access to Your Case page, the user enters values provided by the agency in the following fields:
Page Element
Description
Case ID
Enter the identifier of the case as displayed in the notice.
Access Number
Enter the unique number associated to the specific case, provided by the agency.
Additional Information
Enter any detail, such as a reason for requesting access to the case.
The user clicks the Request Access button.
Agency staff such as a code technician receive the request, review, and decide to issue access or deny the request. For information on reviewing and taking action on access requests, see Using the Code Technician Worklist and Adding Responsible Parties.
Resolving Issues
After the agency staff approve the access request, registered users can view their case in the Resolve Issue page.
On the Resolve Issue page, users get a snapshot of the information regarding the cases to which they have online access. Cases can be displayed in a card view or list view, and actions such as viewing the notice document and requesting an appeal can be performed from the Resolve Issue page.
From the registered user’s landing page, registered users can access their approved cases by clicking the Resolve an Issue. The following table lists the information that registered users can use on the Resolve Issue page:
| Page Element |
Description |
|---|---|
 |
Select to request access to a case. See the previous section for more information. |
 |
Card View: View the cases one at a time displayed on a card format. Slide the card to the left or right to view the previous or next case in the list. This is the default view of the user’s case list. List View: View all the cases in a list format.
Tip: In the list view, you can use the
Filter By and
Sort By options to refine your case search.
|
| Issue type and subtype |
View the issue type and subtype to which the case belongs. |
| Case ID |
View the identifier of the case that was generated at the time of case creation. |
| Address |
View the address of the location associated to the issue. |
| Description |
View detailed information about the issue recorded at the time of case creation. |
| Code Officer |
View the name of the code enforcement officer inspecting the case. |
| Appeal By |
View the last date for submitting the appeal. The Appeal option is available only if the user is viewing the case within its appeal period. The period in which an appeal can be submitted is determined by the agency using the time rules set up. See Setting Up Time Rules. |
 |
Select to submit an appeal for the issued violation or citation. On the Appeal page, enter a reason for appeal and click Submit.
Note: In the list view, the appeal option is available in the
Actions menu.
|
| Appeal Requested On |
View the date on which the user submitted an appeal. |
| Total <amount> Due on <date> |
View the total citation amount to be paid along with the due date. |
| Created On |
View the date of case creation. |
| Case Status |
View the status of the case:
|
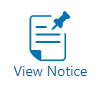 |
Select to open the notice in PDF format. |
| Comply By |
View the last date to ensure compliance. |