Improve Your Contract Approvals Experience with Enhanced UI and Adaptive Search
The Approvals work area provides an enhanced user interface and adaptive search functionality. You can filter approval tasks by approval type, task type, or sender. You can access the Approvals work area from Navigator > Tools > Approvals. For this reason, it’s available to set up at a site or user level. You can view the contract approval, template and clause approval notifications.
The Approvals work area has three views.
Approvals Tasks
The Approvals Tasks page shows a list of the tasks assigned to the current user, including business attributes depending on approval type. You can organize your work using supplied filters, search on keywords, and approve or reject approvals.
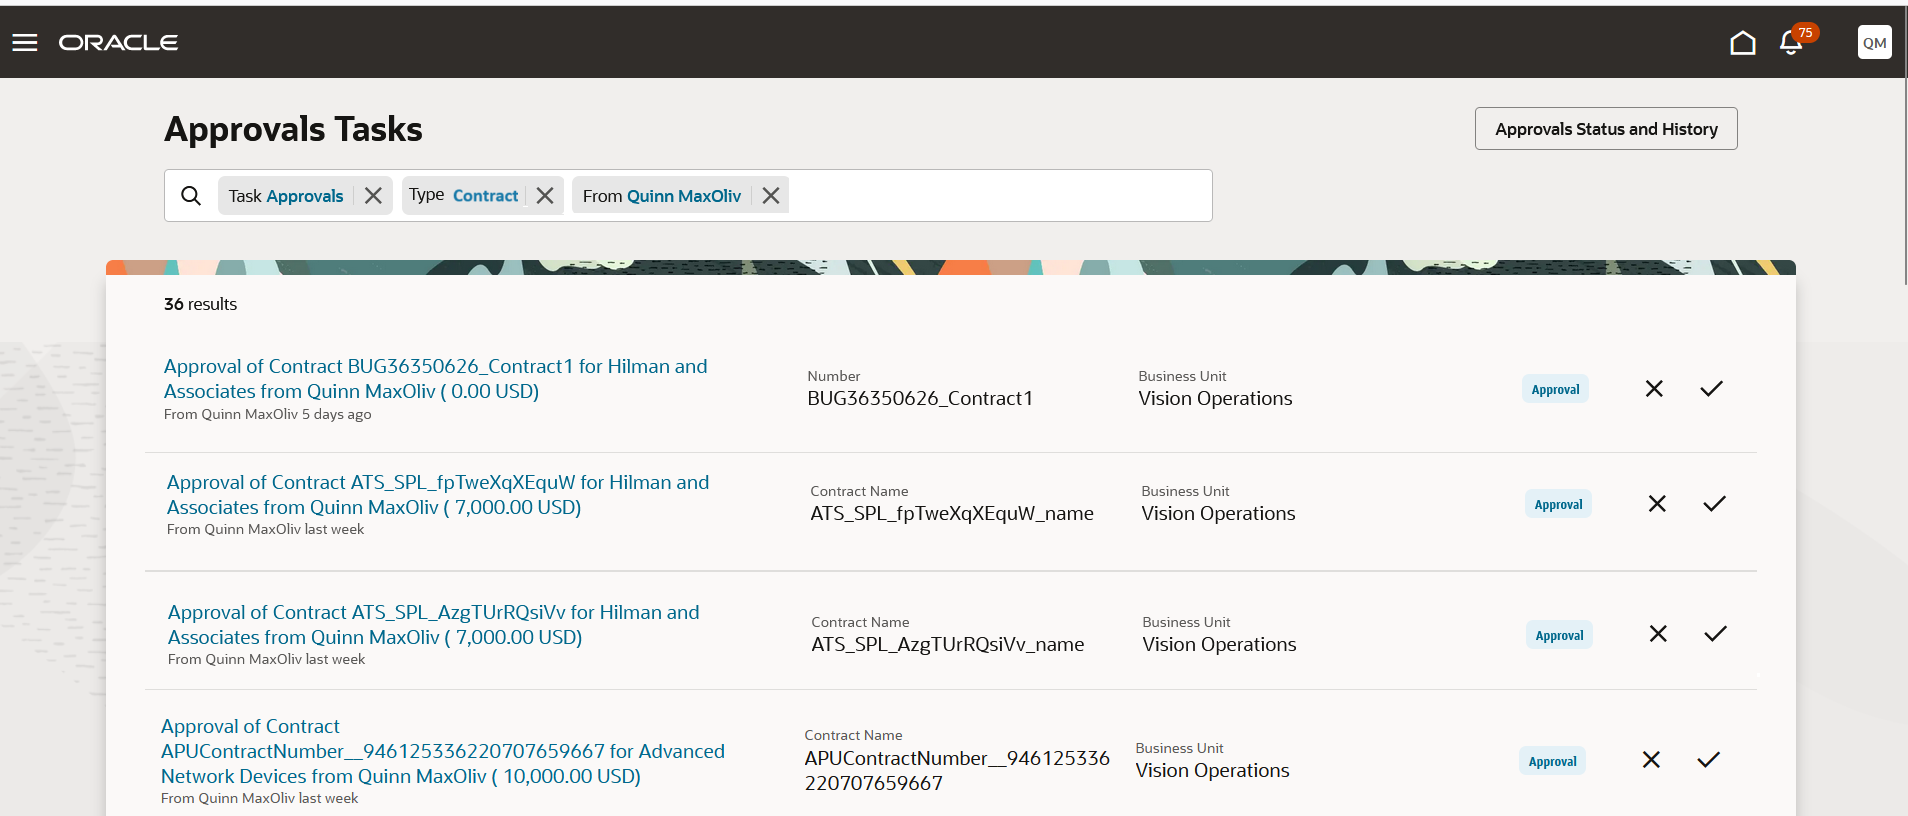
Approvals Tasks
Supplied filters include:
- Task type, for example Approval, FYI, or Request
- Approval type, for example, Contract
- From, or the person who sent the approval
You can quickly address your tasks without waiting for each to complete before moving to the next approval. Supported actions include:
- Approve
- Reject
- Dismiss (FYIs)
You can also comment on approval or rejection actions in a drawer if required.
Quick View
Click a task in the list to open the Quick View, which displays additional information about the approval and allows you to approve or reject it. You can click the arrow to navigate to the next task in the list.
To get more information or take an action that isn’t yet available in the Quick View, click View More Details to open the Analytics Publisher or Application Development Framework (ADF) notification.
Click the Approvals Tasks link to navigate back to the list.
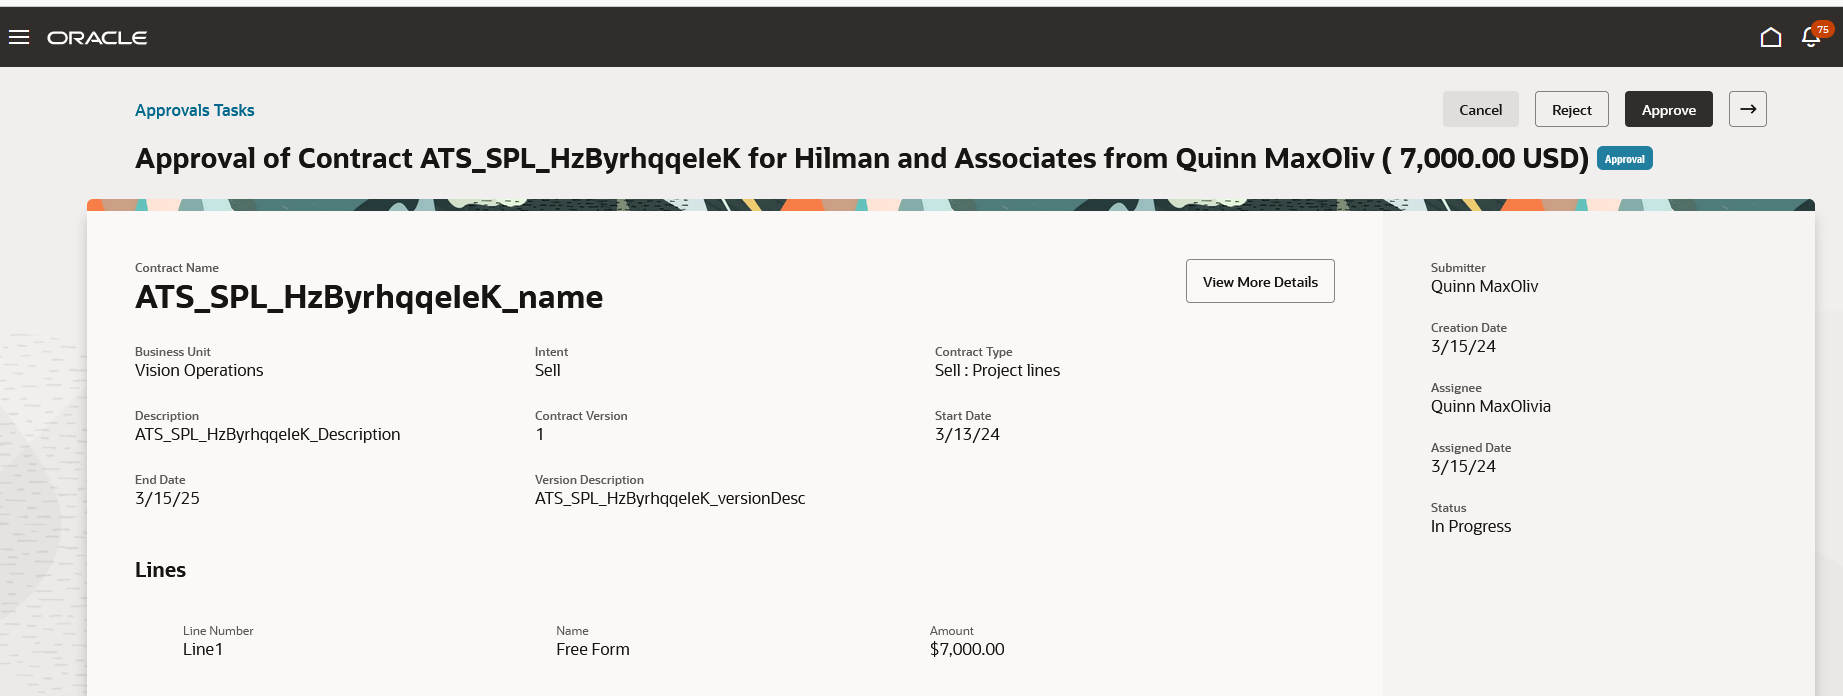
Quick View
Approvals Status and History
Click Approvals Status and History to view the current status and assignee for approvals that you’ve either submitted or been an approver for.
Use the supplied filters and search by keyword to find historic approval information.
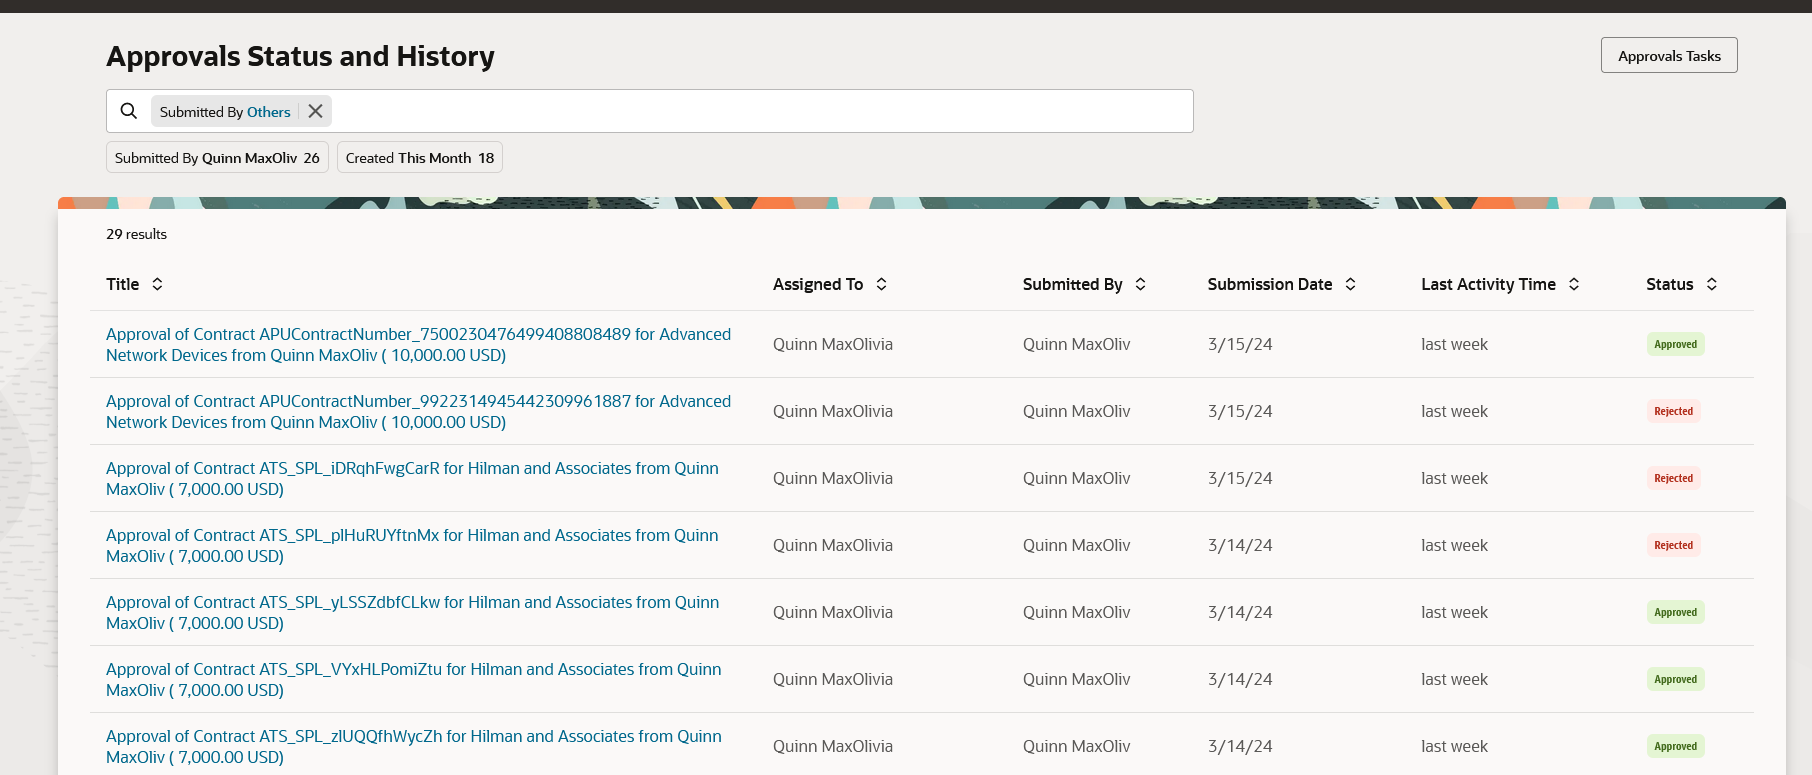
Approvals Status and History
The Approvals work area is designed and built with performance as a priority. The user experience is improved for both desktop and tablet or mobile users, making it easy to act quickly on approval tasks and notifications.
Steps to Enable
Follow the below steps to enable Approvals Application:
- In the Scheduled Processes work area, run the Create Search Index for Worklist scheduled process once and ensure it has completed.
- In the Setup and Maintenance work area, go to the Manage Applications Core Administrator Profile Values task in the Application Extensions functional area. Set the Approval Requests UI Enabled (ORA_FND_APPROVALS) profile value depending on whether you want the Approvals work area to be available to all users or only some users.
Tips And Considerations
The Approvals work area doesn’t replace the BPM worklist or change the behavior of the Notifications icon. You still click Show All from the notifications list in the global header, then click Worklist to open the BPM Worklist and use these tools with the application. Setting up the application doesn’t impact the BPM Worklist or Notifications icon and data remains consistent.
The Tasks List view isn't currently configurable. It includes two attributes for each approval type, and the remaining attributes are shown in the Quick View.
As a new application, not all BPM Worklist use cases are yet supported. You can choose to set up the application at the site or user level. If you have some users who would benefit from this application, but want to keep others using the existing Worklist for all tasks, you can enable this feature for specific users by setting the profile option at the user level.
Key Resources
For more information about the Approvals work area, click here.