Risk and Security Snapshot Report
Risk and Security Snapshot Report is a new feature that allows for users to quickly and simply perform a comprehensive analysis of potential risk in your business processes. It’s designed to be easy for you to use: First, select a "content pack," which is a set of Oracle-developed objects appropriate for analyzing risk in a specified business process. Next, select a time period. Then run an analysis job.
For a 5-minute video introduction, including a demo, click here.
The analysis may involve a large amount of data, so the job typically runs for hours, up to a maximum of twenty-four. Upon completion, the analysis returns a report. It provides summary and detailed information about risk in the business process represented by the content pack you selected, over the period you specified.
Each content pack can perform two types of analysis:
- Access analysis identifies users with separation-of-duties conflicts: each user is assigned roles granting privileges that combine to create the potential for fraud or significant error. The analysis also identifies roles that provide sensitive access: each role on its own grants elevated access, and so can’t be assigned without risk.
- Transaction analysis returns records of actual transactions in Oracle Cloud applications that display evidence of fraud, error, separation-of-duties violations, or other risk.
To perform these analyses, Risk and Security Snapshot Report uses the same underlying algorithms defined in the models library. This is the same library that is used to author Advanced Controls. The snapshot report uses a subset of models that would be considered foundational.
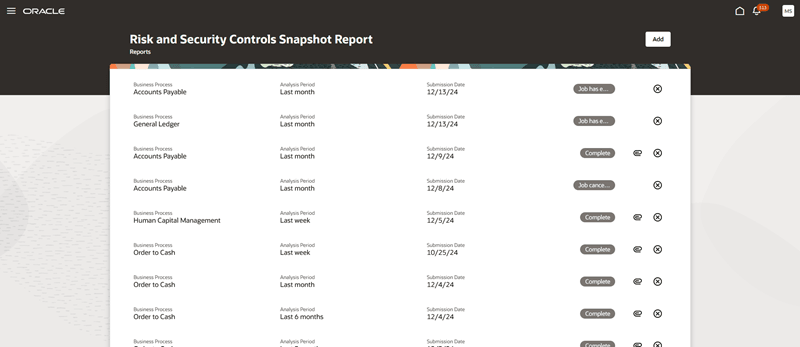
Snapshot Report Dashboard
Business Benefit
Each content pack is a set of models developed by Oracle to implement best practices in risk management. Because the application uses models created by Oracle, you don’t have to wrestle with model development or risk-logic definitions.
Implementers and auditors can use these reports during the ERP implementation phase to evaluate your custom roles on a regular cadence, These reports also include intra-role SOD analysis to assess systemic access risks. This report can help design custom roles, personas and service accounts while minimizing cybersecurity risks.
After ERP go-live, Fusion administrators and auditors can use these reports to help identify which models to activate as advanced controls. The results of these reports can be shared with business process owners to help prioritize the list of advanced controls to activate in phases.
Steps to Enable
Important: This optional feature requires Spectra services. The services must be present in your environment to use it, otherwise, the Risk and Security Snapshot Report feature it will not work.
To use Risk and Security Snapshot Report, your organization must complete several setup procedures. A user with the Application Implementation Consultant job role can complete these procedures. Then your organization must create and assign a custom job role that contains a privilege called Create and Manage Recommendation Analyses as well as a duty role that contains new security elements called "permission groups."
The first setup procedure is to select a promotion code:
- Click Navigator > My Enterprise > Enterprise.
- In an Enterprise Information page, click the Manage Promotion Codes link.
- In a Manage Promotion Codes page, click the Enter Promotion Code button.
- In an Enter Promotion Code dialog, enter the value GTG484673. Then click Save and Close.
- Click the Done button.
Next, opt in to Risk and Security Snapshot Report:
- Click Navigator > My Enterprise > Offerings.
- In the Offerings page, scroll to the Risk Management offering and select it.
- Click the Opt In Features button.
- In an Opt In: Risk Management page, select the Enable check box in the Recommendation Engine row.
- Select the edit (pencil) icon in the Features column of the Recommendation Engine row.
- In an Edit Features page, click the Enable check box for Security Checkup and Recommendations.
- Click Done in the Edit Features page, and then Done again in the Opt In: Risk Management page.
Next, set a profile option that enables job roles to recognize permission groups (and the duty roles that contain them):
- Click Navigator > My Enterprise > Setup and Maintenance.
- Expand the Tasks panel tab and click Search.
- In the Search Tasks field, enter Manage Administrator Profile Values. Click the Search icon.
- In the list returned by the search, click the Manage Administrator Profile Values item.
- The Search area of the Manage Administrator Profile Values page includes a Profile Option Code field. In it, enter ORA_ASE_SAS_INTEGRATION_ENABLED. Click the Search button.
- A record of the ORA_ASE_SAS_INTEGRATION_ENABLED profile value appears. In the row for the Site profile level, select Yes in the Profile Value field.
- Click Save and Close.
Next, create the custom job role that grants access to Risk and Security Snapshot Report, or edit an existing custom job role to provide that access, and assign the role to users. For the procedures to edit a custom job role and to create one from scratch, see two topics in the Securing Risk Management guide: Create Risk Management Roles in the Security Console and Copy or Edit Risk Management Roles in the Security Console. But add this information:
- In the Basic Information page, you assign a name and a code to your role, and select the GRC – Job Roles role category. (If you’re editing a role, this is already done.) An Enable Permission Groups button then becomes active; click it. A dialog opens, showing the name of the role you’re creating or editing. Click its Enable Permission Groups button.
- Use the Function Security Policies page (as instructed in the "Create Risk Management Roles" topic) to add the Create and Manage Recommendation Engine Analyses privilege. You may choose to search for it by its code, GTG_CREATE_AND_MANAGE_RECOMMENDATION_ENGINE_ANALYSES_PRIV.
- Don’t select anything in the Permission Groups page.
- In the Role Hierarchy page, select the Roles and Permission Groups tab. In it, click Add Role. An Add Role Membership dialog opens. In it, search for and select Security and Controls Snapshot Report. This is the duty role that contains the permission groups your job role requires. You may choose to search for the duty role by its role code, ORA_DR_GTG_SECURITY_AND_CONTROLS_SNAPSHOT_REPORT_DUTY.
- If you’re editing a role, the Users page retains the role’s user assignments. If you want to modify those assignments, or if you’ve created a new role and need to assign users to it, you must do so in the Users page.
Finally, log off of Oracle Fusion Cloud Applications and log back in.
Key Resources
- For more information, see Using Risk and Security Snapshot Report.