Project Contract and Sales Order Reconciliation Assistant
Reconcile project contracts with attached sales orders by comparing key attributes and identifying mismatches so corrective action can be taken. This automated reconciliation helps reduce contract approval cycles, accelerate funding, and achieve faster invoicing and revenue recognition.
The assistant performs the following reconciliations between project contracts and attached sales order or ordering documents to ensure that:
a) The scanned, signed ordering document uploaded to the contract must include signatures from both the customer and the supplier.
b) The currency specified on the ordering document matches the currency defined on the contract.
c) The payment terms on the ordering document matches the payment terms configured on the bill plans of the contract.
d) The customer's name on the ordering document matches the customer name on the contract.
e) The service start and end dates on the ordering document matches the contract start and end dates.
f) The bill-to and ship-to addresses on the ordering document must match the corresponding details on the contract parties.
Note: Due to the subjective nature of reconciliations, this assistant is delivered as a template that you can tailor to meet your specific business process needs. After you create an agent from the preconfigured template, users can access the assistant through the Agent Explore page. Please refer to the link for more details.
Worked Example 1: Reconciling a contract with validation errors identified by the assistant.
- The user starts by providing the details of a contract that needs to be reconciled. Sample prompts for reconciling a contract are listed below:
- Contract number {Contract Number}
- Contract name {Contract Name}
- Validate contract {Contract Number}
- The assistant reconciles the contract with the attached sales order or ordering document. Two issues are identified, and the assistant provides the user with details regarding the cause and suggests a resolution.
- To resolve issues, the user must navigate to the Contracts work area and update the contract based on the resolution details provided by the assistant. Once the updates are completed, the user can reconcile the contract again using the assistant.
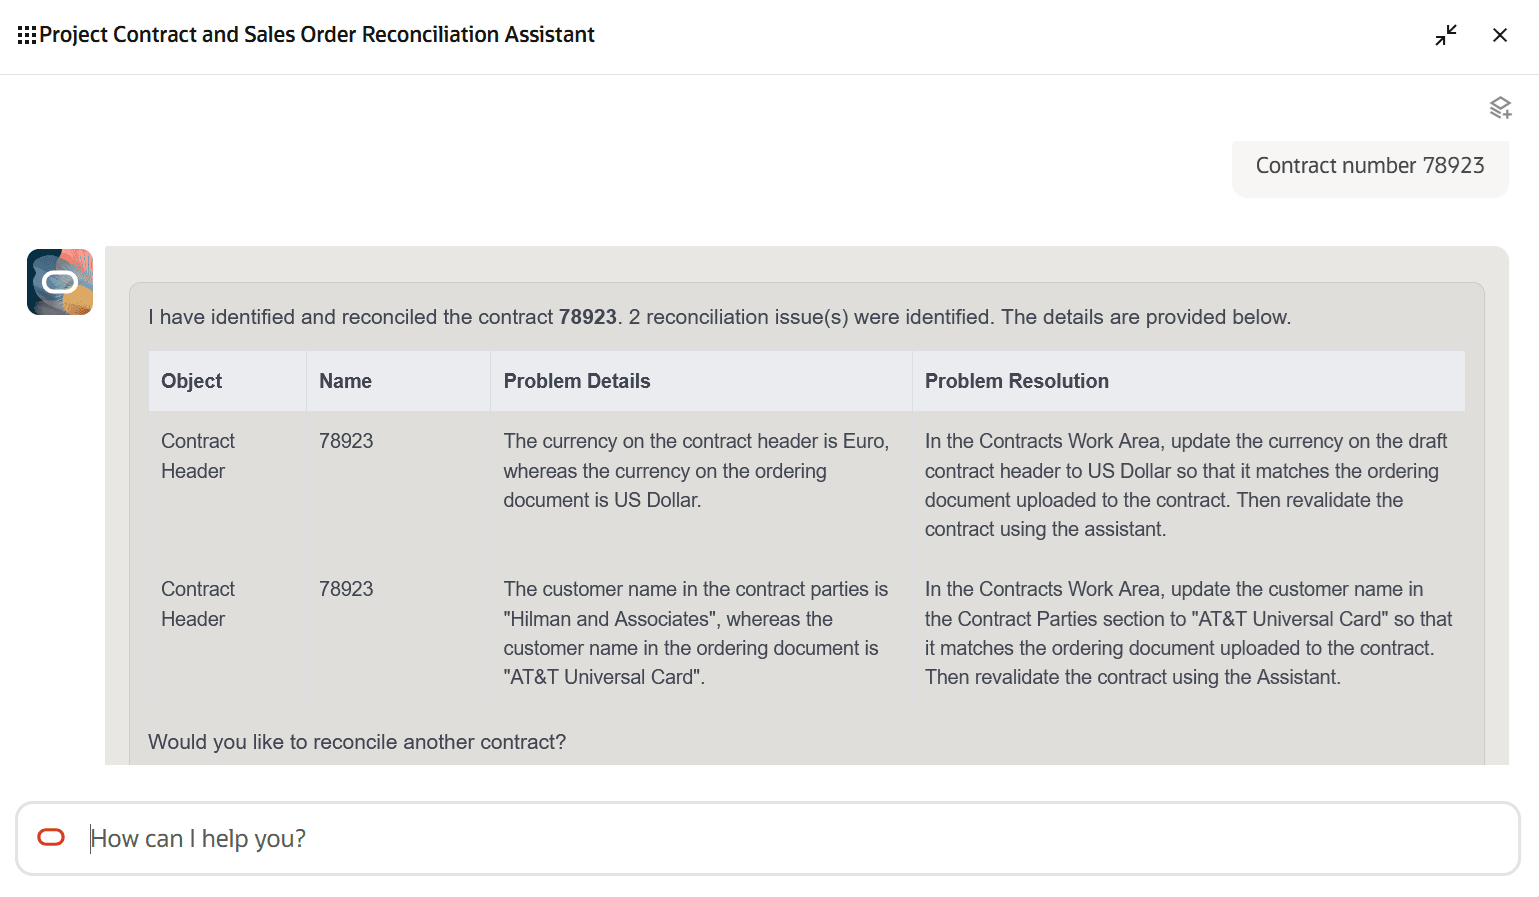
Reconciling a contract
Worked Example 2: Reconciling a contract after resolving the reconciliation errors.
- The user starts by providing the details of a contract that needs to be reconciled. Sample prompts for reconciling a contract are listed below:
- Contract number {Contract Number}
- Contract name {Contract Name}
- Validate contract {Contract Number}
- The assistant reconciles the contract with the attached sales order or ordering document. No issues are identified.
- The assistant asks the user if they'd like to reconcile another contract.
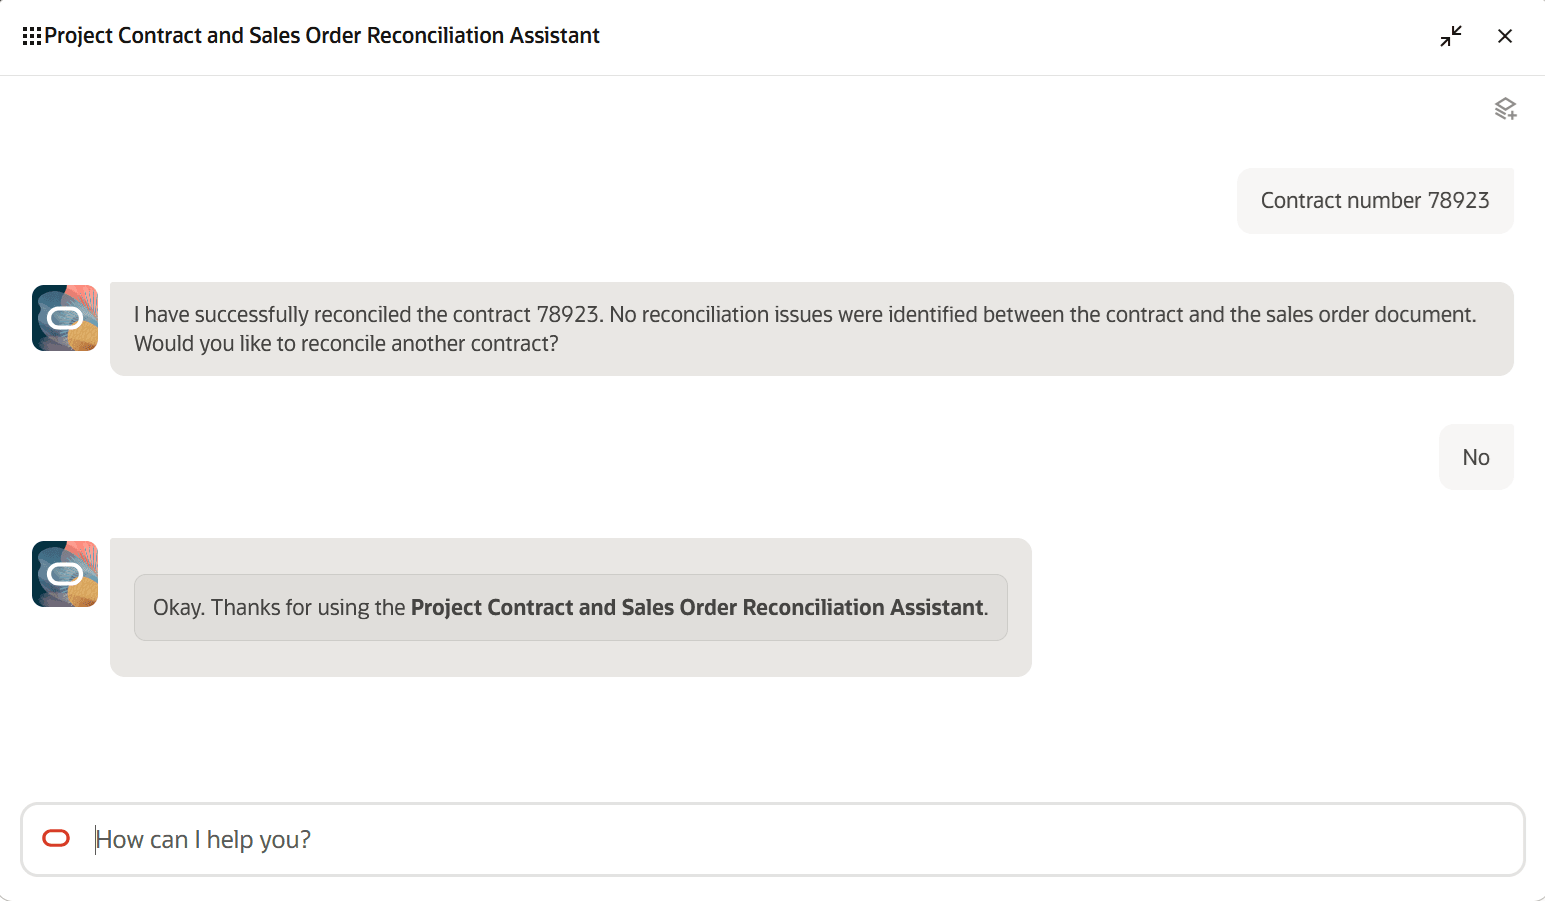
Reconciling a contract after fixing the reconciliation errors
The benefits of this feature are:
- Accelerates quote-to-cash and funding cycles.
- Reduces manual effort and operational costs through automation.
- Improves accuracy and compliance between orders and contract terms.
- Speeds up contract authoring and approval processes.
Steps to enable and configure
-
The Project Contract and Sales Order Reconciliation Assistant is a preconfigured template. You need to create your own agent using the preconfigured template. To learn how to set up AI agents, see Create AI Agents Using Preconfigured Agent Team Templates.
-
Please refer to the Access Requirements section below.
Tips and considerations
- This assistant supports reconciliation for contracts of type External in a Draft or Under Amendment status.
- Users must provide the exact contract name or number to the assistant, as partial values are not currently supported.
- For requests such as creating, canceling, or closing a contract, the assistant responds by informing the user that these actions are not supported.
- If the contract name or number provided by the user matches multiple contracts, the assistant prompts the user to refine the search by providing additional details such as business unit, customer, or contract type.
- The assistant currently supports reconciliation of one contract at a time.
- Currently only English is supported as an input language.
- If a sales order or ordering document are not attached to the contract, the assistant informs the user that reconciliation cannot be performed because the required document(s) are missing.
Key resources
Access requirements
To access the Project Contract and Sales Order Reconciliation Assistant, users must be assigned the predefined Customer Contract Administrator or Customer Contract Manager role, or a custom role copied from these predefined roles.
The custom role needs to have the following configurations:
a) Function Security Policies > Privileges
Add the following functional privileges:
- Edit Contract (OKC_EDIT_CONTRACT_PRIV)
- Edit Contract by Web Service (OKC_EDIT_CONTRACT_VIA_WEB_SERVICE_PRIV)
- Enable Sell Intent (OKC_MANAGE_CONTRACT_SELL_PRIV)
- View Contract (OKC_VIEW_CONTRACT_PRIV)
b) Data Security Policies
Add the following data security policy:
- Grant on Contract
- Data Resource: Contract Header for Table OKC_K_HEADERS_ALL_B
- Data Set: Select by instance set
- Actions: Update; View Contract; Read; Manage Contract
- Condition: Access the contract for table OKC_K_HEADERS_ALL_B for the business units for which they are authorized
c) Role Hierarchy > Roles and Privileges
Add the following duty roles:
- Contract Amendment (ORA_OKC_CONTRACT_AMENDMENT_DUTY)
- Contract Authoring (ORA_OKC_CONTRACT_AUTHORING_DUTY)
- Contract Search and View Access (ORA_OKC_CONTRACT_SEARCH_VIEW_DUTY)
d) Assign the custom role to the user.
In addition, the user must have the appropriate Resource Role and Organization setup in Manage Users to access contracts in the desired business units.
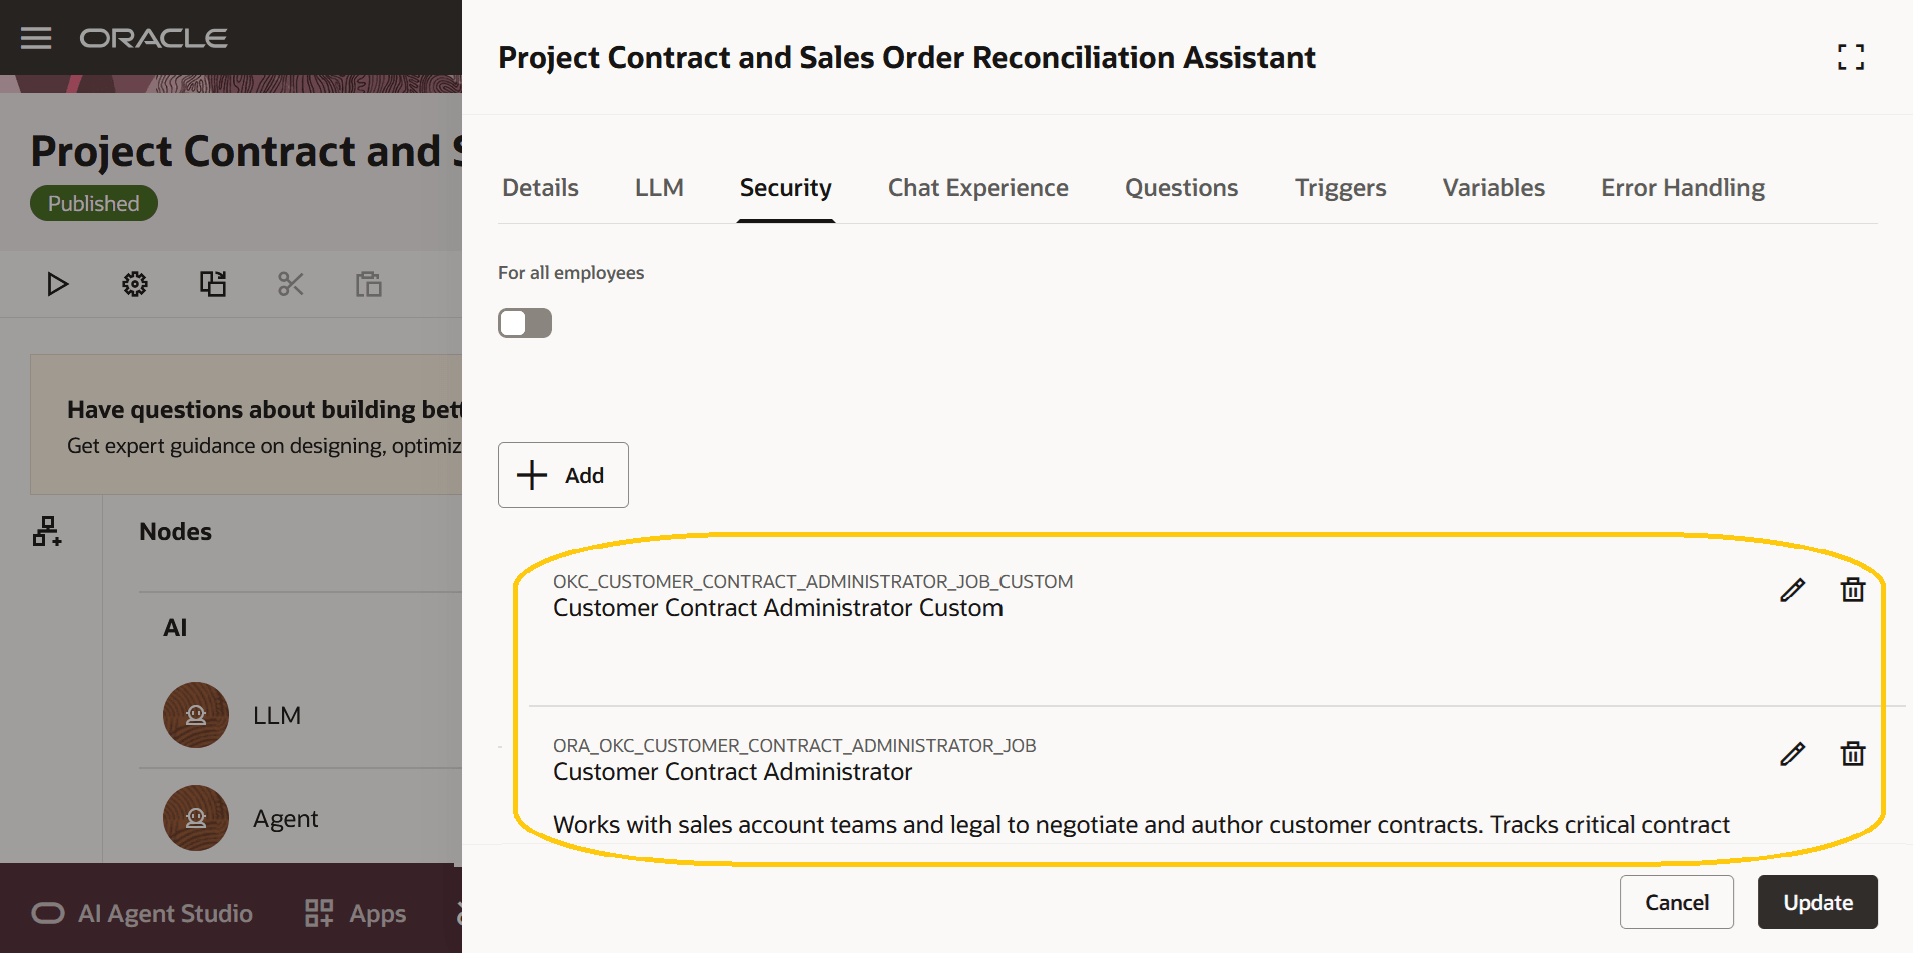
Associate the predefined or custom role with the agent team using a user with administrator access:
- Navigate to Navigator > Tools > AI Agent Studio.
- Open the Agent Teams tab and edit the agent team for which you want to grant user access.
- Click the Agent Team Settings icon and open the Security tab.
- Add the predefined or custom role.
- Apply the changes, then update and publish the agent team.
Agent Team Security