Expenses Agent usability enhancements for employees and delegates
Employees primarily create and modify expenses through email, providing a convenient way to manage individual expenses as part of their everyday workflow. When employees and delegates need visibility across multiple expenses and reports, the new Expenses landing page provides a consolidated, actionable overview of their work. It brings priorities, outstanding issues, and next steps together so employees can quickly understand what requires attention and take action.
The Expenses landing page prioritizes expense-related work across the employee’s own expenses and, where applicable, delegated expenses. Instead of reviewing expenses and reports individually to determine their status, employees can quickly see:
-
Expenses and reports with missing information or other issues
-
Employee and delegate expenses that are ready to submit
-
Recently paid expense reports
-
Available cash advances
-
Spend authorizations that are ready to apply
Selecting the Ask Expenses Agent button at the top of the landing page opens a drawer containing the chat experience to inquire on expense policy guidance without leaving the page.
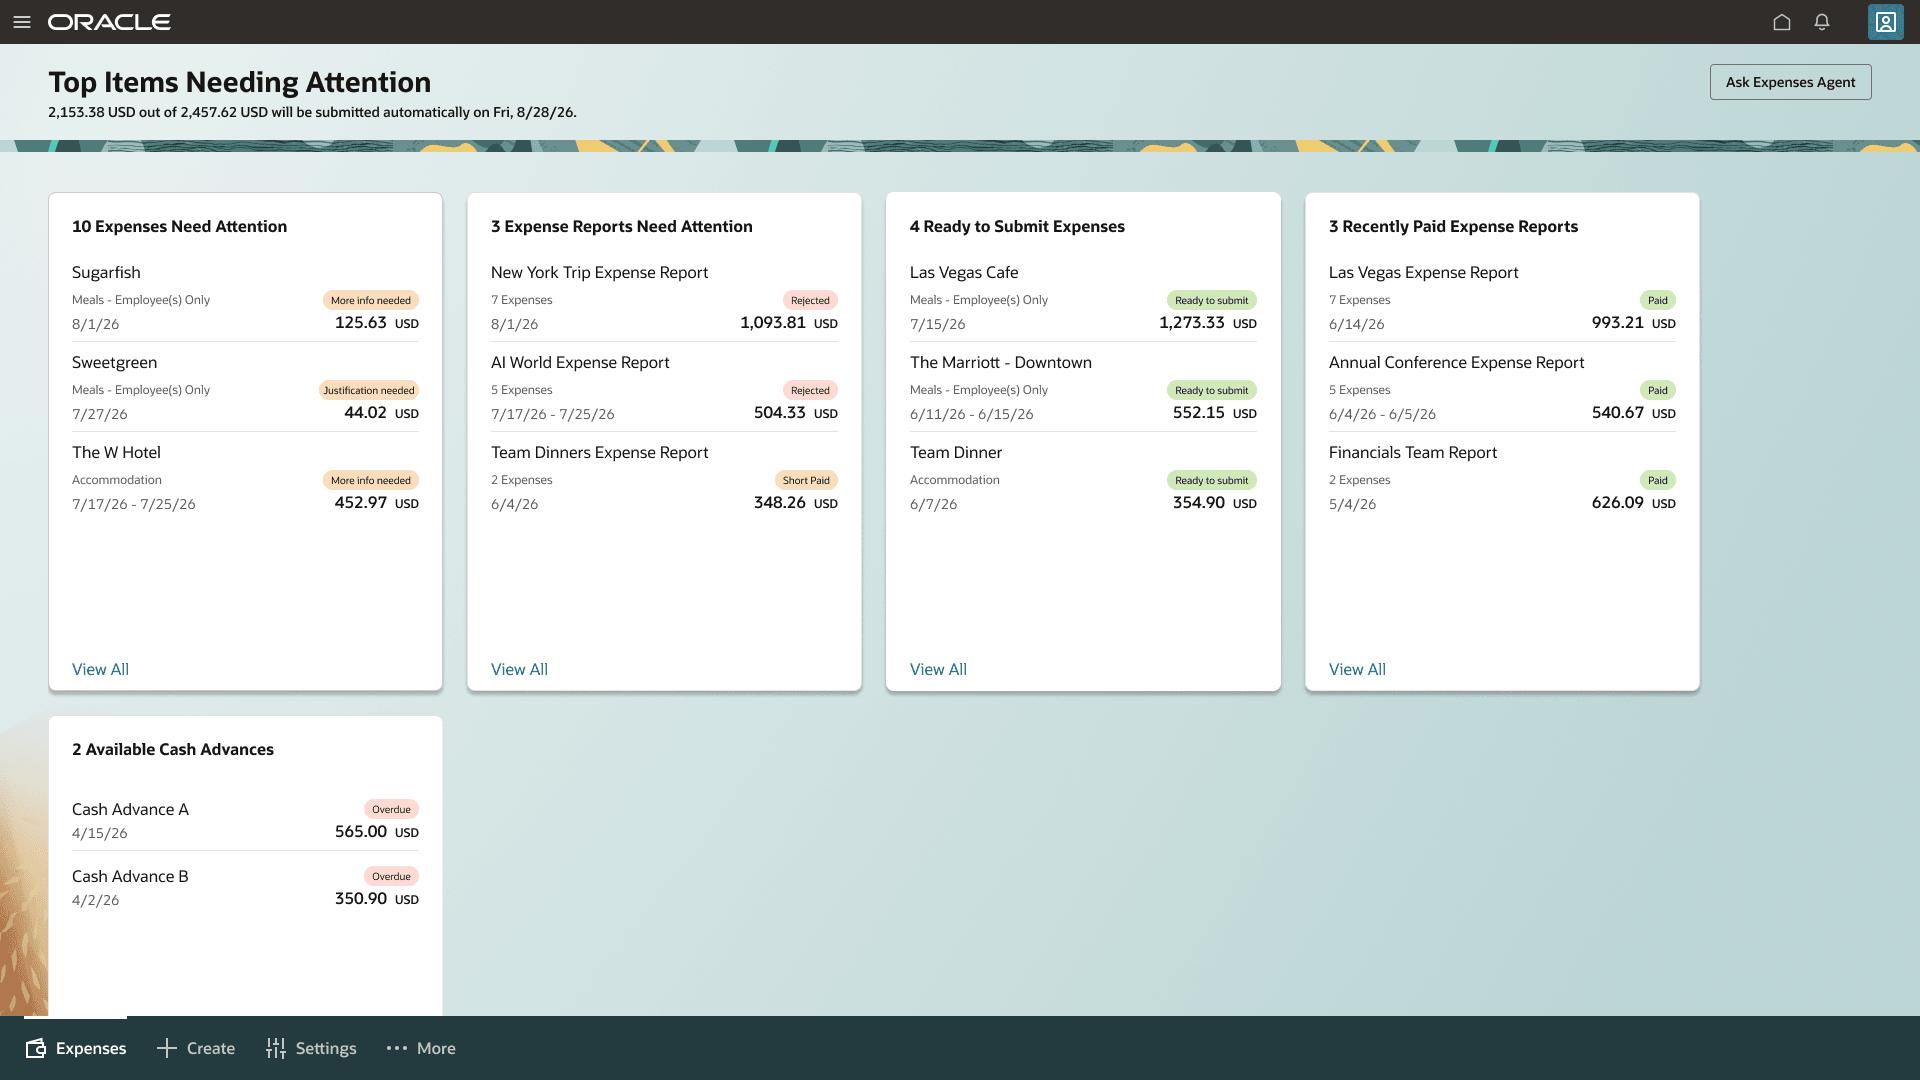
The new expenses landing page.
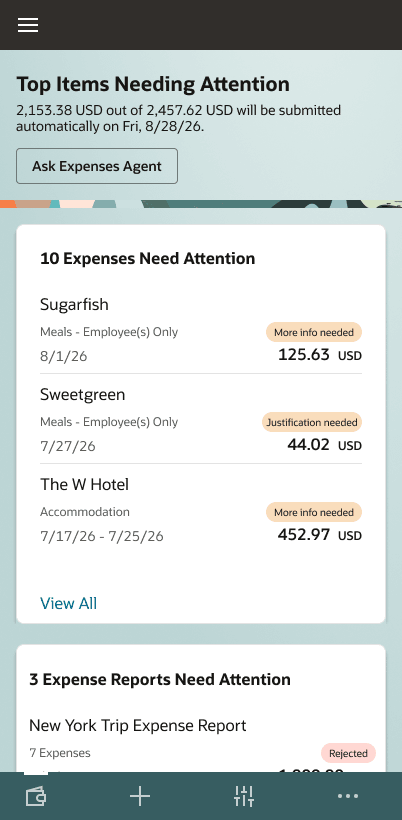
The mobile version of the new expenses landing page.
Each card contains the three most recent items. Selecting "view all" on a card opens a complete list of the card's items. From these lists, employees can work with expenses using available actions such as marking an expense as personal, deleting, merging or splitting expenses, adding project and task information, or charging an expense to an account.
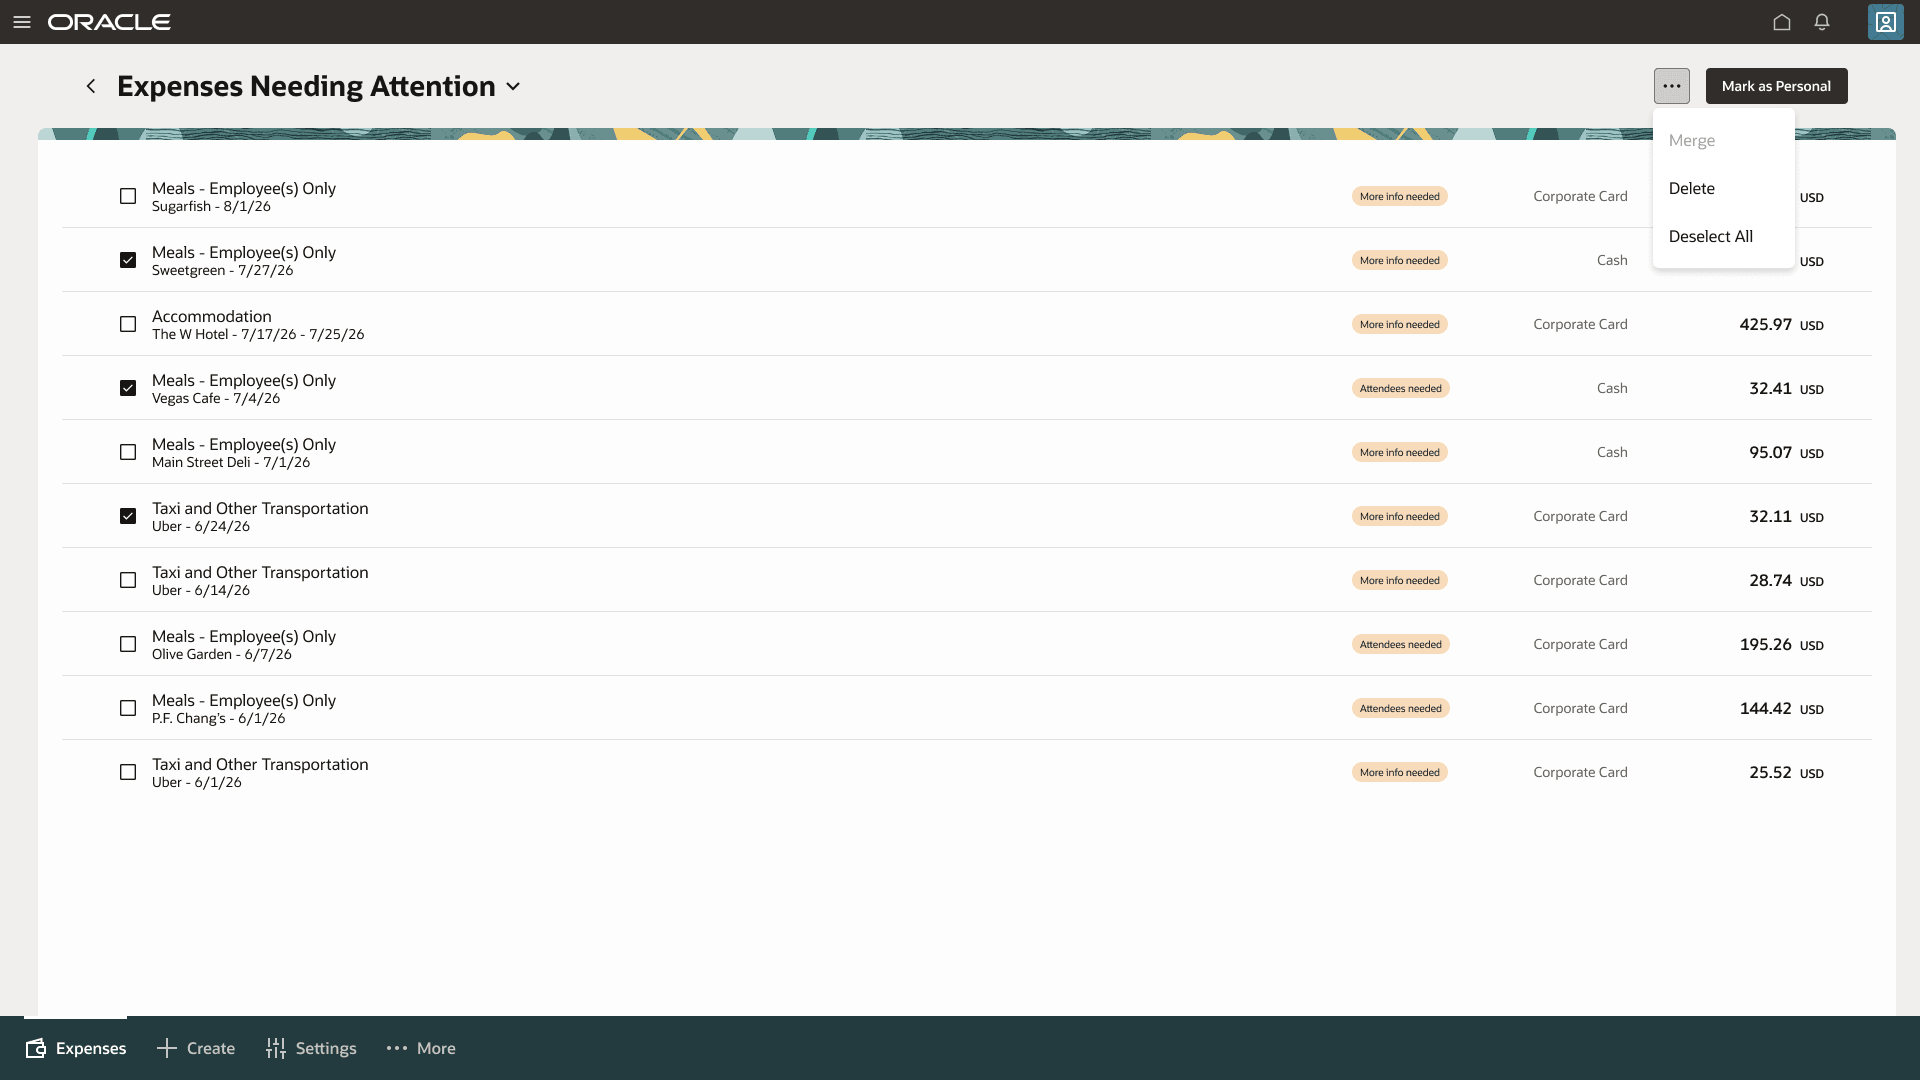
Expenses Needing Attention list view with actions.
Delegate experience
Delegates have a consolidated view of the people whose expenses they manage. The delegator selector at the top of the landing page lets delegates switch between delegators.
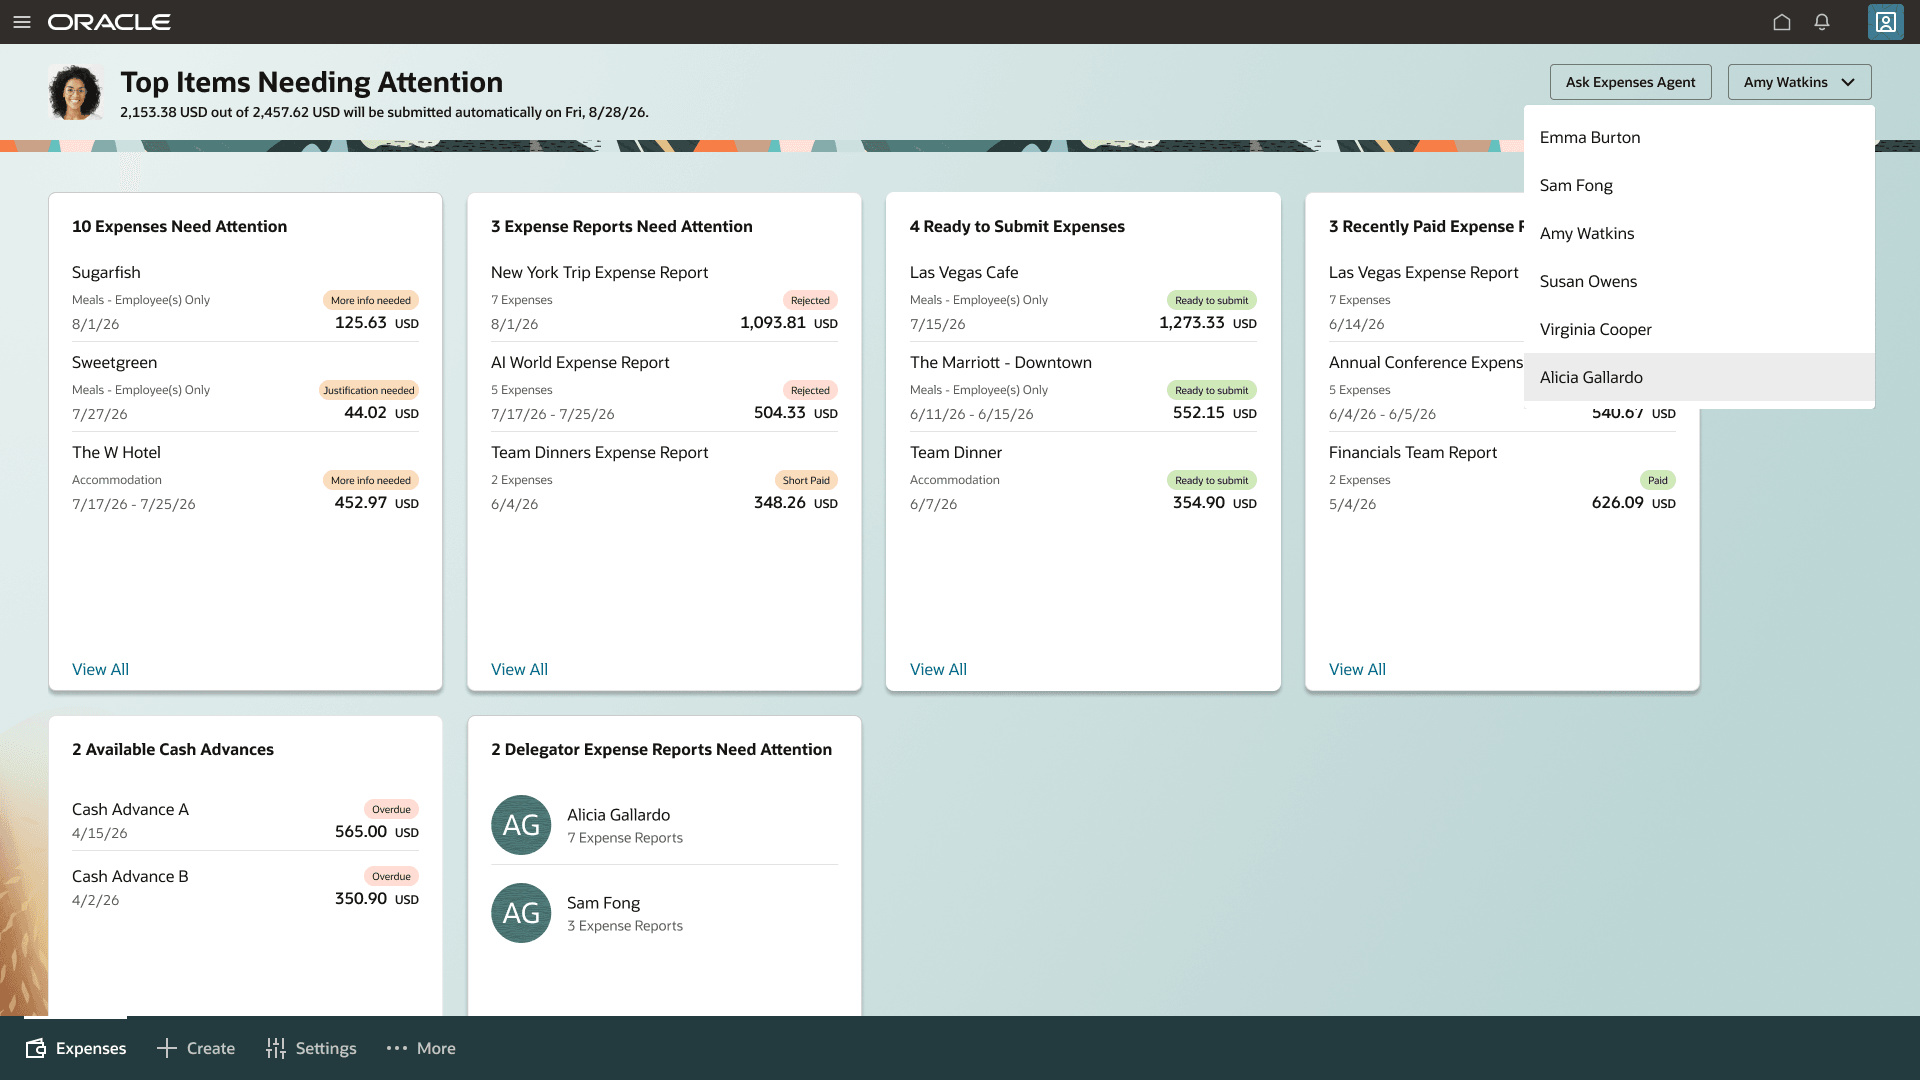
Delegate landing page.
Delegates can also open a list of all their delegators' expenses needing attention, select an individual, and drill down into that person’s expenses. This makes it easier to move between delegators, understand where attention is needed, and manage work across multiple employees without navigating through separate pages.
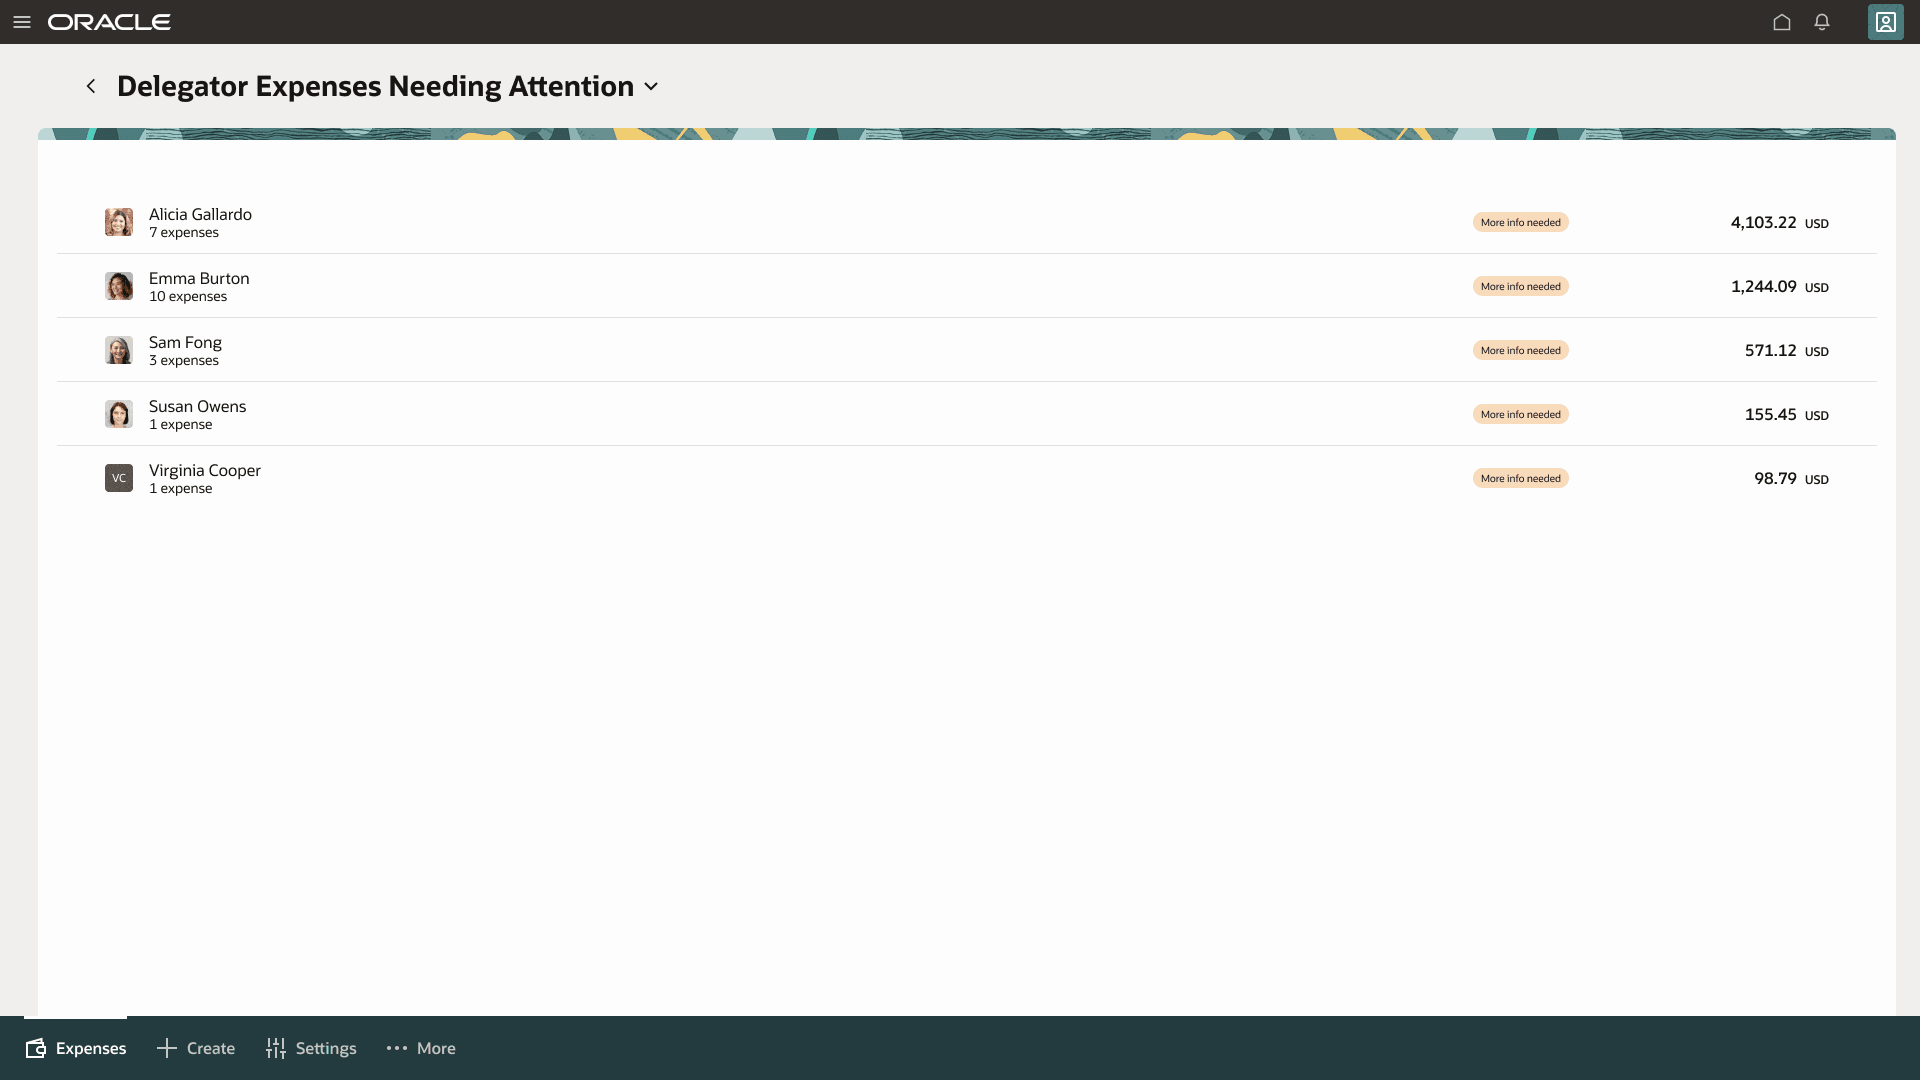
Delegate list view.
Expense details
The updated expense details page provides a header that identifies the expense by merchant, date, and amount. This helps employees confirm which expense they are reviewing, particularly when working through multiple expenses. When some information is unavailable, the header uses the available expense type, date, amount, or a general expense label to identify the expense.
A new error banner at the top of the expense details page identifies outstanding issues and shows which section contains each issue.
Issues are organized by the following area:
-
Expense Details
-
Charge To
-
Itemization
-
Attendees
Sections of the expense details page are presented as collapsible drop-downs. Employees can expand the area they need and collapse the others, reducing visual clutter and making it easier to focus on the sections that require attention.
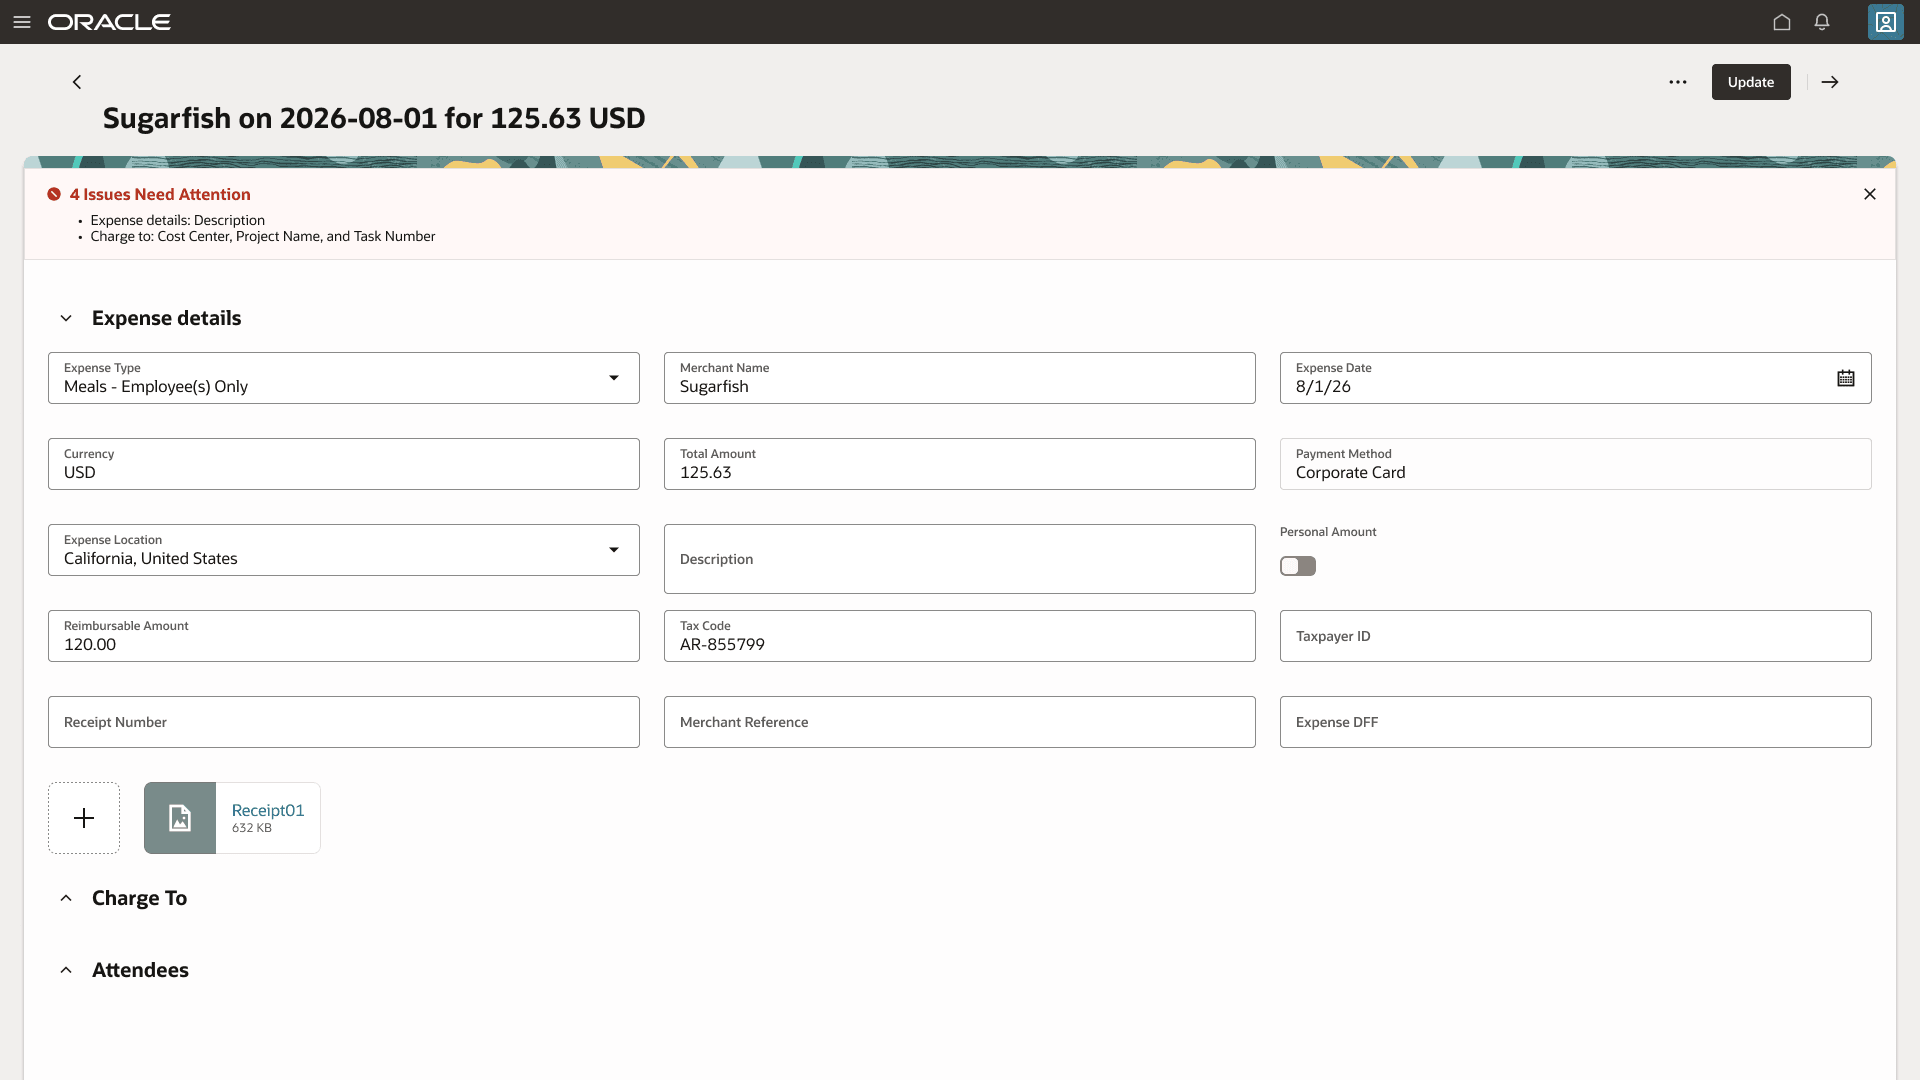
The new expense details page.
From the details page, employees can review and update expense information, add attachments, complete charge account information, and work with itemizations and attendees.
These are the business benefits:
- The new experience connects convenient email-based expense management with an actionable, cross-expense overview. It helps employees and delegates understand their overall expense workload, find issues faster, and complete outstanding work with less searching and navigation.
- Clearer expense identification, section-level issue guidance, and a focused page layout can also improve submission accuracy, reduce rework, and shorten the expense-processing cycle.
Steps to enable and configure
1. Create profile option
-
Login as user having access to Setup and Maintenance.
-
Search for and open Manage Profile Options.
-
Create the following profile option:
-
Profile Option Code: EXM_INBOX_PAGE
-
Enabled Levels: Site and User
-
-
Set the Site-level profile value to Y to enable the feature.
-
Save your changes.
2. Add the profile option to the required categories
-
Go to Manage Applications Core Profile Categories.
-
Search for ORA_FND_AUTH_REST_ACCESS and add the EXM_INBOX_PAGE profile option to the category.
-
Search for ORA_FND_SERVICE_INTERFACE, and add the EXM_INBOX_PAGE profile option to the category.
-
Save your changes.
3. Optionally, only for testing purposes, use the following setup to enable this capability for certain individual users
-
Go to Manage Administrator Profile Values.
-
Search for the EXM_INBOX_PAGE profile option.
-
Add the applicable username.
-
Set the user-level profile value:
-
Y — Enable the new Expenses inbox for the user.
-
N — Disable the new Expenses inbox for the user.
-
-
Save your changes.
Tips and considerations
-
When the profile is enabled, the new landing page replaces the current Expenses landing page.
-
When the profile is disabled, the current Expenses landing page remains.
-
The new landing page experience will become the default in the 27A release for customers who have enabled the Expenses Agent.
-
The Ask Expenses Agent action to inquire on expense policies is moved as a button at the top of the page.
-
The cards in the new landing page appear only when matching information is available. If a card has no content then the card doesn't appear. If no card has content, the card area remains blank.
Access requirements
No new access requirements.