Redwood Experience for Personal Info Pages
Enrich your user experience with the new Personal Info pages, which include the Personal Details, Contact Info, Identification Info, and Family and Emergency Contacts pages, developed using the Redwood toolset. The pages are built from the ground up using Visual Builder Studio (VBS) to give you a unique experience of Oracle applications.
The Personal Details page is used to capture info such as the employee's name, demographic info, biographical info, national identifiers, and disability info.
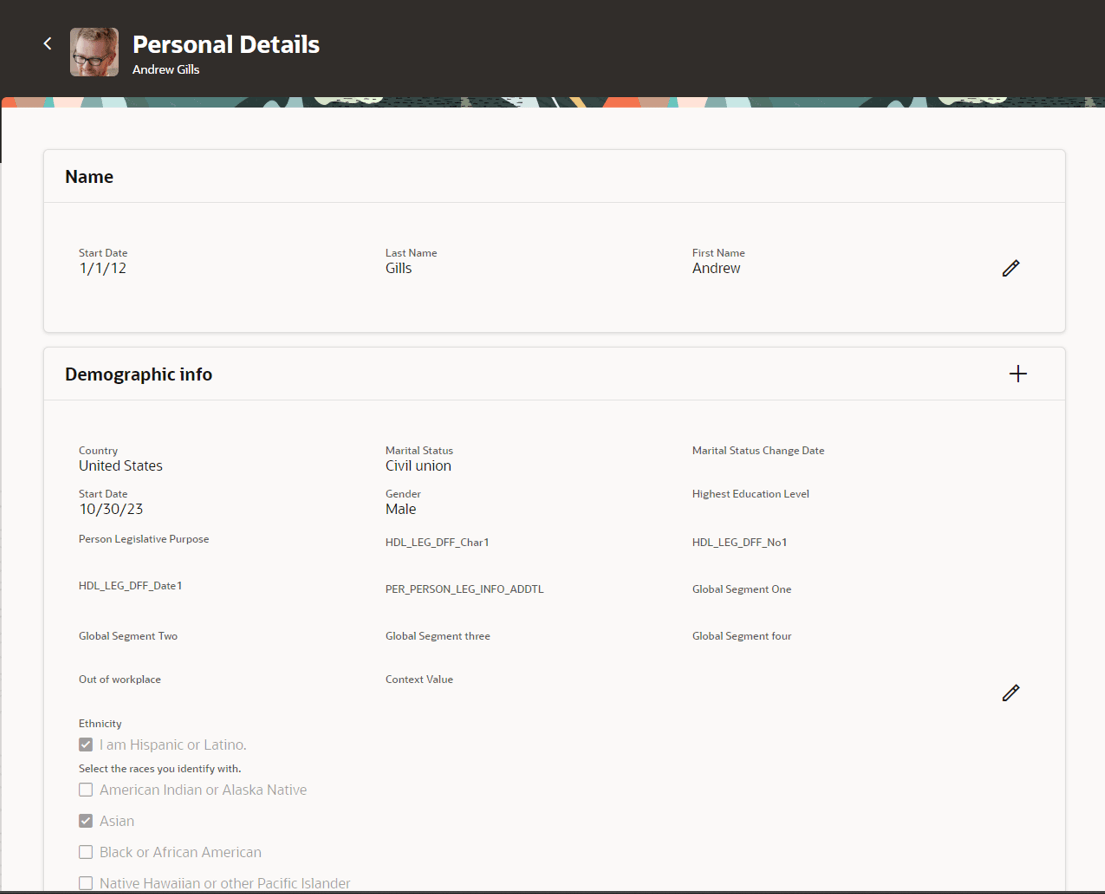
Personal Details
The Contact Info page is used to capture the four different communication channels: phone, emails, addresses, and other communication channels such as social media accounts.
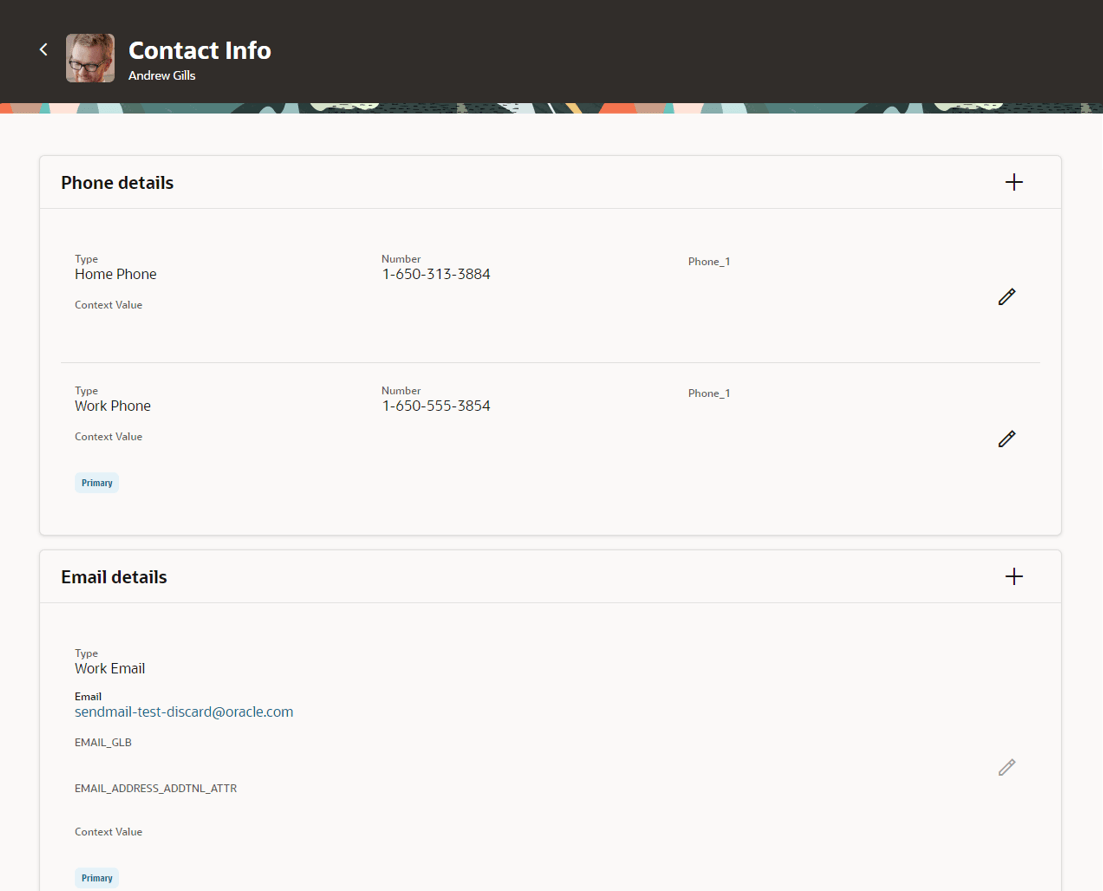
Contact Info
To set the order of preference for these communication channels in the responsive UI, you need to edit a record to set the order. In Redwood, you instead need to add the record in the Order of preference section on the Contact Info page. This section is hidden by default. It’s visible only if approvals are disabled for the Phone details, Email details, Other communication details, and Address sections, and no row is pending for approval. The preferred order that you had set earlier for the communication records will be carried over to Redwood.
While adding a record, you can’t select a preferred order. By default, it’s placed after the last existing row and the order number is 1 greater than the order number of the last existing row. For example, if your last record had the order number as 99, the new record that you add will have the order number 100.
If you have at least two records in the Order of preference section, then the Reorder button is enabled. When you click Reorder, a Reorder drawer is displayed, which has a drag-and-drop button for each record. Use the drag-and-drop button to reorder the rows the way you want. The preferred order number will change after you drag the record to a new position. Click Save. The updated order is now reflected in the Order of Preference section.
When you reorder the records, they’re renumbered in the ascending order, starting from 1 as the order number for the first record. The existing order numbers are overwritten and any existing gaps in numbering are lost. Let’s say you had 5 records with order numbers 1, 4, 5, 9, and 11. If you reorder them, they’re numbered as 1, 2, 3, 4, and 5 respectively.
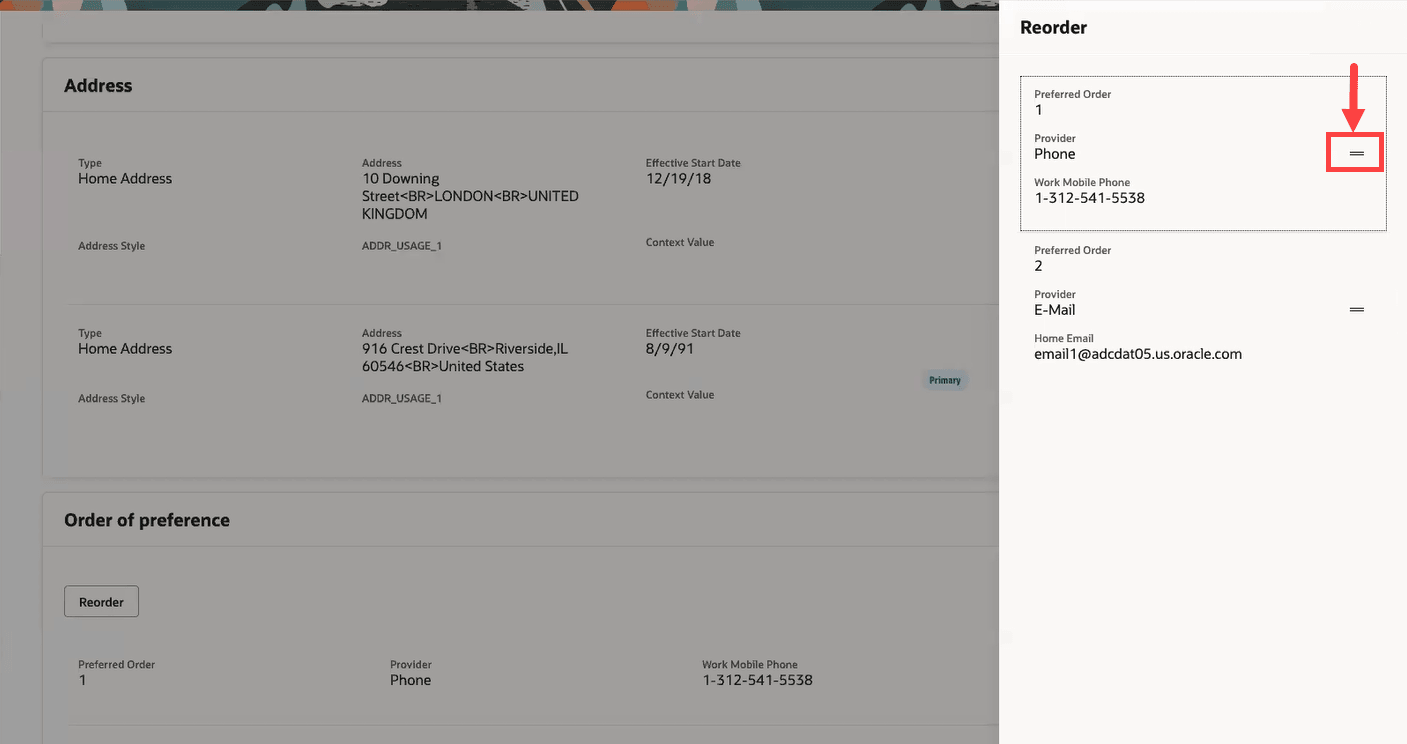
Reorder the order of preference
NOTE: You can also use a keyboard shortcut to reorder a record. Select the record that you want to move, press CTRL+X, and then use the up and down arrows to move it right above where you want to place it. Press CTRL+V.
If you delete a row from the section, the order of preference for the rows below it are updated automatically. A sequential order is always maintained. Using the same example, let’s say you had 5 records with order numbers 1, 4, 5, 9, and 11. And you delete the record with order number 9. Then the last record with order number 11 is now moved up by one place with an order number 6. Now you have 4 records with order numbers 1, 4, 5, and 6.
If you update any of the communication records, that change will be reflected in the Order of preference section only when you reorder, add, or delete a record in this section.
The Identification Info page is used to capture the employee's citizenship, passports, visas and permits, and driver's licenses.
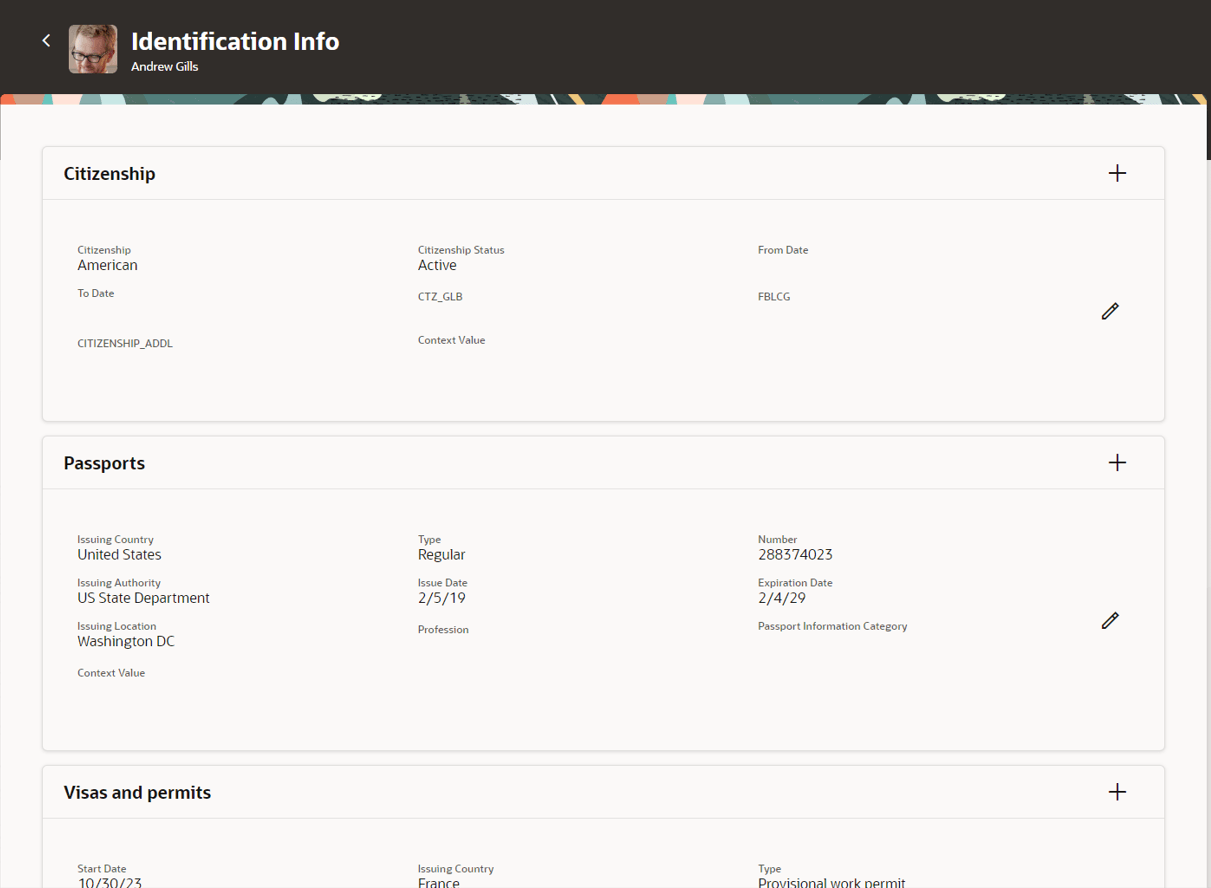
Identification Info
The Family and Emergency Contacts page is used to capture all the family and emergency contacts of the employee.
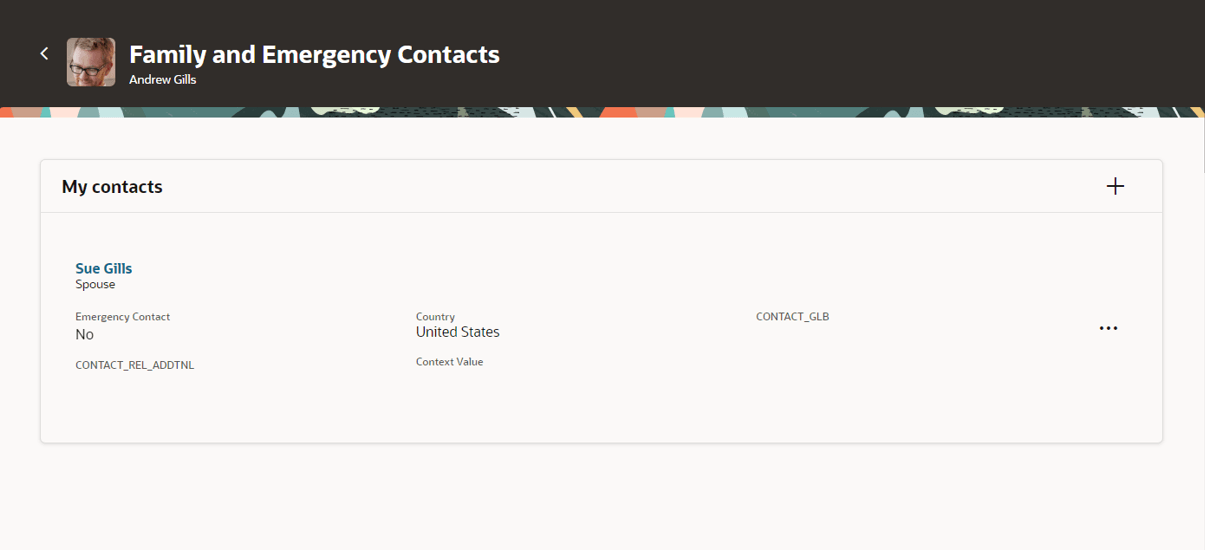
Family and Emergency Contacts
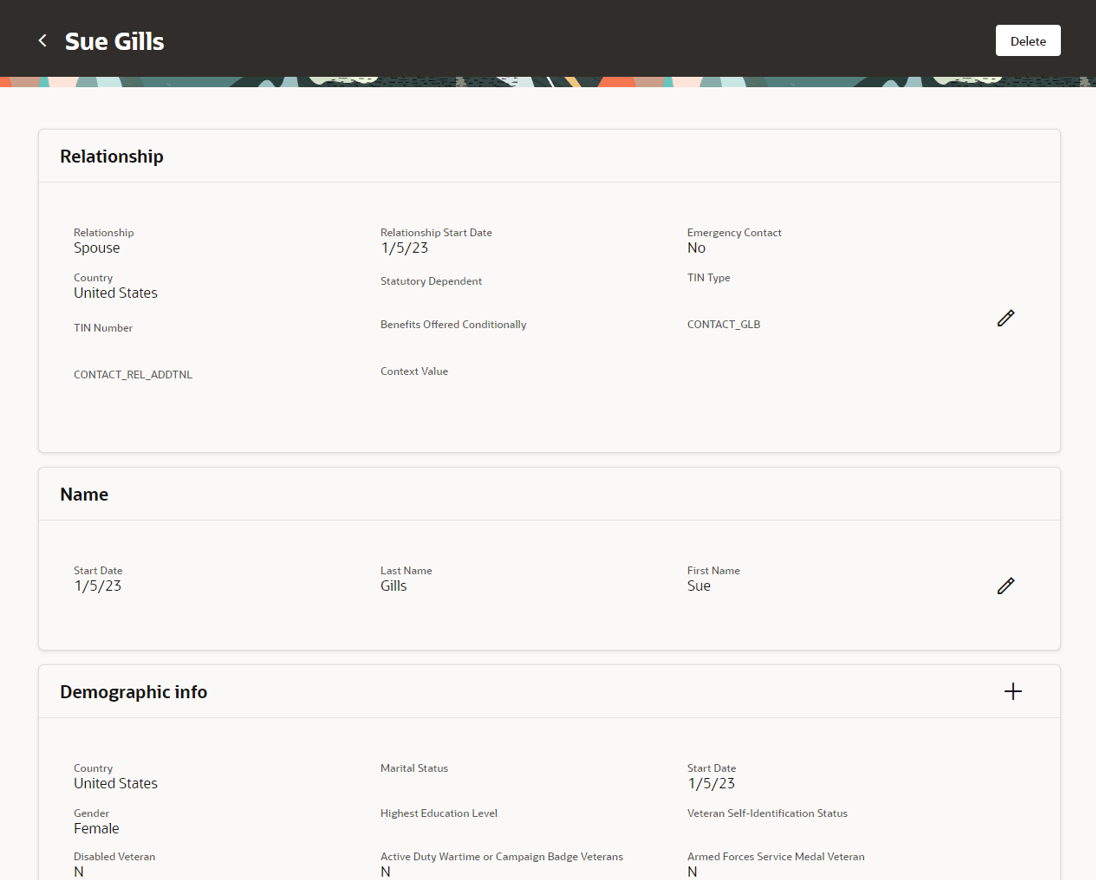
Edit Family and Emergency Contact
The new pages offer fewer clicks and better performance. By using these new pages, you can take advantage of the cohesiveness through the application.
Steps to Enable
- To use the new Redwood Personal Info pages, you need to enable the following profile options at the site level. They’re all disabled by default.
|
Profile Option |
Profile Value |
|---|---|
|
HRC_ELASTIC_SEARCH_ENABLED |
Y |
|
ORA_HCM_VBCS_PWA_ENABLED |
Y |
|
ORA_PER_PERSONAL_INFORMATION_REDWOOD_ENABLED |
Yes |
To enable the profile options, navigate to the Setup and Maintenance work area:
- Search for and click the Manage Administrator Profile Values task.
- Search for and select each of the profile options listed in the table.
- Select the Level as Site.
- In the Profile Value field, enter Y or Yes as applicable based on the table.
- Click Save and Close.
Tips And Considerations
- The National Identifiers aren’t masked yet.
- Guided journeys are available for the new Personal Info pages, which include the Personal Details, Contact Info, Identification Info, and Family and Emergency Contacts pages.
- Nudges are also available for the new pages.
- You can personalize the Redwood pages by using Visual Builder Studio (VBS).
- If you have personalized any of the existing ADF pages, you need to personalize them again in Redwood.
- Even when the Phone details, Email details, and Other communication accounts sections are in the editable mode, the user can reorder the rows in the Order of preference section in the Contact Info page.
- The new page doesn’t yet have support for the following:
-
Autocomplete Rules. Autocomplete Rules isn't supported for the new Person Info pages rebuilt in Redwood. All rules built on the underlying business objects for these pages must be disabled when you enable the Redwood page. Note that disabling rules on a business object will disable Autocomplete for both the Redwood and responsive pages.
-
Key Resources
For more information, refer to these resources on the Oracle Help Center.
- Person Records, Chapter: Person Information, Using Global Human Resources guide.
For a listing of all profile options for the recreated pages across applications, see the following document in My Oracle Support:
- HCM Redwood Pages with Profile Options – MOS Document - 2922407.1
For more information on extending Redwood pages in HCM, see the following feature in Update 23D:
Access Requirements
Access to the new Personal Info pages is controlled using the same security privileges that control access to the responsive Personal Info pages.
For information on existing security privileges, refer to this resource on the Oracle Help Center.