Redwood Experience for Run Results
The Run Results page has been moved to the Redwood toolkit, giving the page the look of Redwood, along with the backend functionality that Redwood has to offer. With this new page you can quickly view and manage calculated run results from Payroll and QuickPay processes.
You can access the Run Results page by using any of these navigations:
- Use the Person Results task to directly search for an employee and view the Run Results page.
- Use the Process Results Summary task to search and select the flow you've submitted and view individual records processed by the flow. Use the Actions menu on an individual record to open the Run Results page of the employee.
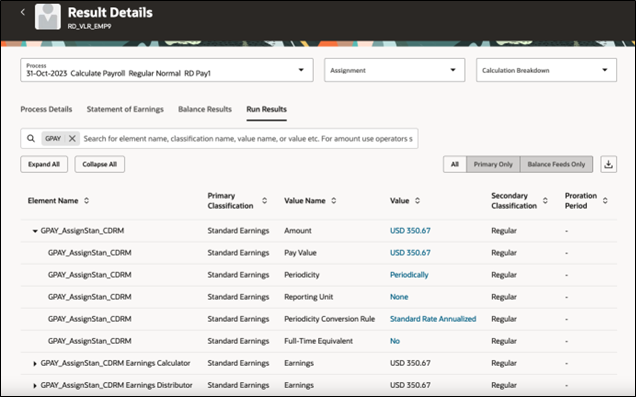
The redesigned page offers you the following:
- Select an element entry and view the calculated run results.
- If the employee has multiple assignments, use the Assignment field to view the calculated run results at the assignment level.
- Use the Process field to view the calculated run results of the employee for a previous payroll period.
- Use the Statement of Earnings tab on the page to view the calculated results from Payroll and QuickPay processes.
- Use the Process Details tab to view details of the process.
- Use the Export option to export the calculated run results details into an MS Excel worksheet.
- Use Expand All or Collapse All to expand or collapse records in the run results table as required.
- Use operands such as '>' or '<' to search for values greater than or less than a specific amount. You can also search by terms such as 'Tax' to search through the table.
Take advantage of all the features that come with the new Redwood Run Results page for a more modern feel.
Steps to Enable and Configure
Use these steps to enable the redesigned Redwood VBS Run Results page.
- Navigate to the Setup and Maintenance area and search for the Manage Administrator Profile Values task.
- On the Manage Administrator Profile Values page, search for and select the ORA_PAY_PROCESS_RESULT_PAGES_FOR_PERSON_REDWOOD_ENABLED profile option.
- In the Profile Values section, click Add.
- Specify the level at which the profile value is to be set. Select Site.
-
Click Save and Close.
Key Resources
For more information on extending Redwood pages in HCM, refer to this announcement on the Oracle Help Center.
For more information on enabling Redwood functionality, refer to this on My Oracle Support:document located on the All Fusion HCM Cloud Product Papers (Doc ID 1504483.1):