XML Data Chunking
Use the HCM Extracts diagnostics that enable you to split high-volume XML data into multiple smaller chunks to reduce the time and memory used for processing large volumes of data. Use this XML data chunking feature of Business Intelligence Publisher (BIP) when you encounter an unexpected issue that disables a business-critical process while running reports for large volumes of data.
The XML data chunking process involves the following stages:
- Scheduling the Extracts data chunking process
- Using BIP to:
- Create a report based on the seeded data model to generate an output
- Schedule a job to deliver the output remotely
- Automating the SFTP delivery option to deliver the data chunks (Optional)
1. Scheduling Extracts data chunking process
To schedule a Data Chunking process to split XML data into smaller chunks:
- Click Navigator > Tools > Scheduled Processes.
- On the Scheduled Processes Overview page, click Schedule New Process.
- Leave the type as Job, search and select the Extracts Process Diagnostics Report process, and click OK.
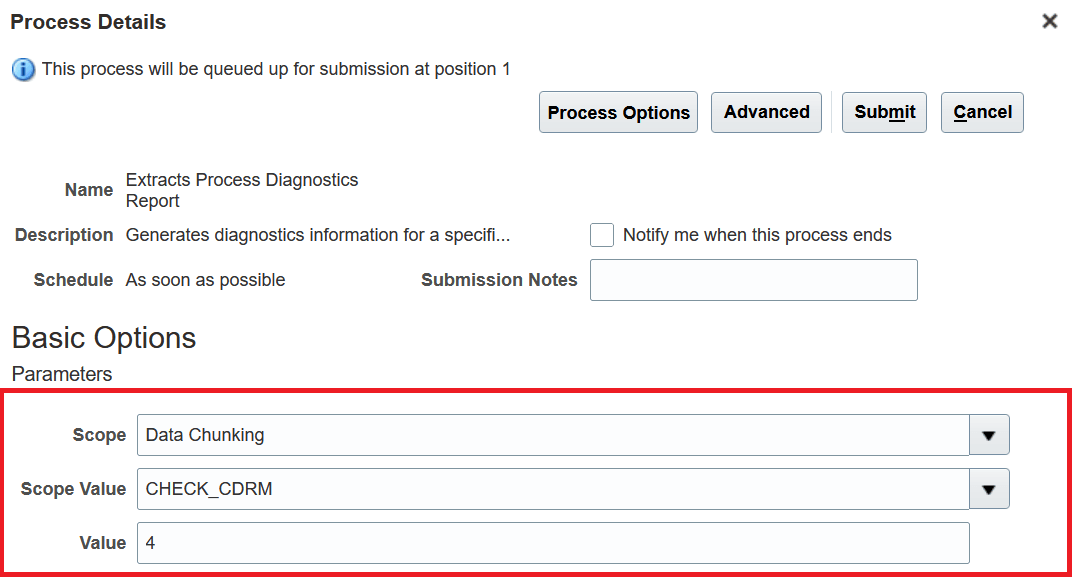
- In the Process Details dialog box, under the Basic Options section:
- Select Data Chunking as the scope for the chunking process.
- Select the instance name as the scope value from which you want to chunk the data.
- Enter a numerical value indicating the number of required chunks size (number of objects in one chunk).
- Define the schedule, output, and notifications for the process set, as you’d do for any scheduled process.
- Set any other required options and click Submit.
- Download the report and log and check the number of chunks generated. Generally, the number of chunks generated is based on the chunk size and total objects. (Total Chunks Generated = Total Objects/Chunk Size)
2. Using BIP to generate and deliver data outputs
To generate the BIP data output and deliver it:
- Click Navigator > Tools > Reports and Analytics.
- On the Reports and Analytics page, click Browse Catalog.
- On the BIP Home page, copy the report associated with the extract definition, and change globalReportsDataModel to DataChunkingDm data model available in the shared directory (Shared Folders/Human Capital Management/Extracts/Data Models/).
- Enter the name and description of the report and save it in the Custom directory. (Shared Folders/Custom/...)
- Click OK to open the report pane.
- Click View Report.
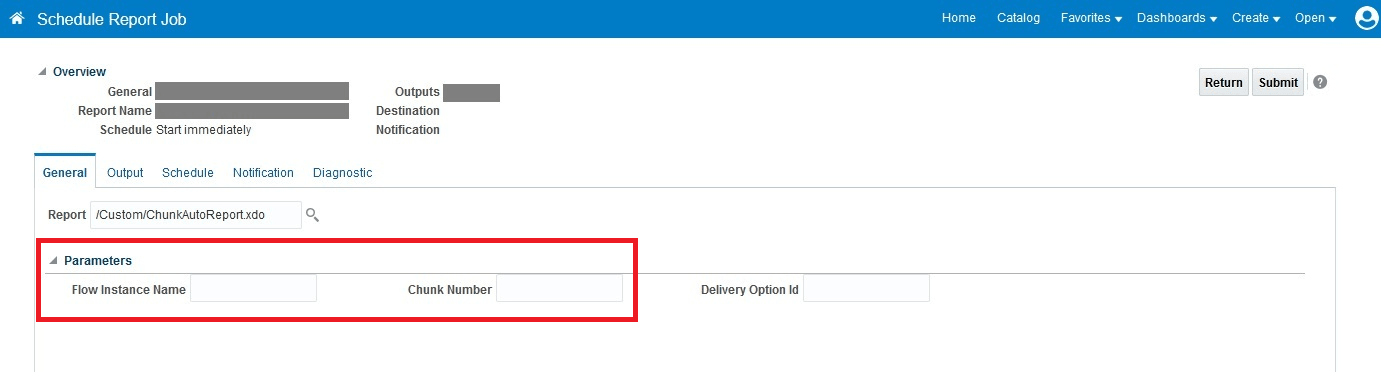
- Click Action > Schedule to schedule a report job.
- In the General tab, enter the values for Flow Instance Name and Chunk Number parameters.
- Execute the report for each generated chunk, starting from chunk 1. For example: If you have 100,000 objects to process and you are using a chunk size of 25000 objects, then 4 chunks will be generated. In order to generate a report for all objects, you will need to run the report for chunks 1 through 4 until all 4 chunks are processed.
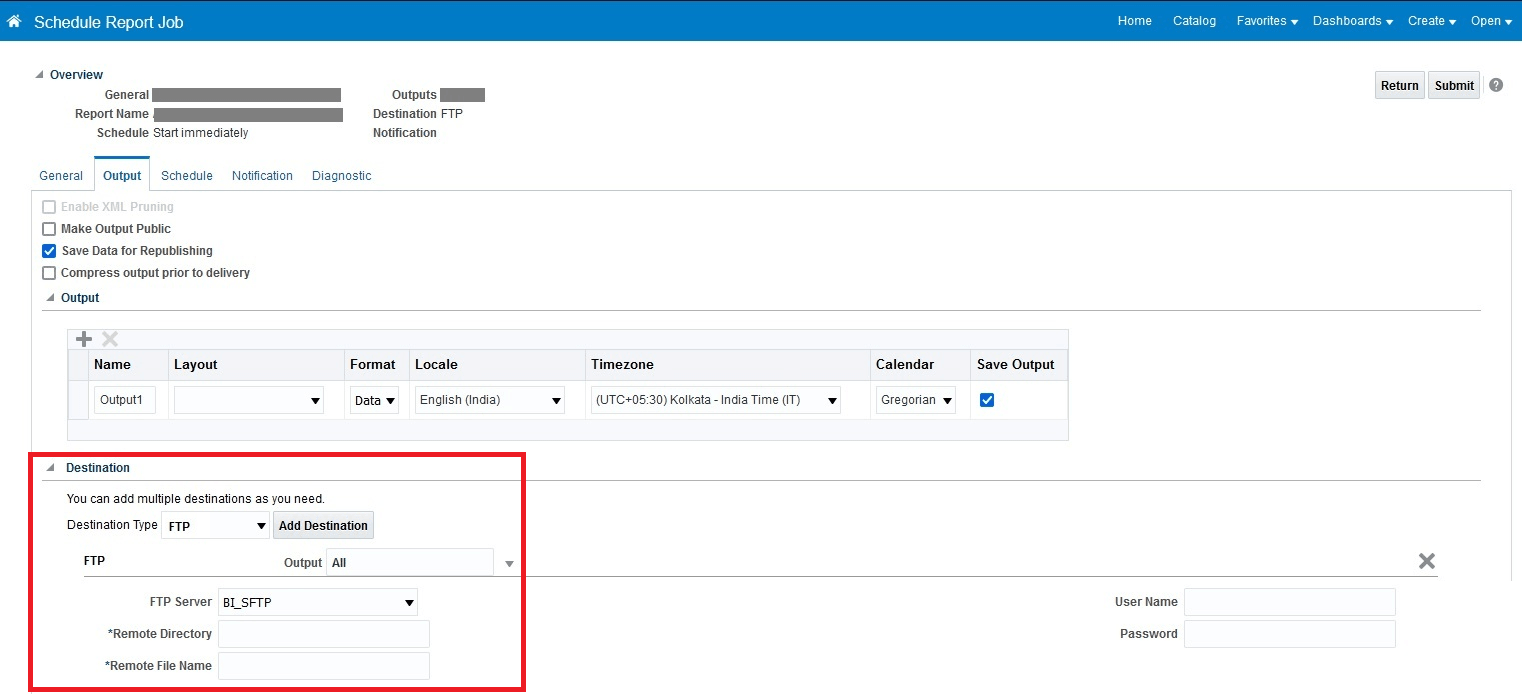
- In the Output tab, select FTP as the destination type and click Add Destination.
- Select the FTP Server from the servers list.
- Enter the remote directory folder path to deliver the data chunks.
- Enter a file name for the generated file.
- Click Submit to schedule the report job.
3. Automating delivery option to deliver data chunks (Optional)
You can create a delivery option placeholder in the extract definition that needs data chunking. To add a delivery option to send the data chunks:
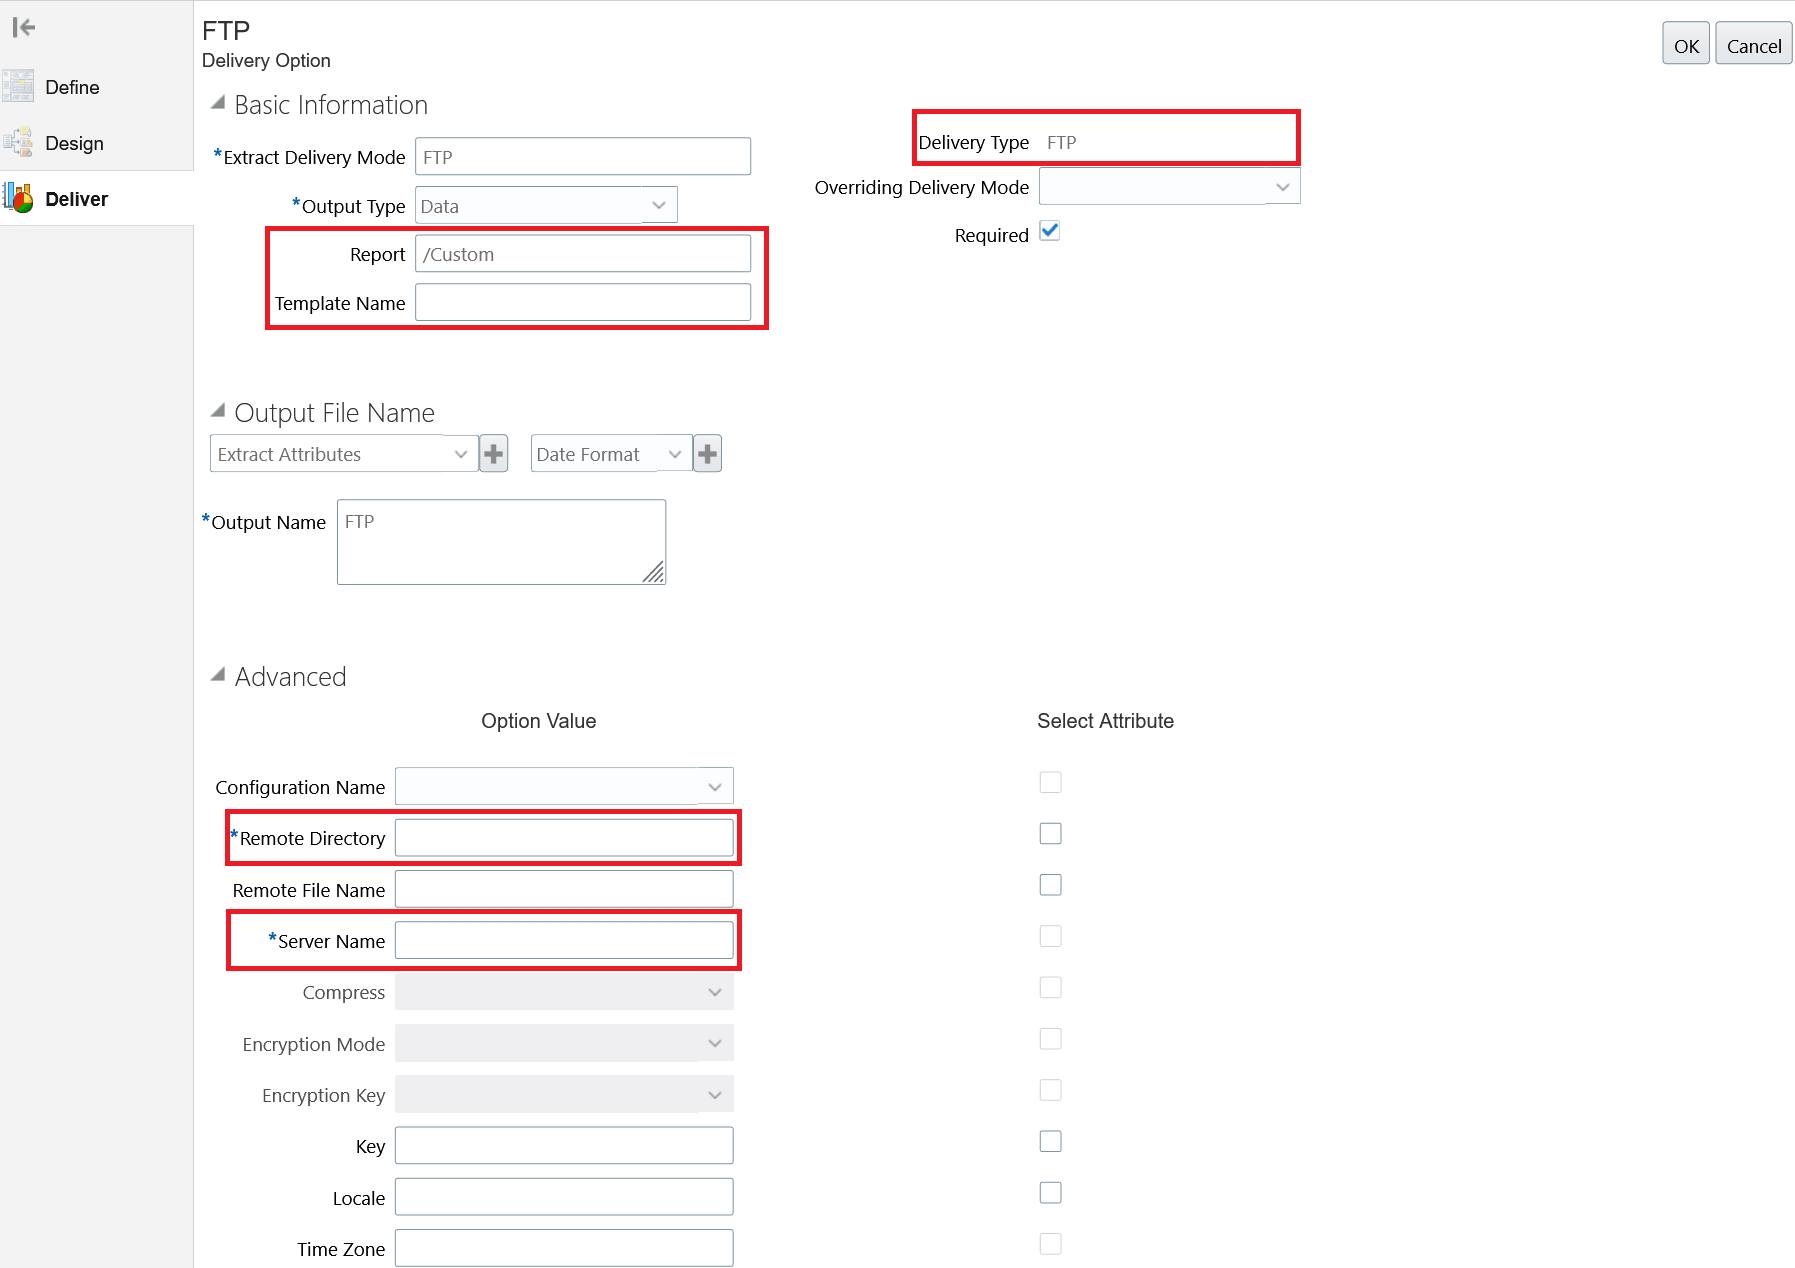
- Open the extract definition and click the Deliver tab.
- Add a new delivery option with the delivery type FTP.
- The delivery option will keep the same report and template names. Enter the remote directory path and SFTP server name.
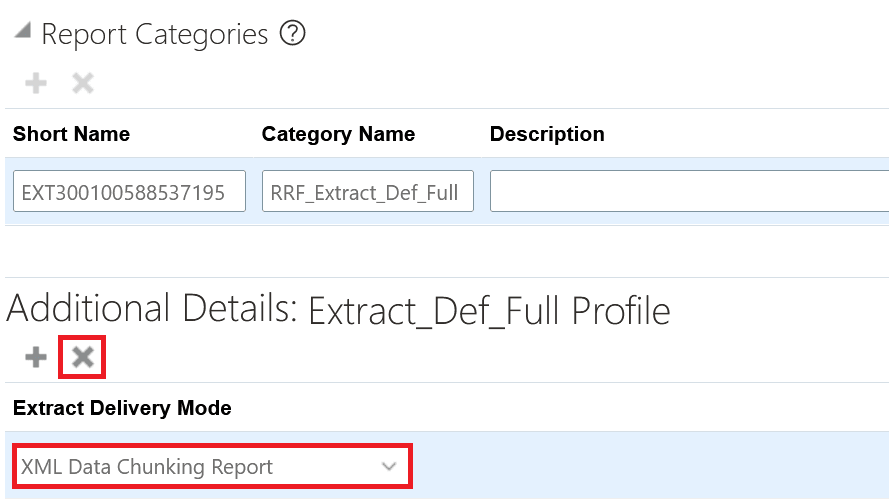
- Delete the Extract Delivery Mode additional details created for the newly added delivery option.
- Validate and save the extract definition.
- Follow the steps mentioned above to run the data chunking process and provide the delivery option name to trigger automatic delivery to an SFTP server.
Steps to Enable
You don't need to do anything to enable this feature.
Tips And Considerations
- The data tables used for data chunking:
hry_ext_transformationHry_ext_parse_dtls- Use the following query to know the total number of chunks generated:
select count(*) from hry_ext_parse_dtls where transformation_id = (select max(transformation_id) from hry_ext_transformation where processing_type = 'CHUNKING' and instance_name = :flow_instance_name)
Key Resources
For more information see:
- How can I enable data chunking for high volume extracts?
- Efficient Processing of Large XML Files in BI Publisher