Redwood Experience for HCM Communicate
Enrich the user experience with the new guided process to create and manage communicate campaigns using the Redwood tool set. Easily navigate through the steps to design a campaign with your business requirements.
The communicate campaign process is enhanced in Redwood with these updates:
- New names for these campaign purposes:
- Share General Info (previous name: General).
- Collect Responses (previous name: Get Response).
- Automatic numbering for campaigns.
- Ability to update the basic campaign details in draft status. For example, you can change the communication team rather than deleting the campaign and creating another one.
- When you open in-progress, scheduled, and completed campaigns, the metrics section automatically displays where you’ll have access to the email and SMS delivery details. You’ll also be able to create another email and SMS. For example, if a campaign wasn’t as successful as you expected, create a follow up email to find out why.
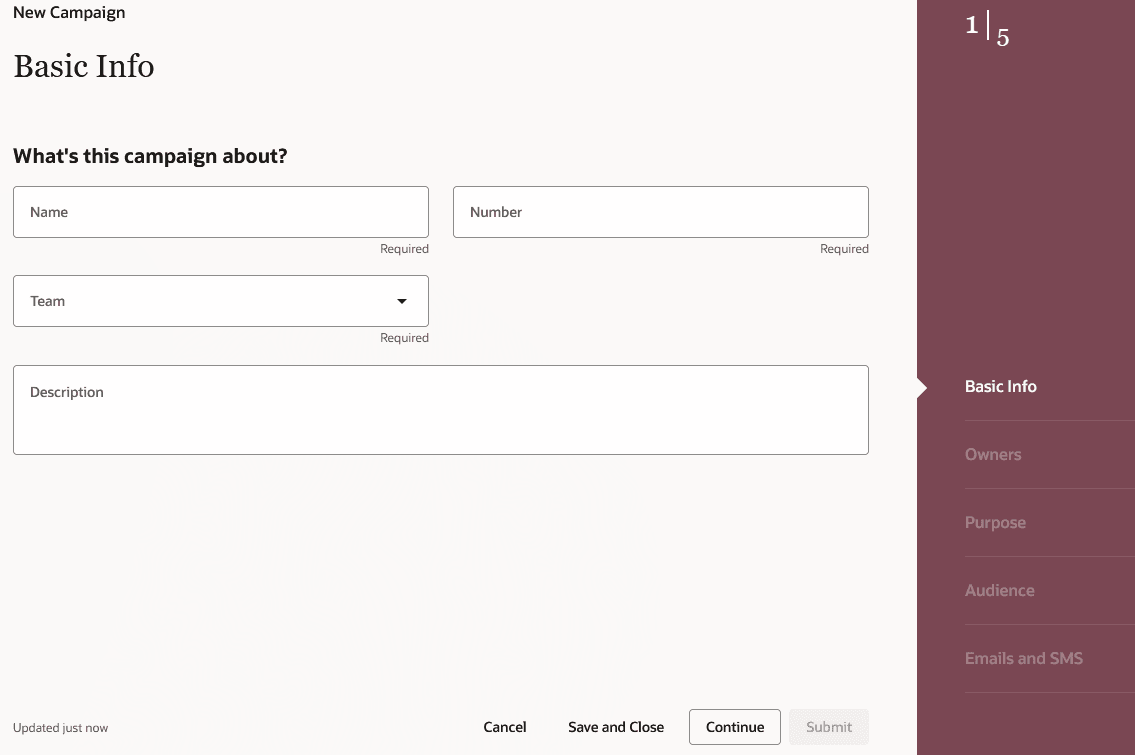
Screen capture shows the Basic Info page

Screen capture shows the campaign purposes
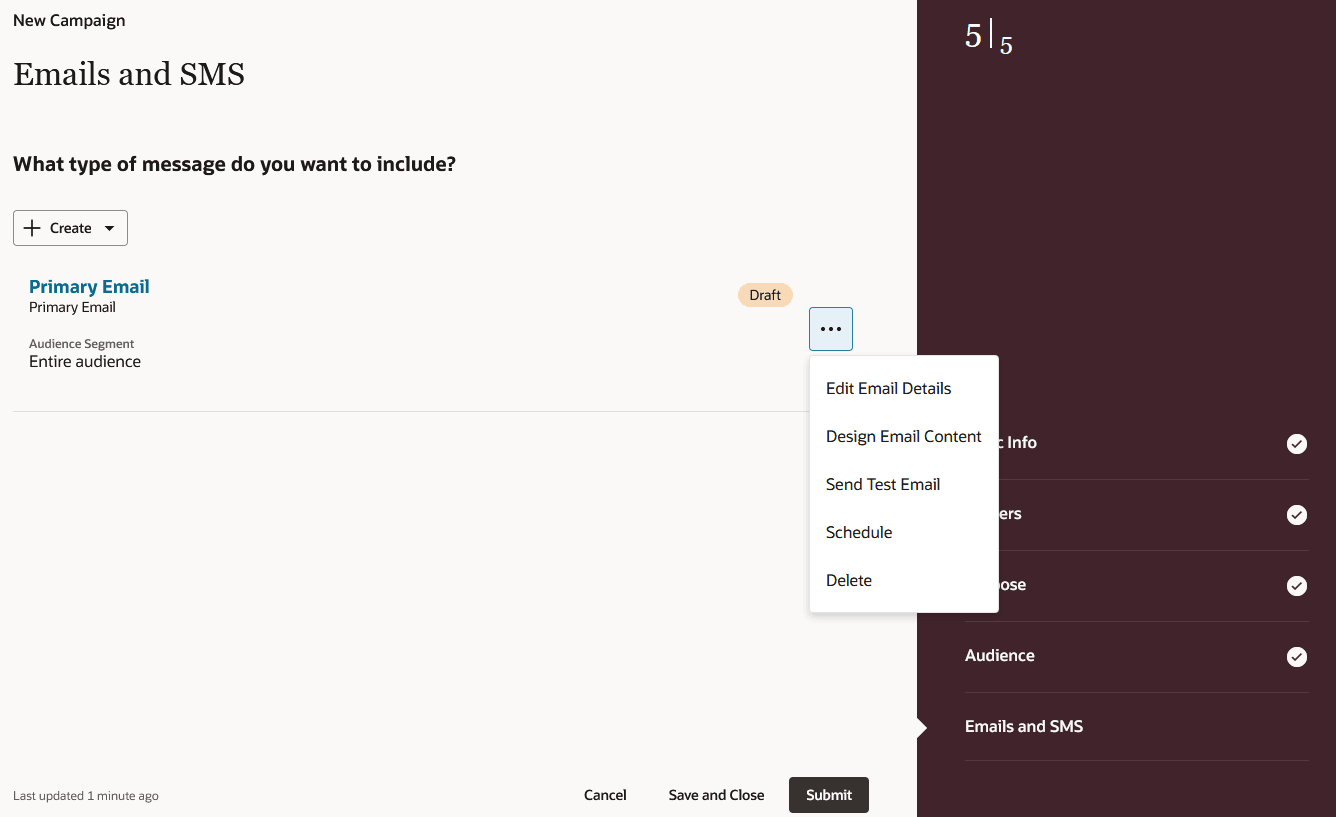
Screen capture shows the Emails and SMS page
Enhance the user’s experience of creating and managing communicate campaigns using Redwood.
Steps to Enable
You need to enable the ORA_HCO_REDWOOD_ENABLED profile option to enable the Redwood journeys setup pages. By default, this profile option is set to N.
Table shows the Redwood profile option details
| Profile Option Code | Profile Display Name | Default Profile Value |
|---|---|---|
| ORA_HCO_REDWOOD_ENABLED | Redwood Enabled for Pages | N |
To change the default profile option value and enable the feature, follow these steps:
- Navigate to the Setup and Maintenance work area.
- Search for and click the Manage Administrator Profile Values task.
- Search for the ORA_HCO_REDWOOD_ENABLED profile option code and select the profile option in the search results.
- In the ORA_HCO_REDWOOD_ENABLED: Profile Values area, enter Y in the Profile Value field.
- Click Save and Close.
- Click Done.
Tips And Considerations
If you want the ability to create SMS campaigns as well as email campaigns, then ensure the campaign admin enables the SMS communications option in the Manage SMS Configurations task.
If you want the ability to use a sender profile when creating a campaign, then ensure the campaign admin enables the Enable Email Profiles option in the Manage Email Profiles task.
Remember to activate the campaign after you’ve saved or submitted it by clicking the Activate Campaign option in the list of campaigns on the Communicate page.
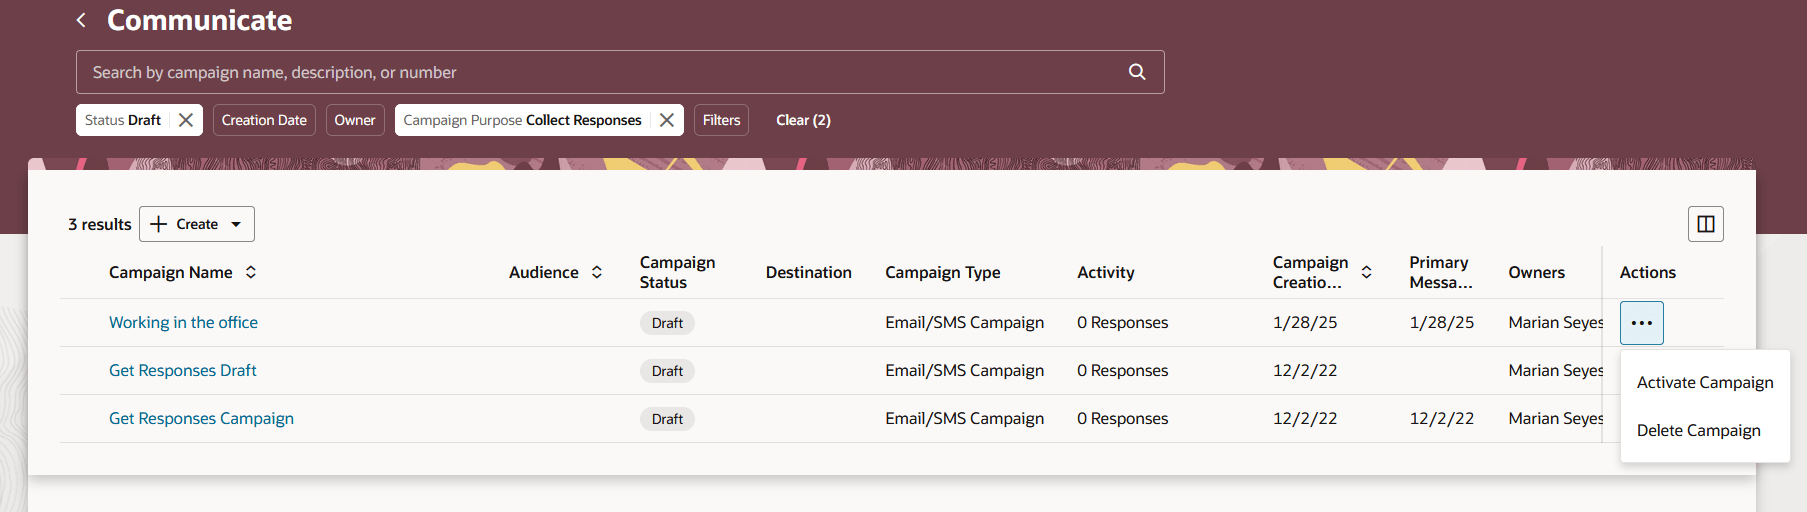
Screen capture shows the Communicate page with the Actions menu