Redwood Experience: Create an Event
Take advantage of the Redwood event creation flow used for creating hiring events, which has been recreated in the Redwood toolset called Visual Builder Studio (VBS).
When the Redwood profile option is enabled, upon clicking the Add button from the Redwood events page users will see the Redwood event creation flow.
The new flow starts with entering basic event info, such as whether users want to create an event based on an existing event or start with a blank event. Based on their selection, more fields are displayed. For example, if a user creates an event using a blank template, several fields and a new section display. The Visibility and Languages fields are pre-populated but the user can change them.
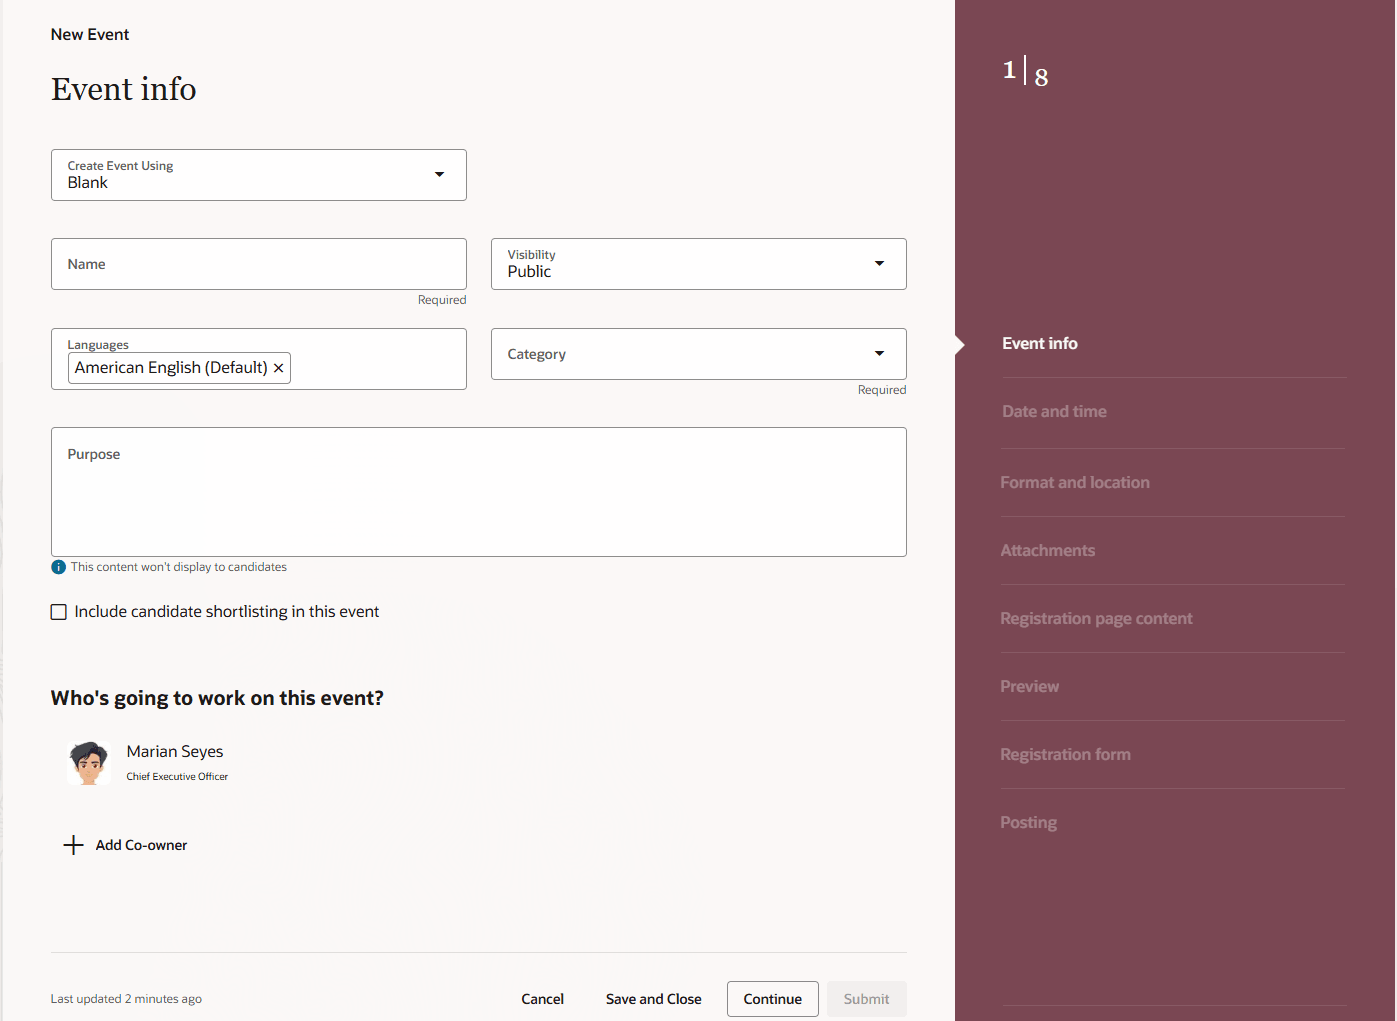
Event Info
Users indicate whether candidate shortlisting will be used during the event. By default, the creator of the event is the owner, but they can add co-owners who will also have the ability to edit the event.

Date and Times for the Event
Users need to complete the Date and times page, which includes the start date, end date, and the last day to register date and times, and then indicate the Format and location. Users can select either In Person or Virtual. The fields that display next are based on that selection.
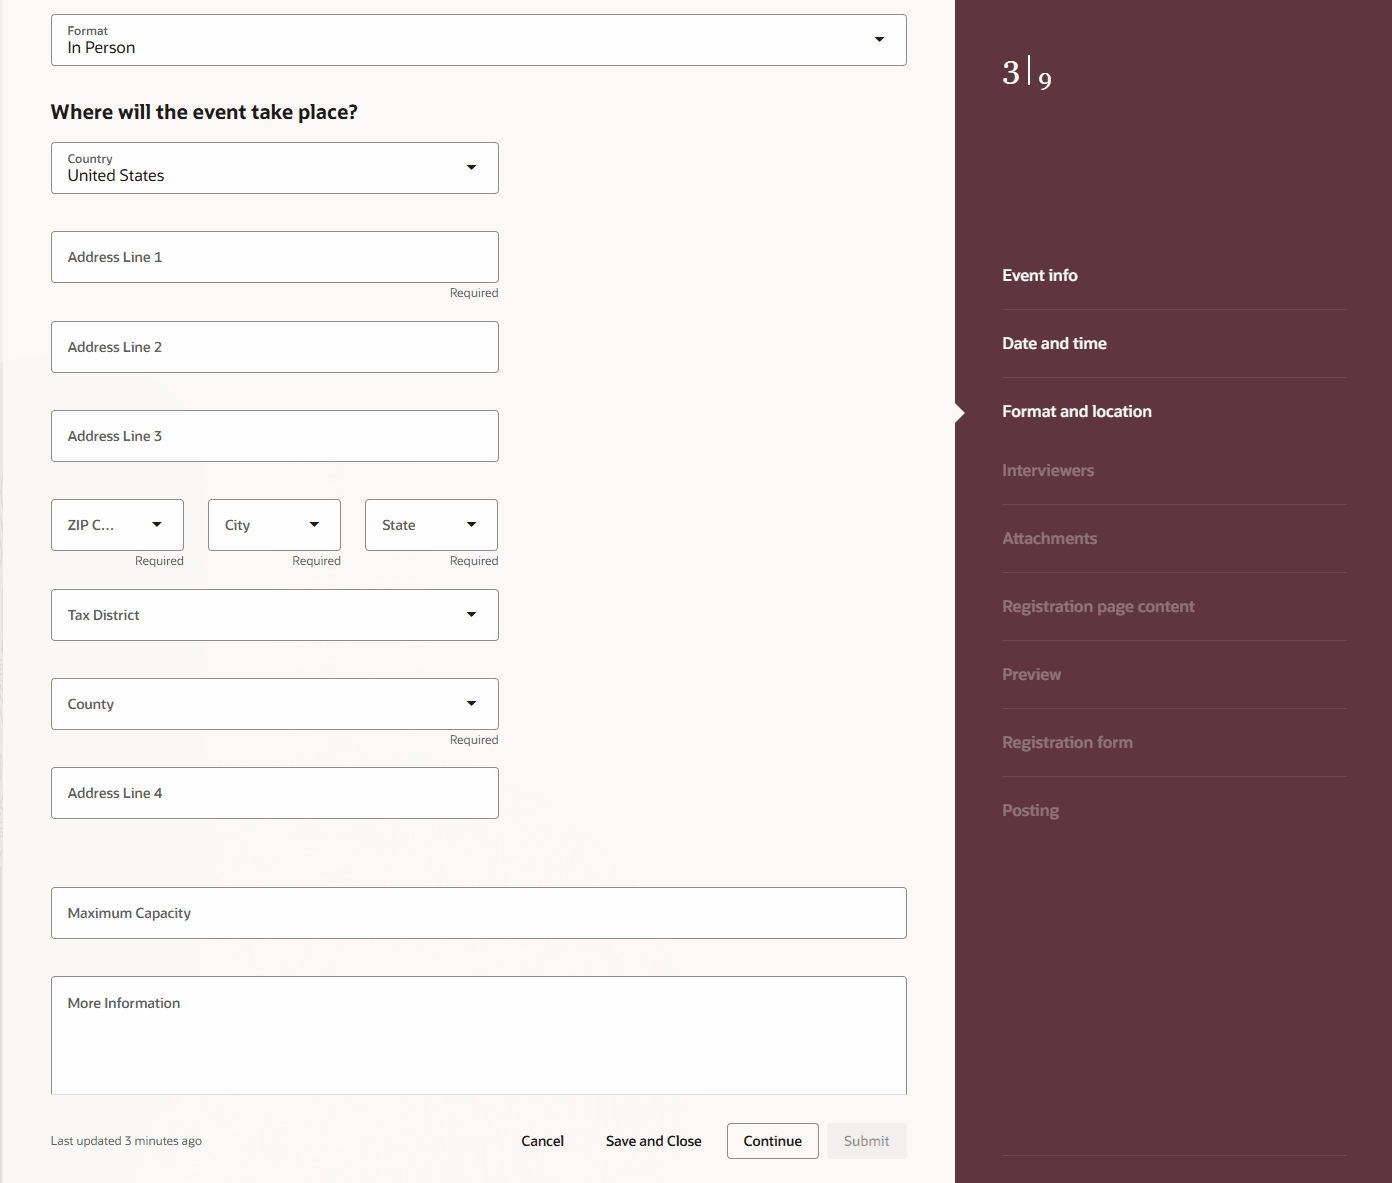
Format and Location of the Event
Some fields are auto-populated based on certain selections. For example, typing a zip code will auto-populate the city, state, and county for US addresses.
If the user indicated that interviews will occur for the event, they'll need to select the employees who will be interviewing candidates.
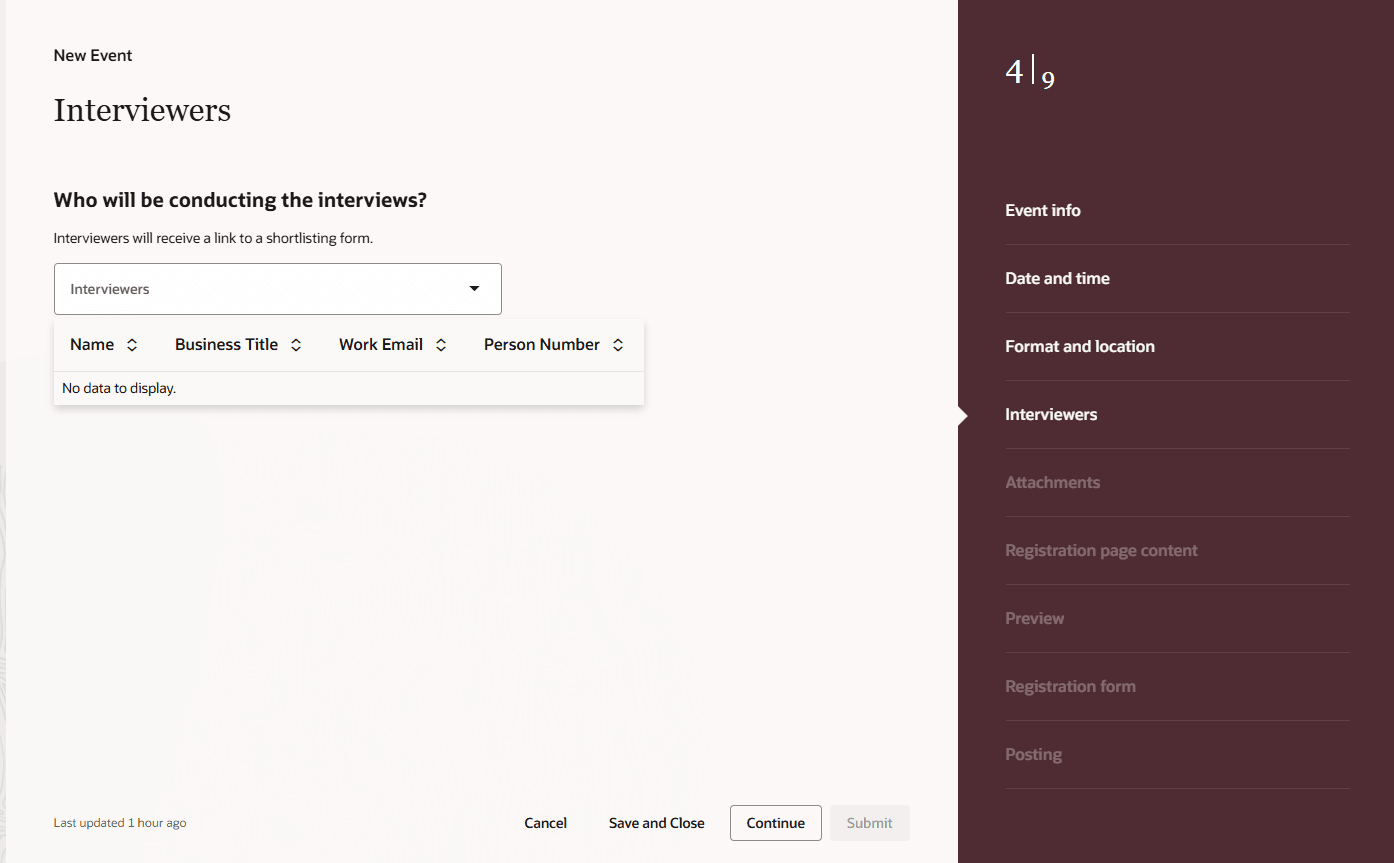
Select Employees Who will Conduct Interviews
Users can optionally add attachments or URLs on the Attachments page.
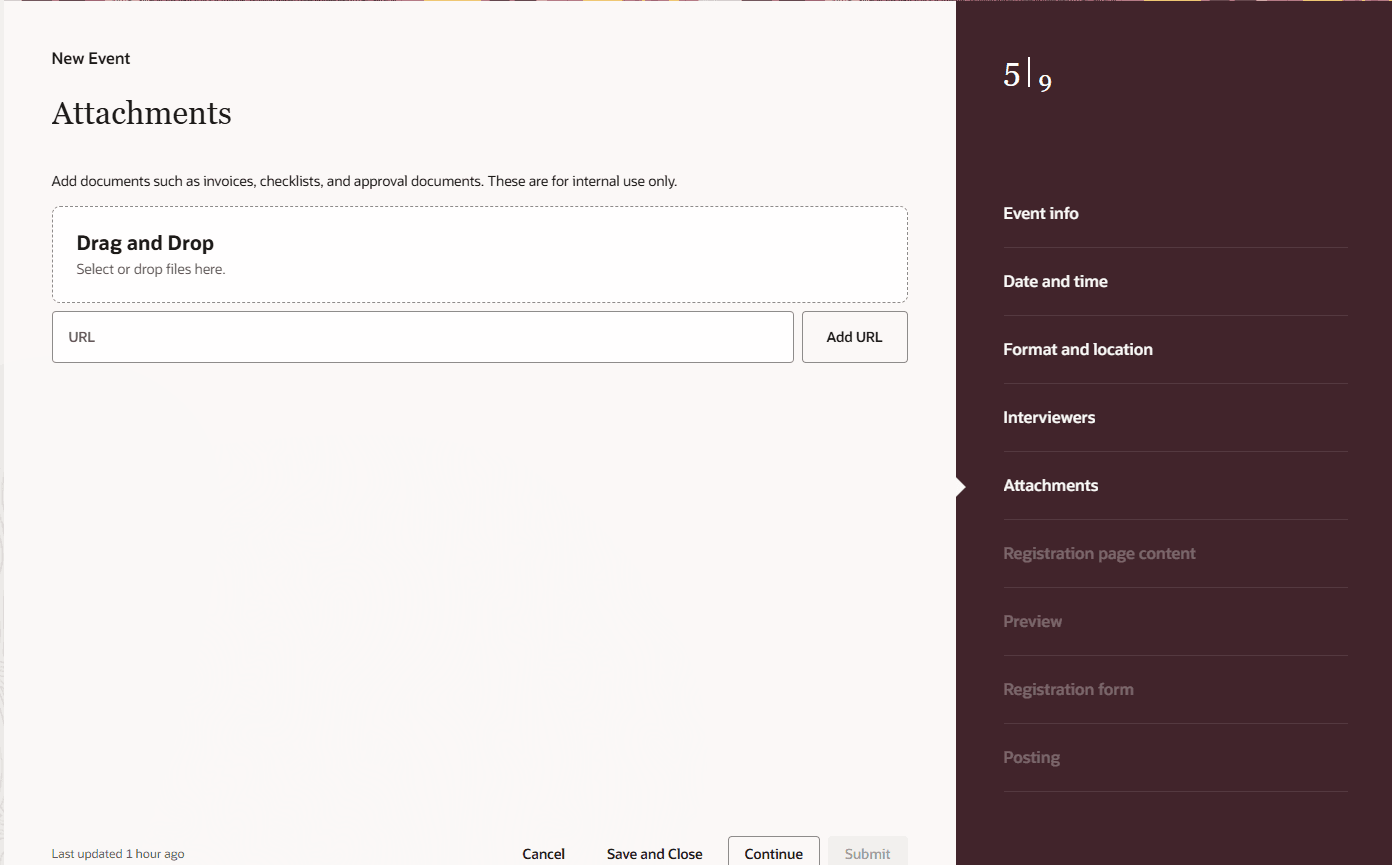
Add Attachments to the Event
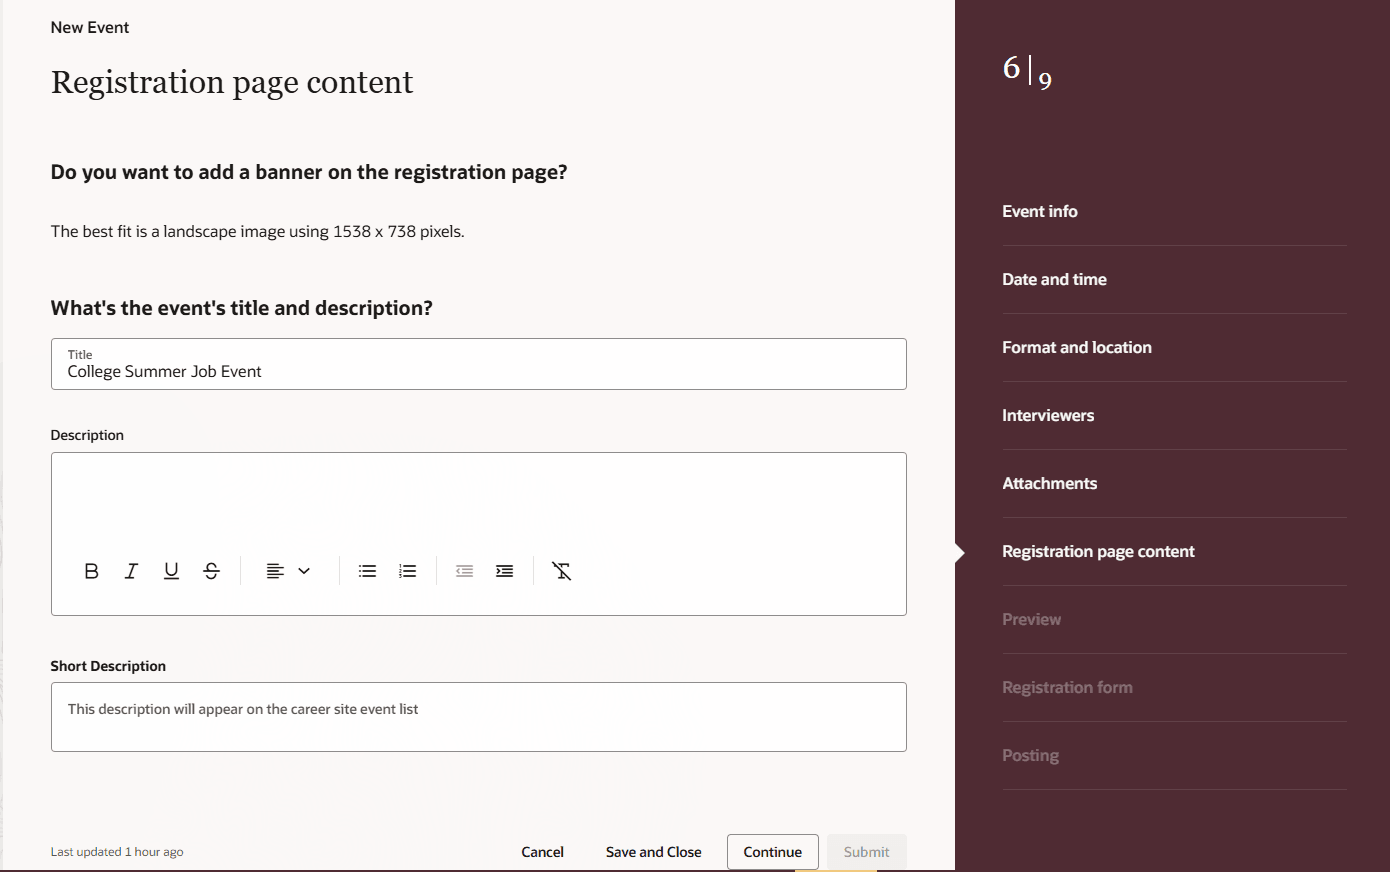
Registration Page Content
They can then add content to be displayed to candidates on the registration page.
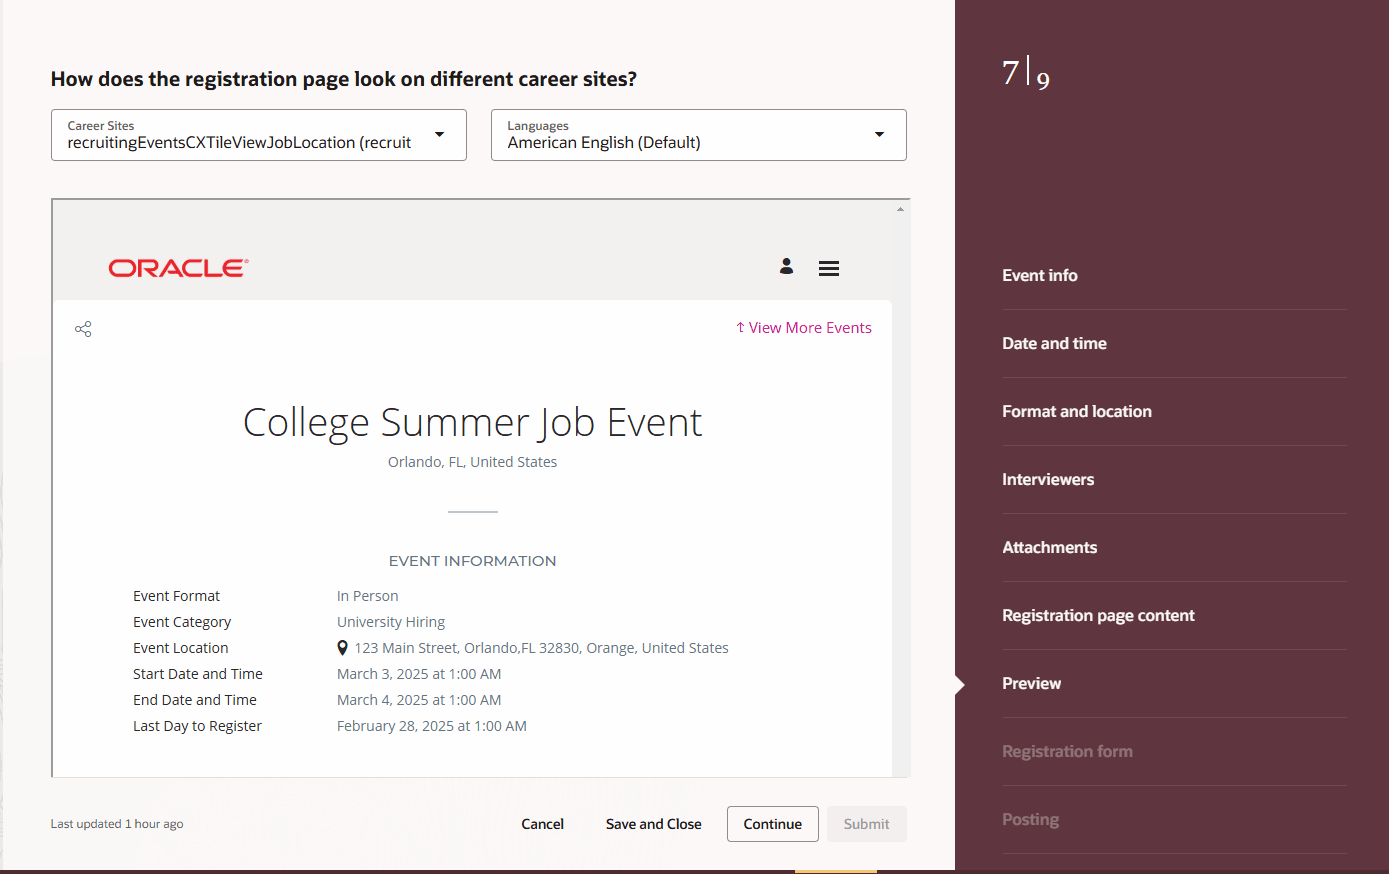
Preview How The Page Looks to Candidates
Users can then see how it appears on various career sites and in different languages using the Preview page.
Note that if they selected multiple languages for the event, they'll need to manually enter the description and short description for each language.
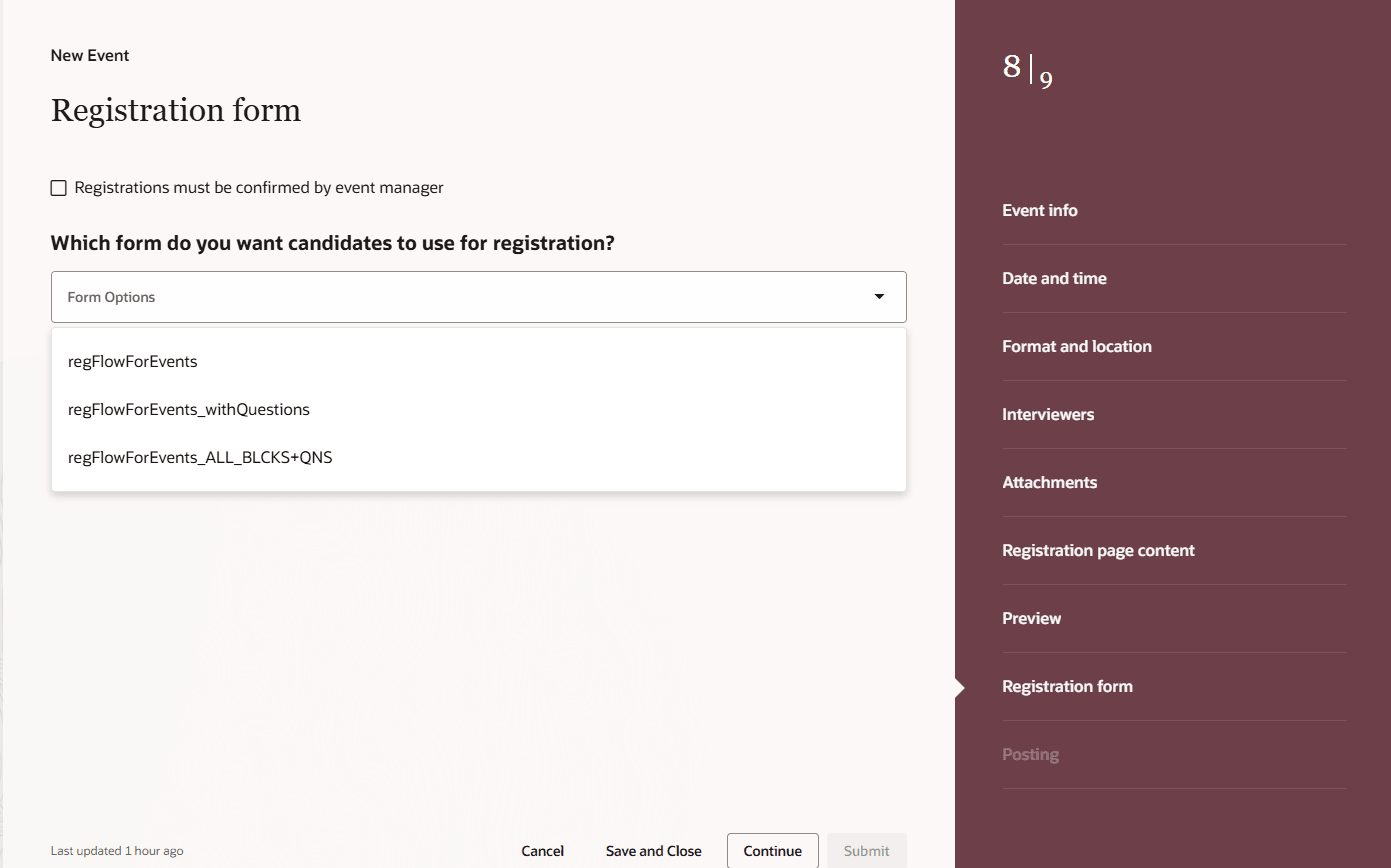
Registration Form()
They can then choose a registration form and indicate whether registrations need to be confirmed by one of the event managers (the event owner or co-owners). If the registration form contains a questionnaire, the Questions page opens when users click Continue.
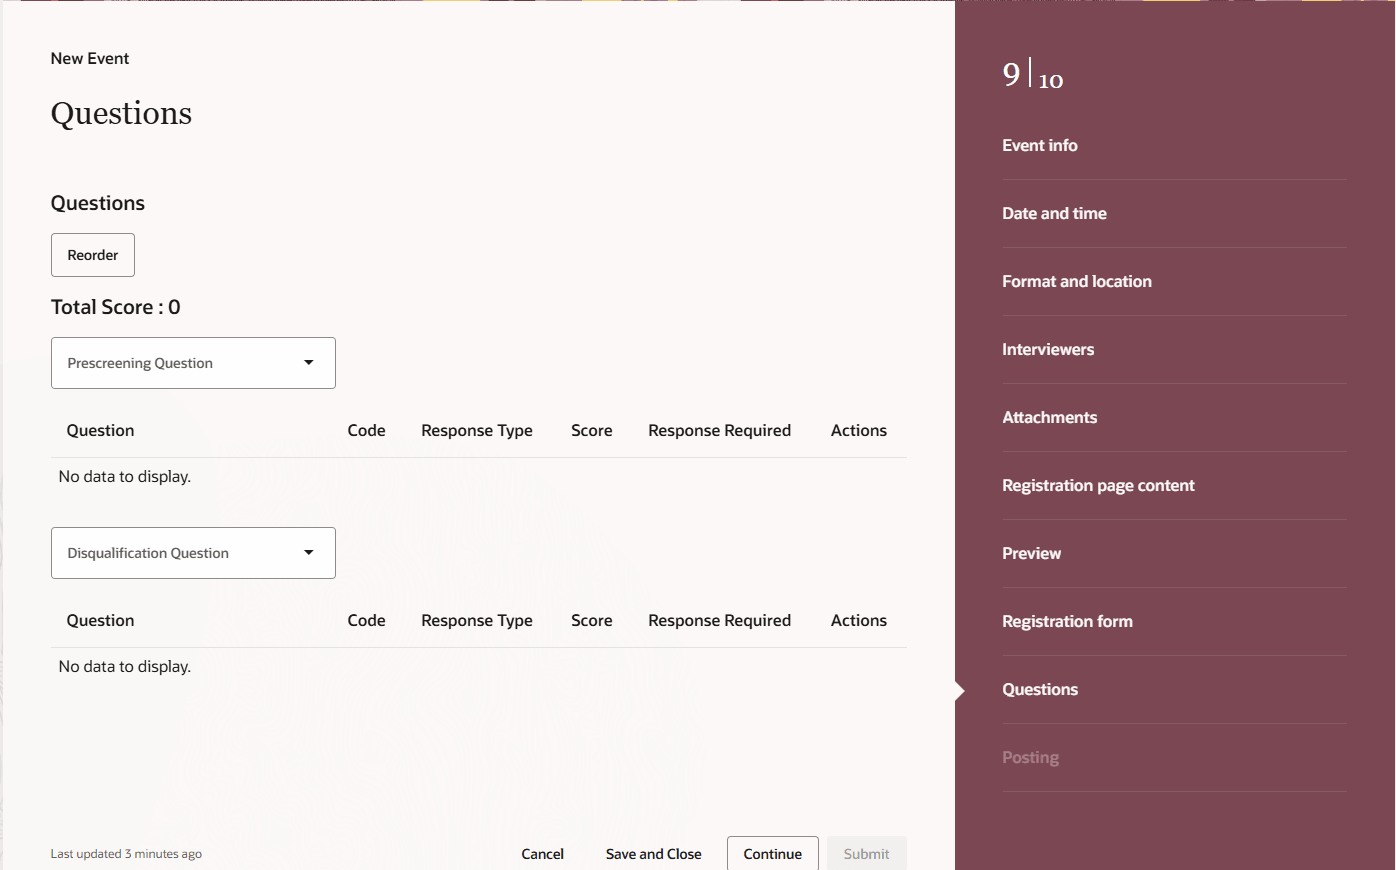
Event Registration Form Questions
They can use the Posting page to indicate when they want to the event to be posted on career sites. They've got the option to post it immediately (Post Now), or post it on a specified date (Post Later).

Posting Page
They can also indicate the specific career sites to post the event. Once submitted, they can still edit some information until the event starts.
With the new Redwood event creation flow, the user experience is greatly improved and users can now follow a step-by-step approach for creating events.
Steps to enable and configure
You need to enable these profile option to access the Redwood event creation flow.
- ORA_IRC_RECRUITING_REDWOOD_ENABLED
- ORA_IRC_EVENT_REDWOOD_ENABLED
- In the Setup and Maintenance work area, click the Tasks icon.
- Click Search.
- On the Search page, search for the task Manage Administrator Profile Values.
- Click the task name.
- On the Manage Administrator Profile Values page, search for the profile option code ORA_IRC_RECRUITING_REDWOOD_ENABLED
- In the Profile Values section, set the profile value to Y.
- On the Manage Administrator Profile Values page, search for the profile option code ORA_IRC_EVENT_REDWOOD_ENABLED
- In the Profile Values section, set the profile value to Y.
- Click Save.