Redwood Experience: Create a Campaign
Take advantage of the Redwood campaign creation flow that has been recreated in the Redwood tool set called Visual Builder Studio (VBS).
When the Redwood profile option is enabled, upon clicking the Create button from the Redwood Campaigns list page you’ll access the Redwood campaign creation flow. The New Campaign guided flow has four steps:
- Basic info
- Purpose
- Audience
- Emails
Below are the key enhancements made to the campaign creation flow in Redwood.
Basic info
In the Basic info step, you provide basic info about the campaign such as the name, number, description, and who will work on the campaign.
Auto-numbering is available to generate the campaign number. This is new in Redwood. When your admin enables auto-numbering, the Campaign Number field doesn't appear. The number is created when saving the campaign as Draft. As a best practice, it's recommended to enable auto-numbering. For details, see the Steps to Enable.
The person who creates the campaign is the campaign owner. The owner can’t be deleted. You can add co-owners who will collaborate on the campaign.
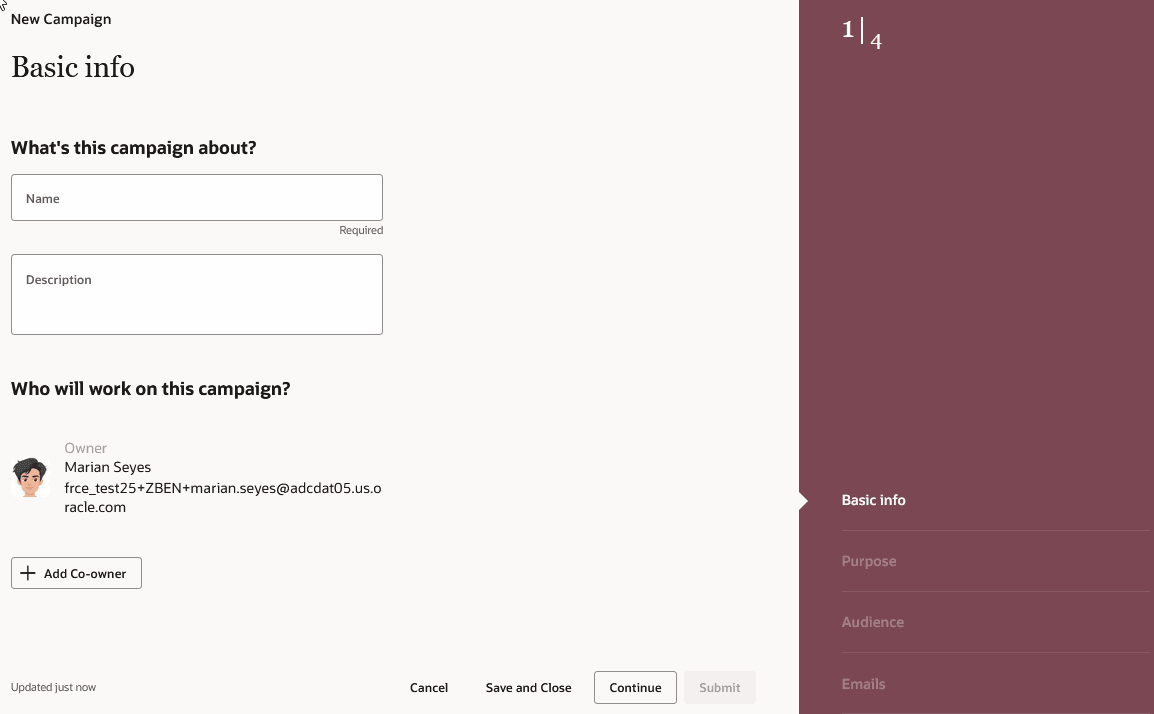
Basic Info Step in the Campaign Creation Flow
Purpose
In the Purpose step, you select the purpose of the campaign, define its duration (one-time or ongoing), and select the job requisitions you want to associate with the campaign.
The following purpose values have been renamed:
- Collect Responses (called Respond to Request in Responsive UI)
- Generate Job Applications (called Apply to Job in Responsive UI)
- Generate Referrals (called Refer Job in Responsive UI)
When you select the Collect Responses purpose, you create the questions you want to ask and add the responses.
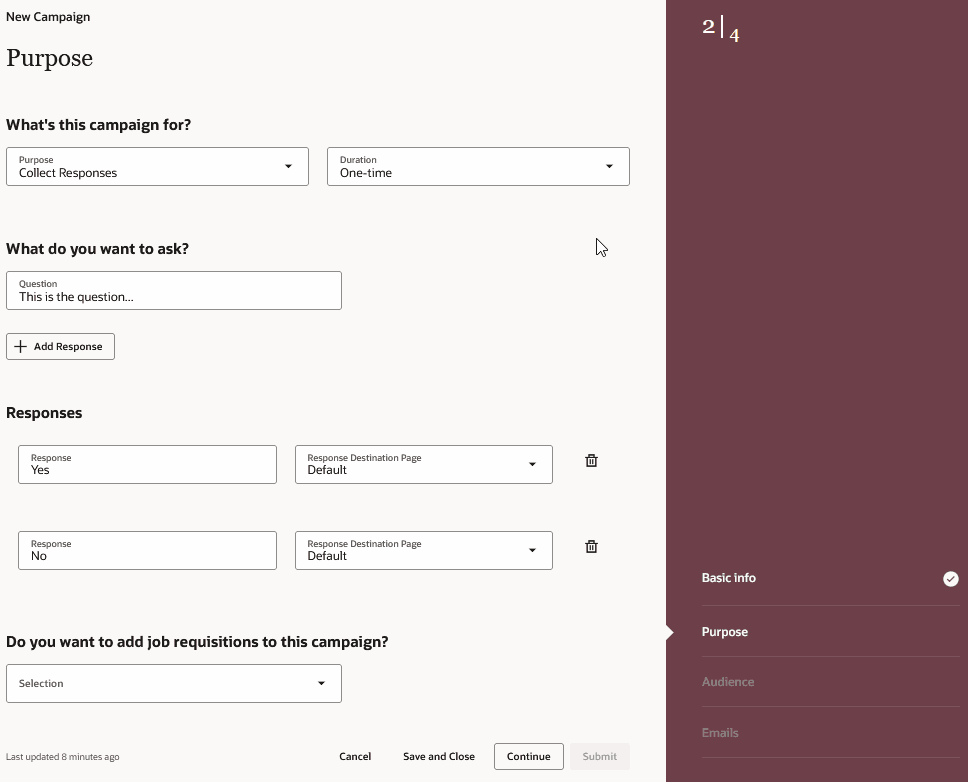
Collect Responses Campaign
When you select the job requisition you want to associate with the campaign, you can select an existing requisition or use job requisition criteria (Location and Job Family attributes).
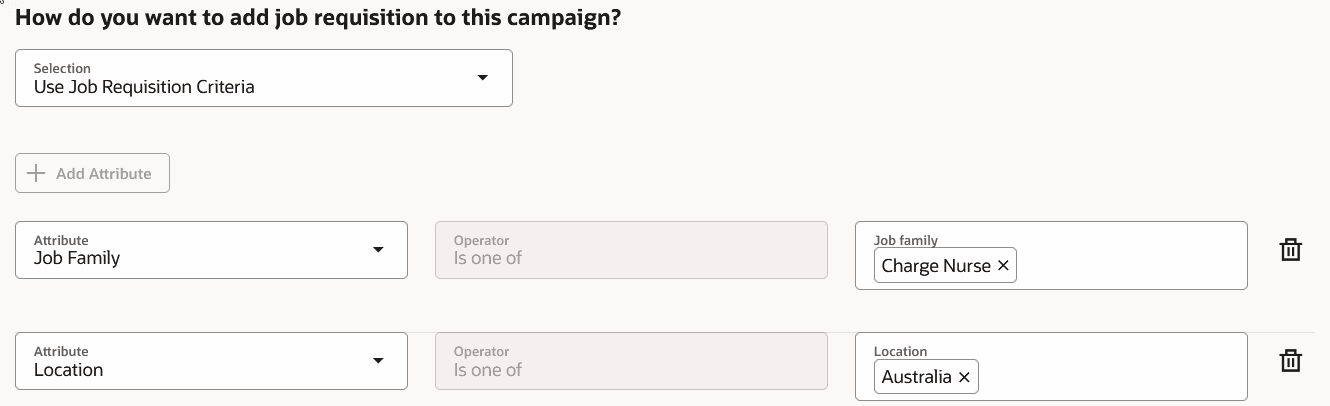
Requisition Attributes
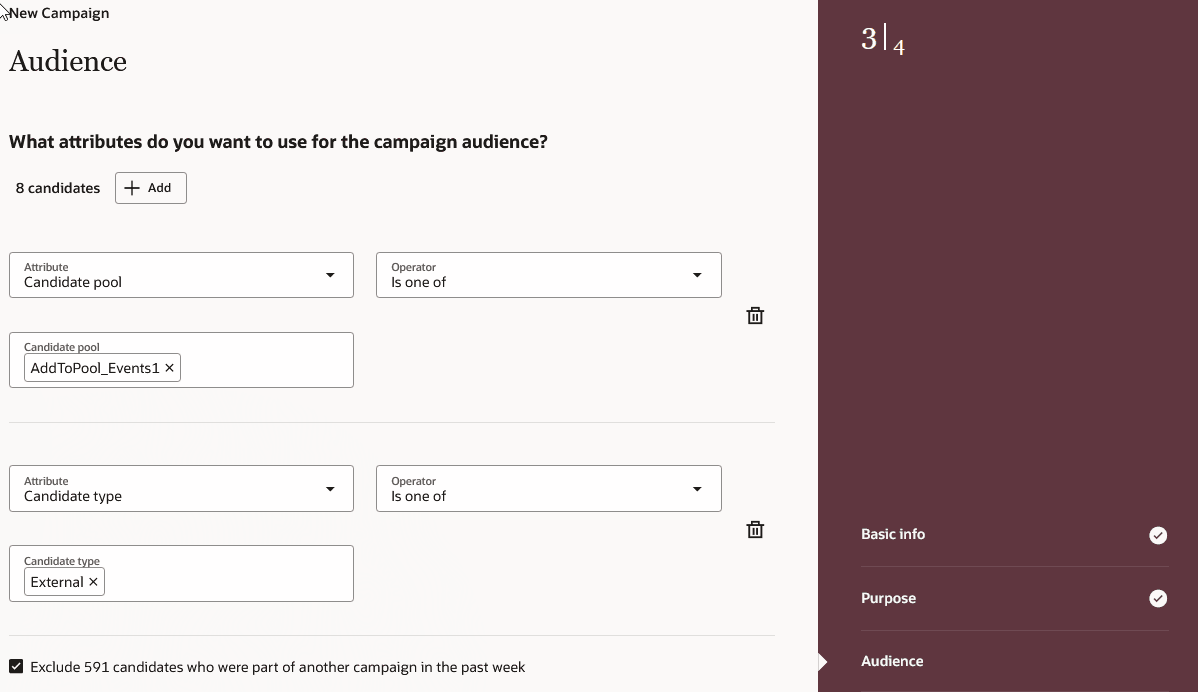
Audience
In the Audience step, you select attributes that help define the audience for the campaign. This is done while creating the campaign (you don’t need to navigate away from the creation process).
Campaign Audience
Use the Marketing communications attribute for candidates who didn’t have the opportunity to opt in to receive marketing communications (maybe because they came through an agency or employee referral or using integration).

Marketing Communications Attribute
When you use the Saved search attribute, you can only select saved searches you created in Redwood. Your Saved Searches from Responsive UI won't carry forward into the Redwood user experience.
Note: Don't delete your saved search before all campaign emails are sent. If you do, future emails won't be sent.

Saved Search Attribute
Use the checkbox Exclude n candidates who were part of another campaign in the past week to exclude a specific audience from the campaign you're creating. This is useful if you don’t want candidates who were included in another campaign recently to receive campaign emails. The display of the check box is controlled by a setting. This setting exists in Responsive UI but was renamed for clarity. For details, see the Steps to Enable.
As soon as you select one filter attribute, the estimated number of audience members is displayed in the Audience breakdown section. Charts showing the breakdown of the top locations, top employers, and top degrees of the target audience are also displayed. The audience count isn't final until the primary email has been sent.
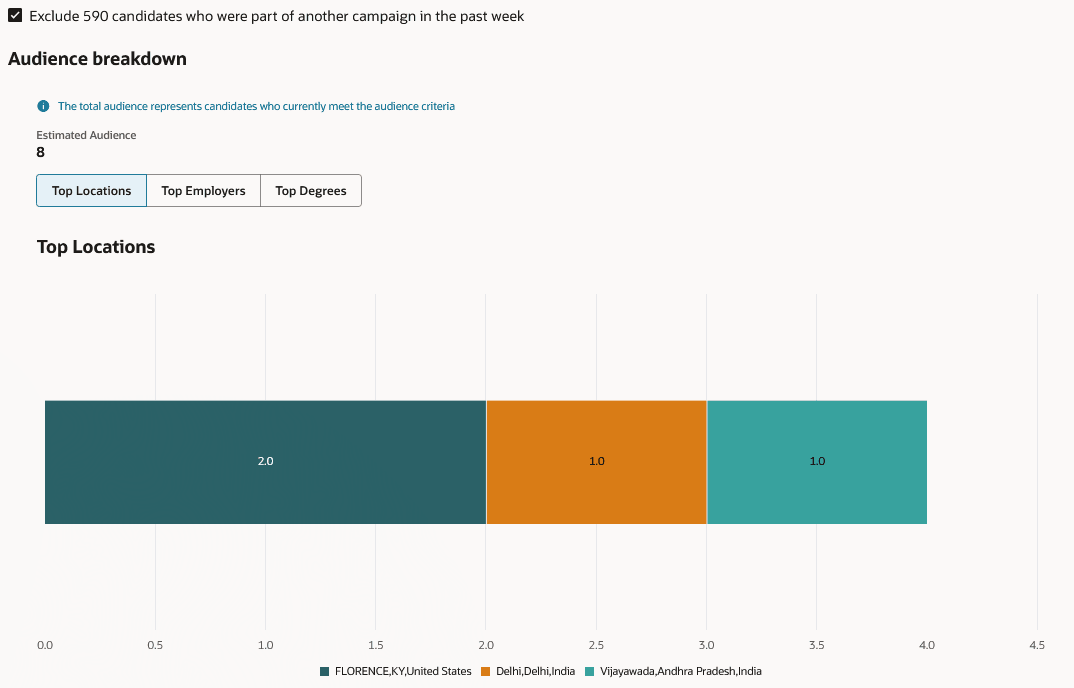
Audience Breakdown
Emails
In the Emails step, you create emails for the campaign, that is the primary email sent to the entire audience and follow-up emails. For follow-up emails, you can send them to the entire audience or segments of the audience:
- Primary Email:
- Primary email opened
- Primary email not opened
- Audience activity:
- Applied to job
- Didn’t apply to job (new in Redwood)
- Referred candidate
- Didn’t refer candidate (new in Redwood)
- Responses:
- Yes
- No
- No response selected by recipient (new in Redwood)
Once you’ve entered email details, you can select these actions from the Actions menu:
- Use the Design Email Content action to open the email editor where you can select a template for the emails or create emails from scratch.
- Use the Sent email test action to preview how the email looks like before you activate it. You can send a test email to a maximum of 5 people.
- Use the Schedule action to schedule the delivery of the email by entering a date and time. You can only schedule follow-up emails once the primary email is scheduled.
When you click Submit, a campaign with the Draft status is created. Next step is to activate the campaign from the Campaigns list. The campaign status is then changed to Scheduled and you won't be able to further edit the details and audience.
When you're viewing a campaign in Scheduled, In Progress, Completed, Closed, or Canceled status, the information is contained into 4 tabs:
- Basic Info
- Audience
- Emails
- Metrics
The campaign performance is all gathered on the Metrics tab (compared to Responsive UI where it's spread between the Overview tab and Emails tab).
With the new Redwood campaign creation flow, the user experience is greatly improved and users can quickly create campaigns.
Steps to enable and configure
By default, this profile option is enabled to create campaigns in Redwood. If you don't want to use the Redwood user experience, you need to disable the profile option. For details, see How do I enable a profile option?
- ORA_IRC_CAMPAIGN_REDWOOD_ENABLED
For details on how to set auto-numbering to generate the campaign number, see How do I set the campaign number generation method?
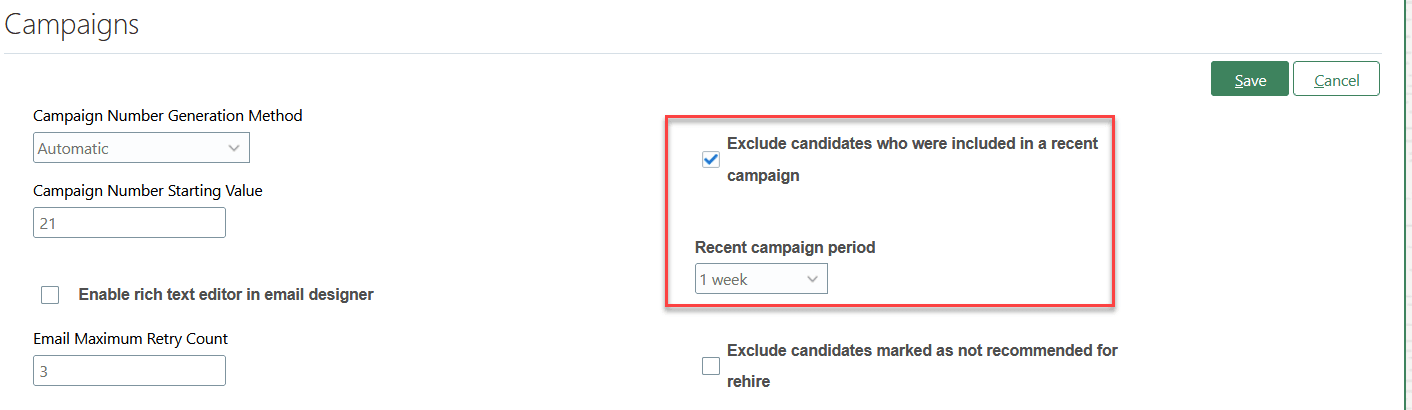
These two settings to configure campaigns in the Setup and Maintenance work area have been renamed:
- Enable Do Not Send Rule is now called Exclude candidates who were included in a recent campaign.
- Don't send emails to audience members who already received emails in the last period is now called Recent campaign period.
Settings When Configuring Campaigns
Tips and considerations
Campaigns which are created in the Responsive UI and are in Draft status will need to have the audience criteria configured in Redwood, even if the audience was configured in the Responsive UI.
Campaigns which are created in the Responsive UI and are in any status other than Draft will show the audience criteria in a table format which is different from audience criteria configured in Redwood. No audience breakdown will be available.
Social Media links and landing pages are not part of the Redwood experience.
The Campaign Goal and Goal Label fields are not part of the Redwood experience.