Configuration UI Preview
This feature provide you with a preview into the upcoming new UI look and feel. This preview is focused on the conversion of the common Power Data UIs in the system to the new more modern Configuration UI equivalent. For this preview, the legacy Cooperative Routing Power Data section of the application has been recreated with the new UI look and feel. The preview version of the new UI for the Cooperative Routing Power Data can be found by navigating to Cooperative Routing > Configuration. The new Configuration UI provides you with a number of improvements including better filter, a flatter non-hierarchical view to the configuration data areas, and a more spreadsheet like view to the data - for viewing, editing and deleting records.
When you navigate to the new Configuration UI - Cooperative Routing > Configuration - you will immediately notice the difference between the legacy Power Data UIs and the new more modern UI.
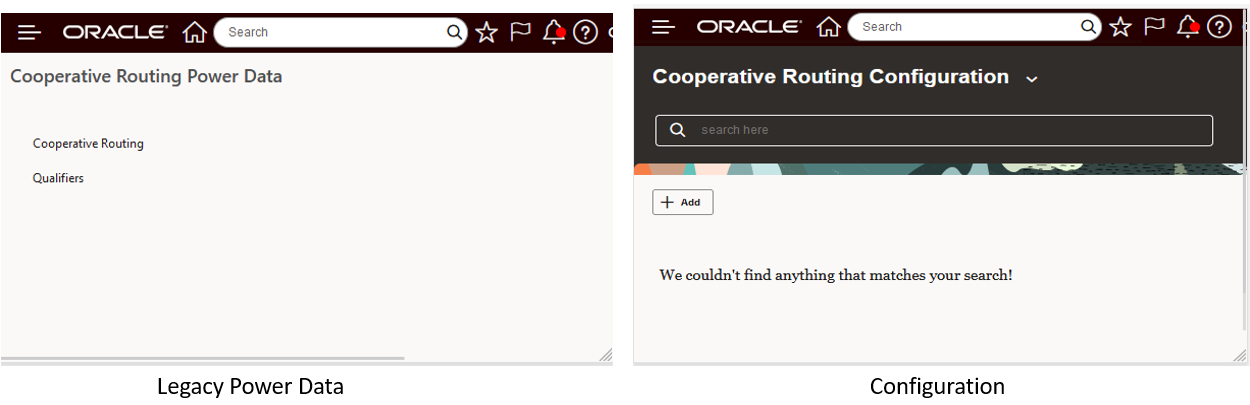
Comparison of Legacy Power Data Screen to New Configuration UI
The new UI has a number of features that simplify the management of the configuration data. At the top of the screen you have access, via the drop down, to all of the configuration data for the object being configured, in this case, Cooperative Routing. For Cooperative Routing there are four configuration data items available, the legacy Power Data screens has these items grouped into two intermediate groupings (Cooperative Routing and Qualifiers), while the Configuration UIs provides direct visibility and access all the configuration items.
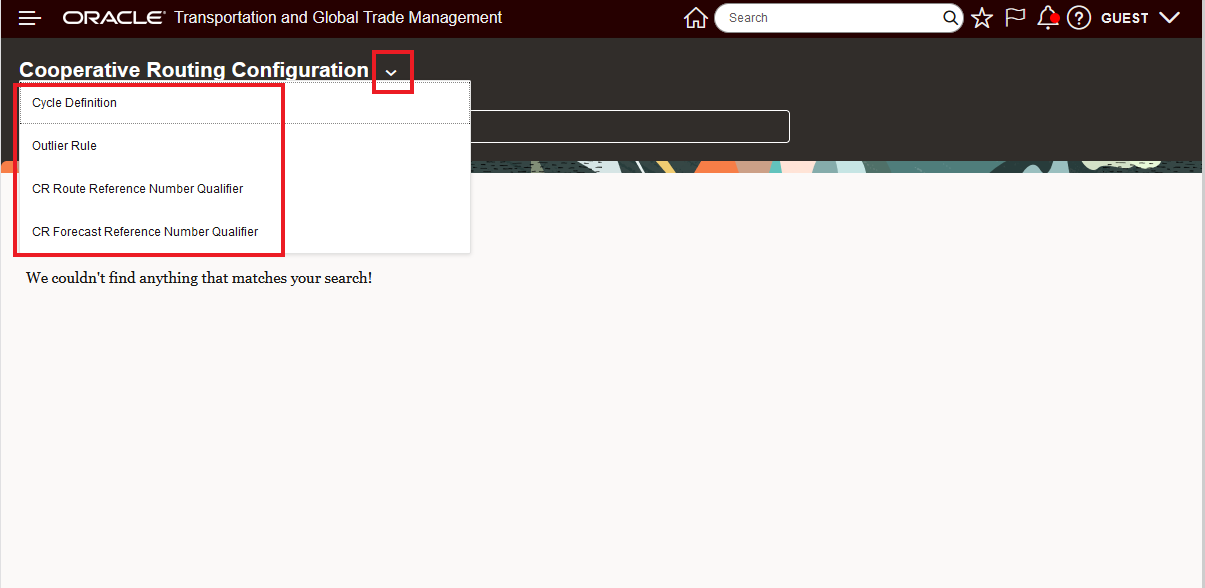
Cooperative Routing Configuration - Drop Down List
Continuing on with the example, the Cycle Definition configuration area will be selected to highlight the benefits of the Configuration UI.
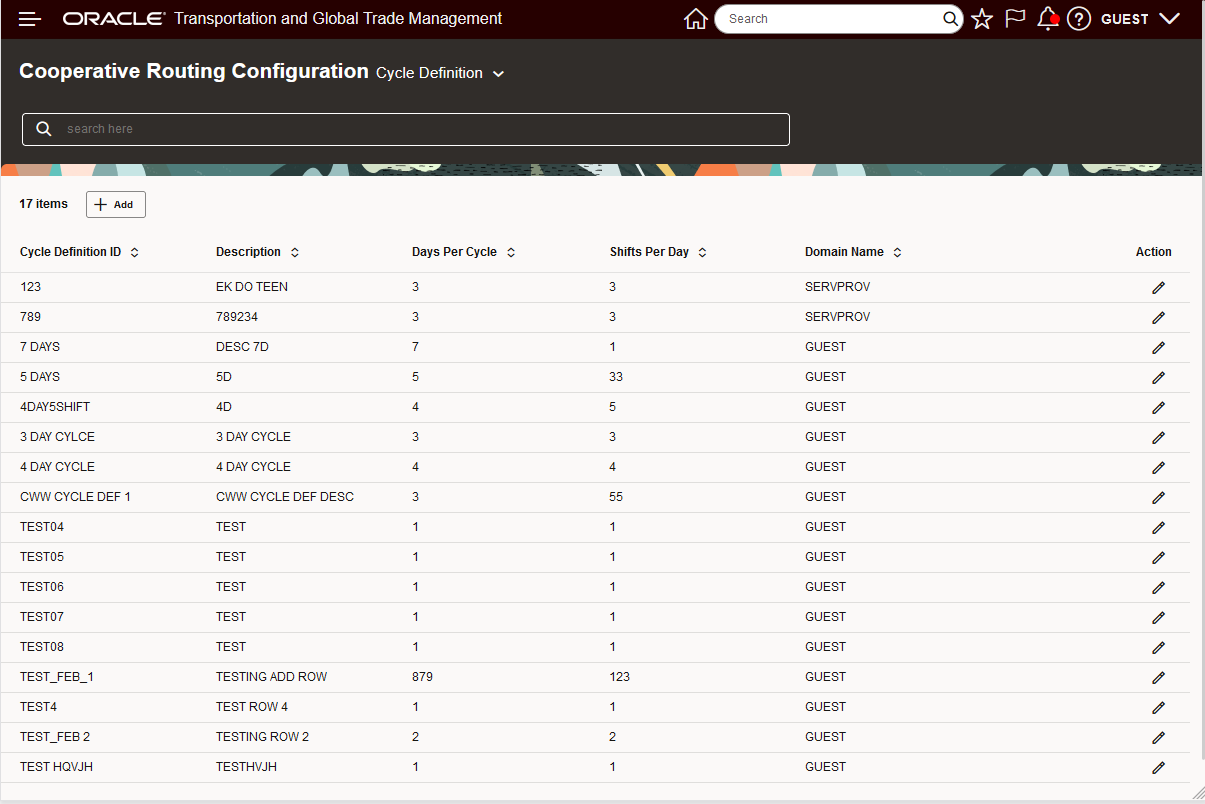
Configuration - Cycle Definition Configuration Data
At the top of the screen the "search here" allows you to easily filter the results provided in the list. In this example, the list is filtered to show all the records with the letters "test".

Filter Example for "test"
You can further refine the filter by adding additional criteria, in the example below the addition filter criteria of "06" was added, limiting the result to just 1 row.

Filter Criteria for "test" and "06"
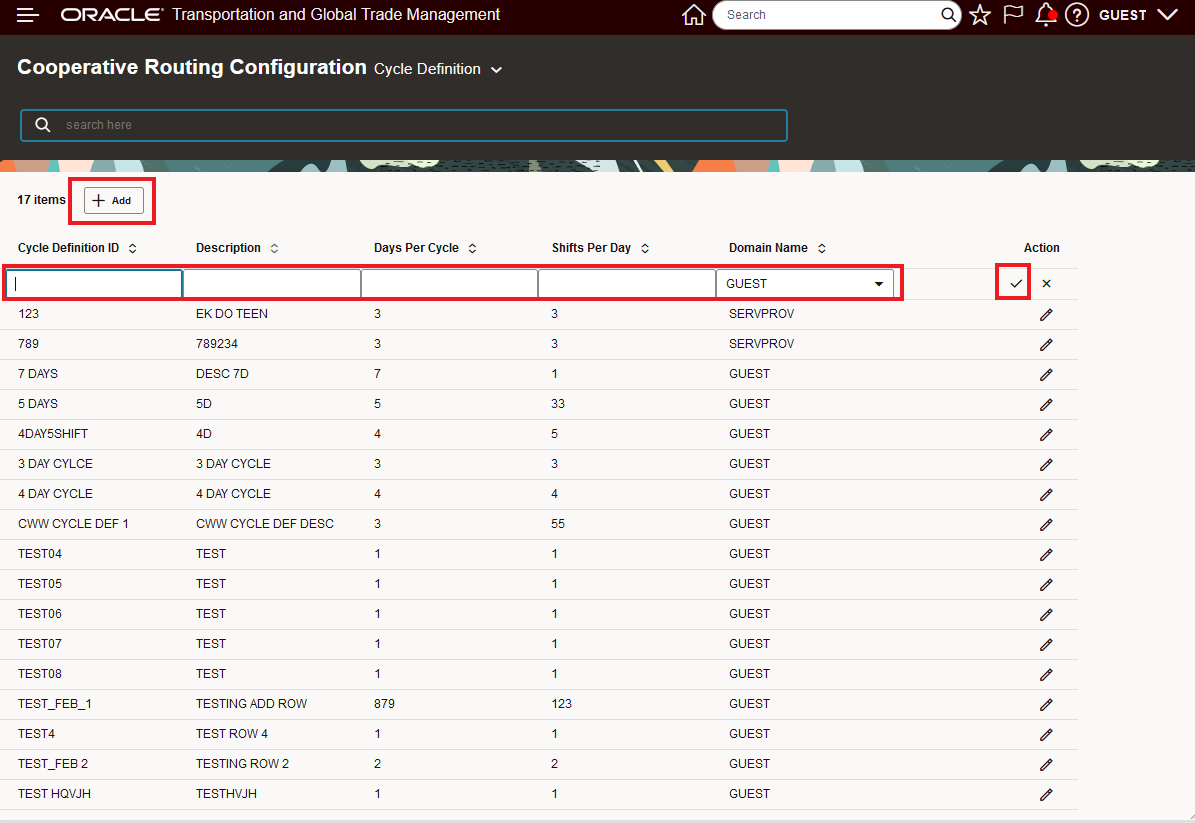
In the example below, the +Add option is used to insert a new entry - note that this option handles the add in a row entry fashion vs opening a new dialog box. To add a new record you select +Add, enter the data in the row and then select the check mark when done.
Add Example Row Based Record Addition
Below is an example of a new record being entered.
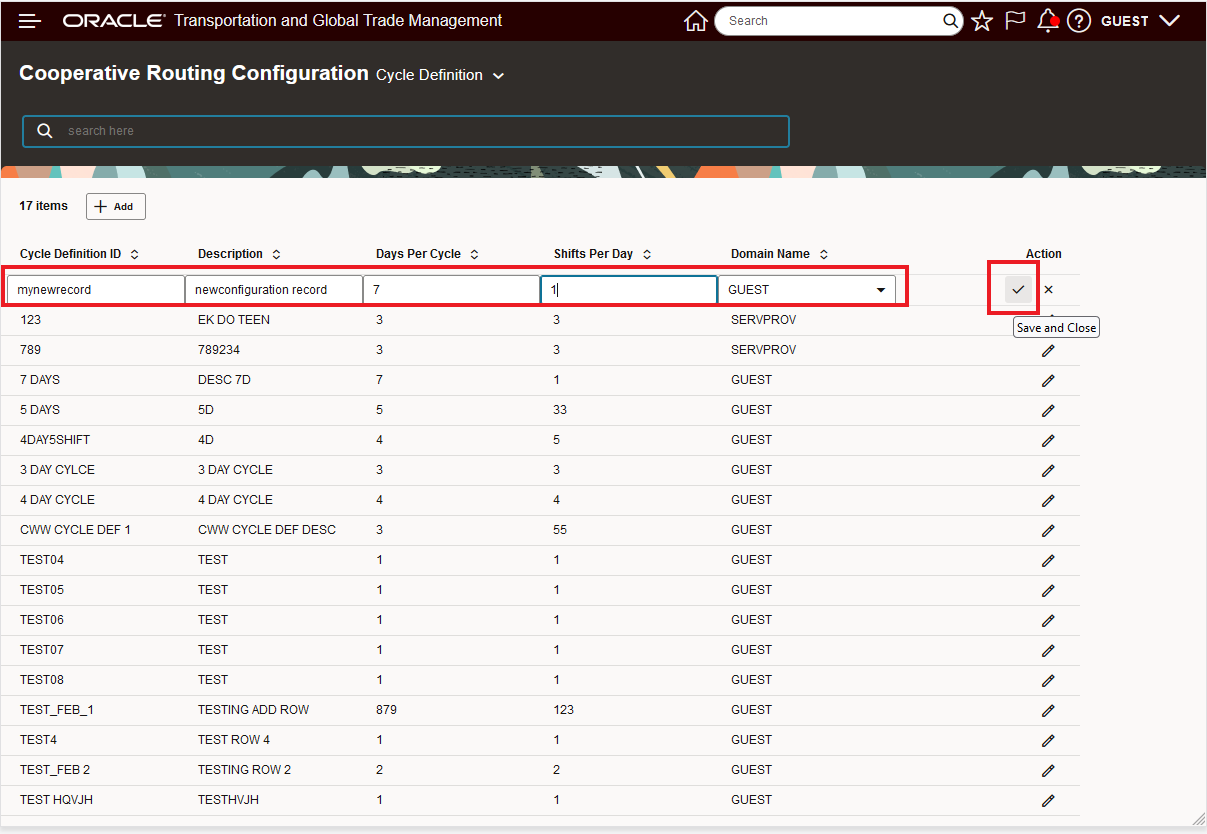
Data Entered for New Record - Ready to Save and Close
When Save and Close is selected you are asked to confirm the add - as shown below.
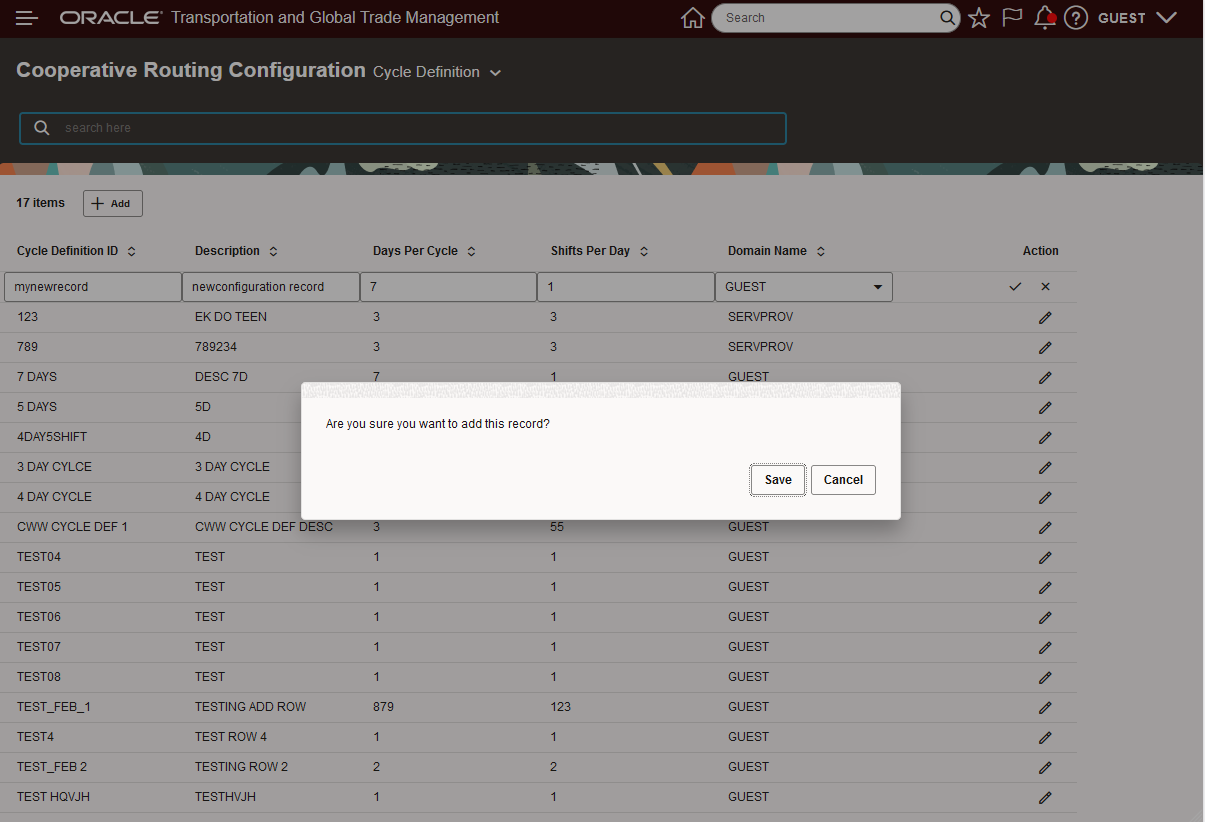
Confirm the Save and Close for Add
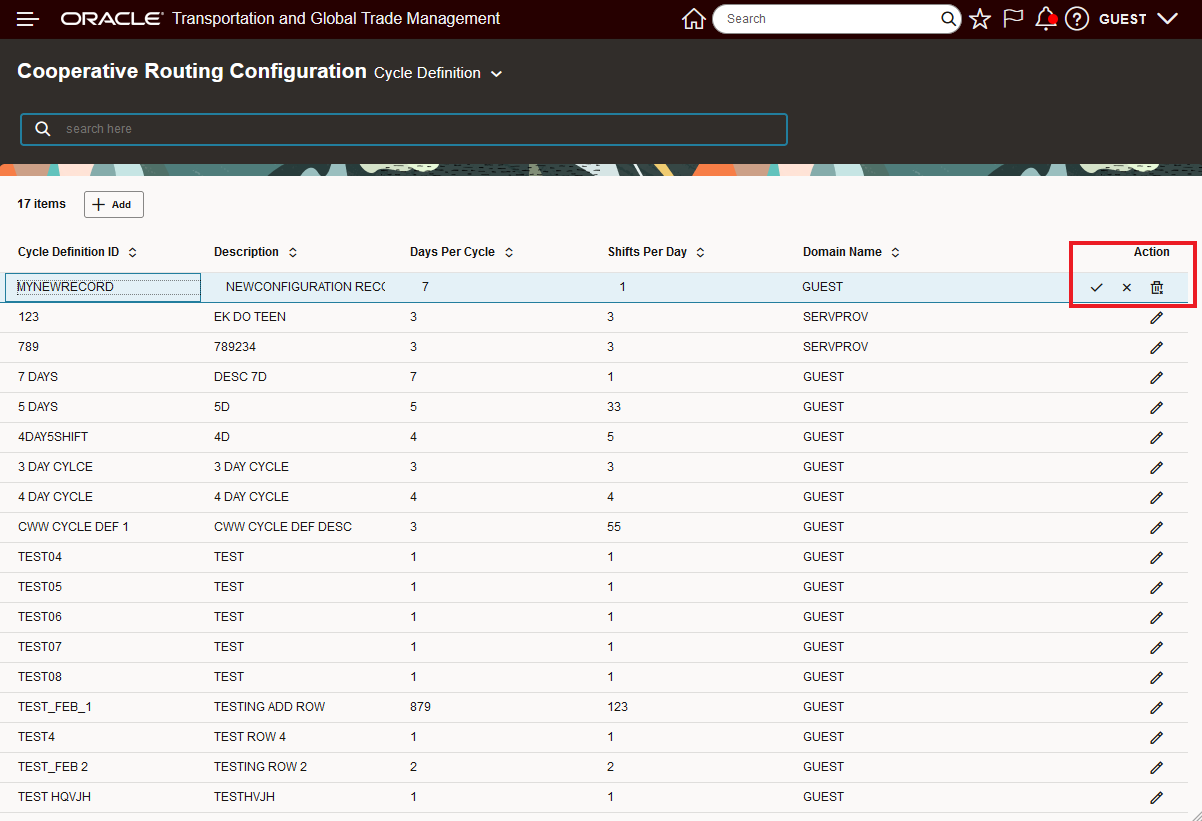
Below is the newly added record.

Added Record Result
The last item to highlight is the Action item. You initiate the actions (and edit) for a row by selecting the pencil icon. Available actions include save your edits (check icon), cancel (X) and delete the row (trash can).
Action Options - Edit, Cancel, Delete
Below is an example of how you can easily update any of the fields for one of the rows. In this case the Description field has been updated. The process starts by selecting the pencil. Then going to field to be updated an updating the data. Once all the edits are complete the changes will be saved by selecting the check icon which will Save and Close.
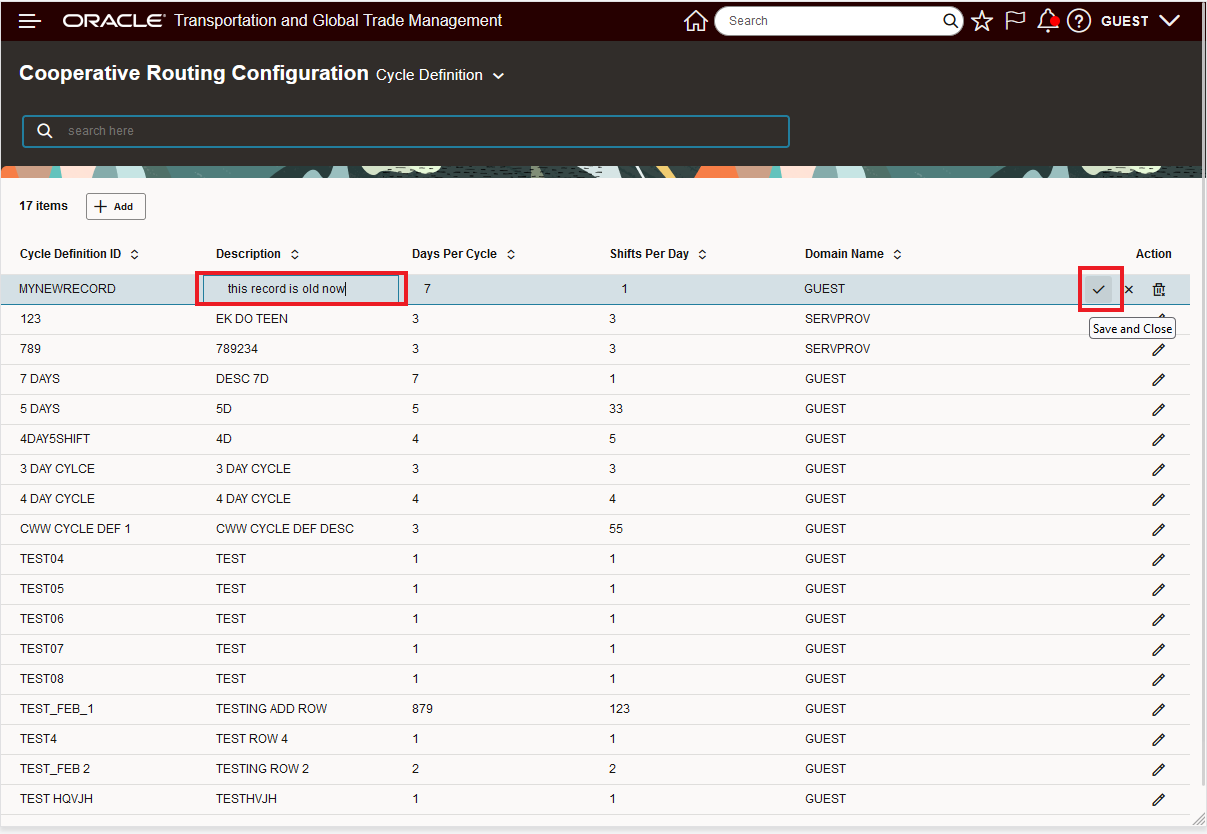
Edit the Field(s) in This Example the Description Field is Modified
Below is the saved result from the edit above.
Saved Result from the Edit of the Description Field
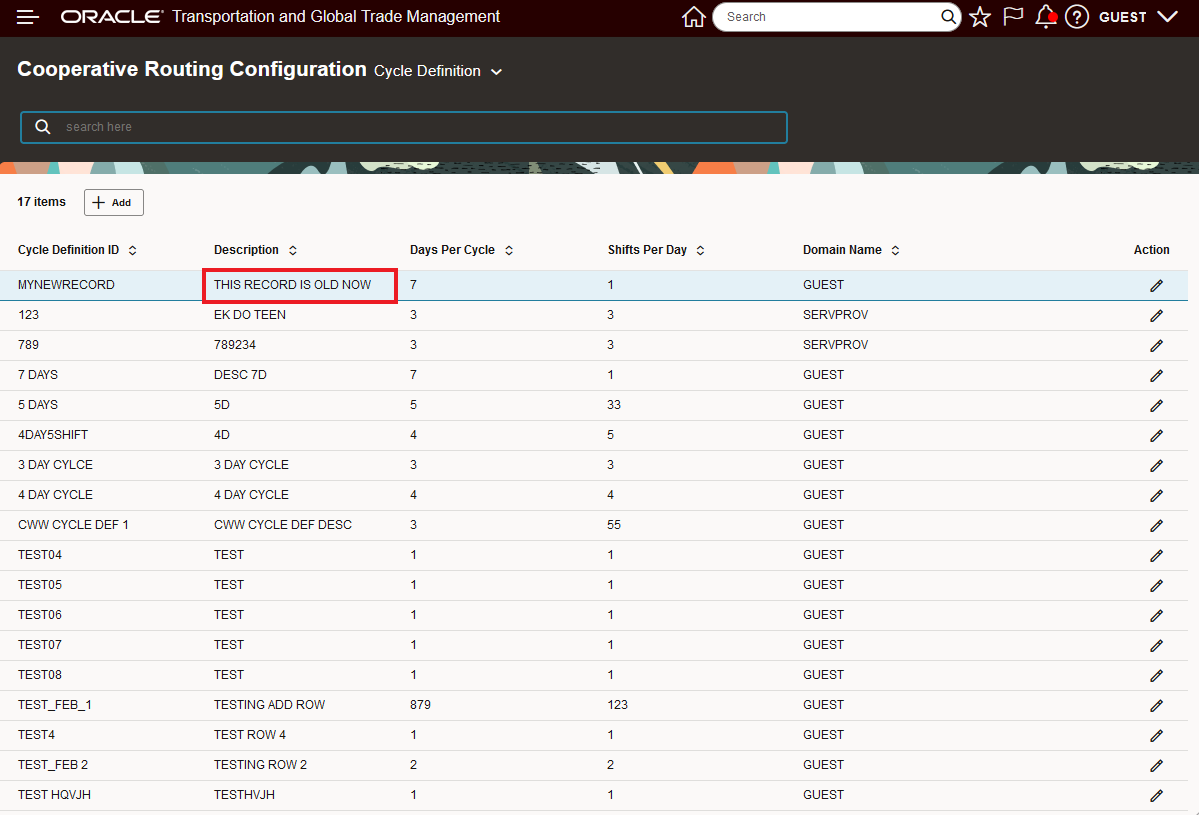
In the series of screen shots below, the delete action is run against the record added and modified above.
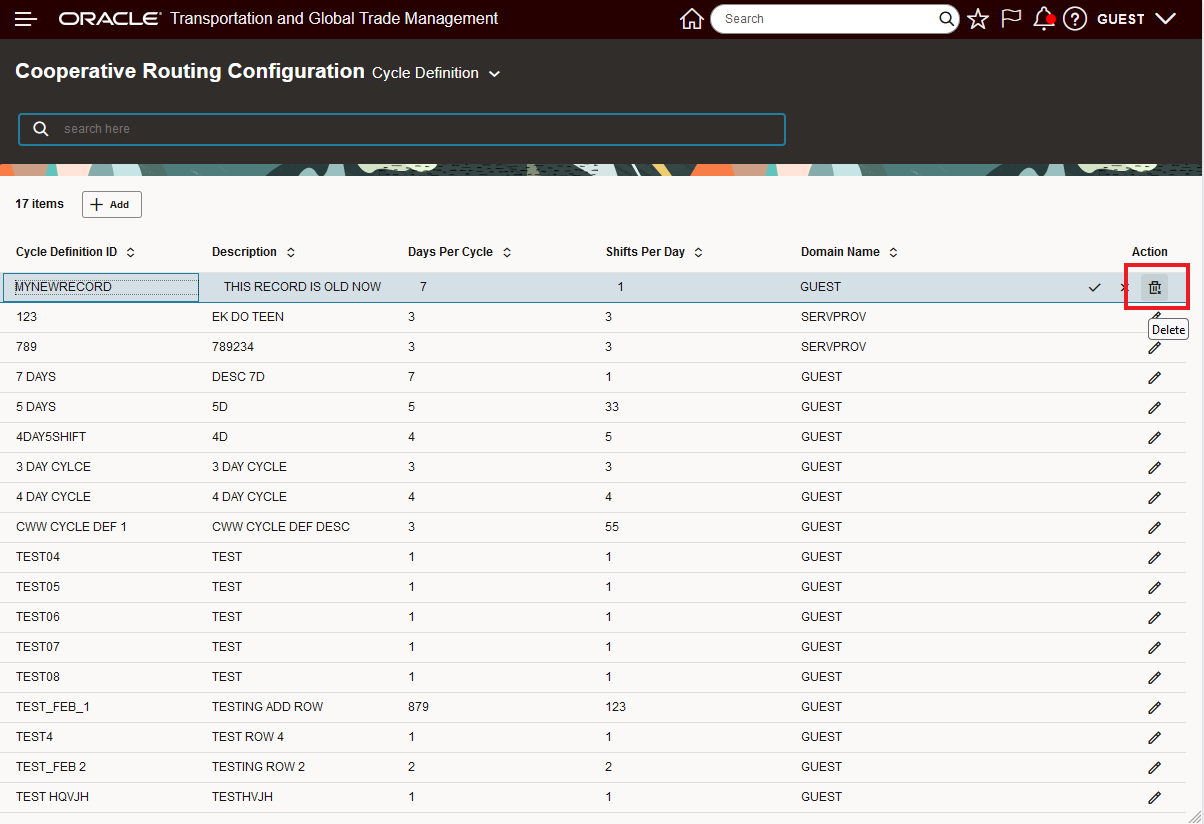
Initiate Delete by Selecting the Trashcan Icon
After the delete is initiated, there is a confirmation step shown below.
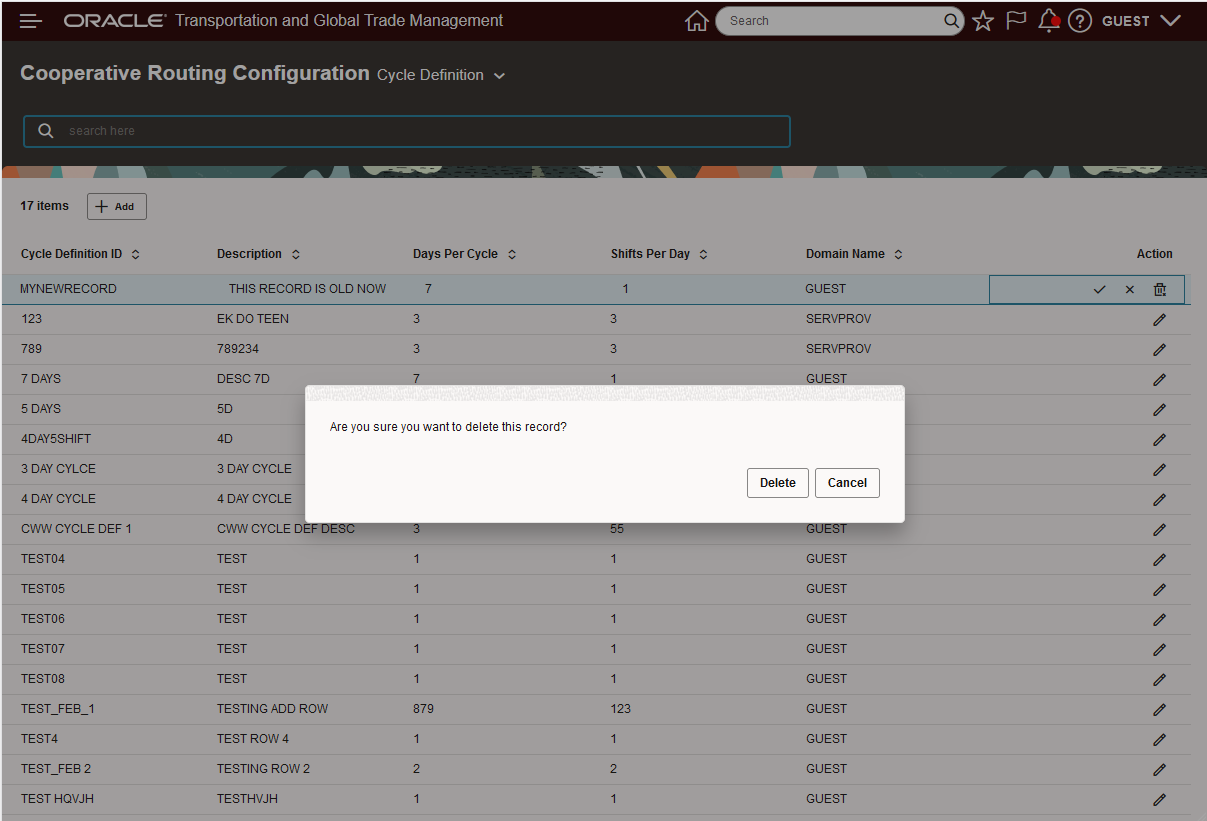
Confirm Delete
The result of the delete is below.
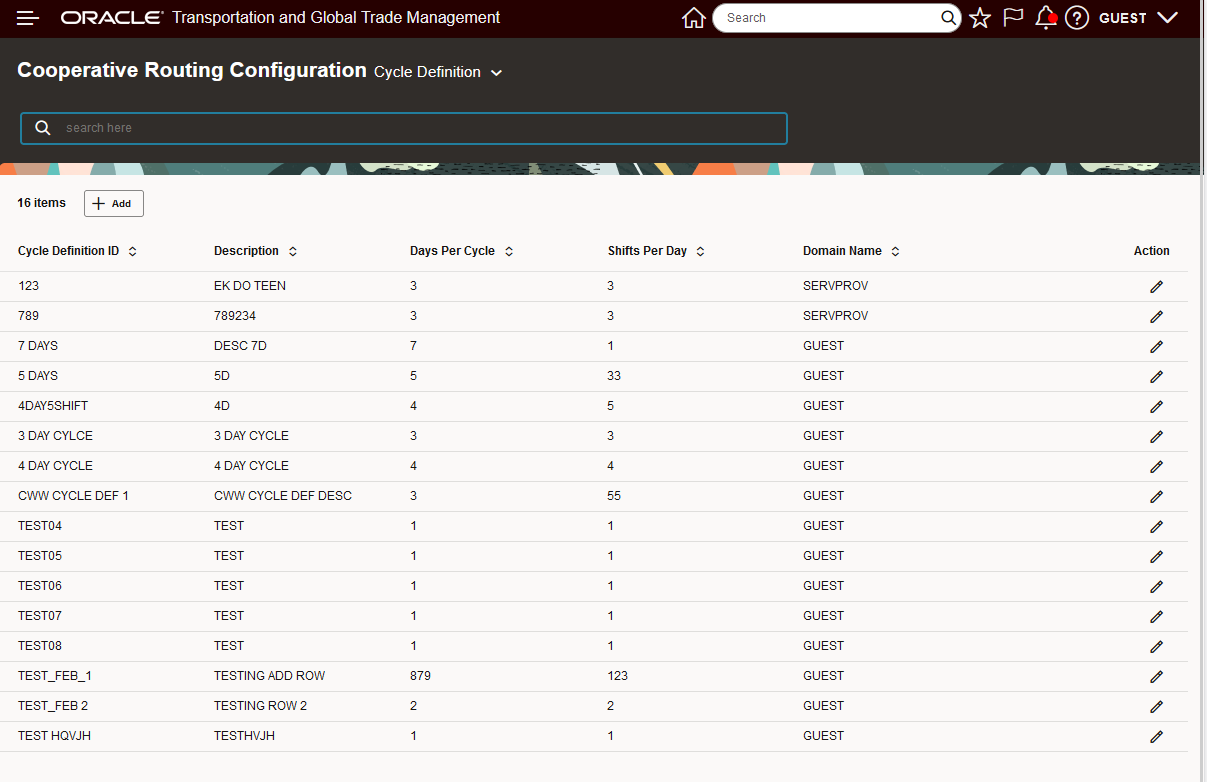
Record Deleted
One final item to point out, you can sort the results provided by the column headings. In the example below the results have been sorted by the description field.
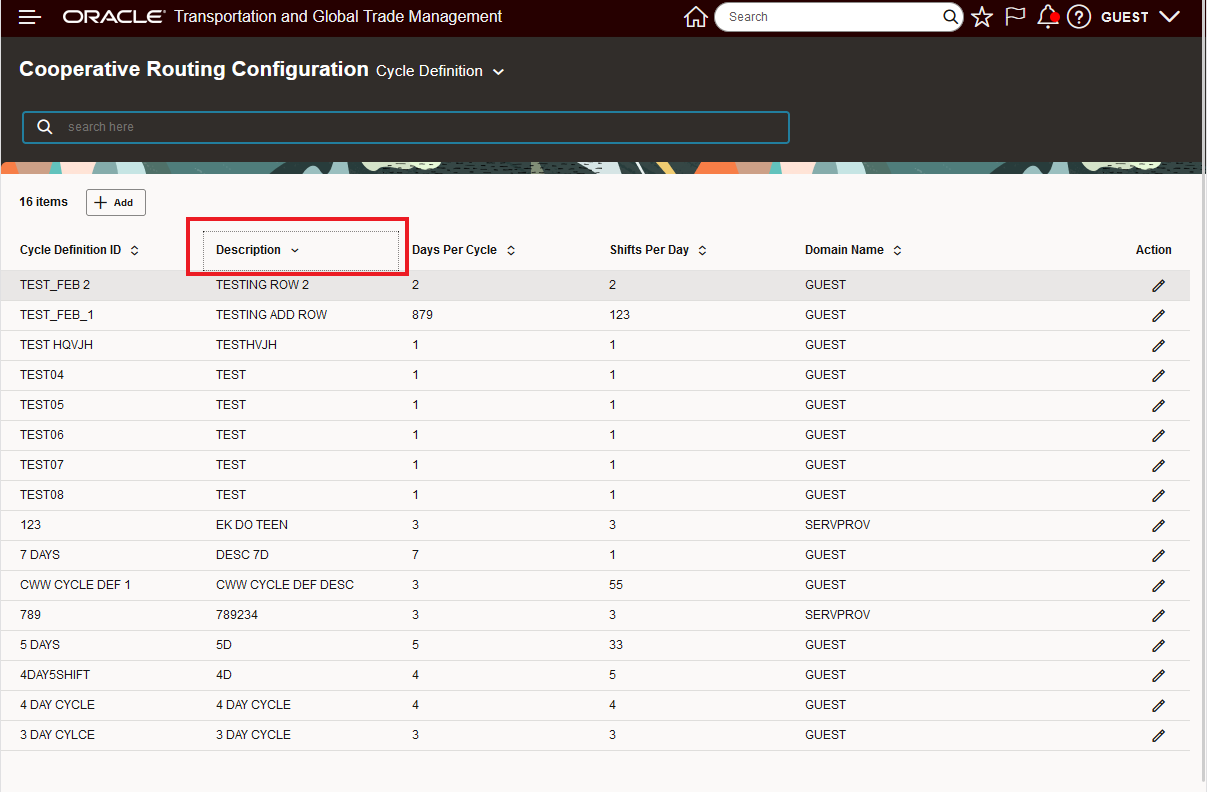
Sorted Results
Provides a preview for the improved modern Redwood UI - look, feel and navigation.
Steps to Enable
You don't need to do anything to enable this feature.
Tips And Considerations
This feature is intended to provide you with an early preview to the exciting UI changes that will be coming in future releases. We welcome your input regarding usability and or improvements suggestions.
Note, for this preview the legacy Cooperative Routing component was selected assuming no actual operational usage of this component i.e., we felt that this area would be a safe area for you to add, delete and modify data as part of your investigation of the new Configuration UI.