Perform Quick Receipt in Purchase Order Detail UI
As a warehouse receiving user, you can bulk receive inventories directly from Purchase Order web UI without going through the hassle of scanning LPNs, items, and adding quantities from the RF interface. This helps your warehouse user to ensure a faster, seamless and accurate bulk receiving process, thereby enhancing warehouse productivity. Also, provides you with an option to either receive or receive and putaway in one single operation such that you can quickly receive inventory from trusted suppliers.
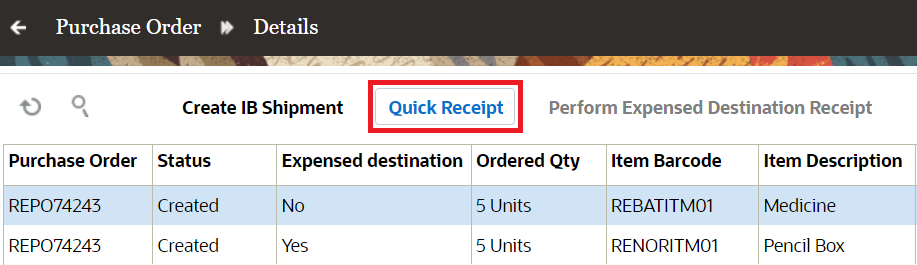
In 24C, you can now perform quick receiving of inventory shipped from your trusted suppliers. A new Quick Receipt action button has been introduced in Purchase Order web UI that helps you to receive PO details. By default, this action button is disabled. On selecting one or multiple PO details with the Expensed Destination flag set to No/Blank, the system enables the “Quick Receipt” action button. If the Expenses Destination flag set to No/Blank, the action button is enabled to perform quick receipt.
Quick Receipt
QUICK RECEIPT
You can now receive multiple PO records from multiple headers at one go via PO details UI without hassling to scan the LPNs and perform RF PO based receiving or create IB Shipment.
The system auto generates an ASN and an LPN number per every quick receipt based on the Sequence counter configurations of Blind LPNs and Blind Receiving Inbound Shipment respectively. After successful completion of receipt, corresponding IHT is captured.
NOTE: The Quick Receipt action button is access controlled and requires enabling the permission “purchase order hdr/Can perform Quick Receipt”.
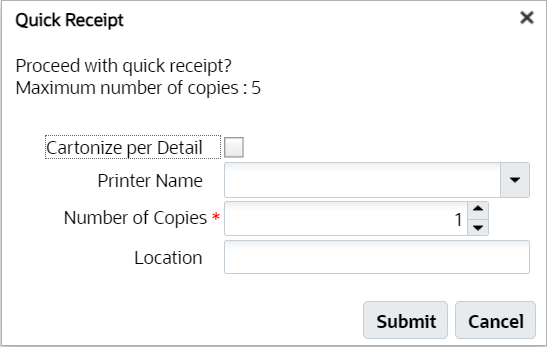
When you perform a quick receipt for a PO detail whose Expensed Destination flag is set to NO, the system prompts you with a confirmation pop-up providing you with an option to create LPN per details, into a single LPN per receipt and print labels with following new fields:
- Cartonize per Dtl: Enabling this checkbox allows you to create one LPN per PO detail. Disable/uncheck will create a single LPN per receipt (all selected PO details go into single LPN).
Quick Receipt
- Printer Name: Select the printer’s name to print the LPN labels after receipt.
NOTE: Here, the LPN will be received first, followed by LPN label generation.
- Number of Copies: Enter the number of copies.
- Location: If you choose to proceed without providing the location details, the system will receive the LPN but will not putaway to a location and LPB labels are not generated.
These fields are non-mandatory. You can proceed with receiving without providing the values in the above fields.
Following are the new messages introduced during Quick Receipt:
- On successful receiving, a confirmation message “LPN %s received” is displayed.
- On successful receiving with Location, a confirmation message. "LPN %s received and located" is displayed. If the receiving with location but fails to putaway, then system displays “LPN %s received, putaway failed” message.
Steps to Enable
You don't need to do anything to enable this feature.