Redwood Experience for Refund History and Print Deposit Slip
The Redwood Experience user interface is now available for the Refund History and Print Deposit Slip pages, featuring an enhanced look and feel of these pages for the Permits, Planning and Zoning, and Business Licenses offerings.
On the Refund History page, new search and filter options allow users to locate refunds by reference ID, amount, payment method, and status, increasing operational efficiency. The new look provides a view for initiating, processing, voiding, and printing refunds. Select a refund to view additional details on the Refund Detail drawer.
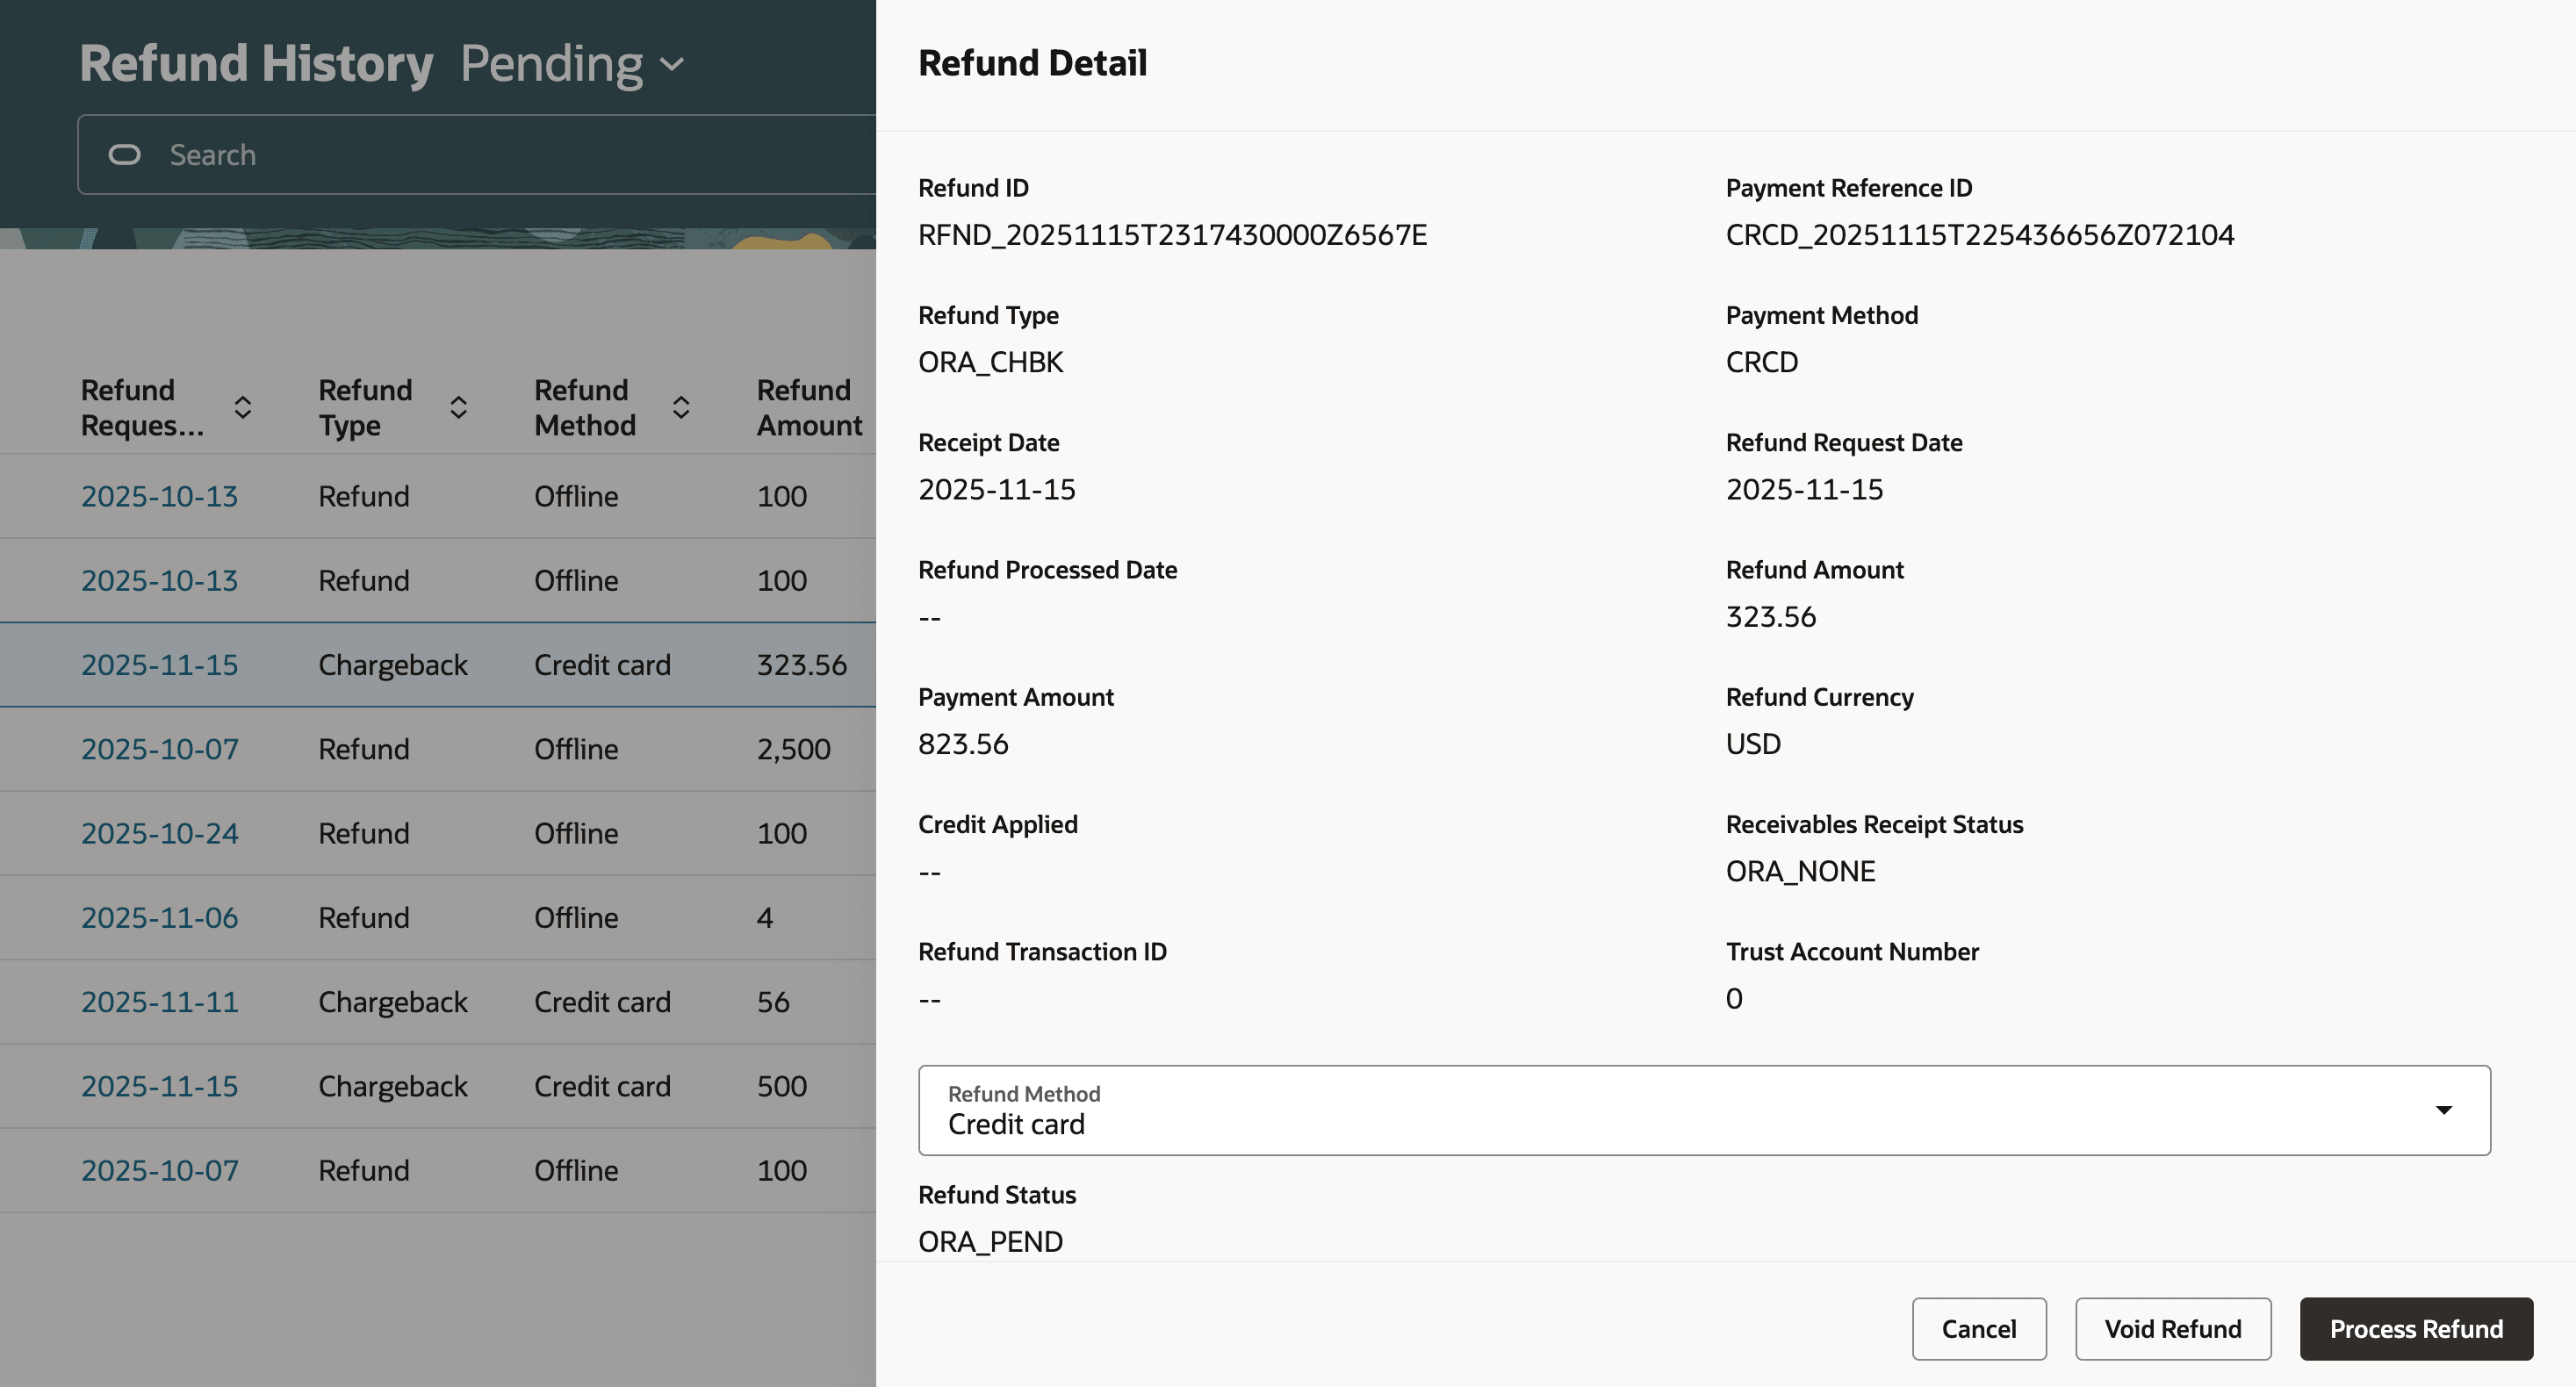
Refund History Detail drawer
Agencies that collect payments use deposit slips to deposit the money collected in the form of cash and checks into the agency's bank account. The Print Deposit Slip page enables easy printing for Cash, Check, and Cashier's Check deposit types.
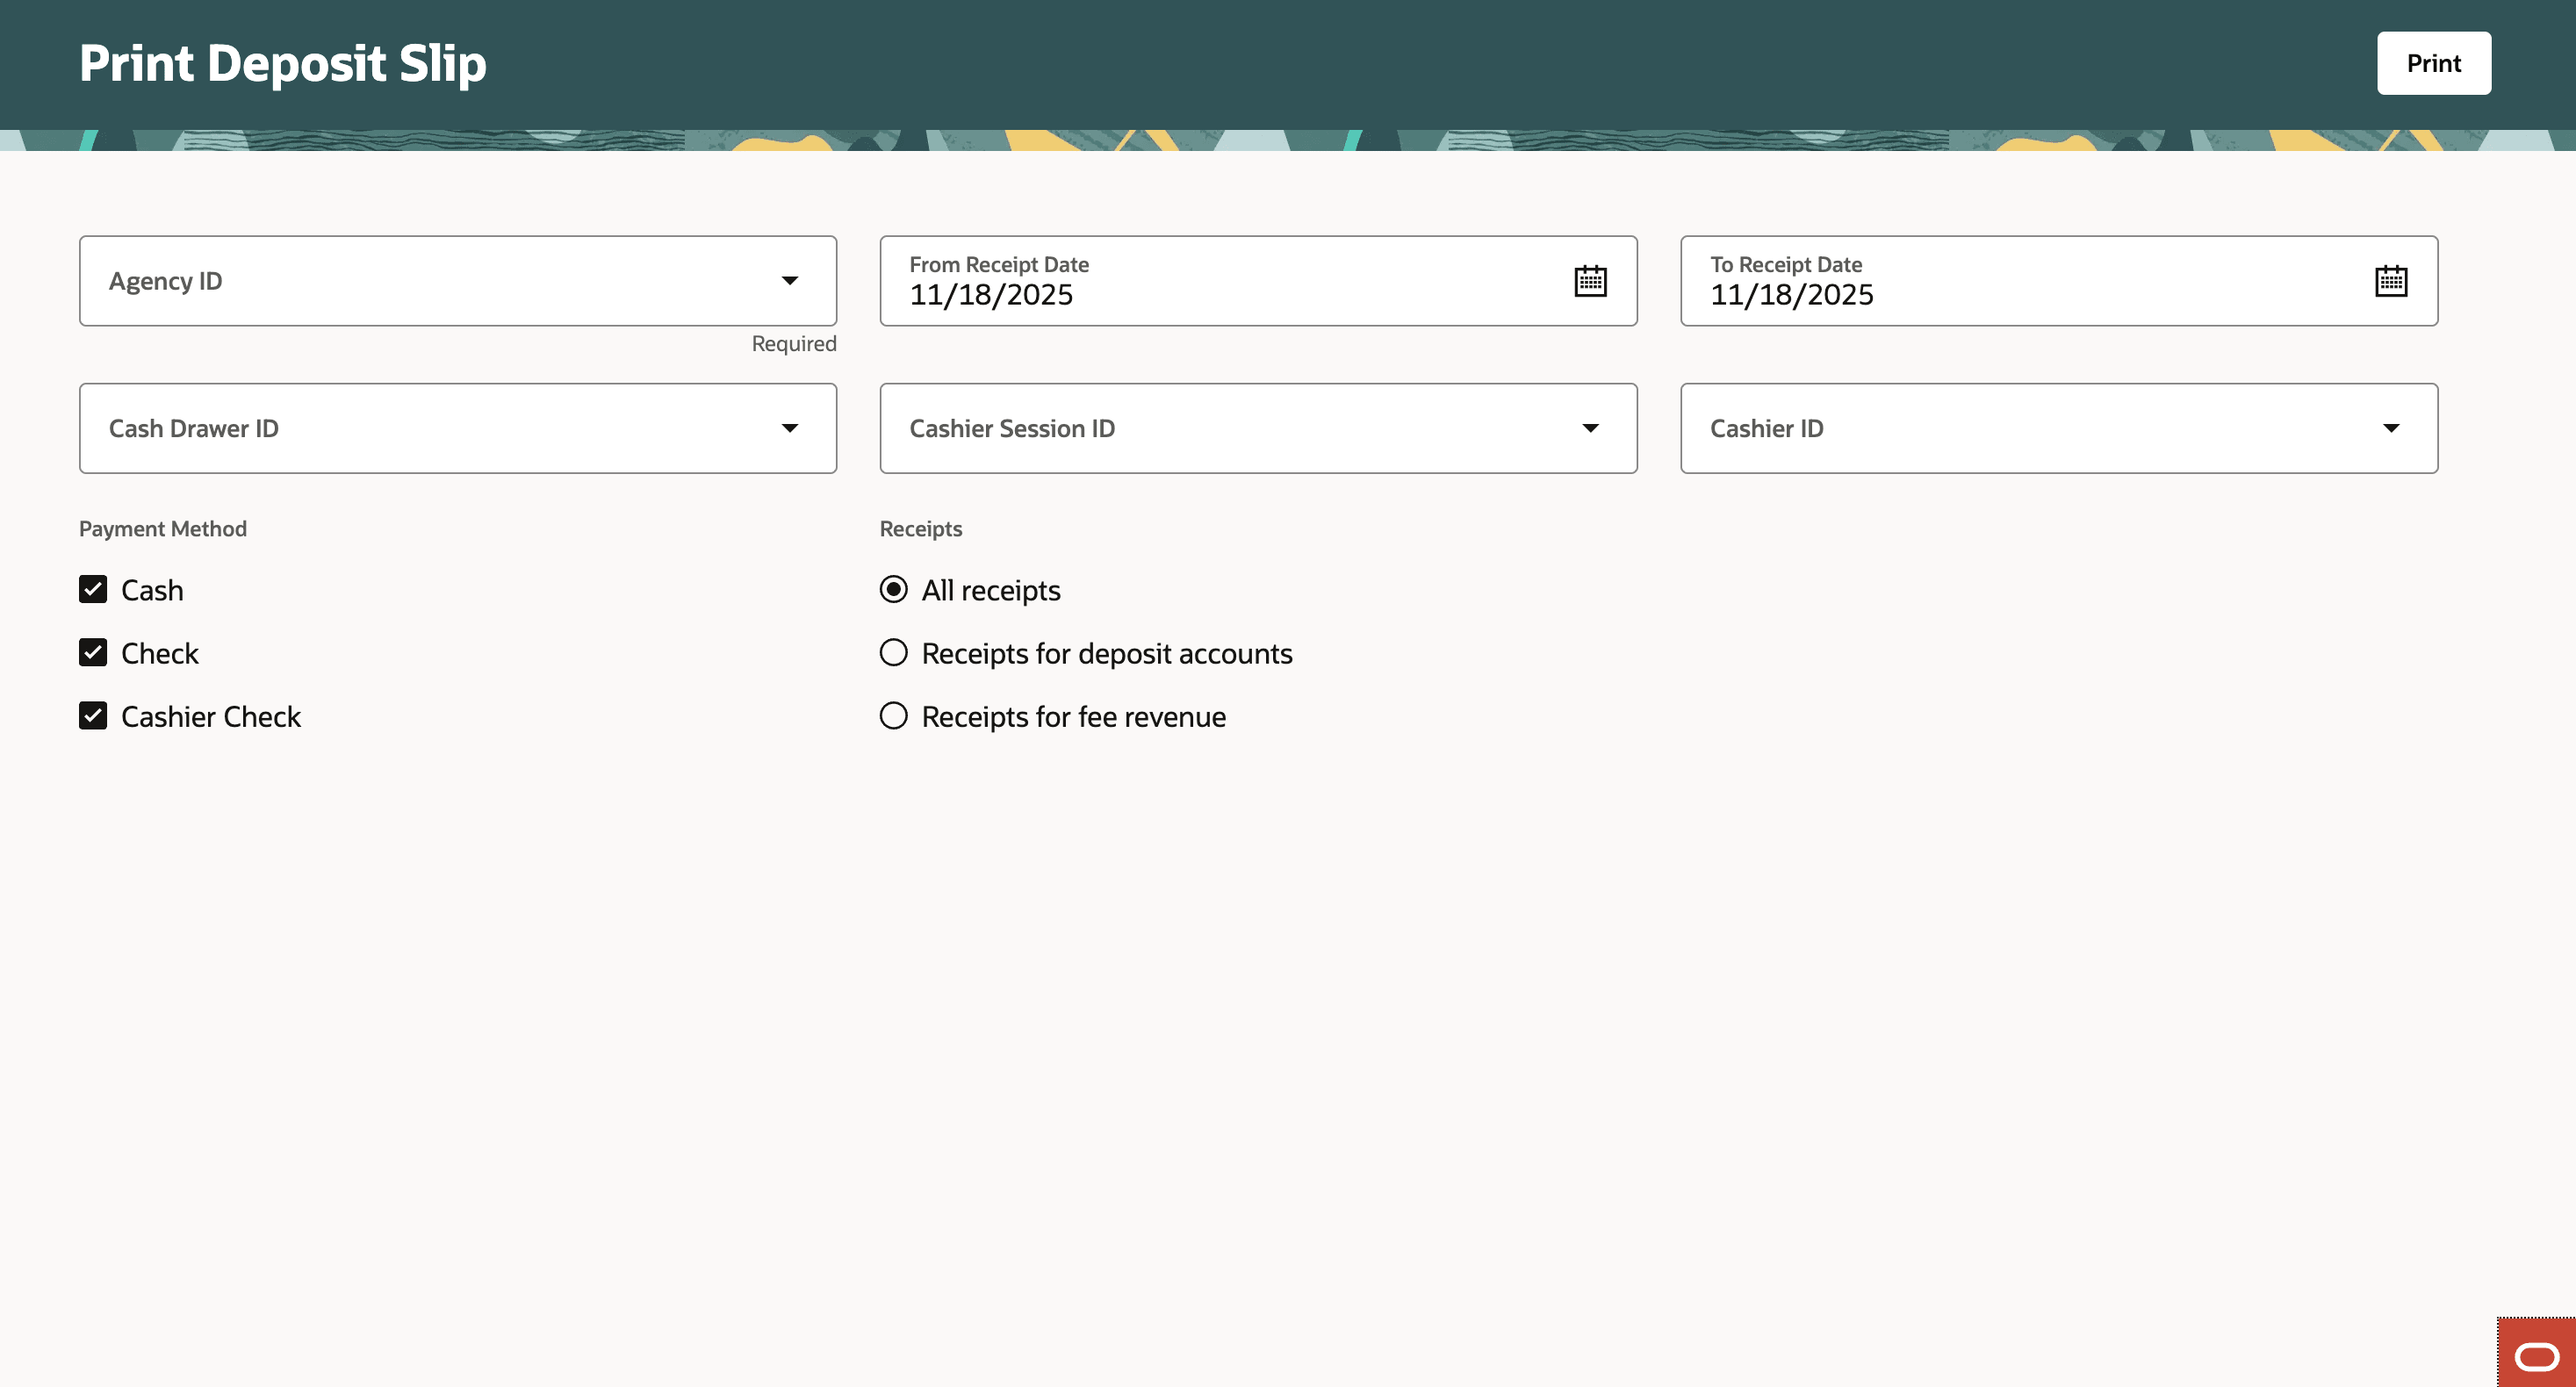
Print Deposit Slip page
The enhanced user experience streamlines the look and feel of the Refund History and Print Deposit Slip pages.
Steps to enable and configure
To utilize these pages, you must have the Redwood Experience for Billing and Payments enabled.
If you have not yet enabled the Redwood Experience for Billing and Payments, complete the following steps:
- Navigate to Setup and Maintenance > Offering: (any) > Change Feature Opt In.
- In the Public Sector <Offering> row, click the pencil icon in the Features column.
- Under the "Redwood Experience for Billing and Payments" select the "Enable" checkbox.
- Click Done.
- If you want to revert back to the classic experience for the Incident List and Details pages, disable the "Enable" checkbox for Redwood Experience for Billing and Payments.
Once you enable the you will need to run the ESS job to create index definitions to ensure that your Incident list and details pages populate properly.
- Log into the Fusion home page as an administrator/super user.
- Navigate to Tools > Schedule Processes page.
- Run the ESS job, "ESS job to create index definition and perform initial ingest to OSCS".
- Give the Index Name parameter for the following indexes:
- fa-psc-applications
- fa-psc-ce-case
- fa-psc-ce-incident
- fa-psc-inspections
- fa-psc-ce-citation
- fa-psc-apo-address
- fa-psc-apo-parcel
- The Incident List and Details pages will populate only after running these ESS jobs successfully.
Tips and considerations
If you have already enabled the Redwood Experience for Billing and Payments, you do not need to complete the steps to enable. These pages will appear as expected.
Key resources
- See Using Community Development Permits, "Working with Payments," Viewing and Processing Refunds on the Oracle Help Center.
- See Using Community Development Permits, "Working with Payments," Printing Deposit Slips on the Oracle Help Center.
Access requirements
The following roles are required:
- ORA_PSC_REFUND_ADMINSTRATION_DUTY for refund history
- ORA_PSC_CASHIERING_ADMINISTRATION_DUTY for print deposit slip