Redwood Quote Designer
The Redwood Quote Designer is integrated into the quote layout. Administrators can easily switch between Live and Design modes to view real-time changes. Seamless editing improves efficiency and accuracy in layout design with robust undo and redo functionality.
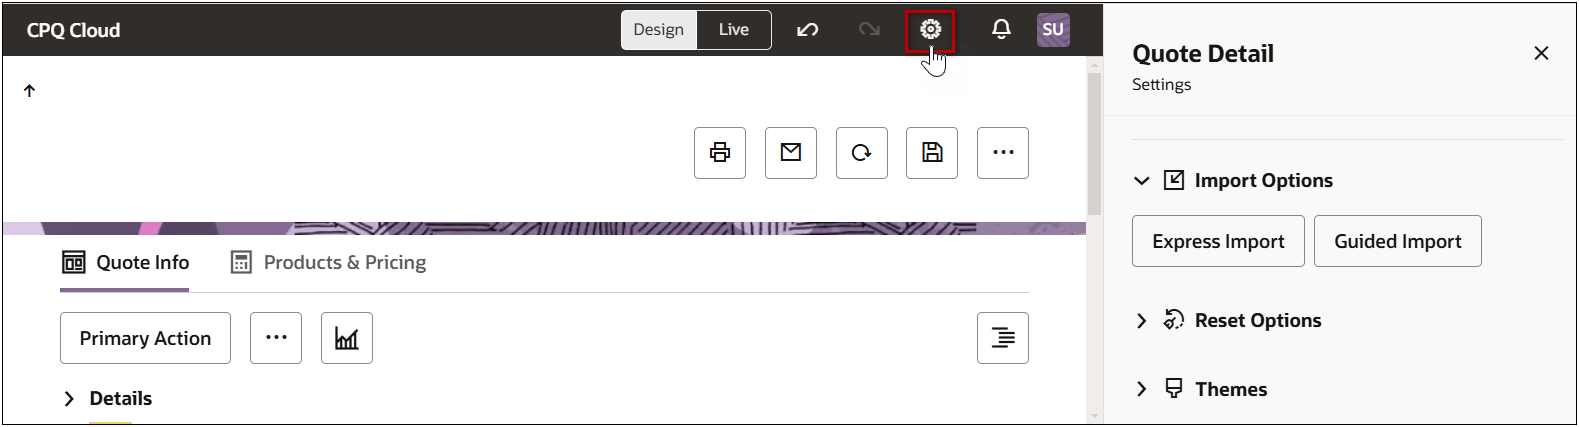
Note: The destination for the Redwood Quote UI header Settings icon is contextual and is different for Live mode versus Design mode.
- In Live mode, the Settings icon will navigate to the Admin Home page. The Redwood header displays Global Navigation Links in Live mode. Available icons are defined by the site Navigation Menu settings.

- In Design mode, the settings icon opens the Quote Detail Settings drawer.

Access Redwood Quote UI Design Mode
-
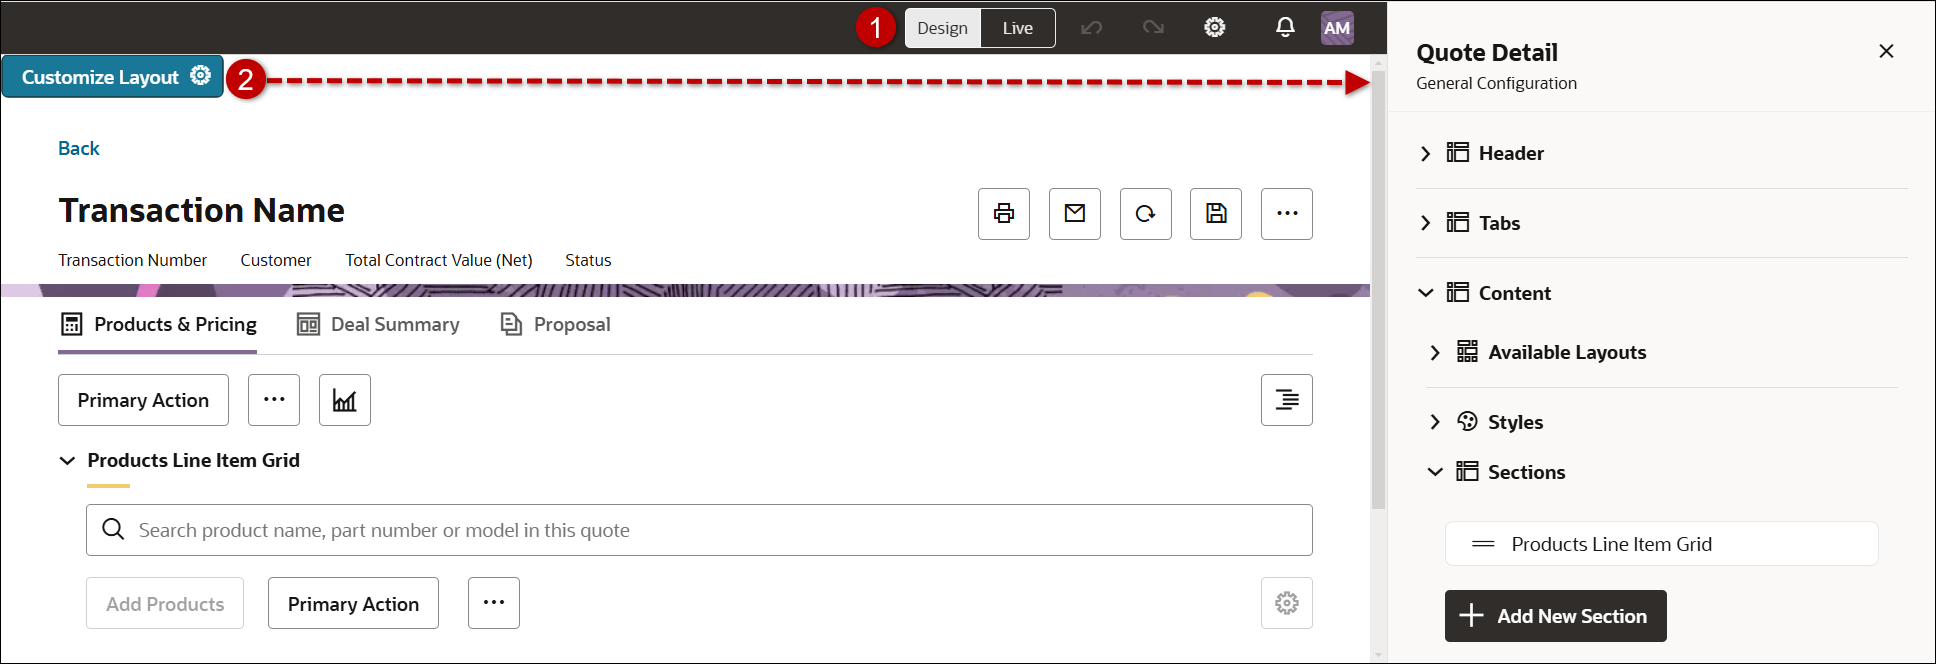
Administrators open a quote and click on Design to access the layout editing mode.
-
To edit a layout item, select a layout item and click the applicable Settings button to open the properties panel.
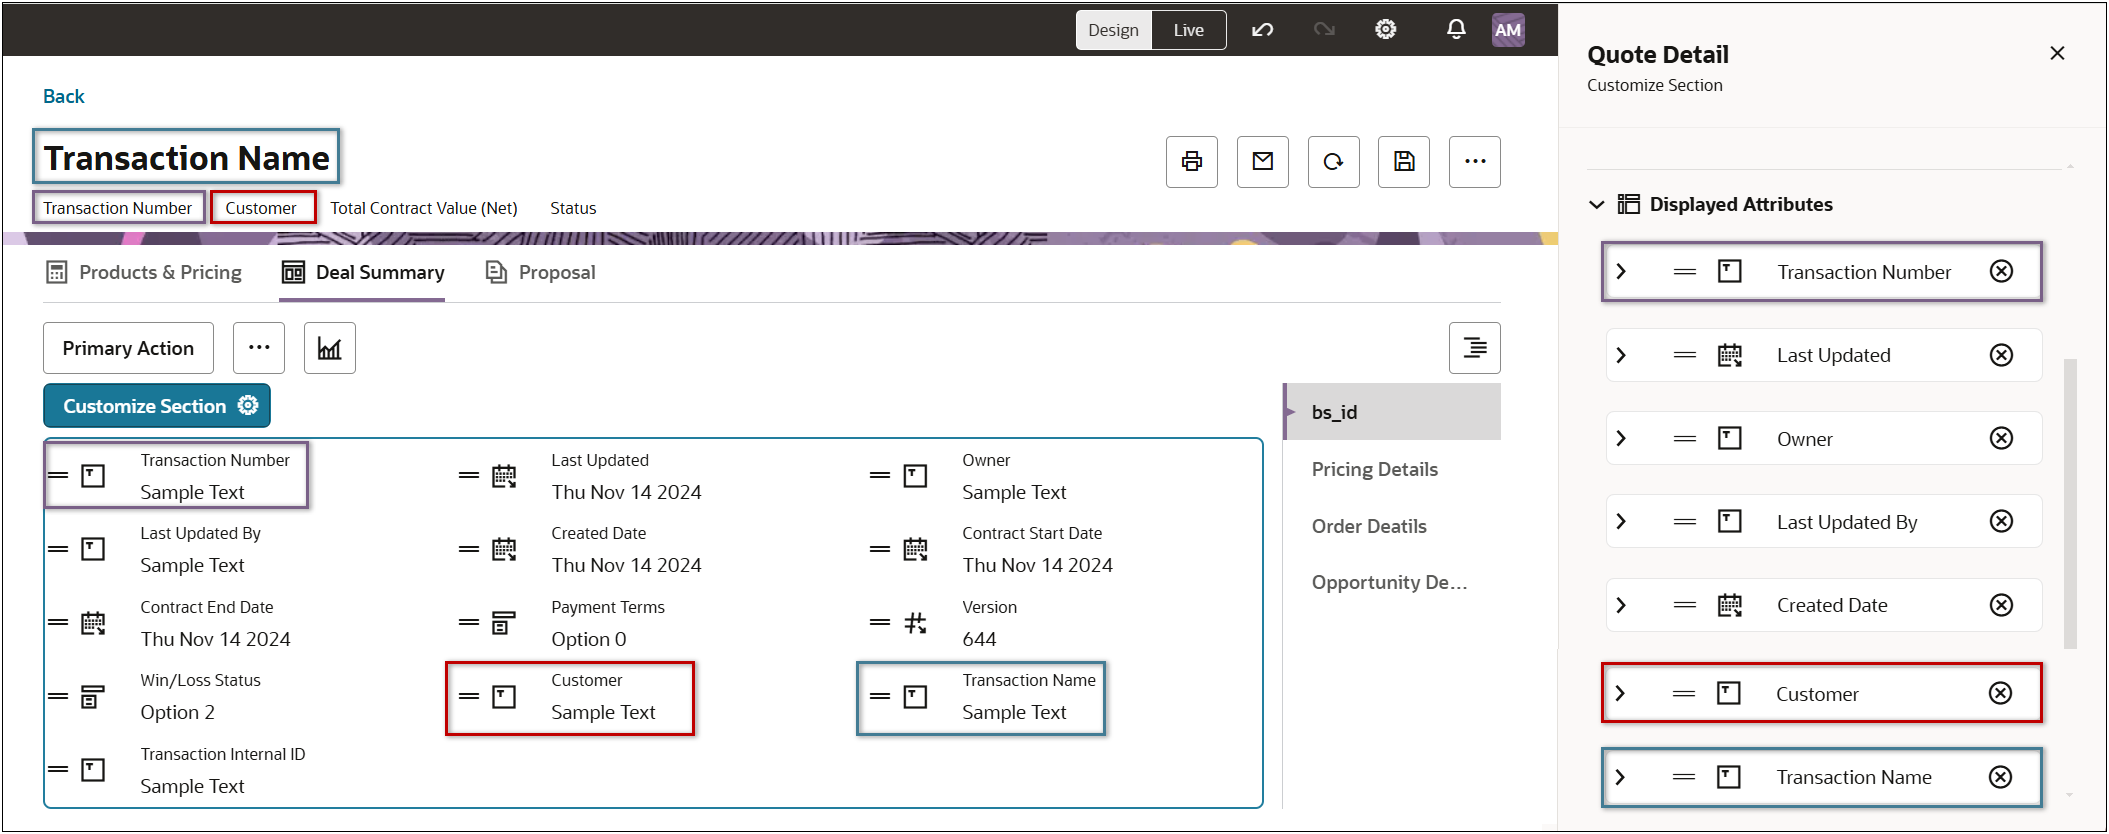
Oracle CPQ 25A also supports adding multiple instances of the same attribute for Redwood quotes. The attribute can be added to the same or different Redwood Quote views. When the attribute value changes in one place, the other instance values are automatically updated. For example, the following layout displays the Transaction Name, Transaction Number, and Customer attributes in the Quote header and in the Quote Details section.
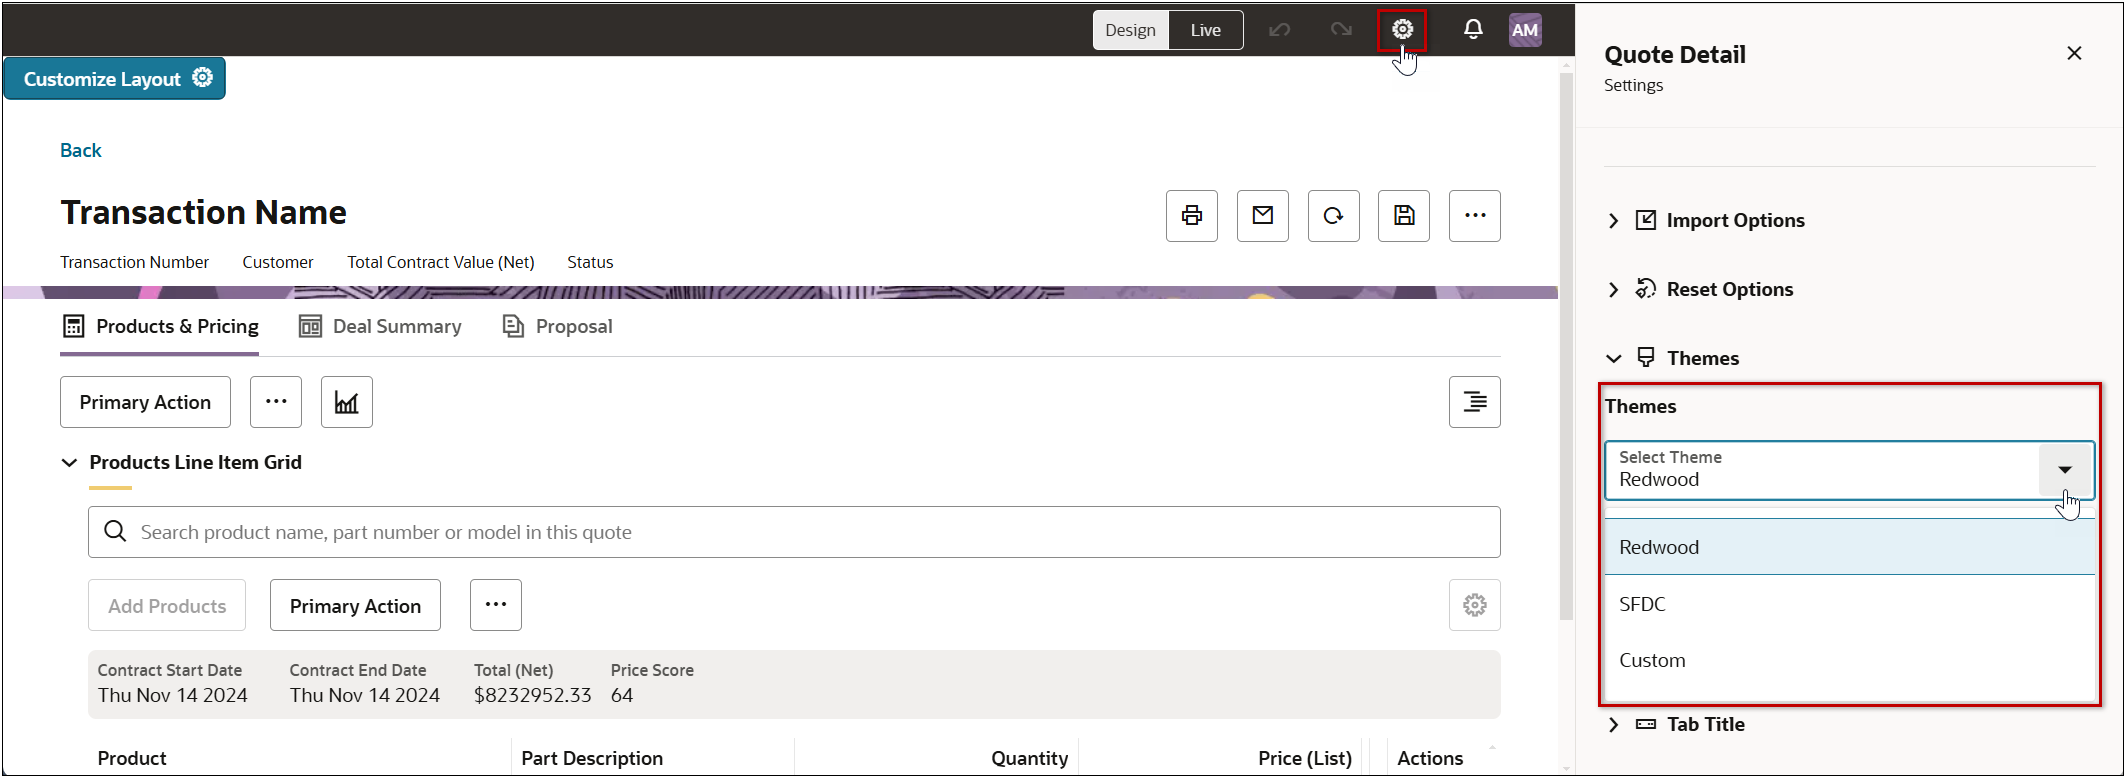
Layout Themes
The Redwood Quote Designer provides multiple pre-built themes to match your company's branding and ensure a uniform appearance across quote documents and user interfaces. In addition to the pre-defined Redwood theme, Oracle CPQ 25A also provides a SFDC theme that can be quickly implemented for Salesforce-integrated environments.
To access the layout themes, click on the Quote Details settings icon in the page header. Then open the Themes section to select a theme.
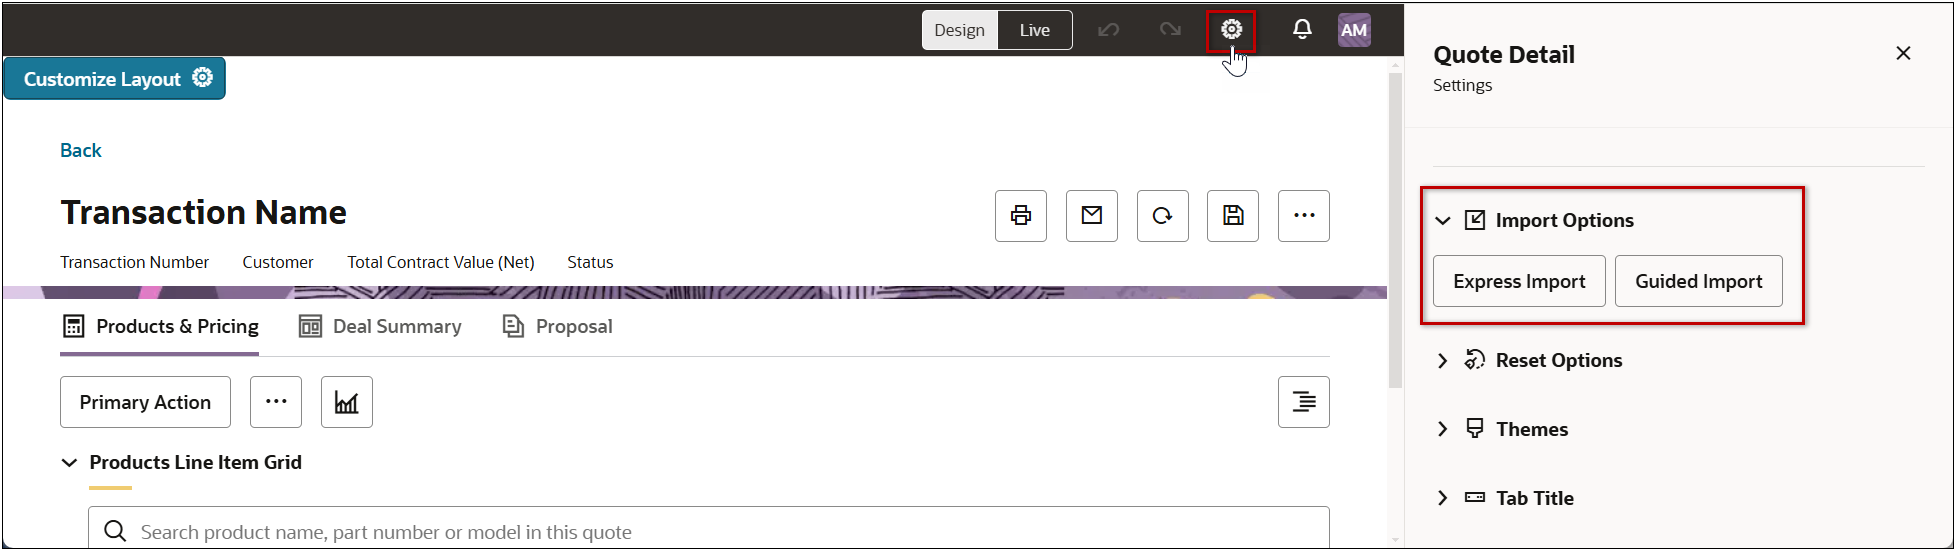
Express and Guided Imports
Express and Guided Import options simplify and streamline the migration process from JET and Legacy layouts to the Redwood layout. They provide a user-friendly design to guide administrators step-by-step through the migration process to ensure a smooth transition with minimal disruption to business operations.
-
The Express Import will import all layout items from the previous JET or Legacy layout.
-
The Guided Import allows selection of Transaction and Transaction Line layout items to import.
The Redwood Designer advanced customization features allow administrators to tailor the appearance and layout views to match specific customer requirements. CPQ also provides several multiple pre-defined views for standard Commerce processes allowing quick implementation of the Redwood Quote UI.
Steps to Enable
The Redwood Quote UI must be enabled before performing an import. Refer to Enable a Redwood Quote UI.
Select Express Import or Guided Import to layout items from the previous JET or Legacy layout.
Express Import
Complete the following steps to select individual Transaction and Transaction Line layout items to import into the Redwood Quote UI.
-
Navigate to the Quotes UI and open or create a quote.
-
Click on the Quote Details settings icon in the page header.
-
Click Express Import.
-
Click Import JET Layout. (for Legacy layouts click Import Legacy Layout)
When the import has finished a "Layout successfully imported banner" is displayed.
-
Deploy the Commerce process.
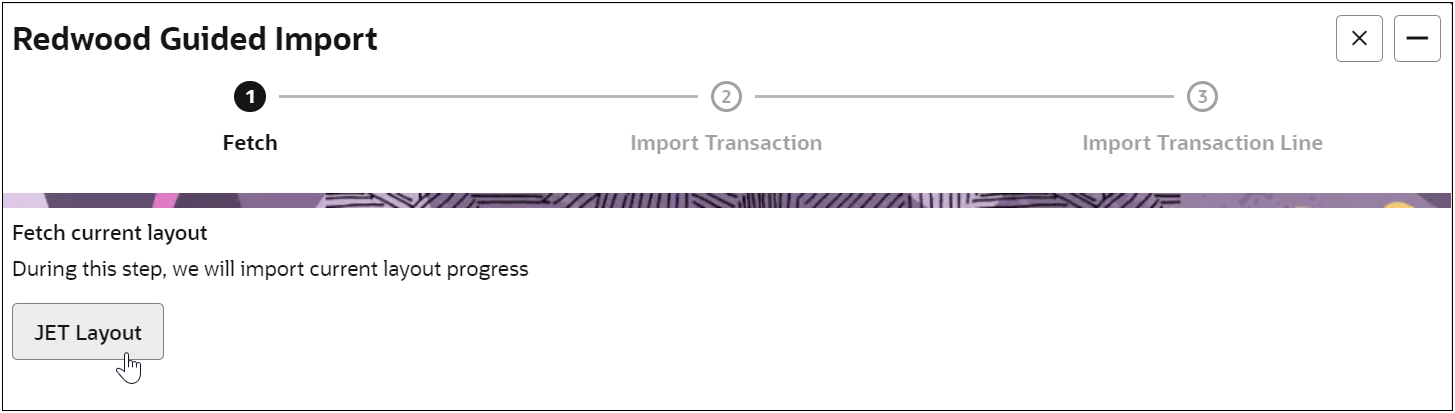
Guided Import
Complete the following steps to import all layout items from the previous JET or Legacy layout into the Redwood Quote UI.
-
Navigate to the Quotes UI and open or create a quote.
-
Click on the Quote Details settings icon in the page header.

-
Click Guided Import.
-
Click JET Layout. (for Legacy layouts click Legacy Layout)
-
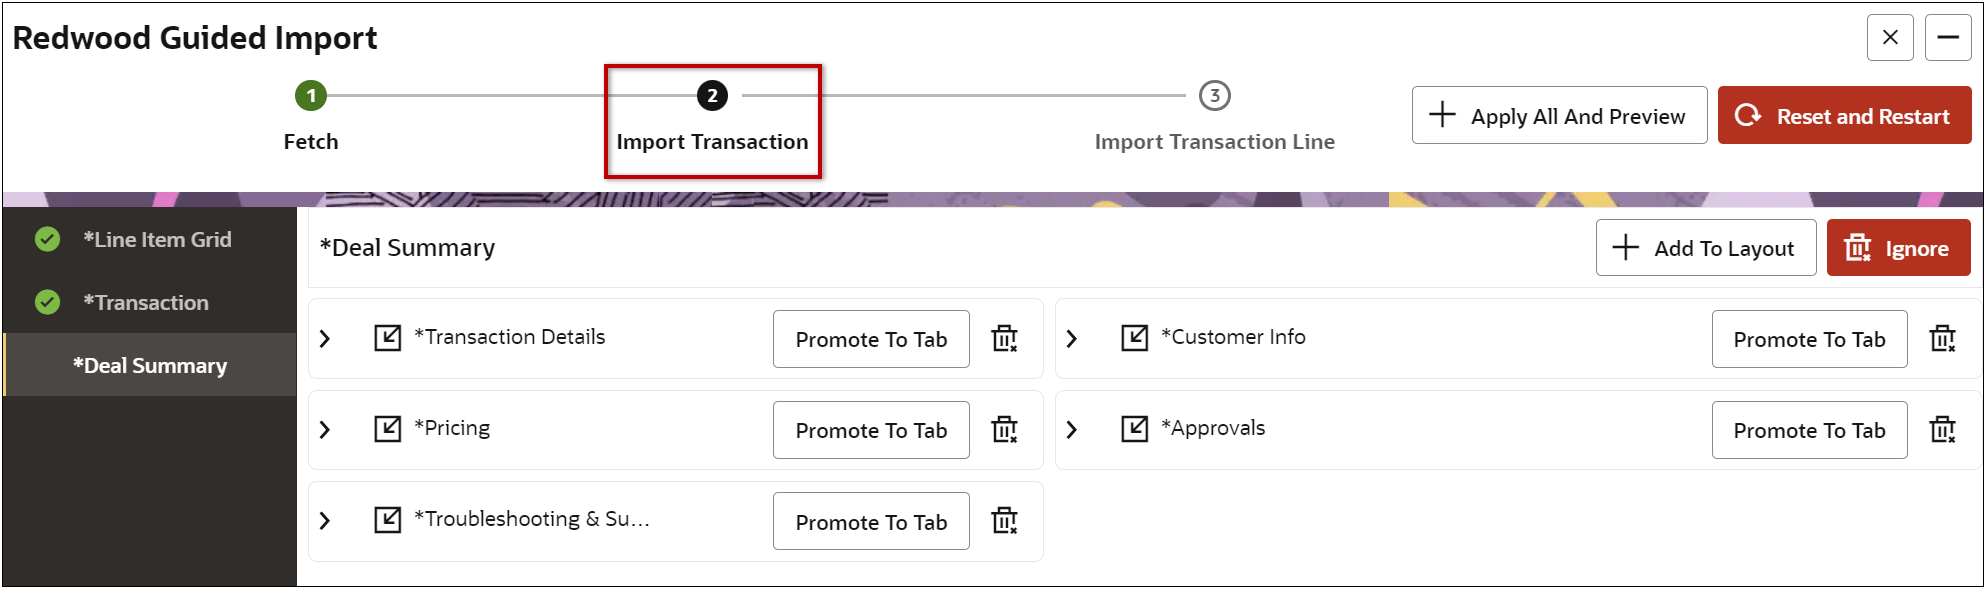
Click Import Transaction to import the transaction layout.
-
Add items to the layout.
-
Click Apply All And Preview to import all items, or
-
Select the desired item and click Add To Layout.
-
You can click Promote To Tab to a raise a section item to the tab level.
-
You can click the Delete icon to exclude an item from import.
-
Repeat this step to add all desired items are selected.
-
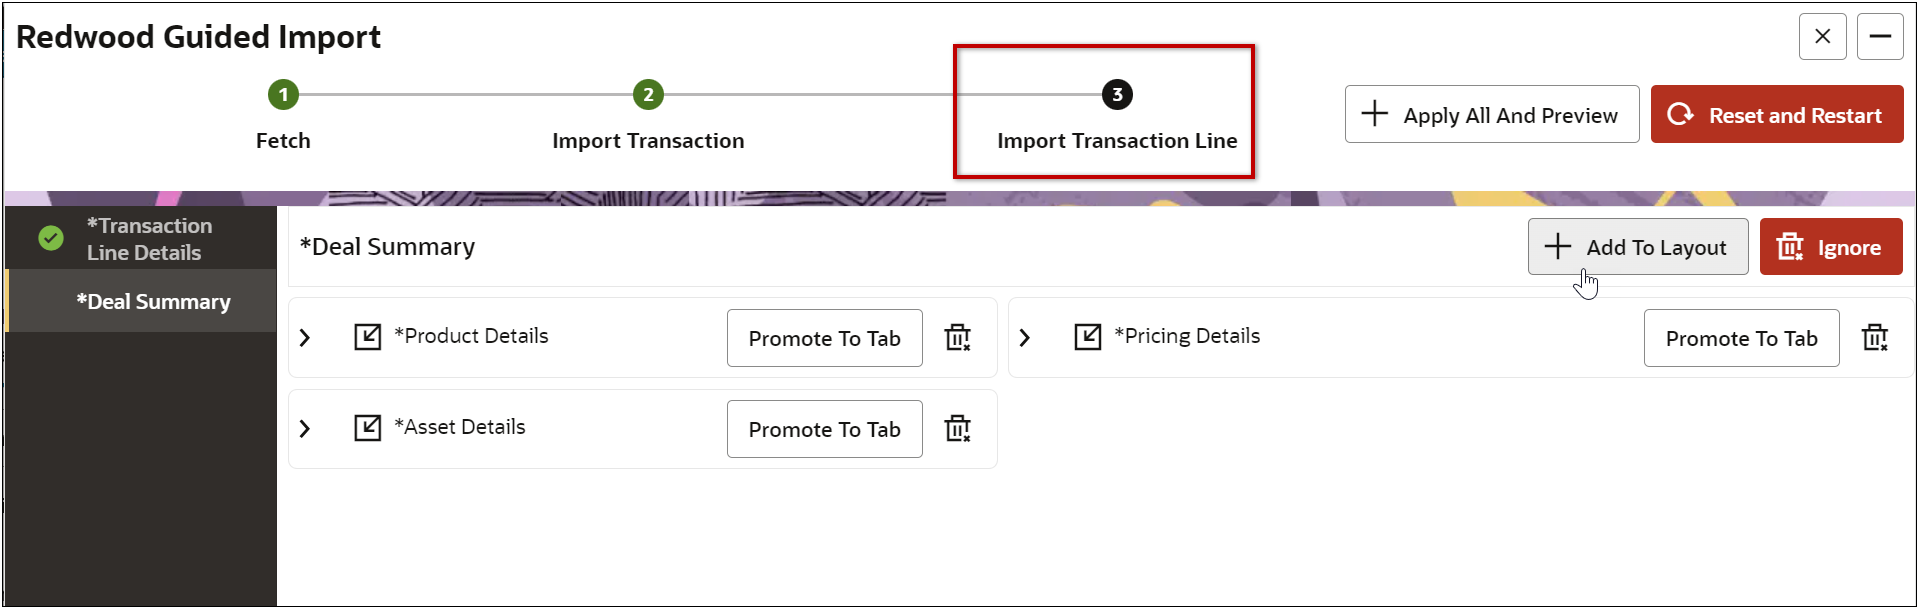
Click Import Transaction Line to import the transaction line layout.
-
Add items to the layout.
-
Click Apply All And Preview to import all items, or
-
Select the desired item and click Add To Layout.
-
You can click Promote To Tab to a section item to a tab.
-
You can click the Delete icon to exclude an item from import.
-
Repeat this step to add all desired items are selected.
When the import has finished a "Layout successfully imported banner" is displayed.
-
Deploy the Commerce process.