Receive Ad Hoc Goods Using a Mobile Device
An inventory organization uses miscellaneous adjustments to item quantities for various reasons. For example, a supply of goods was discovered and needs to be properly accounted for, or a previously issued item wasn't used and needs to be returned for a future requirement. Now you can receive goods using a mobile device to scan the item and location information, and then enter the quantity before completing the transaction.
In update 24B, you could only perform miscellaneous issues using a mobile device. With the addition of miscellaneous receipts in this update, the Miscellaneous Issue task name has been changed to Miscellaneous Transactions, and users can select either a seeded or user-defined transaction type before performing the transaction.
You're able to walk towards the counter with a mobile device, scan the item, input the quantity, scan or enter the location information (locator and subinventory), and add the item to a list. Additionally, you can add items to the list by scanning or entering numerous items at once.
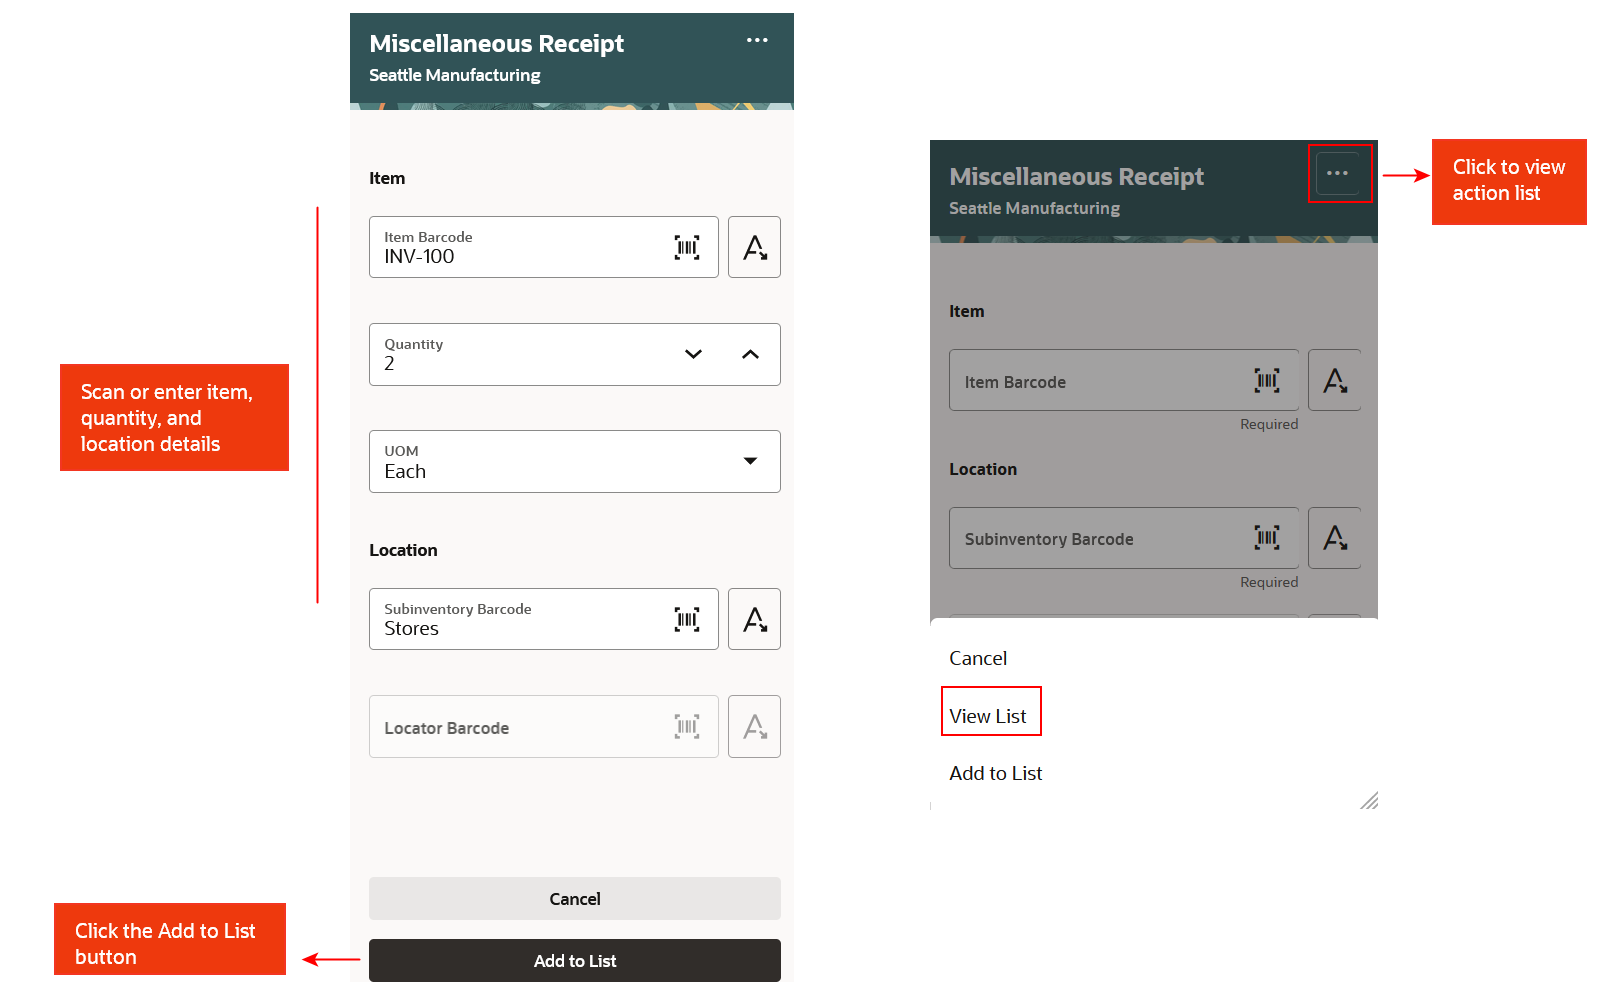
Add Item
Before submitting, you can review the items that you added to the list and make any necessary adjustments by clicking the Edit (pencil) button. Then, add an account and complete the transaction submission.
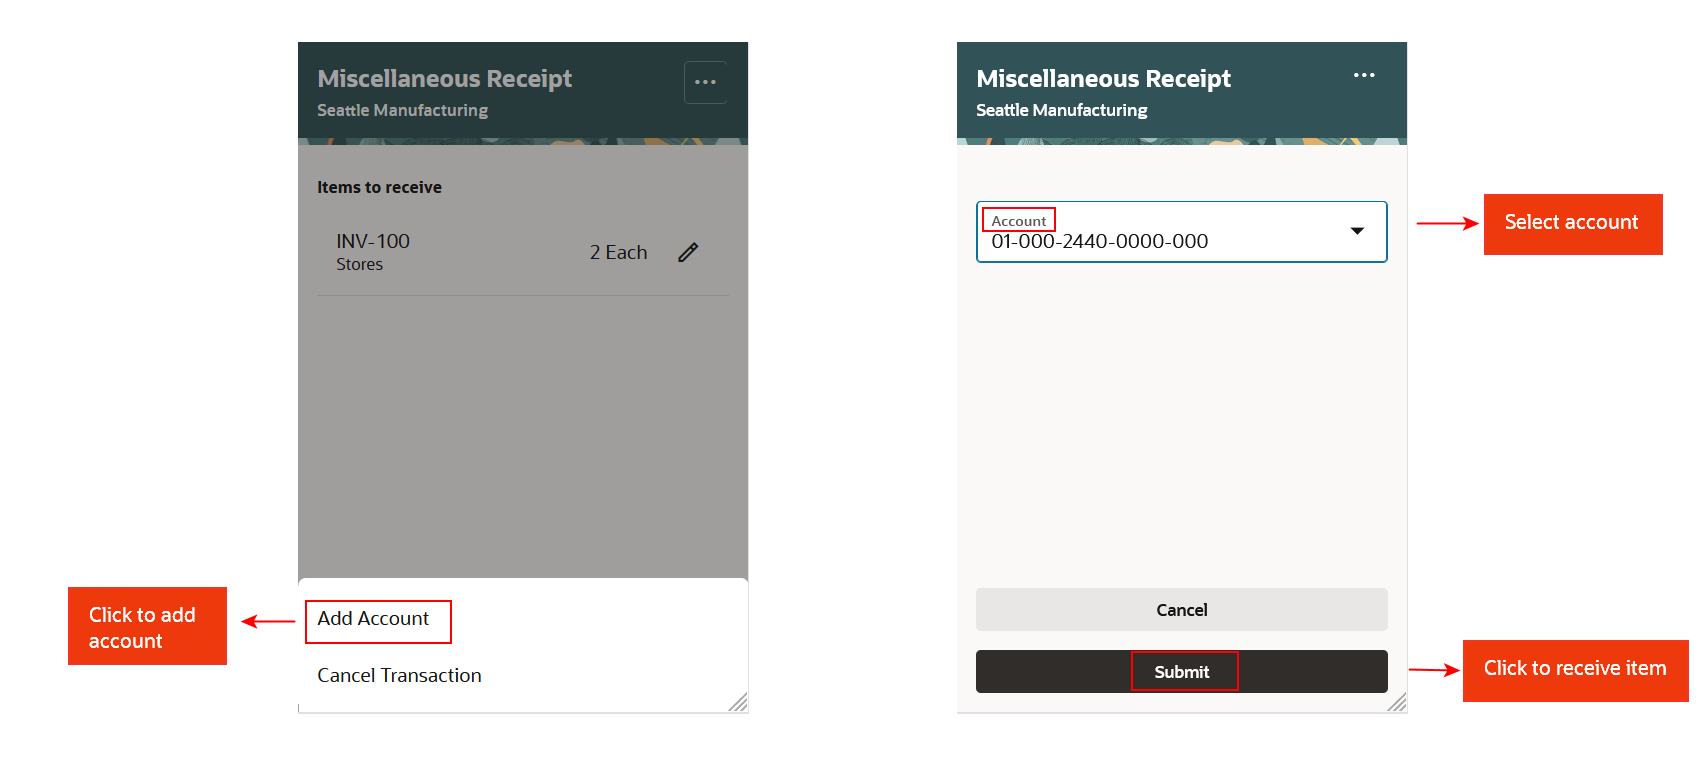
Receive Item
You have the ability to scan or input lot and serial number details, such as supplier lot, lot origination date, lot maturity date, lot expiration date, and supplier serial number.
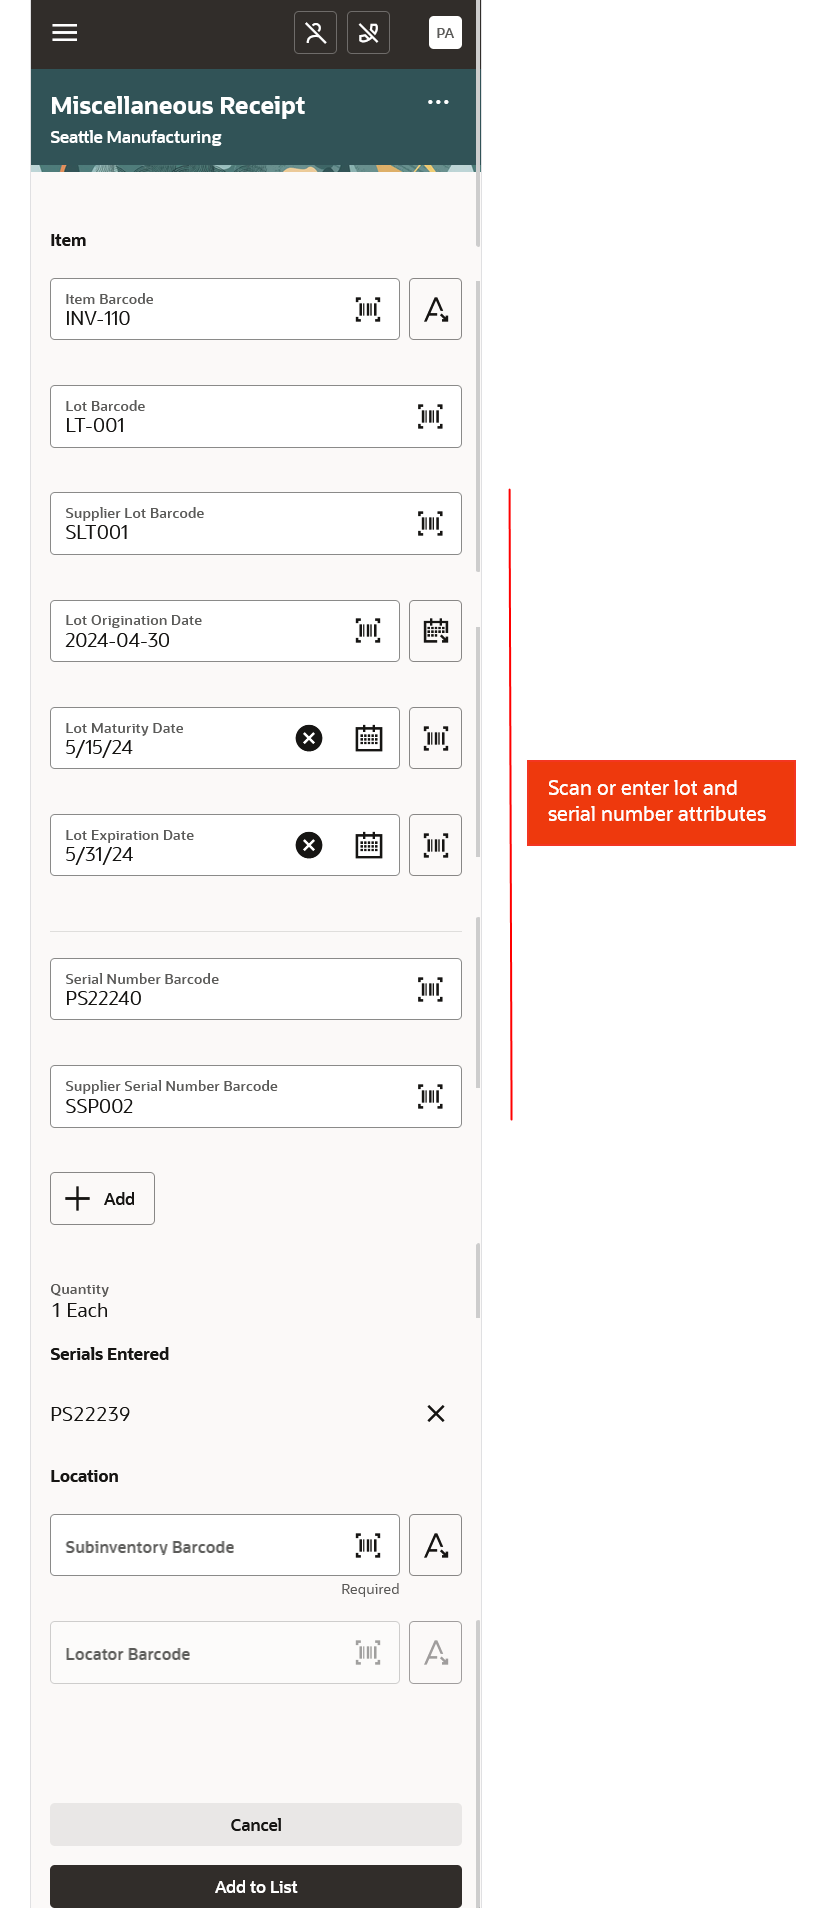
Lot and Serial Attributes
This feature provides you the ability to quickly and efficiently receive goods into your warehouse or stockroom in real time.
Steps to Enable
Configuration steps are required to enable the Item or MPN (Manufacturer Part Number) search field. This will allow you to select an item or MPN from the list of values when performing mobile transactions.
To enable the Item or MPN search field, follow the steps to enable.
Enable Opt-In Feature: Search Items Using the New User Interface
- Navigate to My Enterprise and click Available Features.
- Search for the Search Items Using the New User Interface feature.
- Enable the Search Items Using the New User Interface feature.

Search Items Using the New User Interface
To enable the item search, navigate to the Product Information Management work area or the Product Development work area and complete these steps:
- On the landing page, click the Tasks tab to open the drawer.
- Click Configure Index.
- Click the Item card. The index has a set of predefined attributes that you can use as the starting point for the index.
- Ensure the Manufacturer Part Number attribute is added to the list of attributes.
- Click Update if enabled, and then save the index configuration.
- Click Rebuild.
- In the Schedule index rebuild process dialog box, click Rebuild. The index rebuild process starts and a job ID will be provided to track the process. The rebuild process is a long running process. You can check the index status on the Index Management page. The Item card has an indicator badge which will show Ready when the index rebuild is completed.
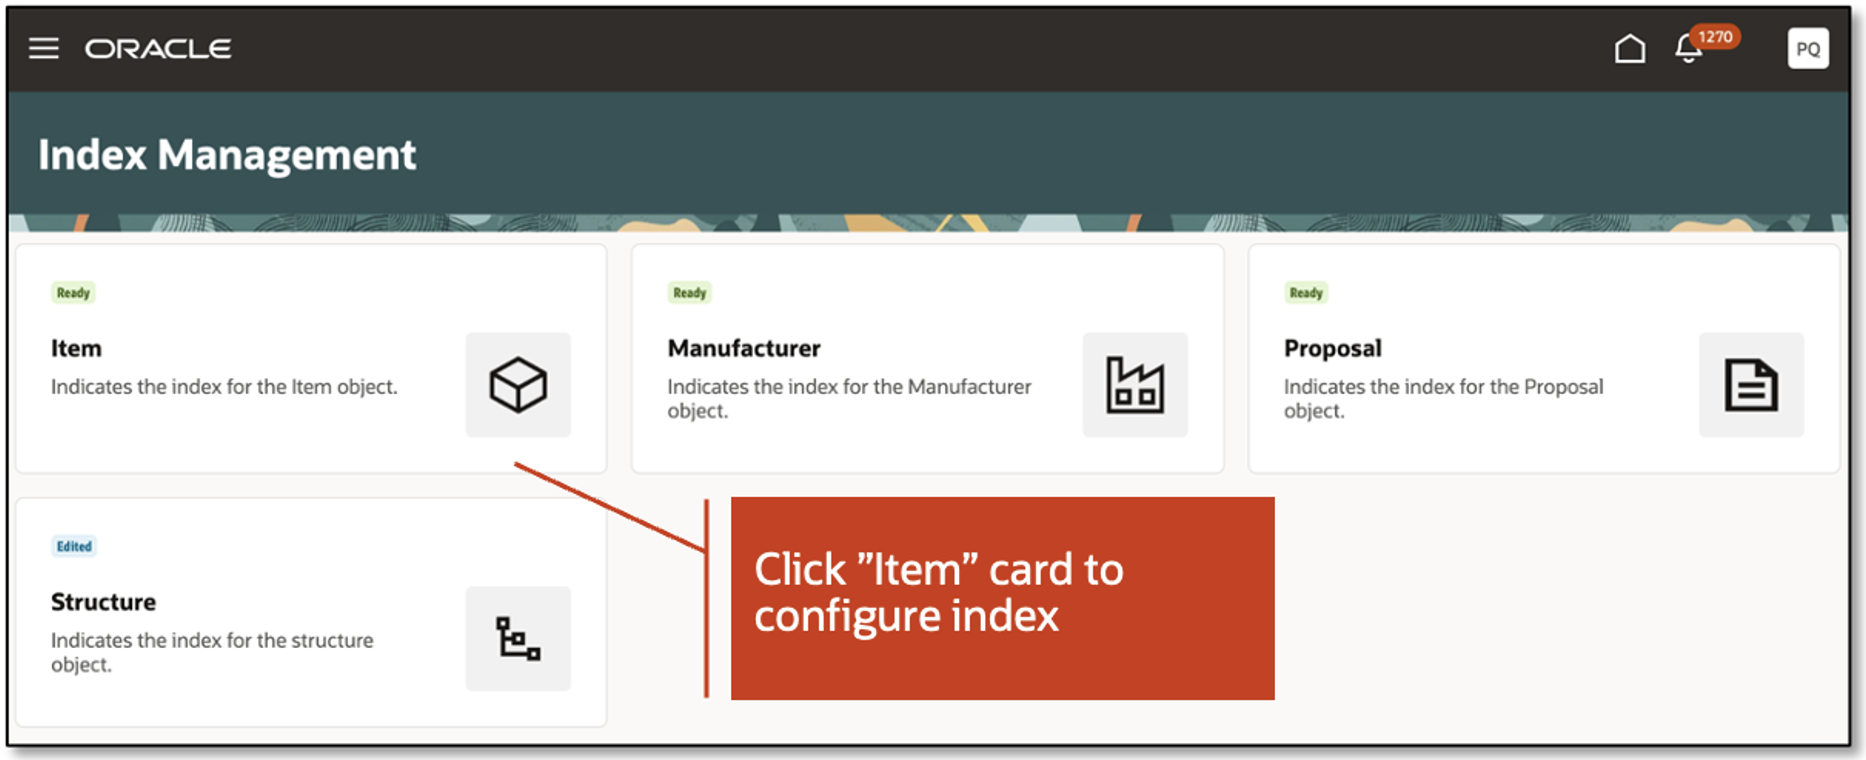
Index Management
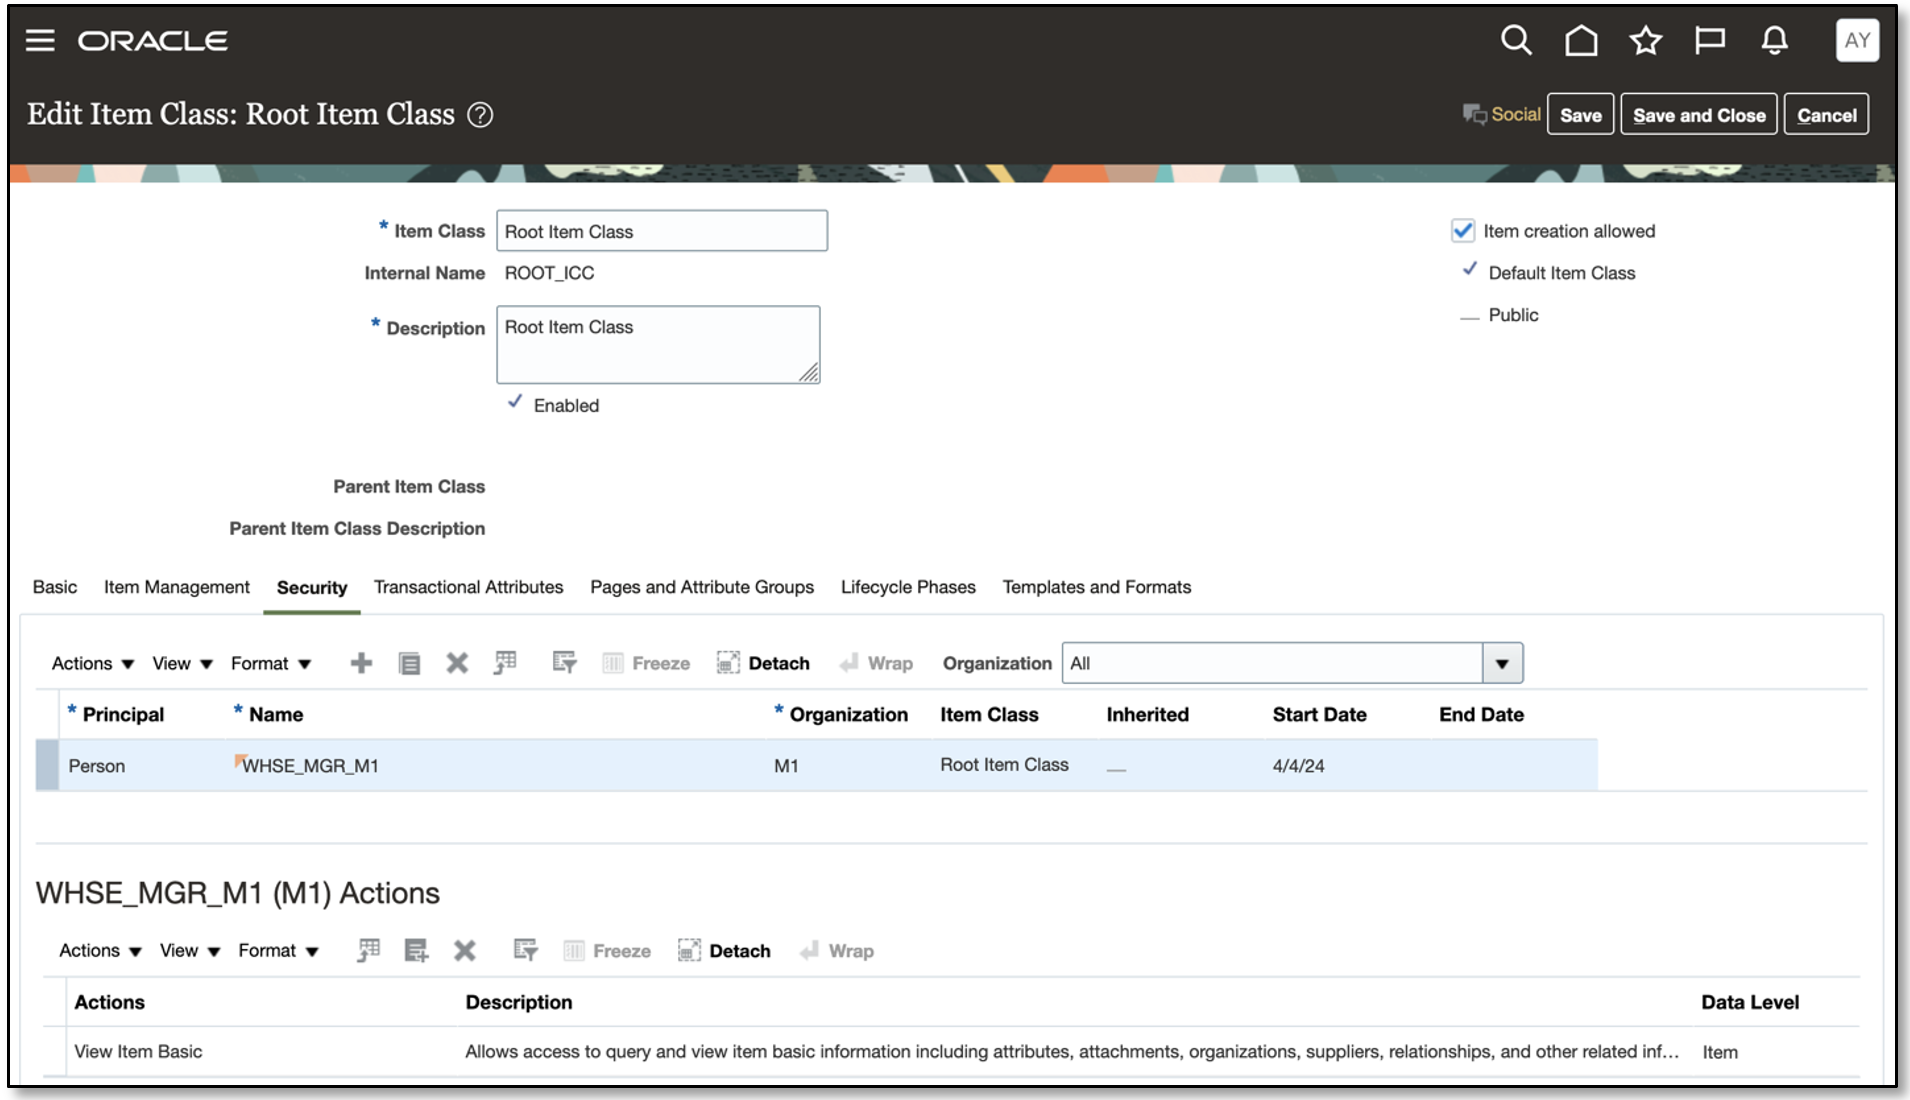
To enable item class security, navigate to the Manage Item Classes setup task and configure security for the root item class.
NOTE: Root item class data security configuration is only required when Oracle Product Hub is licensed.
This is a required data security configuration in Product Management offering to display the inventory items associated with an inventory organization.
- In the Setup and Maintenance work area, search for and select the Manage Item Classes task.
- Search for Root Item Class in the Item Class field.
- Click the Root Item Class link.
- Click the Add icon or the Add Row action.
- Select Person under Principal.
- Select User Name.
- Select Inventory Organization.
- Specify applicable Start Date and End Date.
- Click the Select and Add action or icon.
- Search for the View Item Basic action and click Apply.
- Click Save and Close.
Root Item Class
Tips And Considerations
- This feature provides you with a native mobile experience and barcode-scanning capabilities.
- You have the ability to scan or enter the location, item, lot, and serial numbers.
Key Resources
- Oracle Fusion Cloud SCM: Using Inventory Management guide, available on the Oracle Help Center.
- Watch the Receive Ad Hoc Goods Using a Mobile Device demo.
Access Requirements
Users who are assigned a configured job role that contains this duty role can access this feature:
- Create Miscellaneous Transaction Using Responsive Inventory Duty (ORA_INV_CREATE_MISCELLANEOUS_ISSUE_PWA_DUTY).
This duty role was available prior to this update.