Redwood: Manage Planning Clusters Using a New User Experience
You can now use the Redwood user experience to manage planning clusters for inventory rebalancing. Using the rebalancing process, you can move inventory from locations with an excess to locations with a shortage to minimize inventory costs incurred in procuring material from upstream locations or suppliers.
Using the Planning Clusters page, you can view, search for, create, update, duplicate, and delete planning clusters. You can assign members to a cluster and then specify cluster attributes and assign location priority.
On the Planning Clusters page, you can:
- Search for planning clusters.
- Filter the search results by the name and description of a planning cluster.
- Sort the planning clusters in the ascending or descending order using any of the available columns.
- Export the list of planning clusters to Microsoft Excel.
- Create, edit, copy, or delete a planning cluster.
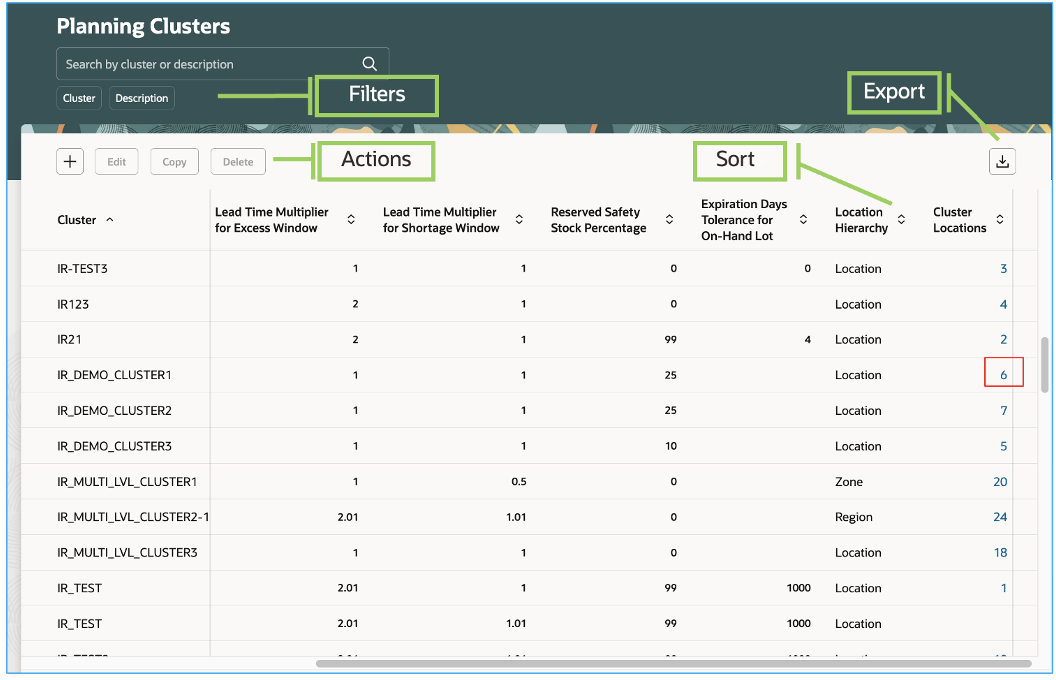
Planning Clusters Page
View the location priorities by clicking the number in the Cluster Locations column. A drawer opens with location priority details.
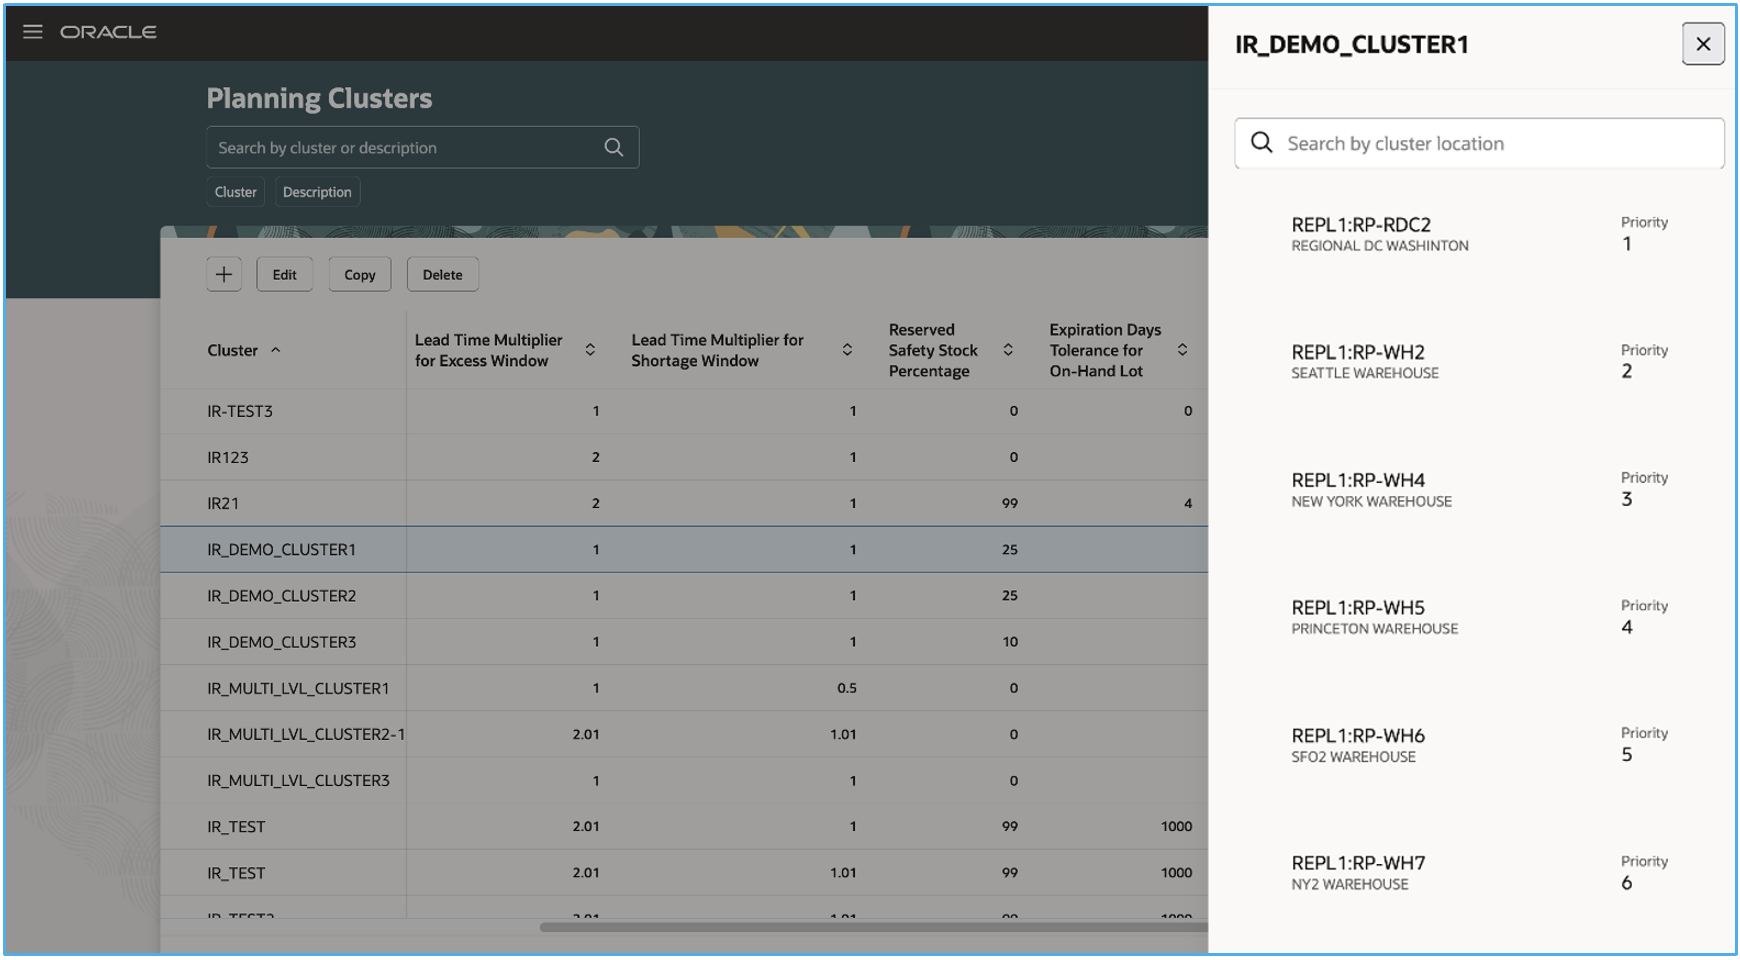
Location Priorities Drawer
To create a planning cluster, follow these steps:
- Click the Create icon.
A guided process opens with two steps.
- In the first step, specify the cluster information.
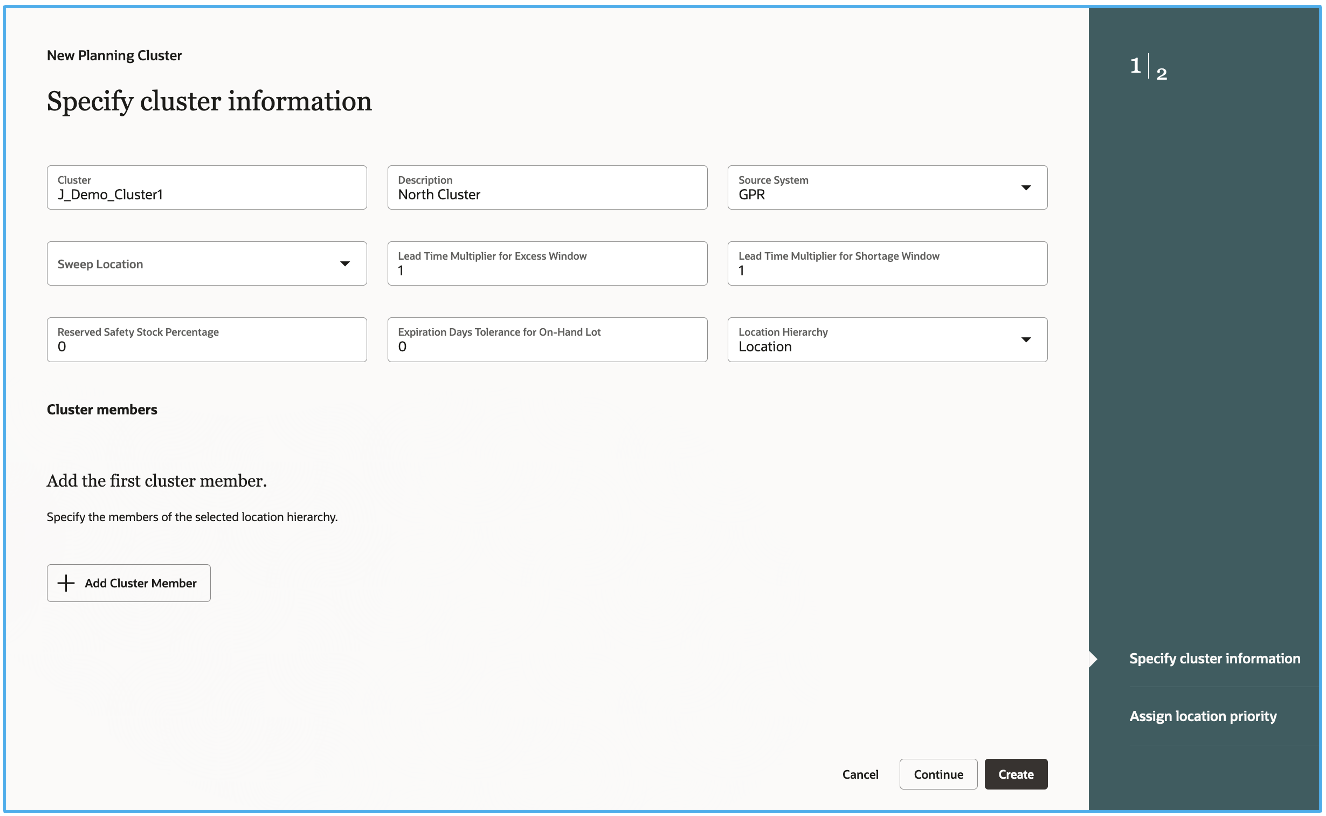
First Step for Specifying Planning Cluster Information
- Click the Add Cluster Member button.
You can first search for the members that you would like to add.
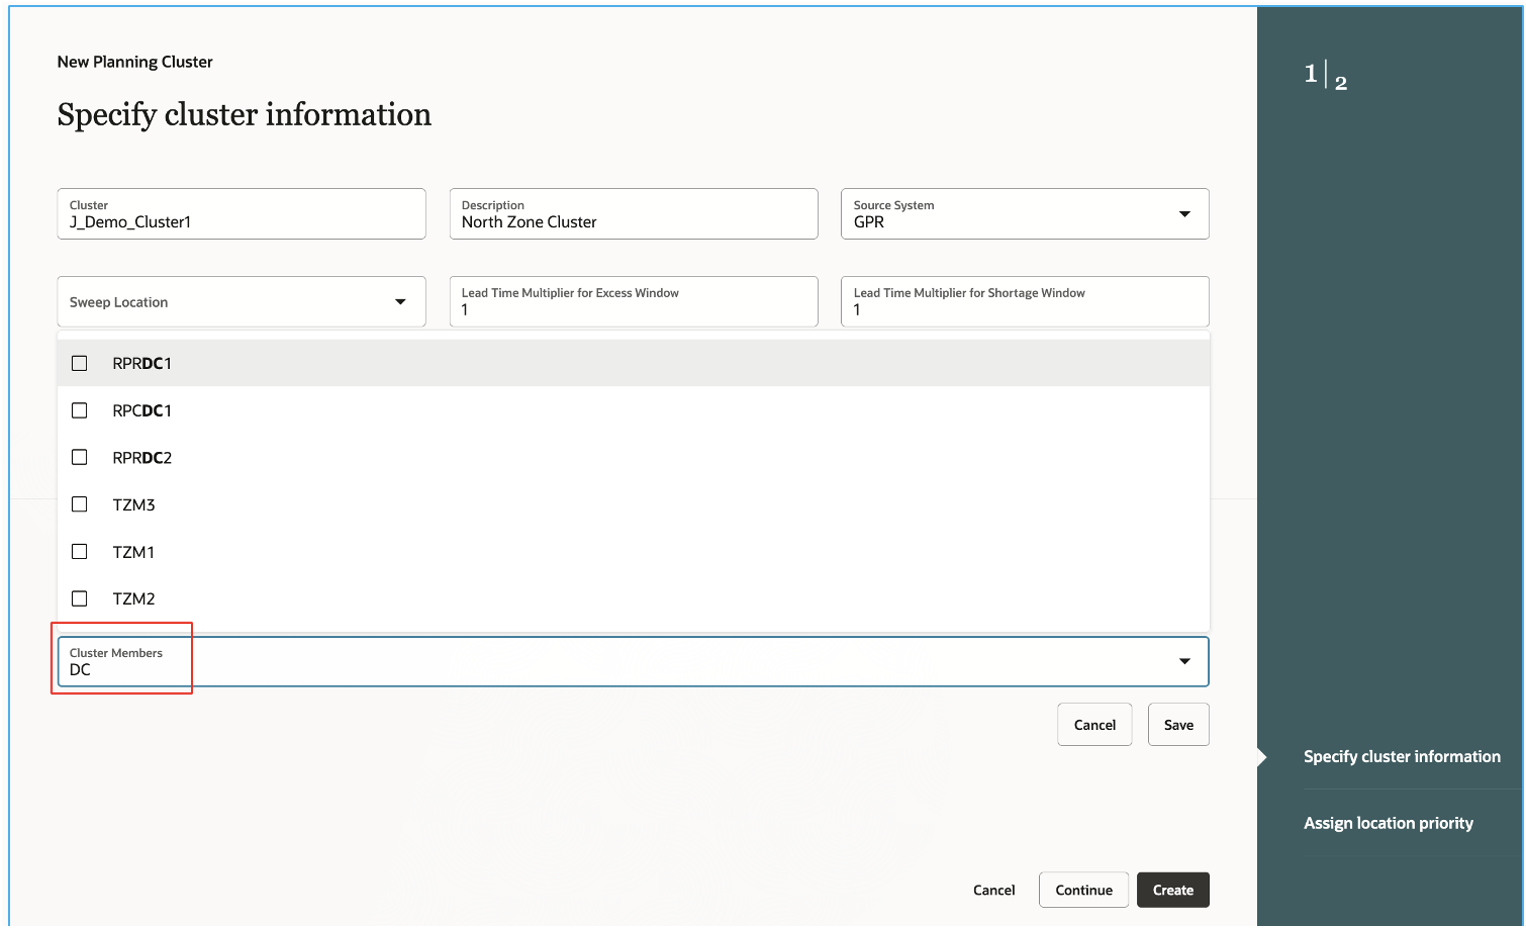
Search for Cluster Members
- Select the members, and click Save.
The members get added to the planning cluster. This action completes the first step of the guided process.
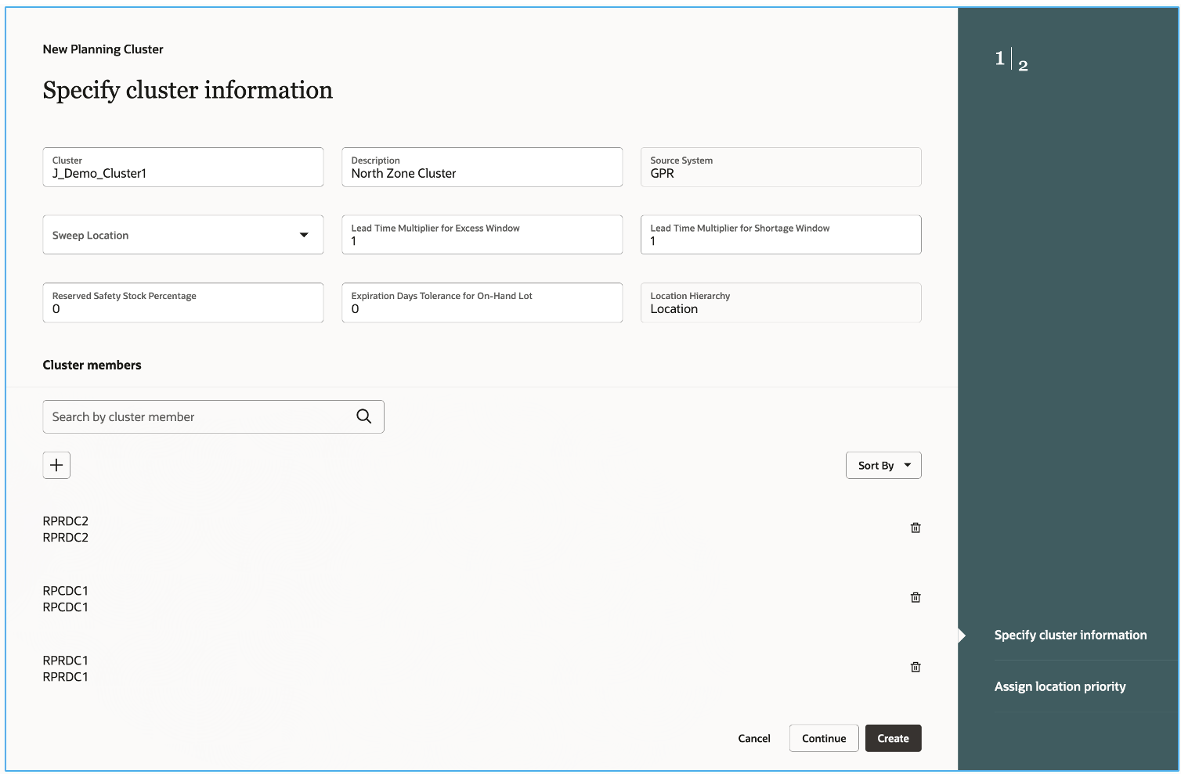
Cluster Information and Cluster Members
- If you’d like to assign the location priority, then click Continue.
The second step of the guided process opens.
You can assign the location priority and click Create to complete creating the planning cluster. You will return to the Planning Clusters page.
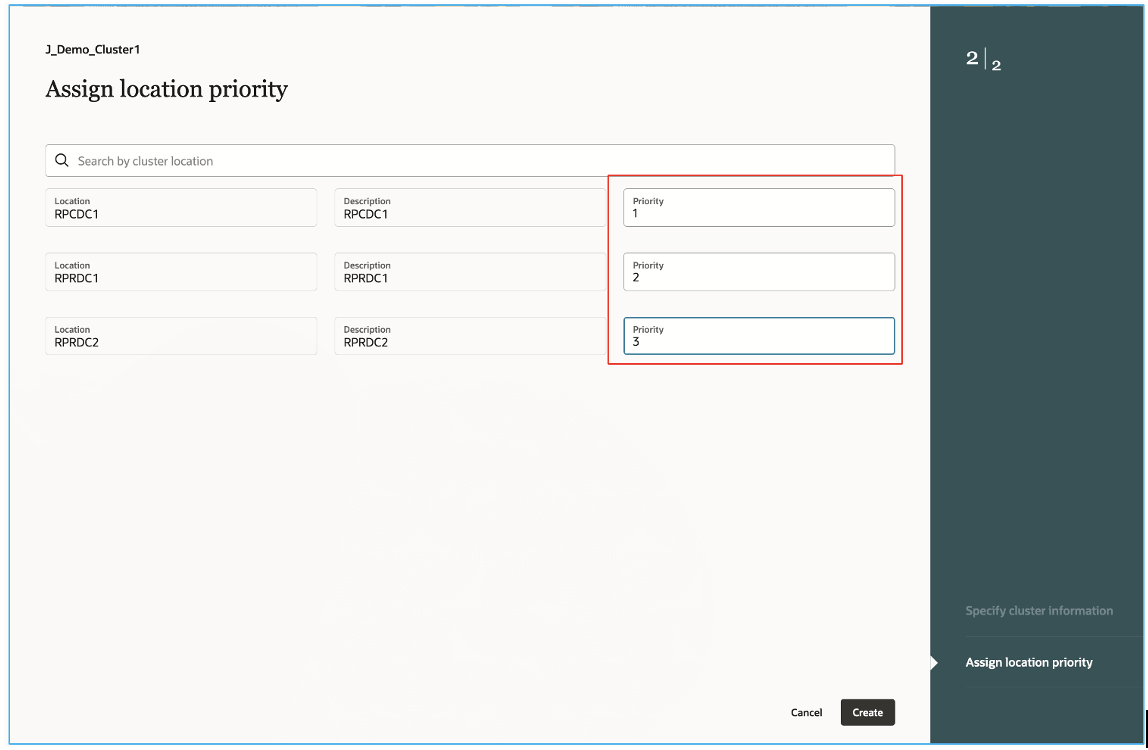
Second Step for Assigning Location Priority
- If you don’t want to assign the location priorities, in the first step of the guided process, click Create to save the planning cluster.
You will return to the Planning Clusters page.
You can always come back and assign the location priority later according to your business requirement.
Steps to Enable
Use the Opt In UI to enable this feature. For instructions, refer to the Optional Uptake of New Features section of this document.
Offering: Supply Chain Planning
If you want to use the Manage Planning Clusters Using a New User Experience feature, then you must opt in to its parent feature: Replenishment Planning. If you’ve already opted in to this parent feature, then you don’t have to opt in again.
Follow these steps to enable or disable this feature:
- In the Setup and Maintenance work area, search for and select the Manage Planning Profile Options task.
- On the Manage Planning Profile Options page, search for and select the ORA_MSC_PLANNING_CLUSTERS_REDWOOD_ENABLED profile option code.
- In the Profile Values section, set the Site level to Yes or No. The default value is No.
- Yes = enables the feature
- No = disables the feature
- Click Save and Close.
- Changes in the profile value will affect users the next time they sign in.
Key Resources
- Visit redwood.oracle.com/ for more information about the Redwood experience.
- For more understanding of Oracle Replenishment Planning, you can go through the following:
- Introduction to Replenishment Planning Cloud (update 19D) in the readiness training
- Replenishment Planning Training on Oracle Cloud Customer Connect
Access Requirements
Users who are assigned a configured job role that contains these privileges can access this feature:
- Monitor Replenishment Planning Work Area (MSC_MONITOR_REPLENISHMENT_PLANNING_WORK_AREA_PRIV)
- Manage Segments (MSC_MANAGE_SEGMENTS_PRIV)
- Manage Search Views (HCM_MANAGE_SEARCH_VIEWS_PRIV)
The first two privileges were available prior to this update. The Manage Search Views privilege is new in this update.