Redwood: Create Documents for Sales Orders
Use the redesigned Order page to create a document that has details about your sales order. As an option, you can set up Oracle Order Management so it prompts you to view or email the document after you submit the order.

Try it:
- Go to the Order Management work area, then click Tasks > Sales Order (New).
- Create and save a sales order, then click Actions > Email Order Document.
- Notice that Order Management automatically created a document that summarizes the sales order. If all looks ok, click Send Email, then Order Management will send the document as an attachment in an email message to the email recipient.
Note
- Order Management uses the Sales Order Report template to create the document. You can select a different template and language, depending on how you set up your templates.
- You can also click Save to download the document as a PDF file before you send it.
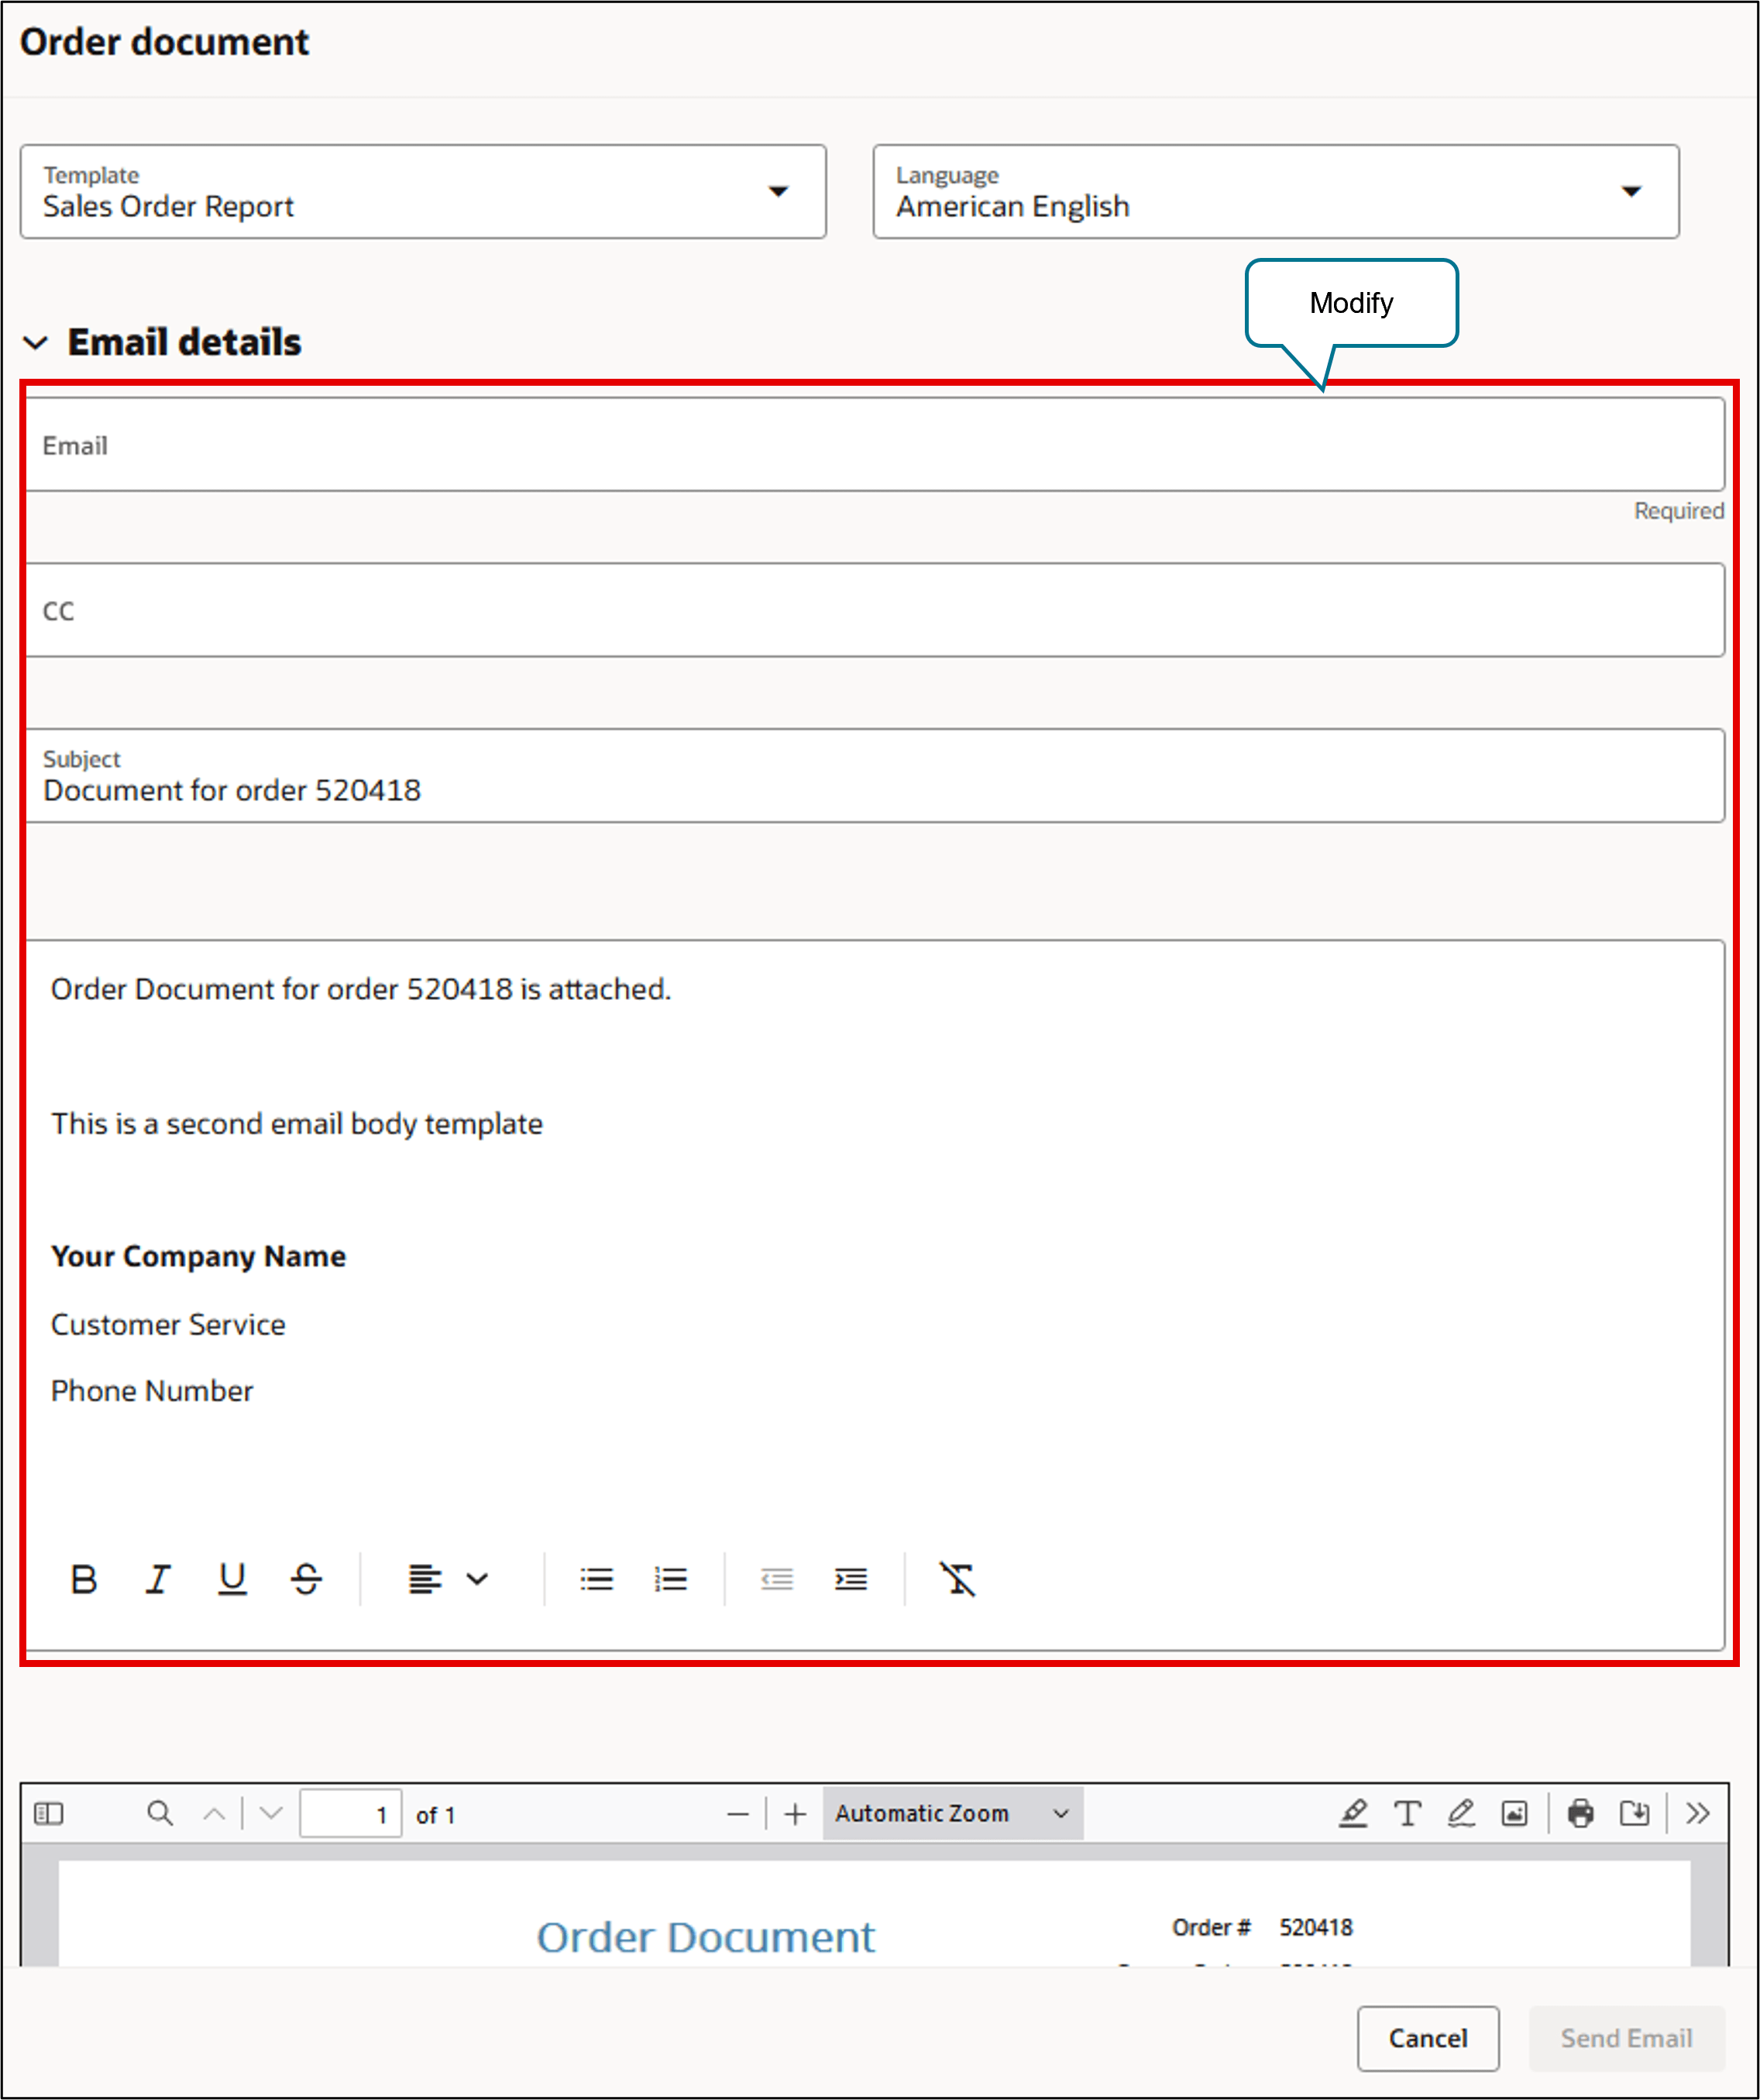
As an option, expand Email Details and modify the email. For example, add more email recipients, or change the defaulted email address, subject, and content:
Create Document After You Submit
You can set up Order Management so it prompts you to create the document after you submit the sales order:
To start, use Visual Builder Studio:
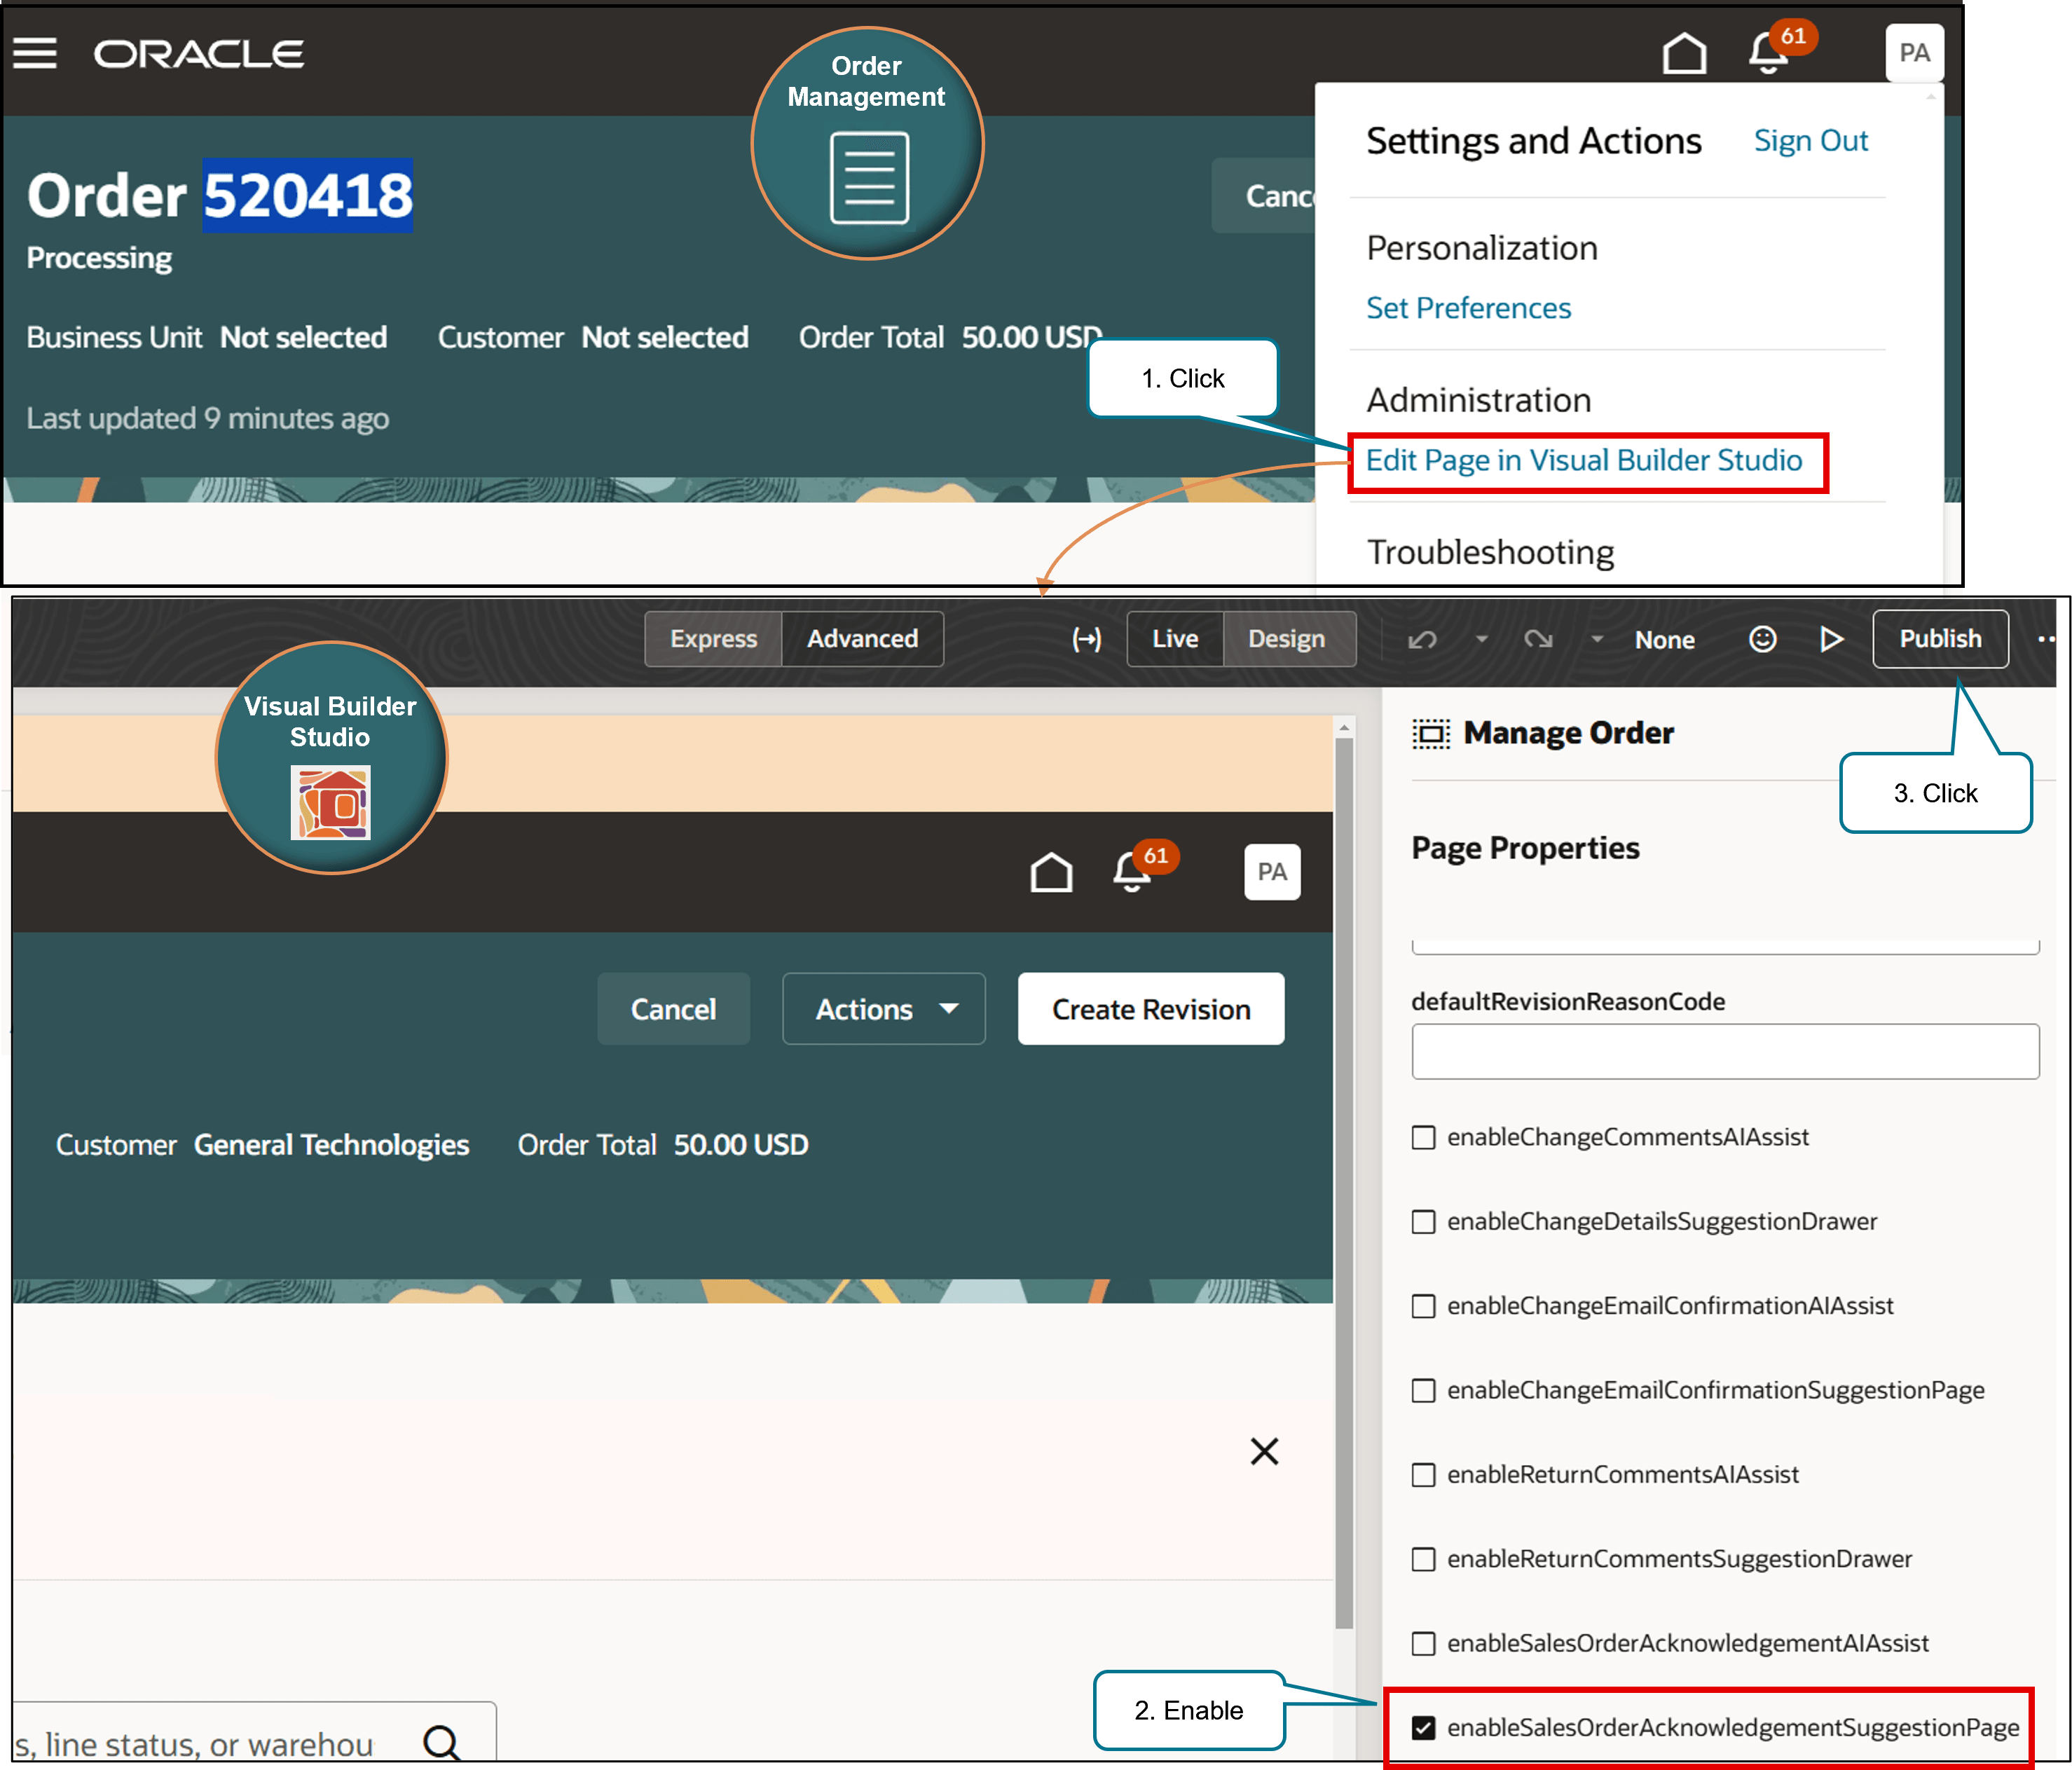
- Click Settings and Actions > Edit Page.
- Set the enableSalesOrderAcknowledgementAISuggestionPage property to True.
- Click Publish.
Create a sales order, submit it, then notice this dialog:
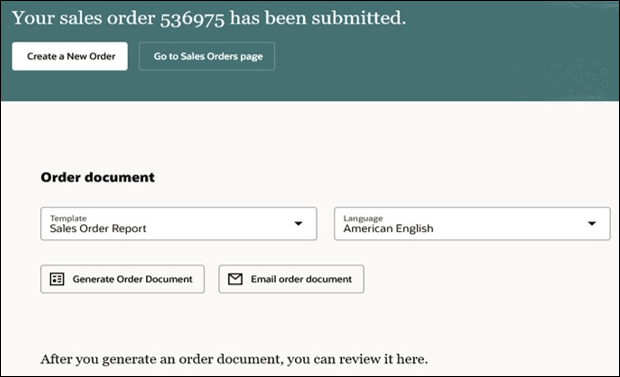
You have a few choices:
- Select the template and language.
- Click Generate Order Document.
- Click Email Order Document.
- Skip all that and create a new sales order or go back to the Sales Orders page.
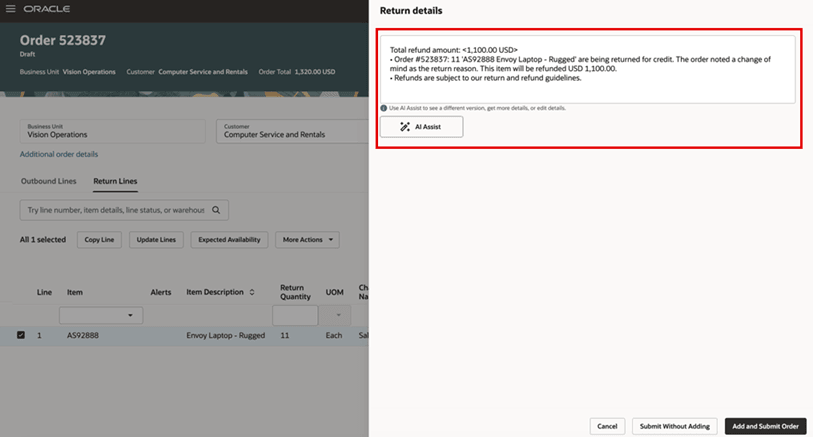
Summarize Your Return Comments
Set the enableReturnCommentsAIAssist property to true, and then use AI Assist to help you create a return comment when you have return lines in your sales order. Consider this example where you have a return line:
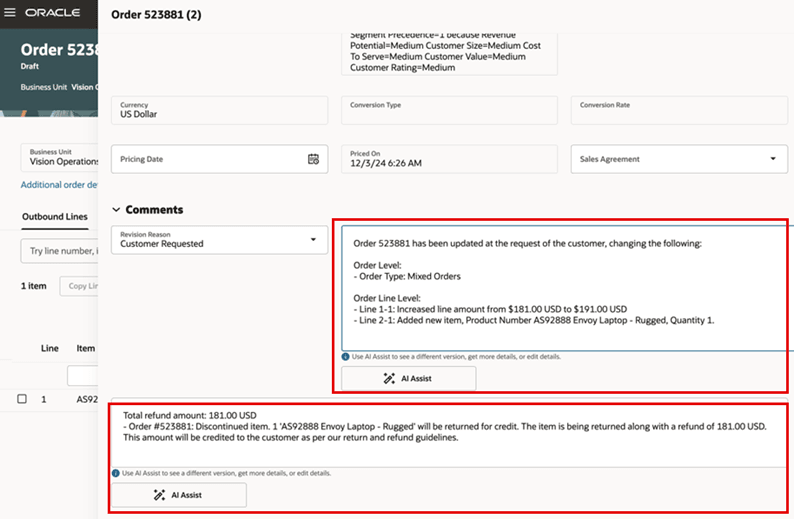
Save your changes and then click AI Assist in the Comments section to automatically create text that summarizes return lines that part of the sales order. You can also click AI Assist for your revision comments.
Set the enableReturnCommentsSuggestionDrawer property to true, and Order Management will display a dialog that you can use to add return comments after you submit the return order:
Set the enableChangeDetailsSuggestionDrawer property to true, and Order Management will display a dialog that includes revision comments and return comments:
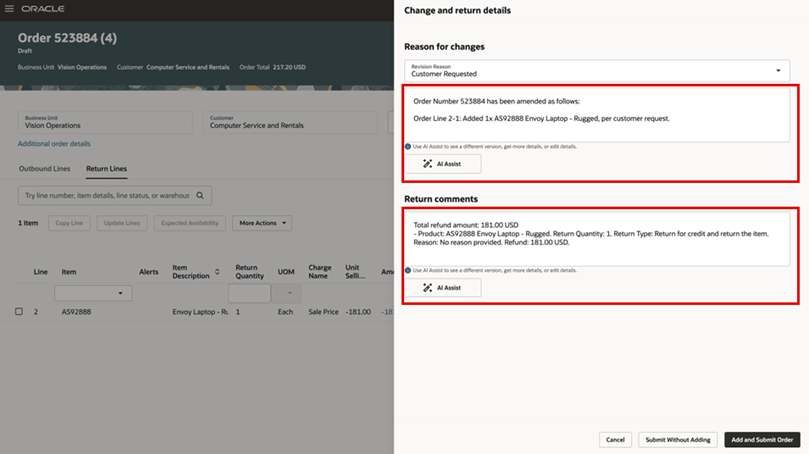
The AI agent considers these attributes when it creates content for your return comments:
- Return Type
- Return Reason
- Product
- Original Ordered Quantity*
- Return Quantity
- Original Order Number*
- Return Order Number
- Requested Ship Date*
- Actual Ship Date*
- Original Line Amount*
- Refund Amount
- Total Refund Amount
The asterisk means the value is from the original, fulfilled sales order.
The revision reason, revision comments, and the new return comments that you added are now available in the Comments section.
Improve responsiveness to your customer's queries. Send the sales order's items, prices, dates, and customer details in a professional looking document.
Steps to Enable
If you want to use the Redwood: Create Documents for Sales Orders feature, then you must opt in to its parent feature: Redwood: Create and Manage Sales Orders. If you’ve already opted in to this parent feature, then you don’t have to opt in again.
Tips And Considerations
As an option, use Oracle Business Intelligence Publisher to set up your own templates. Copy the predefined Sales Order Report template, then modify the copy to meet your needs. You might need to modify the template for the email's body too. For details about how, see Implementing Order Management.
Key Resources
- Extend SCM Redwood Application Pages Using Visual Builder Studio
- Extend Oracle Cloud Applications in Visual Builder Express Mode
- Set up VB Studio to Extend Oracle Cloud Applications