Redwood: Assign a Load Number to Group Shipments and Shipment Lines for Fulfillment
When optimizing your outbound shipments, it's typically more efficient and cost effective to send multiple shipments using full truck loads instead of sending multiple shipments using less than a truck load. In order to send multiple shipments together in the same truck, you need a way to group the shipments or shipment lines together so they are moved through the fulfillment process at the same time. You now have the ability to assign an outbound load to shipment lines or shipments to group them together and ensure they are linked for transport in the same container or truck. When grouping shipments and shipment lines together, you can collectively perform actions like picking the shipment lines together and confirming all of the shipments in the load.
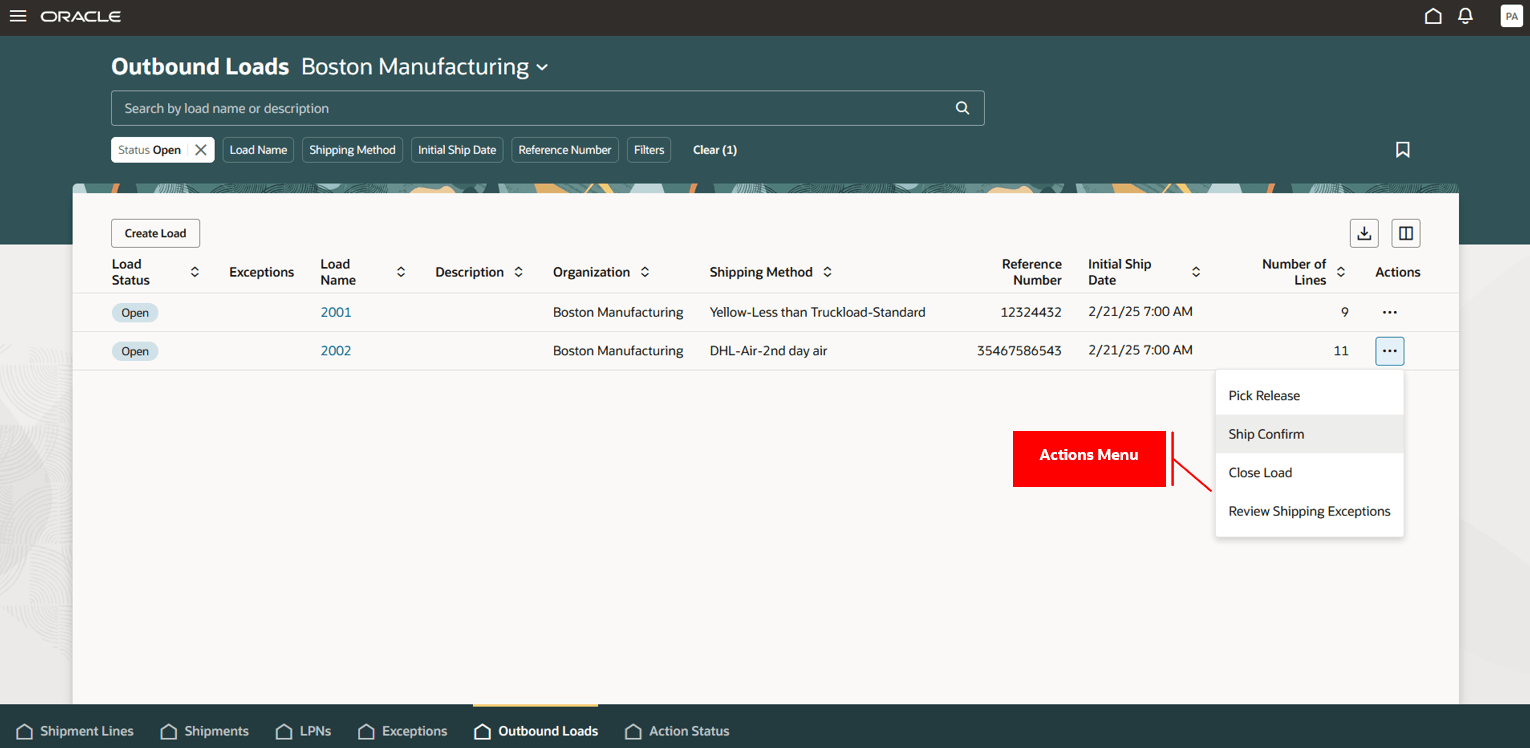
You can access the Outbound Loads page by navigating to the Outbound Shipments task from the Inventory Management work area. Alternatively, you can use the Outbound Shipments task from Quick Actions.
The Shipment Lines page will be open by default. Use the in-app navigation at the bottom of the page to switch to the Outbound Loads tab, where you can review and take action on outbound loads.
Here are some key points about the Outbound Loads page:
- On entering the page, you'll see open loads in organizations for which you have access.
- You can refine your search using filters like Load Name, Shipping Method, Status, and so forth.
- Once you've identified your load, you can:
- Edit the load.
- Pick release all shipment lines assigned to the load.
- Ship confirm all shipments associated with the load.
- If shipment lines in the load aren’t already assigned to a shipment, shipments will be automatically created and confirmed.
- Any shipment lines that aren’t eligible for ship confirm will be automatically removed from the load, and the load will be closed.
- Review shipping exceptions for all associated shipment lines, shipments, and LPNs.
- Close the load.
- The load will be automatically closed when you confirm and close the last shipment in the load.
- If you don't confirm all shipments and manually remove the remaining lines, you can use the Close Load action to close it manually.
- Use the in-app navigation tabs to move between the Shipments, Shipment Lines, Packing Units, Exceptions, Outbound Loads, and Action Status pages.
Outbound Loads
Creating a Load:
Click Create to open a drawer where you can enter:
- Load Name
- Description
- Shipping Method
- Reference Number
- Additional Information
If you don’t provide a Load Name, the system automatically generates a unique one. Once created, you’ll be taken to the Outbound Load page that shows the load details.
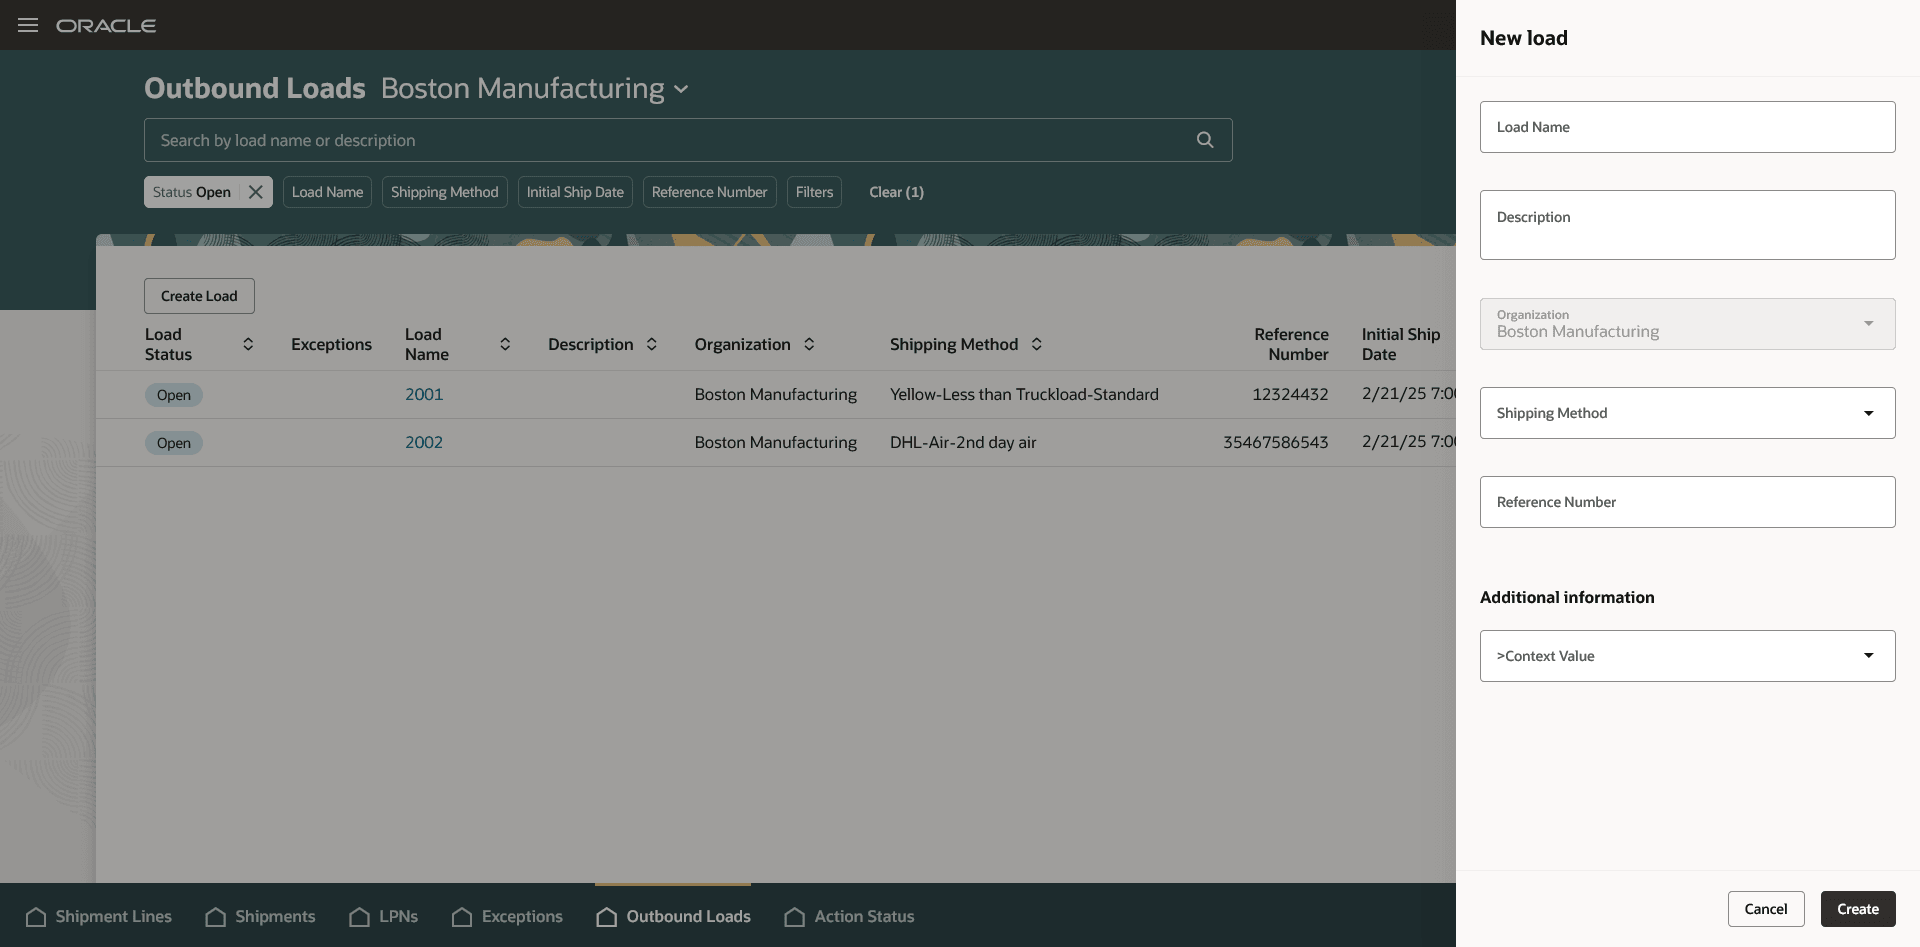
Create Load Drawer
Content Information Section:
This section contains three tabs:
- Shipment Lines – Displays shipment lines assigned to the load.
- Shipments – Displays shipments associated with the shipment lines.
- LPNs – Displays LPNs associated with the shipment lines.
Available Actions:
- Add Line – Search and add shipment lines. If the selected line is tied to a shipment or LPN, all associated lines are automatically added to the load.
- Add Shipments – Search and add shipments. All shipment lines within the shipment are added to the load.
- Add LPNs – Search and add LPNs. All shipment lines within the LPN are added to the load.
- Unassign from Load – Unassign shipment lines from a load by selecting the shipment line, shipment, or LPN.
- If a shipment line is assigned to a shipment or LPN, navigate to the Shipments or LPNs tab to remove the entire shipment or LPN from the load. If only a specific line needs to be removed, unassign the line from the shipment or unpack it from the LPN first, and then unassign it from the load.
- Pick Release – Pick release all shipment lines associated with a selected shipment line, shipment, or LPN.
- Download Shipping Documents – Download shipping documents for shipments associated with the load from the Shipments tab.
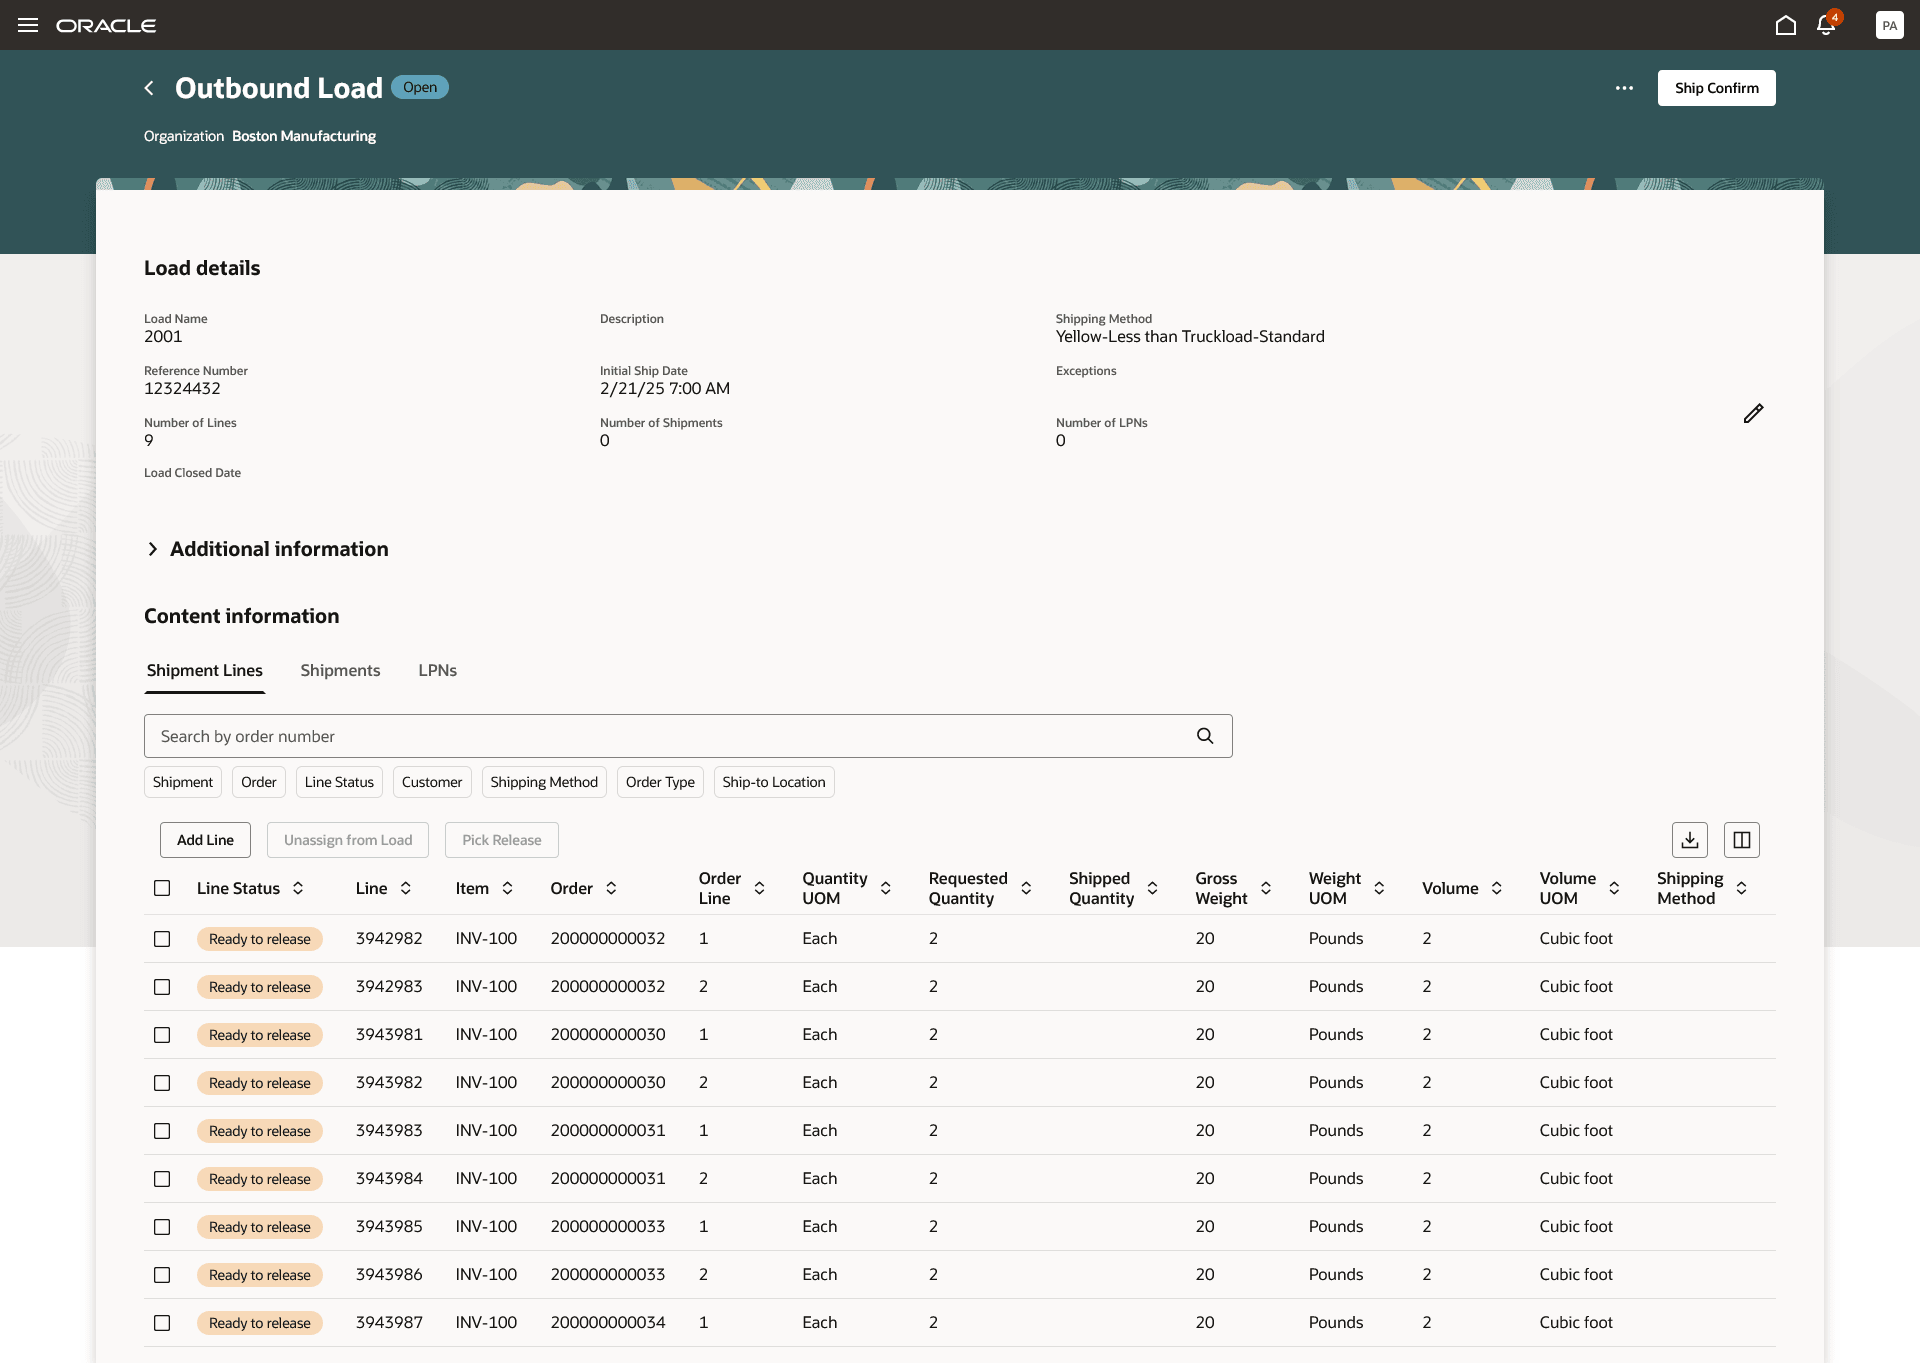
Outbound Load Details
Load Name has been added as a demand selection criterion on the New Pick Wave page. You can use this to pick release all shipment lines assigned to a specific load.
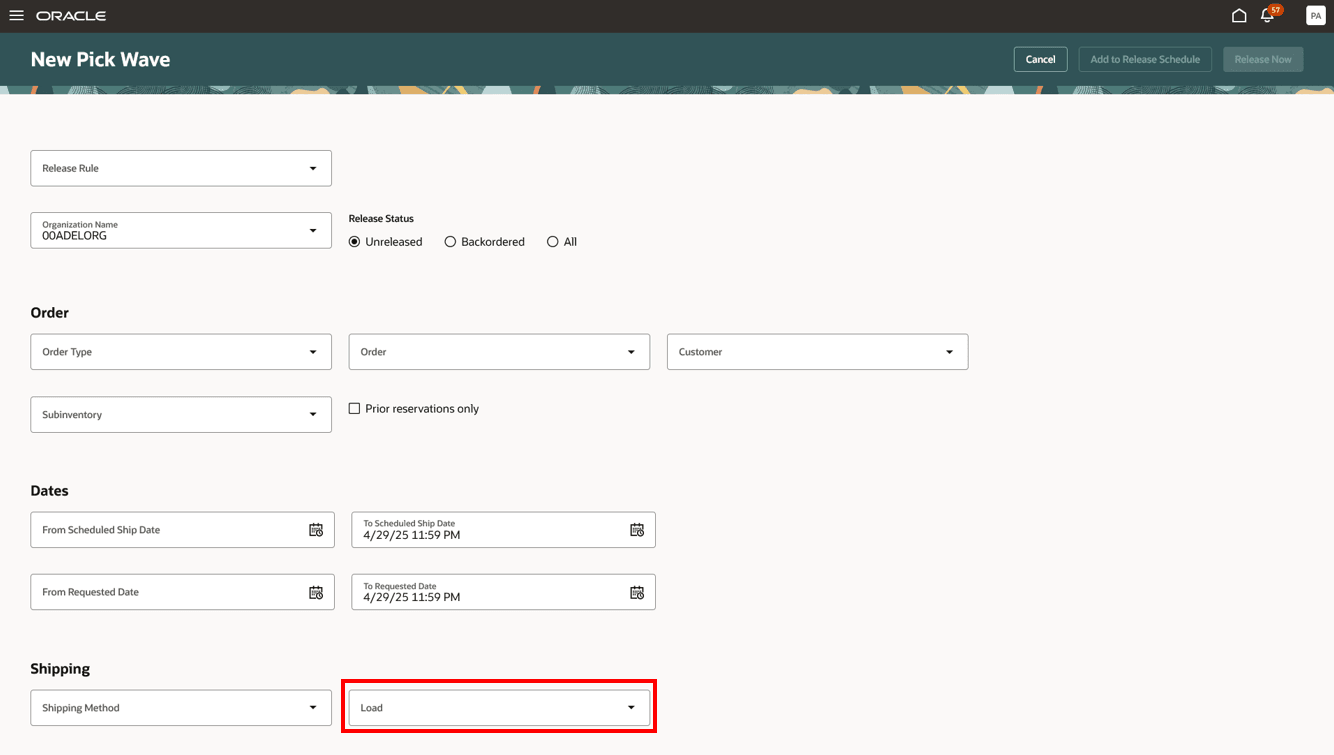
New Pick Wave
Load Name has been added as a search option on the Mobile Ship Goods page. You can use this to search for shipments assigned to a specific load.
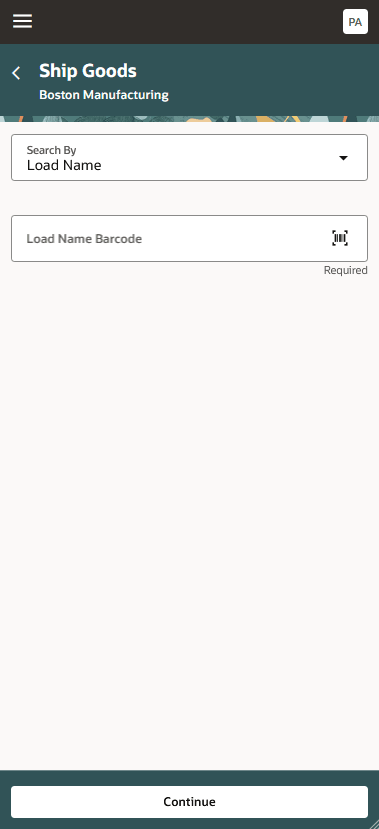
Ship Goods - Search By
Load Name has been added to the search results on the Shipment Lines, Shipments, and LPNs pages.
This feature provides you an efficient way to optimize your outbound shipments and save on freight charges by grouping shipments and shipment lines together to ensure they are transported in the same container or truck.
Here's the demo of these capabilities:
Steps to enable and configure
Important: Before you set up Oracle Fusion Cloud Advanced Inventory Management, see the licensing and enablement information at the beginning of the Advanced Inventory Management section.
Configure Advanced Inventory Parameters
- On the Advanced Inventory Parameters page, select the organization for which you want to enable or disable outbound load creation.
- In the Outbound Loads section,
- Select the Enable Outbound Load Creation checkbox to allow outbound load creation for the organization.
- Deselect the checkbox to disable outbound load creation. You can disable this option only if all existing outbound loads for the organization are closed.
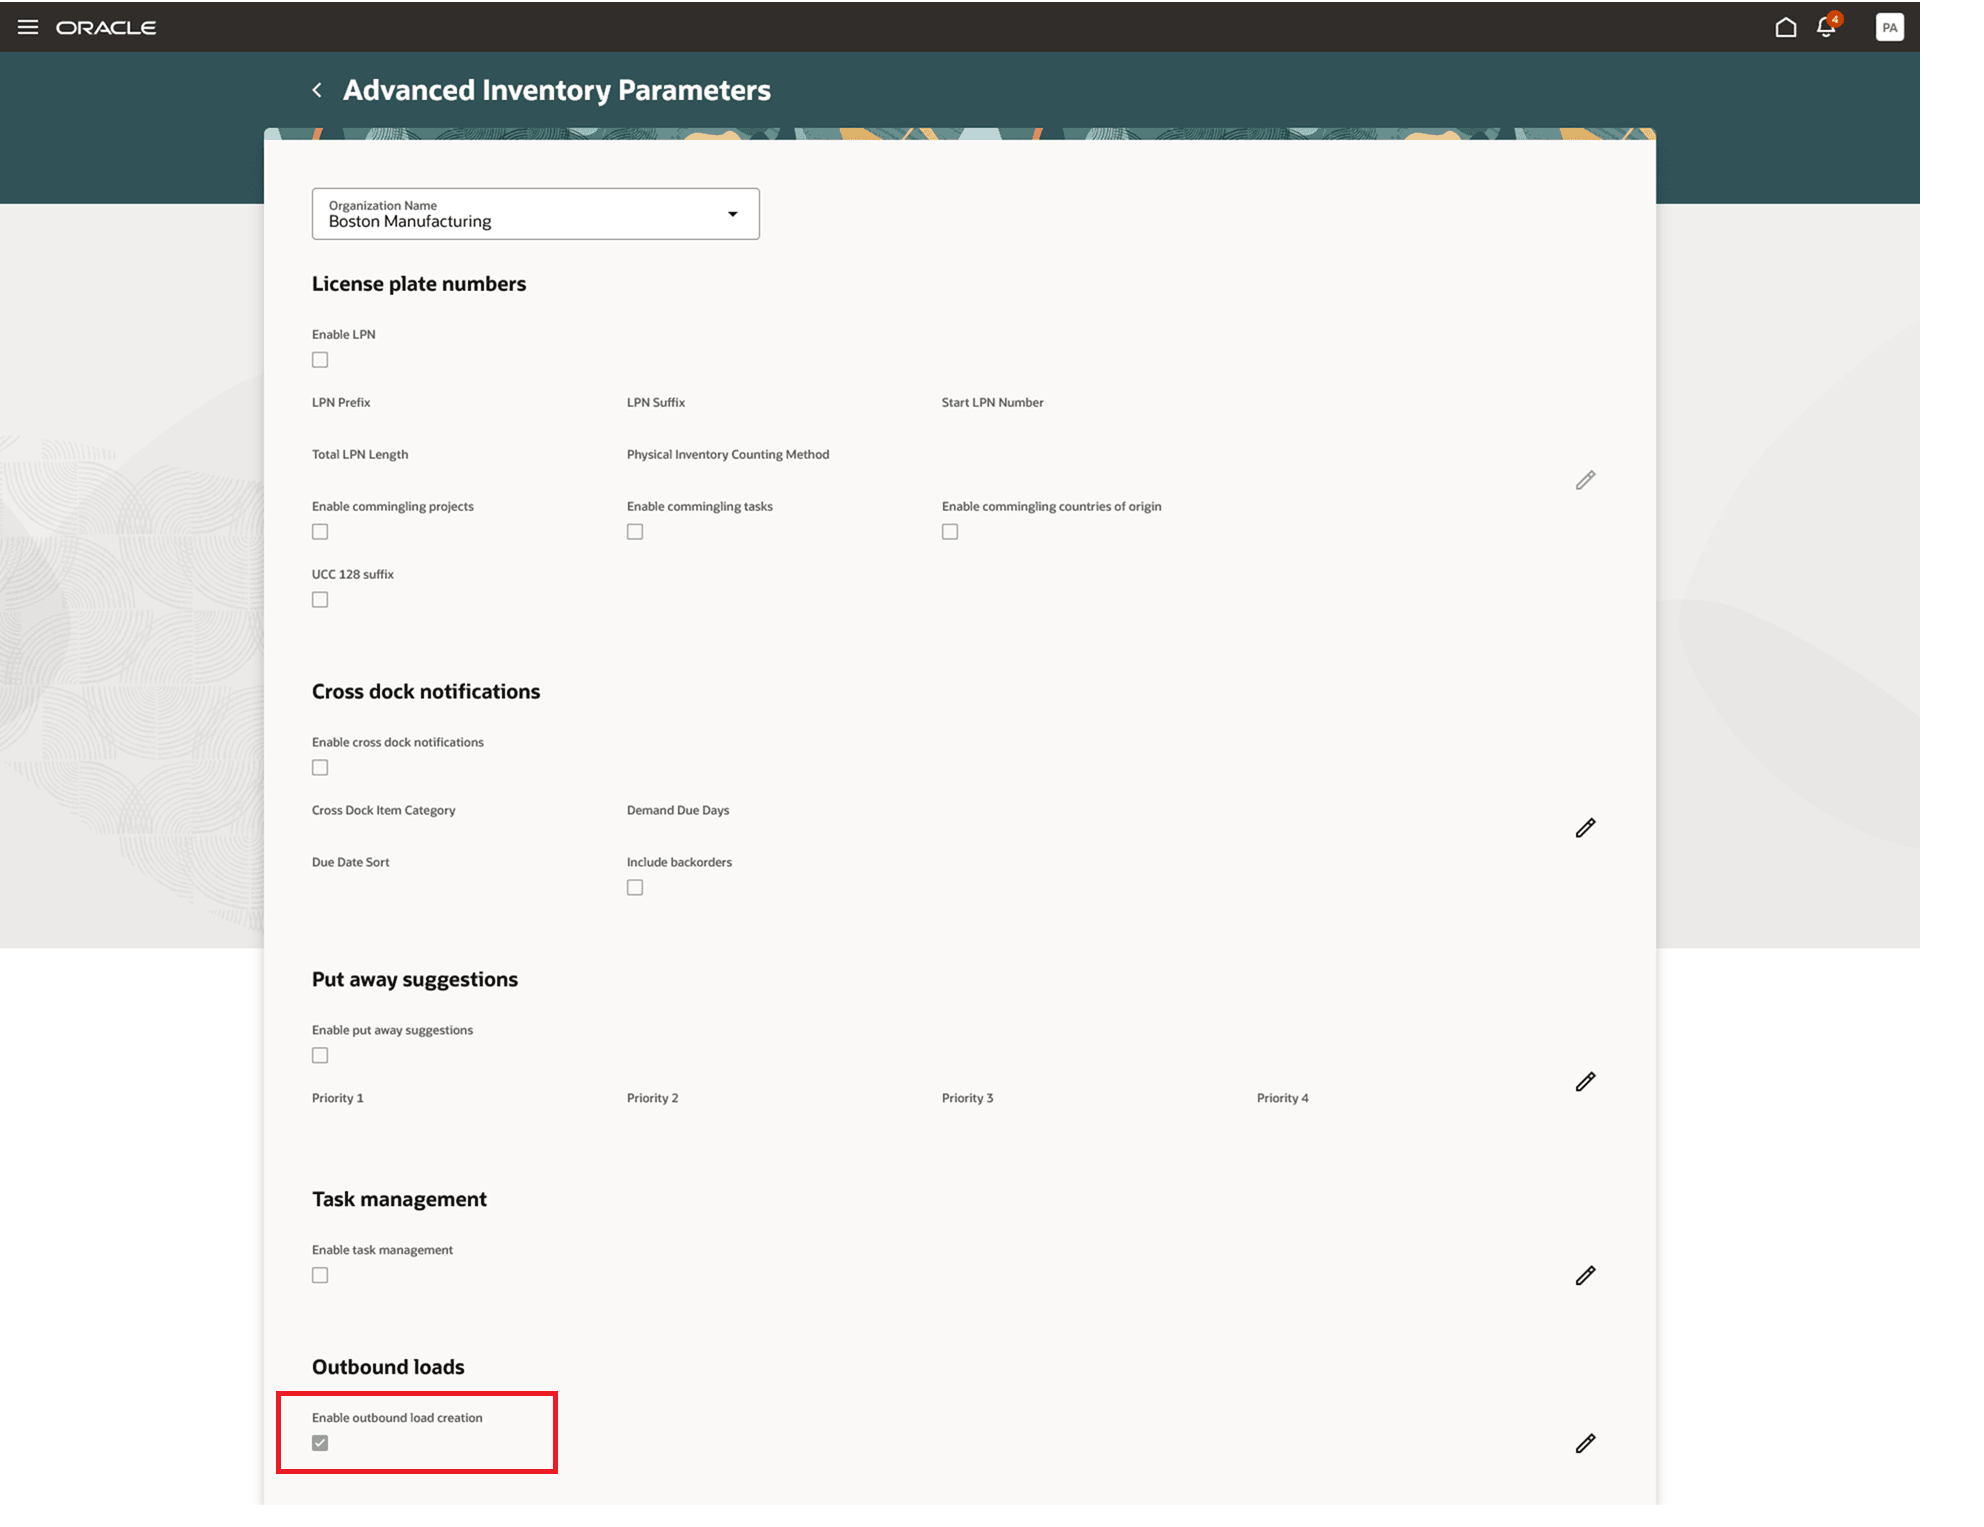
Advanced Inventory Parameters
Follow these steps to enable the Outbound Shipments task to access the Outbound Loads page:
- In the Setup and Maintenance work area, search for and select the Manage Shipping Profile Options task.
- On the Manage Shipping Profile Options page, search for and select the ORA_WSH_OUTBOUND_SHIPMENTS_REDWOOD_ENABLED profile option code.
- In the Profile Values section, set the Site Level to Yes or No. The default value is No.
- Yes = enables the feature
- No = disables the feature
- Click Save and Close. Changes in the profile value will affect users the next time they sign in.
NOTE: Once the profile option is enabled, the Manage Shipments and Manage Shipment Lines tasks will be replaced by the Outbound Shipments task, and Redwood pages must be used to manage shipments, shipment lines, and outbound loads.
Tips and considerations
- You can't add shipment lines to outbound loads if they are managed by Transportation Management Systems for transportation planning or are fulfilled through WMS or external execution systems. So, shipment lines with a Transportation Planning Status of Pending, Planned, or Replan and with an Integration Status of Interfaced are not eligible for outbound loads.
- Once a load is assigned to a shipment line, it becomes the default grouping when assigning the line to a shipment or packing it into an LPN. A shipment or LPN can include lines from only one load.
Key resources
- Oracle Fusion Cloud SCM: Using Shipping guide, available on the Oracle Help Center.
Access requirements
Users who are assigned a configured job role that contains these privileges can access this feature:
- Manage Shipments and Shipment Lines (WSH_MANAGE_SHIPMENT_AND_SHIPMENT_LINE_PRIV)
- Manage Outbound Loads (WSH_MANAGE_OUTBOUND_LOADS_PRIV)
The first privilege was available prior to this update, and the second privilege is new to this update.
NOTE: The Manage Outbound Loads privilege is not assigned to any predefined job roles. In the Security Console, you must manually assign the privilege to a configured job role.
To set up this feature, you'll need a configured job role that contains this new duty role, which is not assigned to any predefined job roles:
- Advanced Inventory Management Administration Duty (ORA_INV_ADVANCED_INVENTORY_MANAGEMENT_ADMINISTRATION_DUTY)
This duty role is new in this update.