Redwood: Eliminate Supplier Setup for Purchasing and Receiving
Use the Redwood B2B Documents task to set up default B2B connections for outbound purchasing and receiving B2B documents. B2B messaging can now use the default settings to route messages, eliminating the need to configure connection details for each site.
You can define document defaults and eliminate site specific setup for these documents:
- Purchase Order – Outbound
- Purchase Order Change – Outbound
- Purchase Order Cancellation – Outbound
- Purchase Order Acknowledgment – Inbound
- Purchase Order Change Acknowledgment – Inbound
- Advance Ship Notice - Inbound
- Receipt Advice – Outbound
- Receipt Confirmation – Inbound
- B2B Message Processing Result – Inbound
- You can reduce the setup time as you can define a default connection for each document and get partner identification from the message payload. If you're using a single service provider, there is no other supplier site specific setup required to send Purchase Orders.
- You don't need site level setup for Inbound Advance Ship Notices and PO Acknowledgments. Instead, you just need an active connection.
- If you need to use different connections for one or more supplier sites, you can create connections for suppliers that are used for all sites of that supplier. This eliminates the need for site specific setup.
- You can now create reusable delivery methods by not specifying a provider when you create the delivery method. Delivery methods without providers can be used for any outbound connection that has a user-defined provider.
Steps to enable and configure
Enable the feature Simplify Configuration and Processing for B2B Messaging and perform the following high-level tasks to set up your purchasing and receiving documents:
- Define your providers (direct and service providers) if you are not using one of the predefined service providers.
- Configure your delivery methods.
- Create new connections if you're not using the predefined connections.
- Configure document properties and assign connections to your outbound documents.
- Add B2B partner properties if you're using DVMs or if you're not retrieving partner information from the payload.
Define Your Providers
- Select B2B Connections from the Task Panel.
- Select the Providers tab to add a new provider.
- Select Direct or Service Provider as the Provider Type and add the remaining details.
- Click Save.
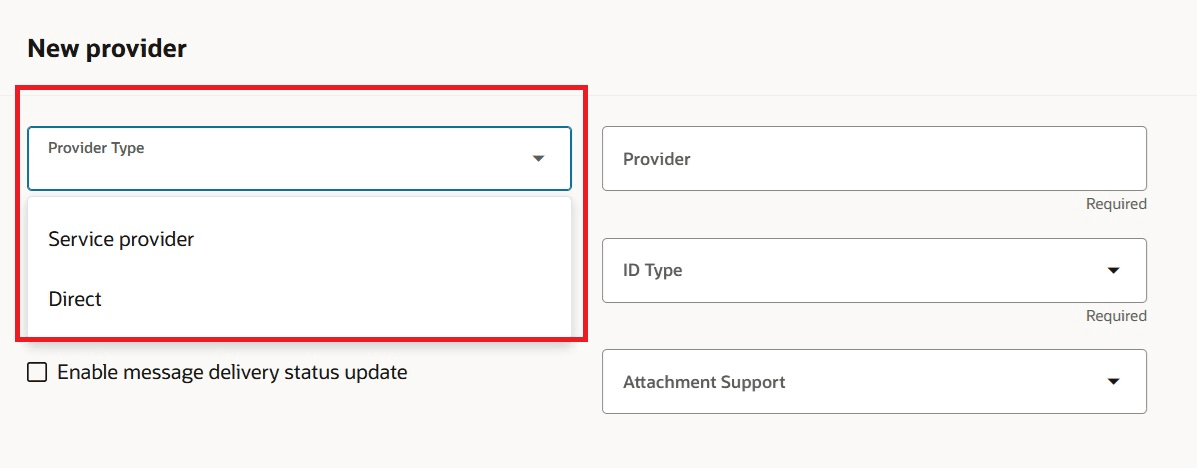
Add a Provider
Configure Delivery Method
- Select B2B Connections from the Task Panel.
- Select the Delivery Methods tab and add a new delivery method.
- Enter details for the delivery method.
- Delivery methods that are associated with a provider can only be used for that provider when creating connections. You don’t need to create delivery methods for B2B Adapter or Business Event. When you're creating connections, you can select one of the values below for these delivery method types:
- ORA_B2BAdapter or
- ORA_BusinessEvent
- Click Save.
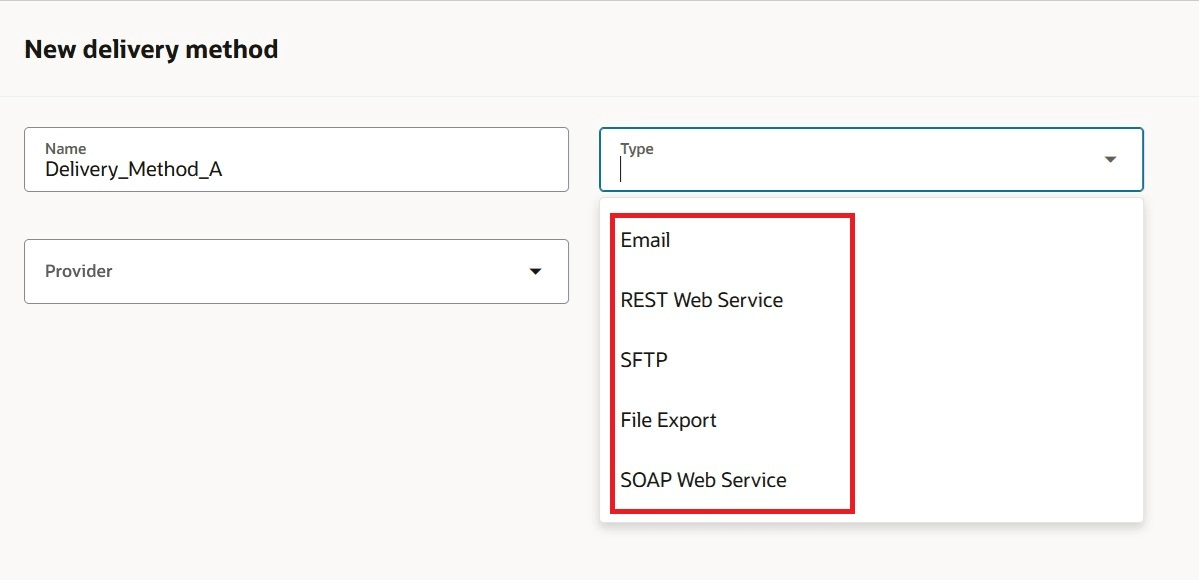
Add a New Delivery Method
Create a Connection for Each of the Documents You Exchange
A connection identifies a specific configuration for exchanging a document with a third party and you must define an active connection for each of the documents you exchange.
- Select B2B Connections from the Task Panel.
- Select the Connections tab.
- Click Add to add a new connection and enter the details. Set the status to Active and click Submit.
- Repeat this process to create connections for all your purchasing and receiving documents.
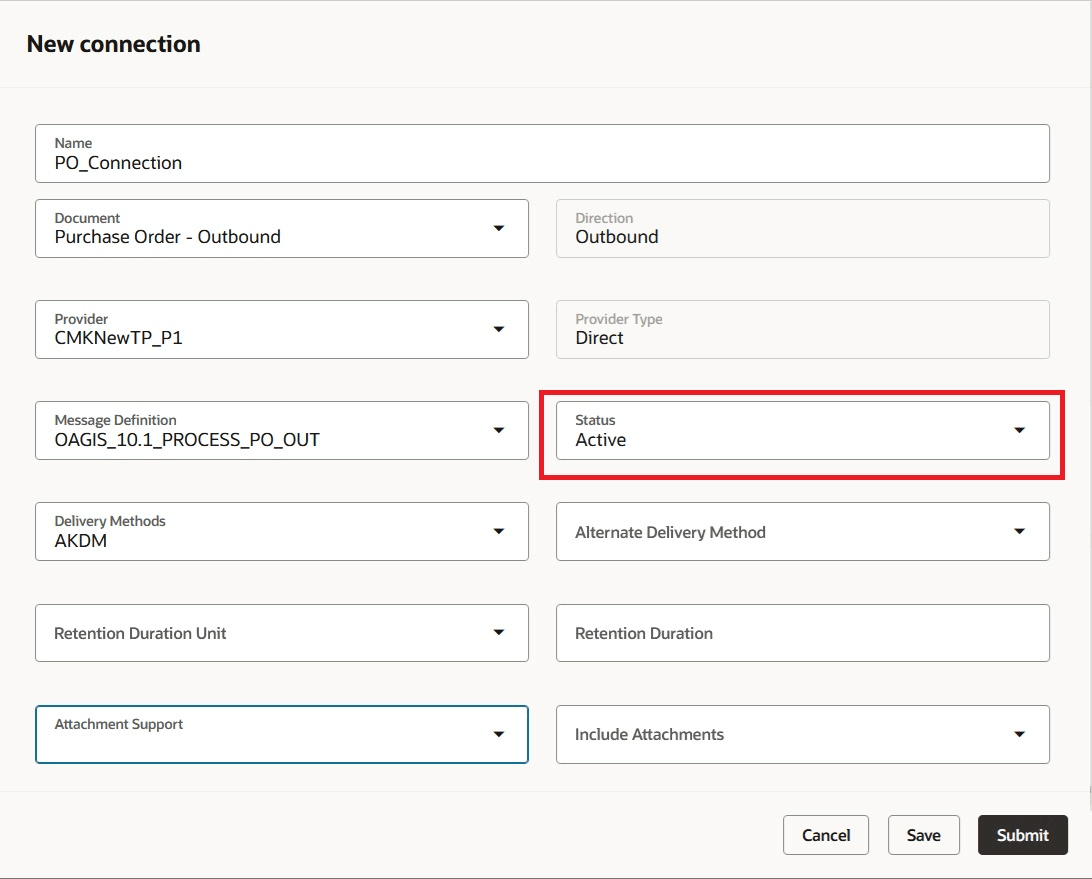
Add a Connection
Configure Document Properties and Assign Connections
- Select B2B Documents from the Task Panel or select Documents from the in-app navigation bar.
- Select each of your documents and the Enabled field to Yes. Select Configure Document Properties to define any properties specific to the selected document.
- For your outbound documents, you can configure the document so that you get the partner information from the payload for message processing.
- Enable the property group Partner identification from payload.
- Click Edit Properties and enter a value for Partner ID path. You can also enter a value for Partner ID type path. If you don’t enter a value, the partner ID type Generic is used.
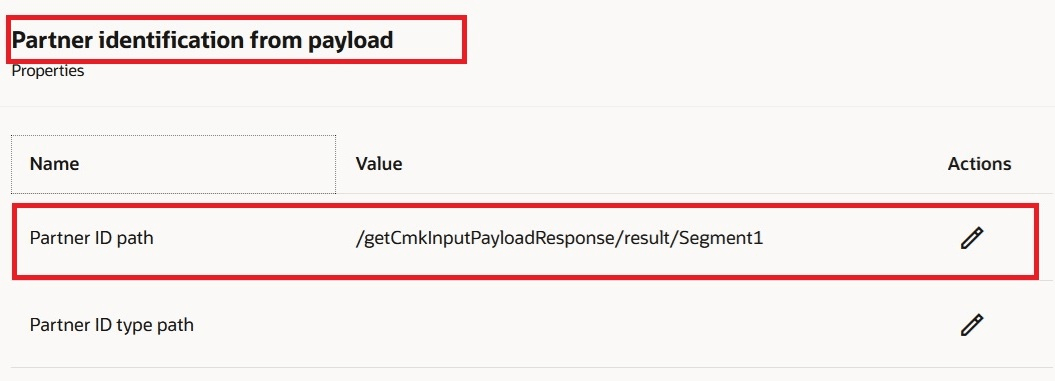
Partner ID from Payload
- After you have configured document properties for each of your documents, assign connections to your outbound documents. On the B2B Documents page, select the outbound document you are configuring and click Assign Connections.
- On the Assign Connections page, select a default connection for the document and enable it. This default connection is used to process the document where there isn’t another connection.
- If you want to use a different connection for a specific supplier, for example, a different service provider or transformation for a specific supplier, you can assign a supplier connection to the document in addition to the default connection. Supplier connections can be assigned to supplier or a supplier site.
- Click Submit.
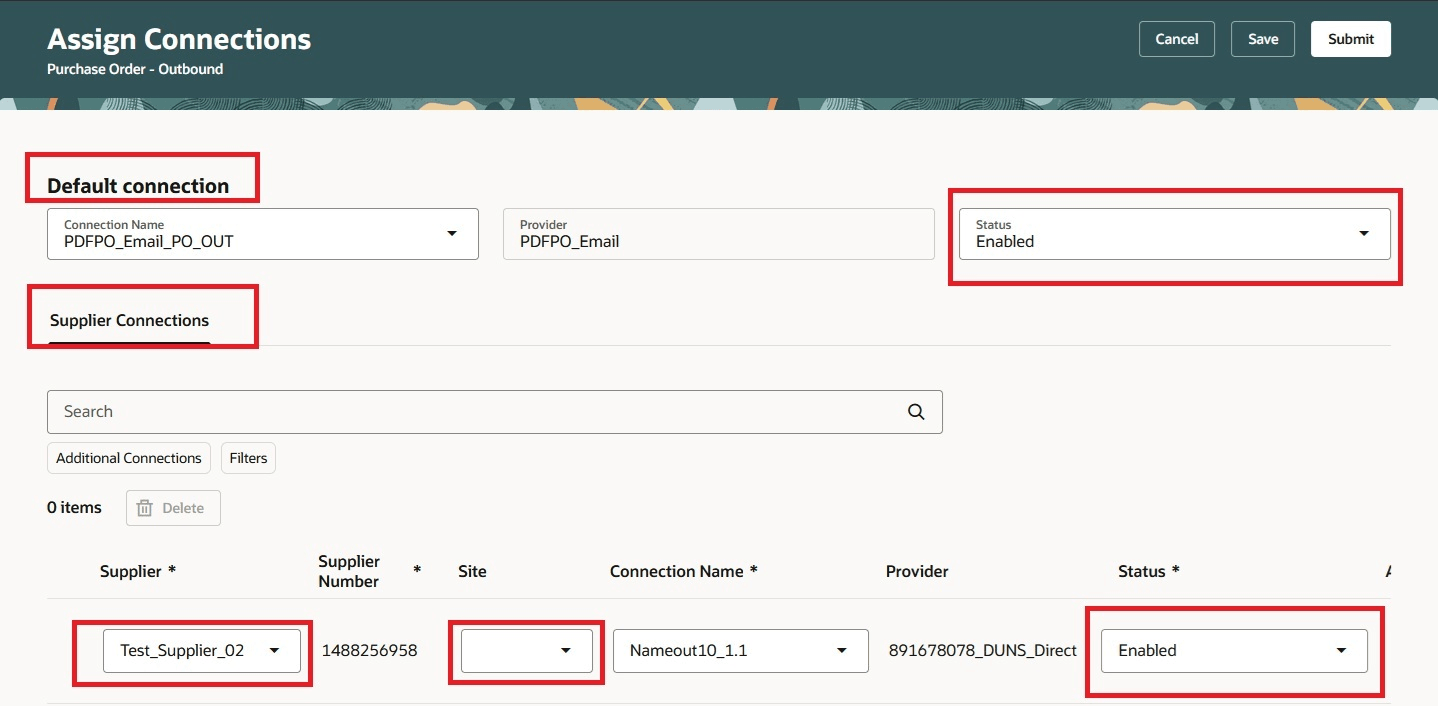
Default and Supplier Connection
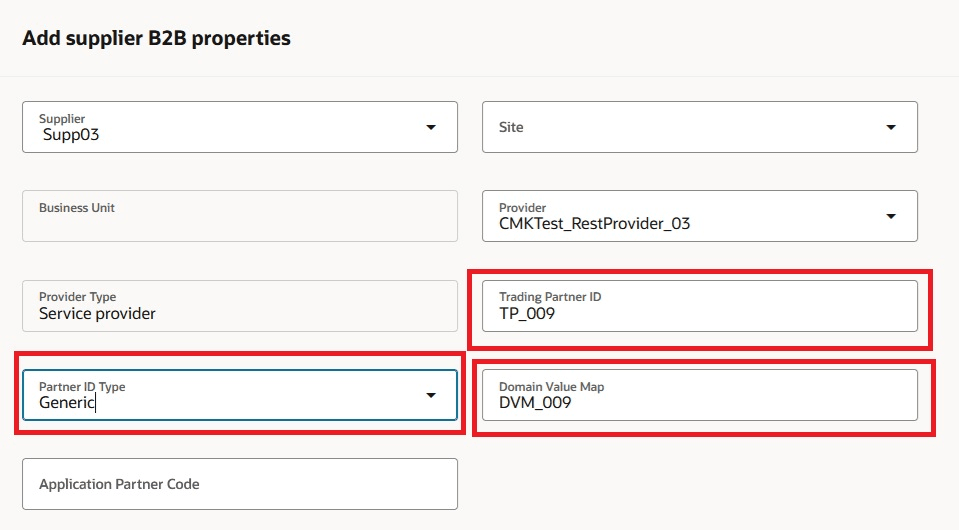
Add Supplier B2B Properties
If you have configured your outbound document to get partner identification from payload, you can add supplier B2B properties to associate domain value maps to your suppliers.
If you haven’t configured your outbound document to get partner identification from payload and you are using a service provider, you’ll need to add supplier B2B properties to provide partner identification information for each for your suppliers for message processing.
Here’s how you add supplier B2B properties:
- Select B2B Partners from the Task Panel.
- Select the Supplier B2B Properties tab, and click Add.
- Add partner information and or a domain value map. The site is optional unless you're providing an application partner code.
- Click Save.
Add Supplier B2B Properties
Tips and considerations
- The term connection is used to refer to an outbound collaboration message setup for a service provider or partner.
- A Provider of type Service Provider is the same as a Service Provider in the previous version.
- A Provider of type Direct is the same as a Trading Partner with Service Provider None in the previous version.
- Receipt Advice – Outbound and Receipt Confirmation – Inbound requires the application partner code for processing and needs to have B2B supplier properties added.
Access requirements
Users who are assigned a configured job role that contains this privilege can access this feature:
- Manage Collaboration Message Definitions by Web Service (CMK_MANAGE_COLLAB_MESG_DEFINITION_WEB_SERVICE_PRIV).
This privilege was available prior to this update.