Create Distributions on Multiple Requisition Lines
Create one or more distributions on multiple requisition lines. With the Edit Multiple Lines feature, you can create distributions that apply to all selected lines. Before this update, you could only update existing distributions.
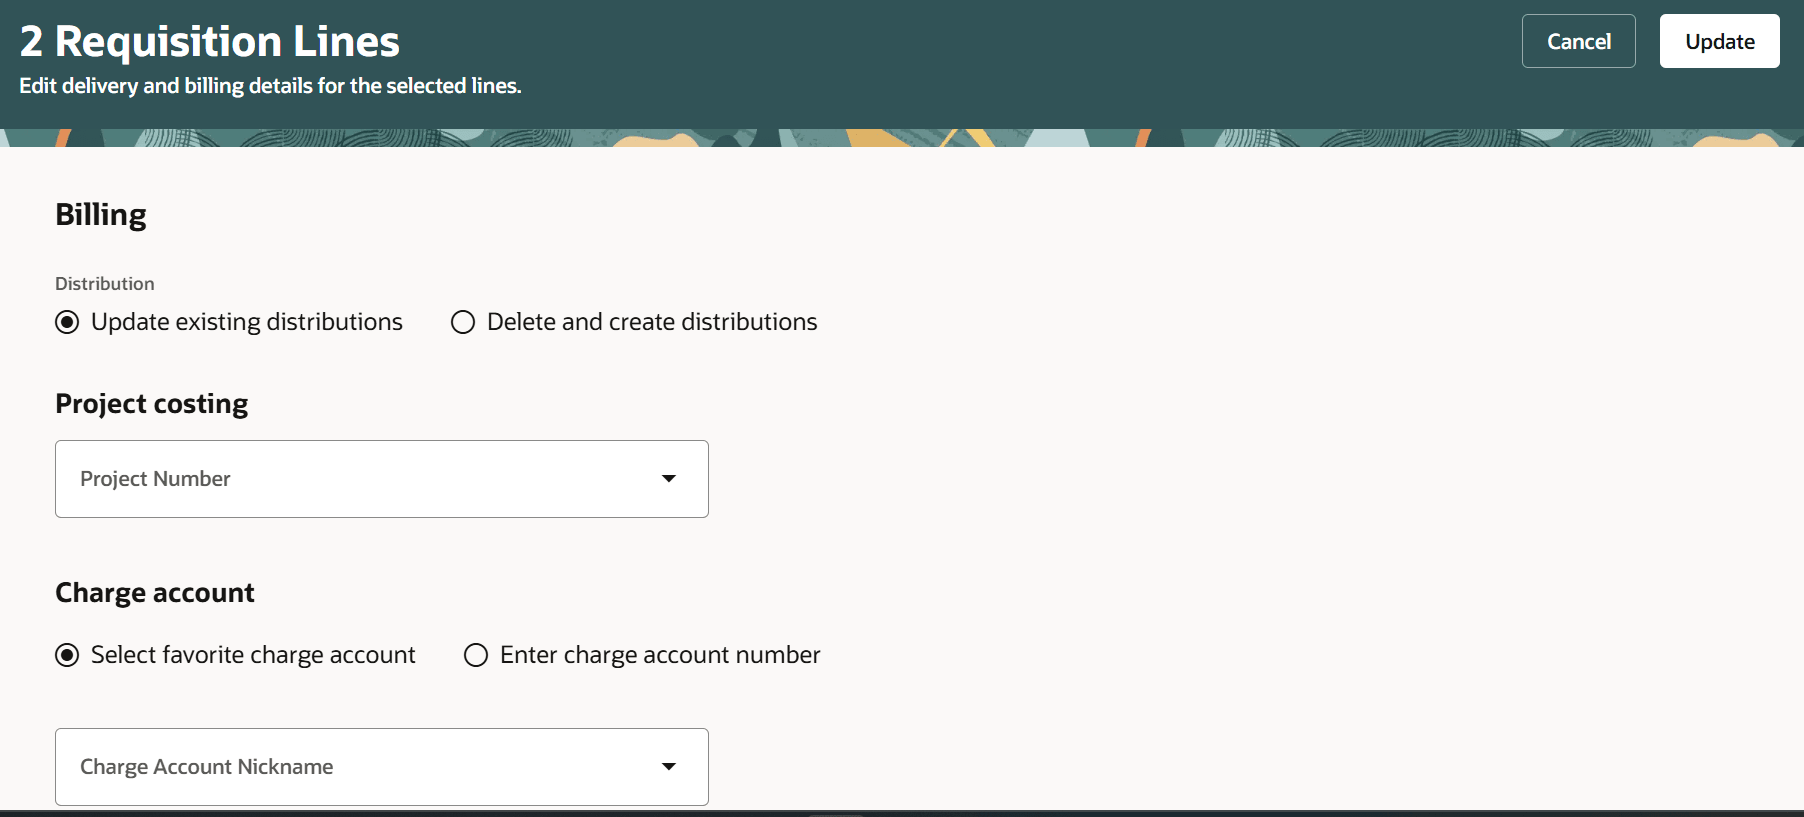
After you have selected the lines for update, navigate to the Edit Multiple Lines page, where you will find these options in the Billing section:
- Update existing distributions - This feature was available prior to this update.
- Delete and create distributions - This is the new feature that allows you to create one or more distributions. By selecting this option, you can initiate the first distribution in the New distribution drawer.

Billing Section with Options to Update or Create Distributions
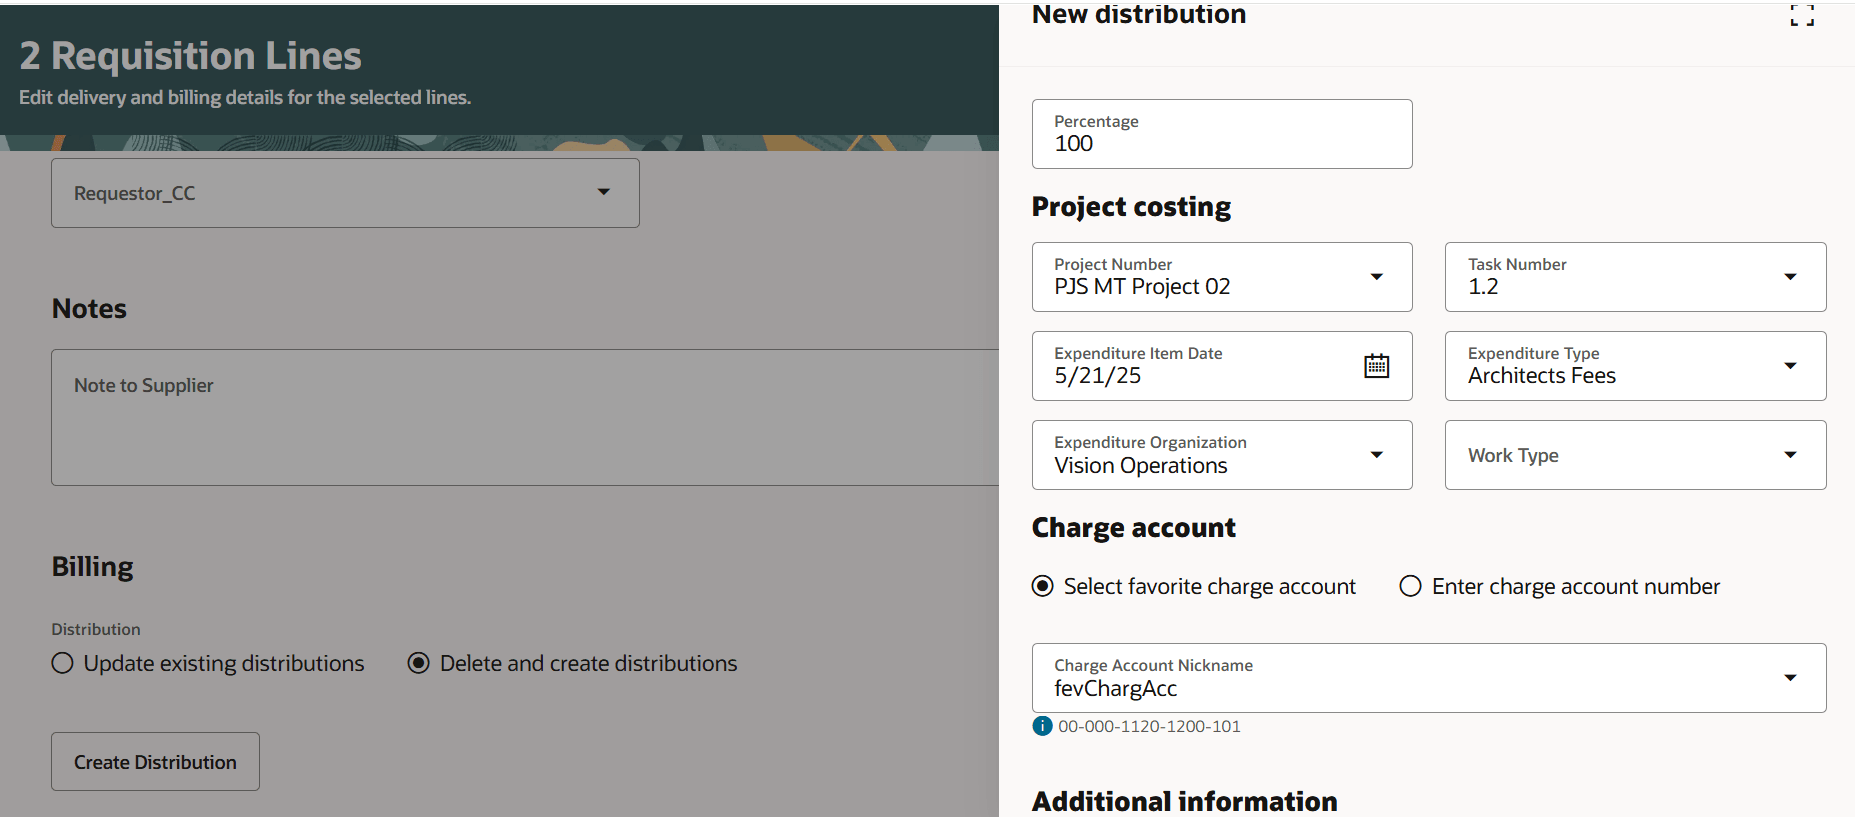
After selecting the Delete and create distributions option, you can use the Create Distribution action to create a distribution.

Create Distributions to Replace Existing Distributions on All Lines
You can then use the Split action in the distribution to create one or more distributions. Upon update on the page, the new distributions will apply to all selected lines.
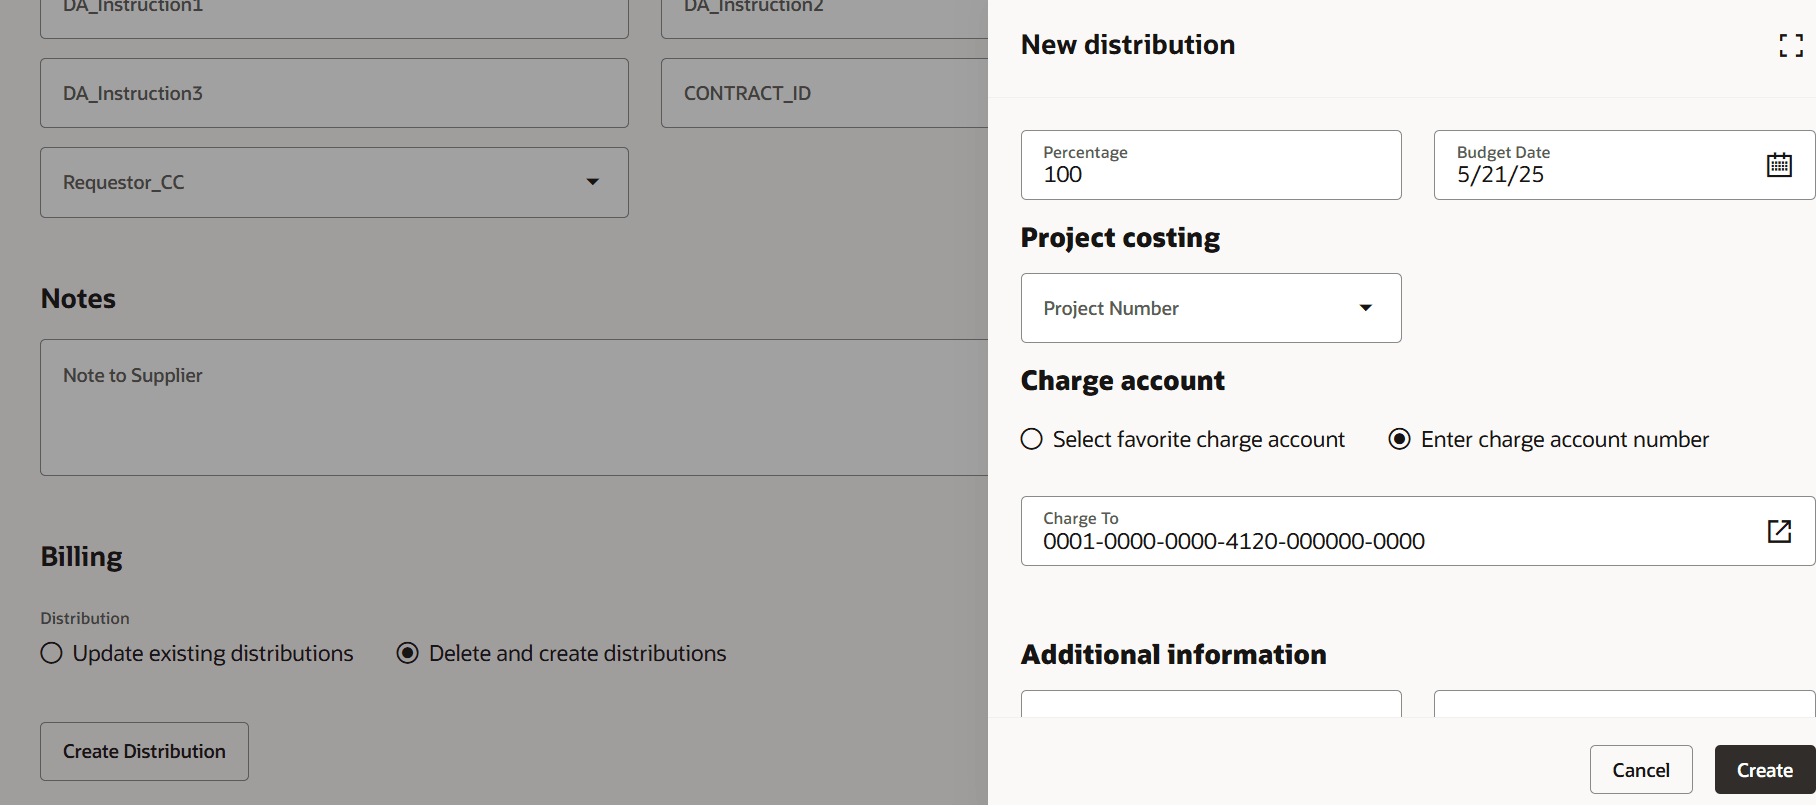
In Budgetary Control-enabled business units, you can provide budget date as well when creating distributions.

Create Distributions in Budgetary Control-Enabled Business Units
You can edit the distribution you just created, split it further, or delete it as needed. It's not necessary for the total percentage of the distribution allocations to equal 100% when you update all lines. However, if you leave it unbalanced, you will need to reallocate the distributions on each line to achieve a total of 100% upon submission.
You can't split distributions for Work Orders or Inventory Destination Types. If the selected lines have multiple destination types associated with them, you must first select the Destination Type of Expense to create one or more distributions.
Steps to Enable
Use the Opt In UI to enable this feature. For instructions, refer to the Optional Uptake of New Features section of this document.
Offering: Procurement
If you want to use the Create Distributions on Multiple Requisition Lines feature, then you must opt in to one or both of these features:
- Enable the Redwood Version as the Default Self Service Procurement Application: Makes the Purchase Requisitions (New) work area available to all your users, and hides the Purchase Requisitions work area from all your users.
- Procure Goods and Services Using the Redwood Self Service Procurement Application: Keeps the Purchase Requisitions work area available to all your users, and makes the Purchase Requisitions (New) work area available to the users who are assigned this privilege: Manage Requisition with the Redwood Self Service Procurement Application (POR_MANAGE_REQ_WITH_PWA_PRIV).
If you’ve already opted in, then you don’t have to opt in again.
Tips And Considerations
- When providing a charge account, you can select a favorite charge account or enter one manually. If you have tried both options, the option that is highlighted during the creation of the distribution will be the one used.
- When creating a distribution, you must provide a percentage allocation value. Without this, you can't create a distribution.
Key Resources
- To know how to provide the required privileges to your requesters to use your own configured role instead of the Requisition Self Service User role, refer to the Privileges Required for a Predefined Role for a Requisition Self Service User topic.
- For more information on how to enable a guided journey for Redwood pages, refer to the Enable a Guided Journey for Redwood Pages topic.
- For information about using Oracle Visual Builder Studio to extend your Redwood application pages, see Oracle Fusion Cloud HCM and SCM: Extending Redwood Applications for HCM and SCM Using Visual Builder Studio.
Access Requirements
Users who are assigned a configured job role that contains this privilege can access this feature:
- Manage Requisition with the Redwood Self Service Procurement Application (POR_MANAGE_REQ_WITH_PWA_PRIV) to access the Redwood Self Service Procurement application.
NOTE: This privilege isn’t required if you have opted in to the Enable the Redwood Version as the Default Self Service Procurement Application feature to access the Redwood Self Service Procurement application.
This privilege was available prior to this update.