Redwood: Manage Measures Using a New User Experience
A measure in Oracle Fusion Cloud Supply Chain Planning contains data that can be analyzed in a planning table by dimensions, such as Product, Organization, Time, and so on. You can slice and dice data using the hierarchies on the various dimensions to obtain business insights. With this update, you can manage measures using a Redwood guided process so that you can make informed decisions on the various parameters that are required to define a measure and ensure that it works to your business needs.
In the Redwood work area named Supply Chain Planning, in your plan, click More Actions > View More to open the Actions drawer.
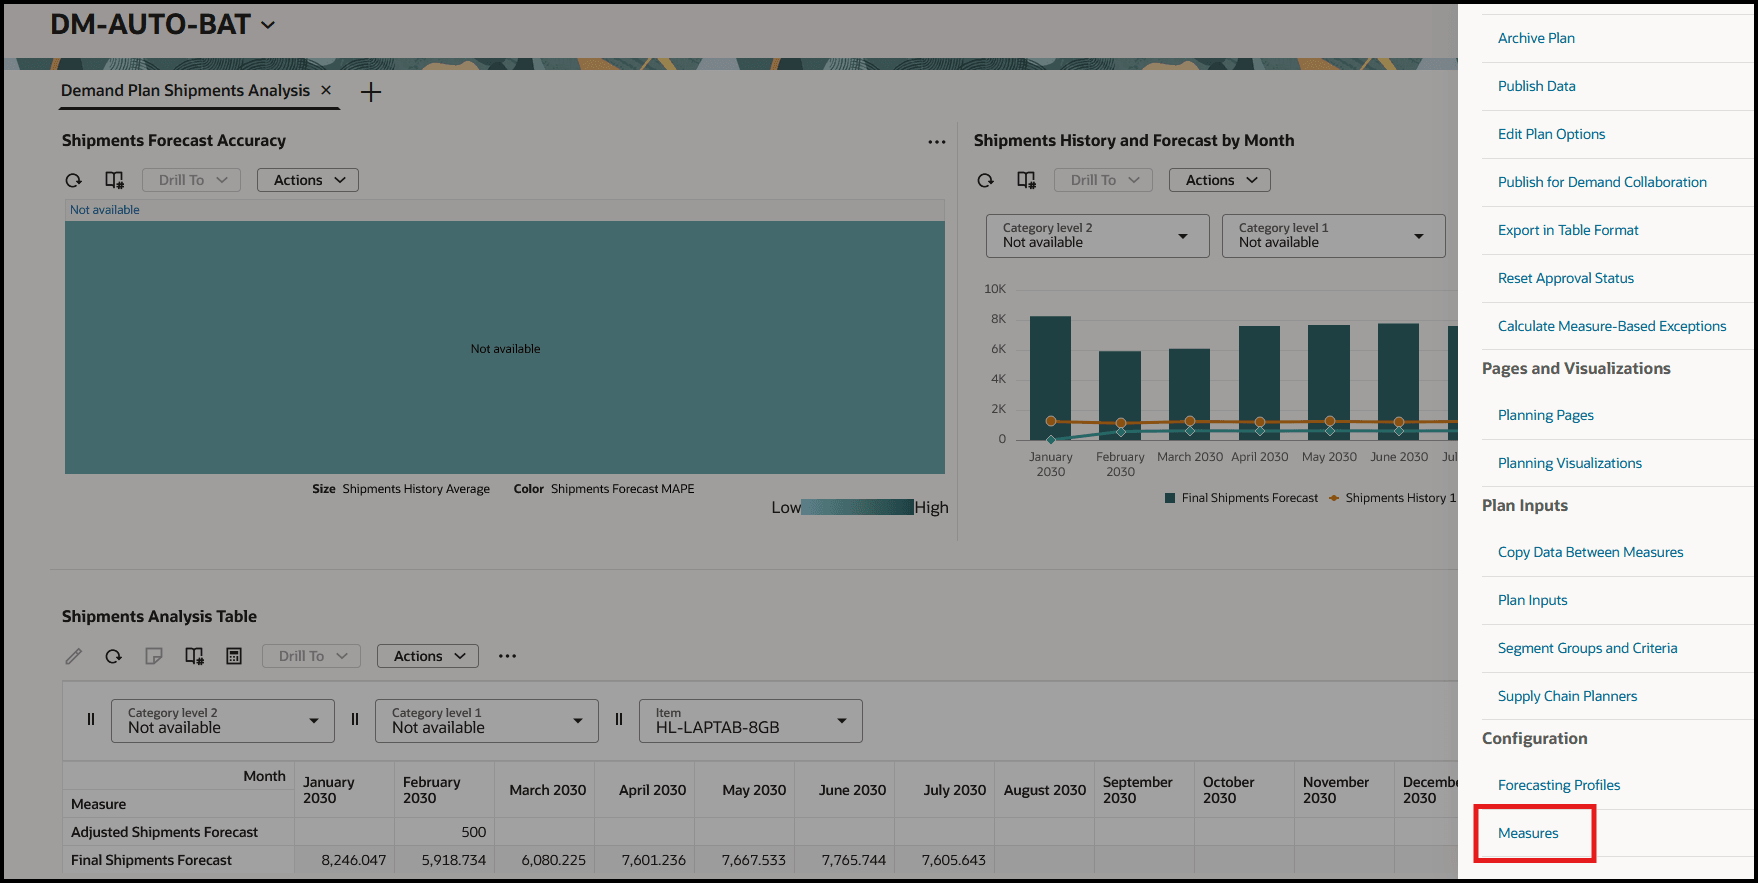
Actions Drawer for Plan
In Configuration, click Measures. The Measures page will open on a new tab.
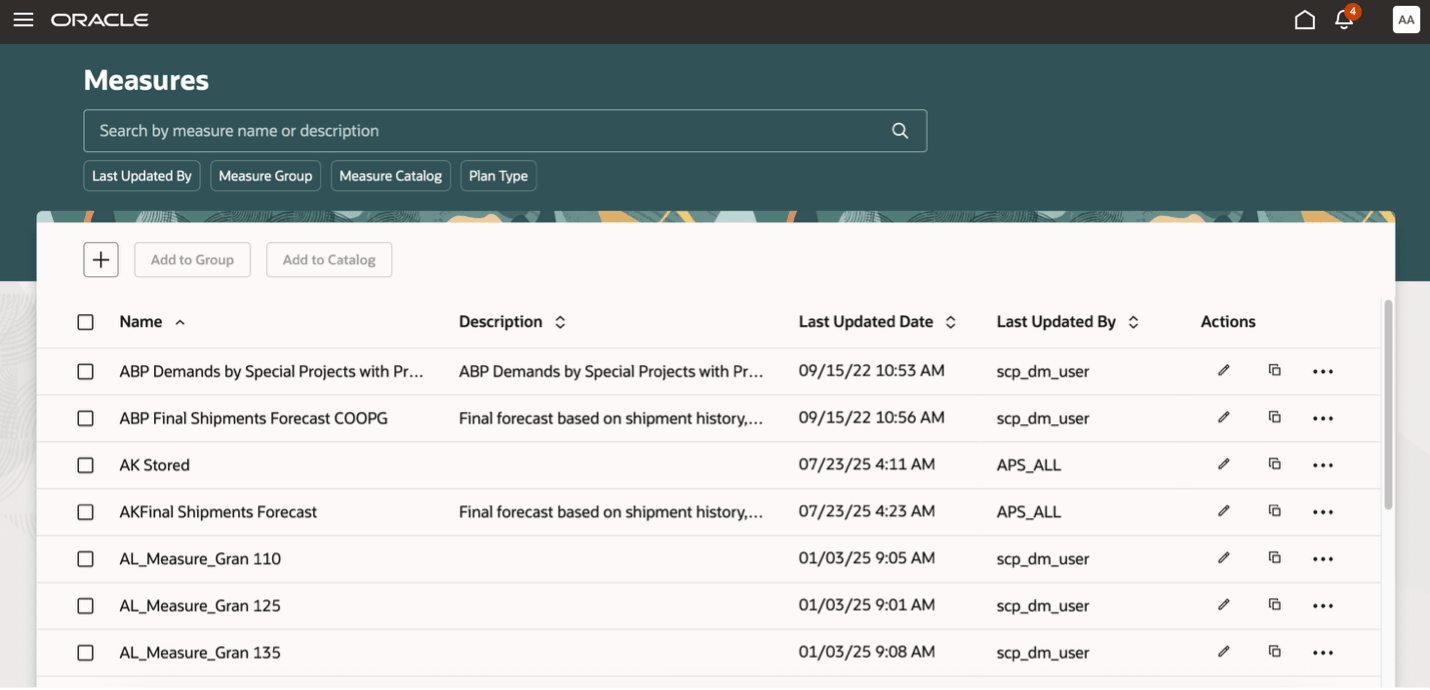
Measures Page
On the Measures page, you can view, create, duplicate, and edit measures.
In the search bar, you can search for measures by their names or descriptions. For example, you can search for measures containing "Final Shipments Forecast" in their names or descriptions.
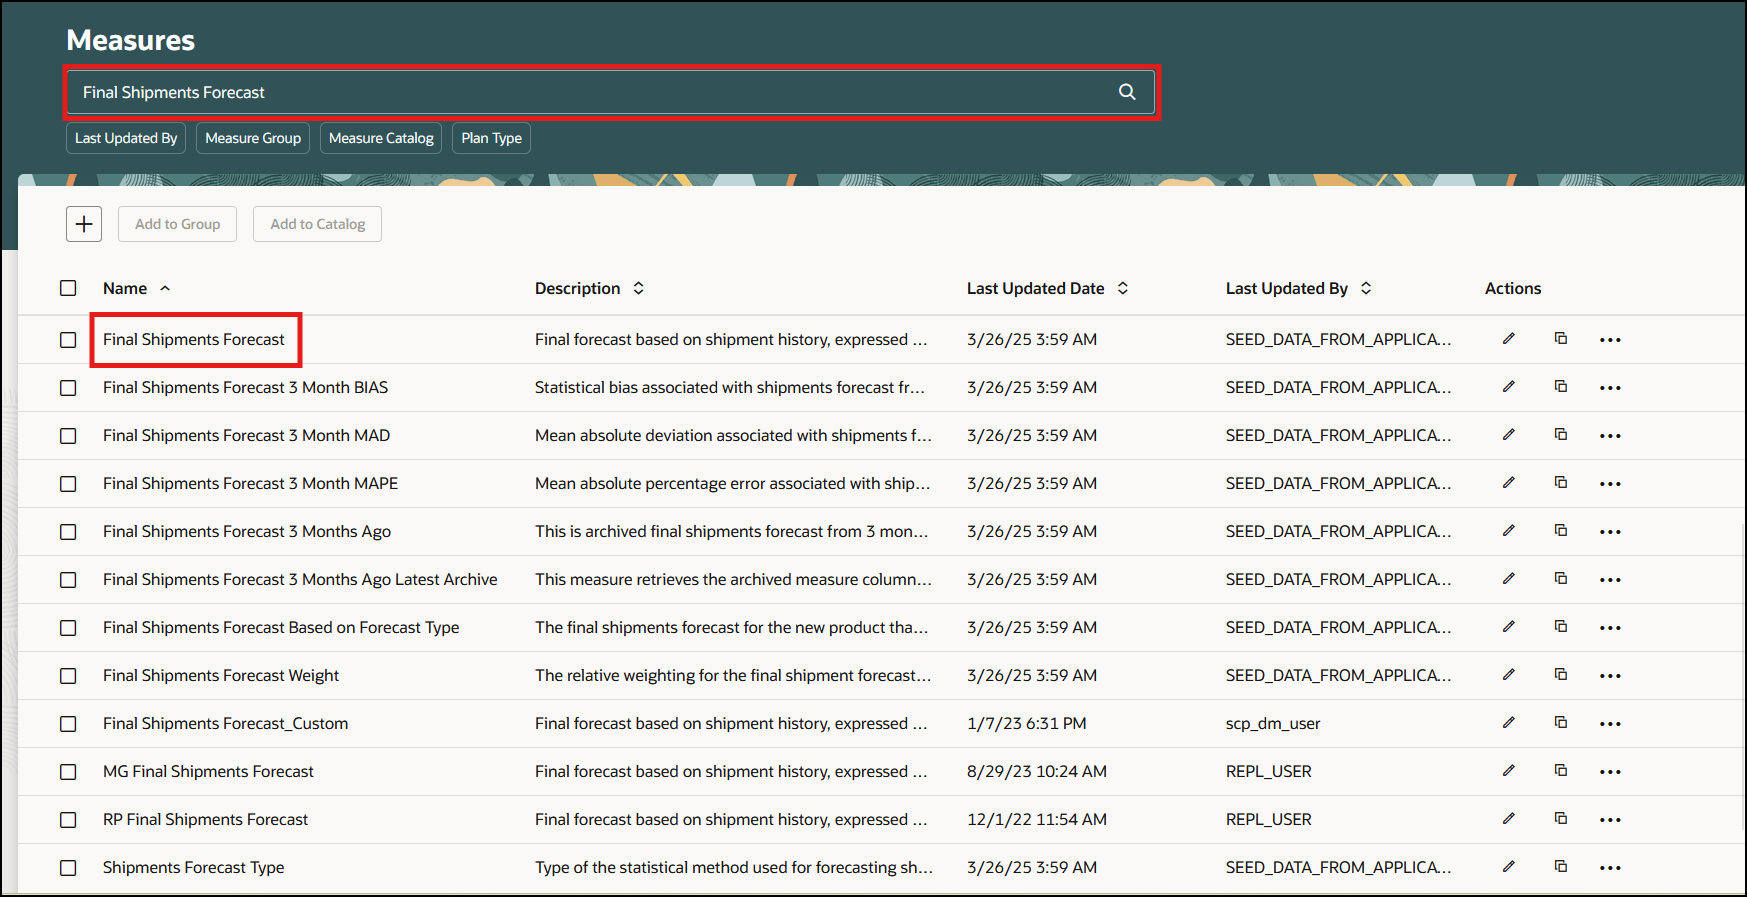
Search Bar on Measures Page
You can also use the suggested filters named Last Updated By, Measure Group, Measure Catalog, and Plan Type. For example, you can search for measures in the Default Demand Management Catalog.
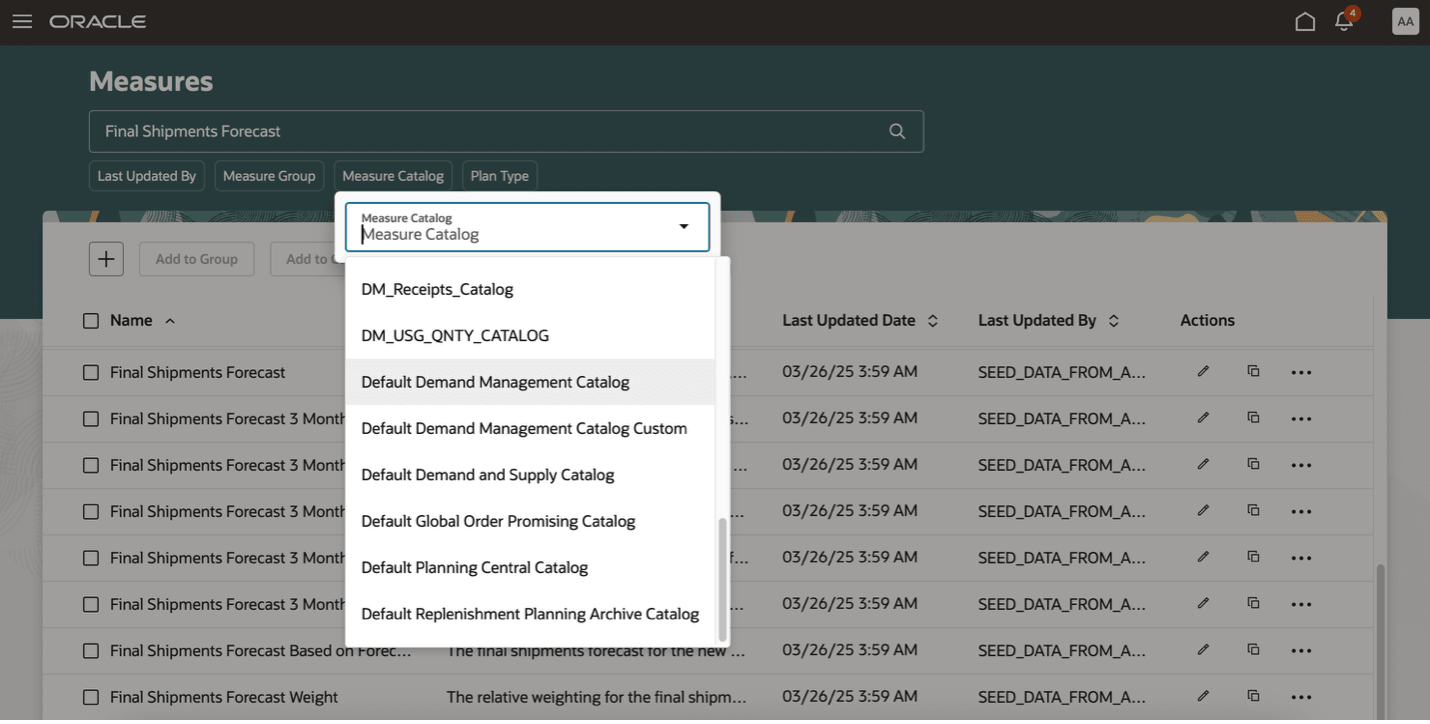
Suggested Filters on Measures Page
You can click the Add icon to create a measure, Edit icon to edit a measure, and Duplicate icon to duplicate a measure. When you click the Actions icon, you can use actions for viewing the change history and associations or deleting a measure.
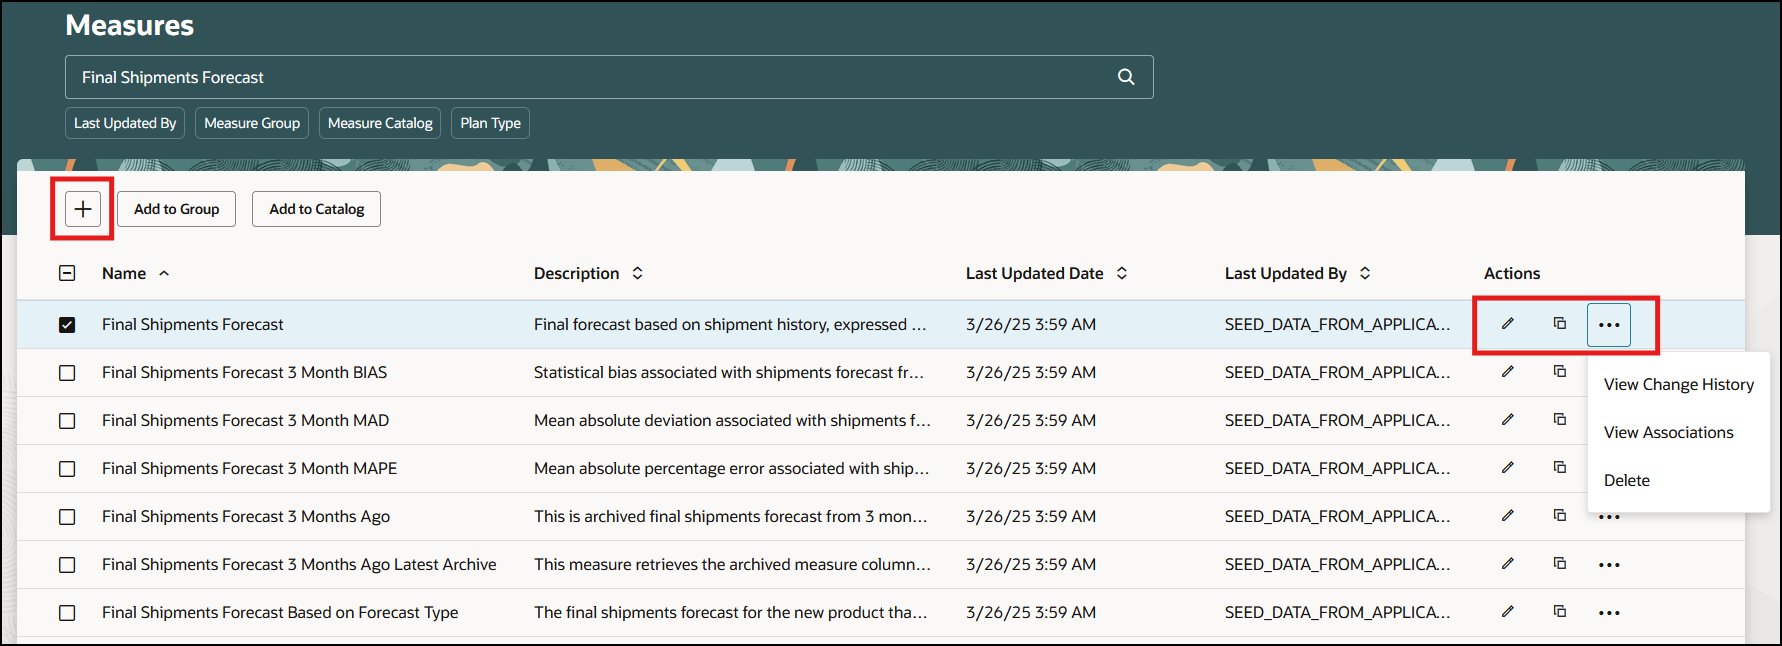
Icons on Measures Page
You can create a measure by clicking Add or Duplicate.
If any errors or warnings occur, then a message will be displayed at the top of the Measures page.
When you click Add, Duplicate, or Edit, a guided process will open on the same tab on which the Measures page is open.
Your privileges will determine if you can only view or also edit any measure’s properties while using the guided process.
By default, the guided process has these steps:
- Properties: Specify basic information about the measure, including the applicable measure groups, measure catalogs, and plan types.
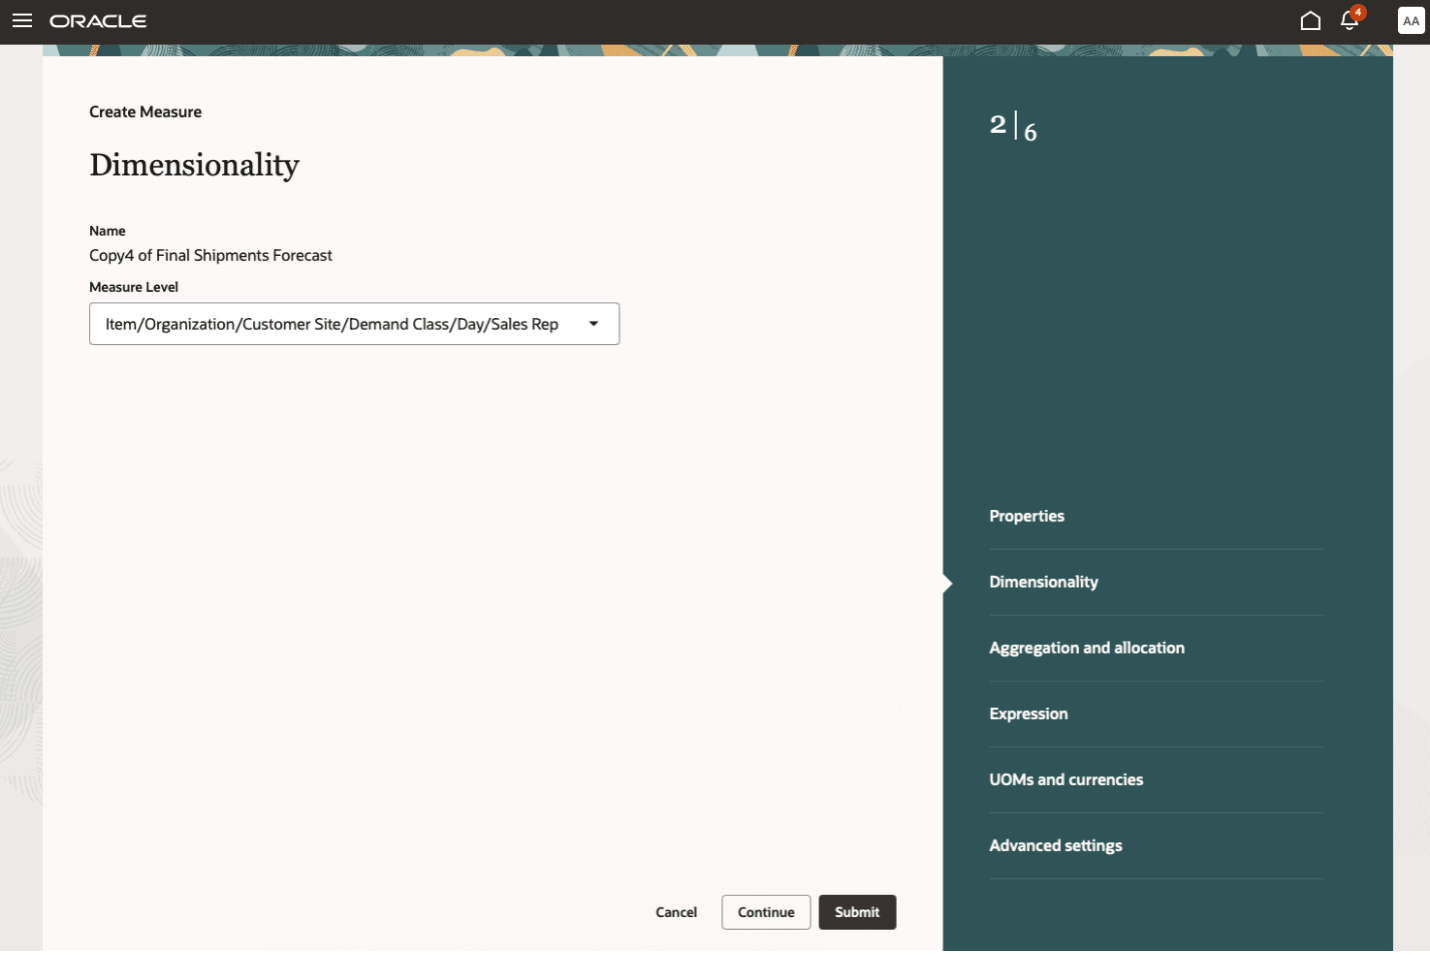
- Dimensionality: Specify the dimensions and stored levels for the measure. Note that you can only select a predefined granularity in the Measure Level field.
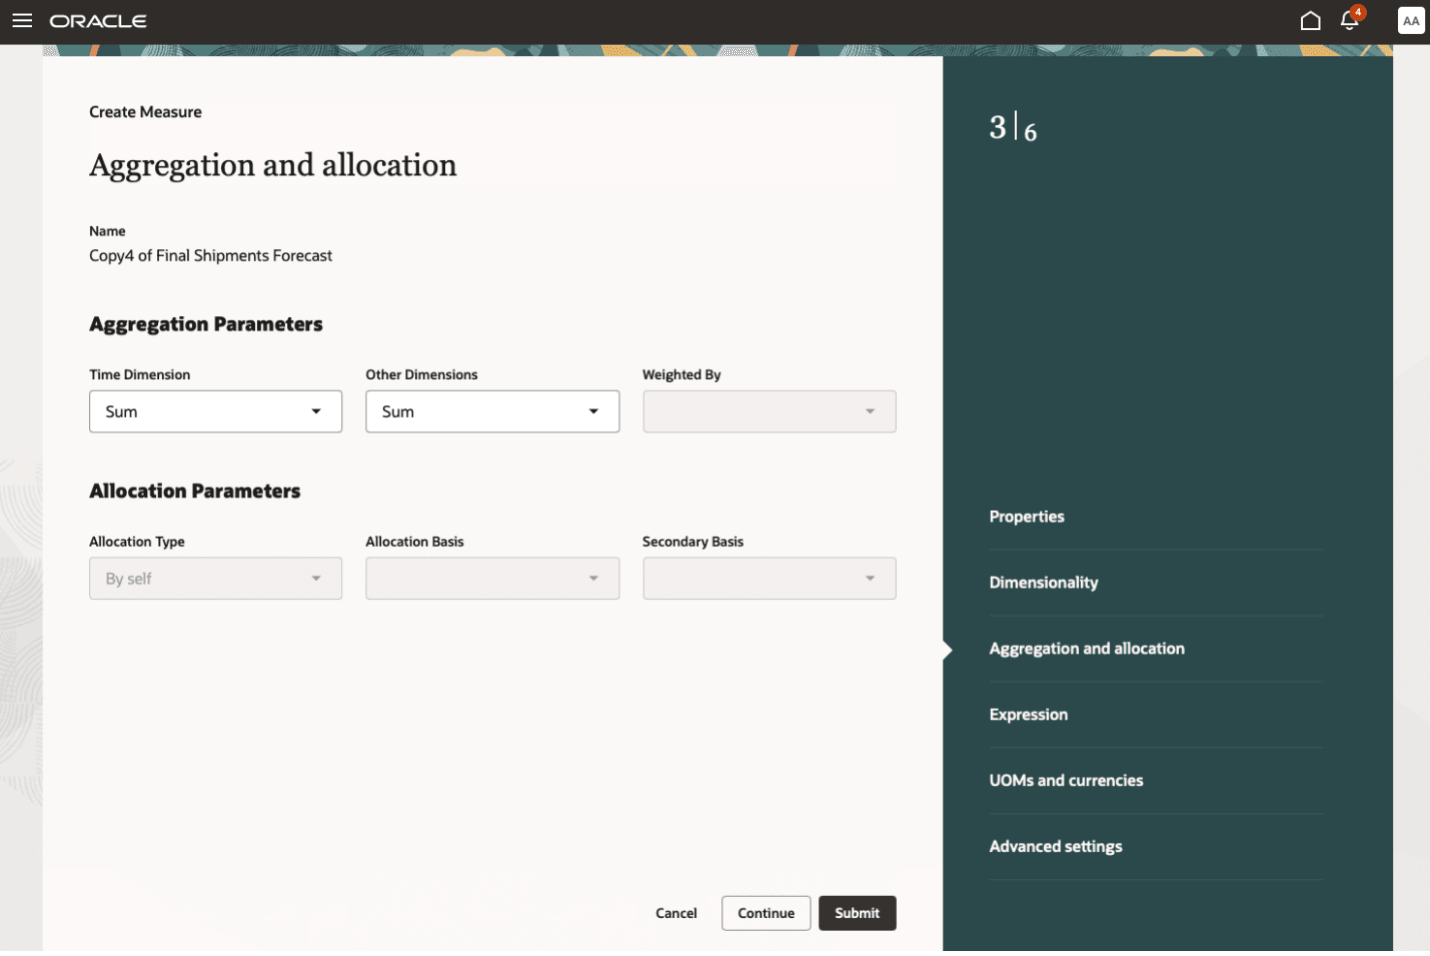
- Aggregation and allocation: Specify how measure values are aggregated and allocated.
- Expression: For measures that are calculated, specify the expression.
When you select the Advanced Settings checkbox in the Properties step, these additional steps are available:
- UOMs and currencies: Select units of measure (UOMs) and currencies for conversion.
- Advanced settings: Specify the aggregation order and whether the measure is plan-specific or shared.
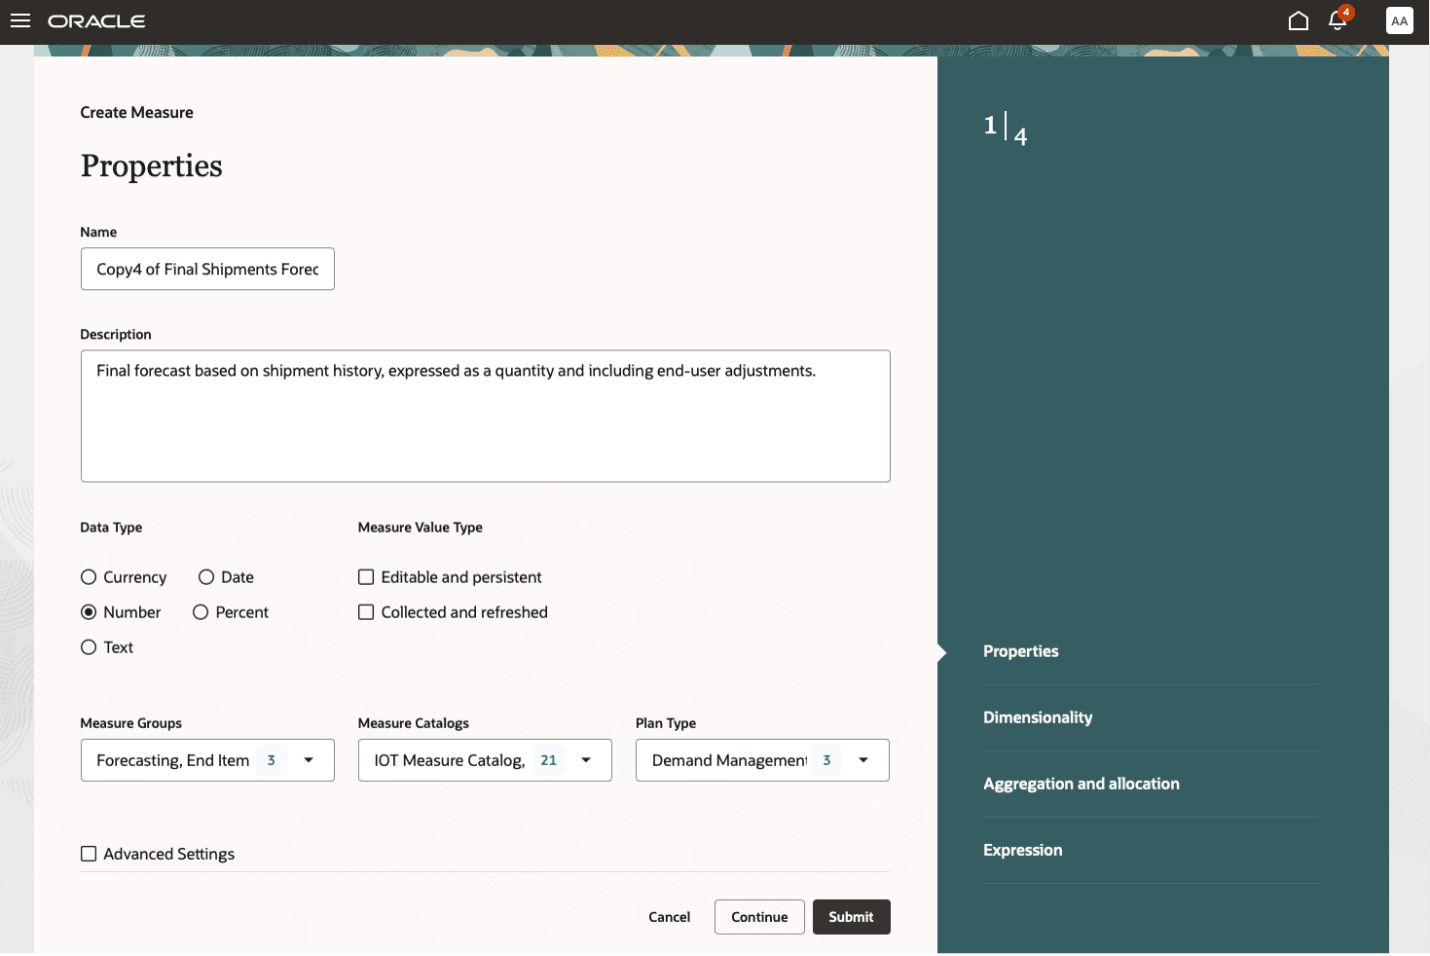
Properties Step in Guided Process for Measures
Dimensionality Step in Guided Process for Measures
Aggregation and Allocation Step in Guided Process for Measures
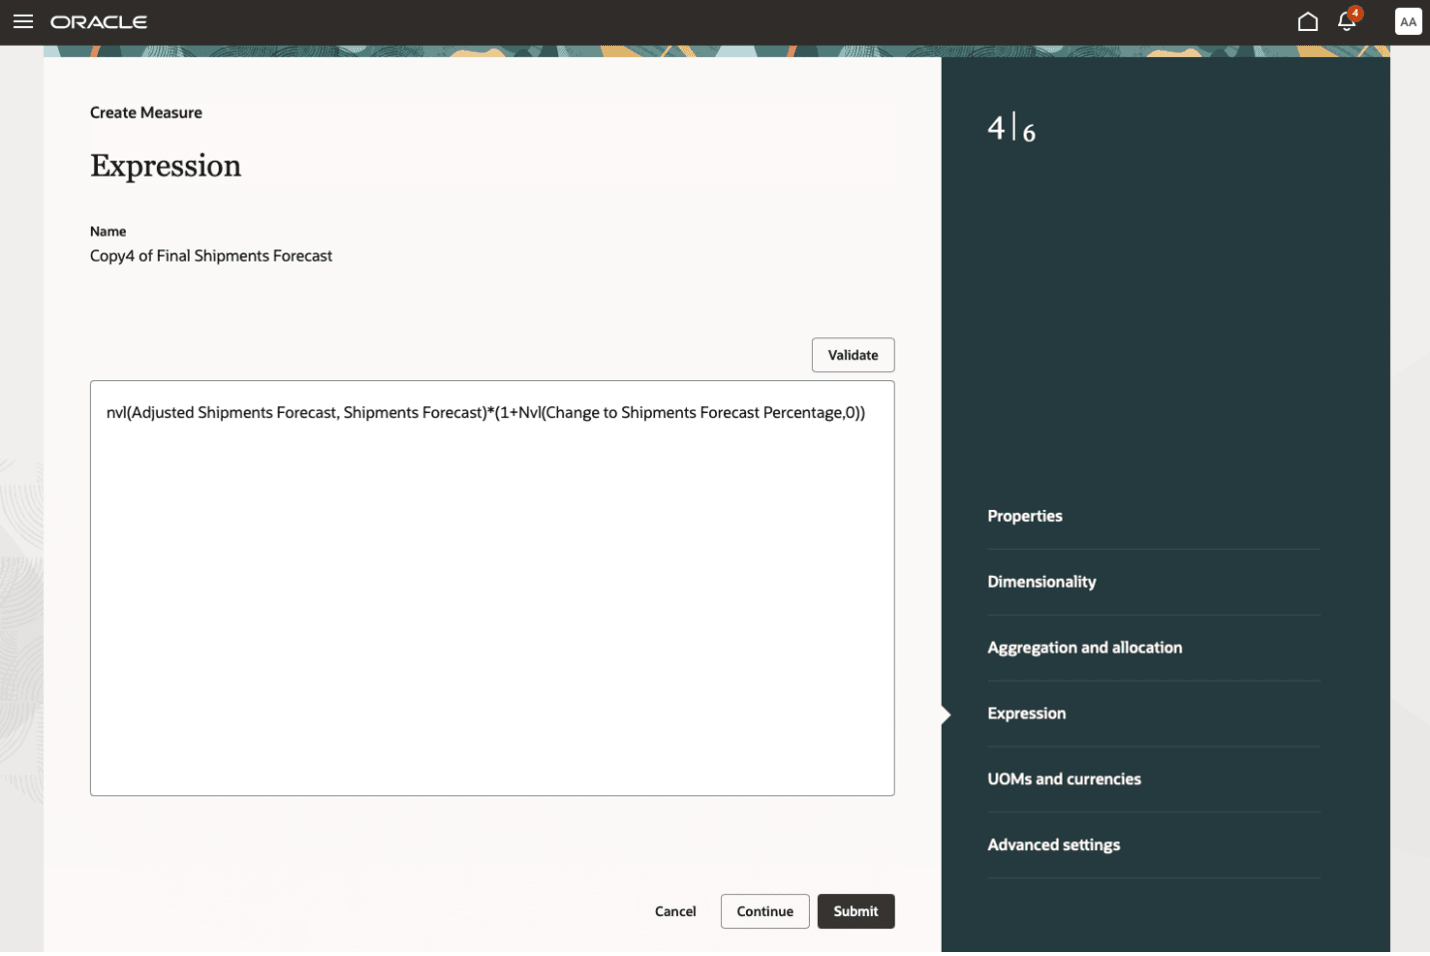
Expression Step in Guided Process for Measures
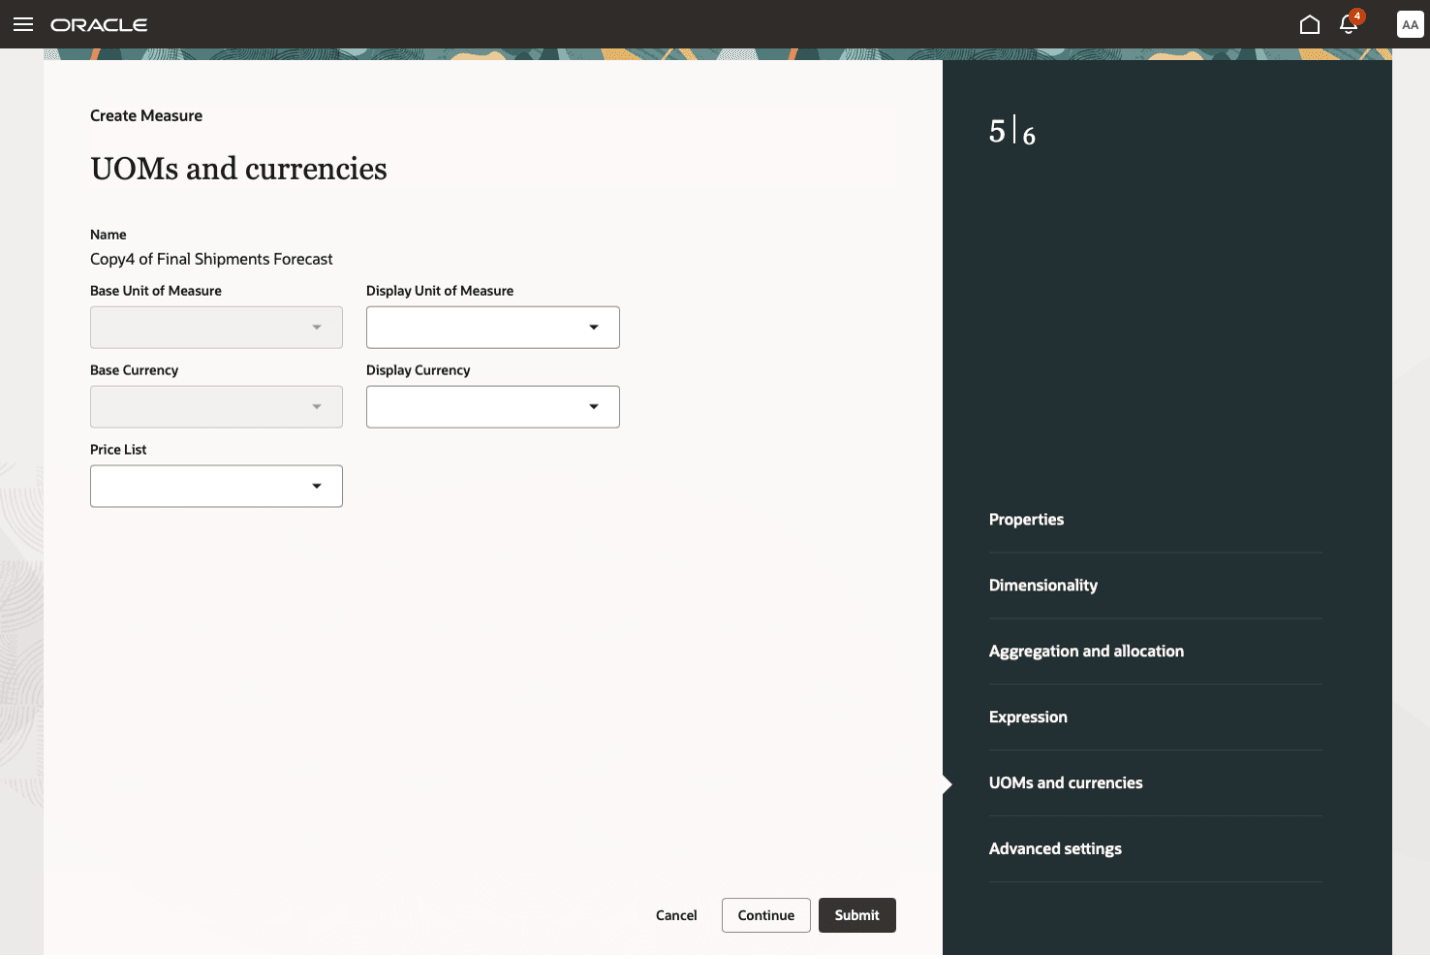
UOMs and Currencies Step in Guided Process for Measures
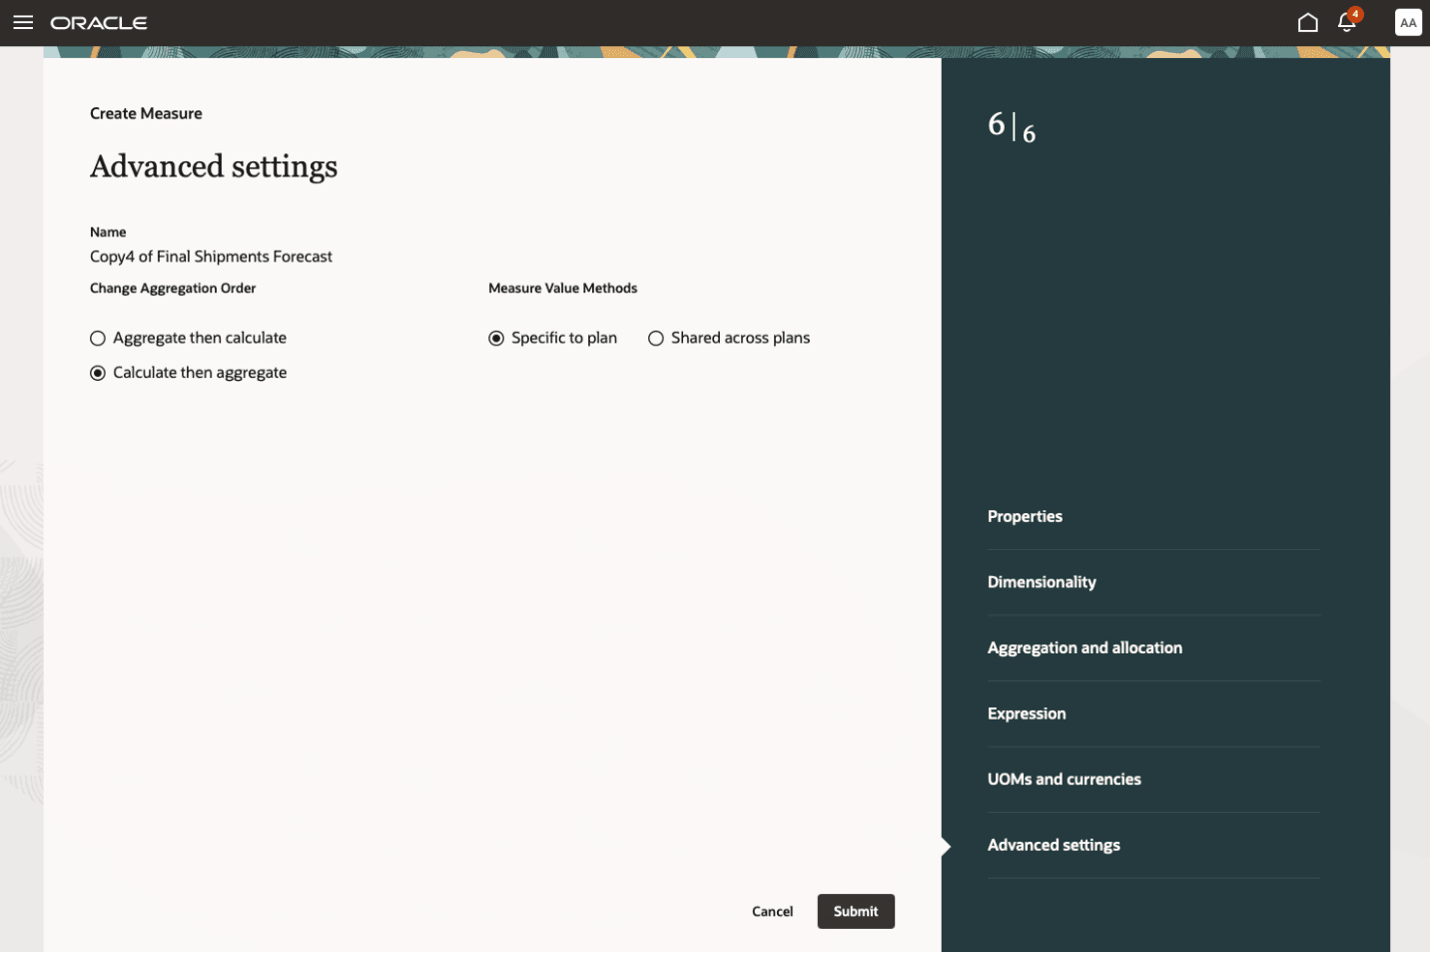
Advanced Settings Step in Guided Process for Measures
Steps to Enable and Configure
To enable this feature, follow these steps:
- In the Setup and Maintenance work area, go to the Manage Profile Options task in the Supply Chain Planning offering.
- On the Manage Profile Options page, in the Profile Options section, click the New icon.
- On the Create Profile Option page, create the profile option as follows:
- Profile Option Code: MSC_REDWOOD_ENABLE_MEASURES
- Profile Display Name: MSC_REDWOOD_ENABLE_MEASURES
- Application: Planning Common
- Module: Planning Common
- Start Date: current date
Leave the remaining fields blank.
- Click Save and Close.
- On the Manage Profile Options page, for the MSC_REDWOOD_ENABLE_MEASURES profile option, in the Profile Option Levels section, select the checkboxes in the Enabled and Updatable columns for the Site level.
- Click Save and Close.
- In the Setup and Maintenance work area, go to the Manage Planning Profile Options task in the Supply Chain Planning offering.
- On the Manage Planning Profile Options page, search for and select the MSC_REDWOOD_ENABLE_MEASURES profile option.
- In the Profile Values section, click the New icon.
- Add a profile value as follows:
- Profile Level: Select Site to set the value globally for all users.
- Profile Value: Enter Yes.
- Click Save and Close.
- In the Setup and Maintenance work area, go to the Manage Profile Categories task in the Supply Chain Planning offering.
- On the Manage Profile Categories page, search for and select the category code named ORA_FND_ANON_REST_ACCESS.
- In the Profile Options section, click the New icon.
- In the Profile Name field, select the profile option named MSC_REDWOOD_ENABLE_MEASURES.
- In the Display Sequence field, enter zero (0).
- Click Save and Close.
NOTE: You may need to work with someone who has administration privileges to make these profile-related changes.
Tips And Considerations
The following settings are planned to be added in future updates:
- Measure formatting, including decimal places, graph colors, and conditional formatting
- Edit locks
- Data lookups
- Selection of dimensions and stored levels while creating a measure
- Selection of the measure context
- Change of measure granularity
Key Resources
- Visit https://redwood.oracle.com for more information about the Redwood experience.
Access Requirements
Users who are assigned a configured job role that contains these privileges can access this feature:
- Delete Measure Definition (MSC_DELETE_MEASURE_DEFINITION_PRIV)
- Edit Planning Analytics Configuration (MSC_EDIT_PLANNING_ANALYTICS_CONFIGURATION_PRIV)
- Maintain Measure Definition (MSC_MAINTAIN_MEASURE_DEFINITION_PRIV)
- View Measure Definition (MSC_VIEW_MEASURE_DEFINITION_PRIV)
These privileges were available prior to this update.