AI Agent: Recalls Curation Assistant
You can now upload supplier recall letters in PDF format directly from the user interface and let the AI agent automatically curate them into recall notices.
Instead of manually reading PDFs and entering data, simply upload a supplier letter PDF. This triggers a scheduled process that automatically parses header details, contacts, parts, lots, and serials, and creates a recall notice with both the original letter and AI-curated output attached.
The application then evaluates part relevancy, assigns an initial status such as Pending Acceptance or Pending Review, and notifies the recall manager by default when the notice is created in Pending Acceptance status.
This enhancement eliminates manual data entry and speeds up the creation of recall notices - bringing efficiency and accuracy to supplier recall management.
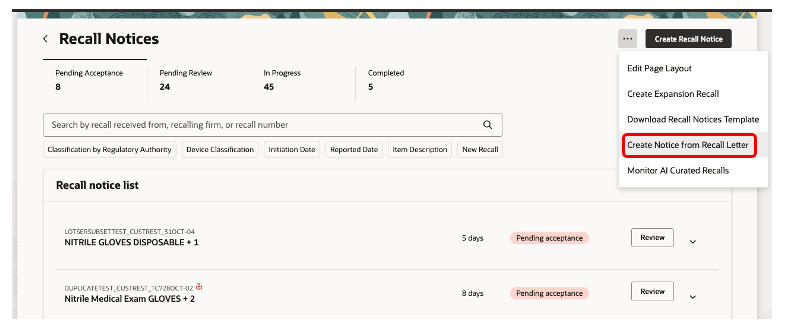
Create Recall Notice
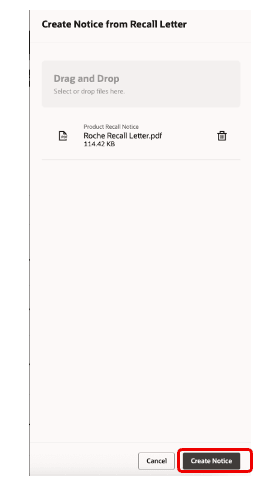
Upload recall letter
You can now track the processing status of each document - Processing, Processed, or Error, and drill in to review or edit missing attributes before acceptance.
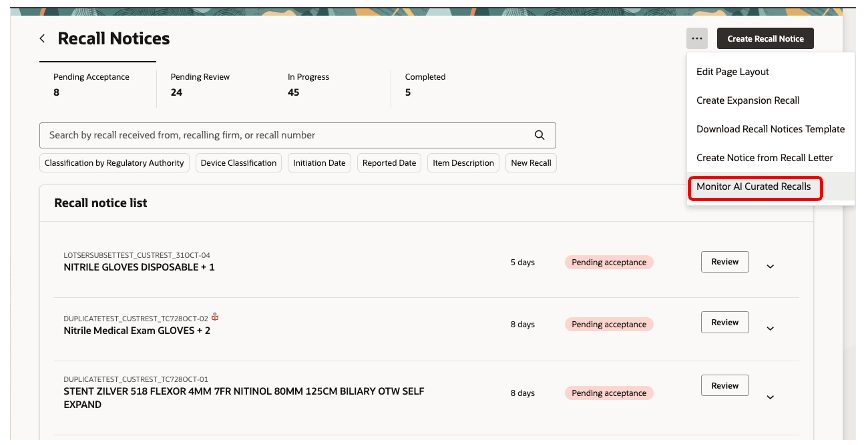
Monitor AI curated recalls
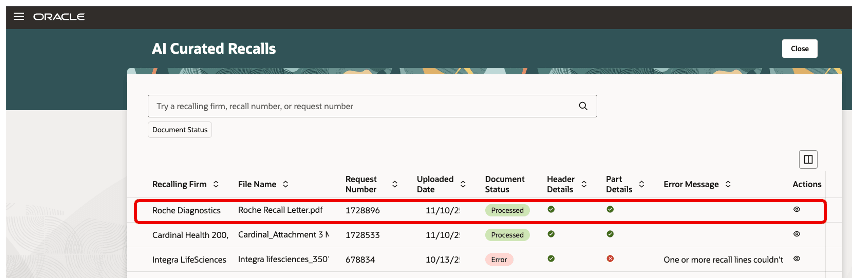
AI curated recall processing status
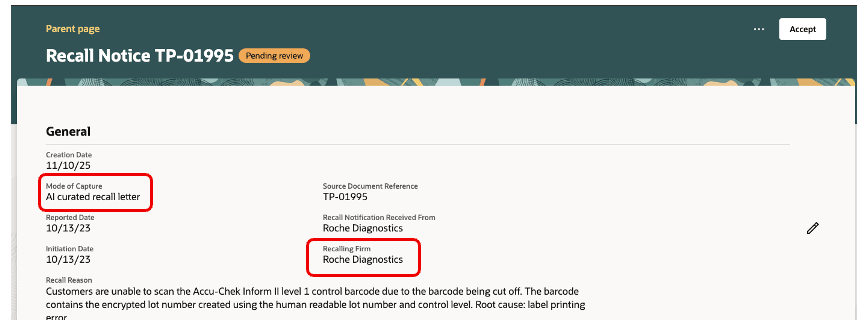
View AI curated recall notice
Previously, you had to manually interpret supplier communications and enter data across multiple fields. This update provides real-time visibility and control over document processing, significantly reducing manual effort.
- Reduce manual data entry and accelerate time-to-action
- Improve data quality with structured, AI-extracted recall details
- Monitor processing outcomes and resolve issues quickly
- Standardize intake from diverse supplier letters into consistent recall records
- Preserve traceability by auto-attaching the source letter and AI output
Steps to enable and configure
- To enable permission groups for roles, take these steps:
- In the Setup and Maintenance work area, search for the Manage Administrator Profile Values task using the search link in the Tasks panel tab.
- Search for the Enable Security Console External Application Integration (ORA_ASE_SAS_INTEGRATION_ENABLED) profile option and set the Site profile level to Yes.
- To access the Oracle AI Agent Studio for Fusion Applications and manage SCM AI agents, users must be assigned a configured job role that contains these duty roles:
- SCM Intelligent Agent Management Duty (ORA_RCS_SCM_AI_AGENT_MANAGEMENT_DUTY)
- SCM Intelligent Agent Management Duty (ORA_RCS_SCM_AI_AGENT_MANAGEMENT_DUTY_HCM)
- Fai Genai Agent SCM Administrator Duty (ORA_DR_FAI_GENERATIVE_AI_AGENT_SCM_ADMINISTRATOR_DUTY)
- To interact with AI agents in product pages, users must be assigned a configured job role that contains this duty role:
- Fai Genai Agent Runtime Duty (ORA_DR_FAI_GENERATIVE_AI_AGENT_RUNTIME_DUTY)
- To allow users to interact with agents, you must also enable permission groups in the Security Console on those users' configured job roles that contain the Fai Genai Agent Runtime Duty role. You can enable permission groups when you manage the basic information of your configured job roles.
- Users' configured job roles must also contain privileges that allow access to the pages where AI agents are enabled.
- Go to Home Page > Tools > AI Agent Studio, set the Family to SCM, the Product to Product Recall Management, search for Recalls Curation Assistant, then click Copy Template on Recalls Curation Assistant.
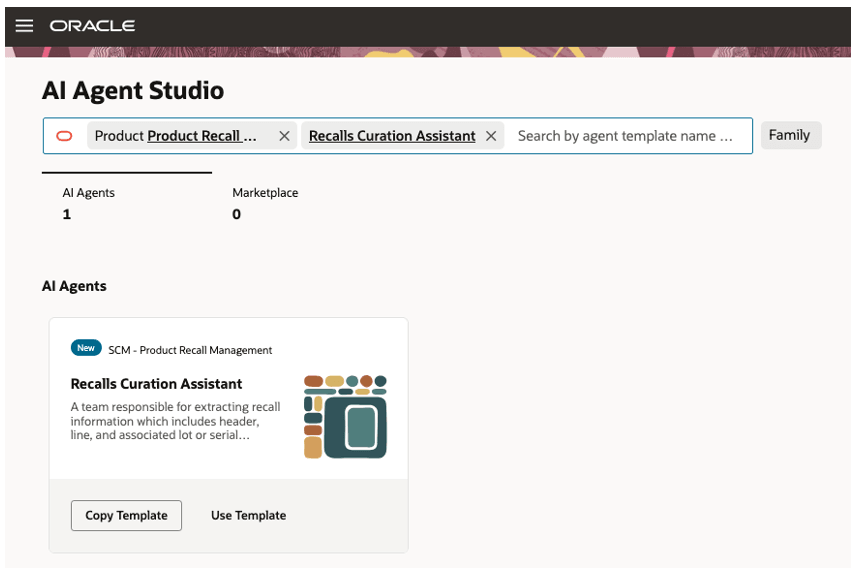
Copy AI agent template
- Enter the number 1 for the suffix, then click Continue. We recommend that you use the suffix to indicate versions, such as 1, 2, 3.
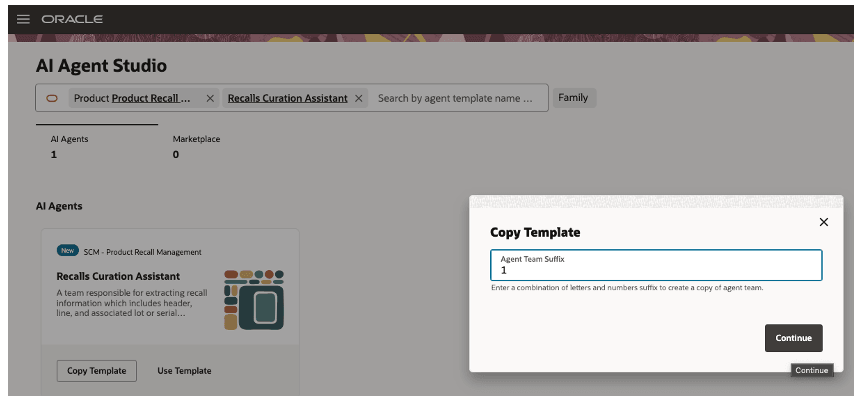
Create AI agent template version
- Click . . . > Edit.
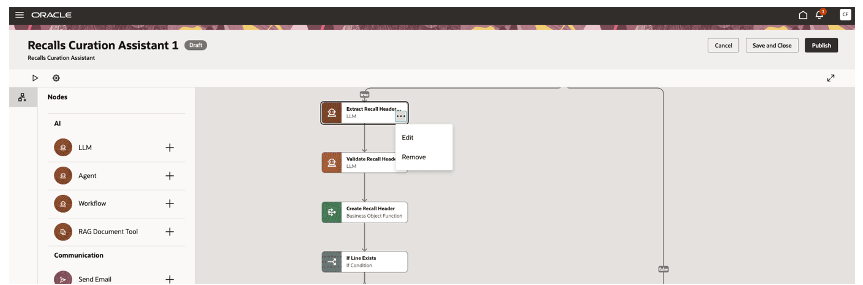
Edit template
- Use the predefined values on the Details tab or modify them to meet your needs.
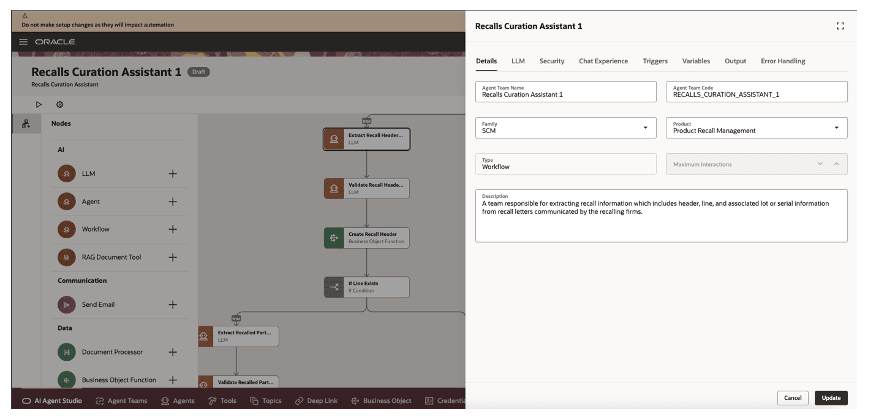
Agent details
- Click LLM, then examine the predefined prompt. If necessary, you can modify it, then click Update.
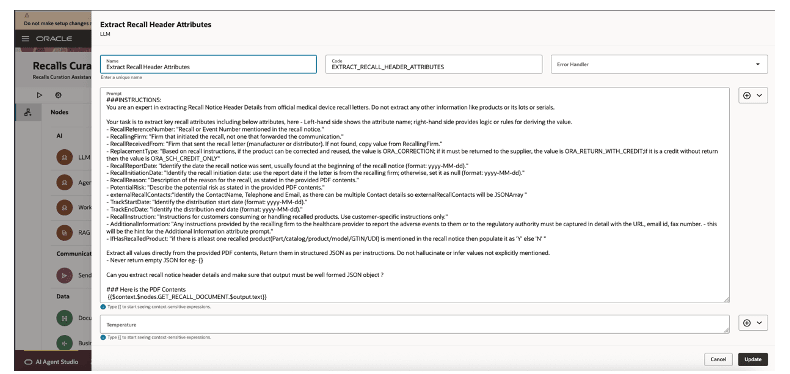
Modify LLM
- Click Security, then assign the configured job role or seeded role which would be used to create a recall notice by uploading the recall letter.
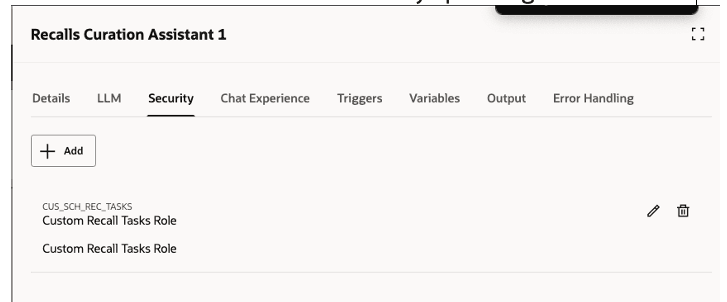
Agent security
- Click Publish.
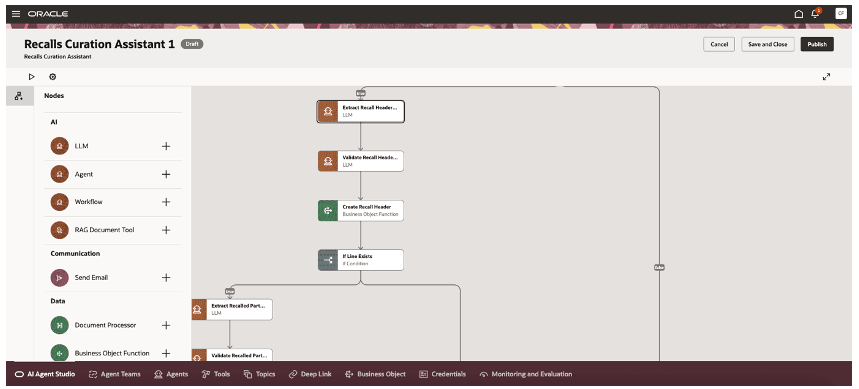
Publish template
- Click Agent Teams, search for and open Recalls Curation Assistant 1, then verify the status is Published.
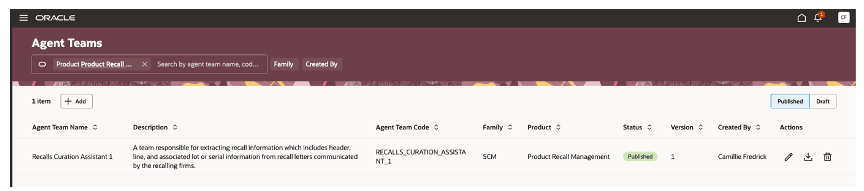
New version of AI agent template
- Go to Home > Setup and Maintenance > Tasks > Search > Manage Profile Options, then define a profile option as follows:
- Profile Option Code should be SCH_RECALL_SUPPLIER_LETTER_AI
- Profile Display Name: It is an user-defined name
- Application: Supply Chain for Healthcare
- Module: Recall Management
- Start Date: Current date
- Enable this profile at site level
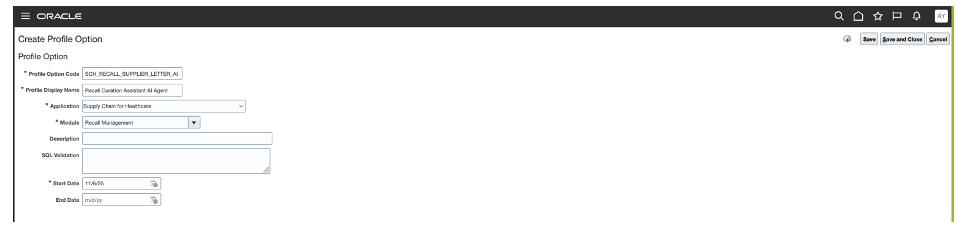
Profile option for extended AI agent
- Go to Home > Setup and Maintenance > Tasks > Search > Manage Administrator Profile Values, then search for the above defined profile and set the value with agent team code, PUBLISHED, and version number. For example, RECALLS_CURATION_ASSISTANT1,PUBLISHED,1.
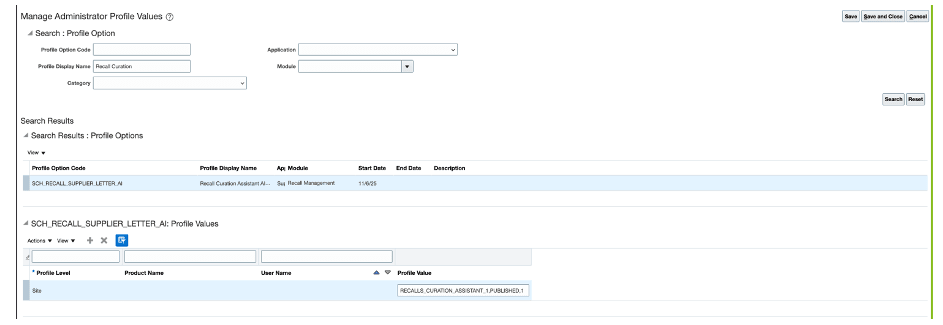
Profile value set up for extended AI agent
Tips and considerations
- Only PDF Files Supported: Only PDF files are supported in this release.
- Single File Limitation: Only one PDF file can be uploaded per recall notice creation.
- Web References not Recognized: PDF files containing only URLs or hyperlinks to external sites with the recalled part details will not be recognized during curation.
- Image-only PDFs not Supported: Files containing only images are not supported. If the PDF contains images with part number, lot, or serial information (i.e., text embedded as images), these details will not be recognized during curation.
Ensuring Searchable PDFs with OCR
To make sure your scanned documents produce PDFs recognized as text (searchable and selectable), you must use Optical Character Recognition (OCR) when scanning or converting files.
OCR adds a text layer over the image, making the PDF searchable and accessible for copying and editing.
How to Scan to Searchable PDF:
- Scan with OCR-Enabled Apps: Use a scanner or app that offers OCR as part of the scan process (e.g., Adobe Scan, Microsoft Office Lens) to create a PDF with recognized text.
- Convert Existing Scans: If you have a scanned image or non-searchable PDF, use software with OCR features (e.g., Adobe Acrobat Pro, Xodo, or other reputable OCR tools).
- OCR in Adobe Acrobat Pro: Open your file, go to Tools > Enhance Scans > Recognize Text, then save the output as a searchable PDF.
Key resources
- Oracle Supply Chain Management guide, Using Product Recall Management guide, available on the Oracle Help Center.
- Oracle Supply Chain Management guide, Implementing Product Recall Management guide, available on the Oracle Help Center.
Access requirements
Users who are assigned with configured job role that contains the following privileges can access this feature:
- Manage Product Recall Notices (ENQ_MANAGE_PRODUCT_RECALL_NOTICES)
This privilege was available before this update.