Redwood: Create and Manage Procurement Contracts
Create and manage procurement contracts in Redwood pages. Here's the list of key features supported in Redwood in this release.
The new navigator menu Contracts (New) is available on the home page under Contract Management. To view this menu, enable the opt-in Redwood Contract Management. You can access the contracts Redwood list page by selecting this menu. For more details, refer to the Redwood: Search and Manage Contracts from List Page in Oracle Fusion Cloud Sales Force Automation What's New, Update 26A.
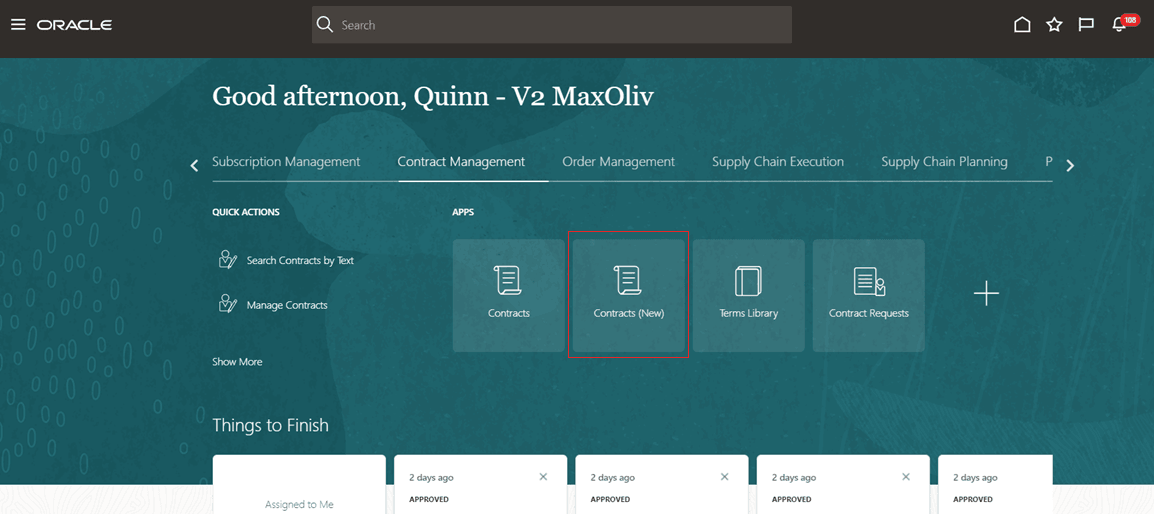
Contracts (New) Navigator Menu
List page
You can search and manage procurement contracts directly from the Contracts list page. Not all features in the classic contract UIs are supported in Redwood in this release. When you open a contract from the search results, the contract will open in the classic contract edit page if it meets any of the conditions listed below. If none of the conditions are met, the contract will open in the new Redwood page.
Contracts that will open in the classic UI:
- Contract with structured or simplified terms
- Contract has fulfillment lines created from classic UI
- Contract status is HOLD
- Contract types with AdobeSign and OneSpan E-signature enabled
- Contract has deliverables
Create Drawer
To create a new contract, select the Create Contract action on the Contracts List page. This will open a drawer where you can enter the required information and click Create, which will take you to the Overview tab of the newly created contract document.
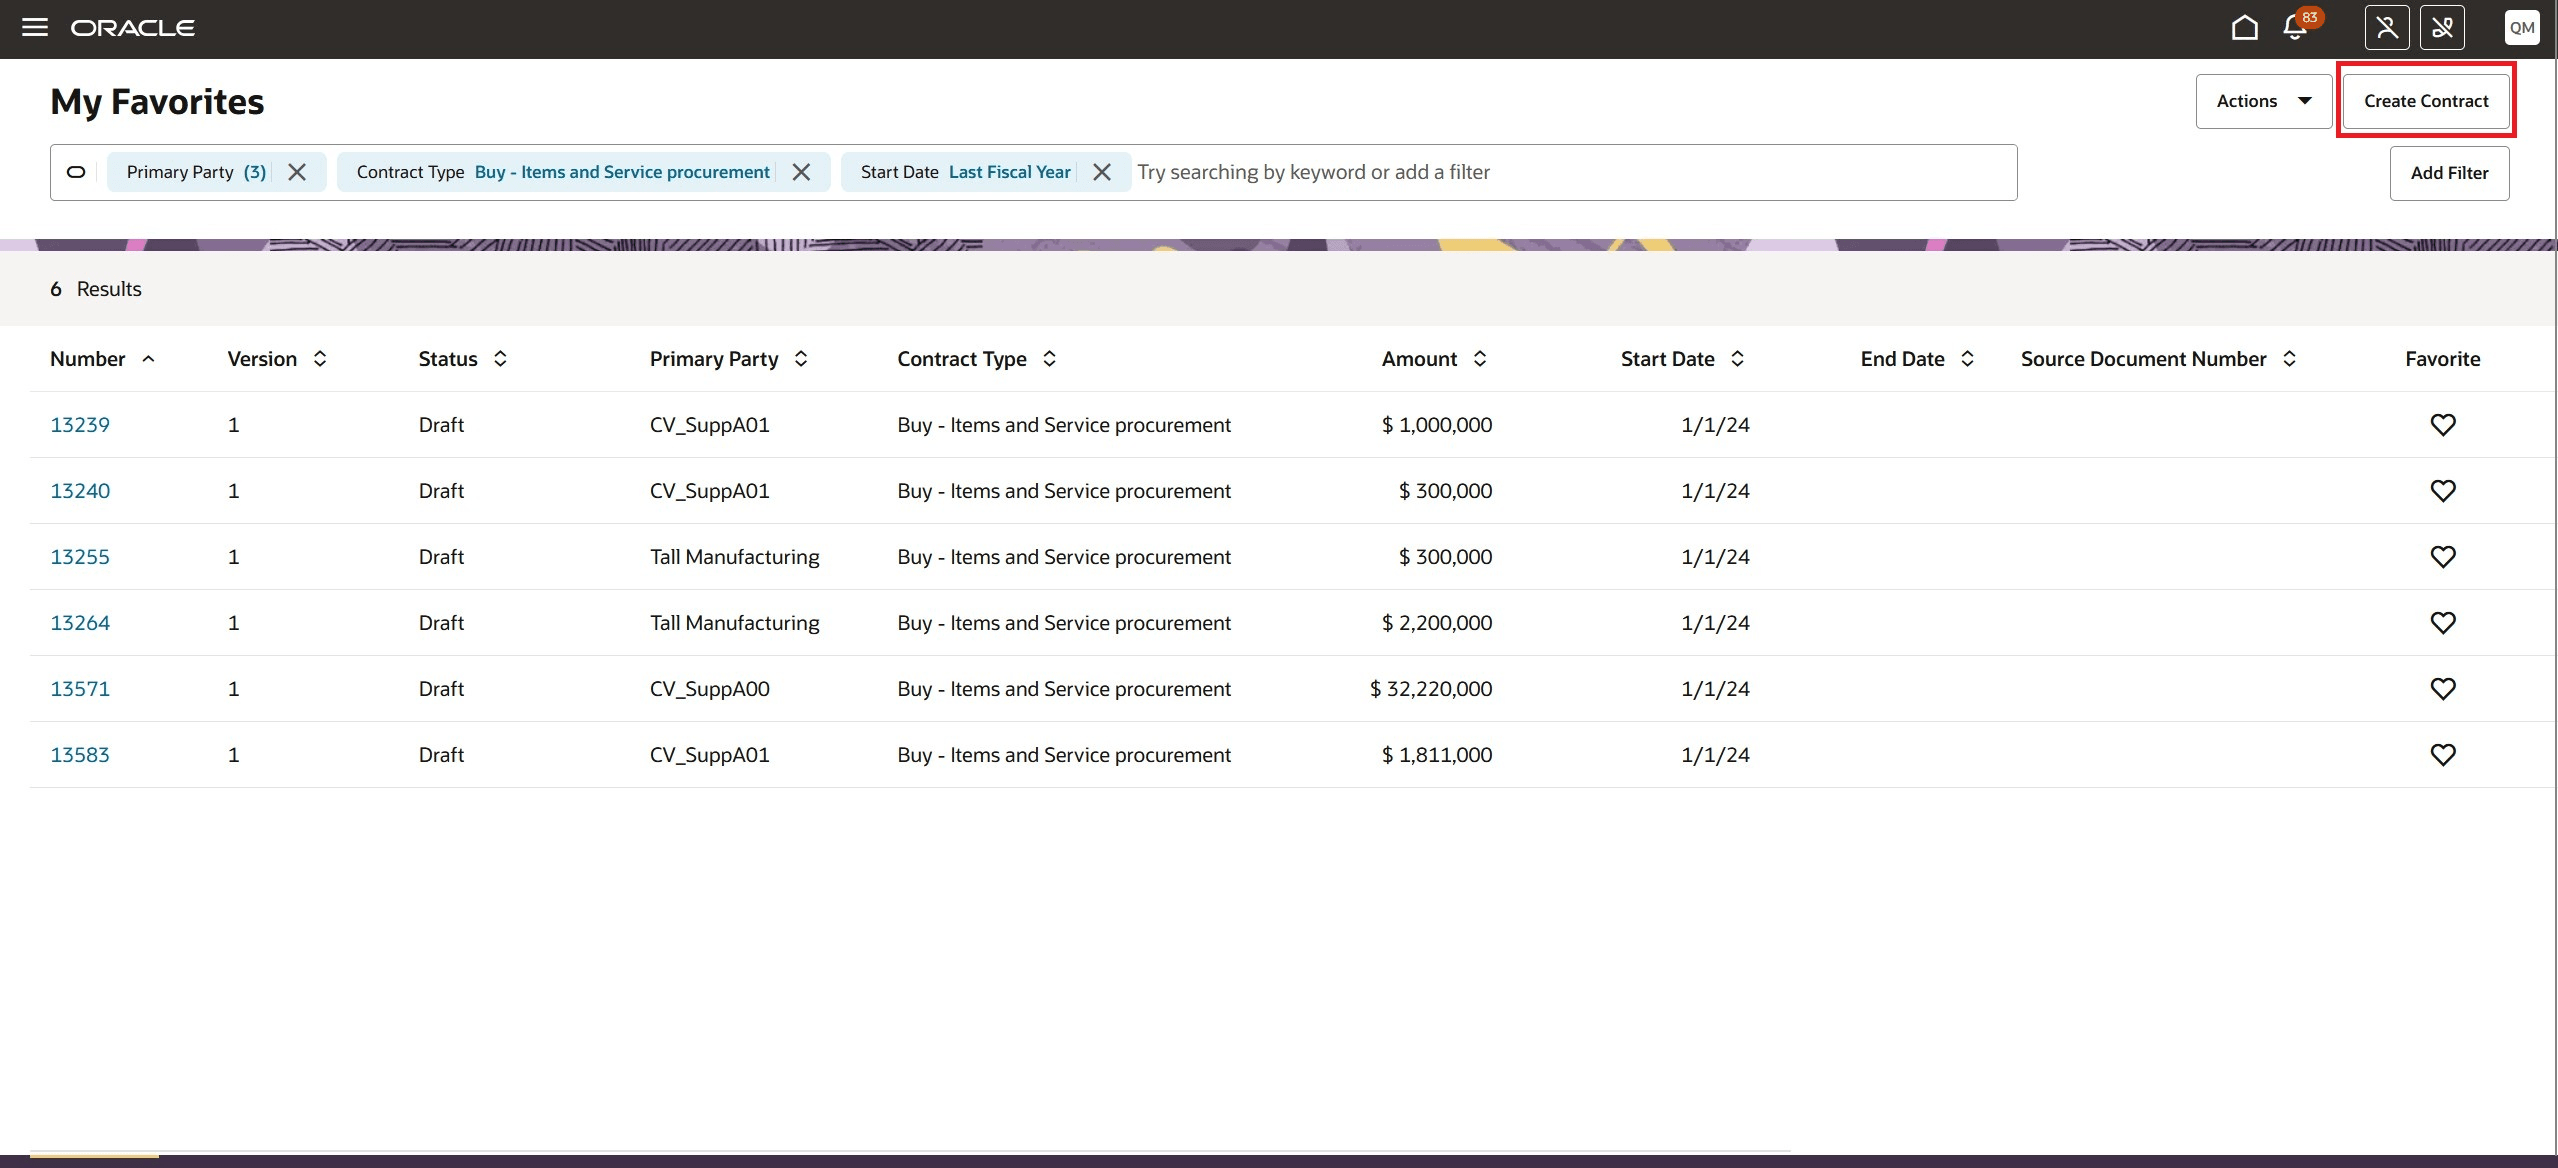
Create Contract Action
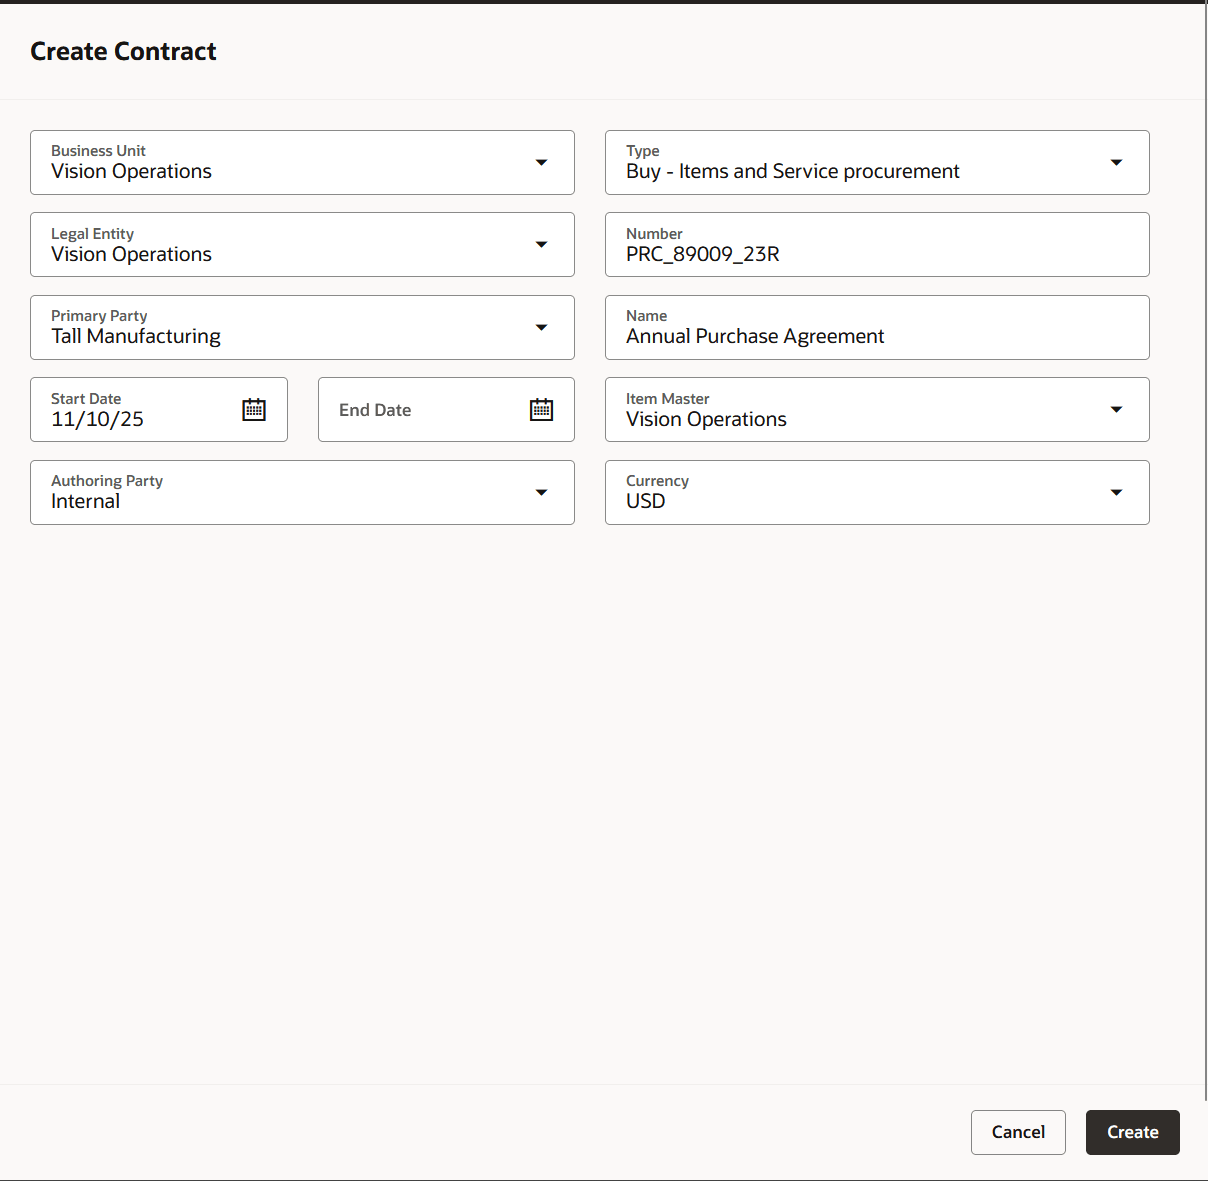
Create Contract Drawer
Contract Overview
The edit contract page is launched from the Redwood list page when user clicks on a contract number. The details of the contracts are displayed in various tabs.
Based on the status of the contract, you can edit certain fields. The Source document region contains the details of the source application - such as Contract Request, Oracle Fusion Sourcing or Requisition and the document number which is the source for this contract. You can generate and view the contract summary from the Summary region. Once you initiate the creation of purchasing documents, you'll find the details of the fulfillment and the document created in the Fulfillment details region. You can also edit the descriptive flexfields and application composer attributes in this tab.,
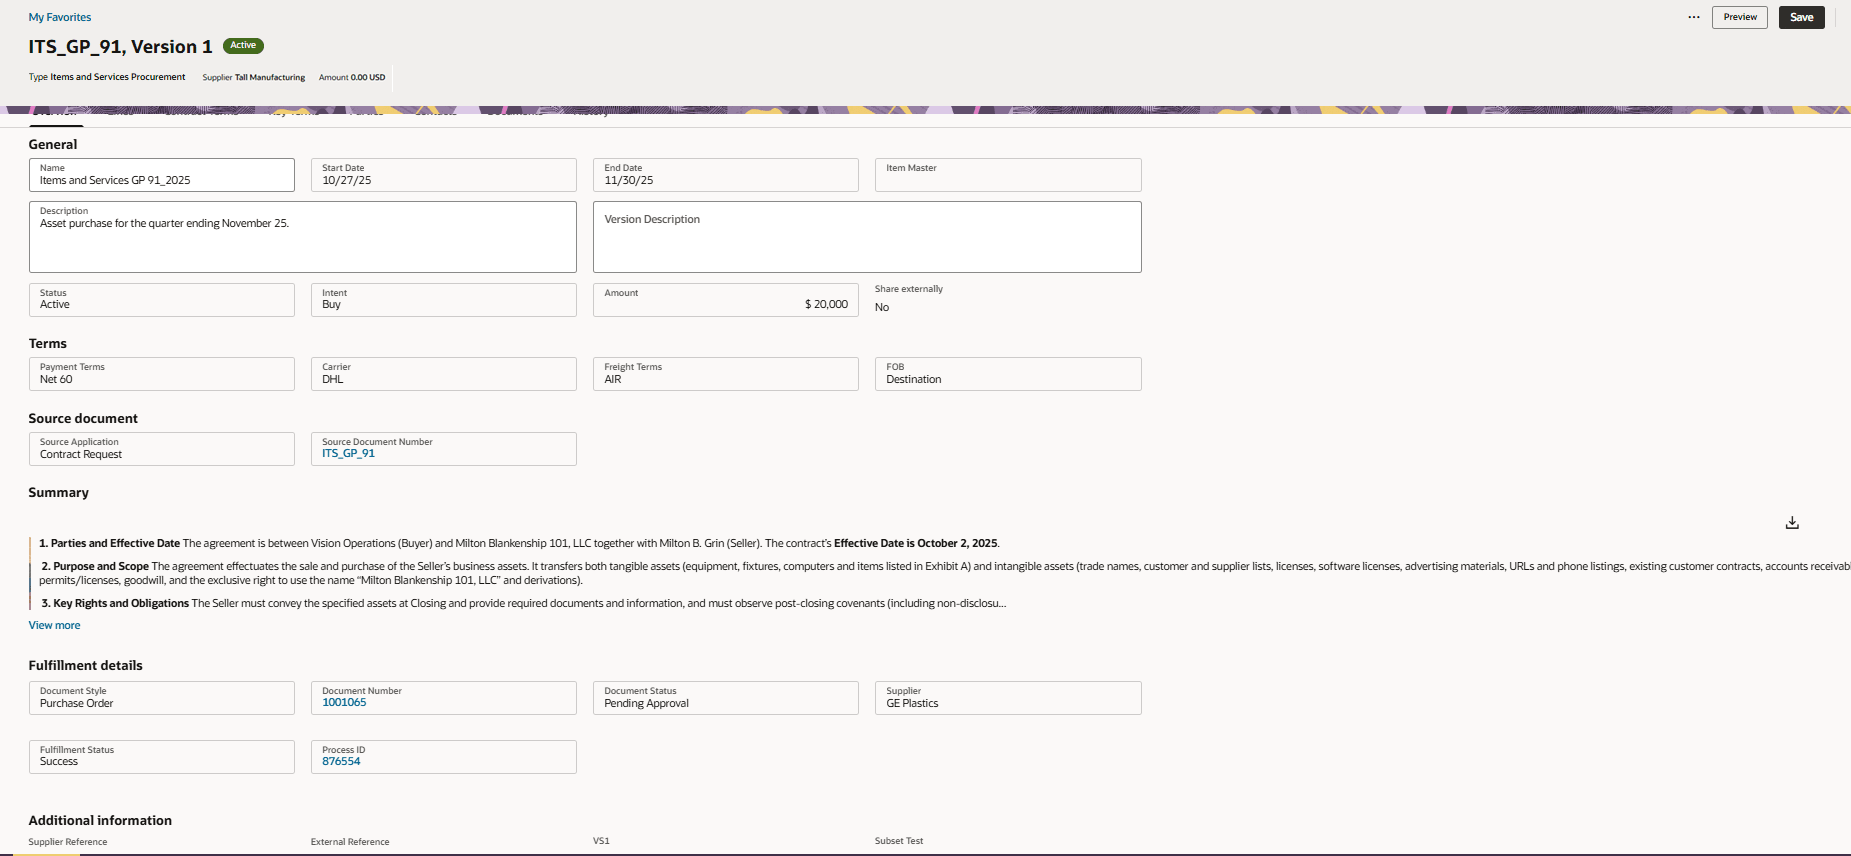
Overview Tab
Contract Summarization
When a PDF terms document is added in the Contract Terms tab, the Contract Summarization Using AI scheduled process is automatically submitted and the details of the process can be viewed in the Summary region. You can also run the job manually by clicking the Generate button.
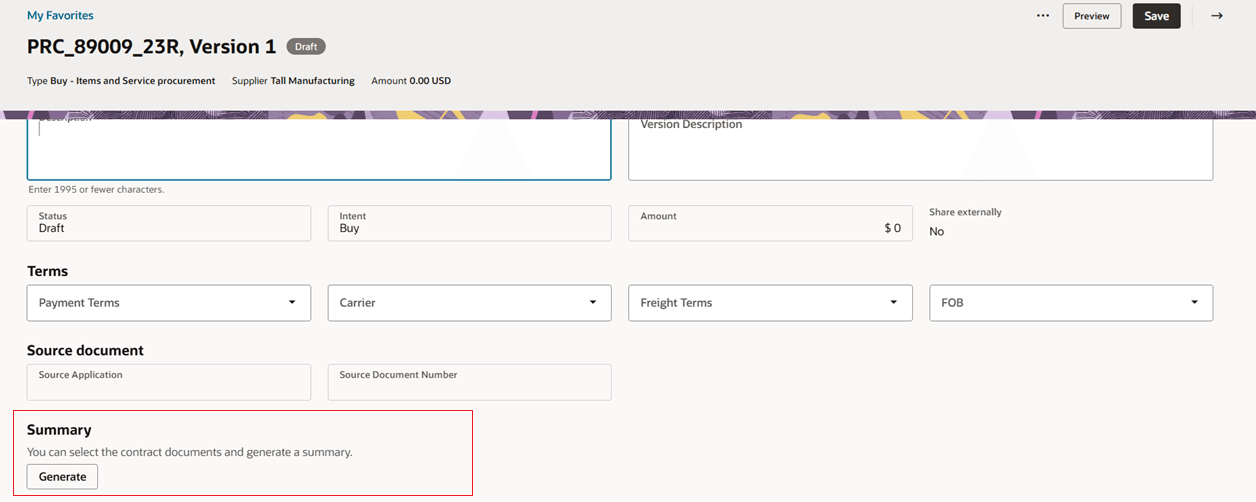
Generate Summary
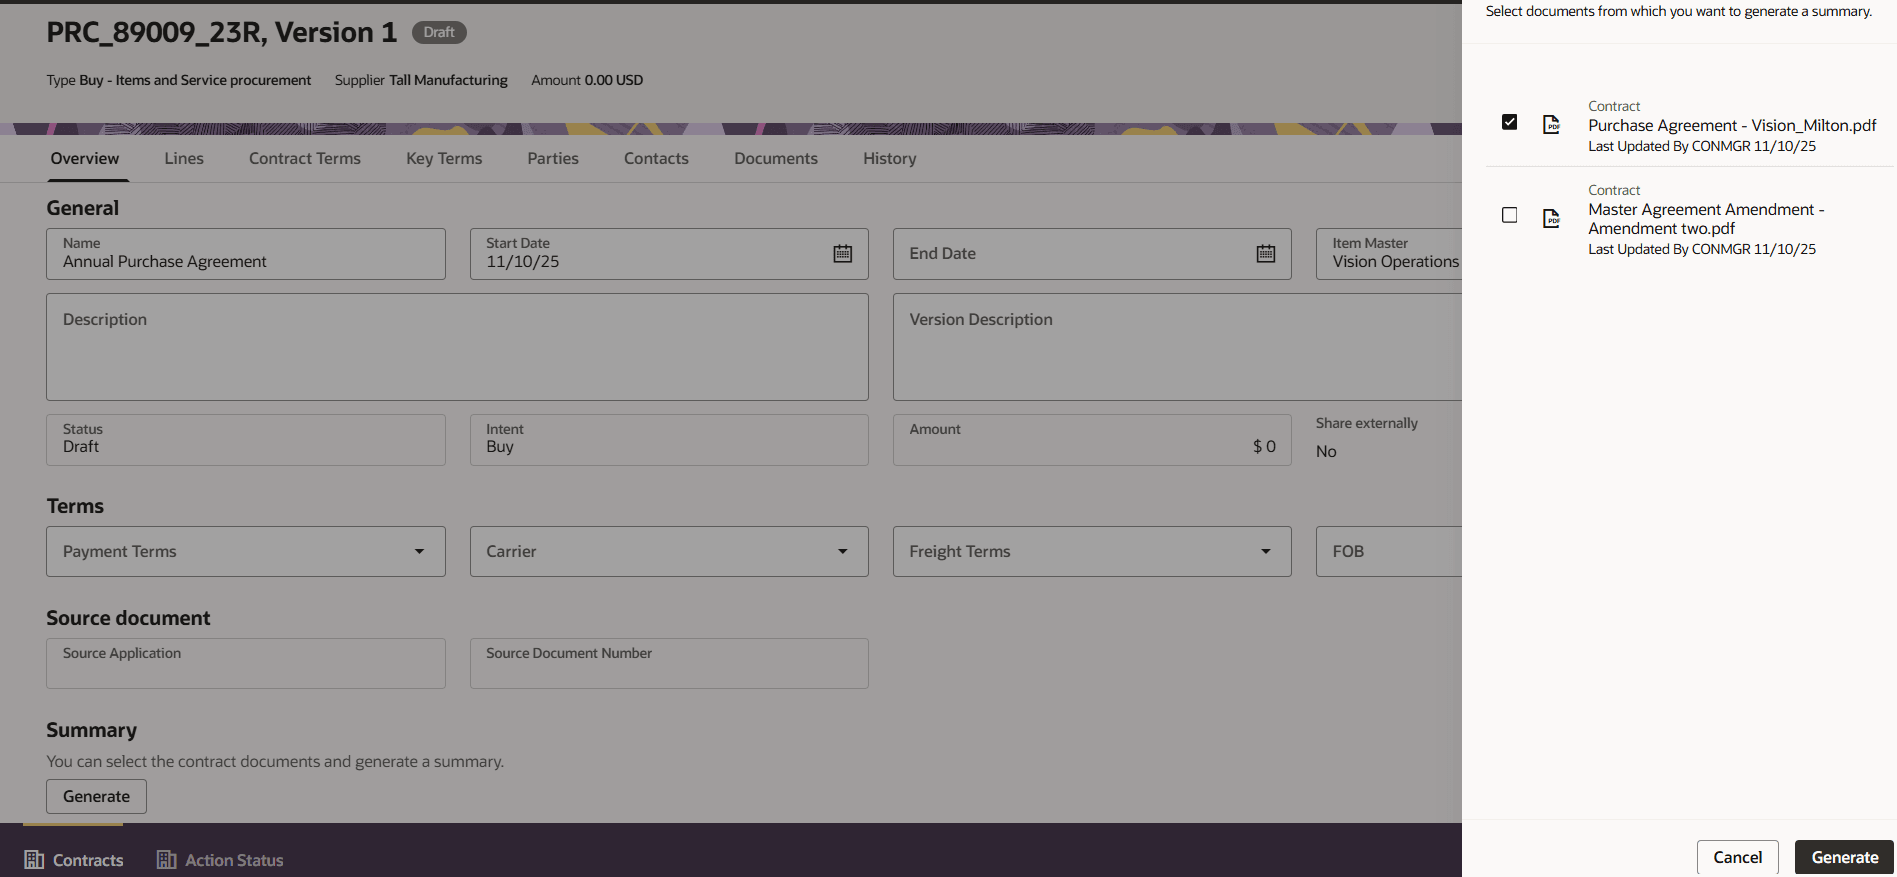
Select Documents
Select the documents for generating a summary and click Generate. The details of the scheduled process is available.
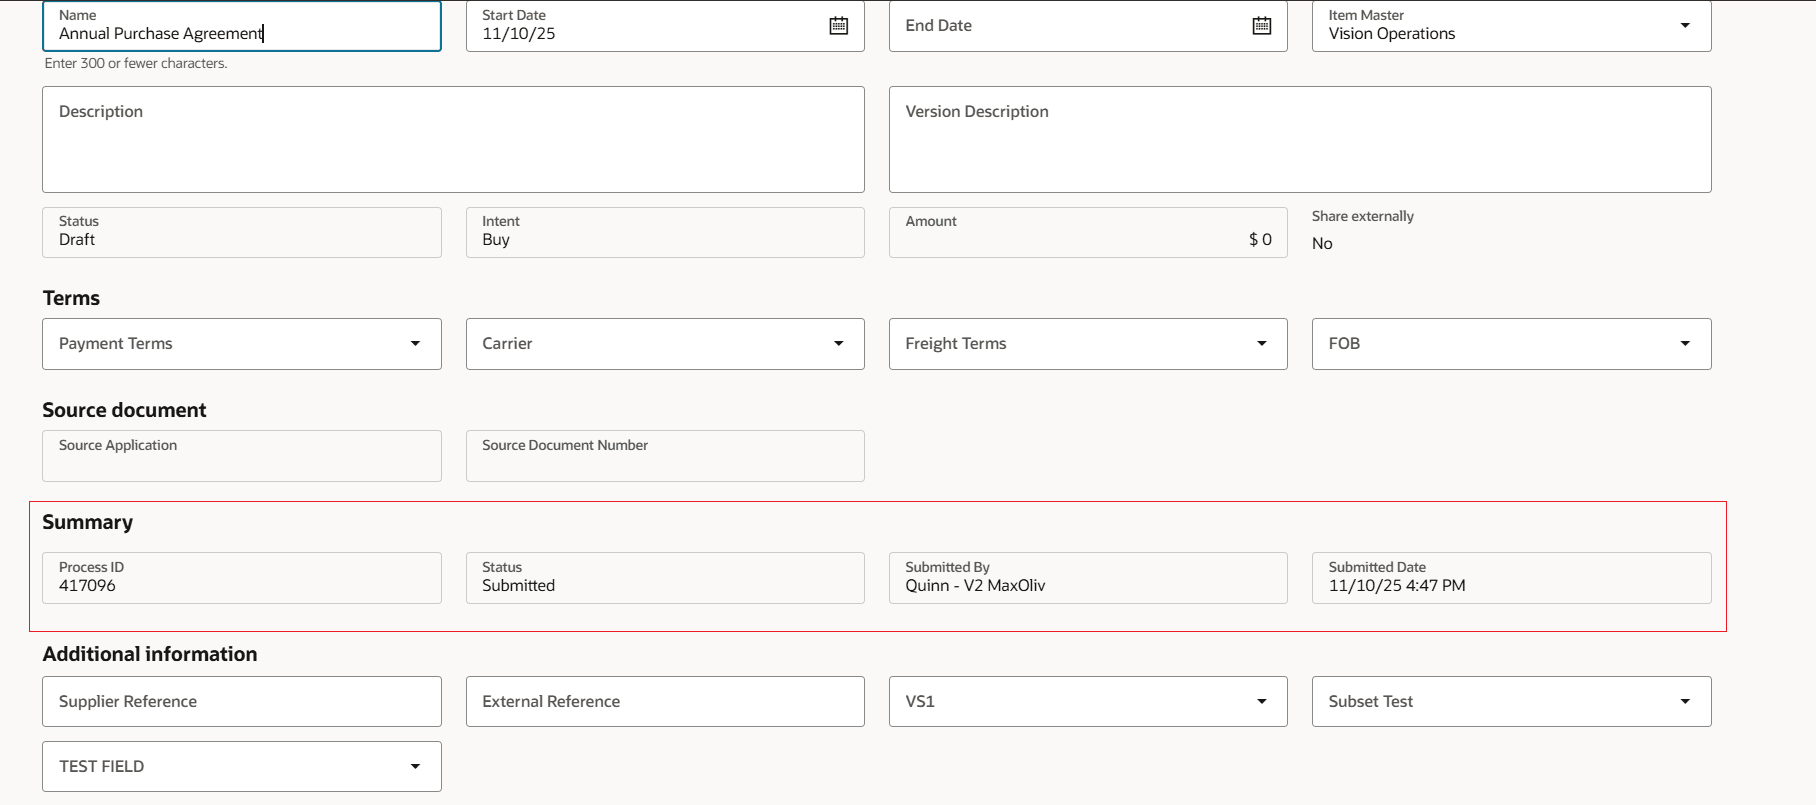
Process Submitted
Refresh the browser to get the latest status of the process.
Generated summary can be viewed by clicking the View More link. You can also download the summary by clicking the Download icon.
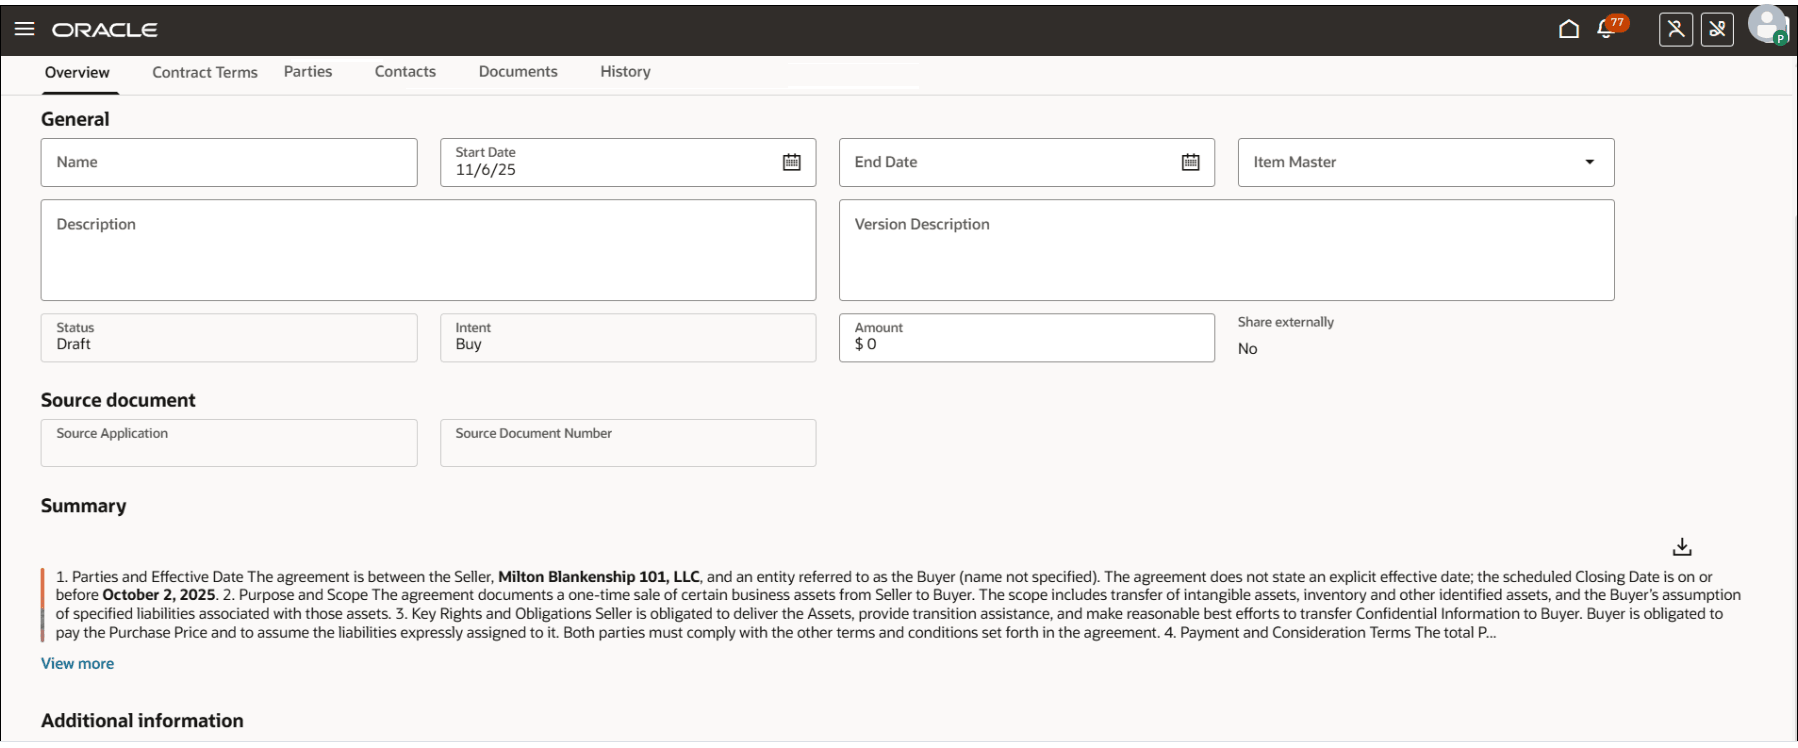
Generated Summary
You can edit the summary or regenerate by clicking on the Generate button.
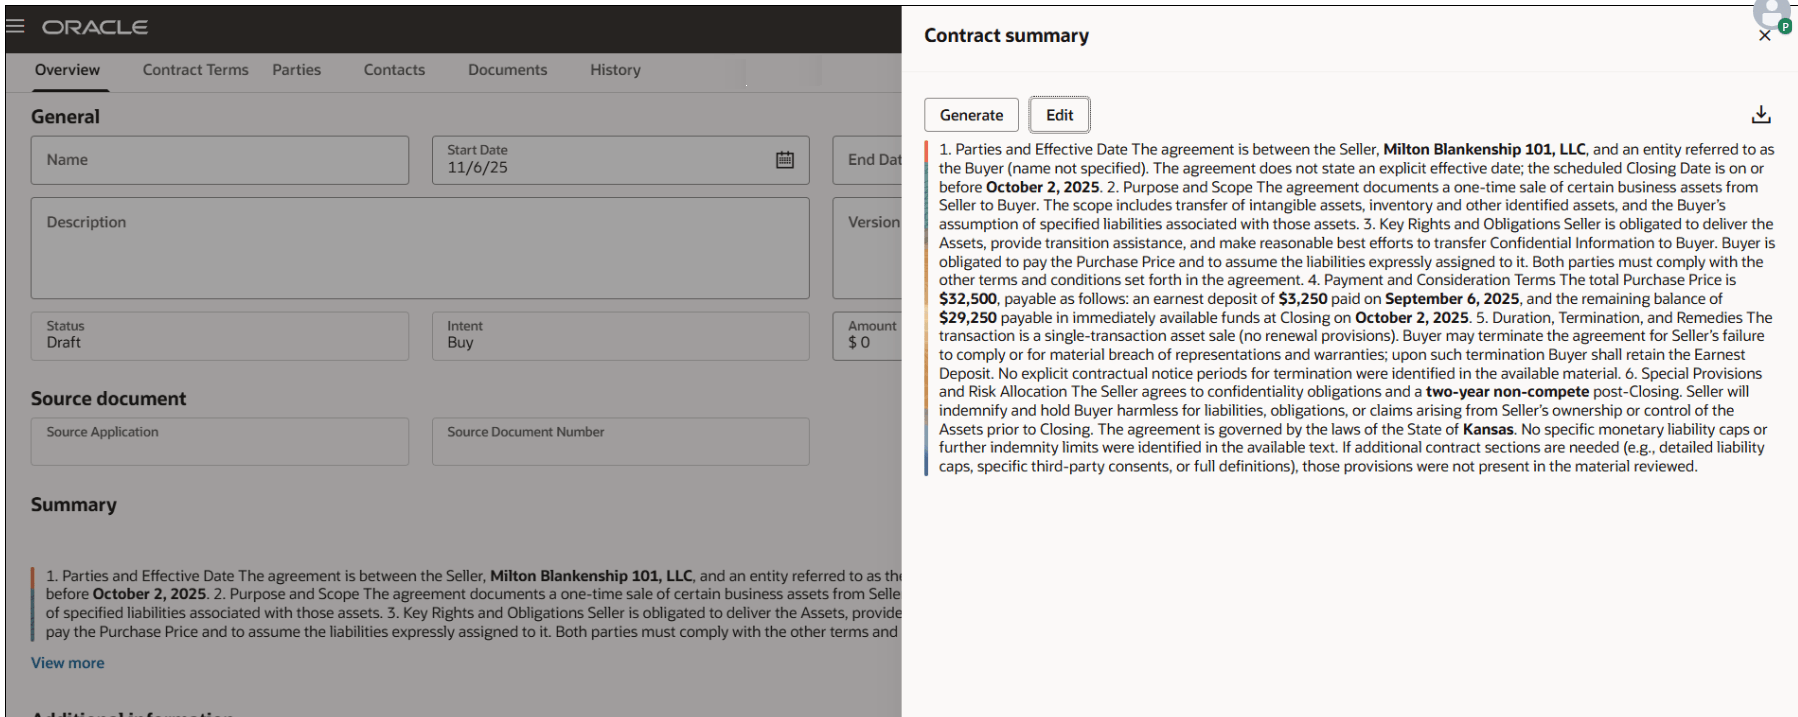
Edit Summary
Contract Lines
You can add lines to a contract, provided the contract type permits lines according to the Manage Contract Type setup. The available actions for the Lines tab appear at the top of the table. Additional columns for the line can be added to the layout using column layout management. To edit a line, click the pencil icon located at the line level. To access line descriptive flexfields, use the action on the More Details column.
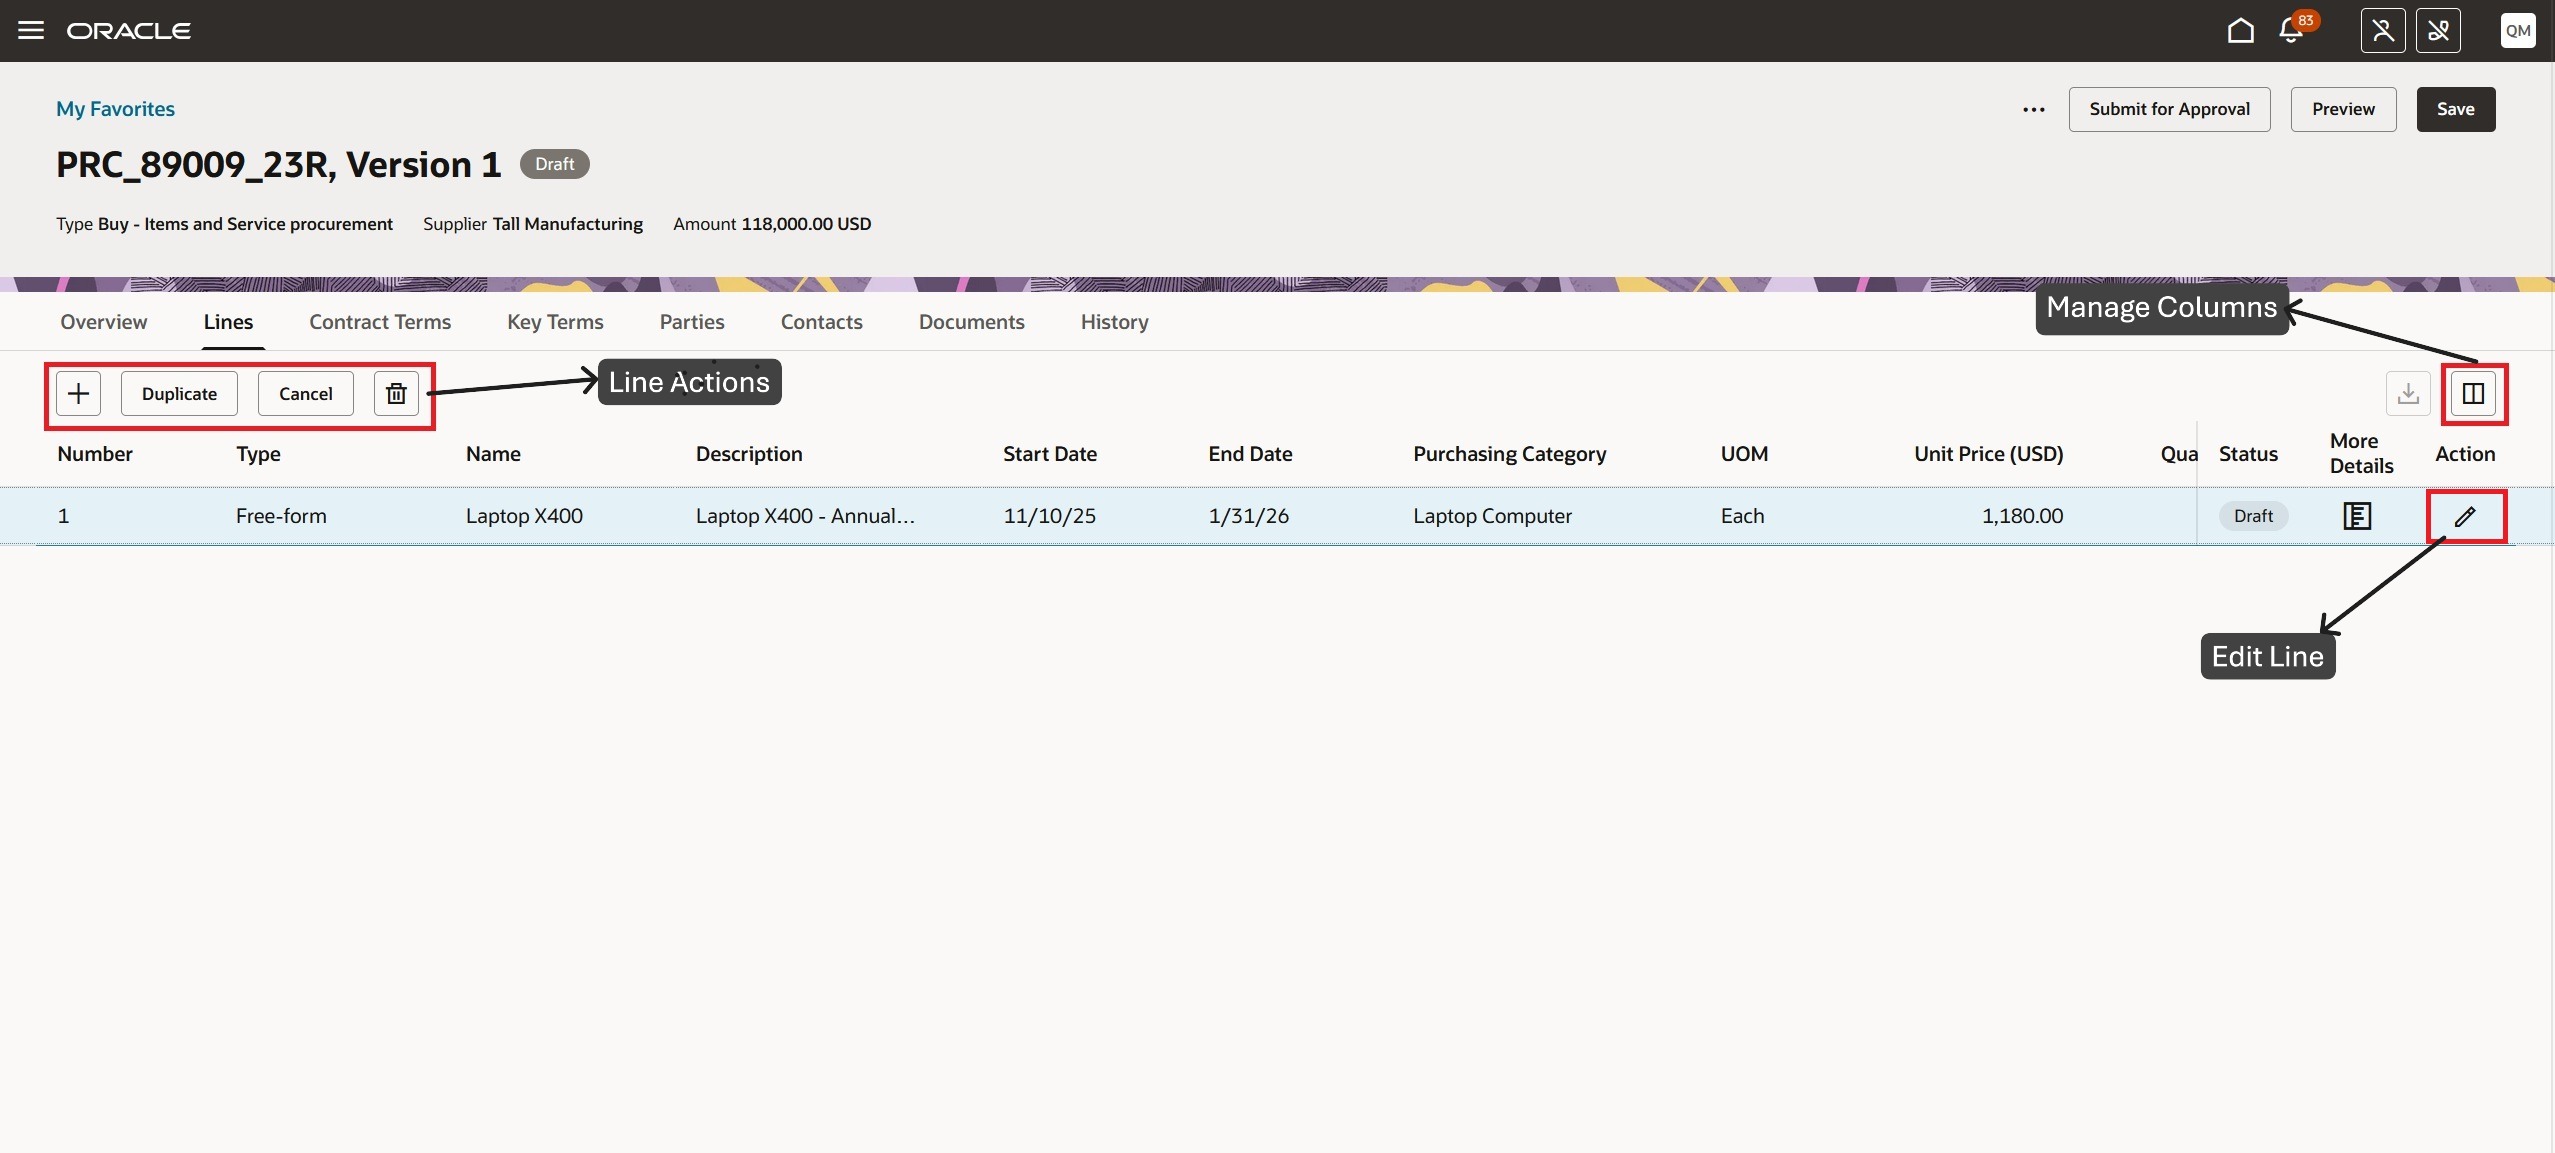
Contract Lines
Parties
Use the Parties tab to manage the parties associated with your contract. You can add or remove parties using the actions above the table, and edit existing parties by selecting the pencil icon in the Actions column. If descriptive flexfields for parties are configured, access them from the More Details column. In the Default Locations section, you can maintain default values for Supplier, Supplier Address, Ship-to Organization, Ship-to Location, and Bill-to Location.
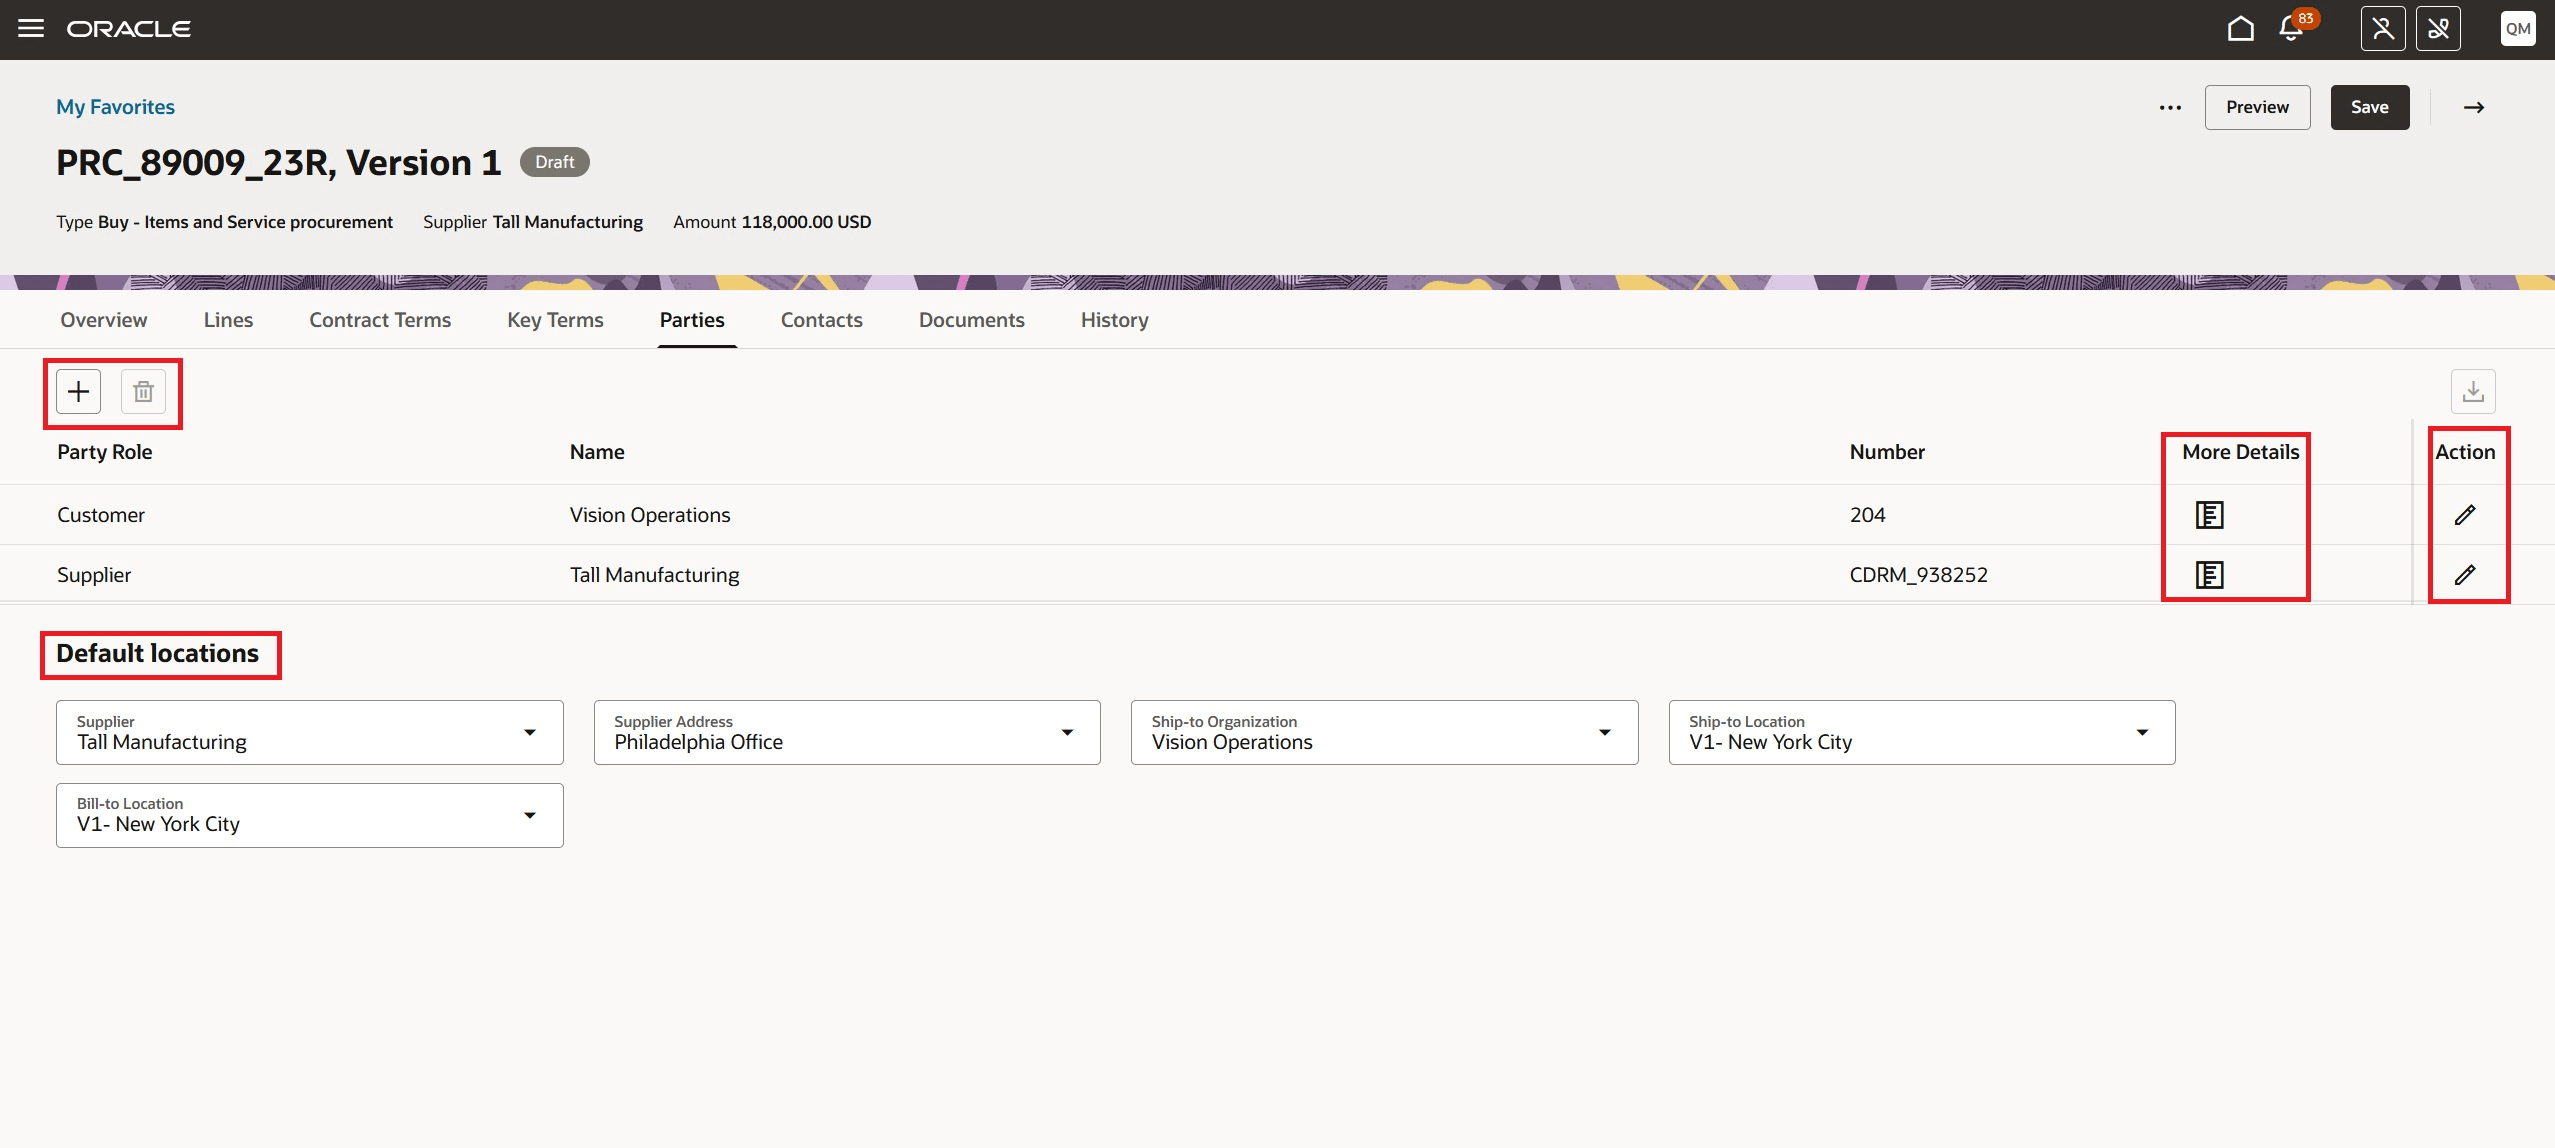
Contract Parties
Contacts
For each party you’ve added in the Parties tab, you can manage their associated contacts in the Contacts tab. The Contacts tab is divided into Internal and External sections. For Buy Intent contracts, internal contacts represent individuals within your business unit, while external contacts are linked to parties outside your organization, such as suppliers. To add an internal contact, select the internal party and complete the necessary fields. For external party contacts, first choose the party role and organization before entering additional details.
The following screenshot illustrate a sample entry for Internal and External contacts.
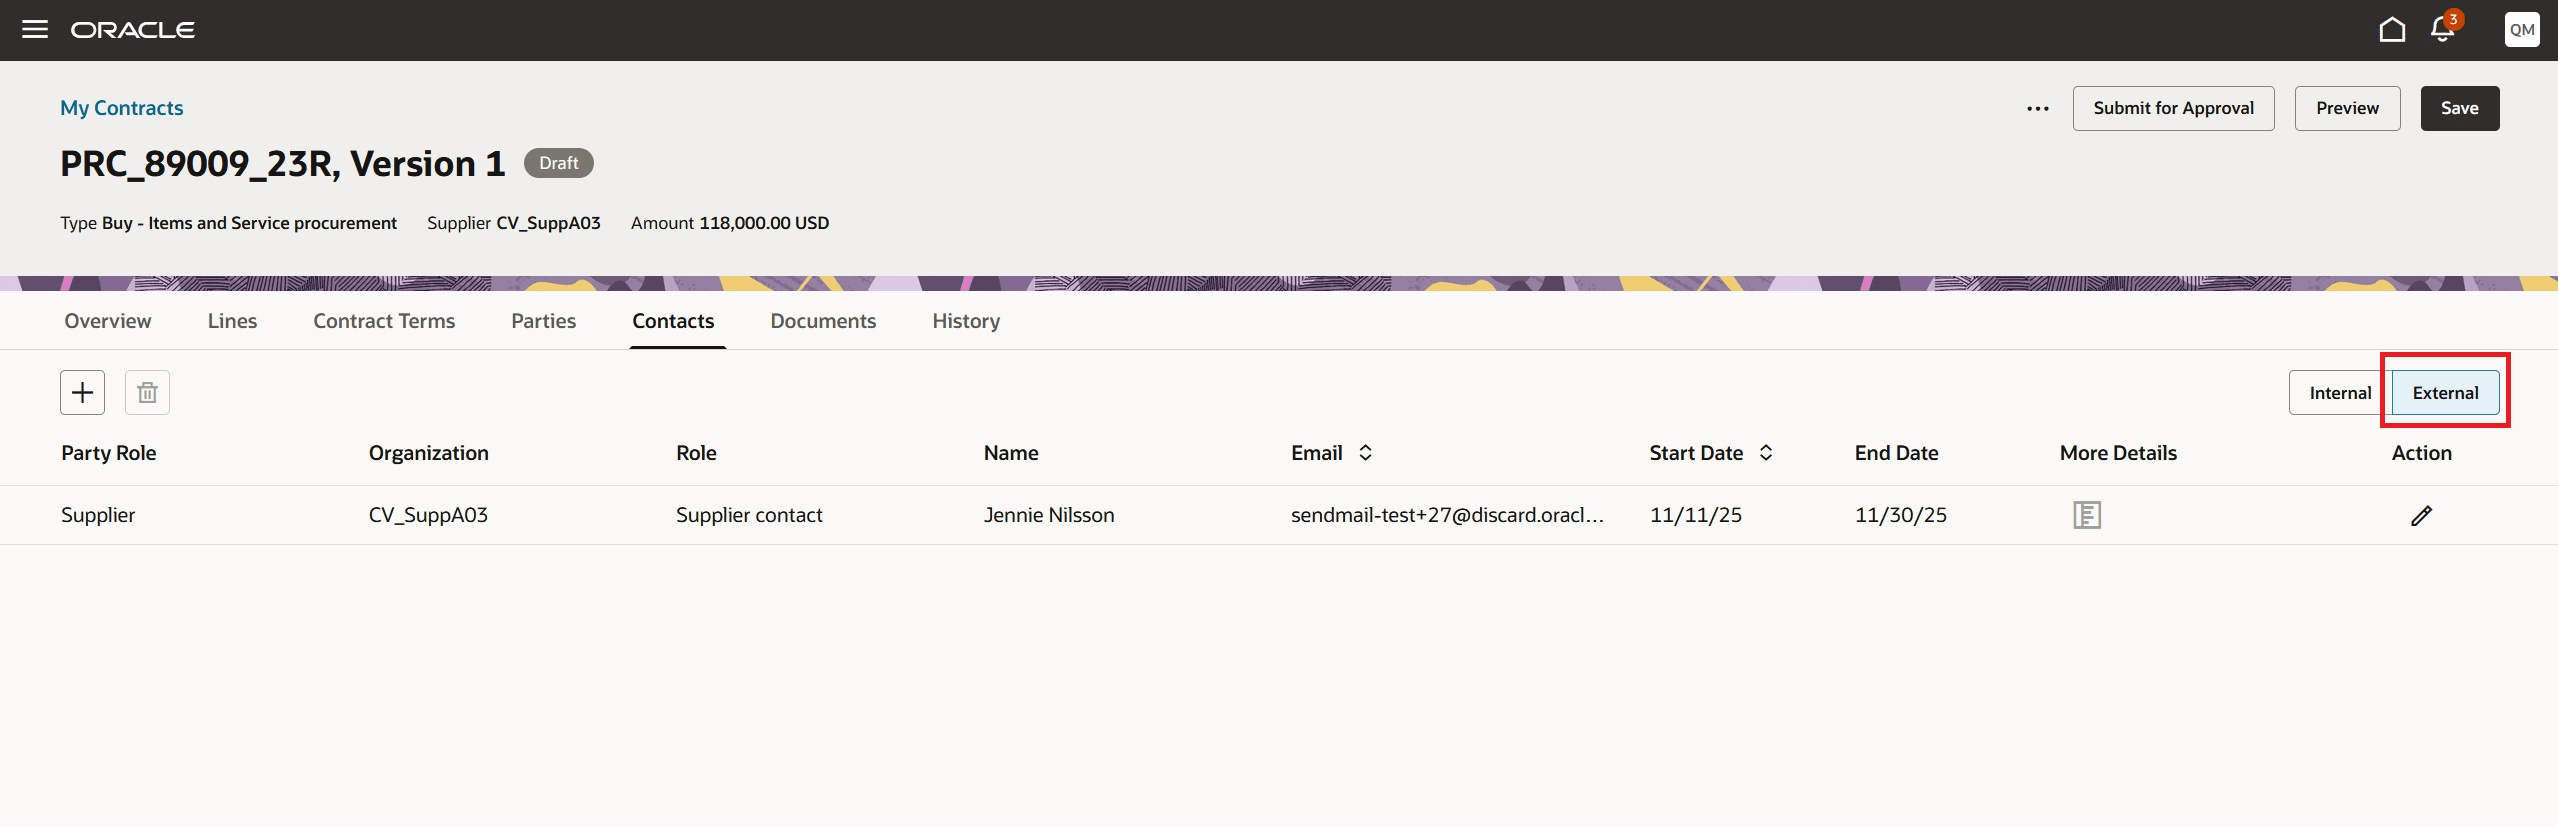
External Contacts
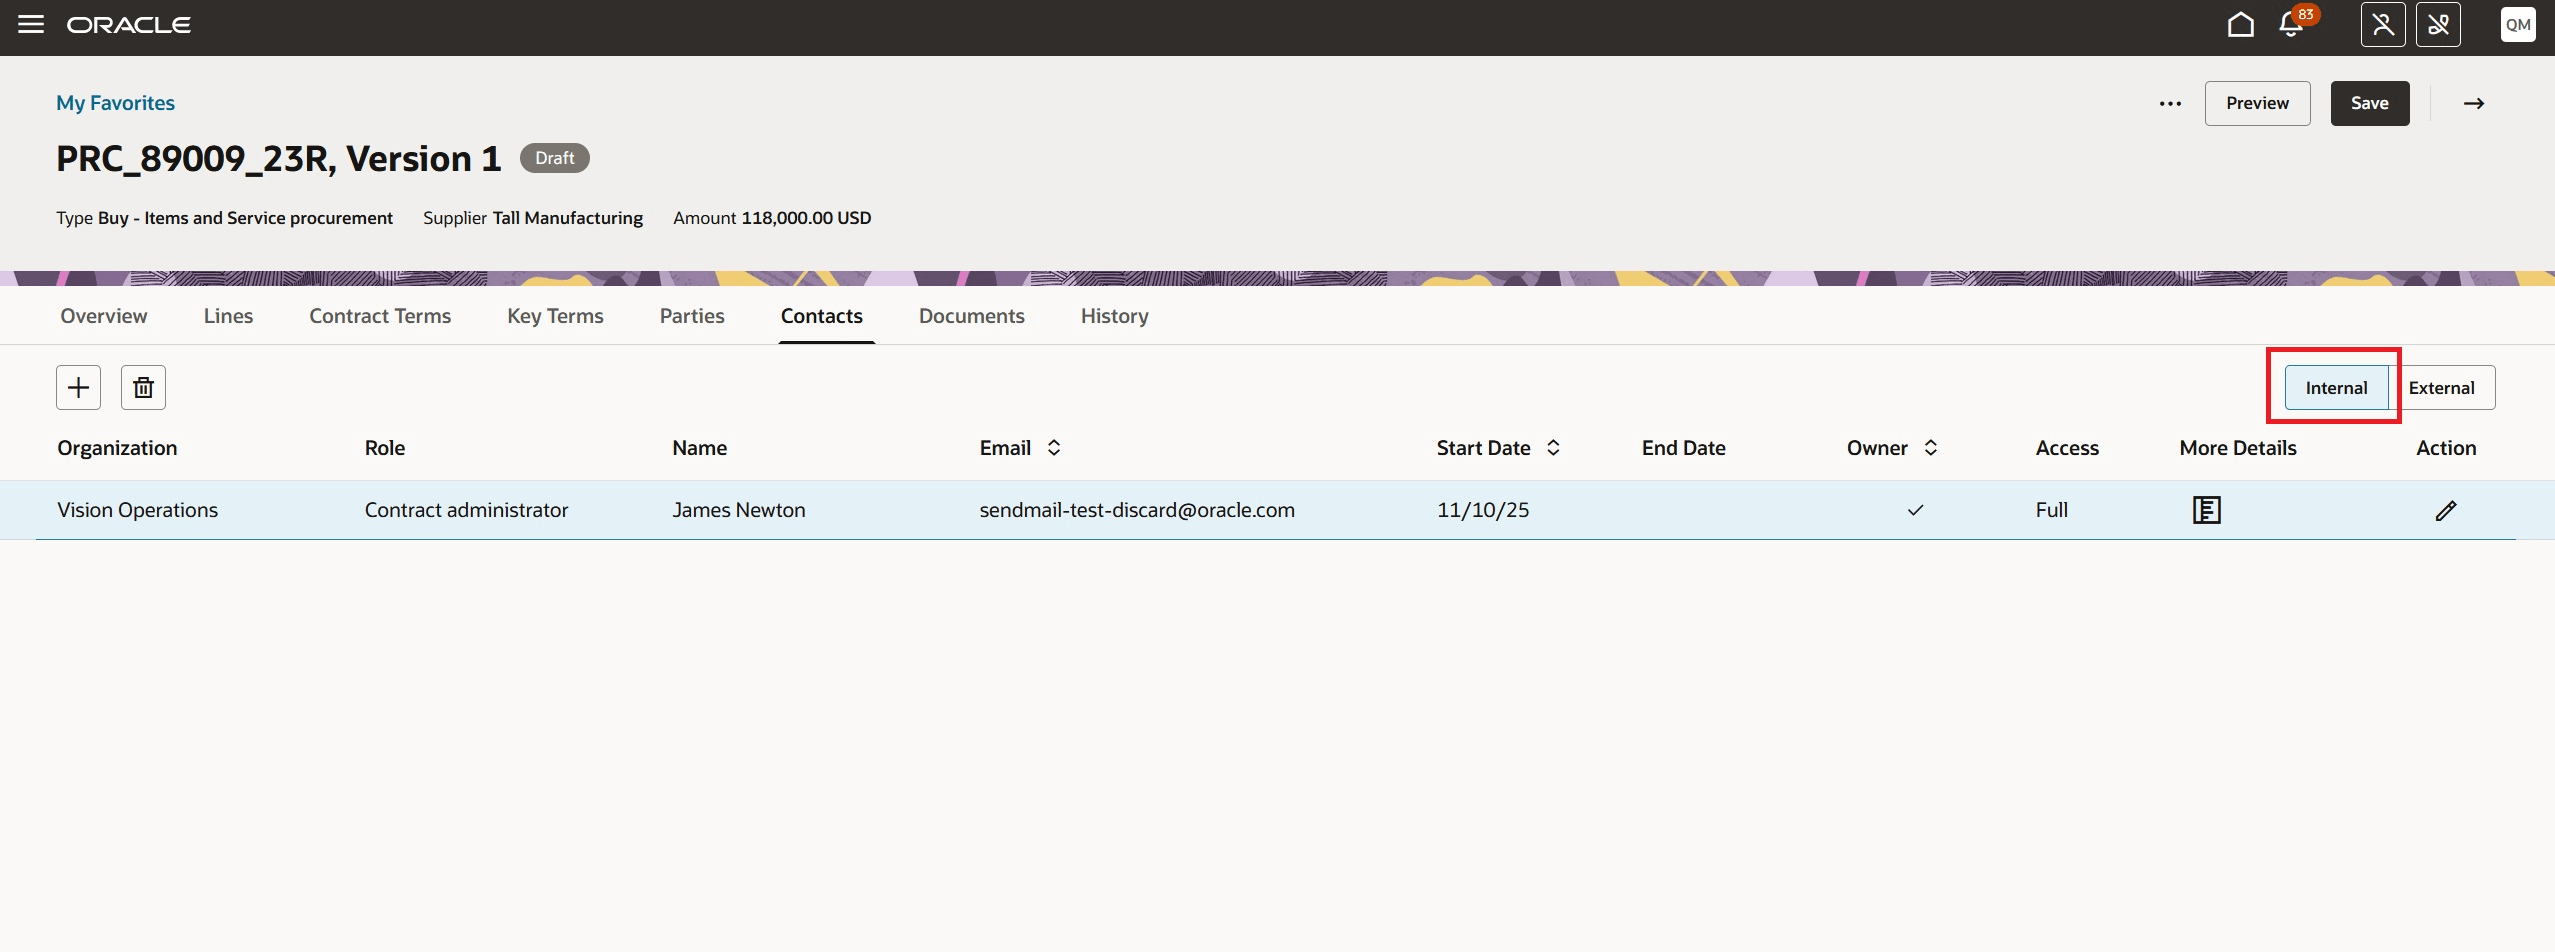
Internal Contacts
Documents
Documents related to the contract can be added by clicking on Add Documents. Documents can be added in the following sections.
- Signed contract document
- Contract documents
- Supporting documents
- Internal shared
- External shared
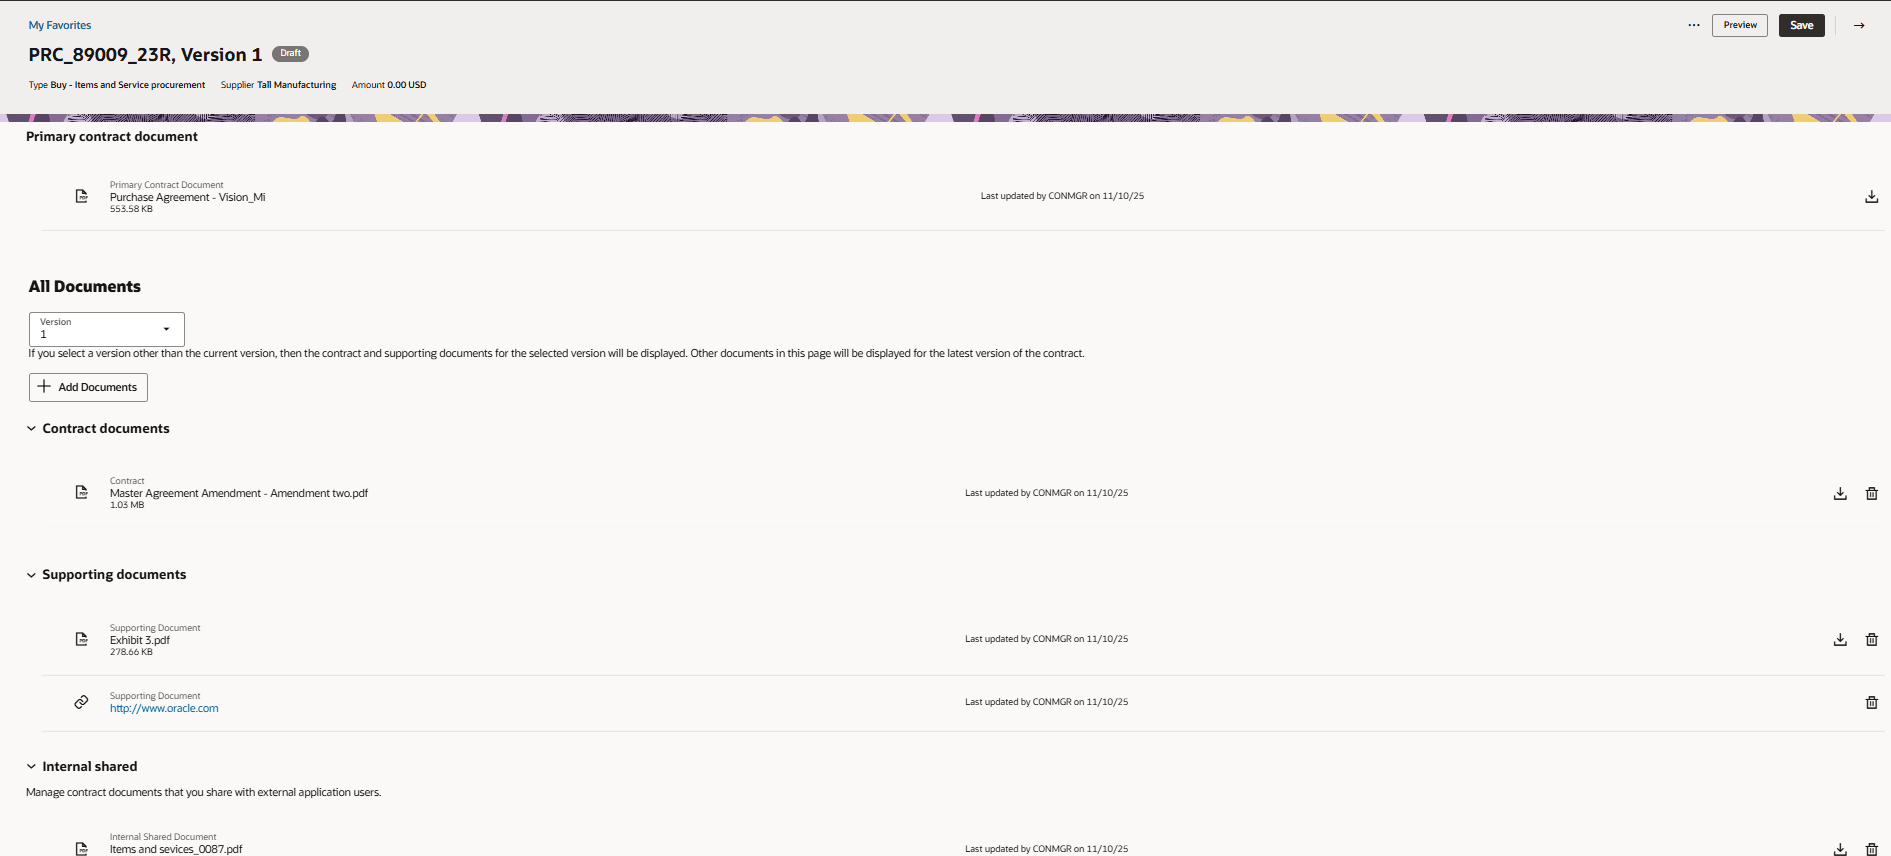
Documents Tab
From the Add documents drawer, add documents and URLs to various sections. Custom document categories are supported.
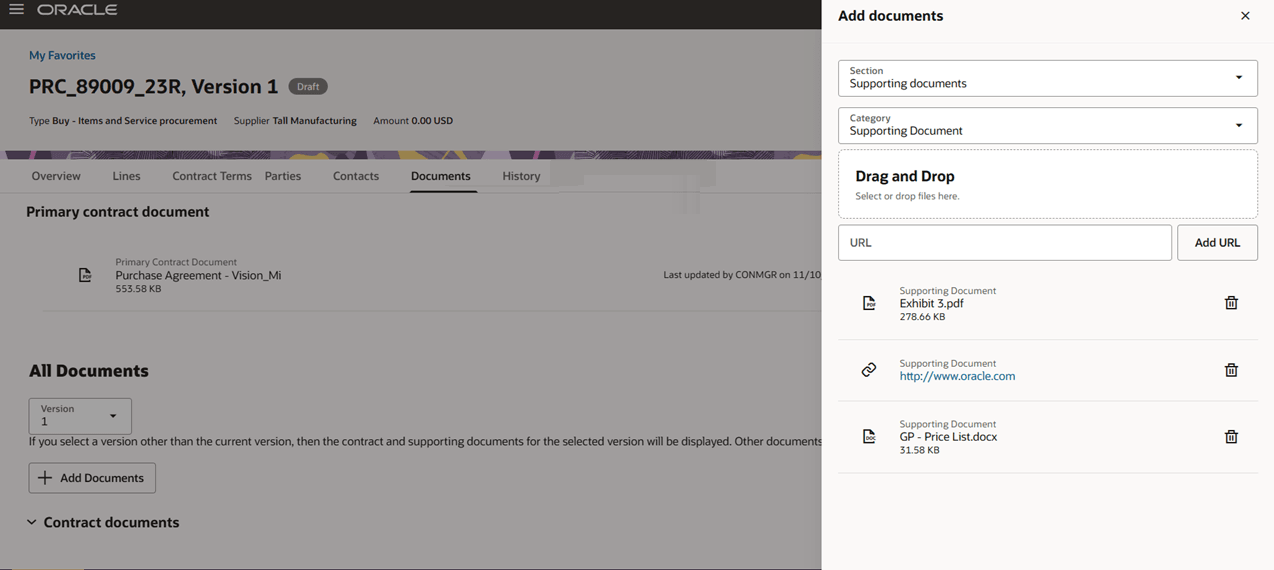
Add Documents
Docusign:
For contract types with Docusign integration setup and contracts with Enable Electronic Signature check box enabled, you can create, manage and sign the envelopes. Ensure that the signer details are added in the Contacts tab.
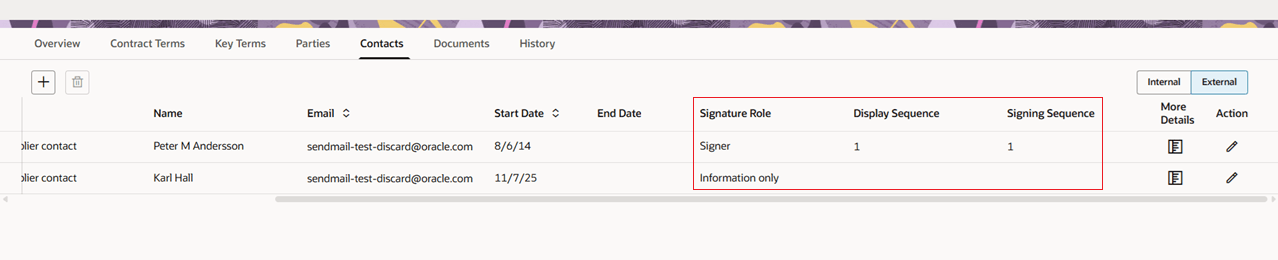
Docusign Signer Details
History
Use the history tab to get more information related to key dates, versions, approval history, and status.
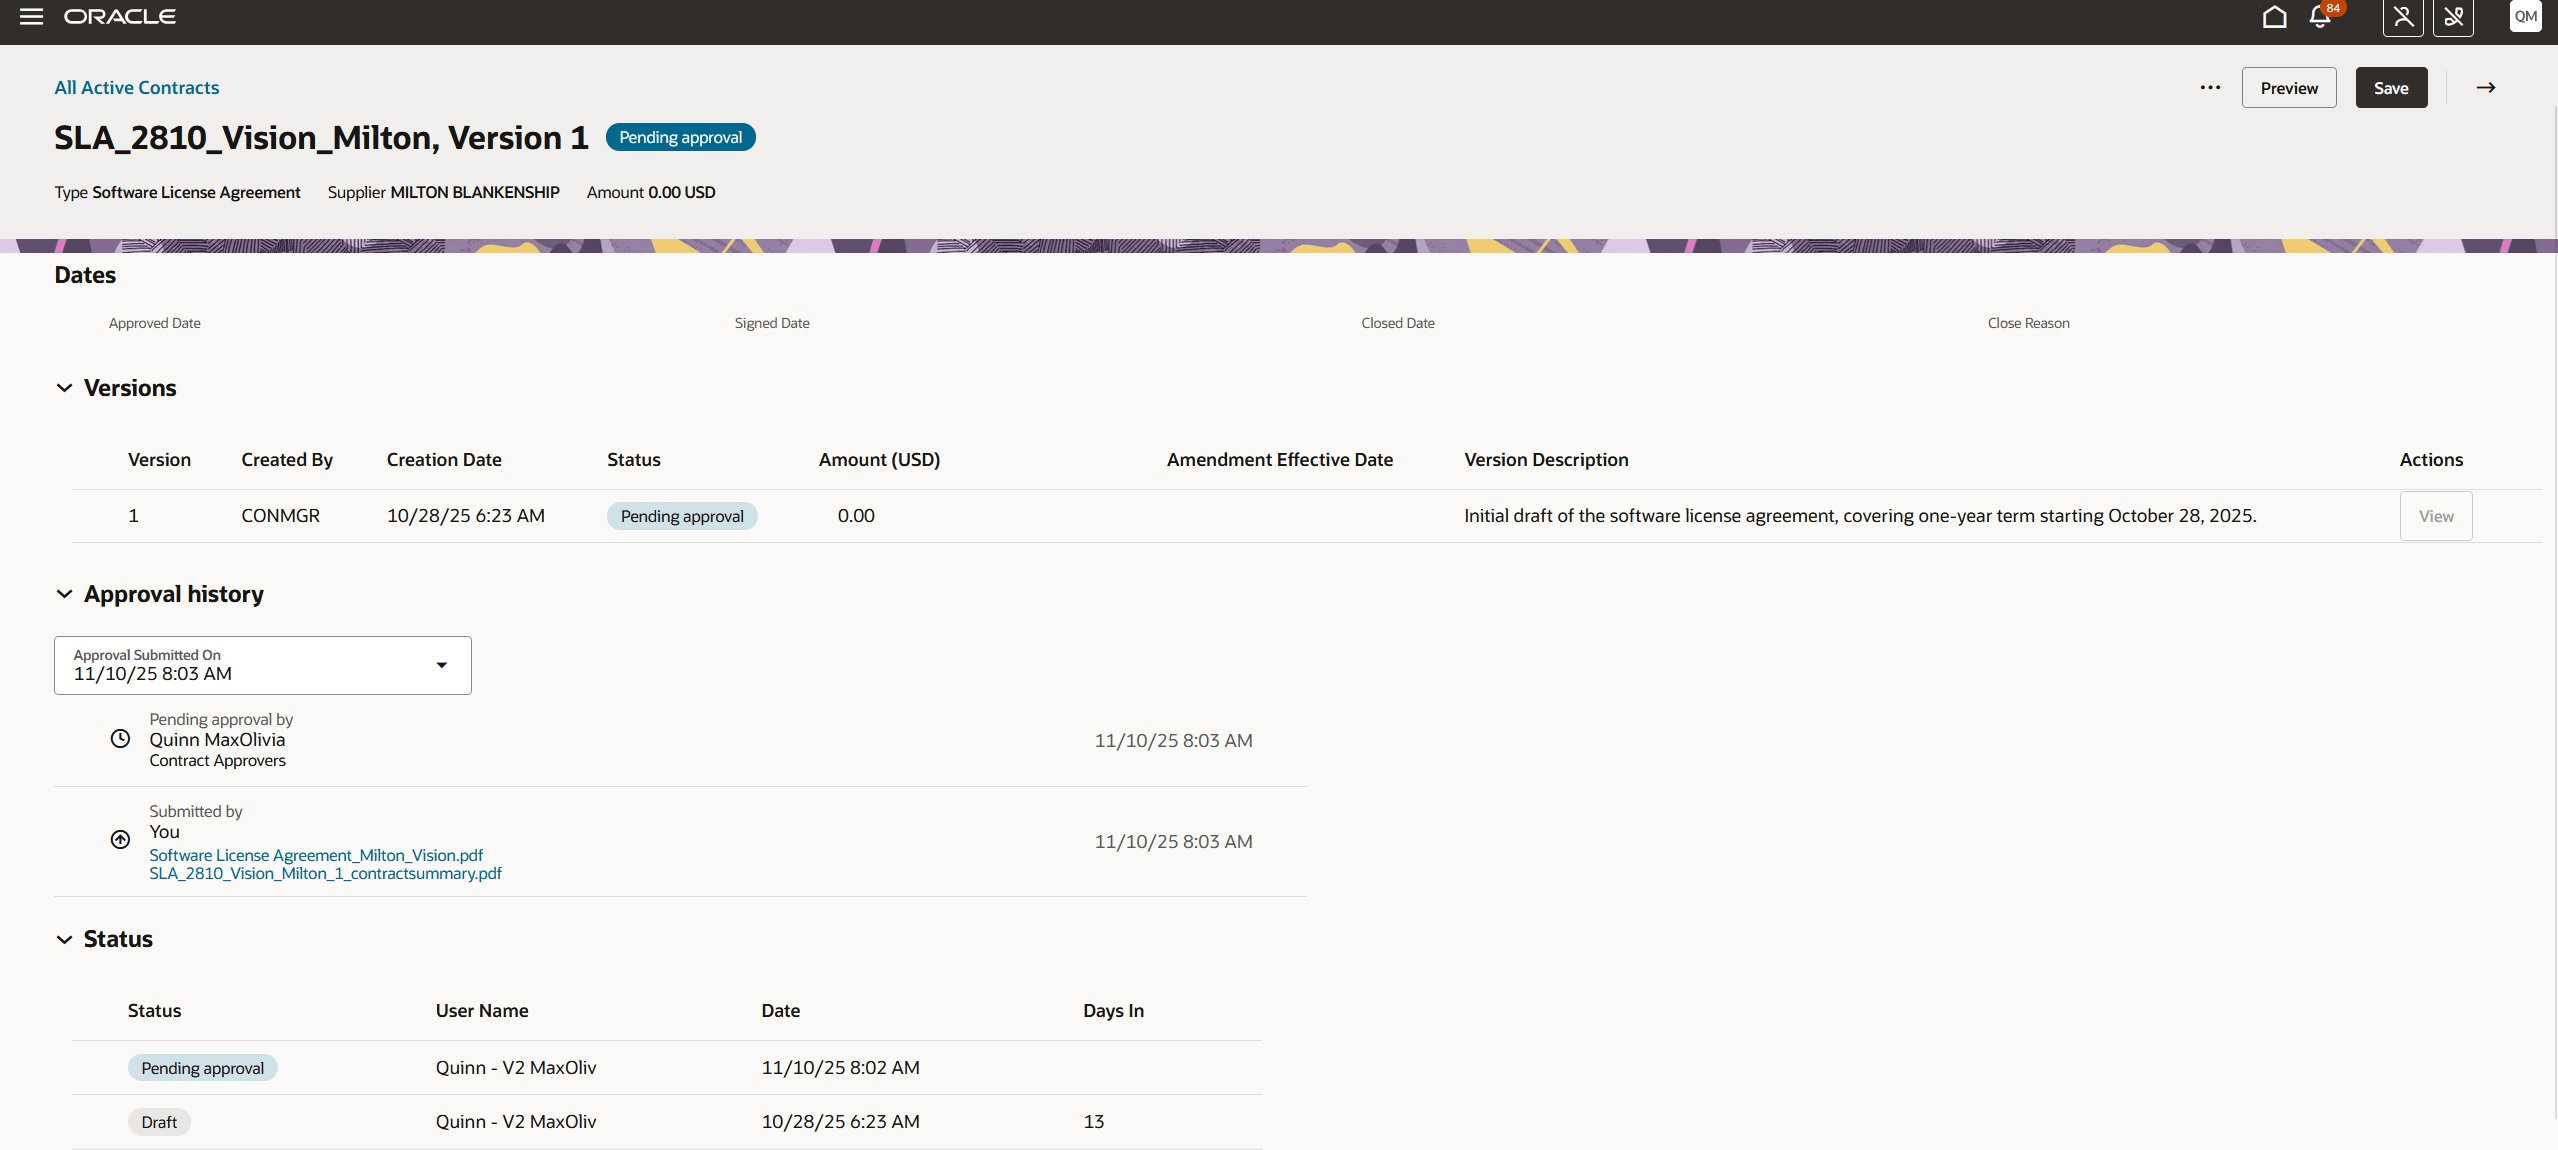
Contract History
To navigate to a previous version of the contract, use the View action against the version in the history tab.
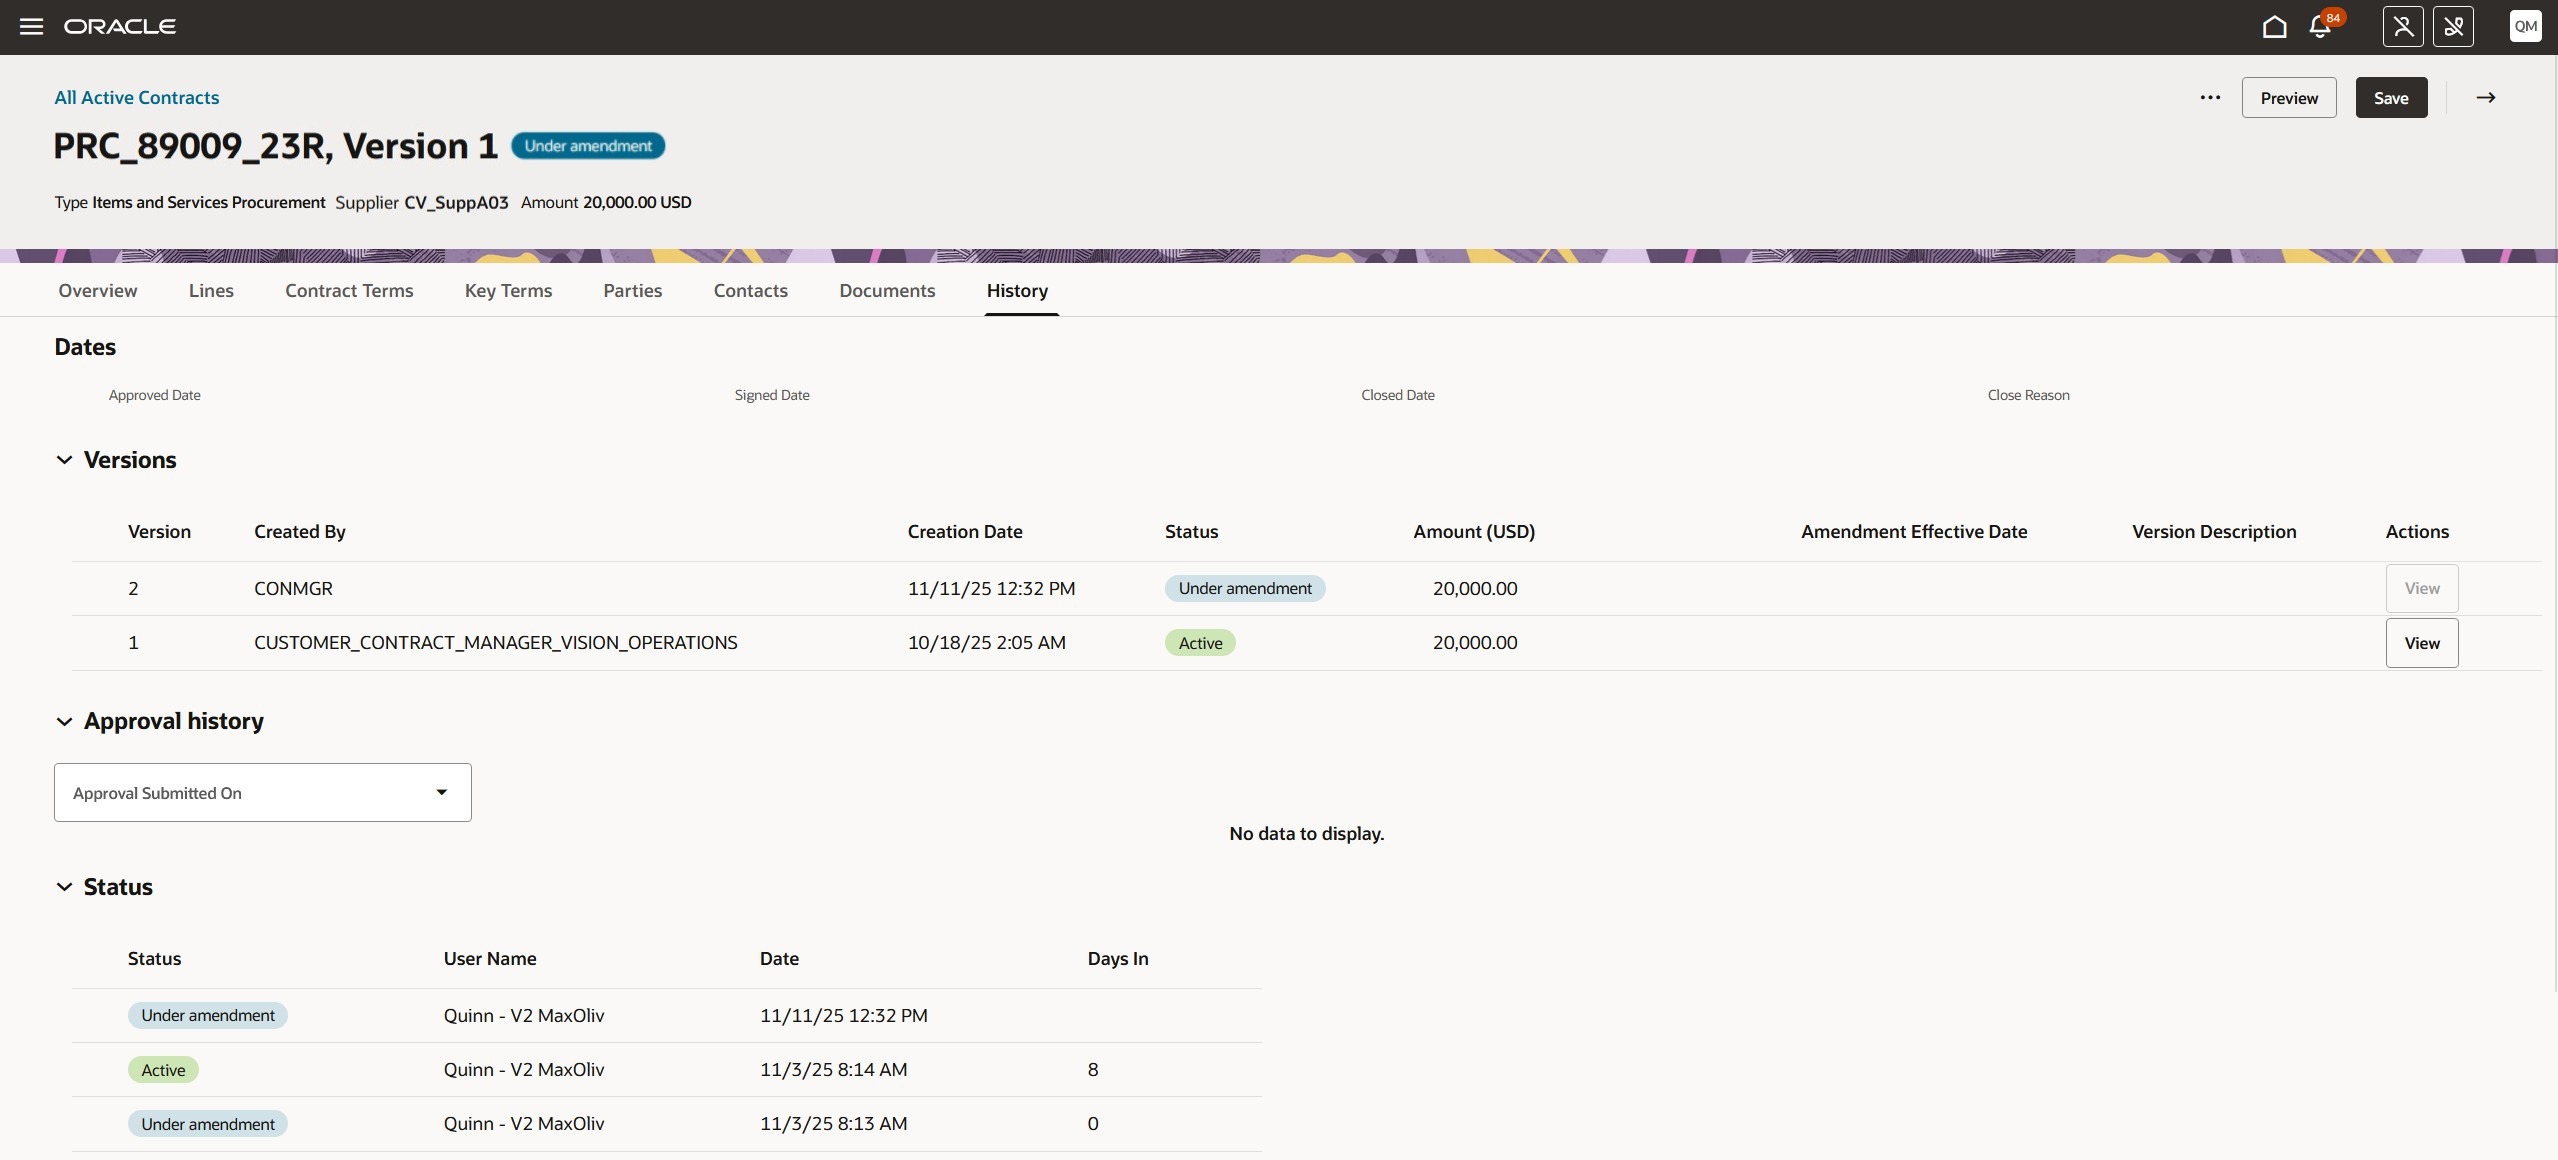
View Contract Previous Version
Create Purchasing Document
In this release, the fulfillment process has been streamlined into a single step for creating purchasing documents. After contract approval, you can simply use the Create Purchasing Document action to fulfill the contract.
Select the Create Purchasing Document action, which opens a drawer where you can enter all required information. If you check the Autosubmit for approval box, the purchase document will be automatically submitted upon creation. When ready, click Create.
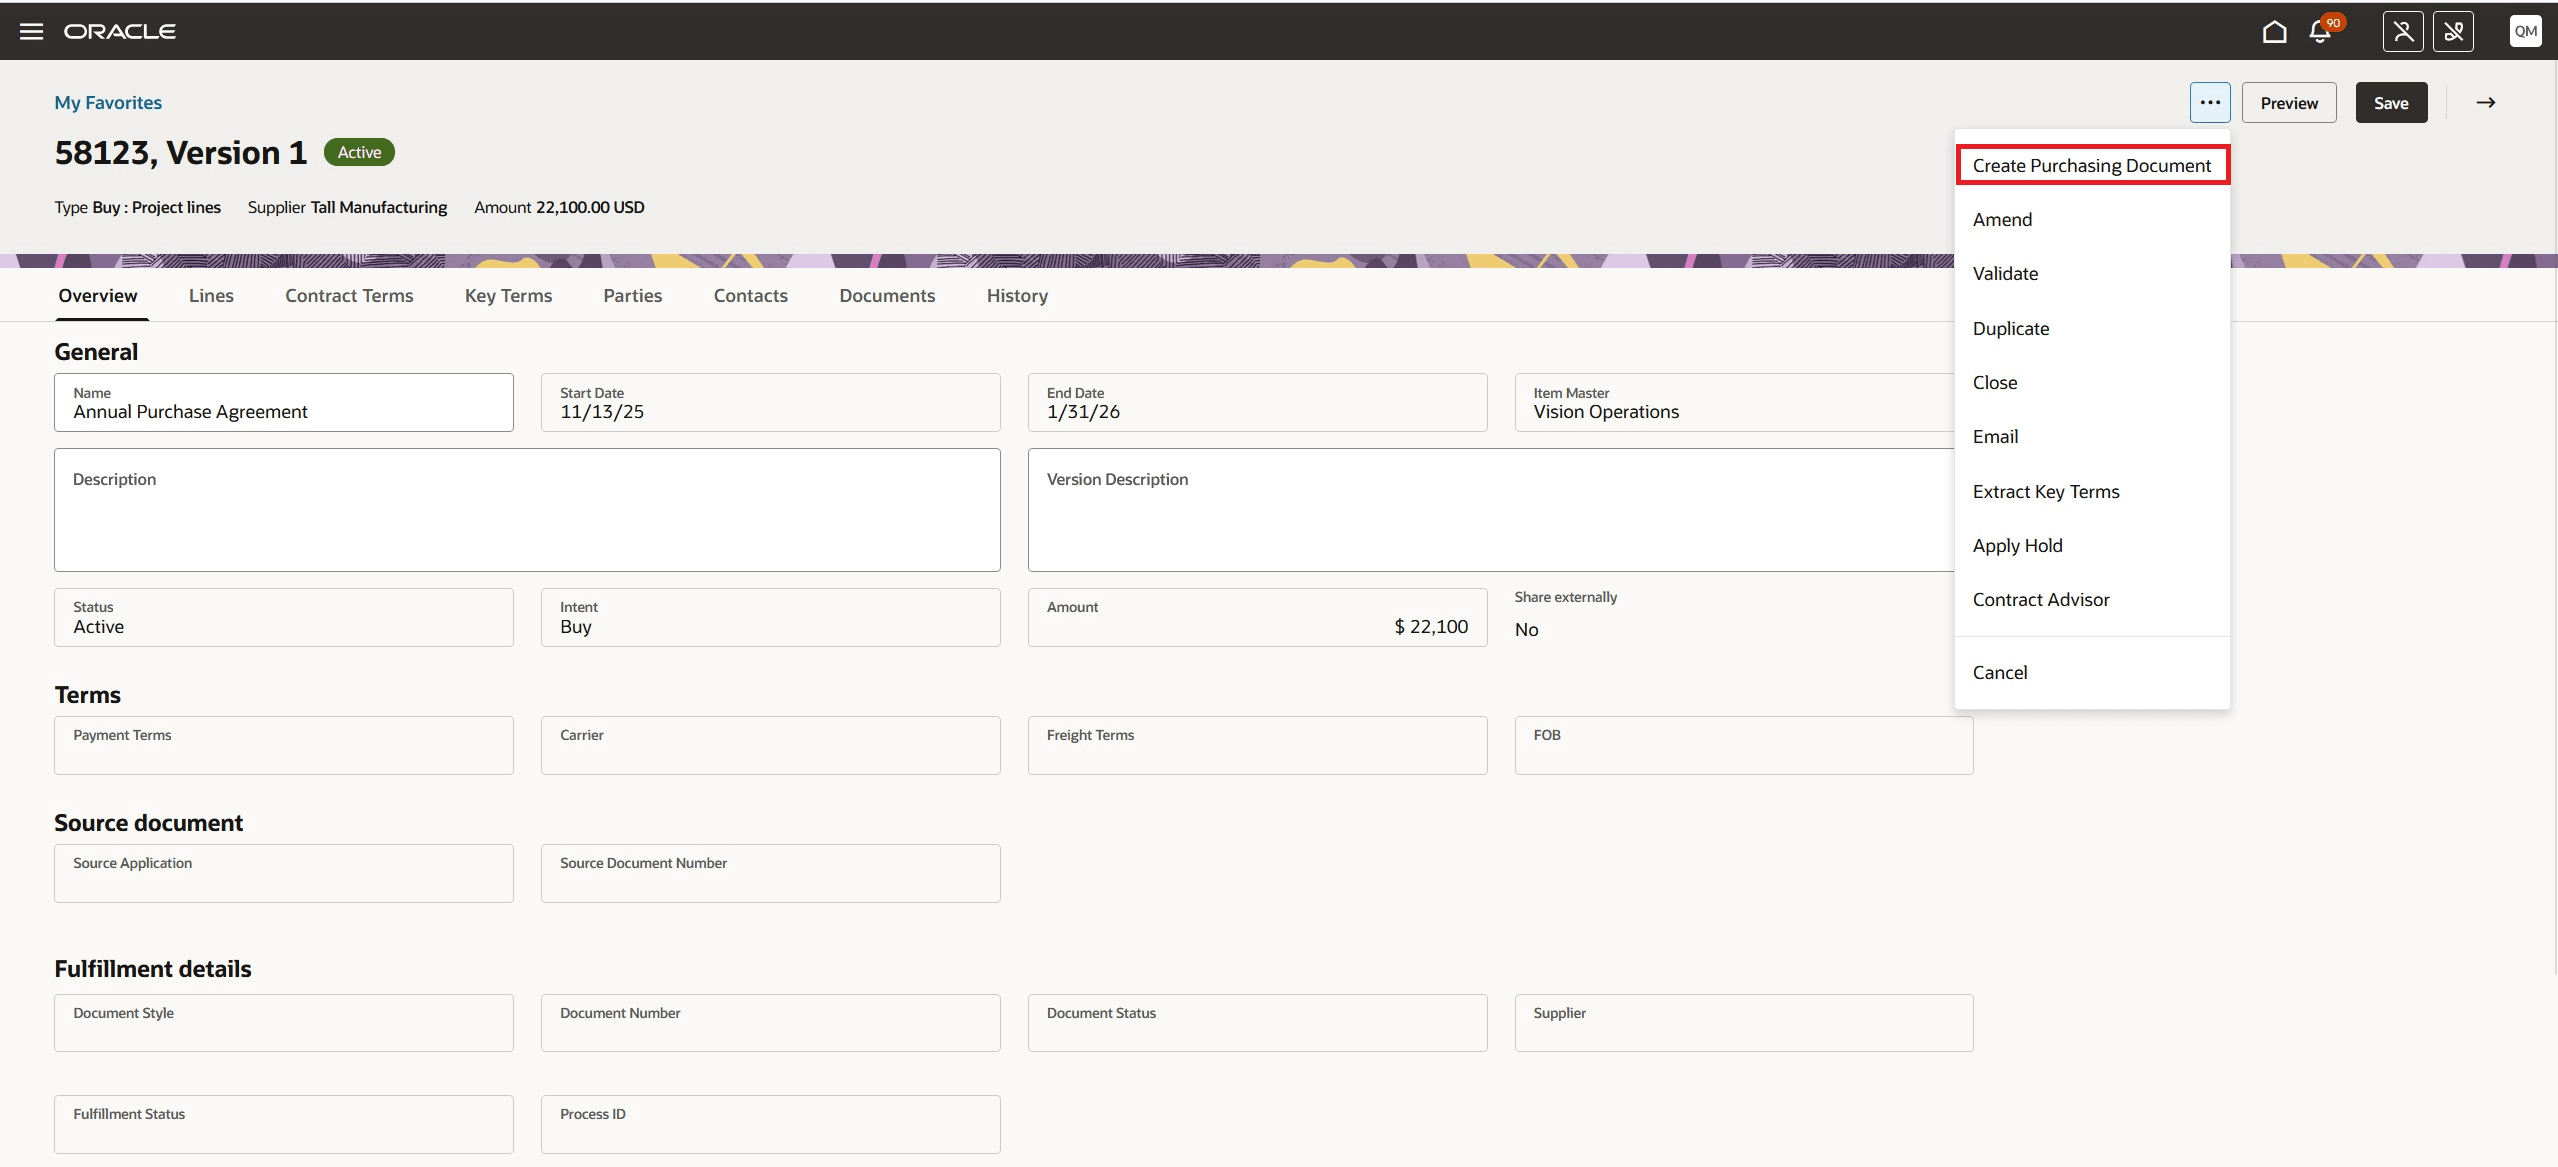
Create Purchasing Document Action
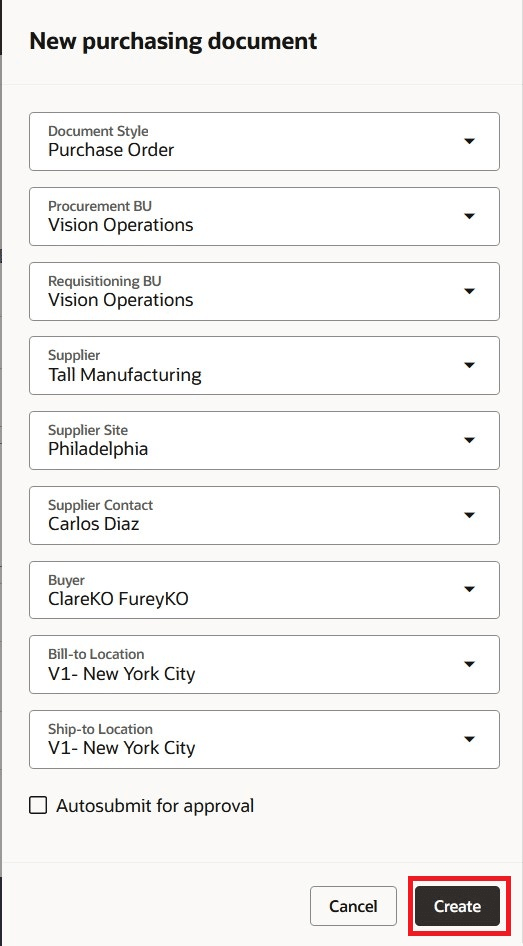
New Purchasing Document Drawer
Once the purchasing document is created a confirmation message appears with the order or agreement number. You can find fulfillment details in the Fulfillment section of the Overview tab.
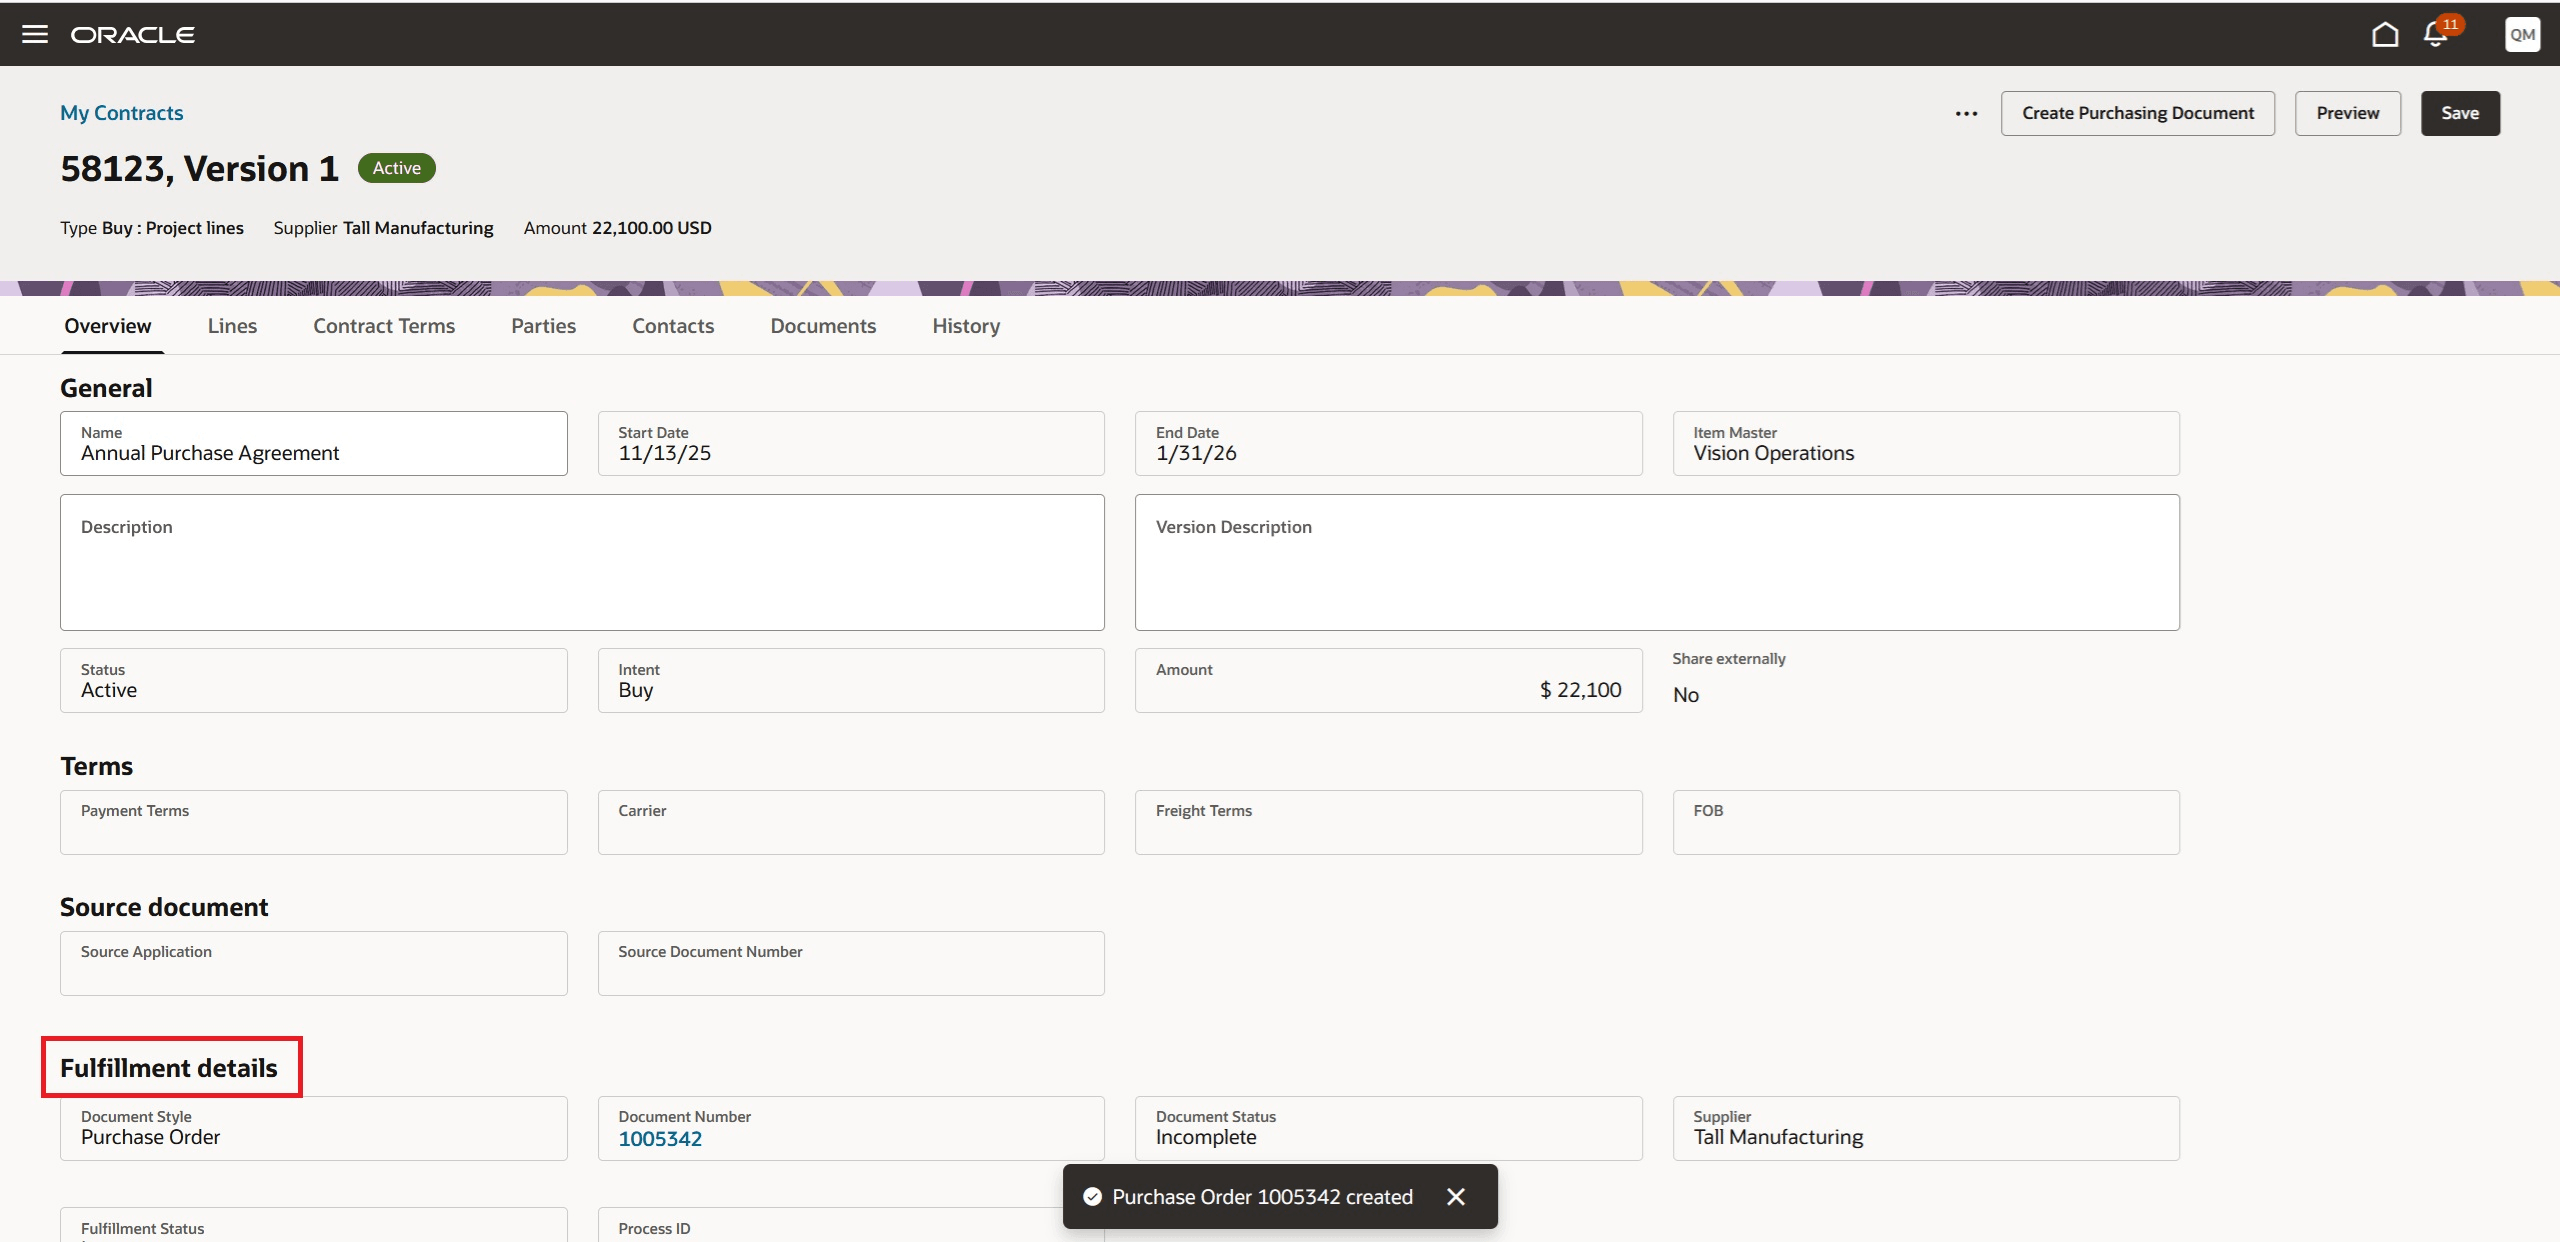
Fulfillment Section
To review process details, click on the Process ID which opens a drawer. To view purchasing document information, click on the Document Number to navigate to the Redwood Purchasing Document page.
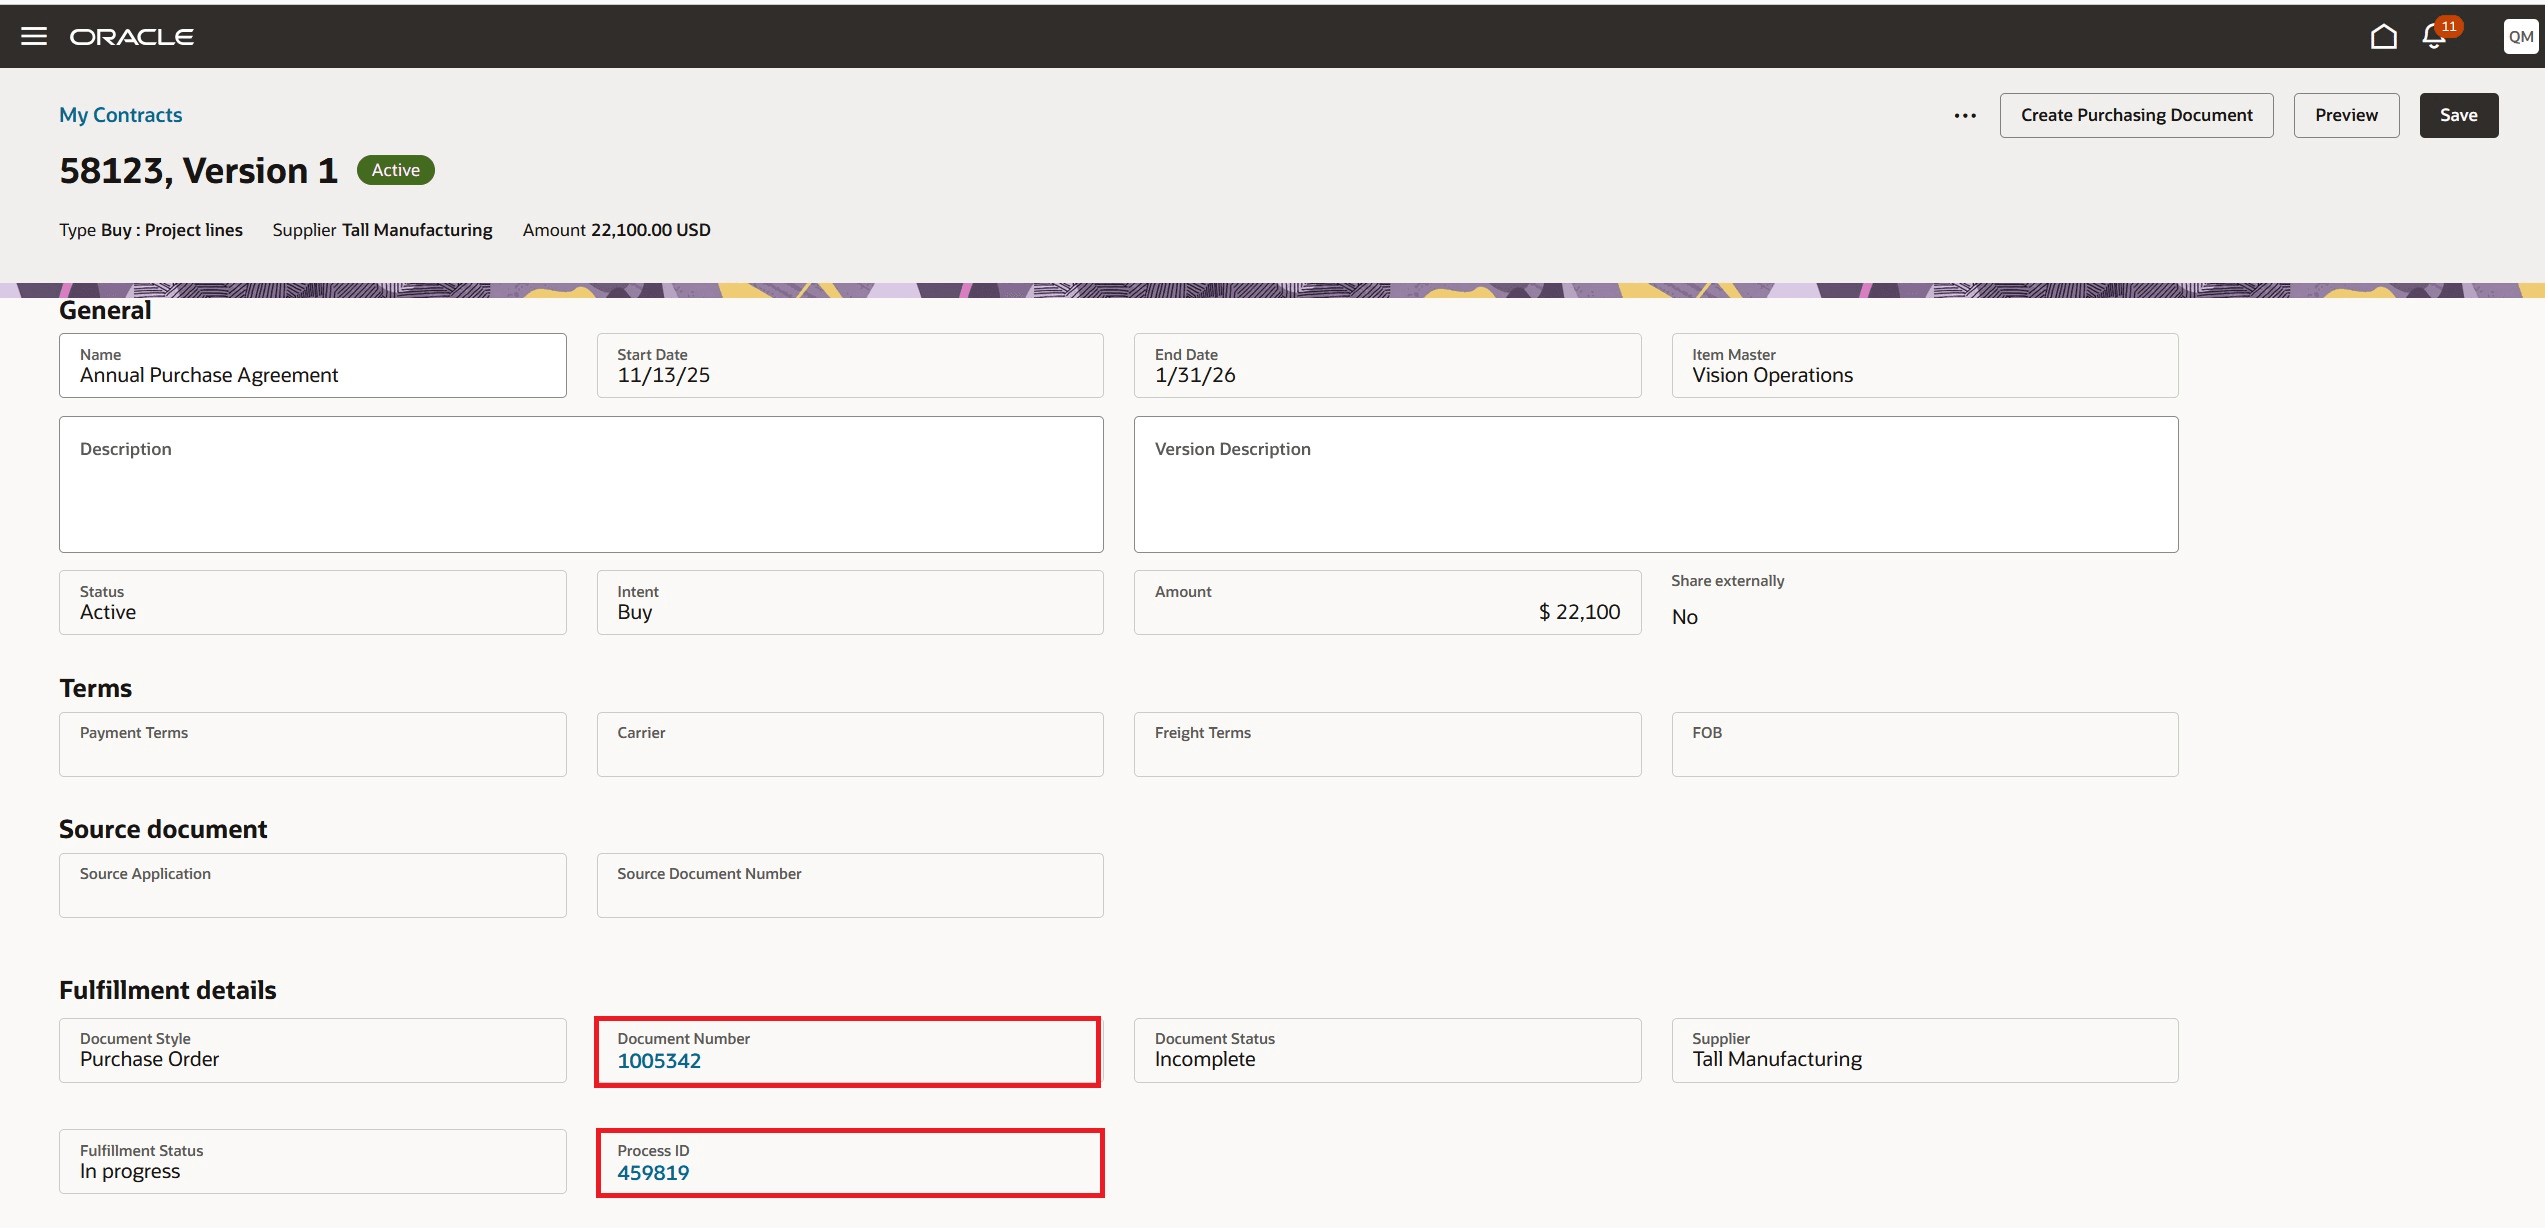
Fulfillment Process and Document Details
For any failure that occur during the Create Purchasing Document process, you will see a banner message with a drill down to view the error details.
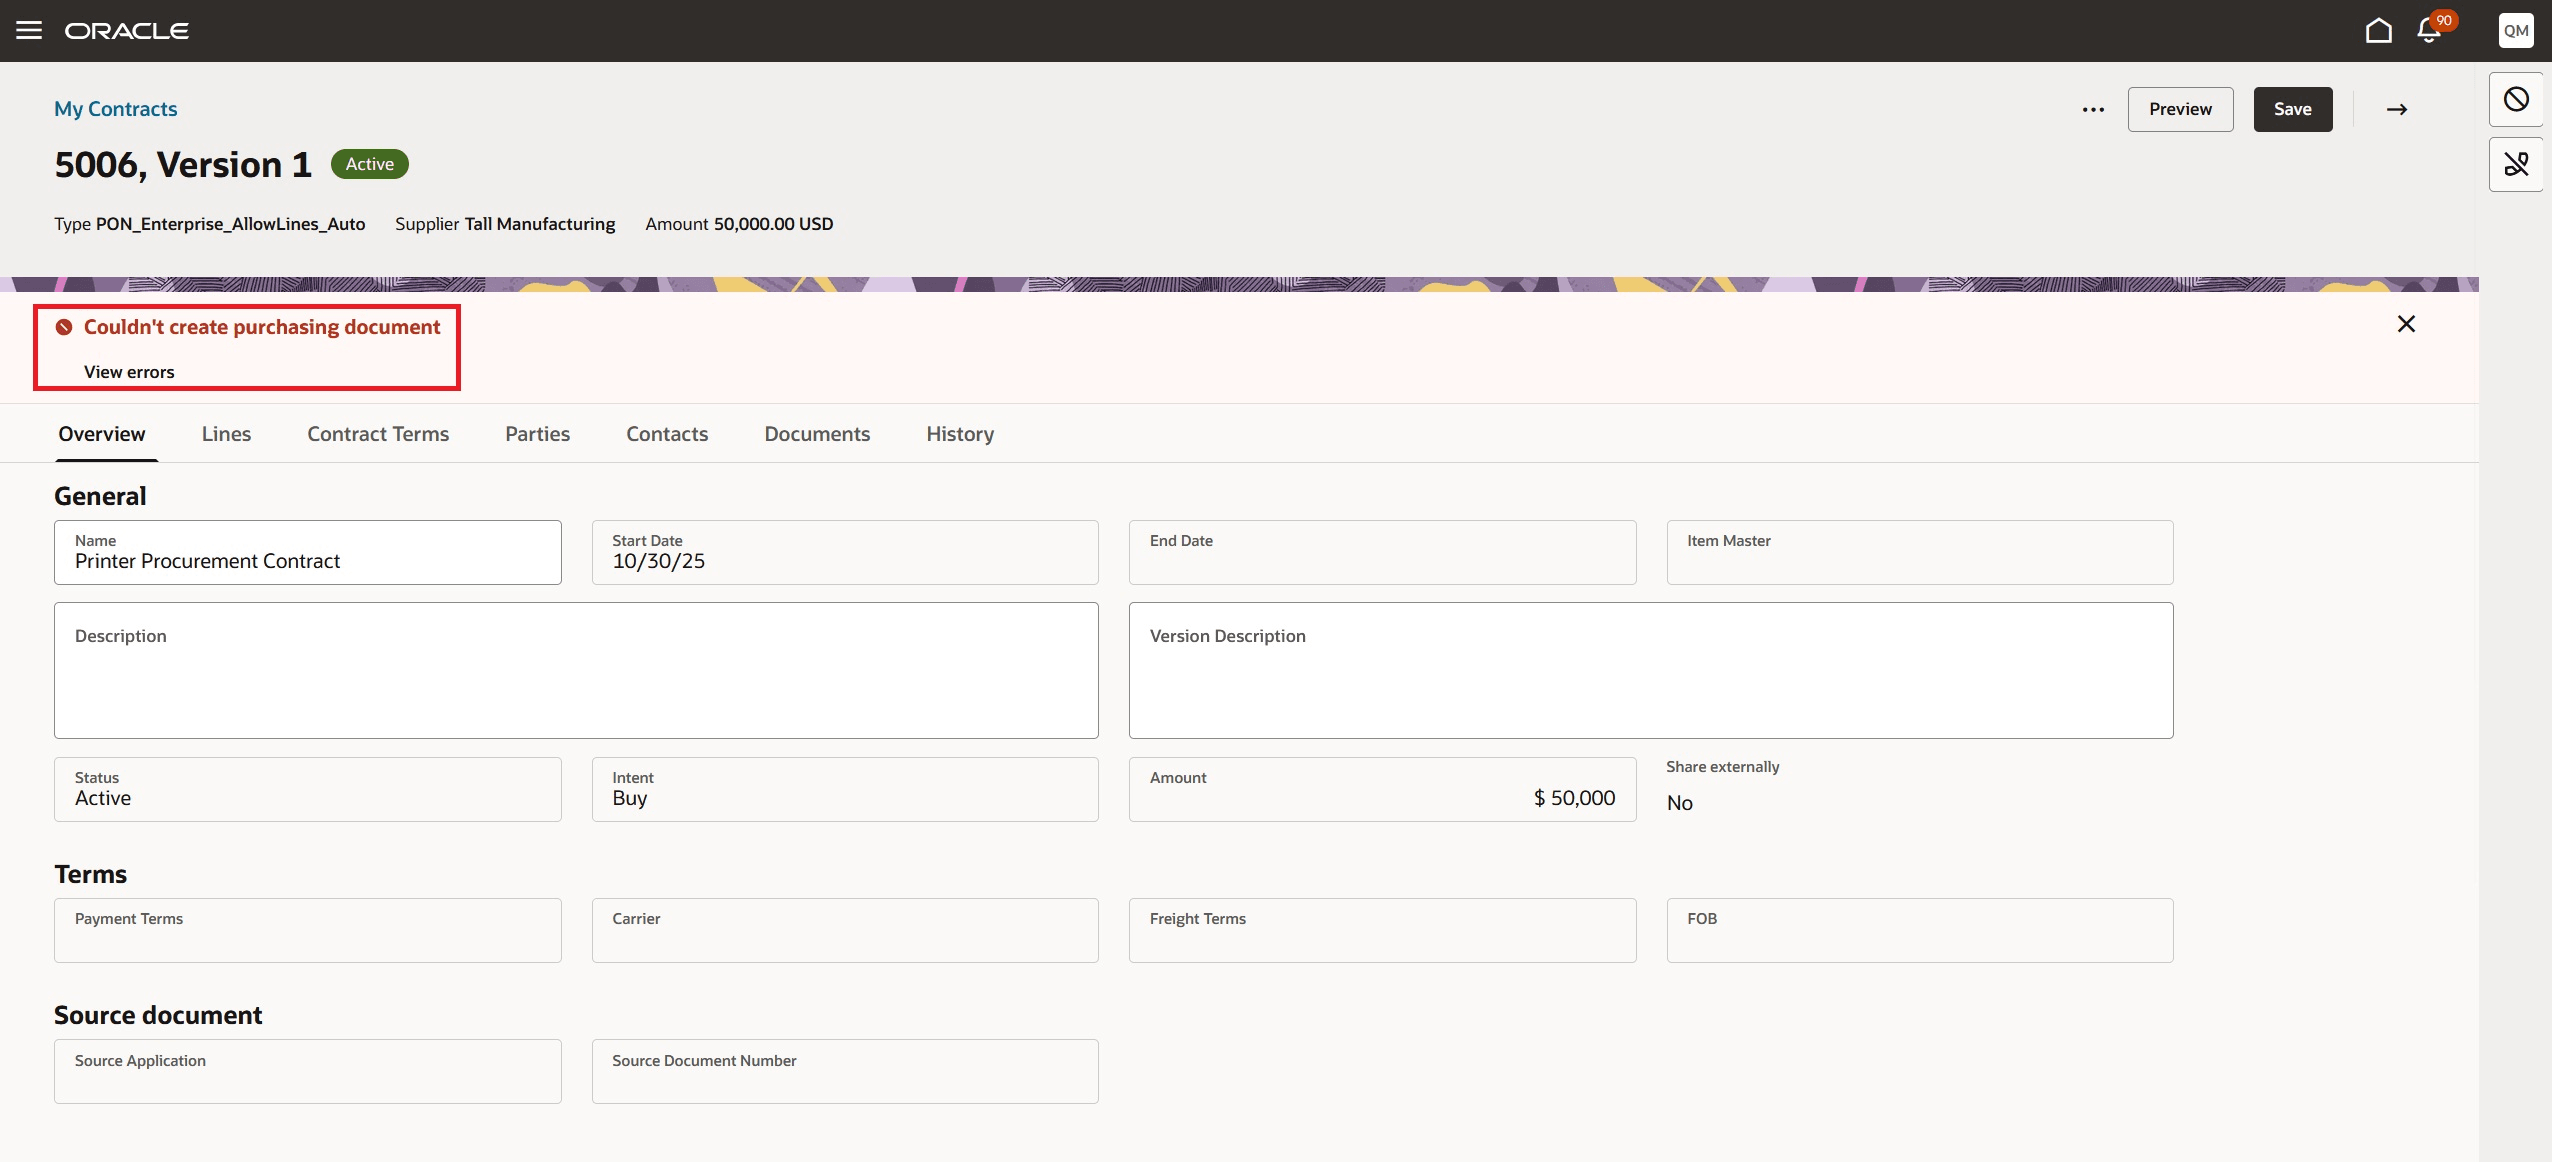
Fulfillment Error Details
Contract Actions
The following actions are supported in this release.
- Cancel
- Delete
- Validate
- Submit
- Stop Approval
- Amend
- Revert
- Close
- Reopen
- Duplicate
- Preview
- Create New Version
- Share in Supplier Portal
- Manual Signature
- Contract Advisor - Details about this feature is available in Redwood: Contract Advisor AI Agent What's New document.
Guided Journey
You can configure guided journeys for the new Redwood Contracts page and provide users with guidance such as tutorials, company policies, and best practices. Refer to Overview of Guided Journeys in the Oracle Fusion Cloud Human Resources: Implementing and Using Journeys guide, available on the Oracle Help Center.
The following features are not supported in this release in Redwood:
- Sell Intent contracts - All contract types with intent as Sell
- Structured and Simplified Terms - Add structured or simplified terms templates
- Key Terms Extraction - Ability to extract key terms using Generative AI
- Hold Management - Add hold and Remove hold on contracts
- Deliverables - Manage contract deliverables
- Renewal - Manual renewal
- Notes - Create and manage notes related to contracts
- Email - Send emails directly from a contract
- Related Contracts - Establish relationship between contracts
- Digital Sign Integration - Adobe Sign and OneSpan digital signature
- Risks - Create and manage contract risks
- User status transitions - Manage user status transitions
- Assign user - Resource workload management
- Contract Template - Create contracts from template
- Contract Wizard - Create contract through wizard
- Text Search - Ability to perform text search within contract documents
- Purge Contracts - Purge all versions or historical versions of contracts
- Ability to perform fulfillment at contract line level and create multiple purchasing document from a contract document
- Ability to view approval history of a contract after the workflow is completed. In this release, approval history is available only while the contract is pending approval.
- Fulfillment notifications
Highlights of the contracts Redwood experience:
- List page: Faster, intuitive, and highly configurable interface powered by Adaptive Search. Supports multiple dynamic filters, group records, sort columns, mark favorites and columns.
- Drawer-based workflows: Create, edit, and manage the actions in drawers without leaving the page, reducing context switching.
- Inline authoring: Edit line attributes in the inline table, then adjust quantities and dates in place.
- Upload attachments: Select and upload multiple files for different document categories in one-go.
- Personalization: Use Visual Builder Studio to show or hide fields, set defaults, and order sections.
Steps to enable and configure
Use the Opt In UI to enable this feature. For instructions, refer to the Optional Uptake of New Features section of this document.
Offering: Enterprise Contracts
Tips and considerations
- Visit Oracle Redwood for more information about the Redwood experience.
- Look here for everything you need to know to start using
Key resources
- Refer the following 26A What's New documents:
- Redwood: Search and Manage Contracts from List Page
- Redwood: Contract Advisor AI Agent
- Redwood: Release a Purchase Order from a Contract That Fulfills Requisition Demand
- Control Access to Contracts Using Access Groups
- Contracts Documentation
Access requirements
Users who are assigned a configured job role that contains Search Contracts privilege can access this feature.