AI Agent: Goods Return Assistant
In organizations, such as healthcare, to return damaged, defective, or unwanted goods is not always a straightforward process. As a user, when you are not part of the supply chain team, it's difficult to return items without knowing where they came from, what receipt they were on, or which supplier and purchase order they were tied to. This makes the return process dependent on tribal knowledge and manual guidance.
At the same time, as an inventory and receiving manager with exact knowledge of the return process, you want a faster and a more efficient way to complete returns without navigating through unnecessary steps.
The Goods Return Assistant AI agent helps you address these scenarios effectively. If you are a less experienced user, it provides you with intelligent prompts and recommendations to navigate through the return process. As an inventory and receiving manager, it helps you streamline the workflow to ensure faster and efficient return process.
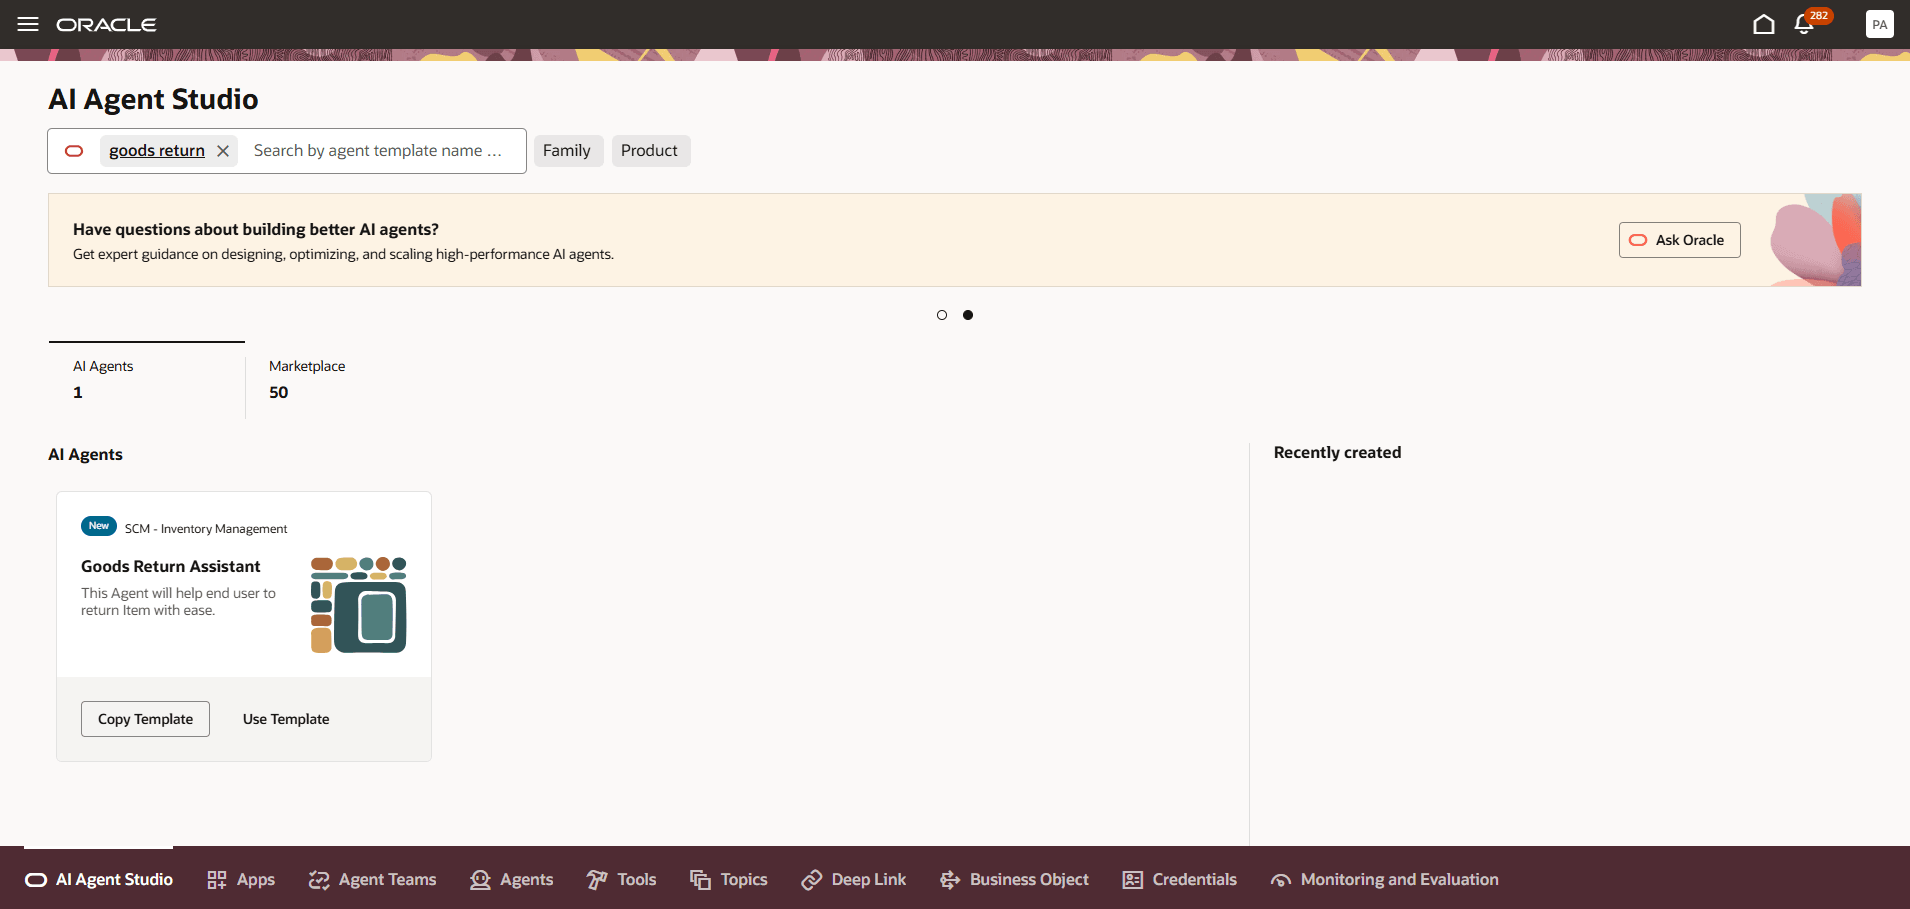
Goods Return Assistant - Template
You can enter the item, organization, and quantity you want to return. The AI assistant then searches for matching receipts and creates the return against the appropriate receipt.
If there is only one receipt matching the entered item and organization in the receipt lookup date range, the AI assistant automatically creates the return against that receipt. If multiple matching receipts are found, the assistant displays the matching receipts, and you can then select the receipt against which the return should be created.
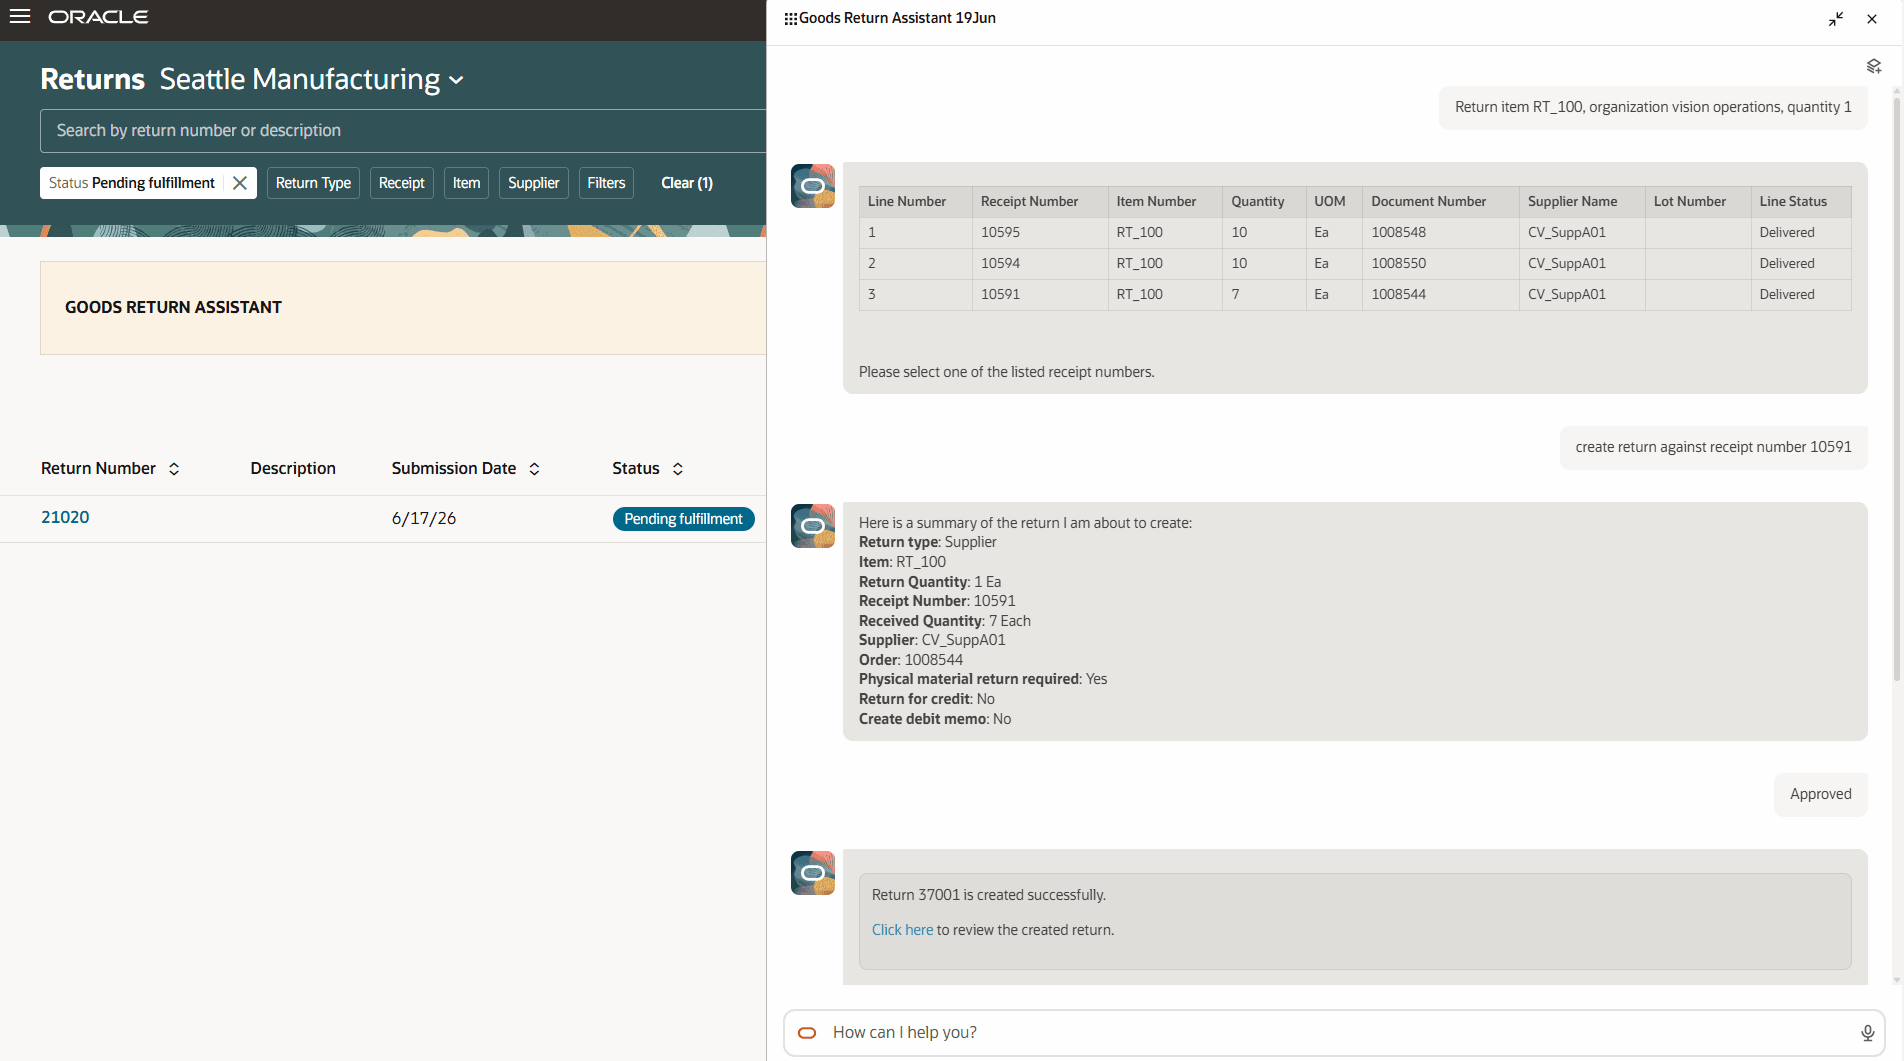
Goods Return Assistant - Create Return
After the return is created, the AI assistant displays a confirmation message with a link to the return. You can click open the link and view the return details.
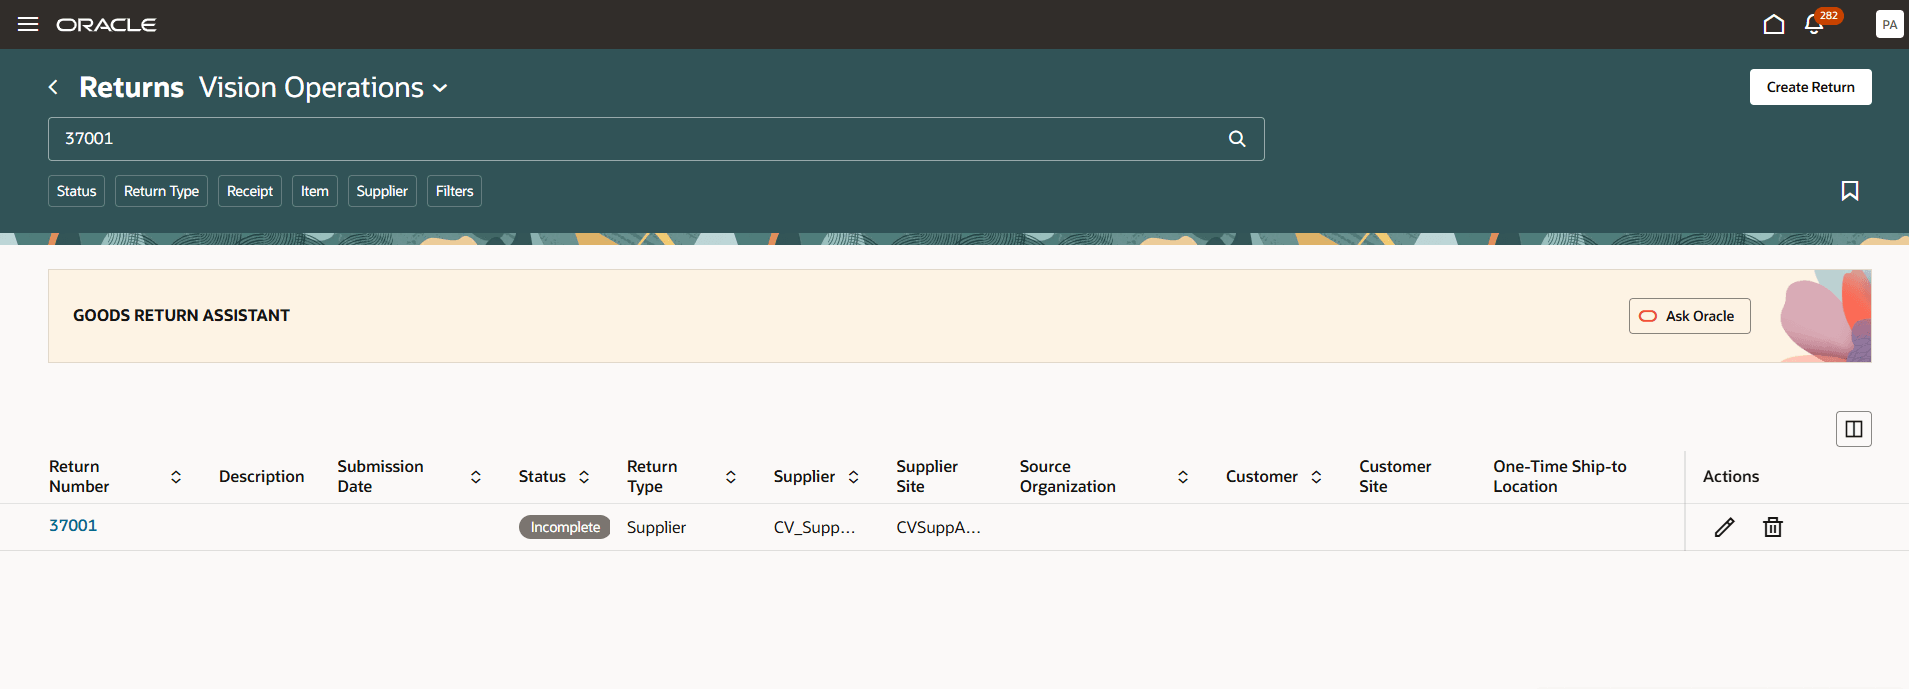
Goods Return Assistant - Review Return
This agent creates a simpler, more consistent return experience that reduces errors, saves time, and improves operational efficiency.
Steps to enable and configure
You can use the AI Agent Studio to use or copy the preconfigured agent template to create Agents for your business processes. To automatically add a suffix to all artifacts in your agent team, you can Copy Template instead of Use Template. When you copy a template, you're directly navigated to the agent team canvas where you can edit the agent team settings, agents, tools, and topics. The Use Template option takes you through a step-by-step process for configuring each artifact in the agent team.
The assistant also provides these configuration options:
- ReceiptLookupDays: Determines how many days of receipt history the assistant searches when looking for matching receipts. The default value is 30 days.
- SendEmail: Determines whether an email with return details is sent to the user who created the return. Users can set this value to true to send an email. The default value is false.
- ReturnStatusIncomplete: Determines whether returns are created in incomplete status or submitted immediately. The default value is Yes. When set to Yes, returns are created in incomplete status. When set to No, returns are submitted after creation.
To change values for these parameters:
- Navigate to the Set Default Parameters node, click the More Options icon, and then click Edit.
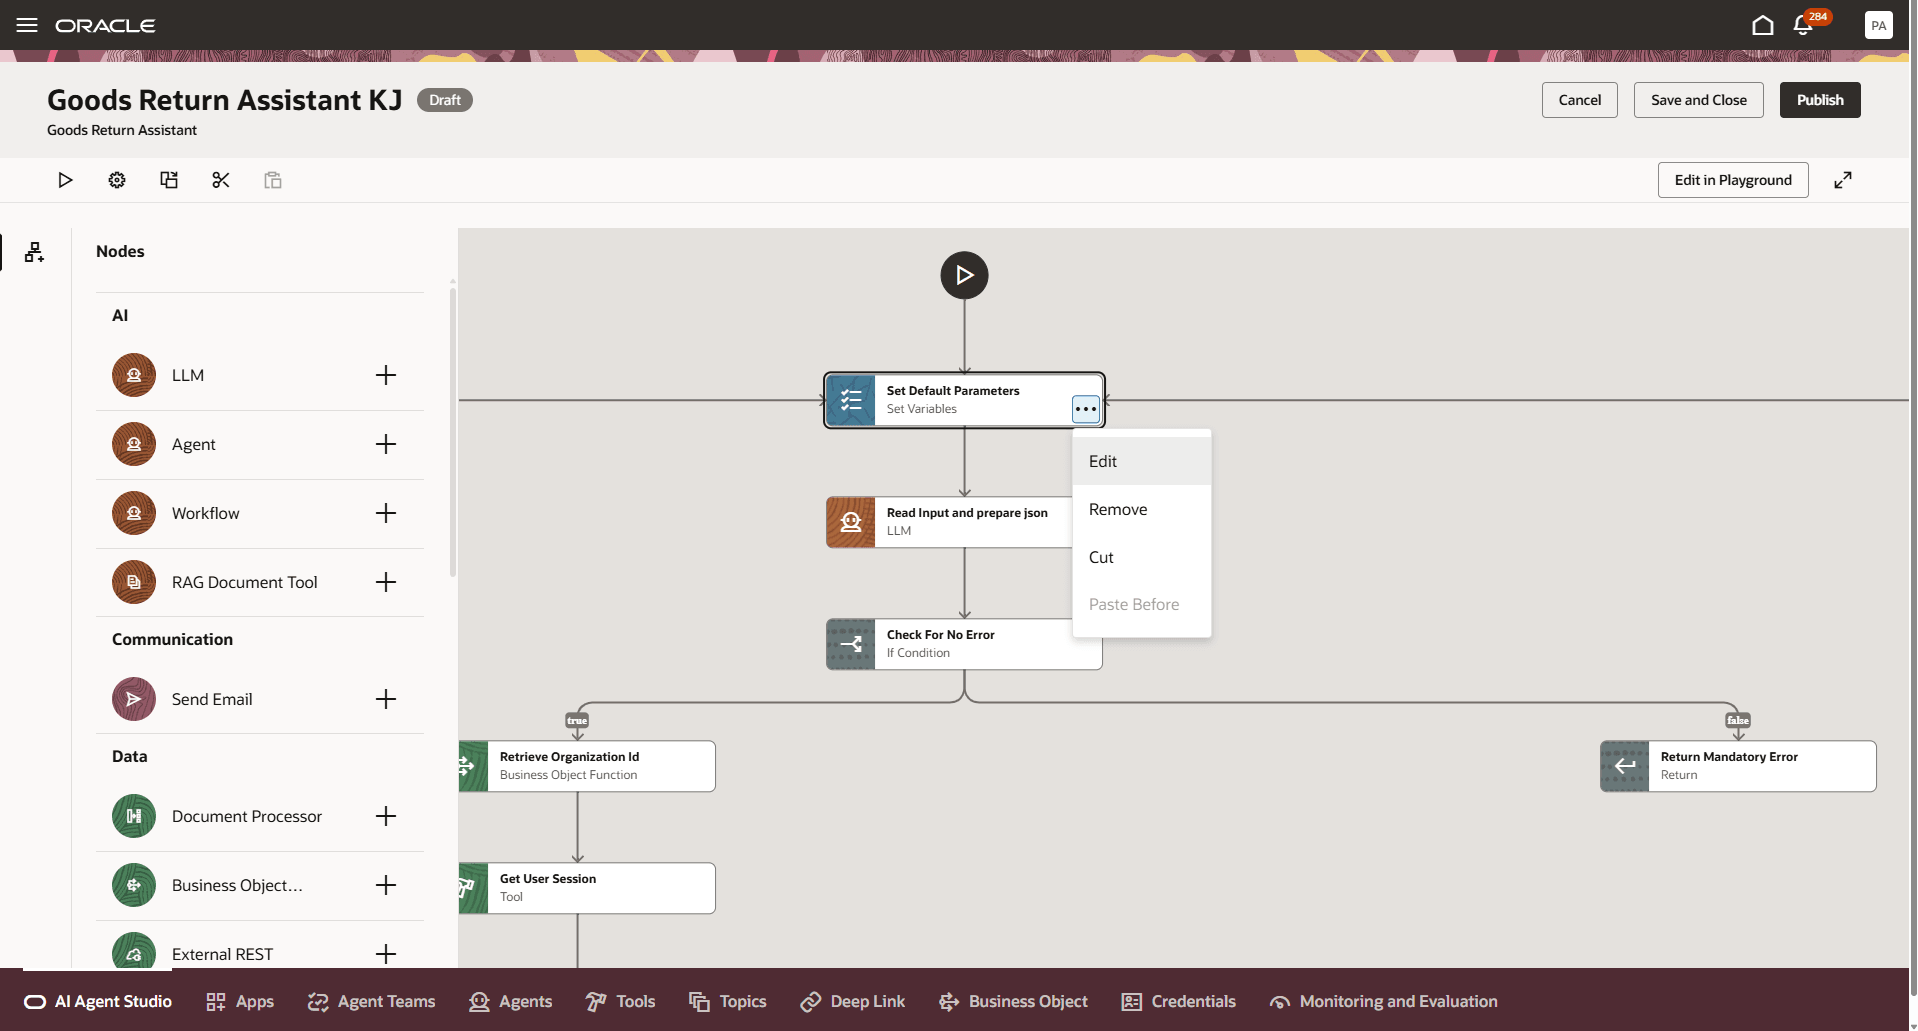
Set Default Parameters - Edit
- Update values for the required parameters and click Update.
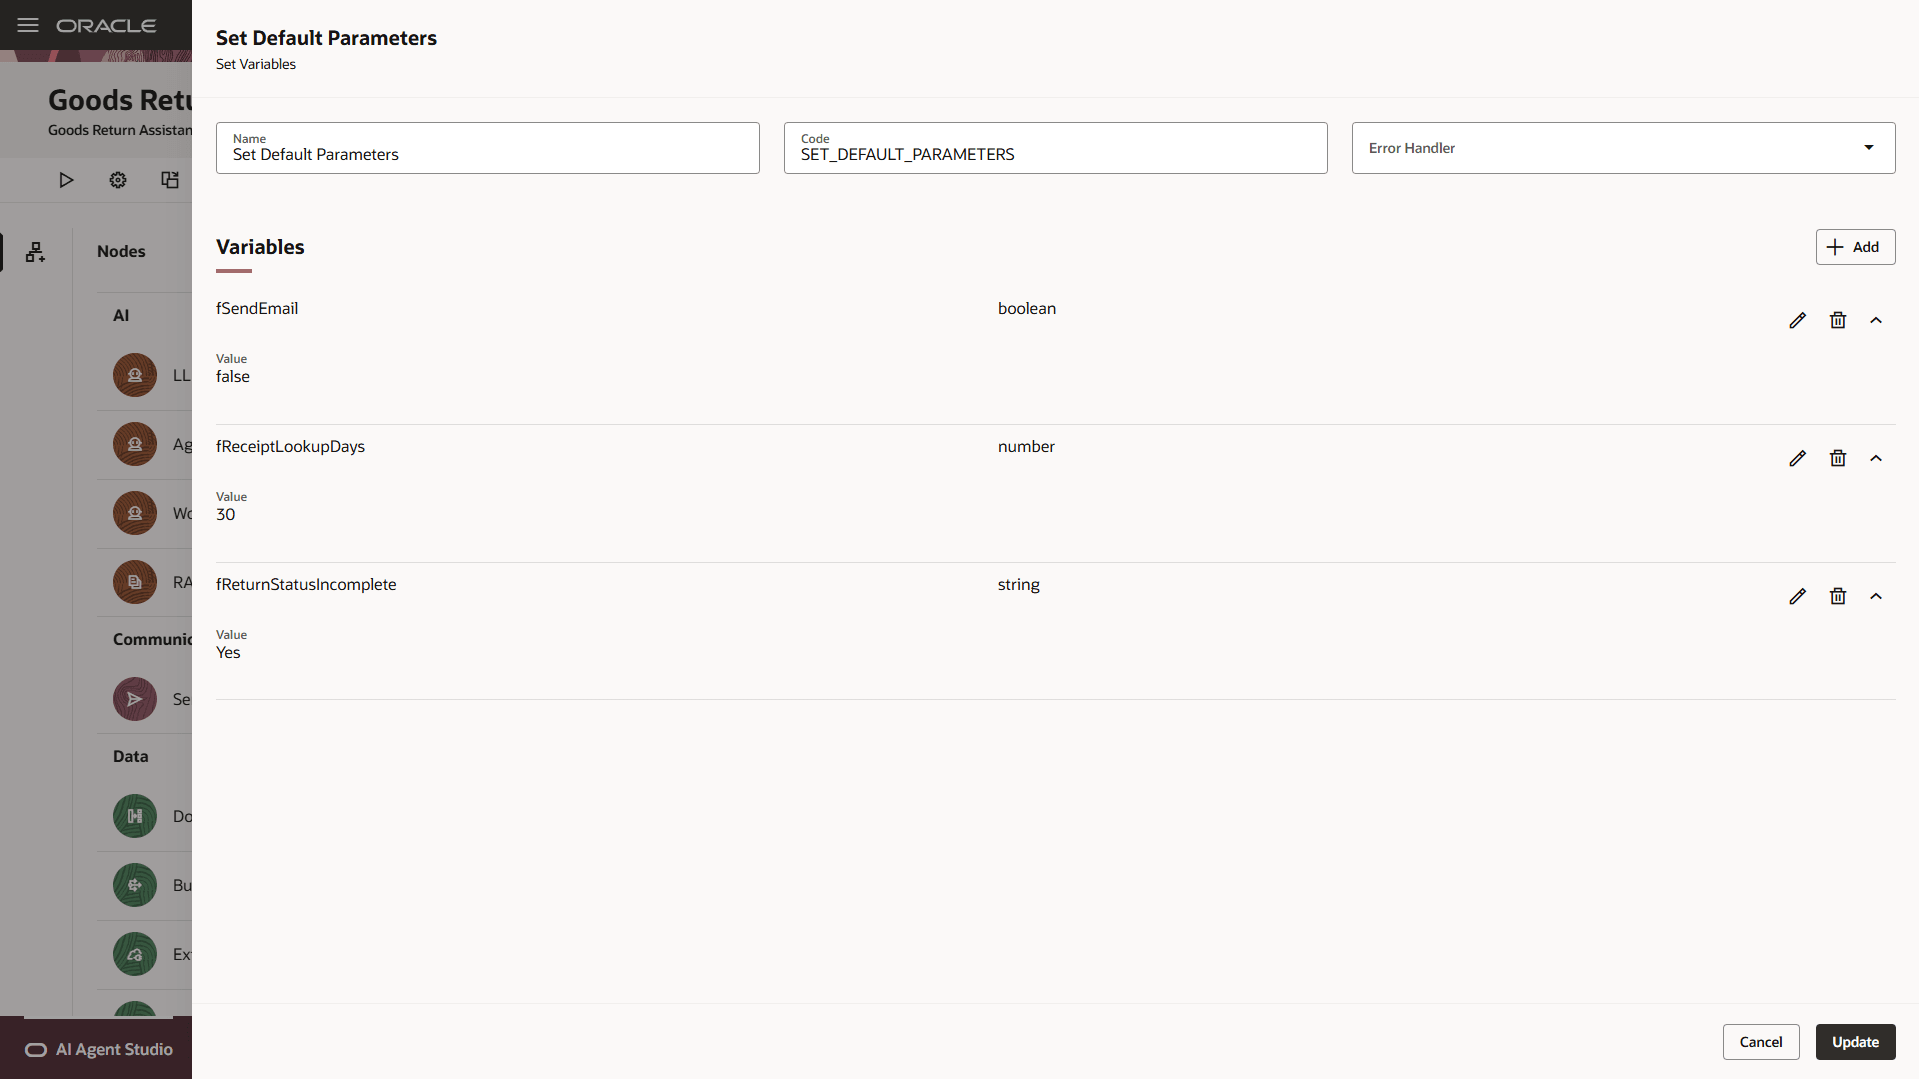
Set Default Parameters - Update
Tips and considerations
After publishing your agent, you can add it to a page by including it in the guided journey of that page. To do this, create an Agent task of type Workflow Agent for the agent, and add it to the guided journey.
Key resources
- Oracle Fusion Cloud SCM: Using Receiving guide, available on the Oracle Help Center.
- Oracle Fusion Cloud SCM: Implementing Manufacturing and Supply Chain Materials Management guide, available on the Oracle Help Center.
- Oracle Fusion Cloud SCM: Security Reference for Manufacturing and Supply Chain Materials Management on the Oracle Help Center.
- Access Requirements for AI Agent Studio
- How can I give users access to AI agents?
- For information on using AI Agent Studio, see How do I use AI Agent Studio?
Access requirements
To access the Oracle AI Agent Studio for Fusion Applications and manage SCM AI agents, users must be assigned a configured job role that contains these duty roles:
- SCM Intelligent Agent Management Duty (ORA_RCS_SCM_AI_AGENT_MANAGEMENT_DUTY and ORA_RCS_SCM_AI_AGENT_MANAGEMENT_DUTY_HCM – both duty role codes are required)
- Fai Genai Agent SCM Administrator Duty (ORA_DR_FAI_GENERATIVE_AI_AGENT_SCM_ADMINISTRATOR_DUTY)
To interact with AI agents in product pages, users must be assigned a configured job role that contains this duty role:
- Fai Genai Agent Runtime Duty (ORA_DR_FAI_GENERATIVE_AI_AGENT_RUNTIME_DUTY)
To allow users to interact with agents, you must also enable permission groups in the Security Console on those users’ configured job roles that contain the Fai Genai Agent Runtime Duty role. You can enable permission groups when you manage the basic information of your configured job roles.
Users' configured job roles must also contain privileges that allow access to the pages where AI agents are enabled.
See Access Requirements for AI Agent Studio (for administrators) and How can I give users access to AI agents (for end-users) for more information.
Users who are assigned a configured job role that contains this duty role can access this feature:
- Receiving Transaction Maintenance Duty (ORA_RCV_RECEIVING_TRANSACTION_MAINTENANCE_DUTY)
This duty role was available prior to this update.