AI Agent: Purchase Order to Sales Order Converter via email
This feature maximizes your teams efficiency by automating the conversion of purchase orders into sales orders. The agent creates a touchless order-entry process by configuring email to receive purchase orders and processing each purchase order. Users can rely on the system to automatically pick up incoming purchase orders and convert them into sales orders. The agent can handle high volumes of orders quickly processing conversions to sales orders and correcting errors. These key efficiencies allow sales teams to focus on more important tasks, rather than repetitive data entry.
Get these benefits
- Get instant and automatic purchase order to sales order conversion
- Improve order accuracy with auto-correction and error logging.
- Work more efficiently without spending time on manual order processing and validation.
How it works
Purchase orders coming into the designated emails get picked up automatically by the agent and converted to sales orders without user intervention. The Sales Order Correction Agent, if enabled, corrects errors automatically and logs them as warnings for review. You can search for sales orders by a filter created by the agent. You can also additionally look for the Validation Error filter to see if there are corrections made by the Sales Order Correction Agent.
Once this feature is enabled, there are a few simple steps to the use it in the Redwood UI.
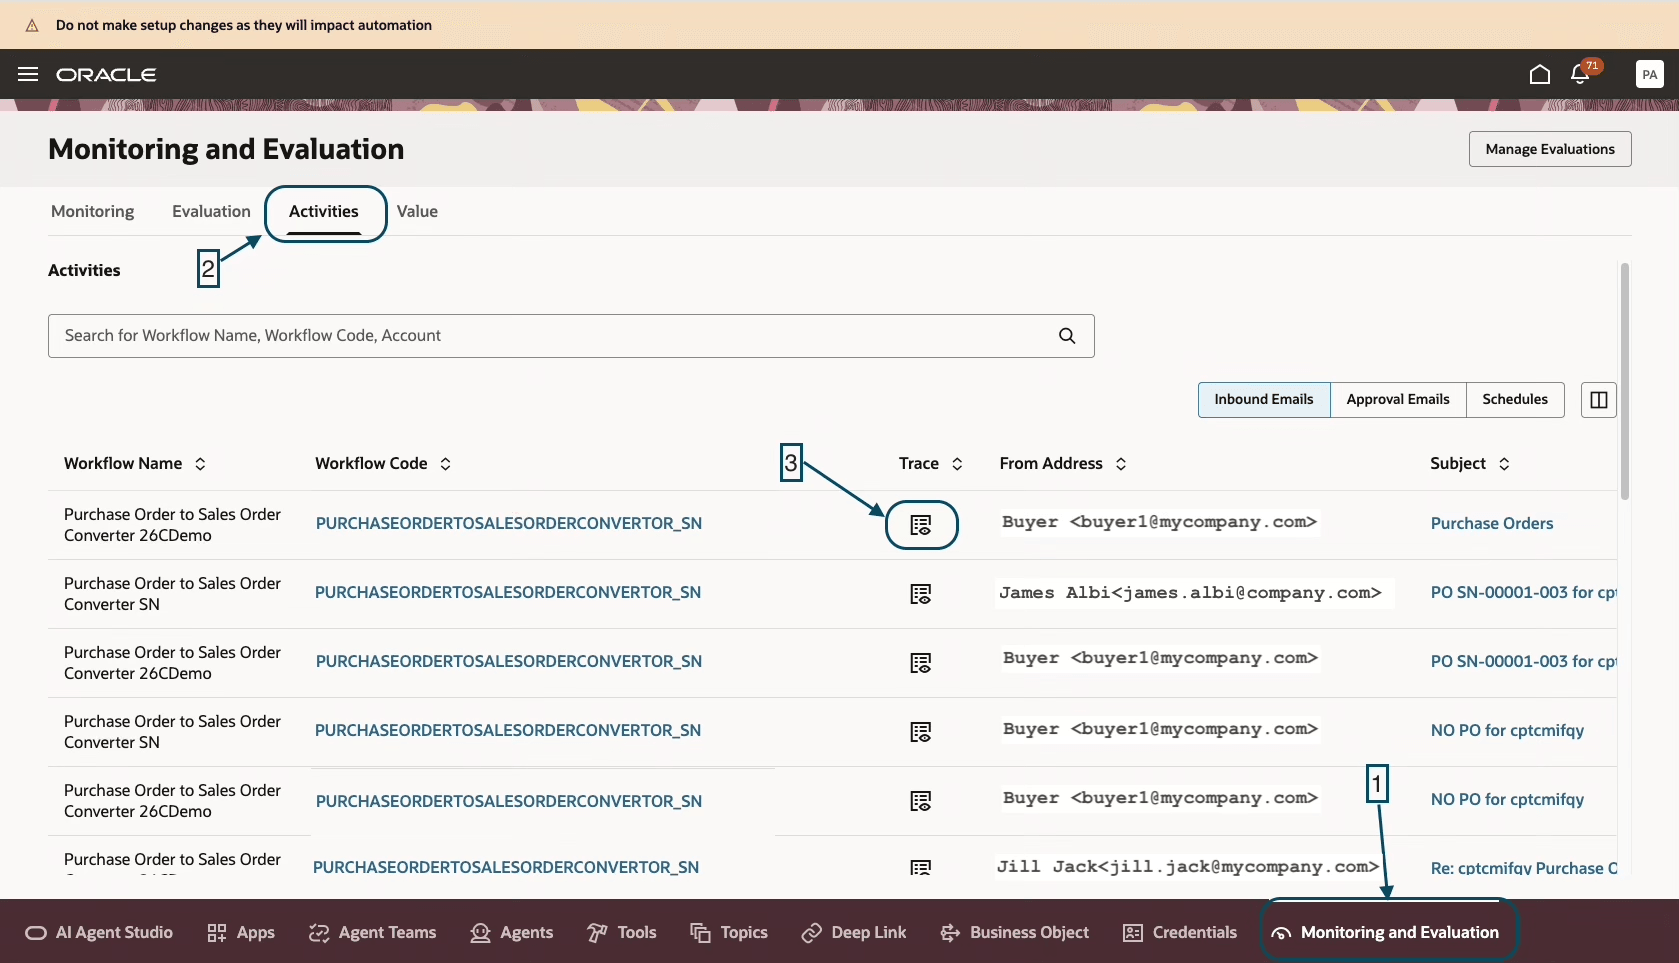
- Navigate to the Monitoring and Evaluation page.
- Select the Activities tab. Notice the email options and the Trace icon.
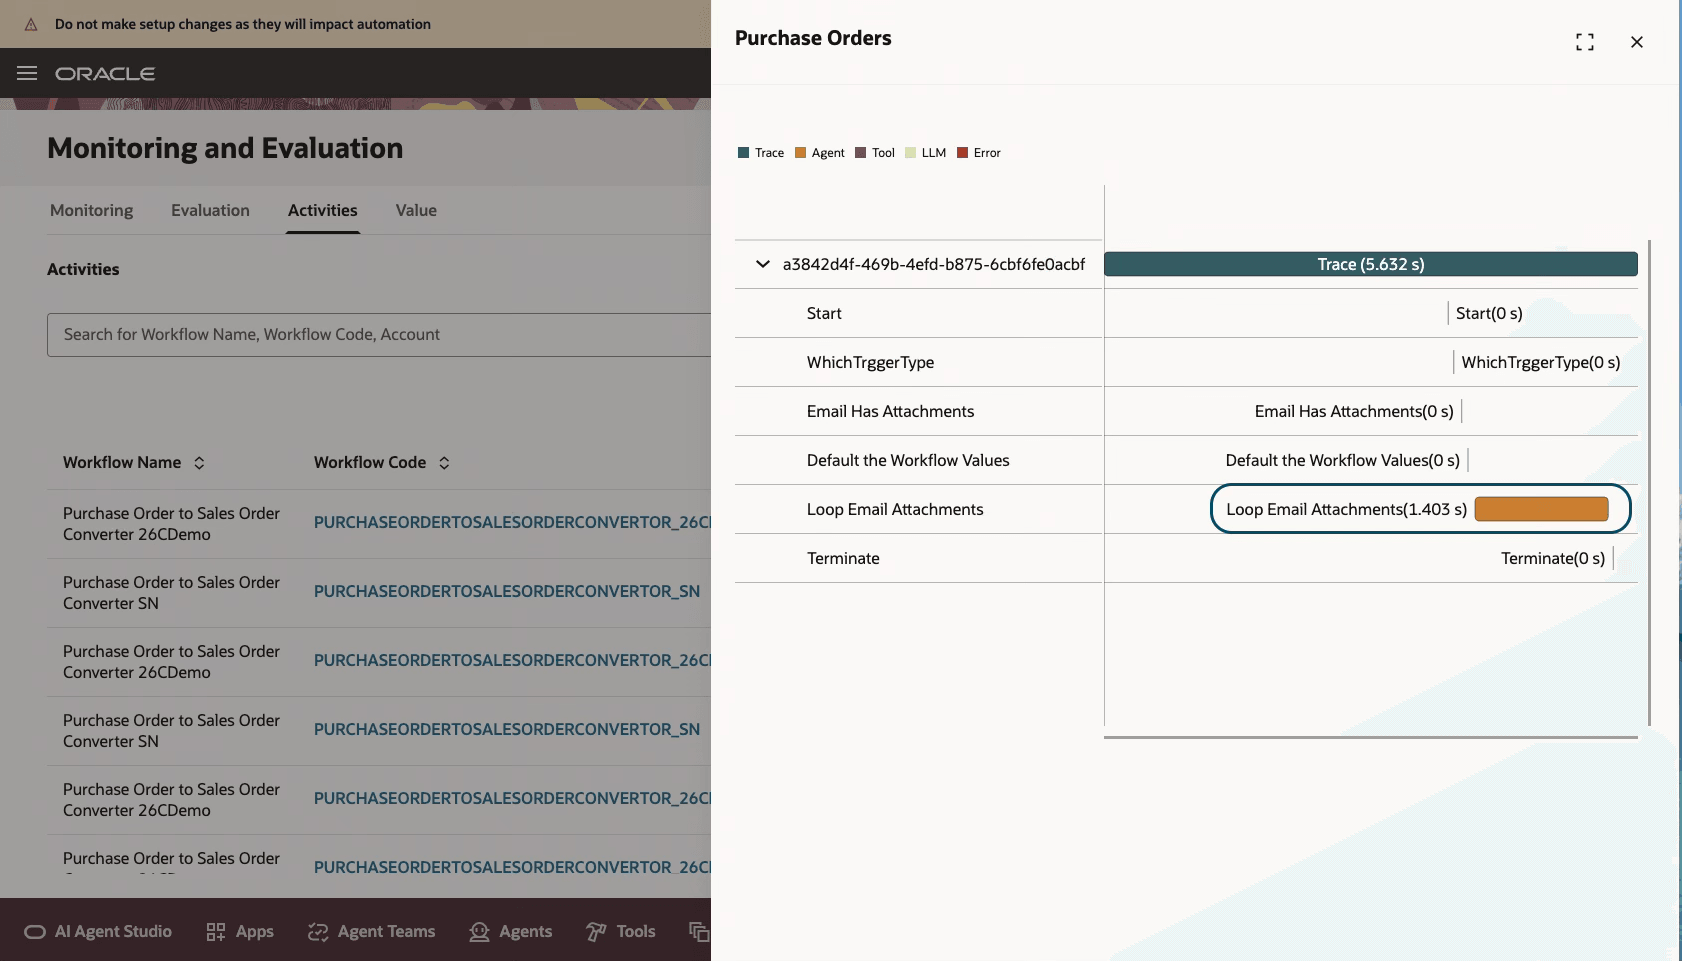
- If you don't see any emails, then wait a bit, or check the pooling frequency setup in configuration. Click the Trace to see the details. The email attachment bar shows any attached purchase orders.
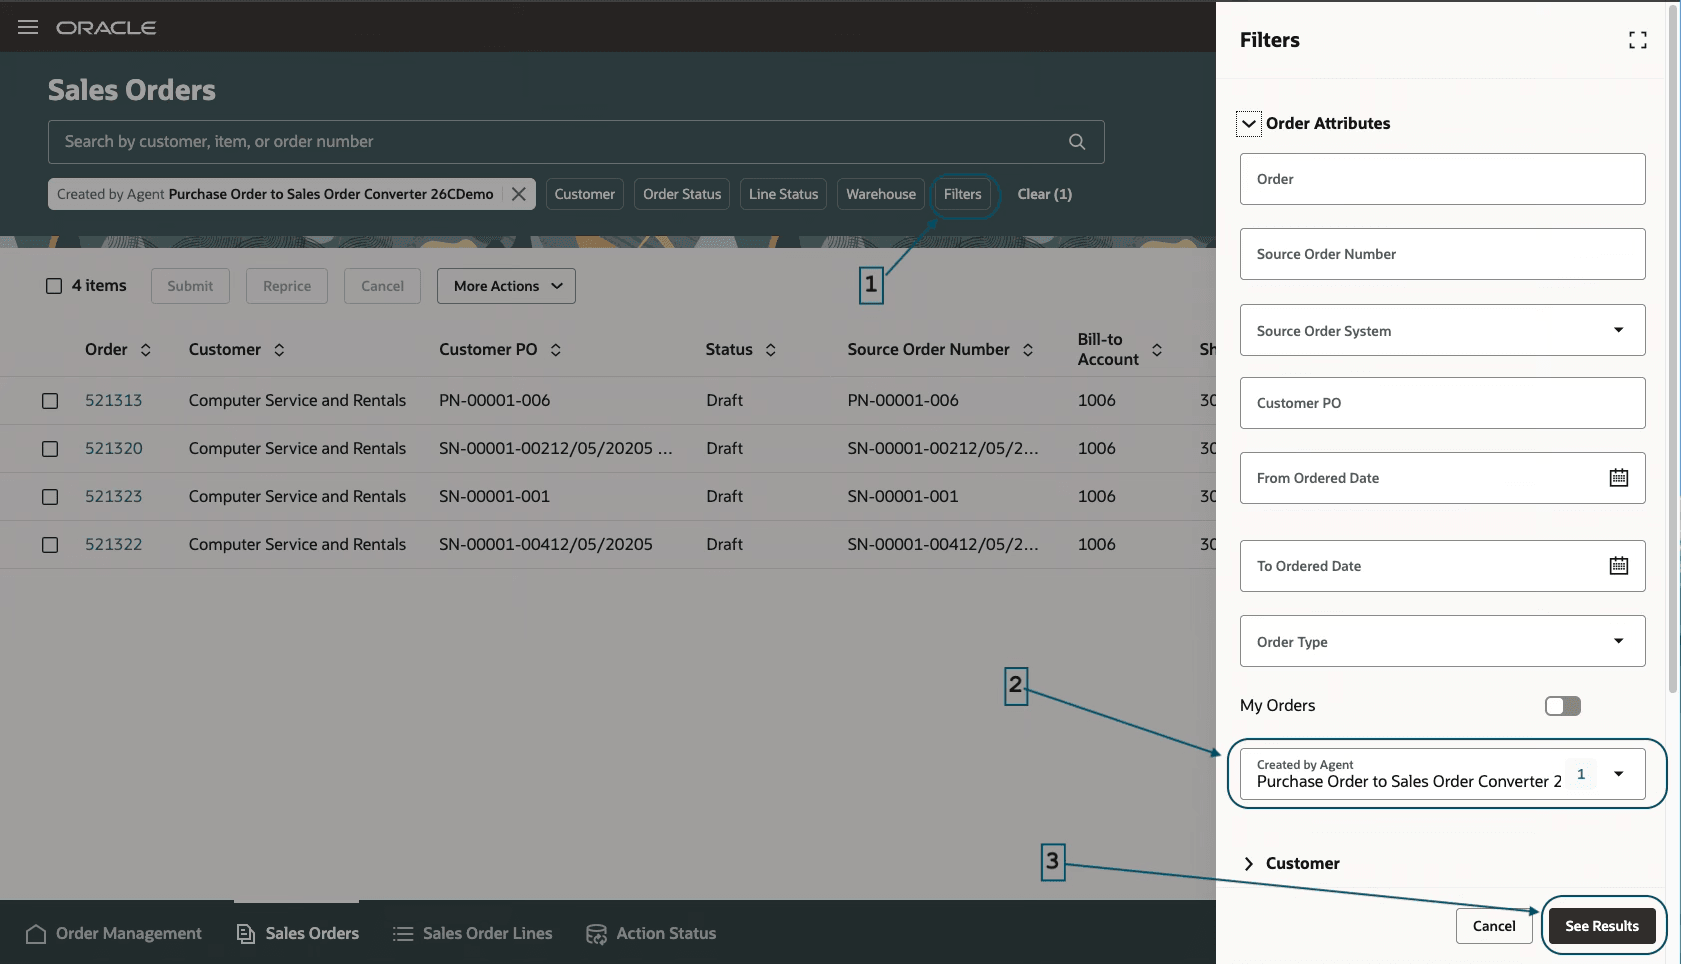
- Navigate to the Sales Orders page and search for an order using the Created by Agent filter. A drawer appears showing all the agent created sales orders. Click See Results to view all the agent-created orders.
This shows the Activities tab, which then provides a list of emails with attached purchase orders you can convert.
Clicking Trace drills down to email details showing whether or not a purchase order is attached.
Filter for the orders created by the agent and show the filter results.
Steps to enable and configure
Setting up this feature requires a few easy steps.
1. Configure the inbound purchase order email account in AI Agent Studio, including the email address, monitored folder, authorization details, and polling interval. Go to Home > Tools > AI Agent Studio, > Credentials > Email Accounts > Add Account
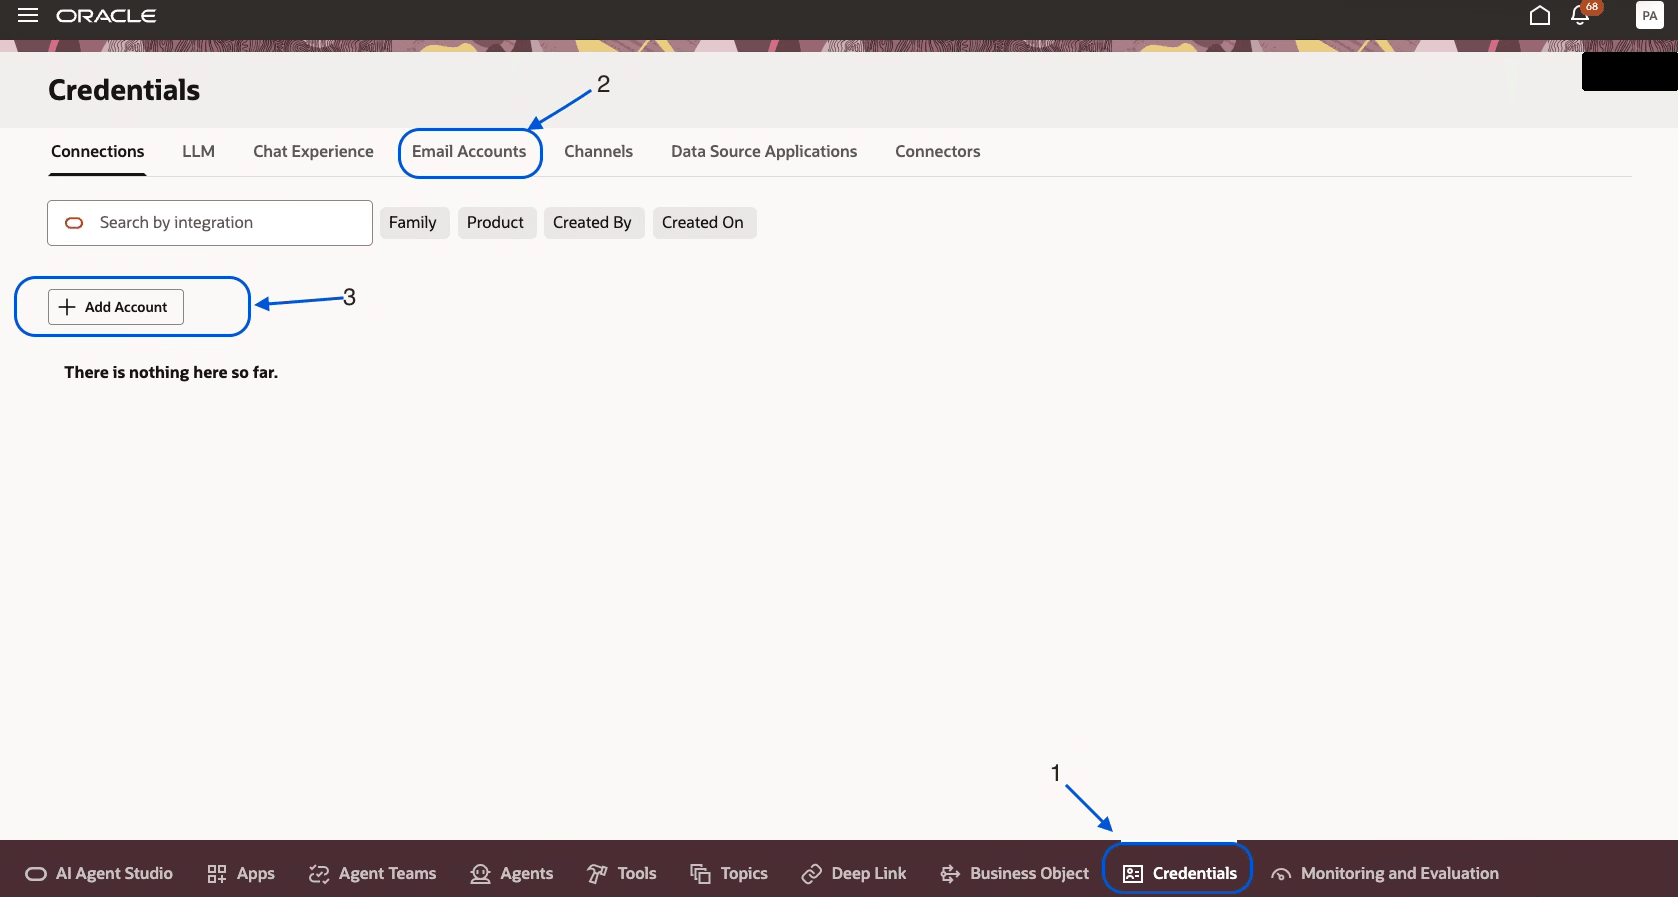
2. Select appropriate email domain and click + to create an email account.
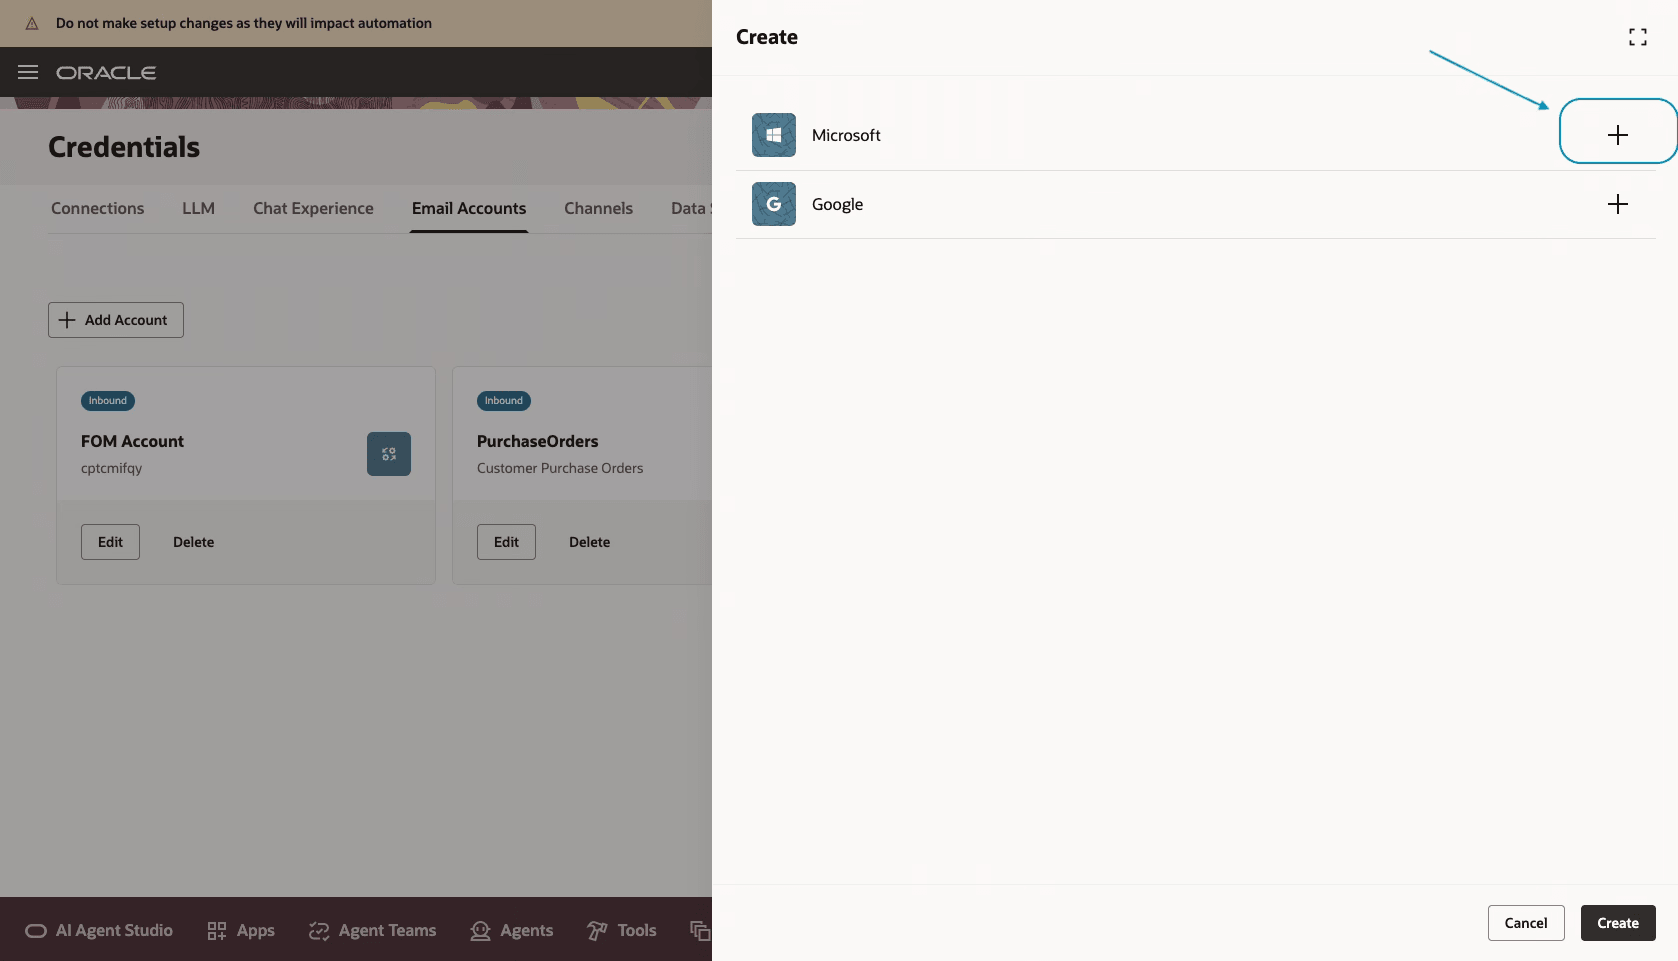
3. Provide all the required information, Account Name, Email Address that you already have configured in your email domain, Email Folder, Description, and Authentication (Tenant Id, Client Id, Secret). Click on Create. Note the email account details for later use.

5. Configure the Purchase Order to Sales Order Converter Agent workflow. Click Actions > Copy Template, enter a suffix, then click Continue. We recommend that you use the suffix to indicate versions, such as 1, 2, 3. For this example, assume you enter 1 for the suffix.
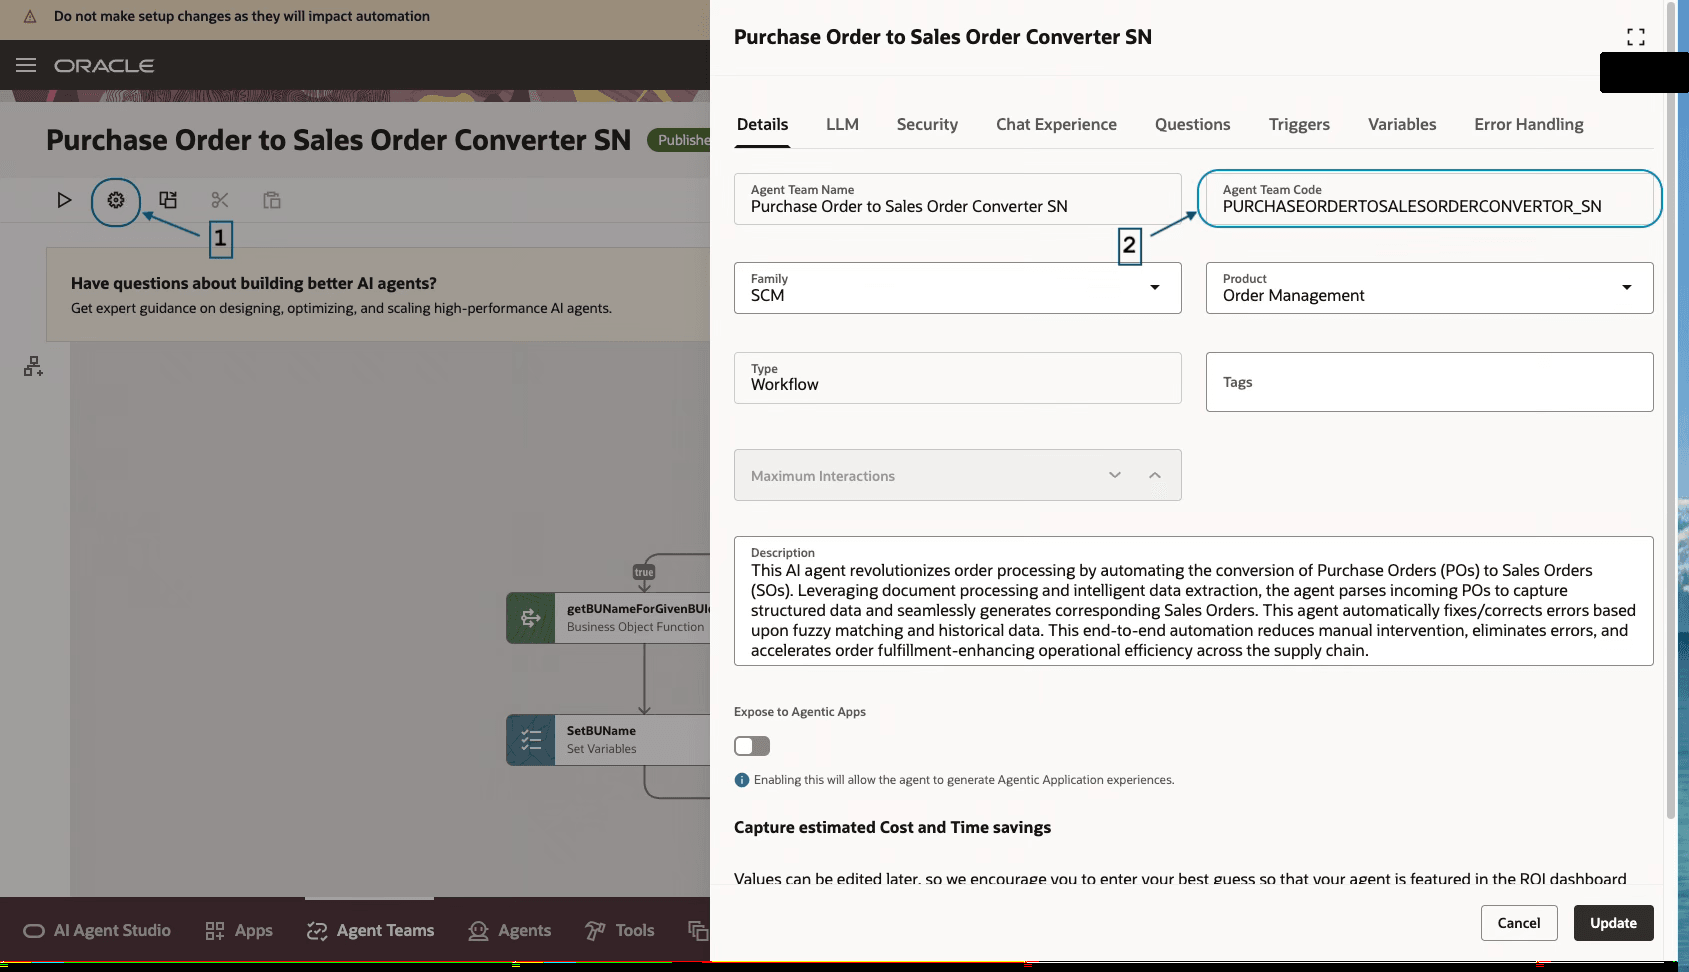
6. Get the Agent Code by navigating to setup in the agent.
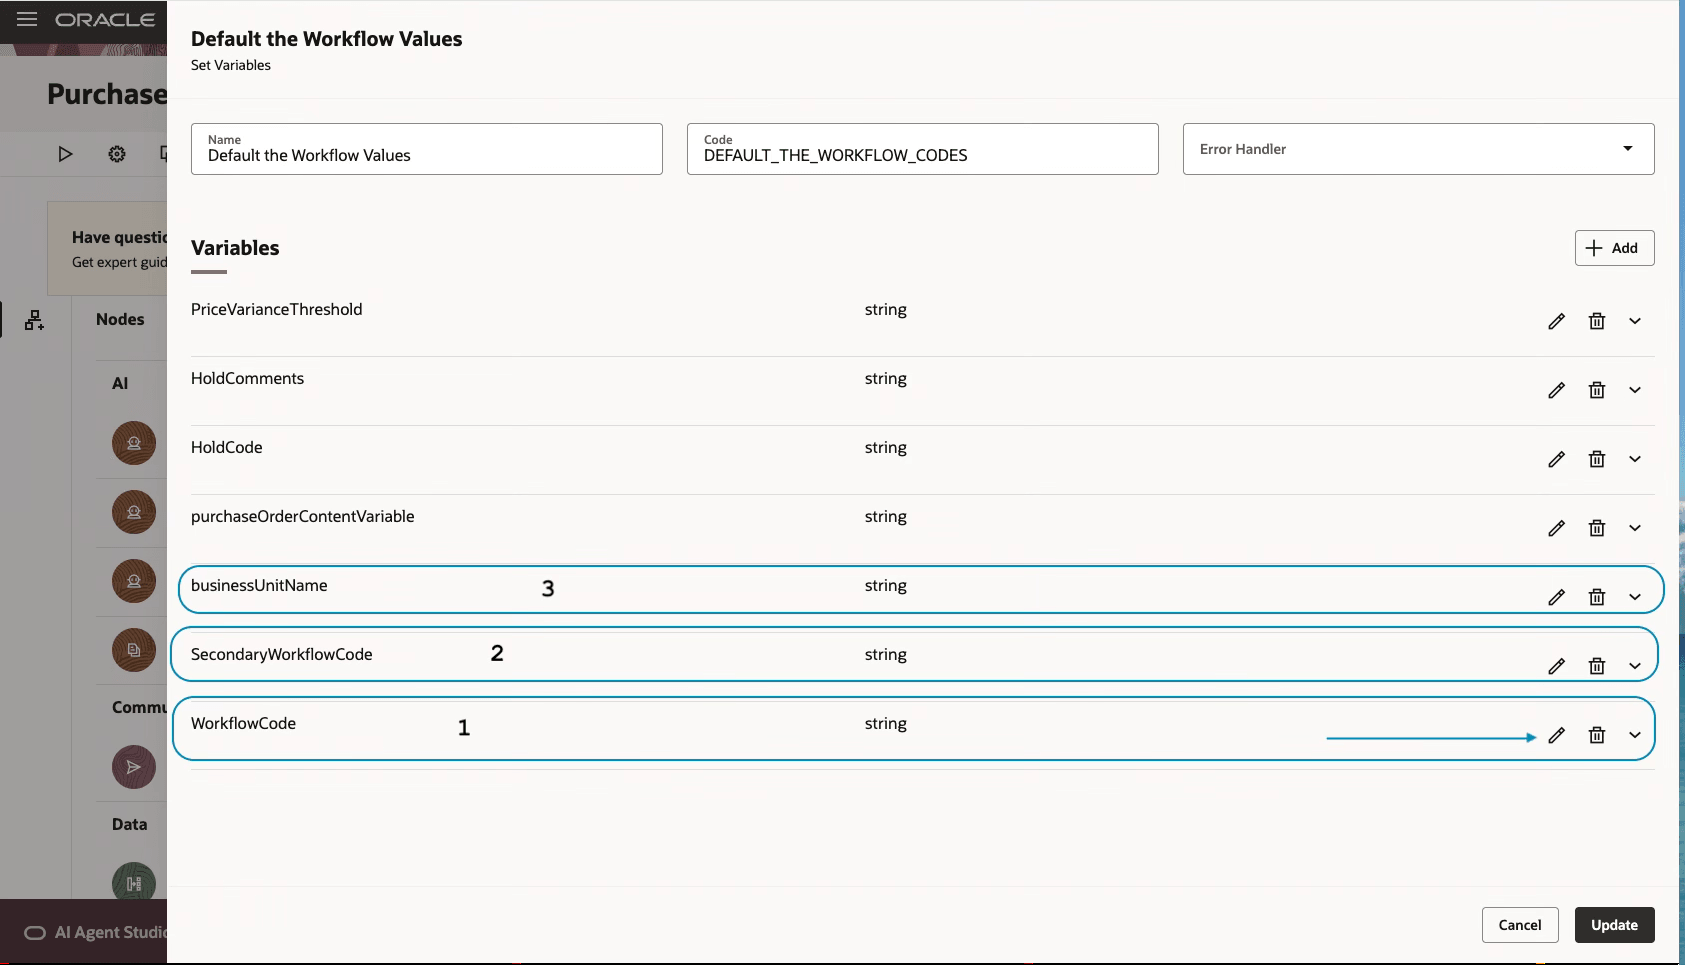
7. Look for the node named Default the Workflow Values, click Edit.

8. Add the variables. Click Update
- WorkflowCode – Agent code for this agent as derived in step 6
- SecondaryWorkflowCode – Agent Code Import correction Agent that you have configured (Optional)
- businessUnitName – Default business unit name, where you want to create sales orders
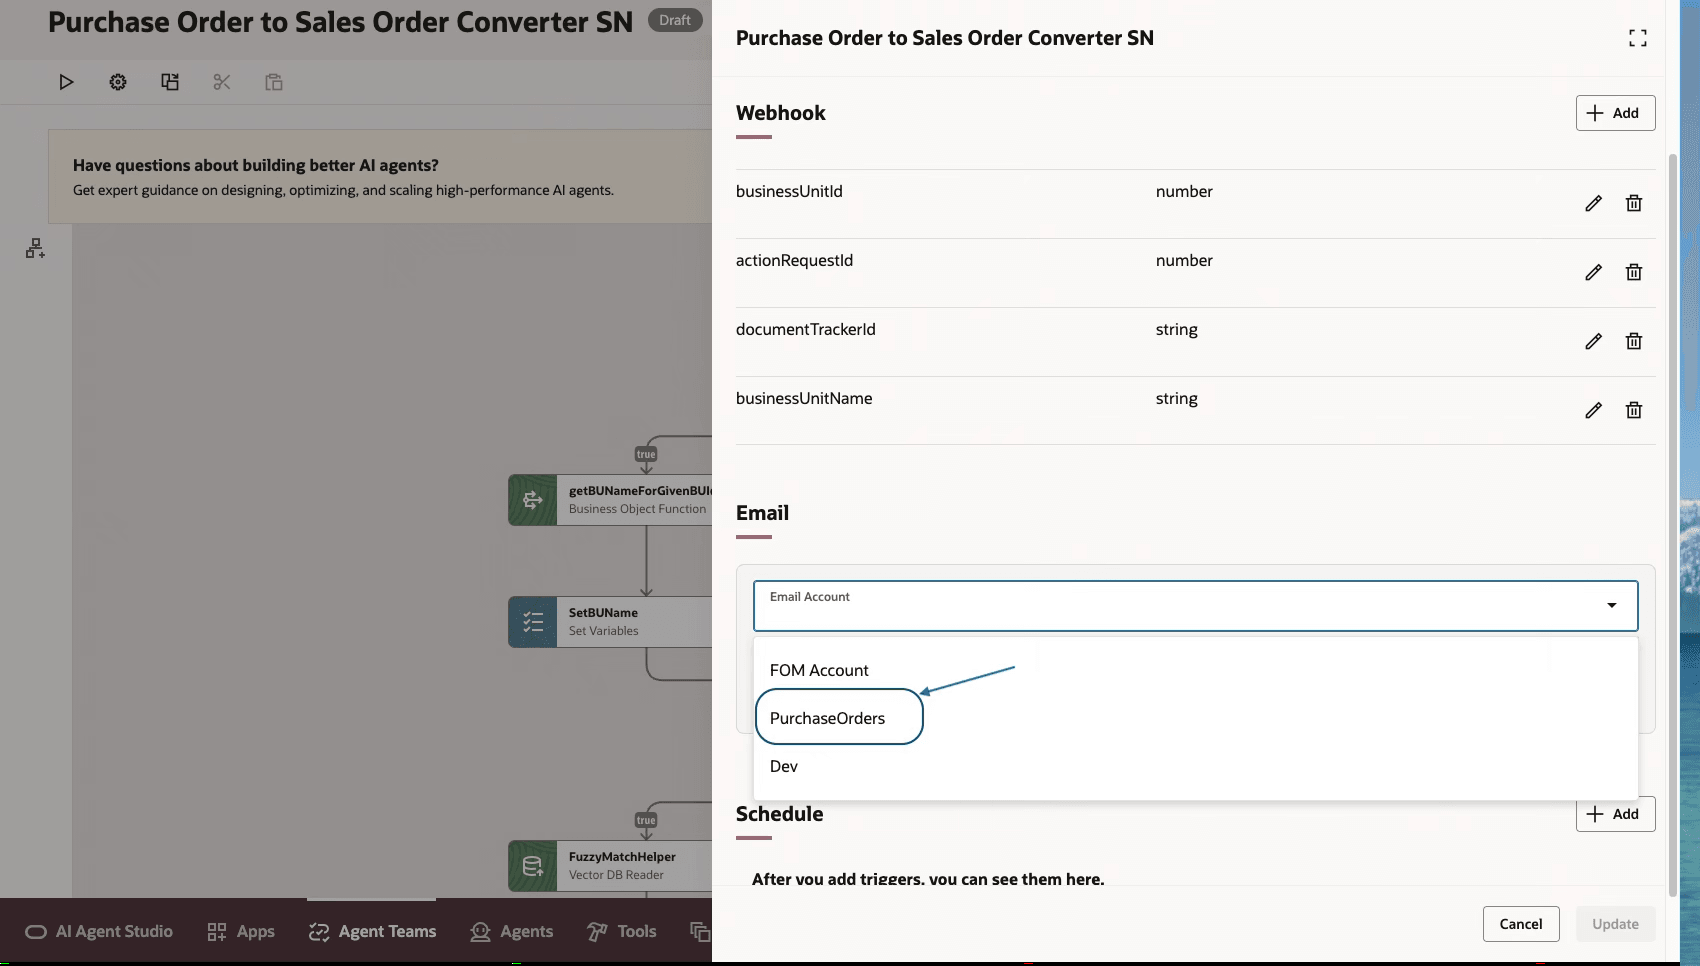
9. Add an email trigger to the workflow. Click Agent Team Settings, then Triggers and then Add under Email
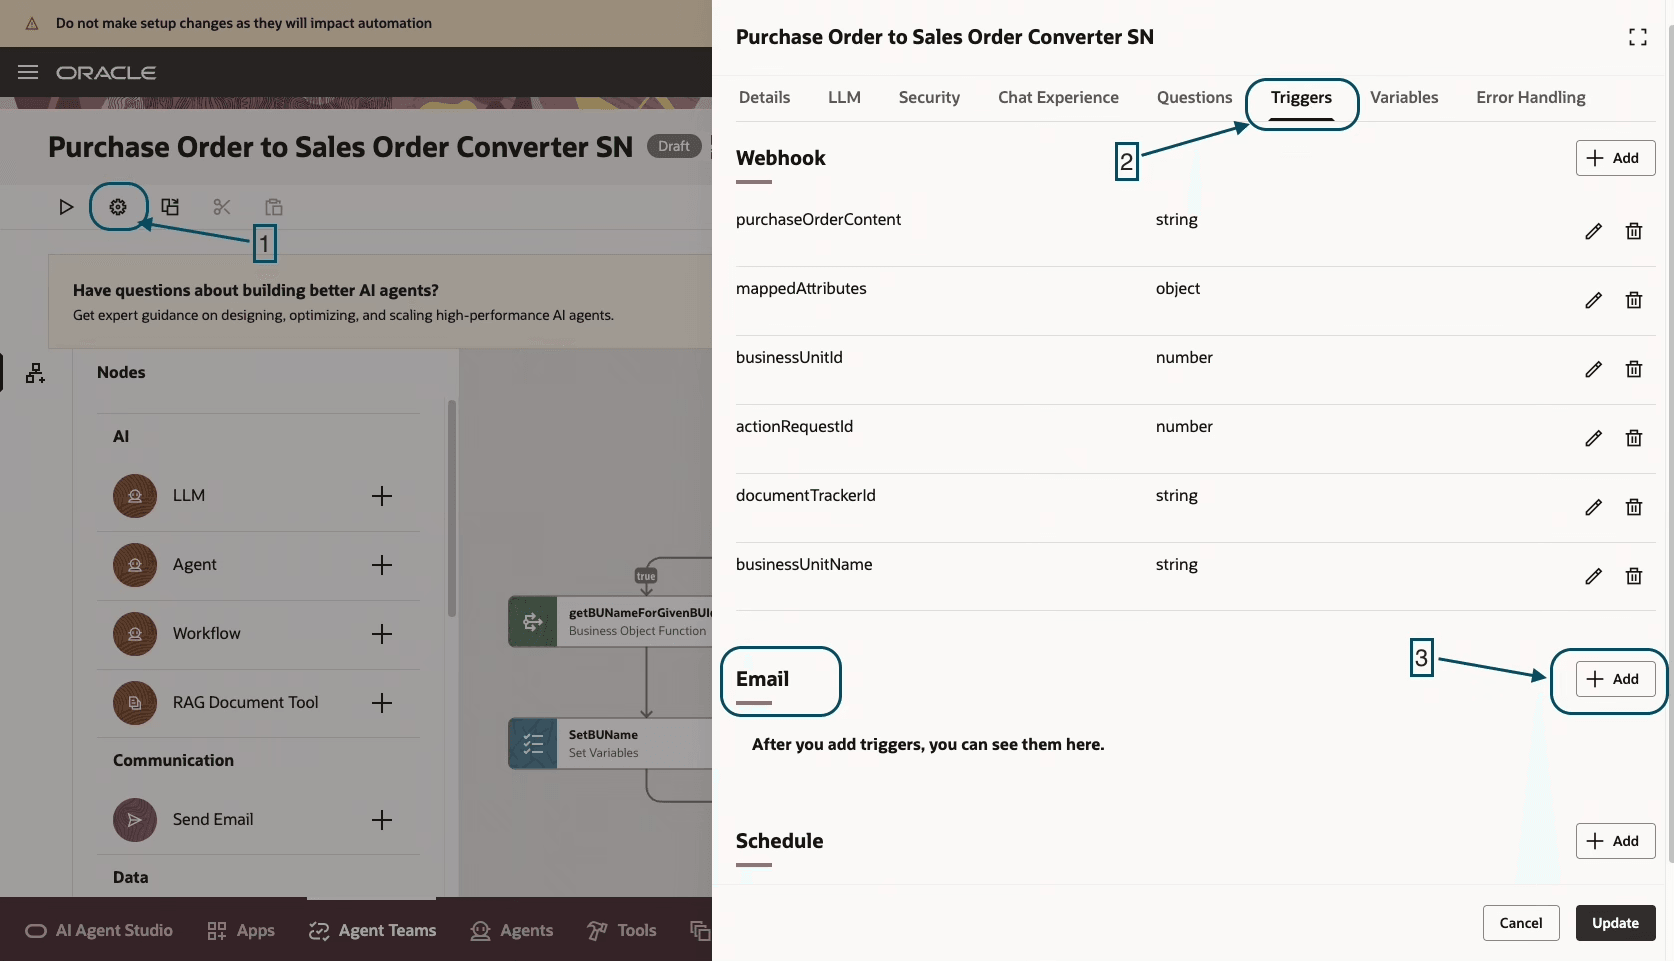
10, Select Email account created in step 3 from the drop-down, then click Update.
11. When you're finished you can publish the configured agent.
Tips and considerations
-
Make any changes needed in the agent to meet your specific business requirements.
-
Keep the monitored email folder and mailbox rule aligned with the email account configuration so the workflow can find incoming purchase orders.
-
Review the generated sales order and any holds or exceptions before continuing downstream order processing.
-
You can't have multiple instances of same agent that is sharing same email address.
Key resources
- Also review the feature for Sales Order Correction Assistant
Access requirements
No New Access requirements
To access the Oracle AI Agent Studio for Fusion Applications and manage SCM AI agents, users must be assigned a configured job role that contains these duty roles:
SCM Intelligent Agent Management Duty (ORA_RCS_SCM_AI_AGENT_MANAGEMENT_DUTY and ORA_RCS_SCM_AI_AGENT_MANAGEMENT_DUTY_HCM both duty role codes are required)
Fai Genai Agent SCM Administrator Duty (ORA_DR_FAI_GENERATIVE_AI_AGENT_SCM_ADMINISTRATOR_DUTY)
In the Security Console, filter by Roles and Privileges to find the SCM Intelligent Agent Management Duty role. Filter by Roles and Permission Groups to find the Fai Genai Agent SCM Administrator Duty role.
To interact with AI agents in product pages, users must be assigned a configured job role that contains this duty role:
Fai Genai Agent Runtime Duty (ORA_DR_FAI_GENERATIVE_AI_AGENT_RUNTIME_DUTY)
In the Security Console, filter by Roles and Permission Groups to find this duty role.
To allow users to interact with agents, you must also enable permission groups in the Security Console on those users configured job roles that contain the Fai Genai Agent Runtime Duty role. You can enable permission groups when you manage details for your configured job roles.
Users' configured job roles must also contain privileges that allow access to the pages where AI agents are enabled.
View Orders (FOM_VIEW_ORDERS_PRIV)