Contract Collaboration using Microsoft SharePoint
You can now collaborate on contract terms using Microsoft SharePoint from the Microsoft Word Add-in. This feature lets contract managers, legal users, and internal stakeholders review and update a shared contract terms document in SharePoint instead of exchanging multiple document copies over email.
When collaboration is started, the contract terms document is uploaded to the configured SharePoint site. A contract-specific folder is created in SharePoint, and the contract terms file is placed in that folder. The SharePoint-hosted document becomes the working copy for collaboration, allowing users to review, comment, and edit the same file based on their assigned access. This improves collaboration by helping teams work from a single shared document, reducing version conflicts, avoiding manual consolidation of feedback, and improving visibility into comments and changes.
Key Features
With Microsoft SharePoint contract collaboration, contract managers, legal users, and internal stakeholders can work together on a shared contract terms document from the Microsoft Word Add-in.
This capability includes:
- SharePoint-based collaboration for contract terms: Start collaboration from the Word Add-in and work on a shared contract terms document in Microsoft SharePoint.
- Automatic SharePoint folder and file setup: When collaboration starts, the application programatically creates a contract-specific folder in the configured SharePoint site and stores the contract terms file in that folder.
- Single shared working copy: The SharePoint-hosted document becomes the working copy for collaboration, helping users avoid multiple local copies and email-based document exchanges.
- Contract contacts as collaborators: Internal contract contacts are included as collaborators, with SharePoint access defaulted from their contract access.
- Independent SharePoint access control: The collaboration initiator can update each collaborator’s SharePoint access, such as Can edit, Can view, or No access. These changes apply only to the SharePoint folder or file and don’t change contract access in the application.
- Microsoft Word collaboration tools: Collaborators can use Microsoft Word capabilities such as coauthoring, comments, assigned tasks, reviewing, and tracked changes.
- Email notifications for collaborators: Collaborators can receive Microsoft notifications when they’re invited to access or review the shared folder or document.
- Manage access during collaboration: The collaboration initiator can manage collaborator access after the collaboration session has started.
- Upload final terms back to the application: When review is complete, the lock owner can leverage word add-in capabilities and upload the final reviewed contract terms back to the application.
How It Works
- Open Microsoft Word and launch the Contracts Word Add-in.
- Connect to the application
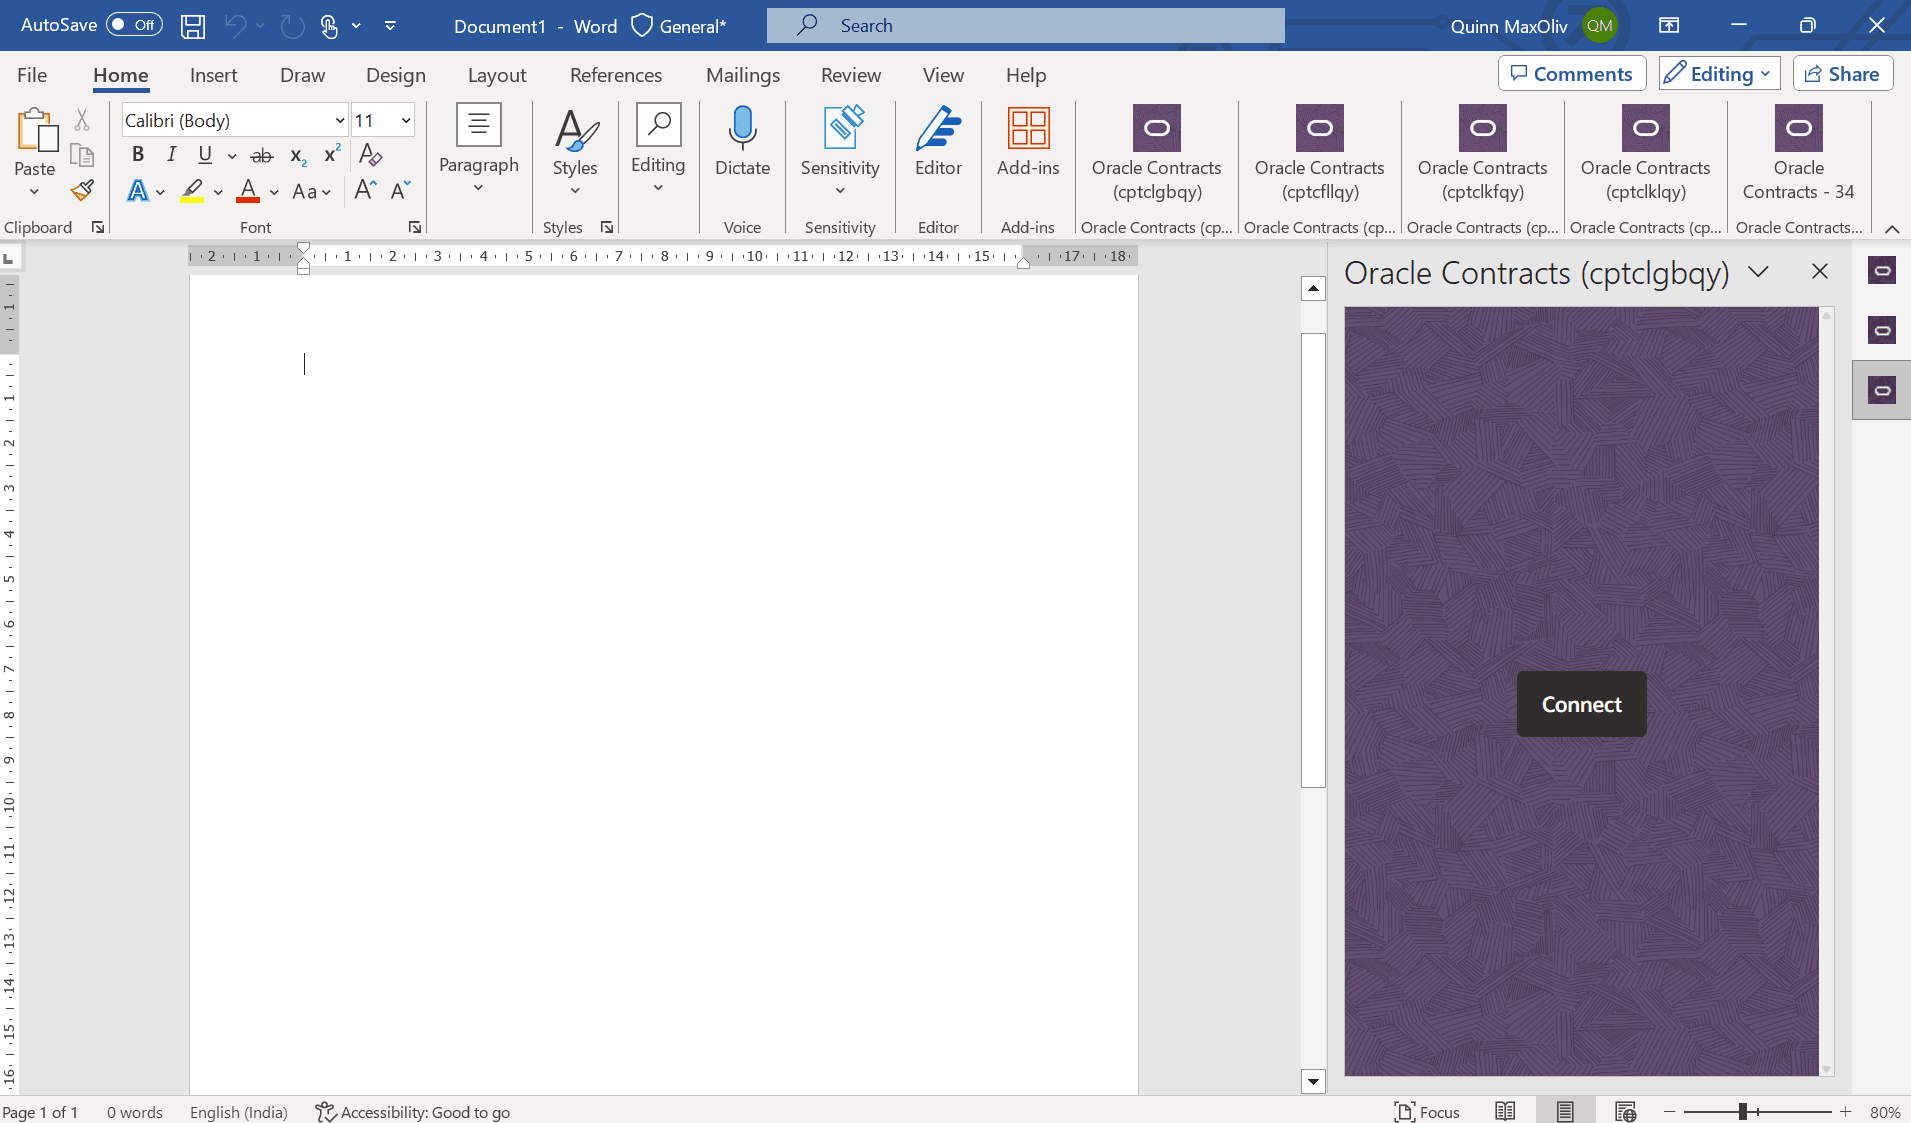
Click on Connect to Login
- Enter your Fusion application credentials
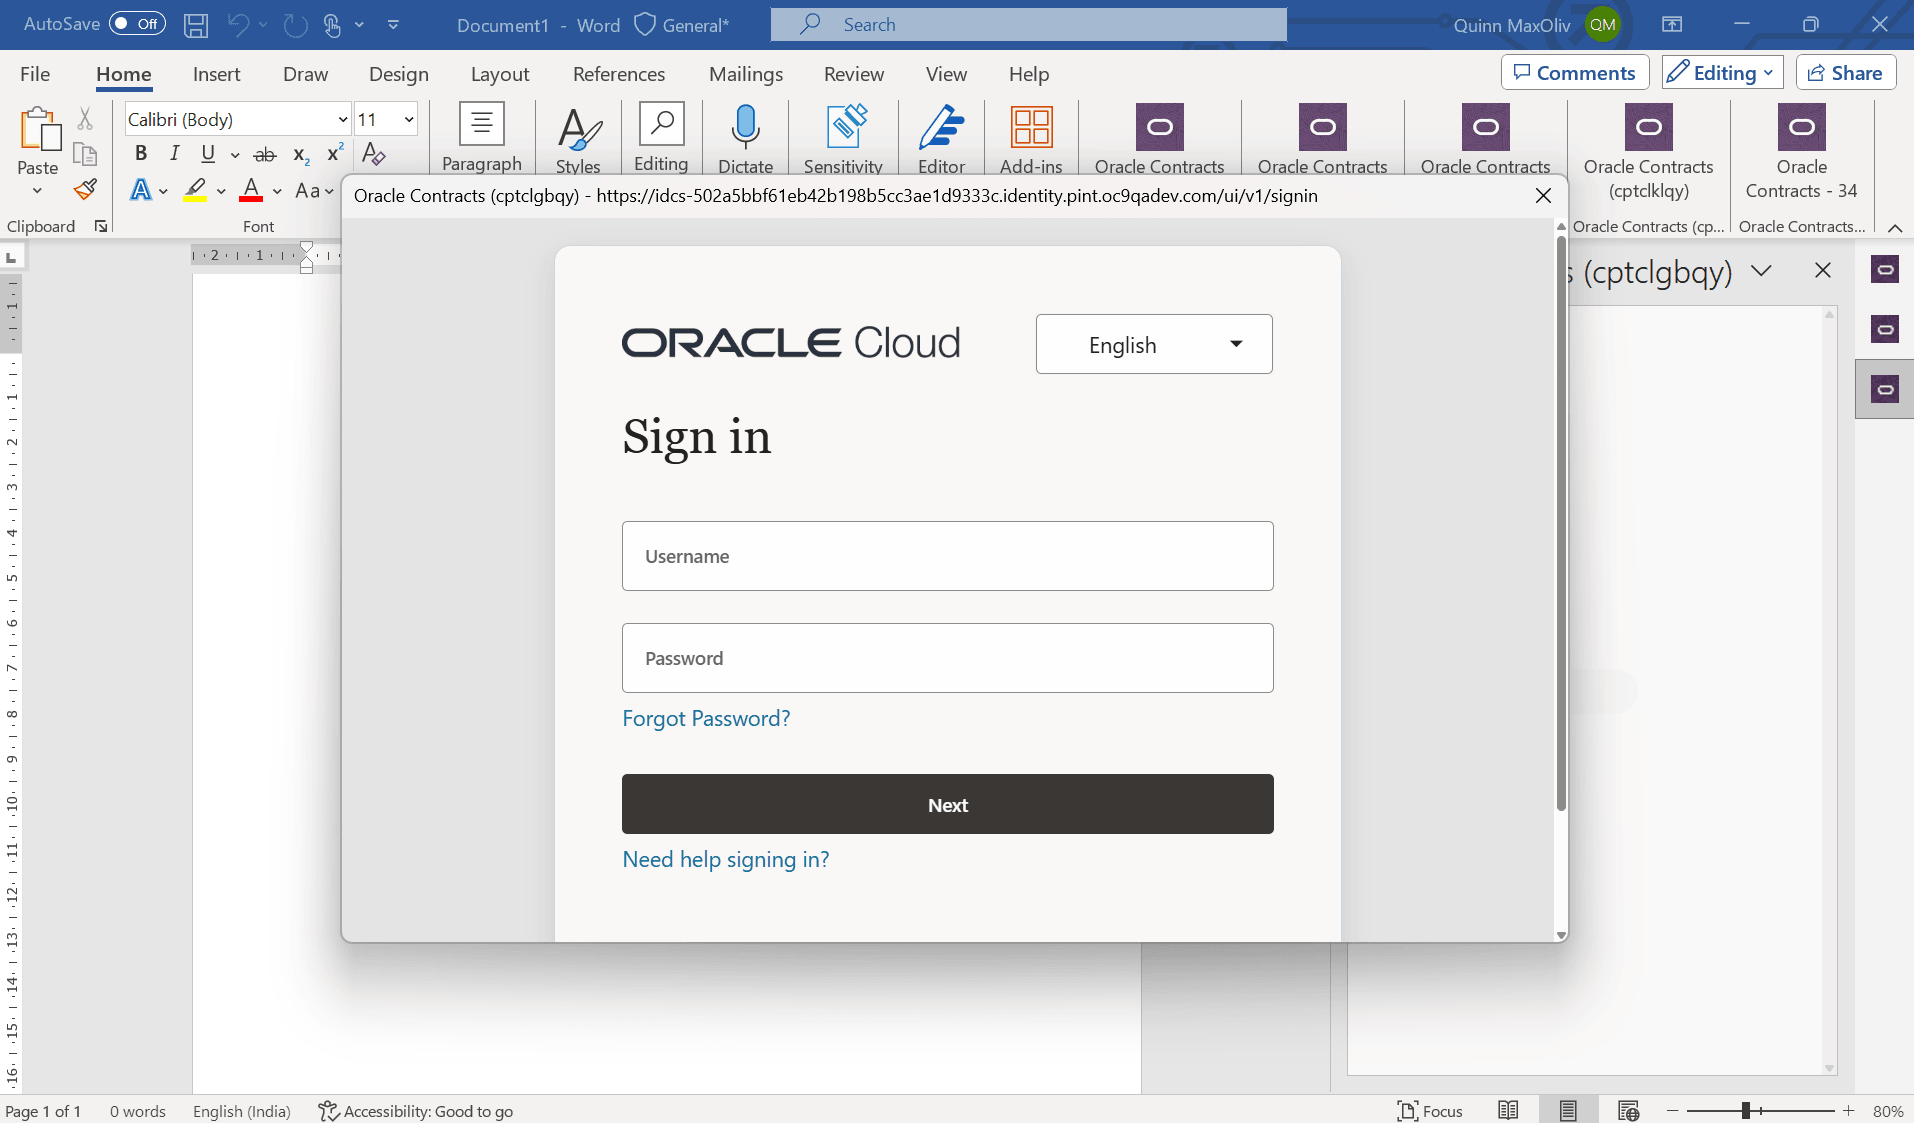
Application login from Word Add-in
- Download the contract terms
- From the Word Add-in, search for and download the contract terms for which you want to start collaboration.
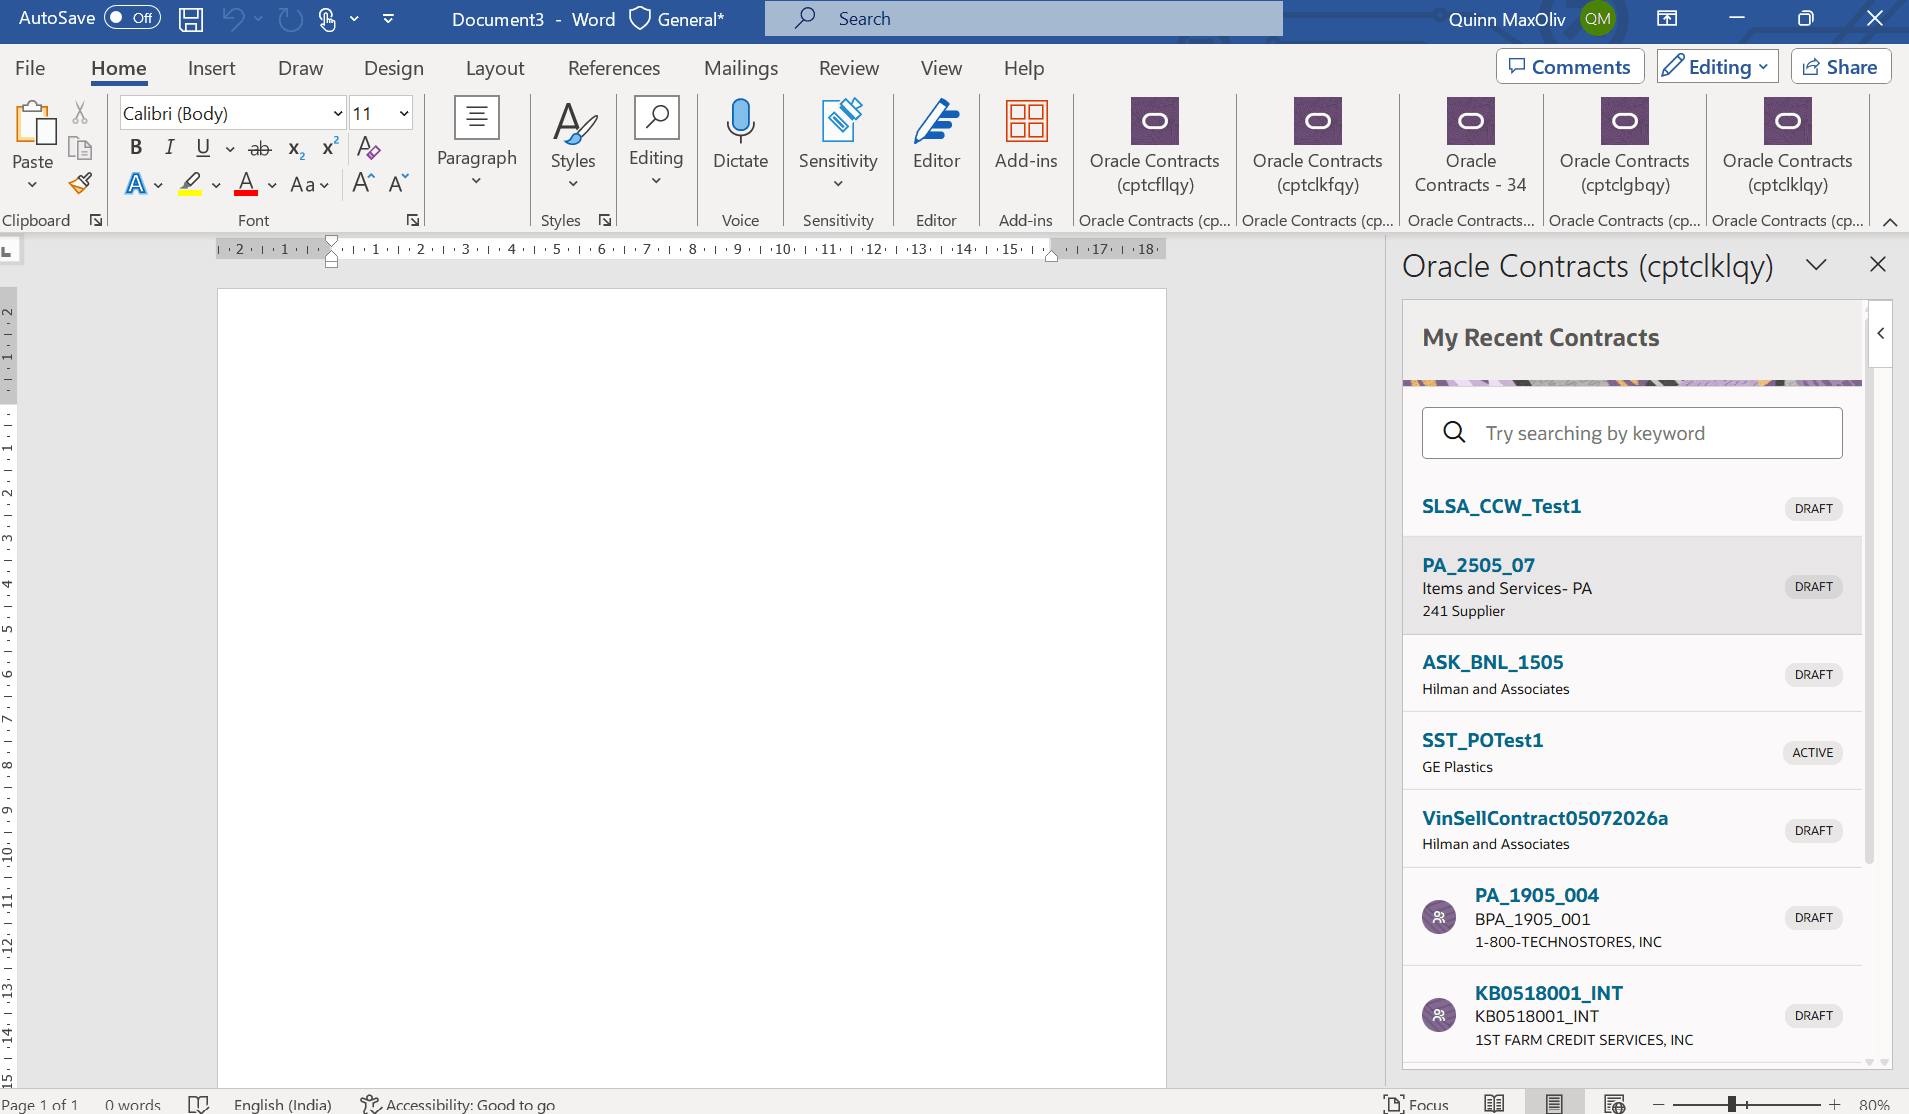
Download Terms from Add-in
- From the Word Add-in, search for and download the contract terms for which you want to start collaboration.
- Start collaboration from Microsoft Word -
- Open the contract terms in Microsoft Word and use the Word Add-in to start collaboration. From the add-in, open the actions menu and select Collaborate.
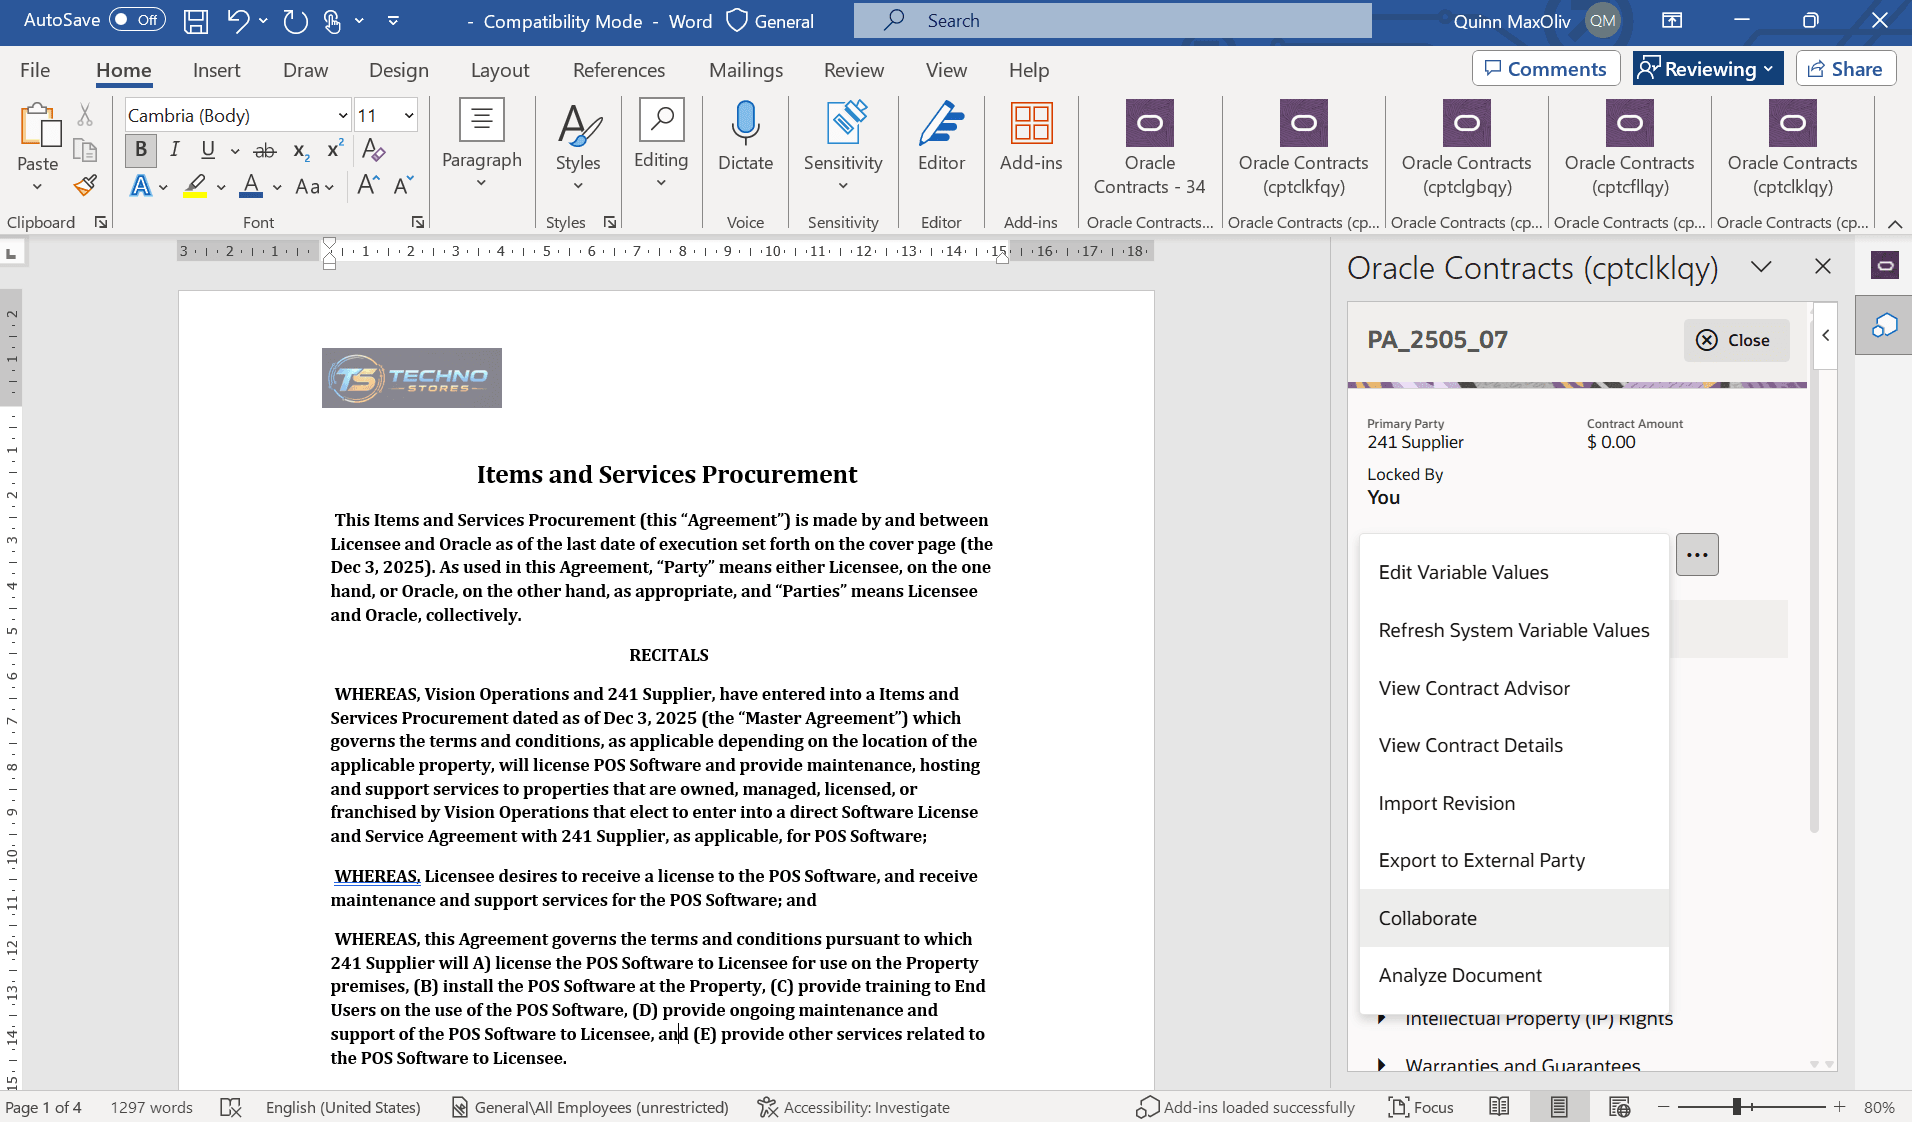
Click on Collaborate
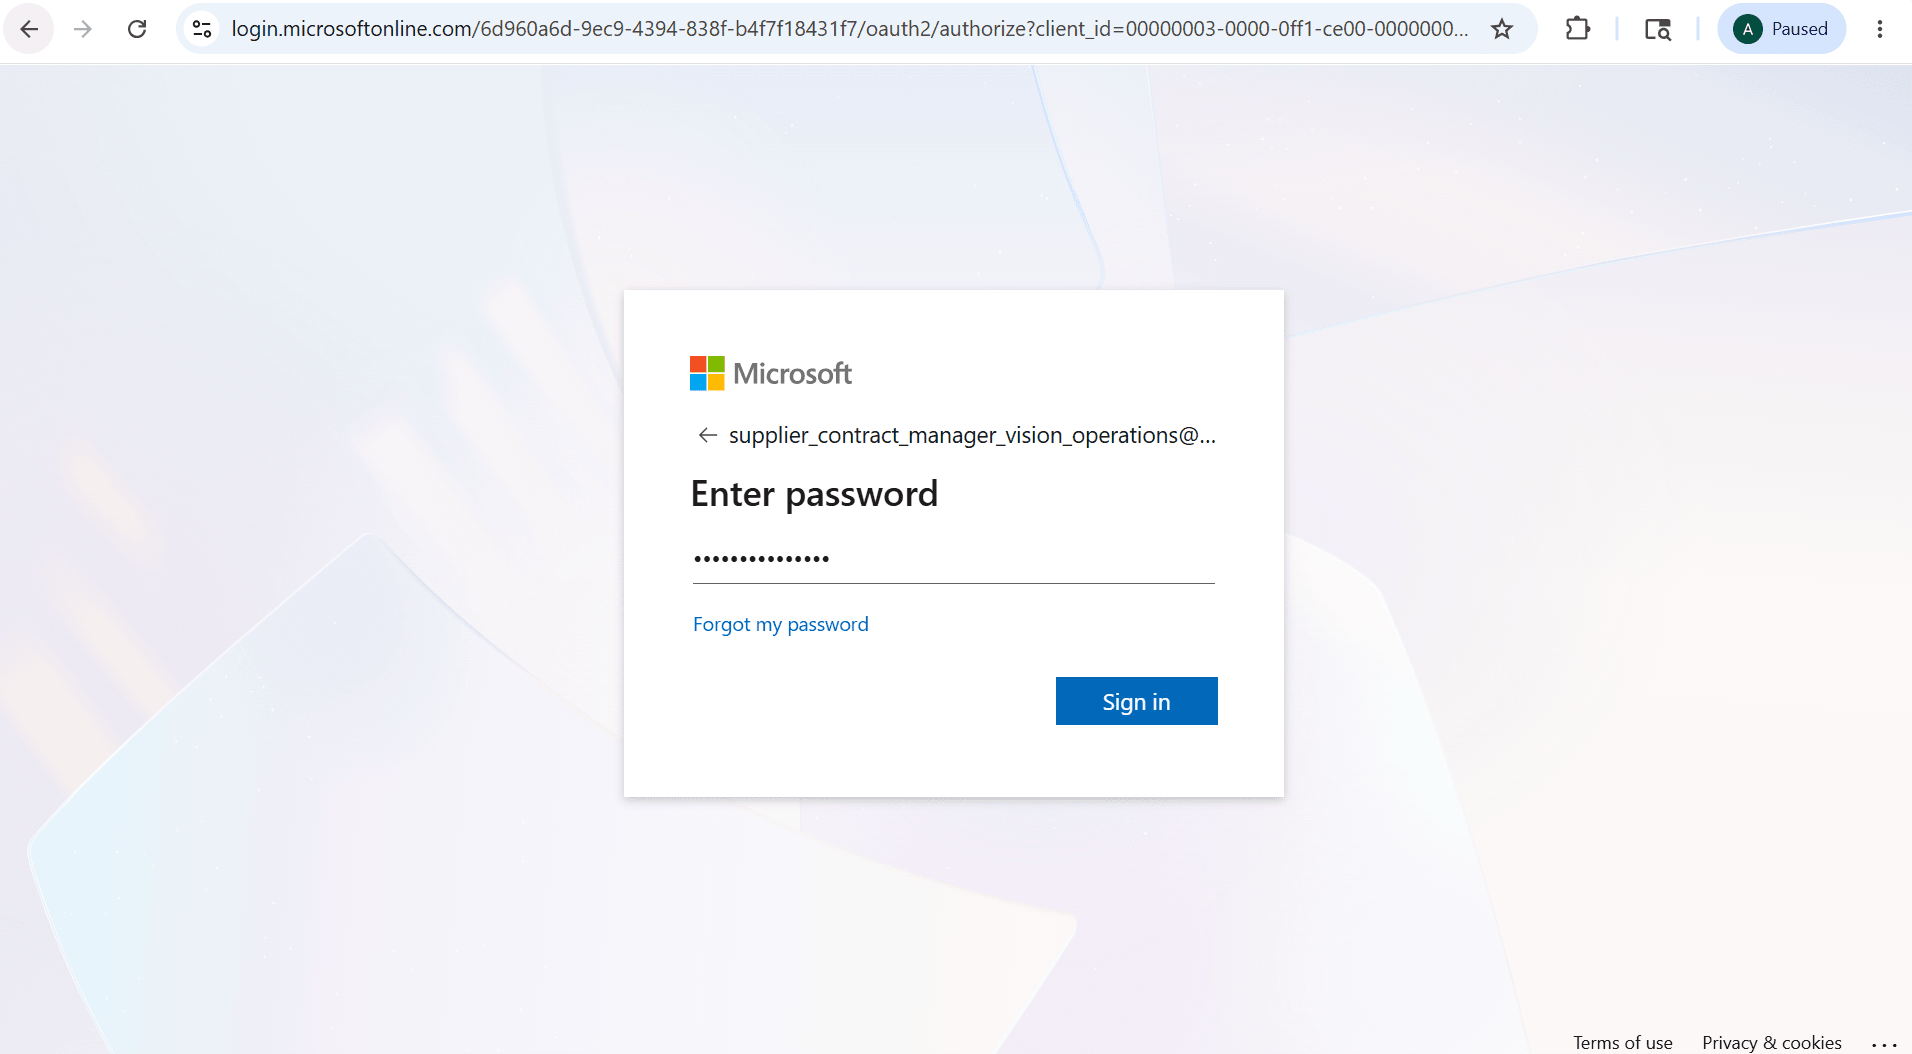
- A Microsoft sign-in window appears. Enter your Microsoft account credentials to continue
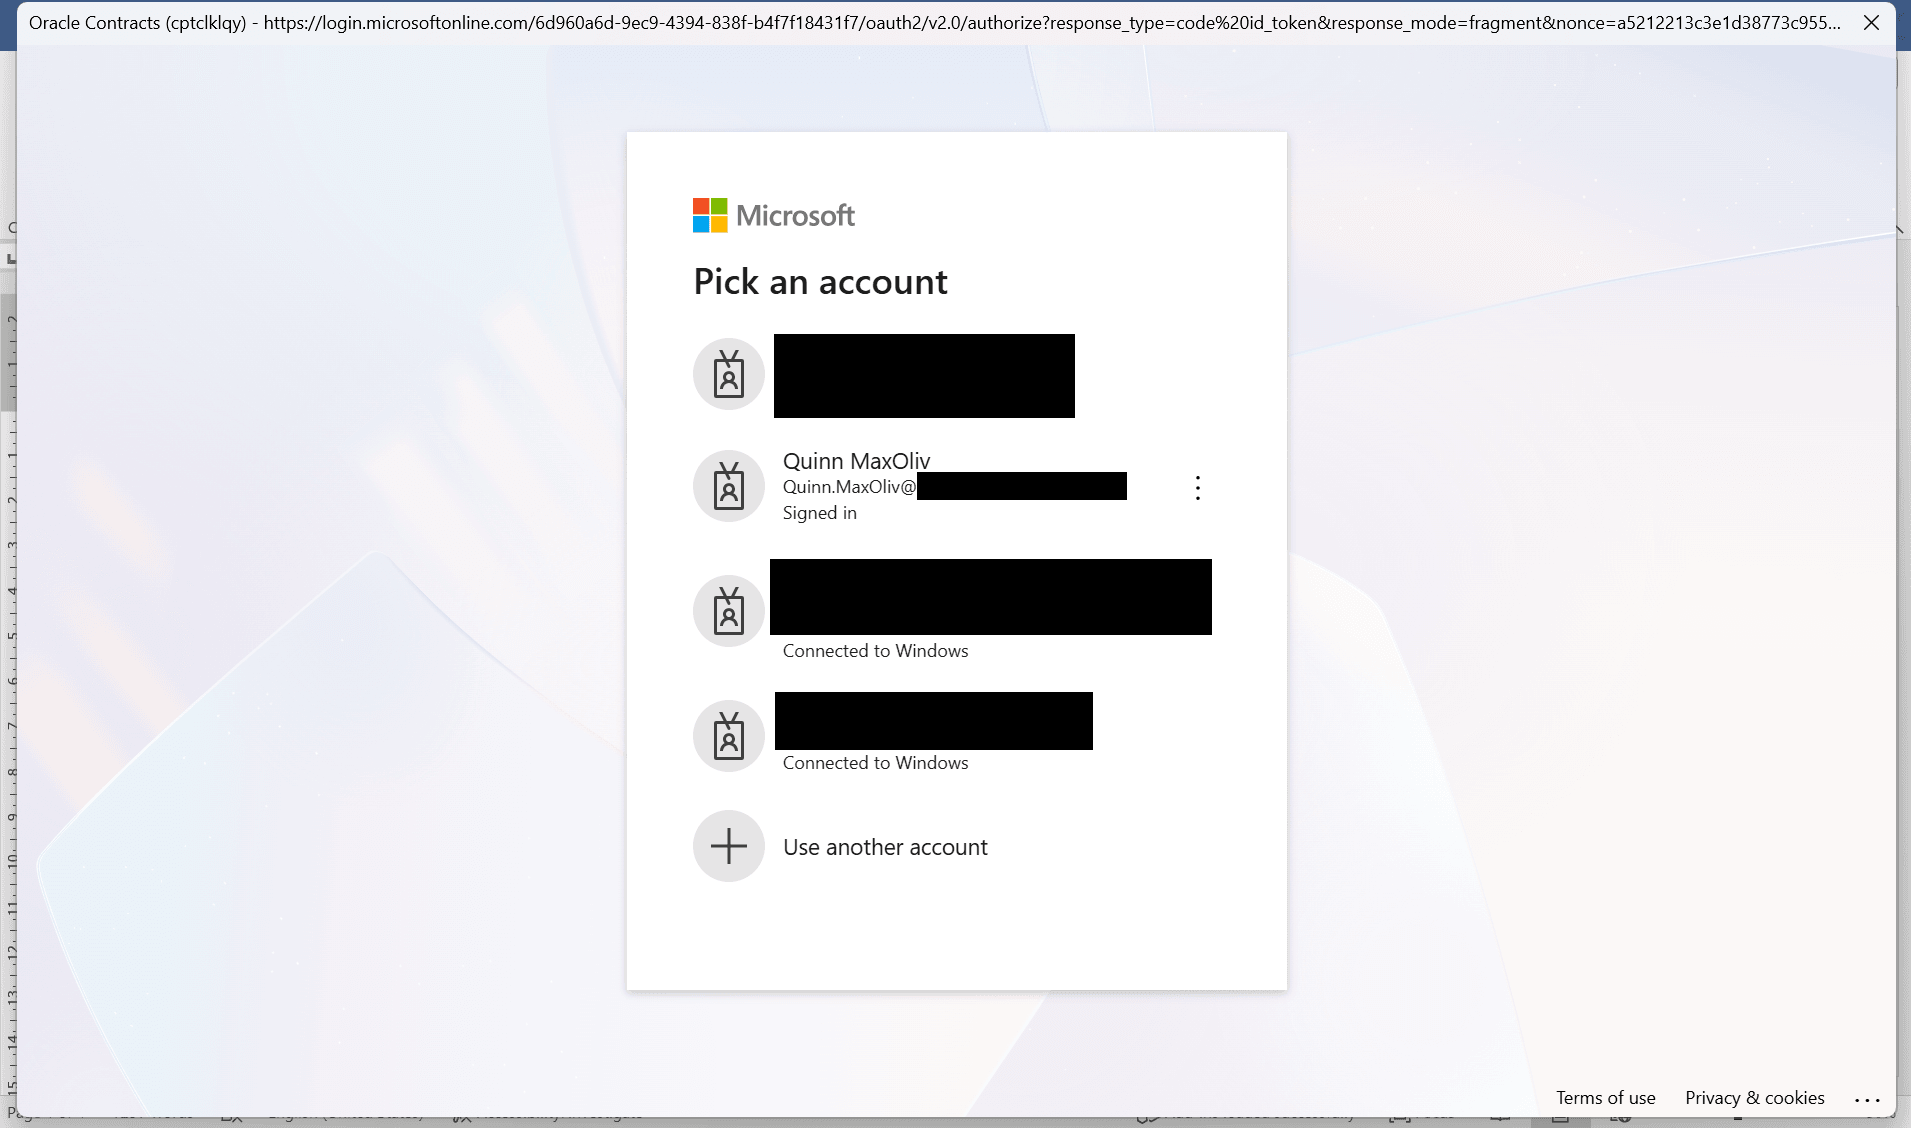
Sign in to Microsoft
- Review collaboration details
- The Collaborate drawer shows the SharePoint collaboration details, such as the collaboration platform, site, folder, file name, and collaborators. The listed collaborators are the internal contacts on the contract. Their SharePoint access is defaulted based on their contract access.
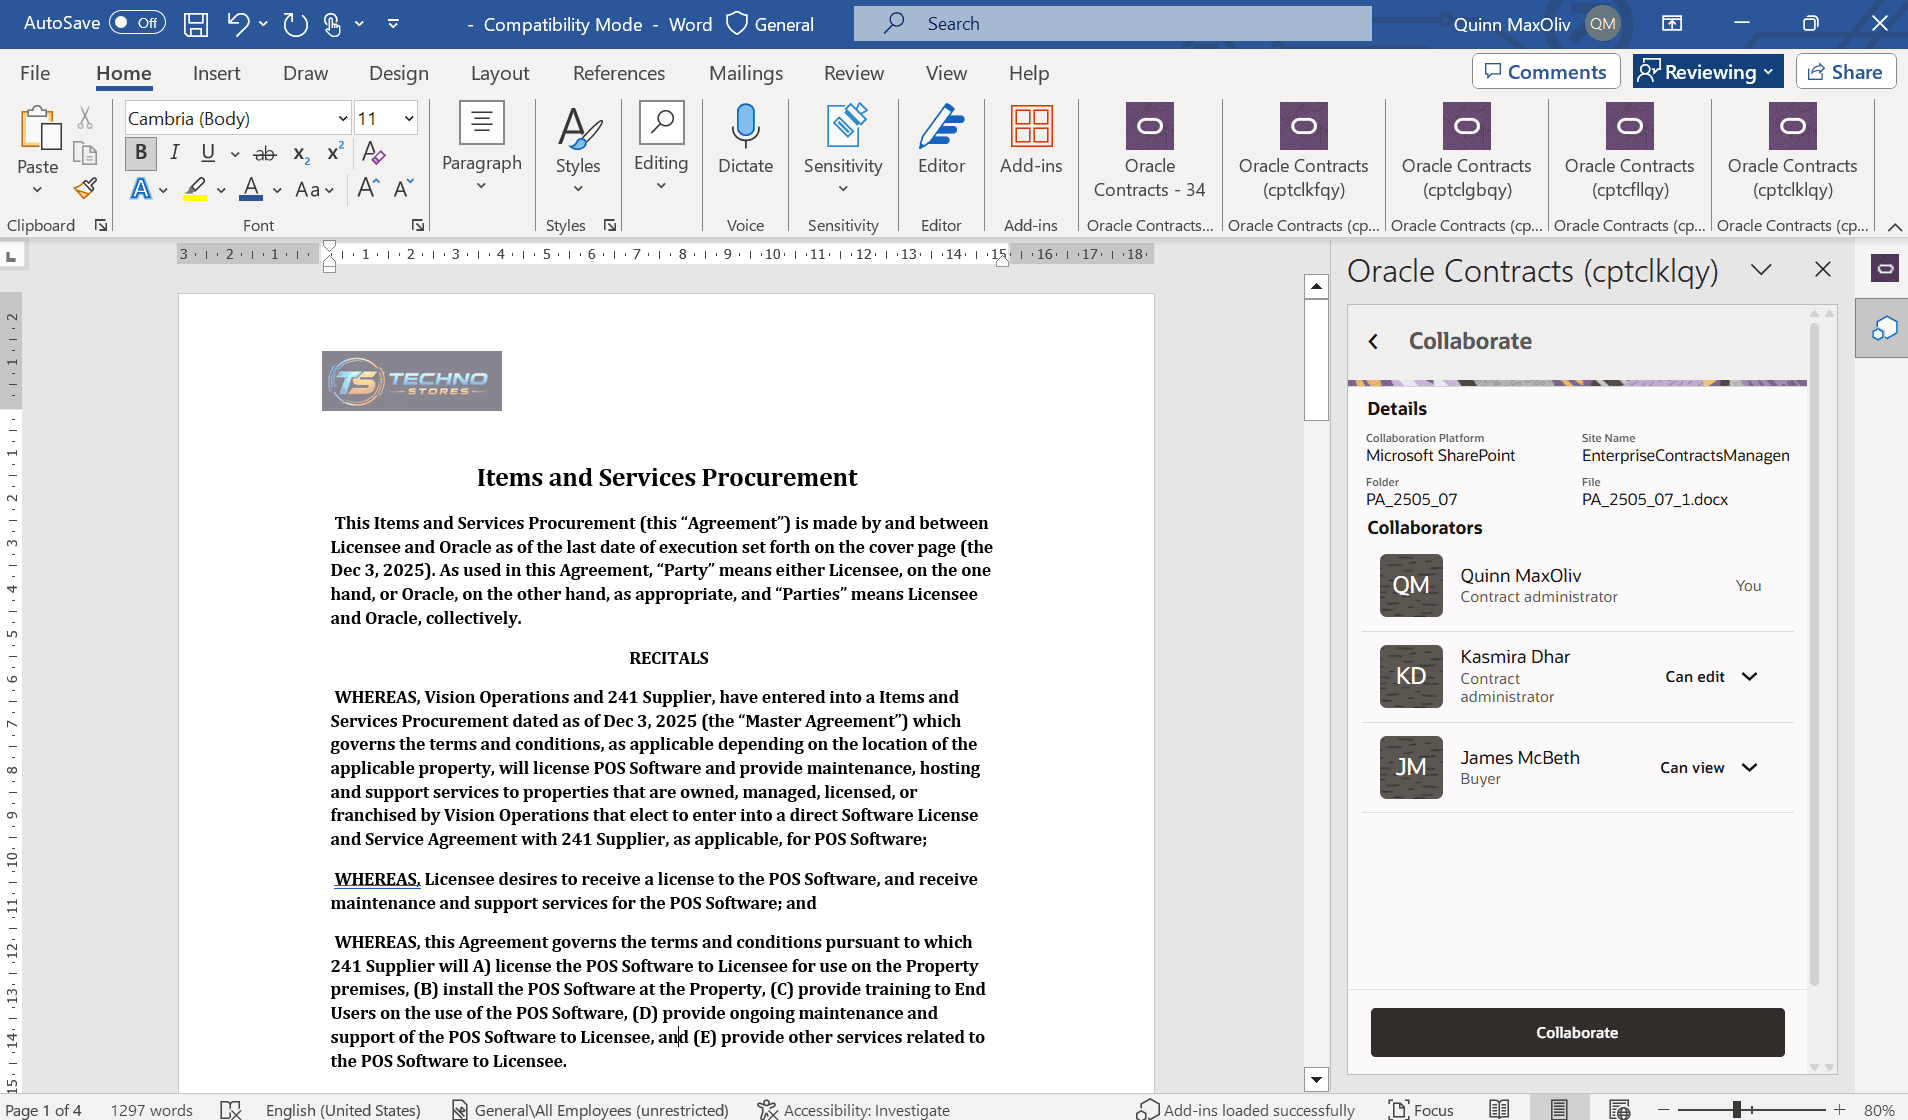
Collaborate Drawer Details
- Adjust collaborator access, if needed
- Before starting collaboration, the initiator can update each collaborator’s SharePoint access to Can edit, Can view, or No access. These changes apply only to the SharePoint collaboration location. They don’t change the user’s contract access in application.

Collaborators Access Change
- Start the collaboration session
- After reviewing the details and access, the initiator clicks Collaborate. The application opens the contract terms in Microsoft SharePoint. In the background, it creates the contract-specific folder in the configured SharePoint site and posts the contract terms file to that folder.
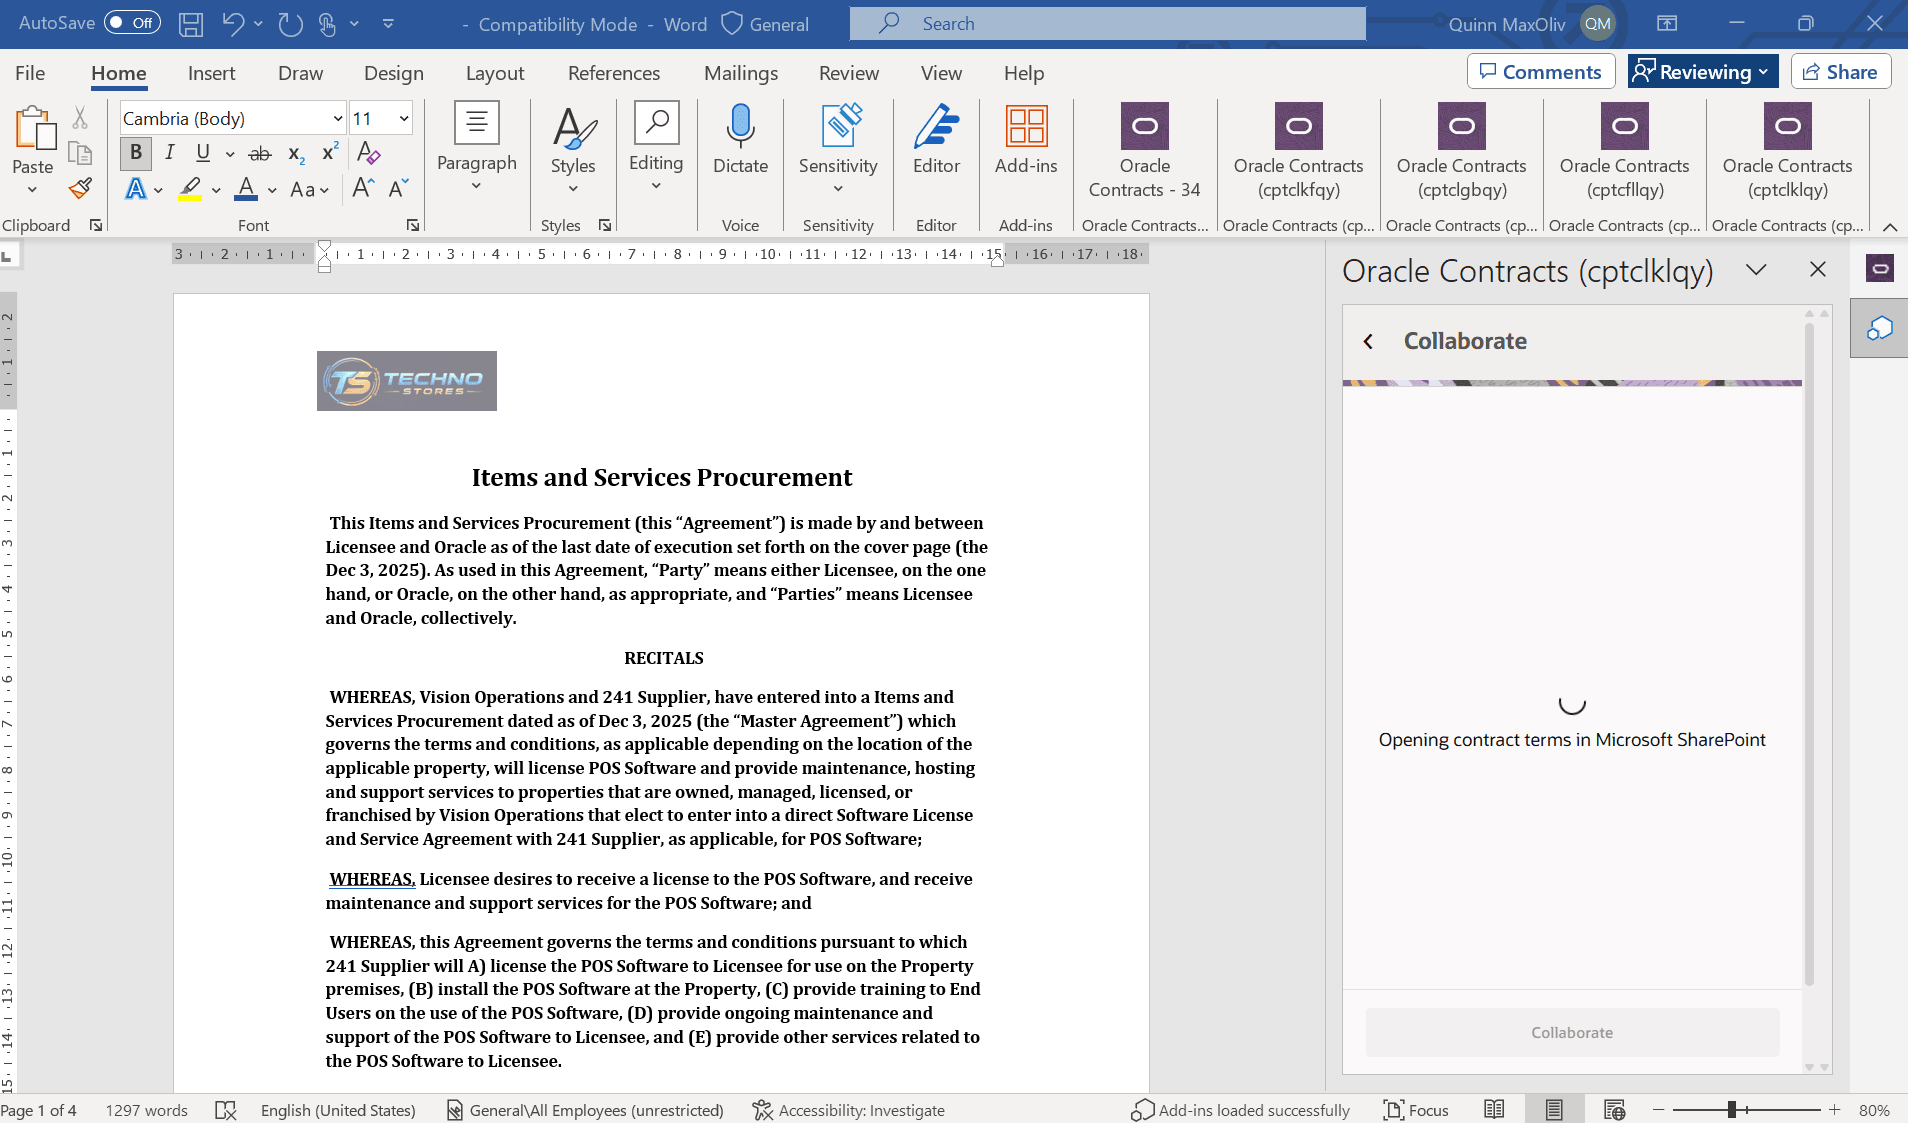
Terms opening as SharePoint File
- Collaborate on the shared document
- The SharePoint-hosted file becomes the working copy for collaboration. Collaborators work on the same contract terms document instead of exchanging separate copies over email. Users can use Microsoft Word capabilities such as comments, assigned tasks, coauthoring, and tracked changes to review and update the terms.
SharePoint File
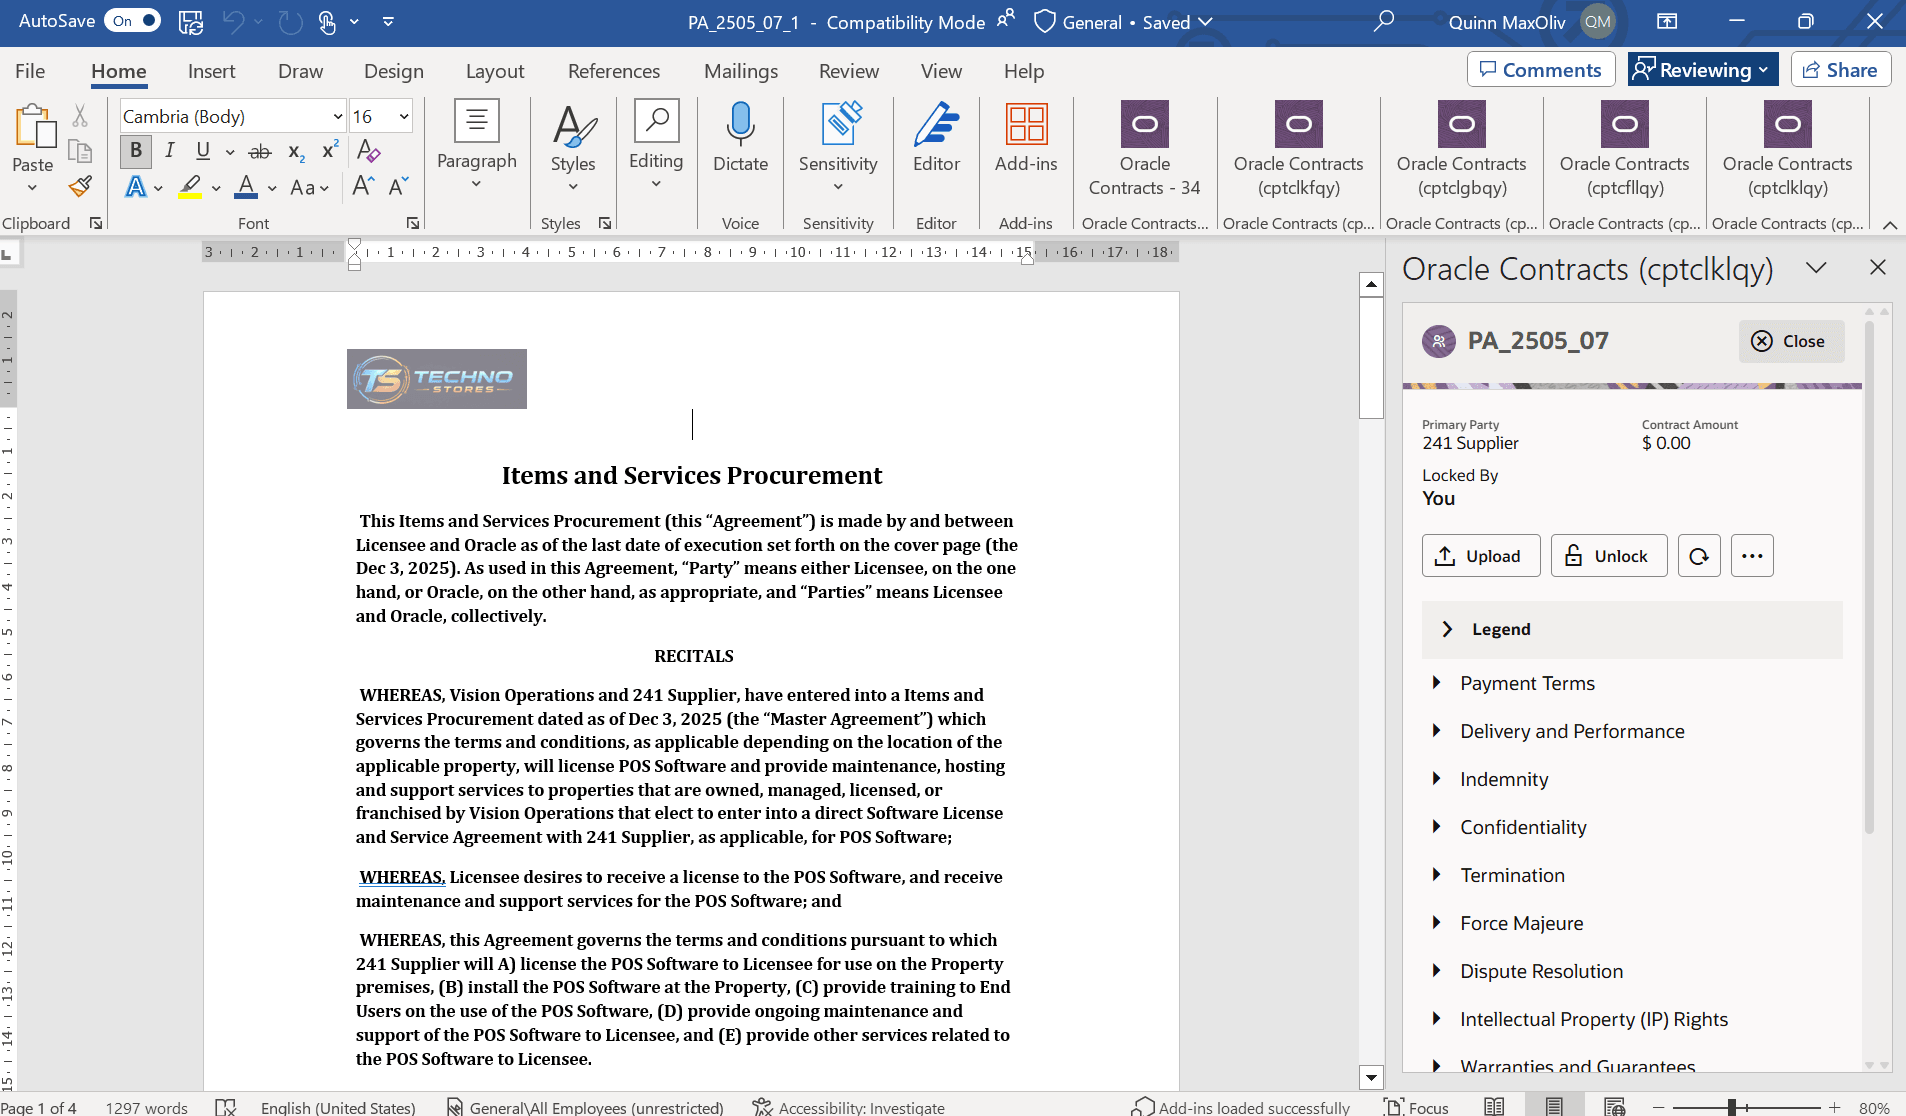
-
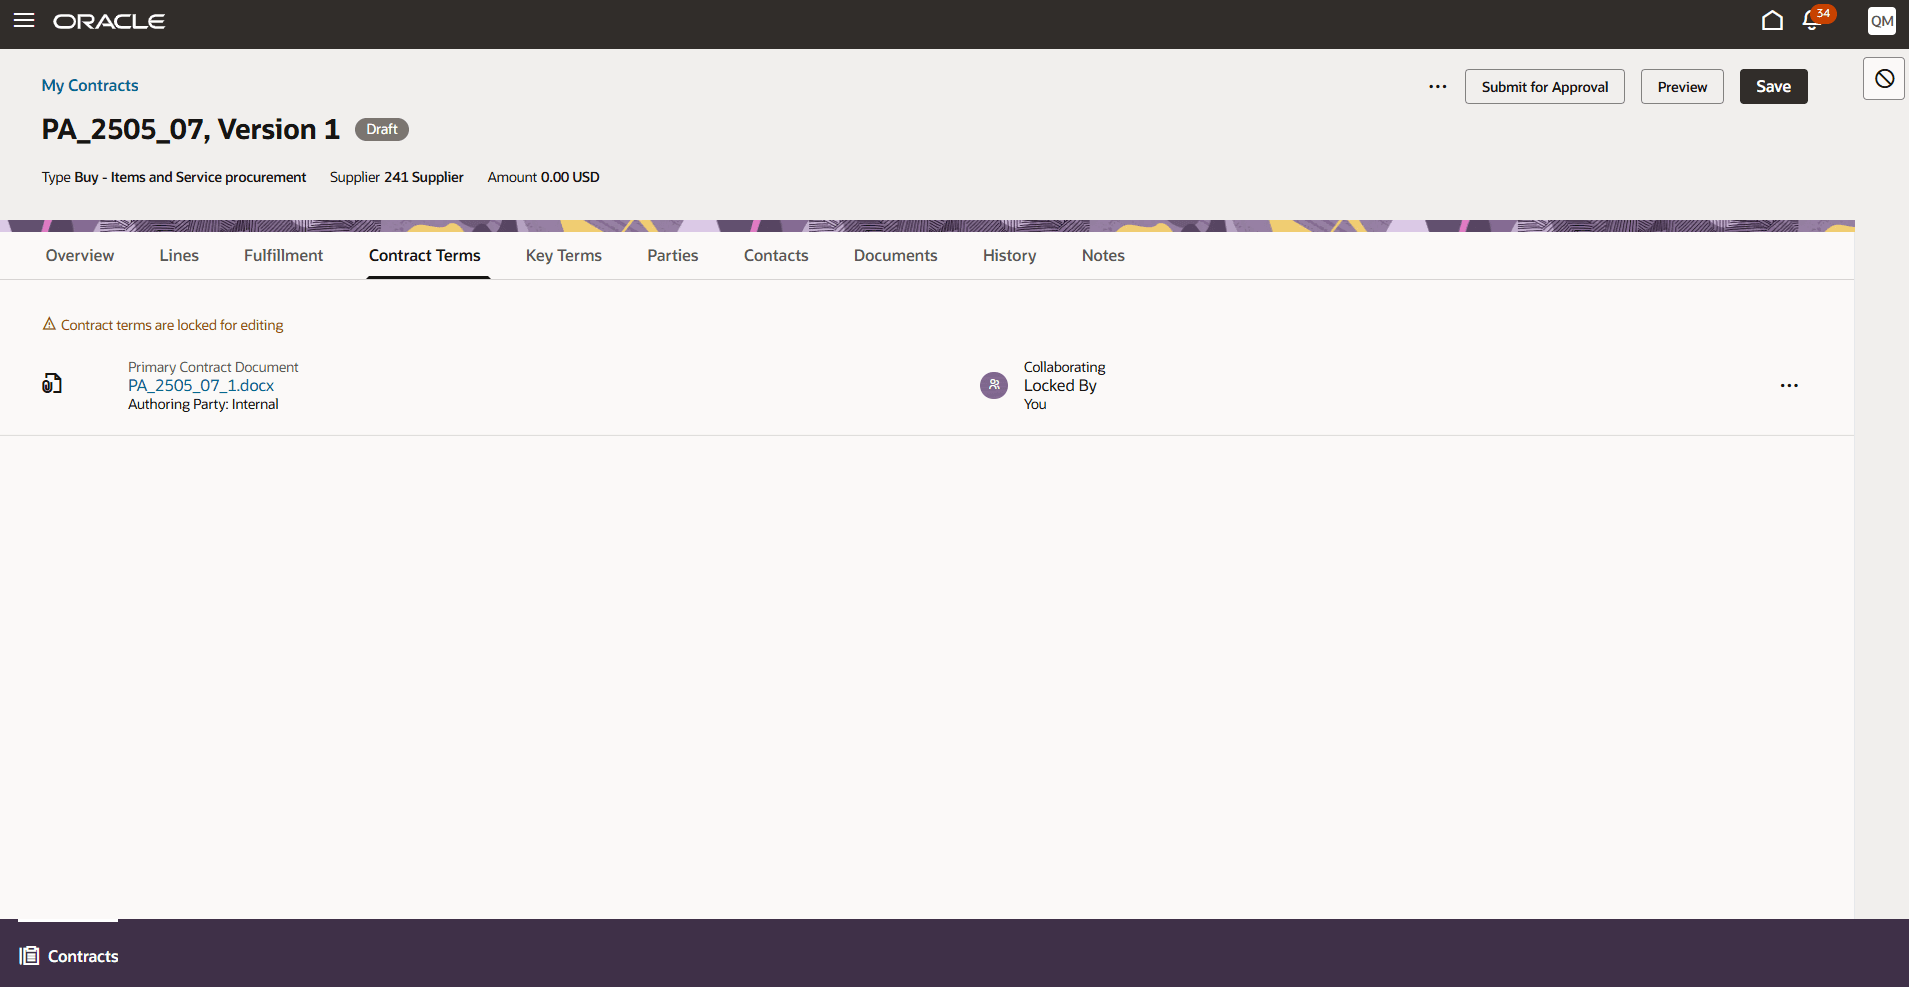
Contract Terms Tab during Collaboration
-
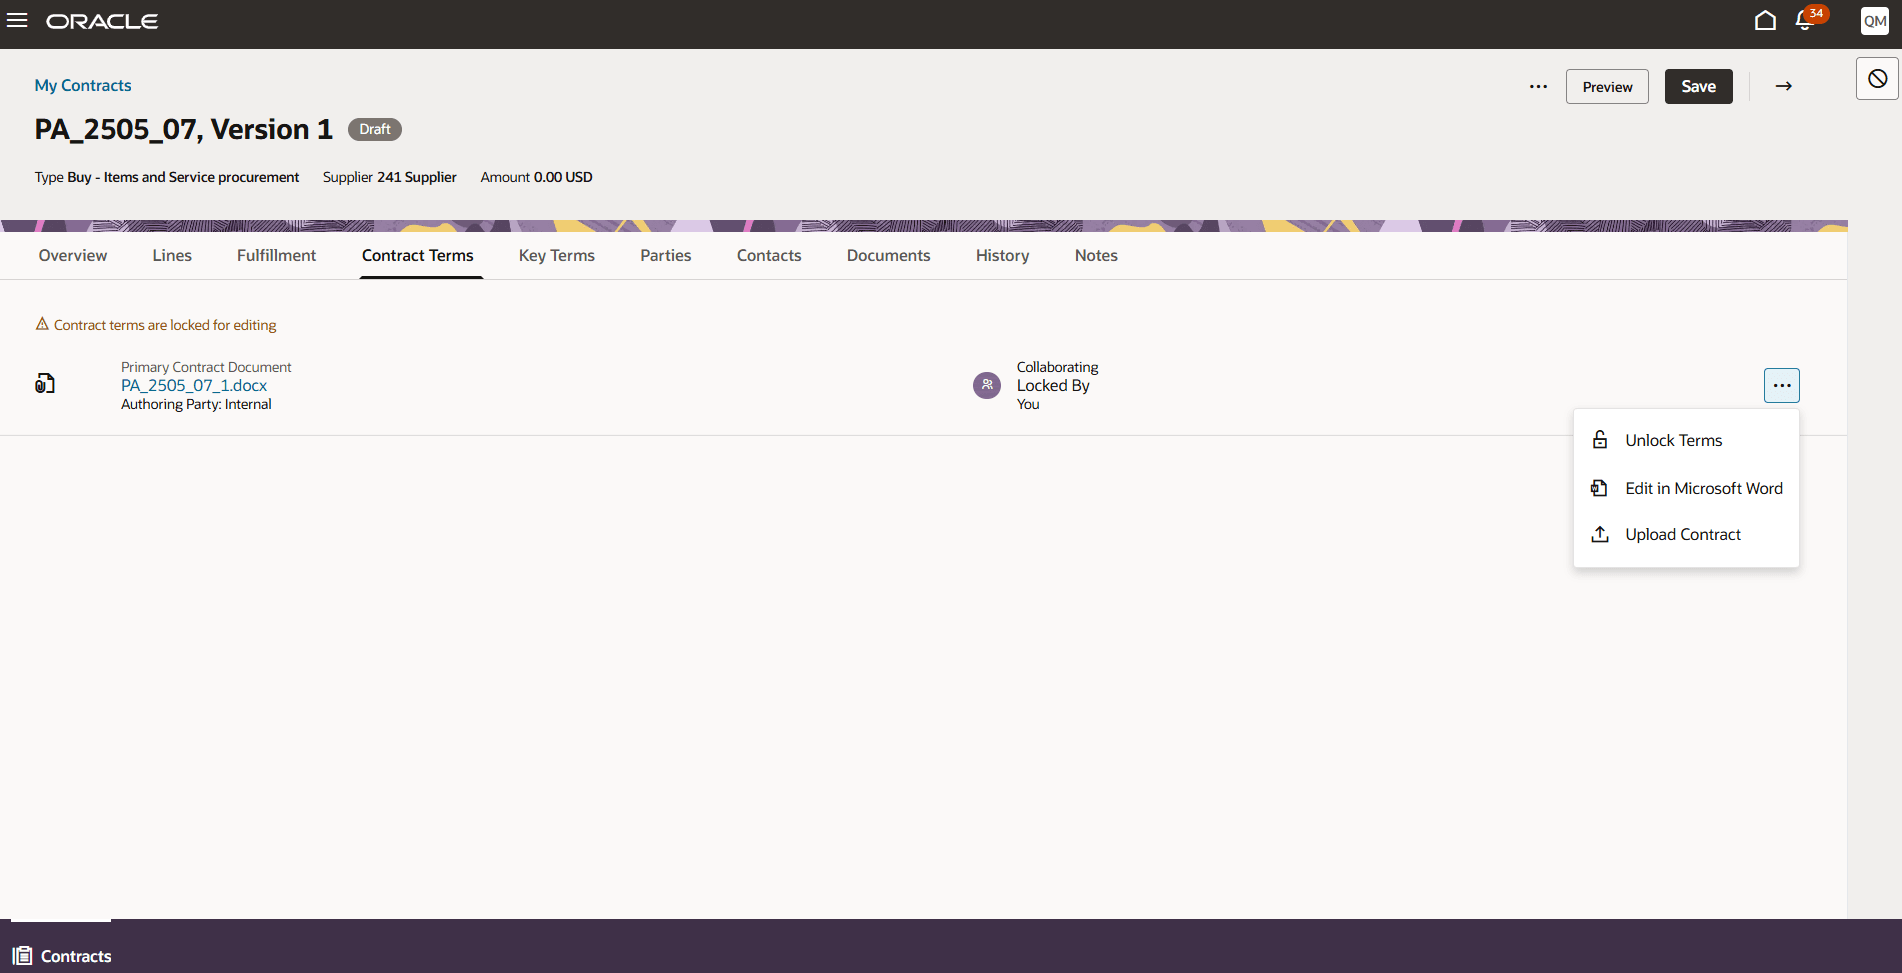
Contract Terms Actions During Collaboration
-
When contract terms are in collaboration, the Contract Terms tab shows the collaboration status and the available actions for the contract terms document.
-
Unlock Terms
-
Edit in Microsoft Word
-
Upload Contract
-
Actions in Redwood during Collaboration
-
-
- Notify collaborators
- Collaborators receive Microsoft notifications when they’re invited to access the shared folder or when they’re mentioned or assigned a task in the document. They can open the document from the notification and complete their review.
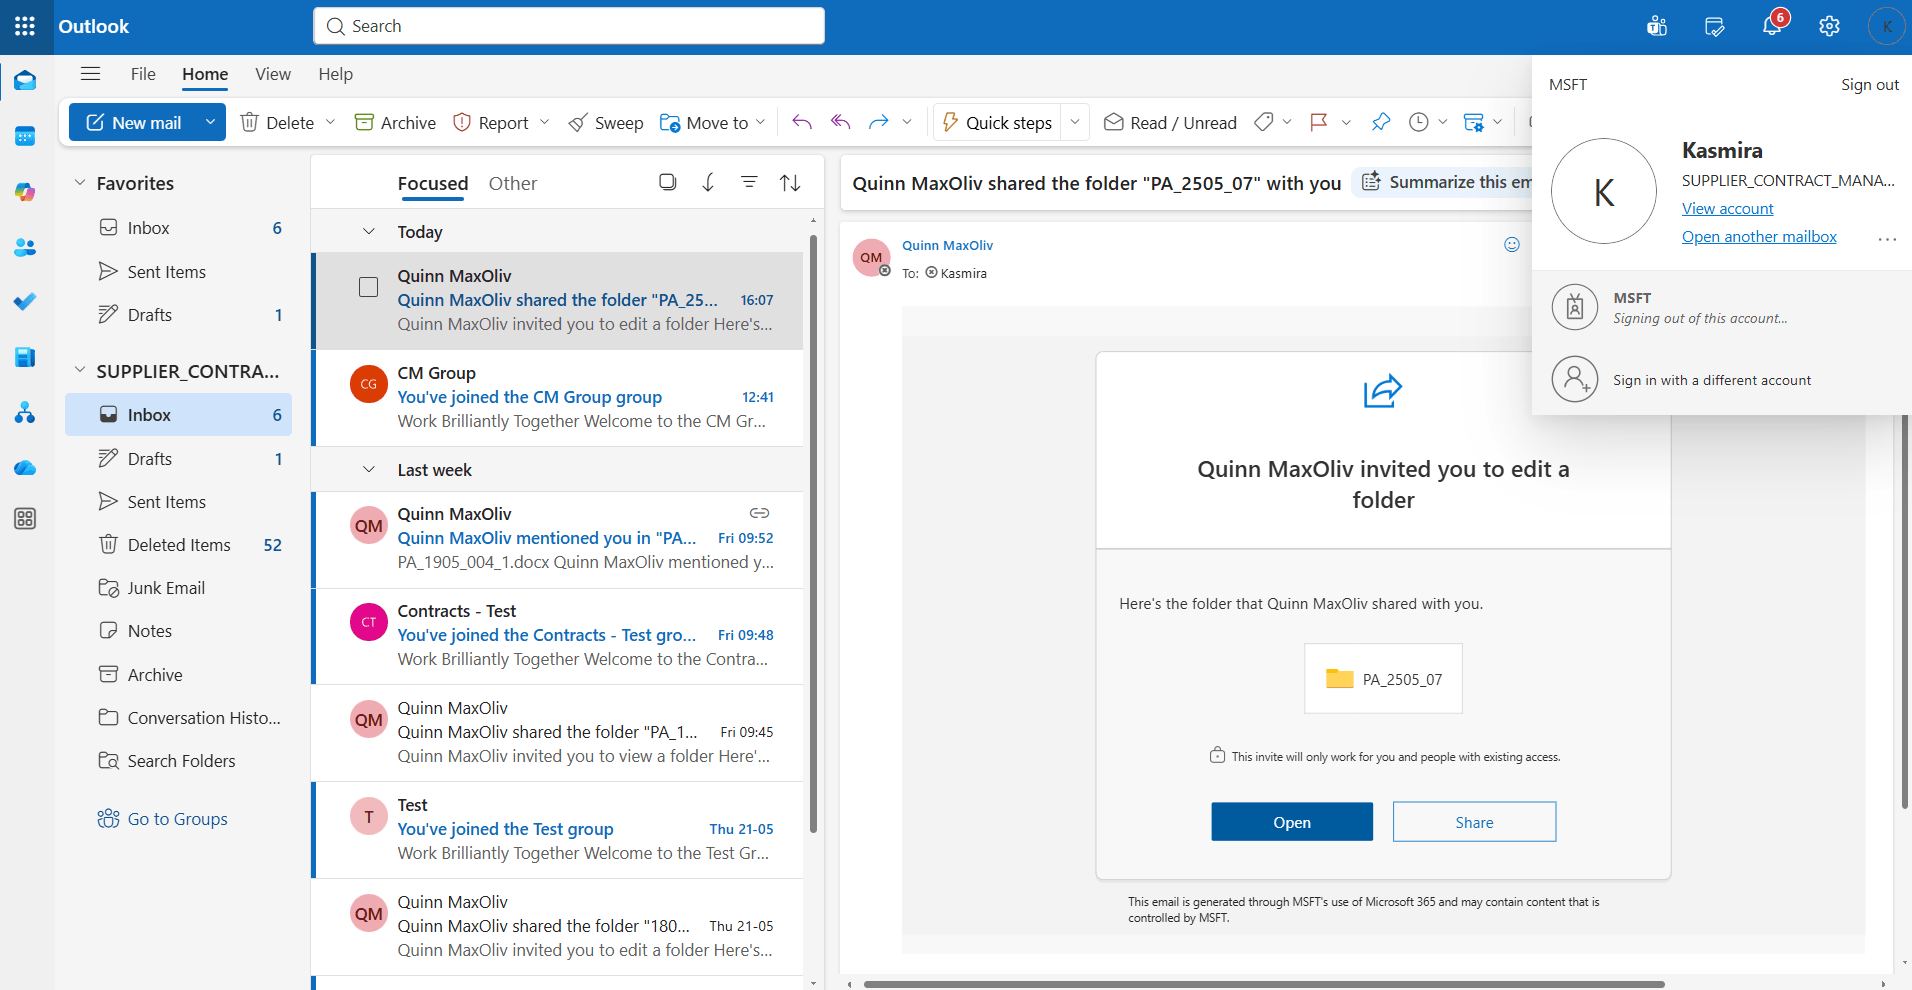
Collaborators getting the email notification to collaborate
- Review changes in one place
- Because everyone works on the same SharePoint-hosted document, comments, edits, and task updates are visible in one place. This helps the contract owner and reviewers validate updates without manually consolidating feedback from multiple files.
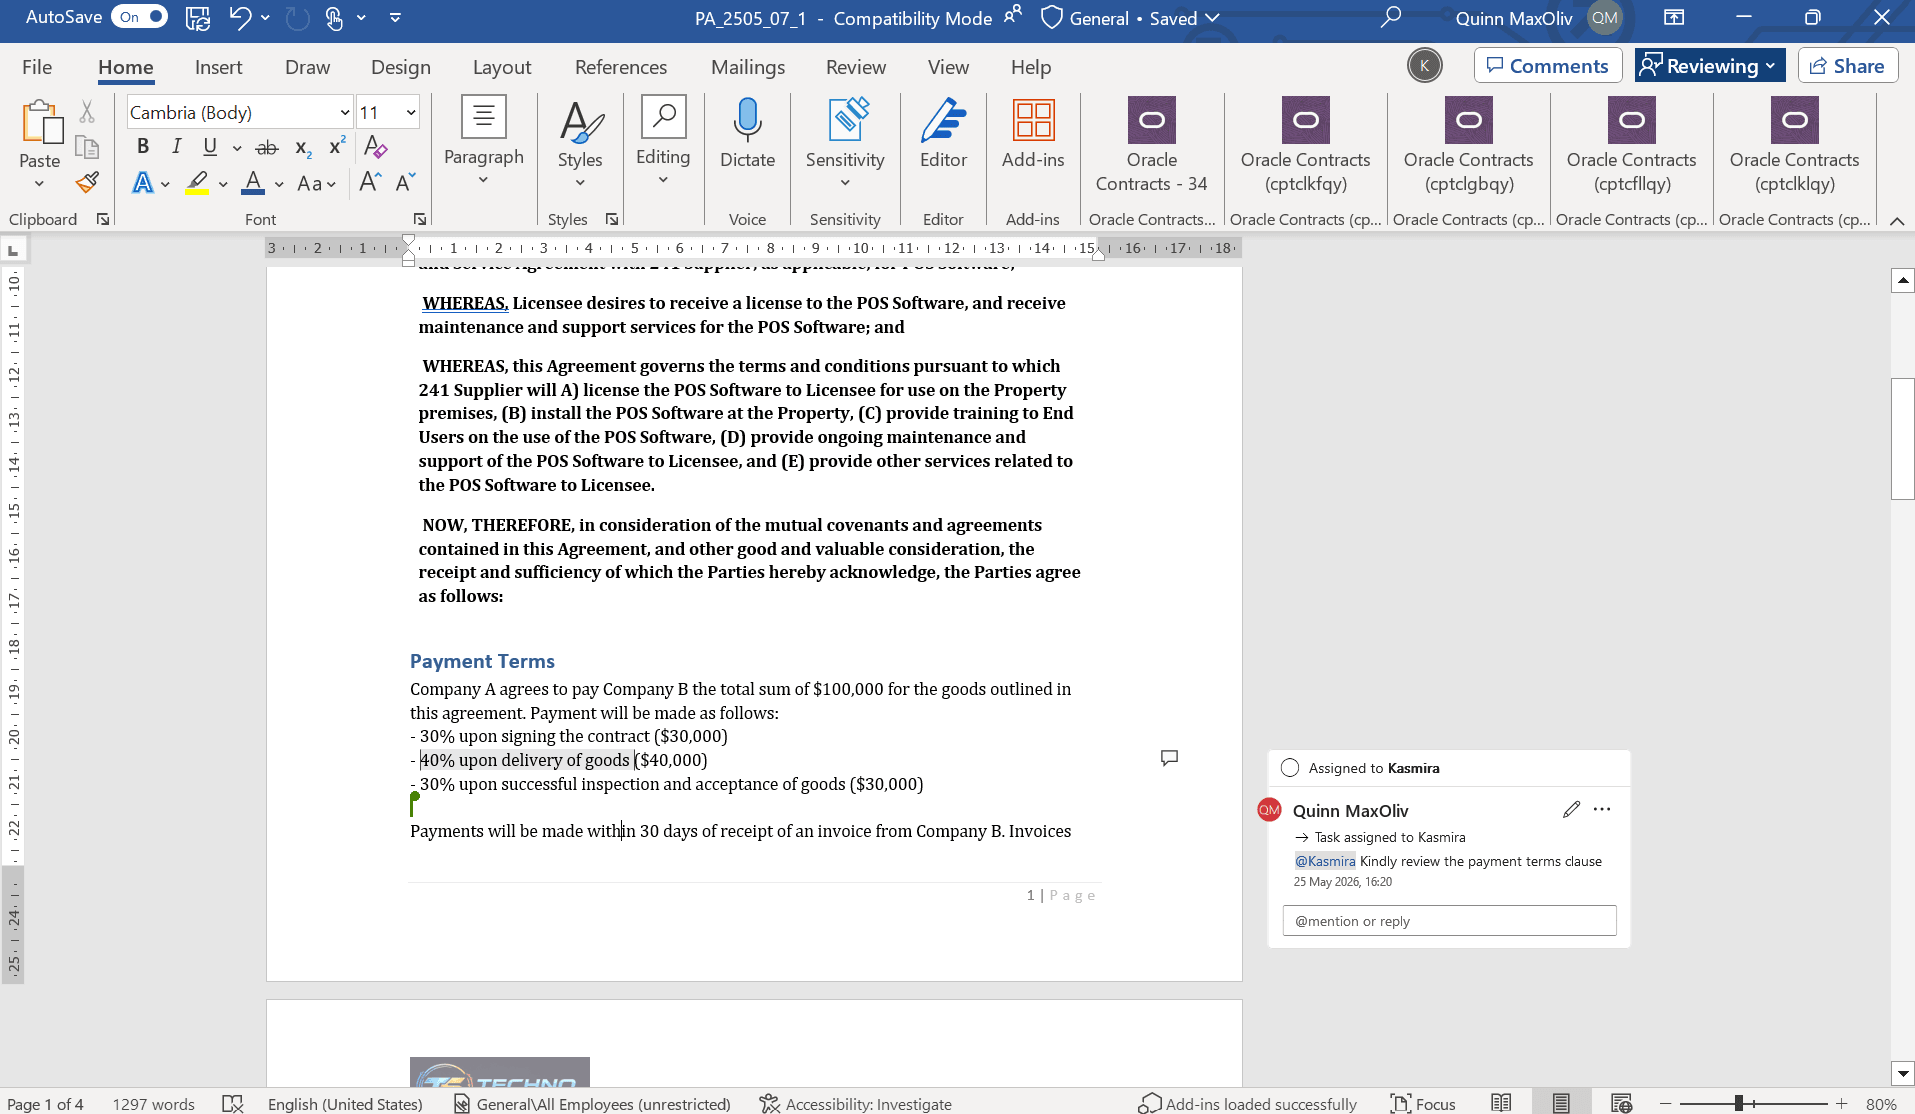
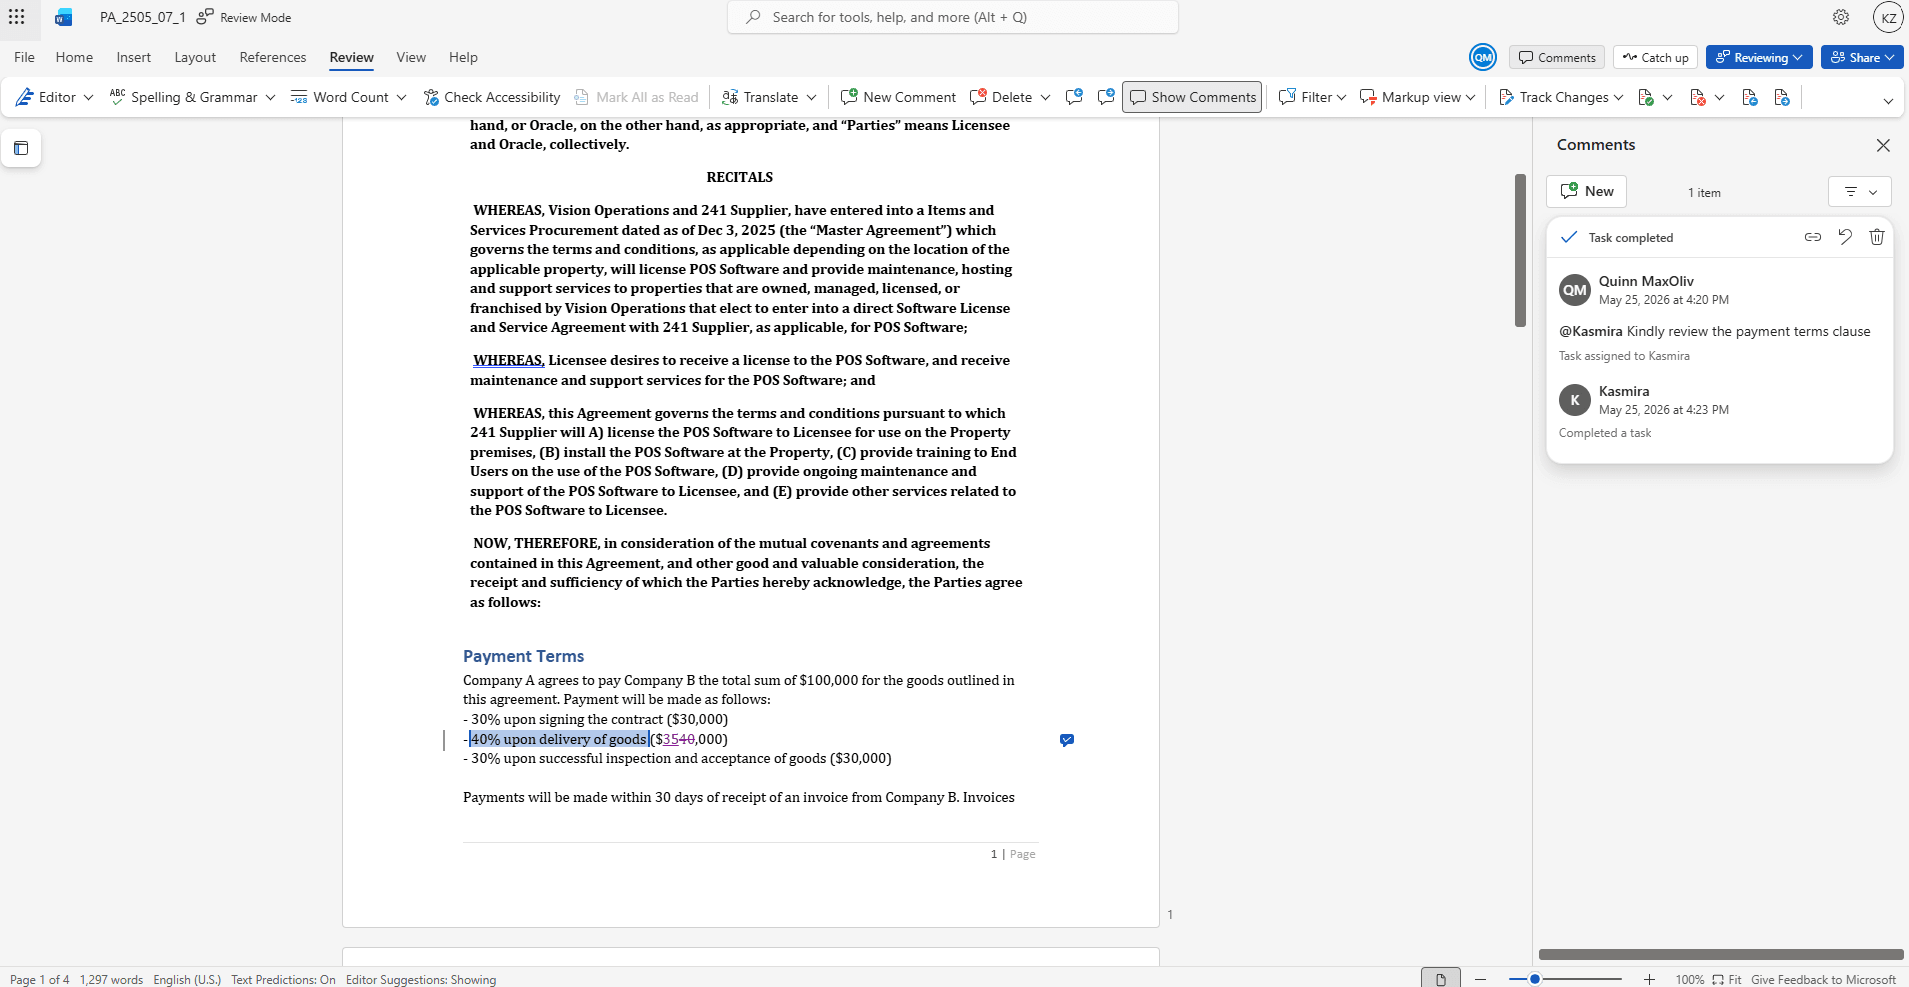
Collaborator commenting to review a clause

Email received to review the comments
Collaborator reviewing and making the changes

Initiator can verify the changes made
- Manage access during collaboration
- After collaboration starts, the initiator can use Manage Access from the Word Add-in to review or update collaborator SharePoint access. Any changes made here continue to apply only to the SharePoint collaboration folder or file and don’t affect the users’ contract access.
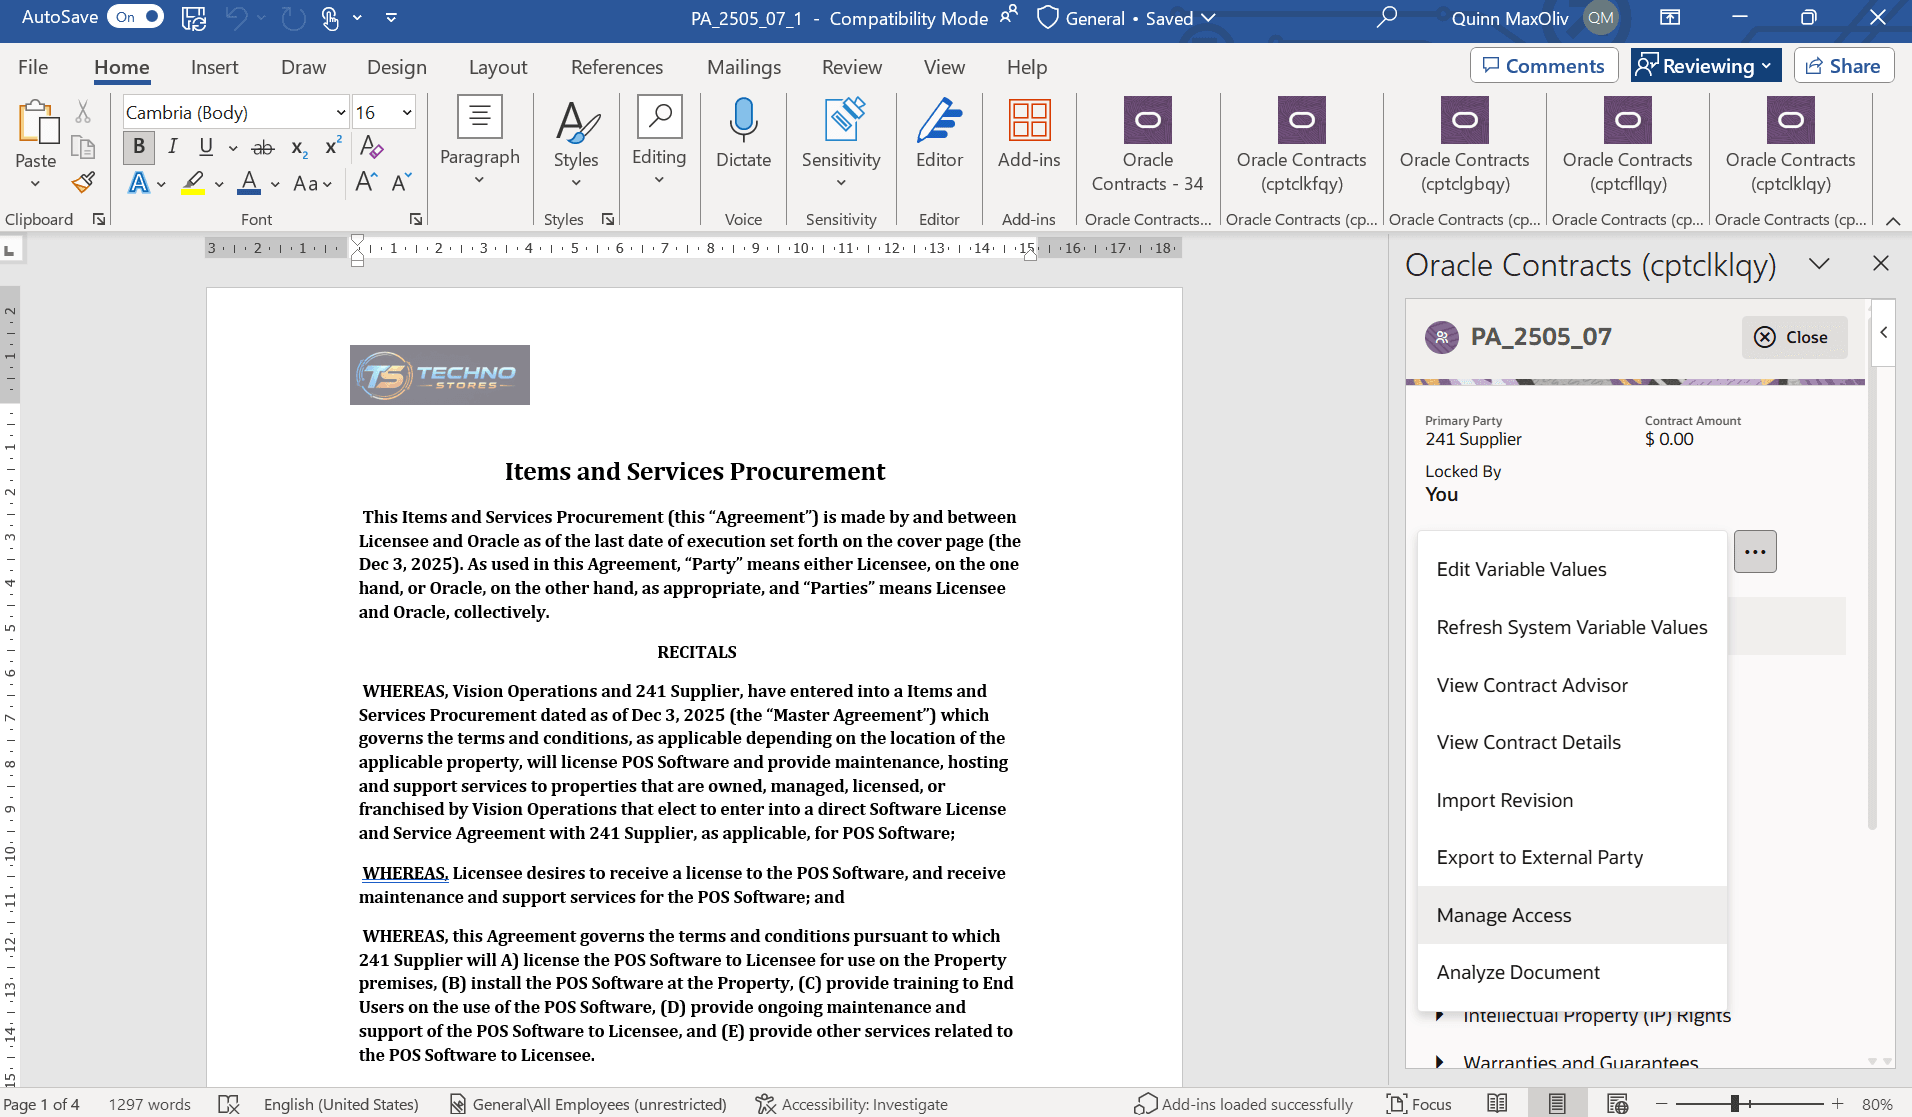
Manage Access Action
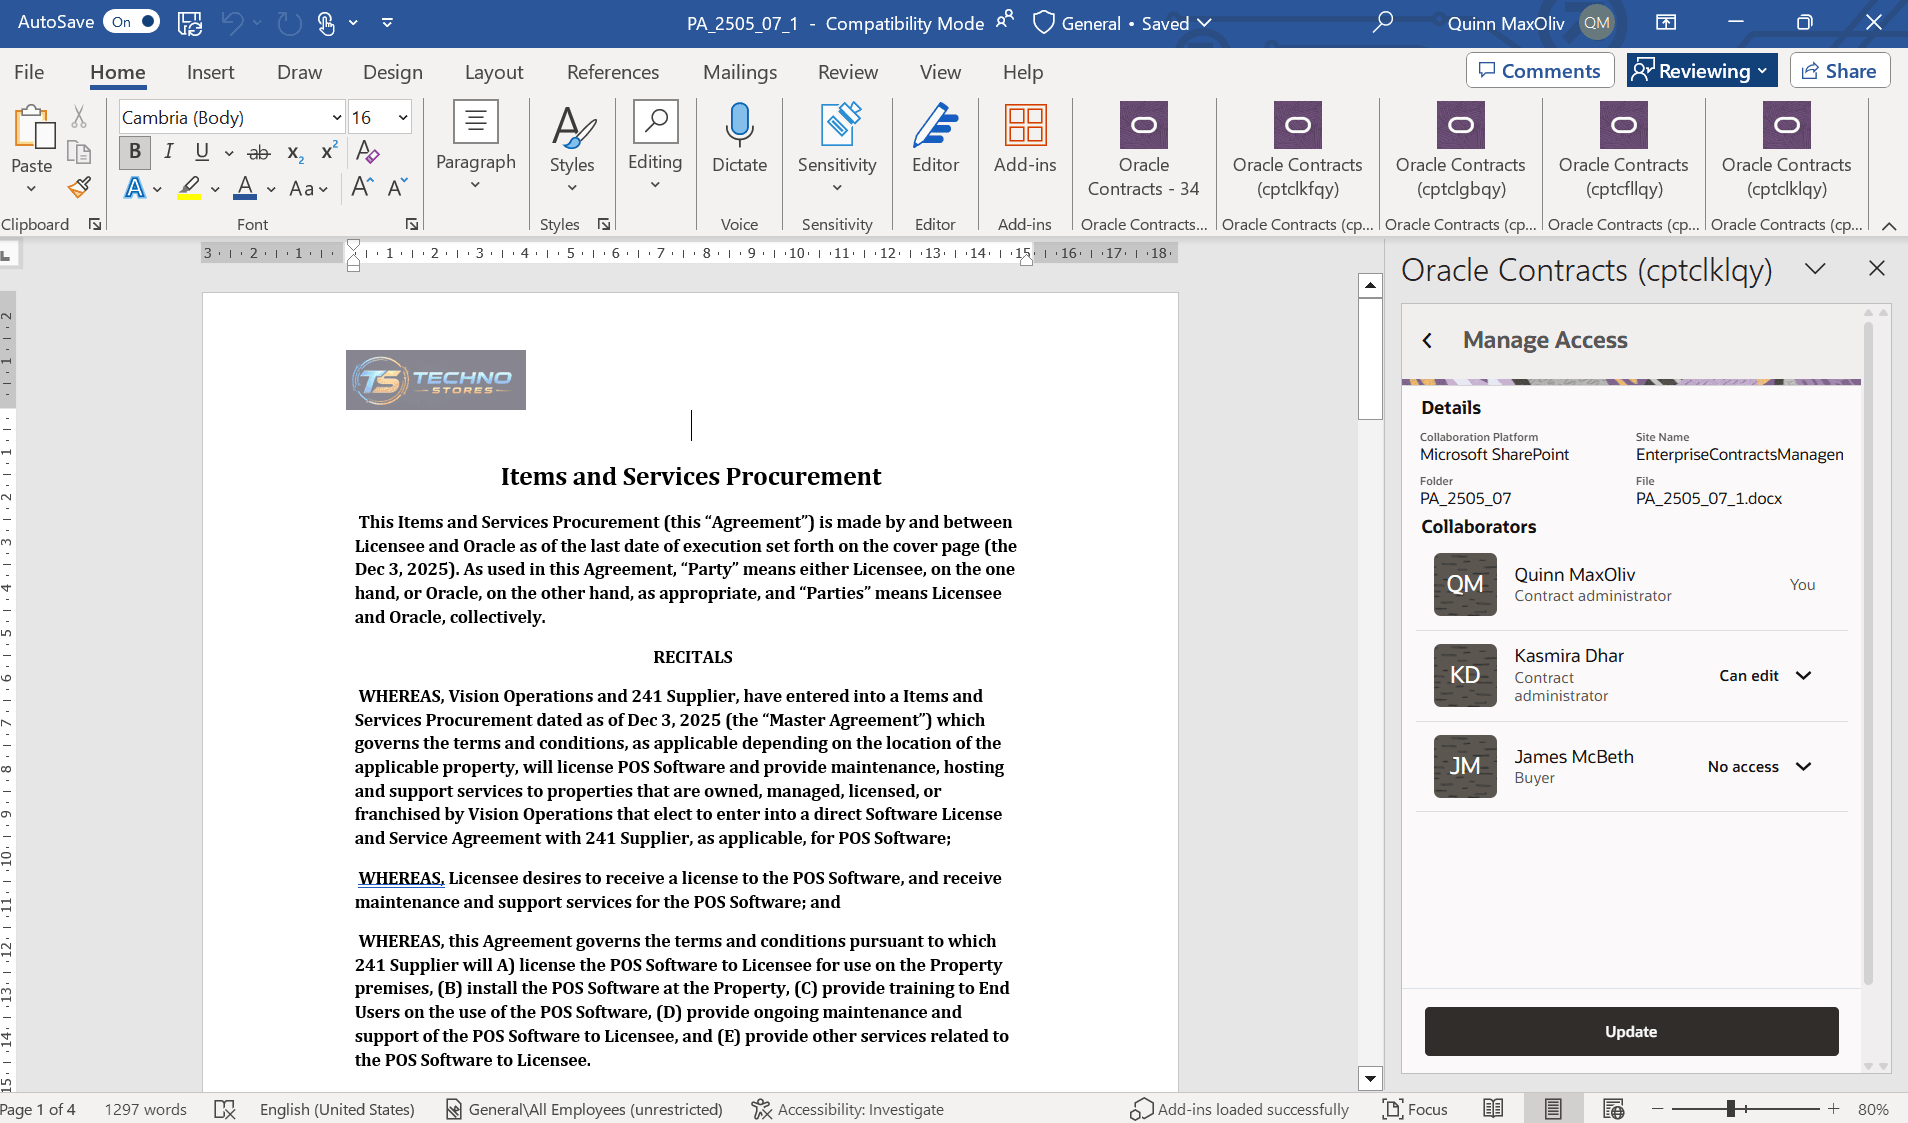
Manage Access Details
- Upload final terms
- When the review is complete, the lock owner uploads the final contract terms back to the application from the Word Add-in. This updates the contract terms in the application with the reviewed version.
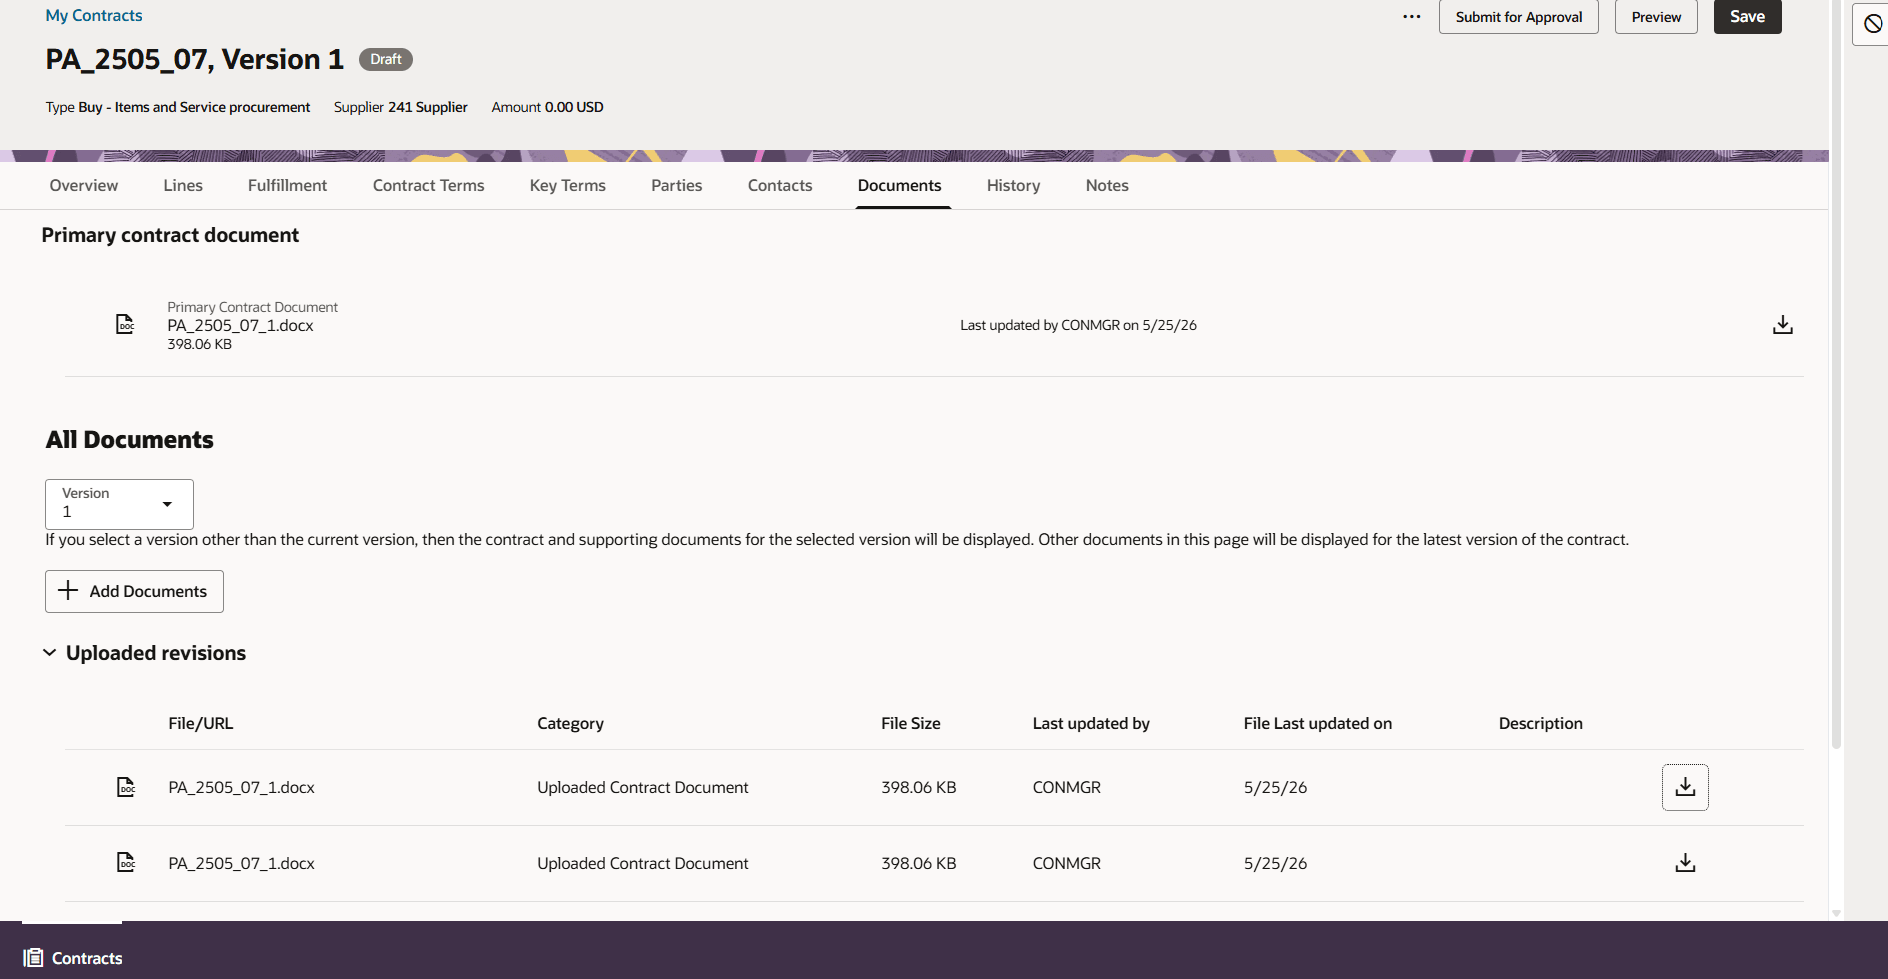
Uploaded Terms under Documents section
Note: When collaboration starts, the application automatically creates the required SharePoint folder and stores the contract terms file in the configured SharePoint site. If collaboration is initiated again for the same contract after uploading, the previous collaboration file is moved to an Archive folder for audit and reference, and the new contract terms file becomes the active working copy.
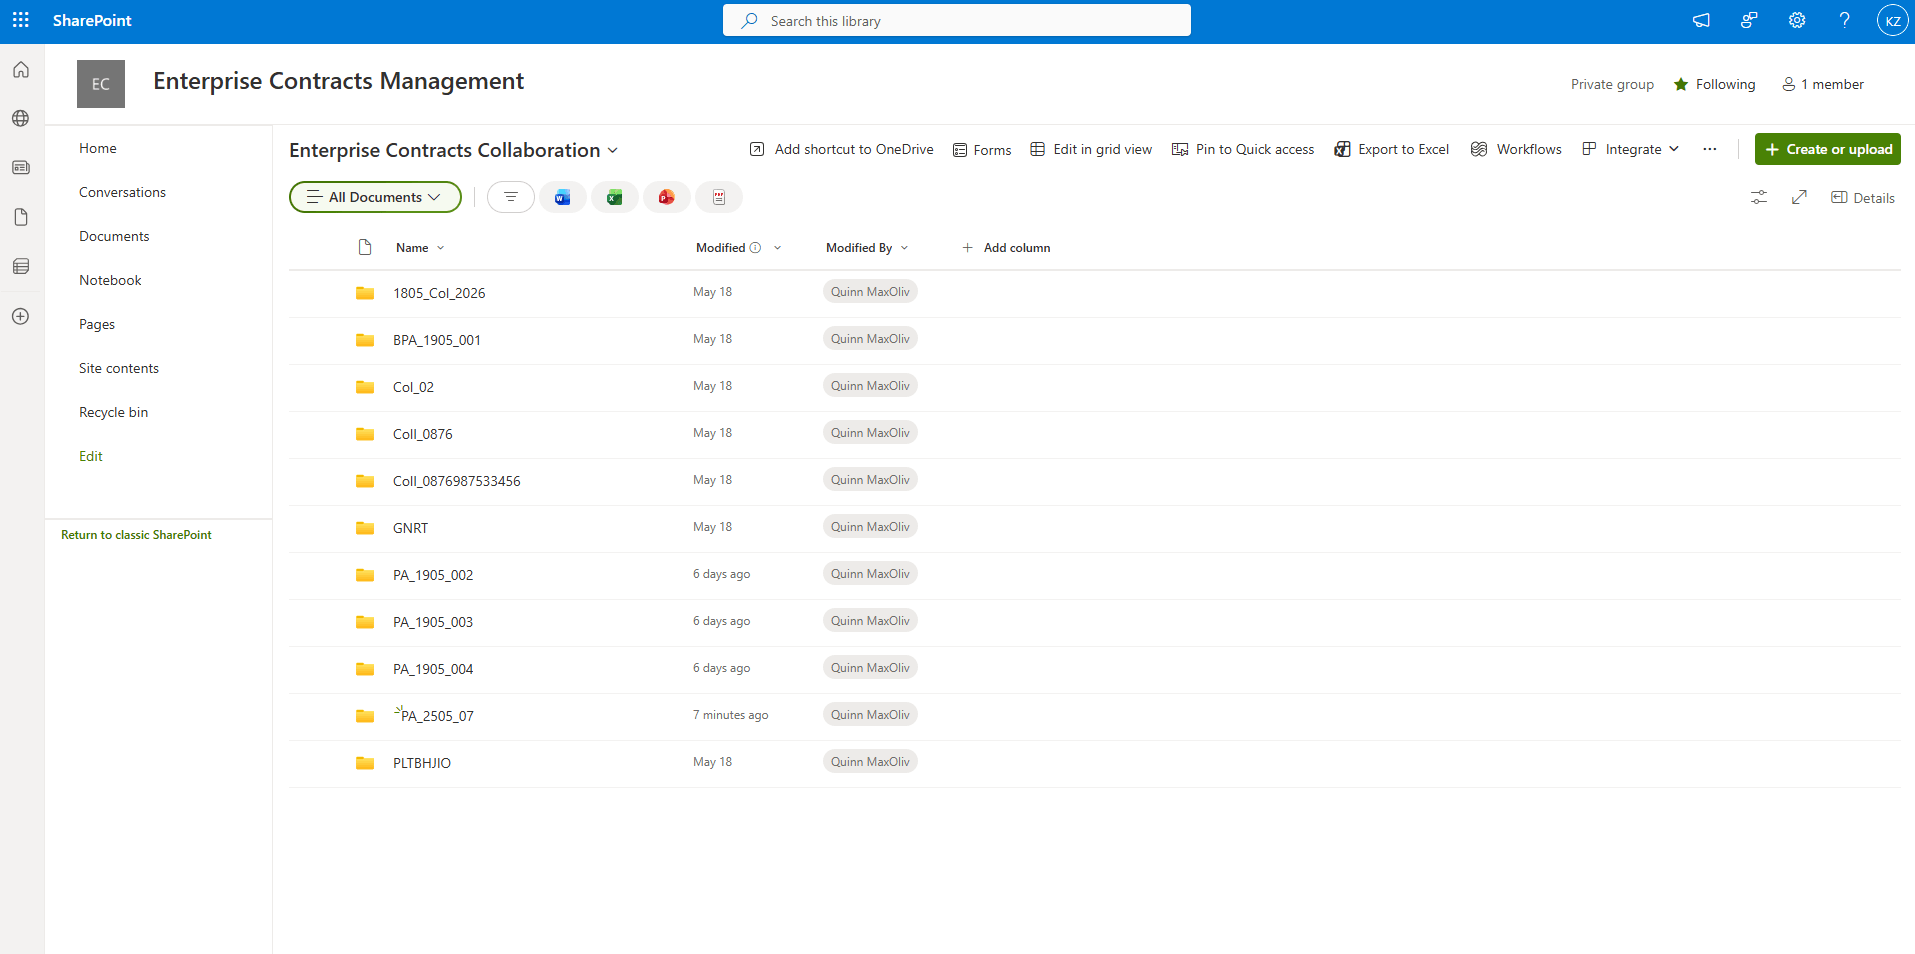
Folder Created in configured SharePoint Site
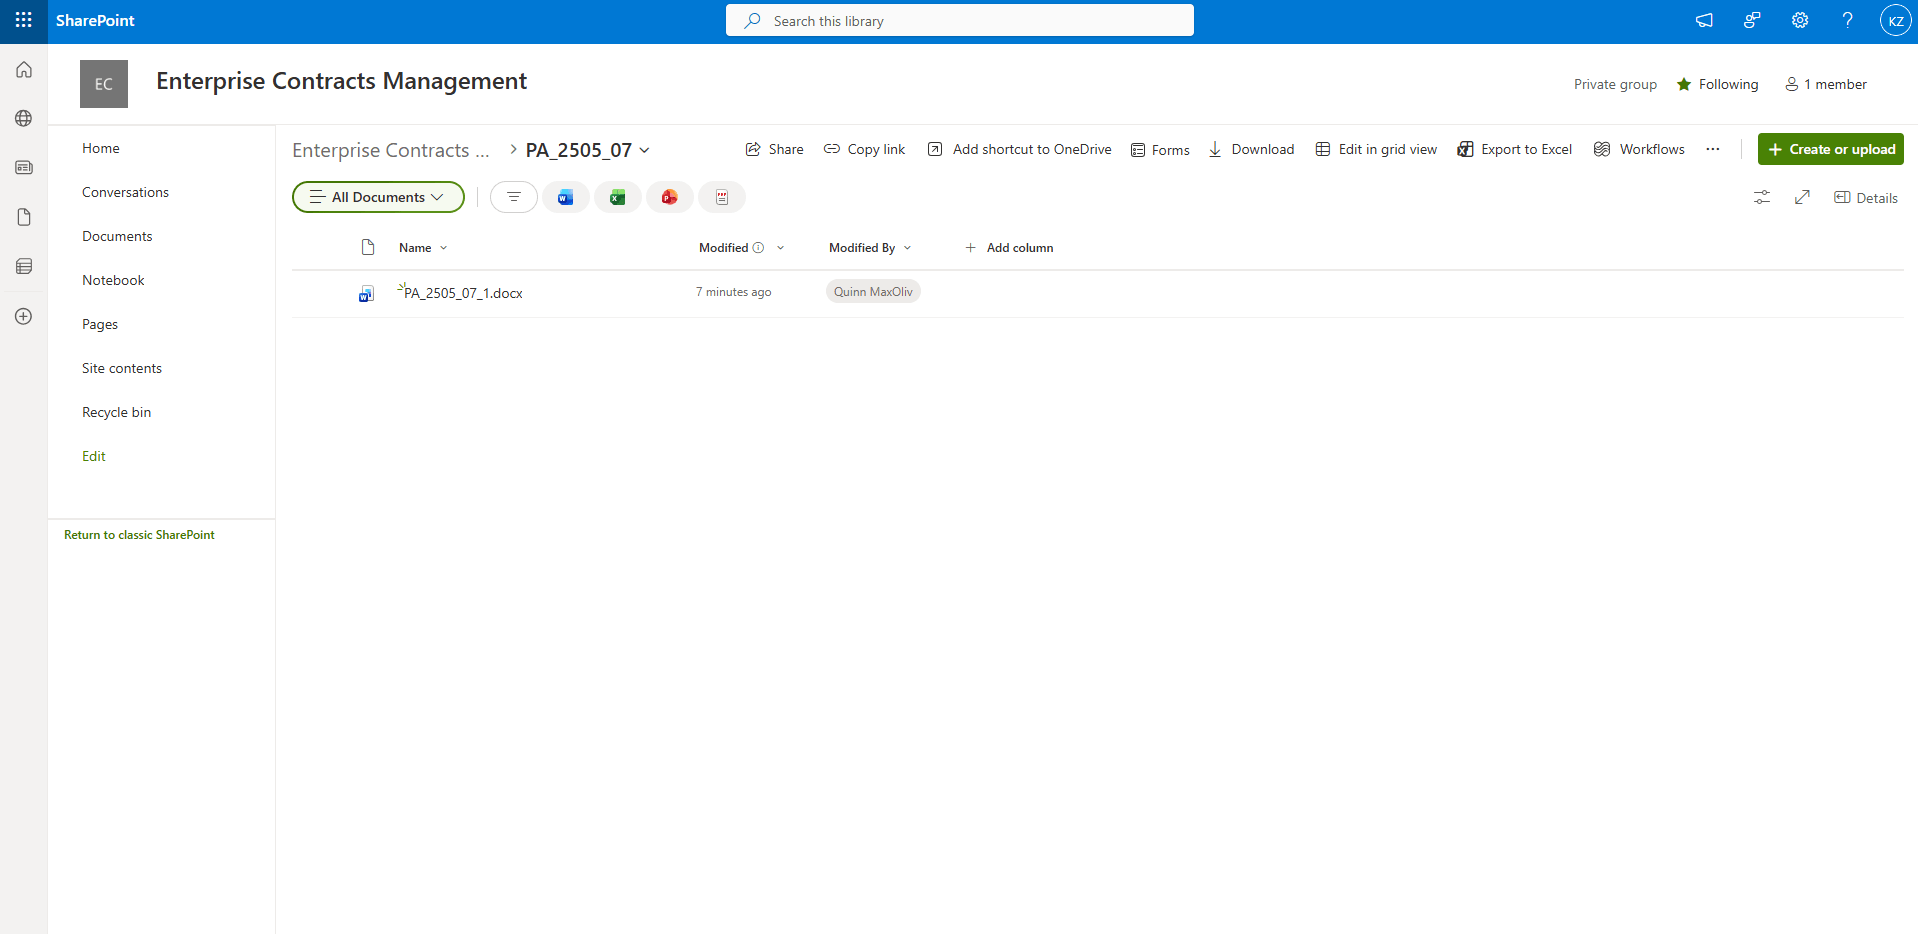
Terms posted in SharePoint Folder under the configured Site
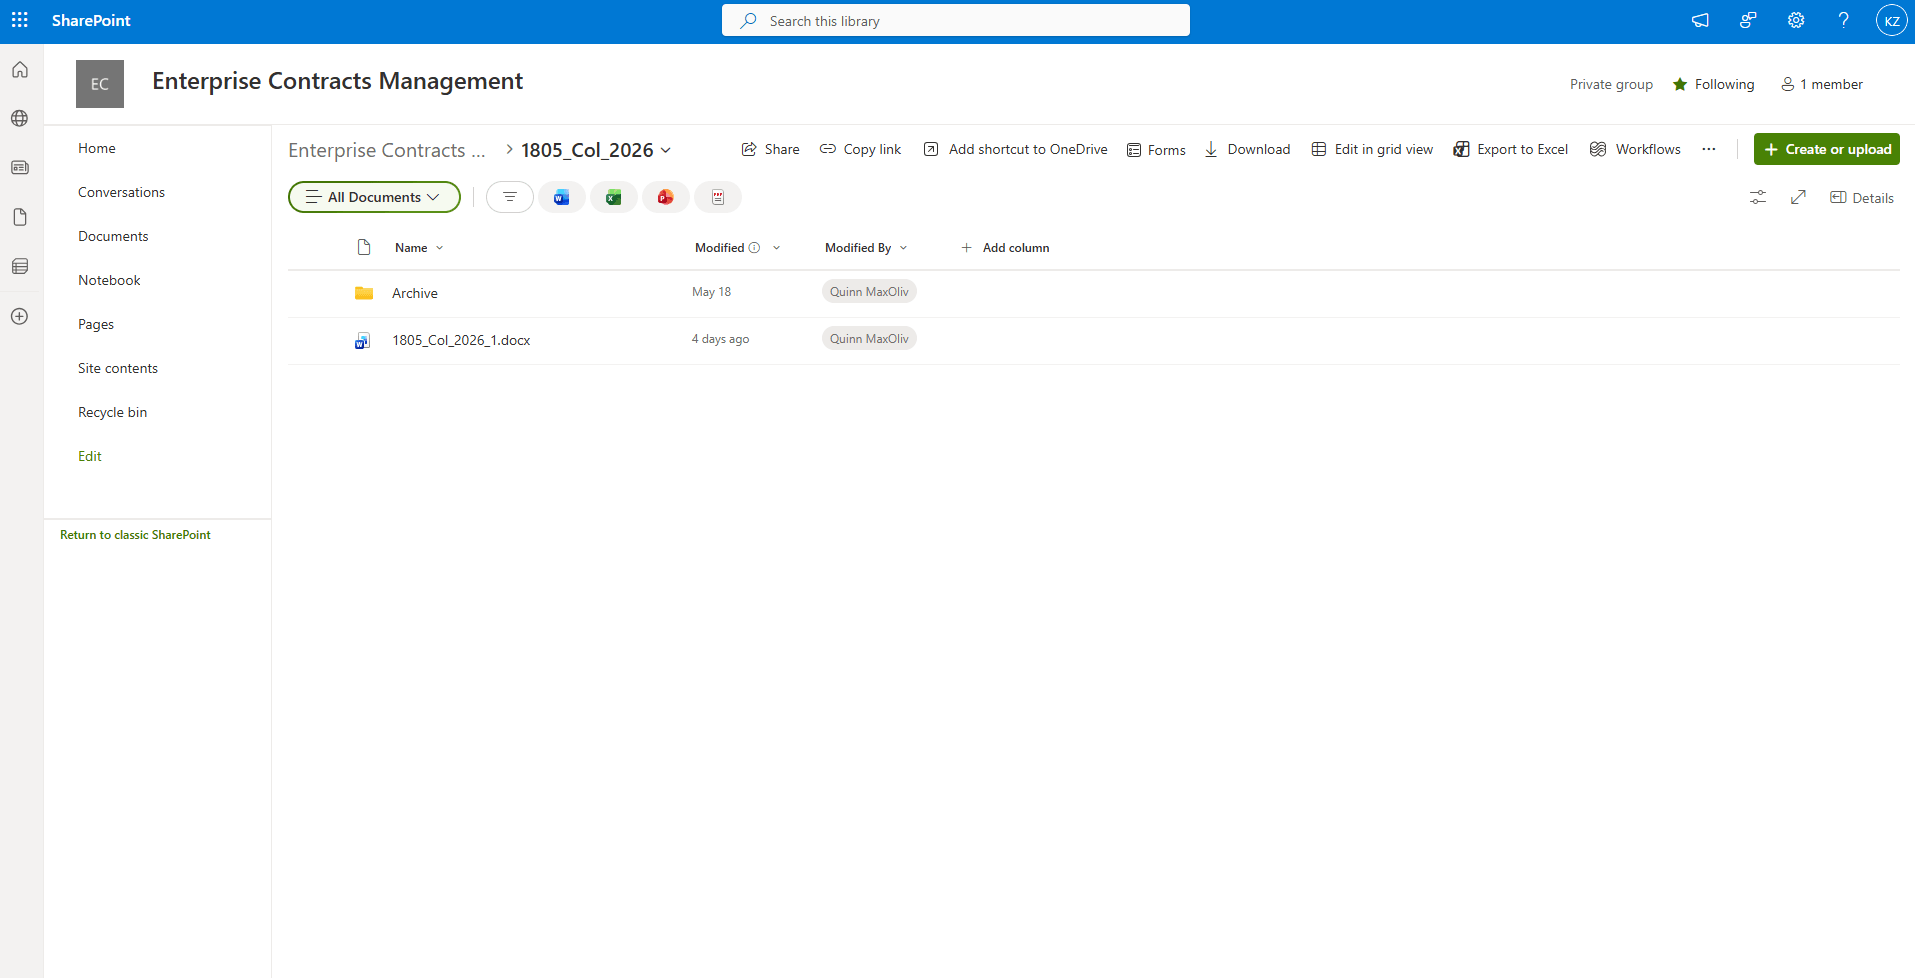
Archive Folder for preserving past collaboration Files
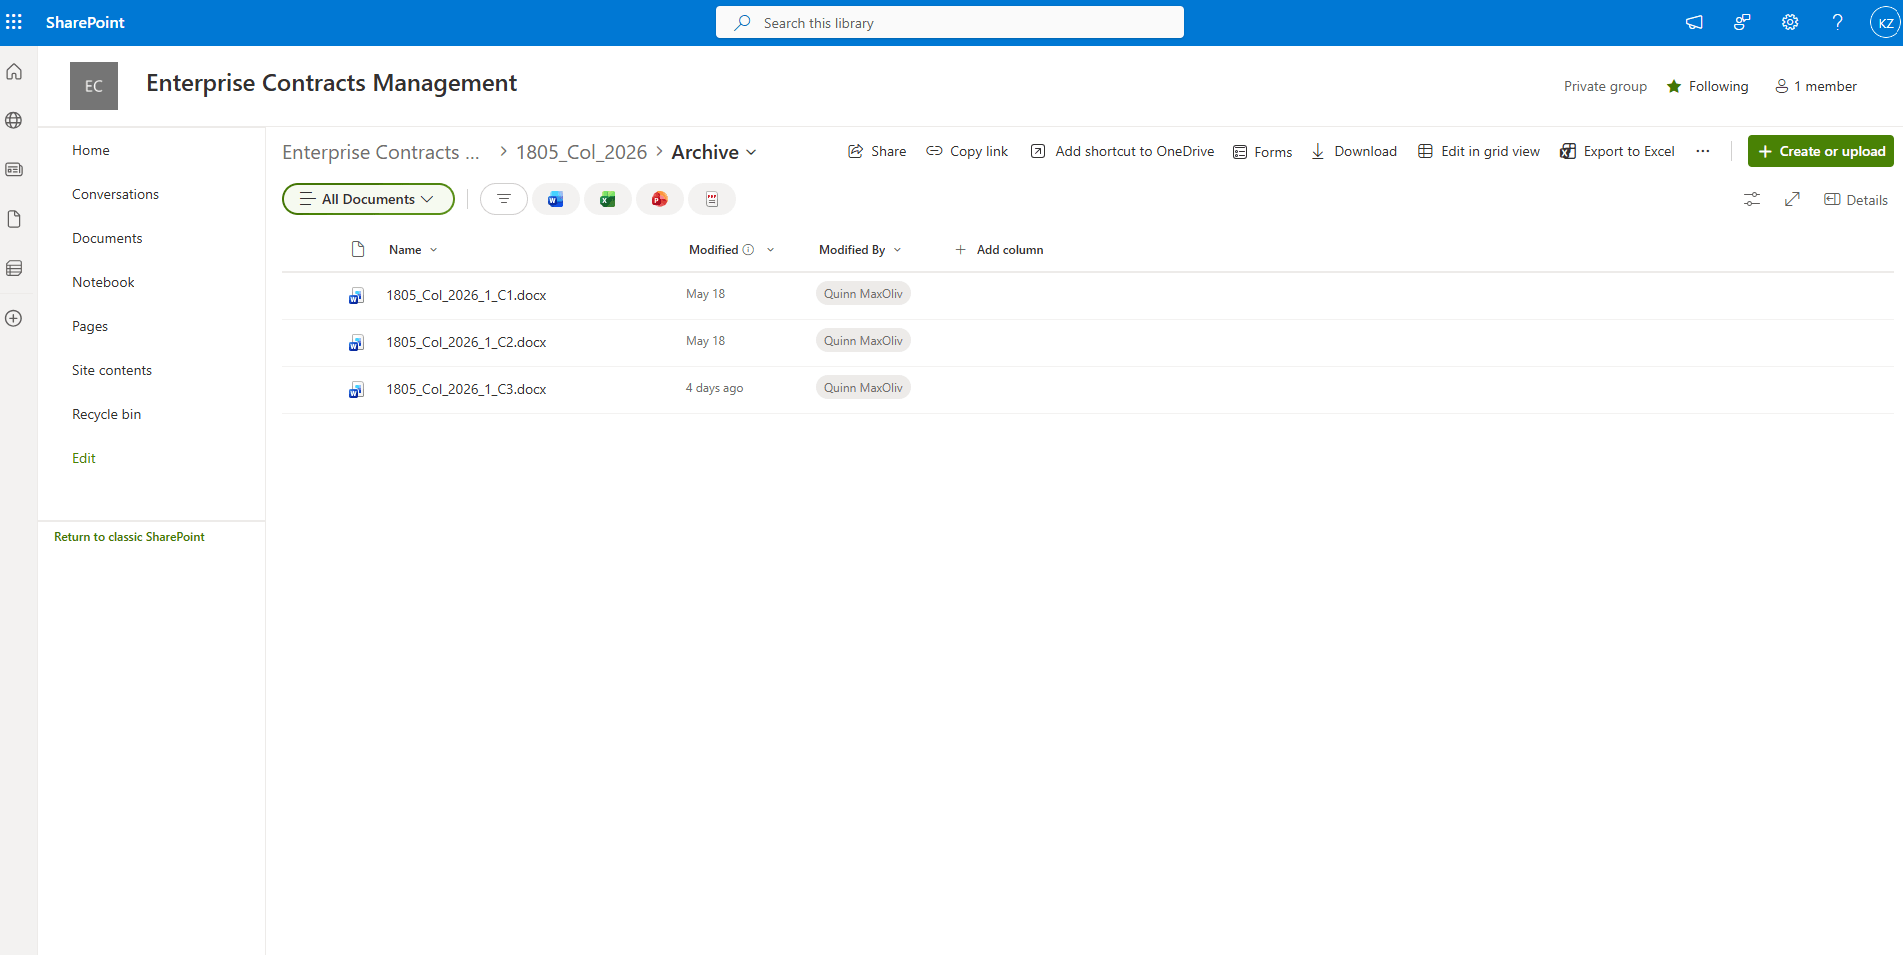
Past Collaboration Files under Archive Folder
- Faster contract reviews: Stakeholders can review and update the same SharePoint-hosted contract terms file, reducing delays caused by sending files back and forth over email.
- Fewer version conflicts: Collaboration happens on a single shared working copy, so teams don’t need to manually compare or consolidate changes from multiple document versions.
- Improved visibility and coordination: Comments, edits, assigned tasks, and tracked changes are captured in one place, making it easier for reviewers to see the latest updates and respond quickly.
Steps to enable and configure
Step 1:
Configure the Microsoft Azure Application
Register the Application
As an Azure administrator, sign in to the Microsoft Entra admin center: https://entra.microsoft.com/#home
- On the home page, search for App registrations.
- Click App registrations.
- Click New registration.
-
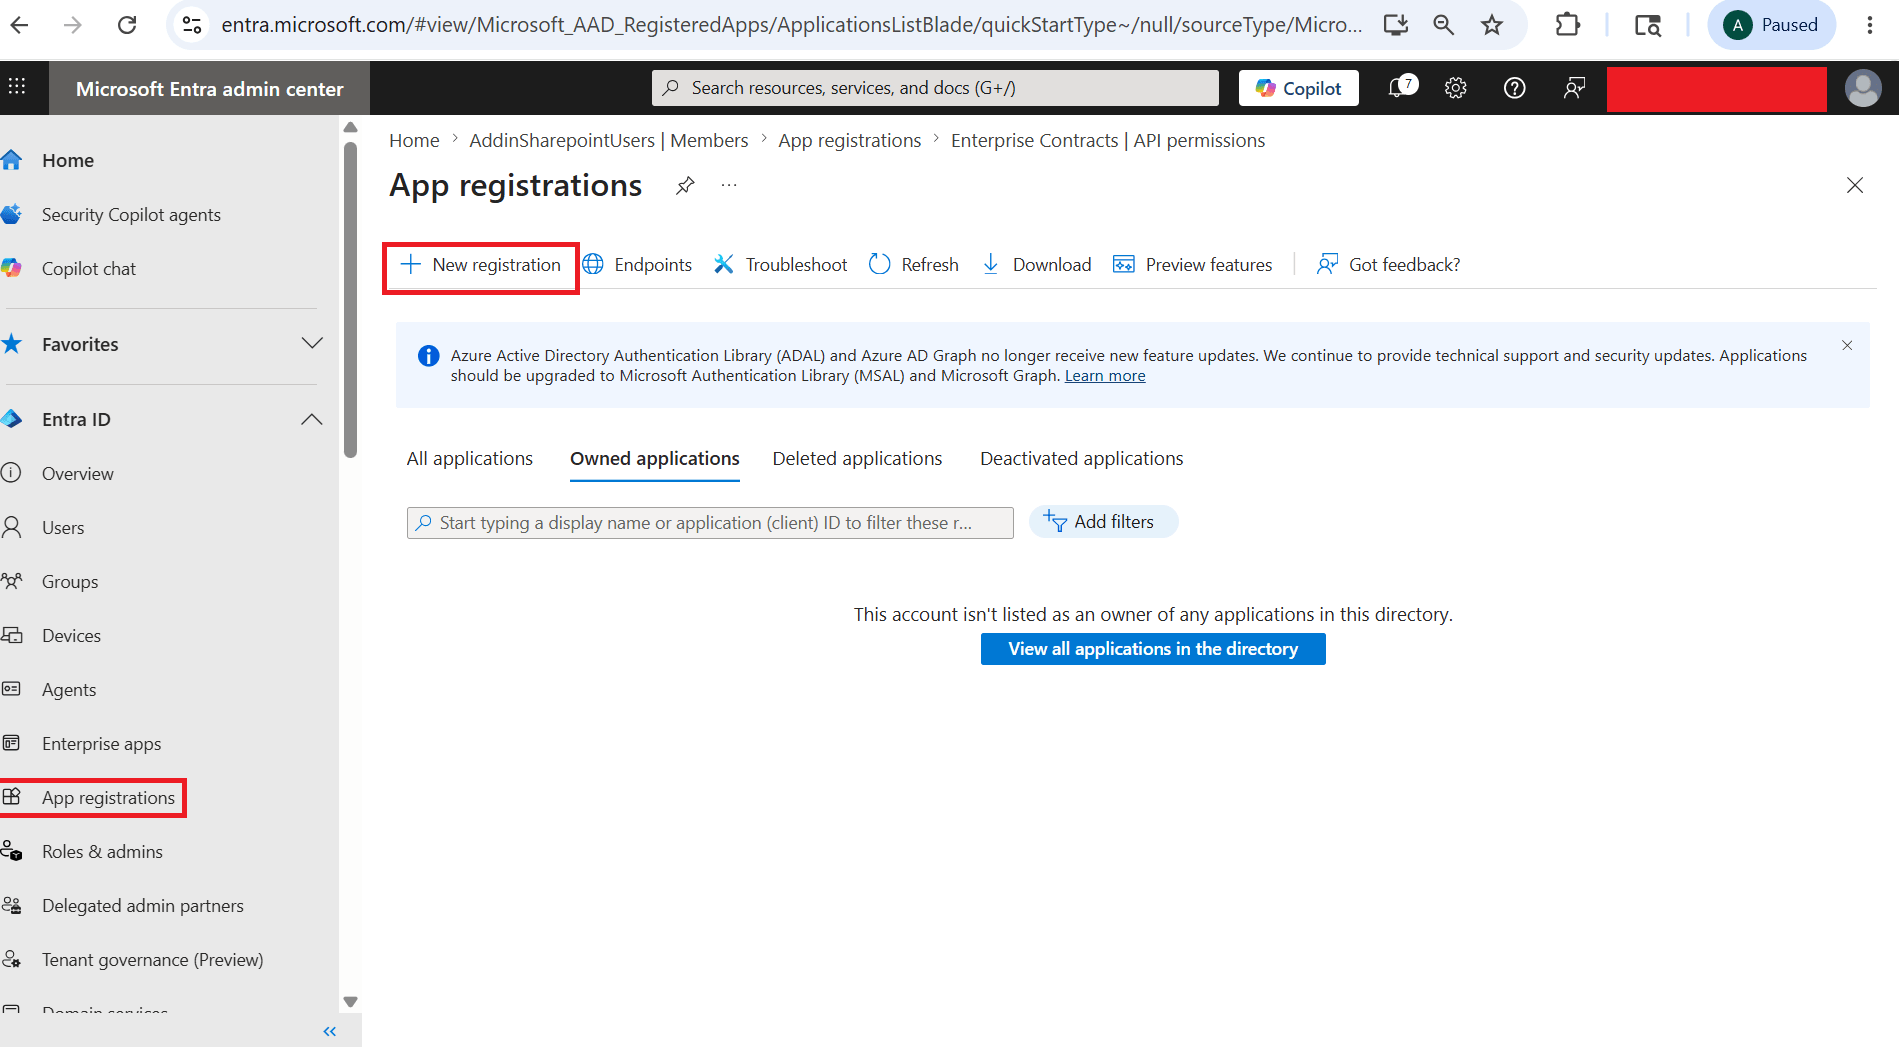
Click on New Registration from App Registrations
-
- On the Register an application page, enter a name for the application.
-
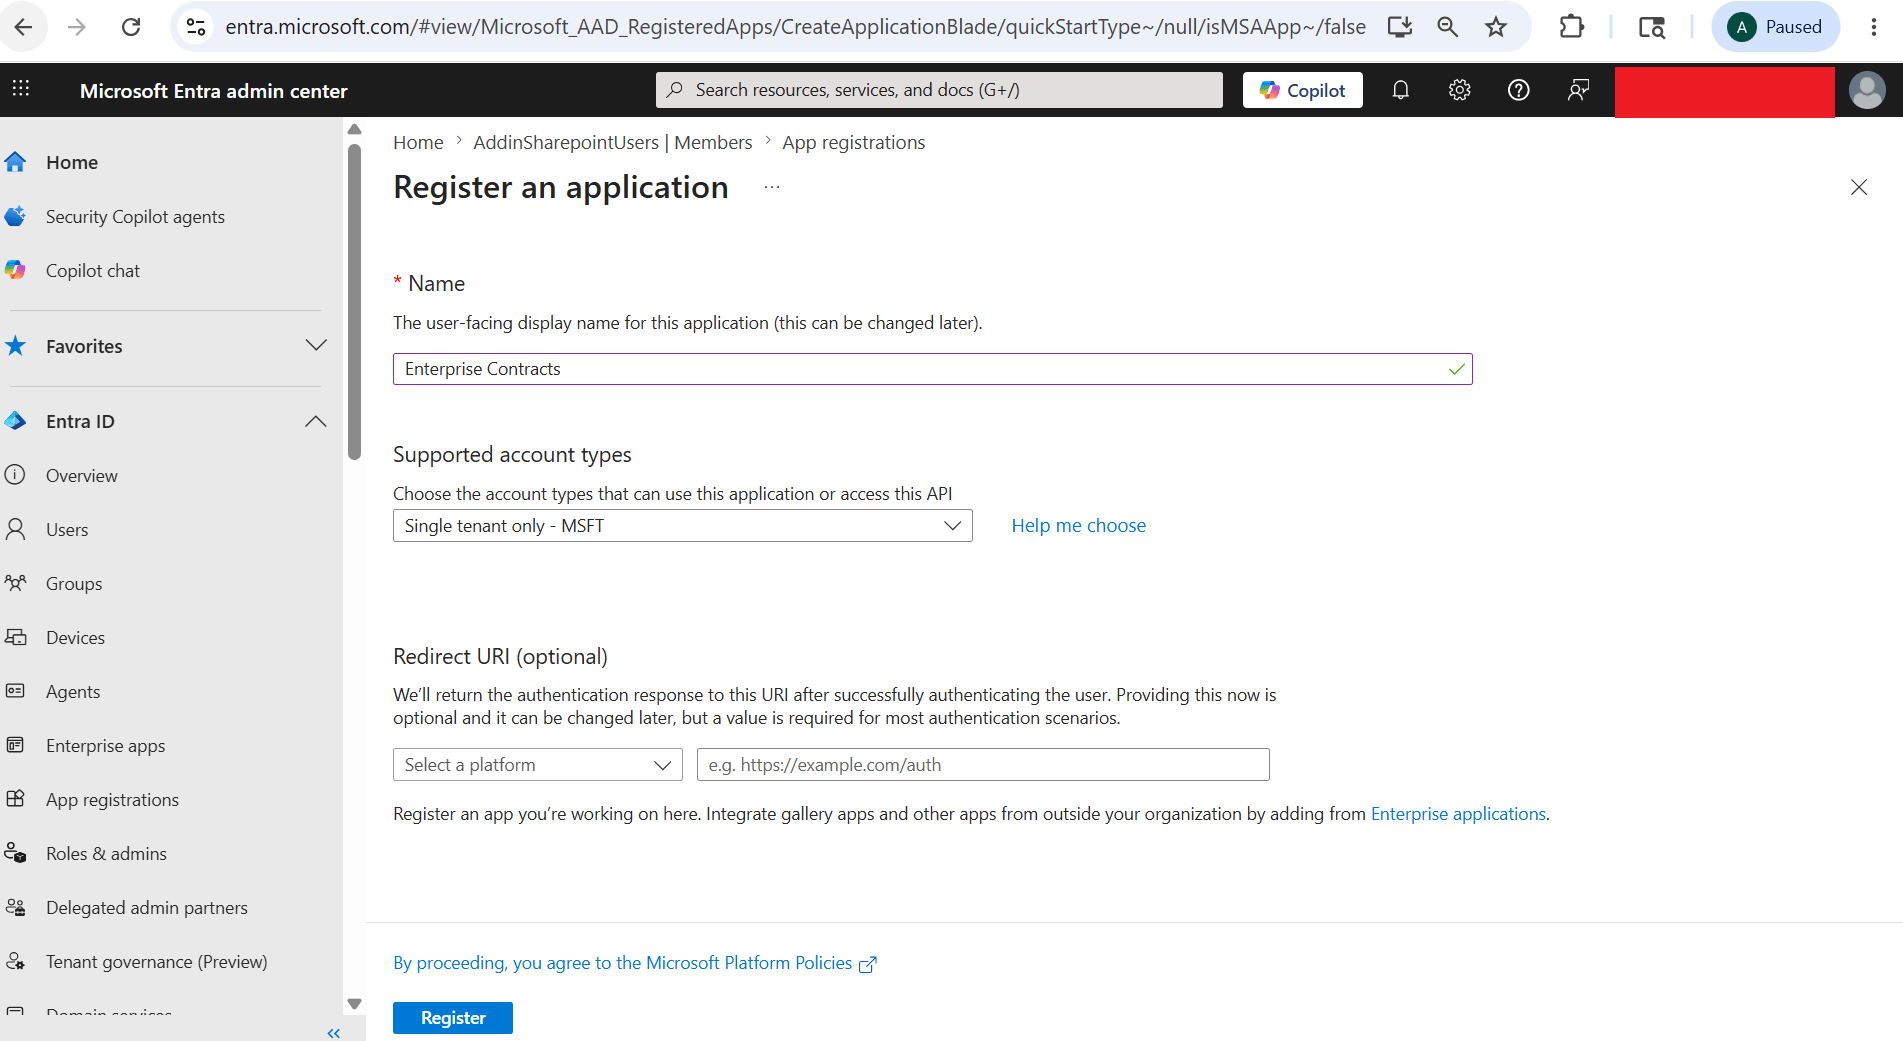
Enter Application Name
-
- For Supported account types, make sure Single tenant only - MSFT is selected.
- Skip Redirect URI for now.
- Click Register.
- After registration, you’re redirected to the Overview page.
- Copy these values for later use:
- Application (client) ID
- Directory (tenant) ID
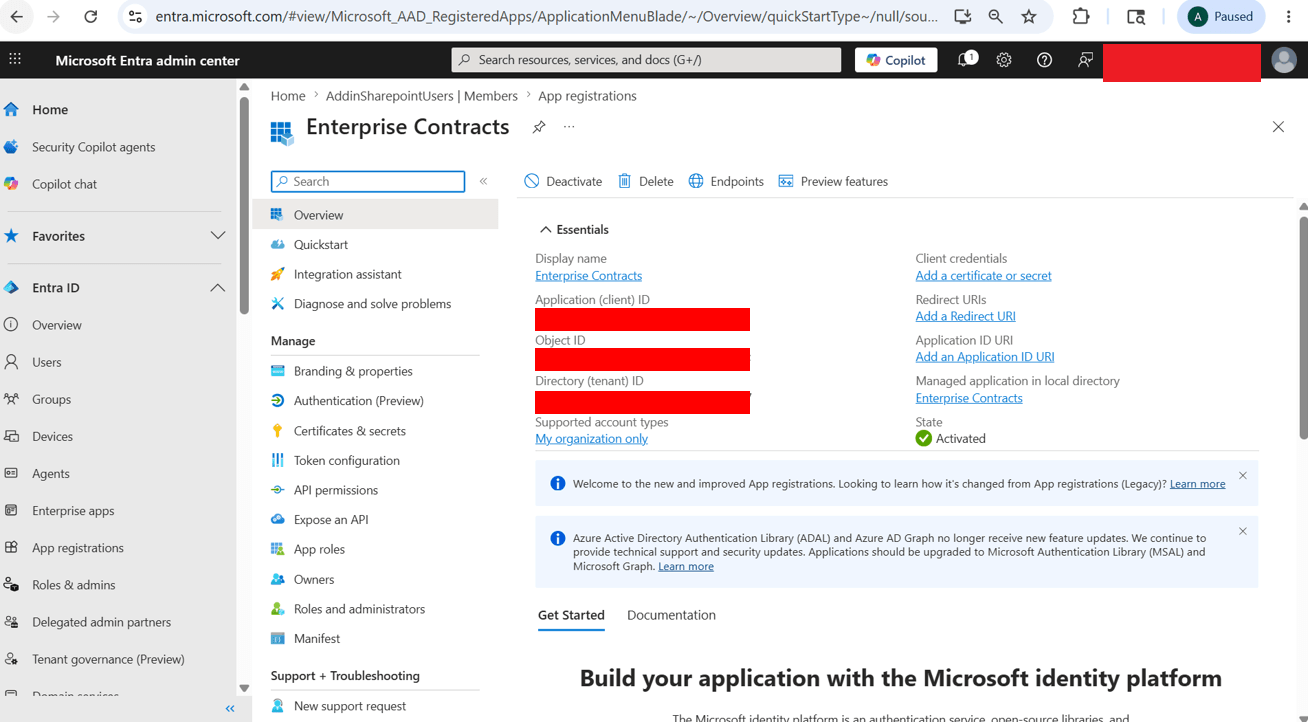
Overview Tab after Registration
Add Redirect URIs
The redirect URI is needed to redirect the Word Add-in to the appropriate page after the required details are fetched from the Microsoft response during sign-in.
- In the navigation pane, click Authentication (Preview).
- Click Add Redirect URI.
-
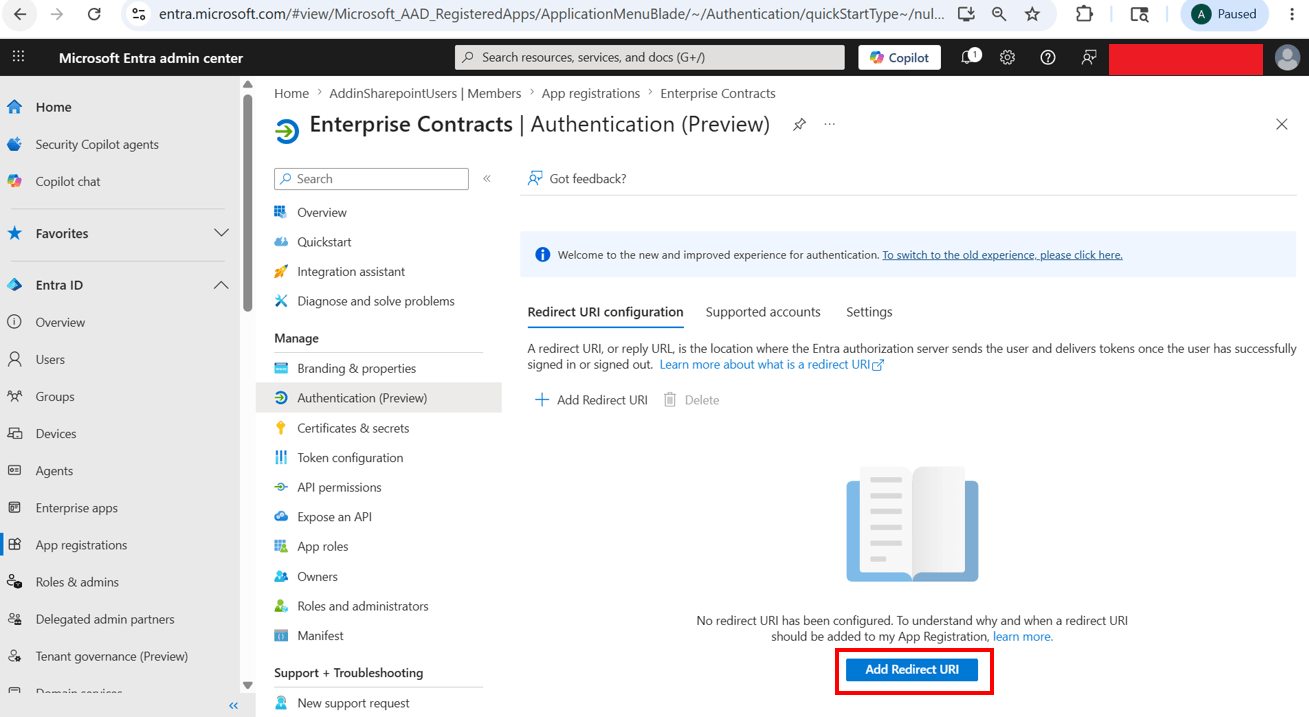
Click on Add Redirect URI from Authentication (Preview)
-
- On the Configure platforms page, click Web.
-

Click on Web
-
- In the Redirect URIs section of the Configure Web window, add the required URI.
- Format: https://<host>/fscmUI/o365Contracts/web/msAuthCodeRedirect.html
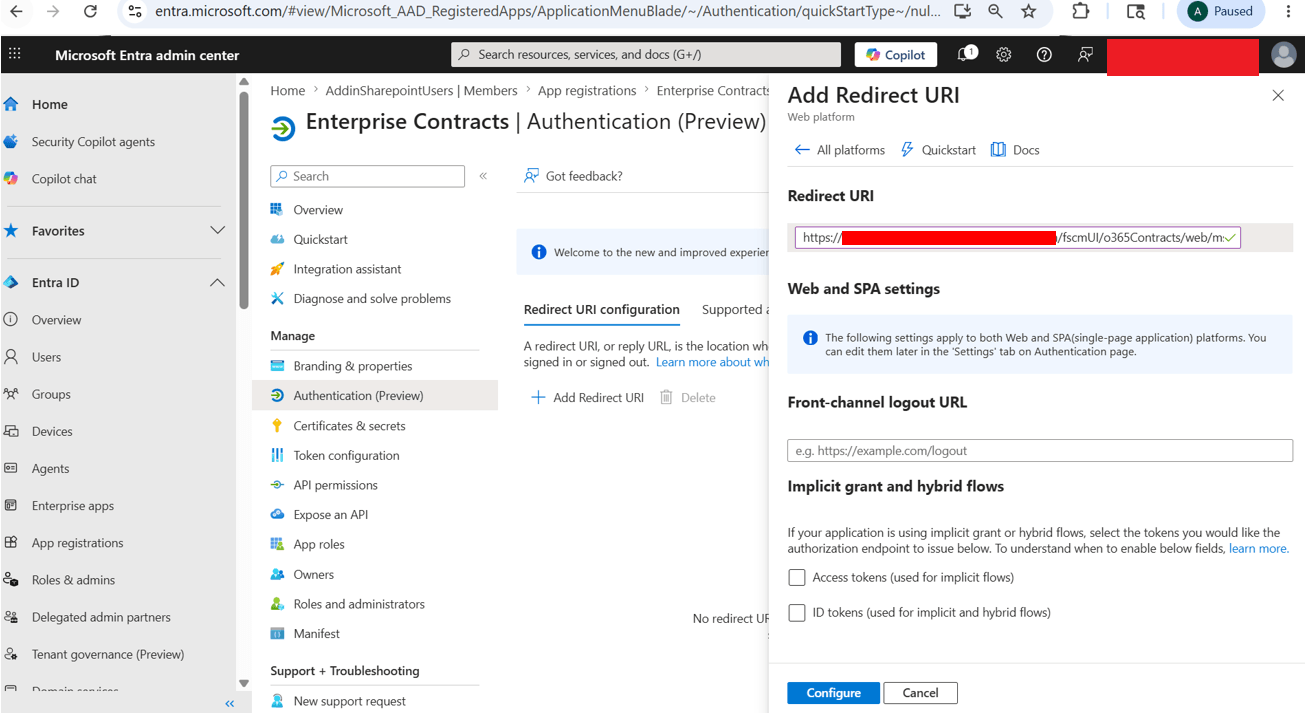
Configure Redirect URI
- Click Configure.
- Click Cancel on the drawer to return to the main page.
-
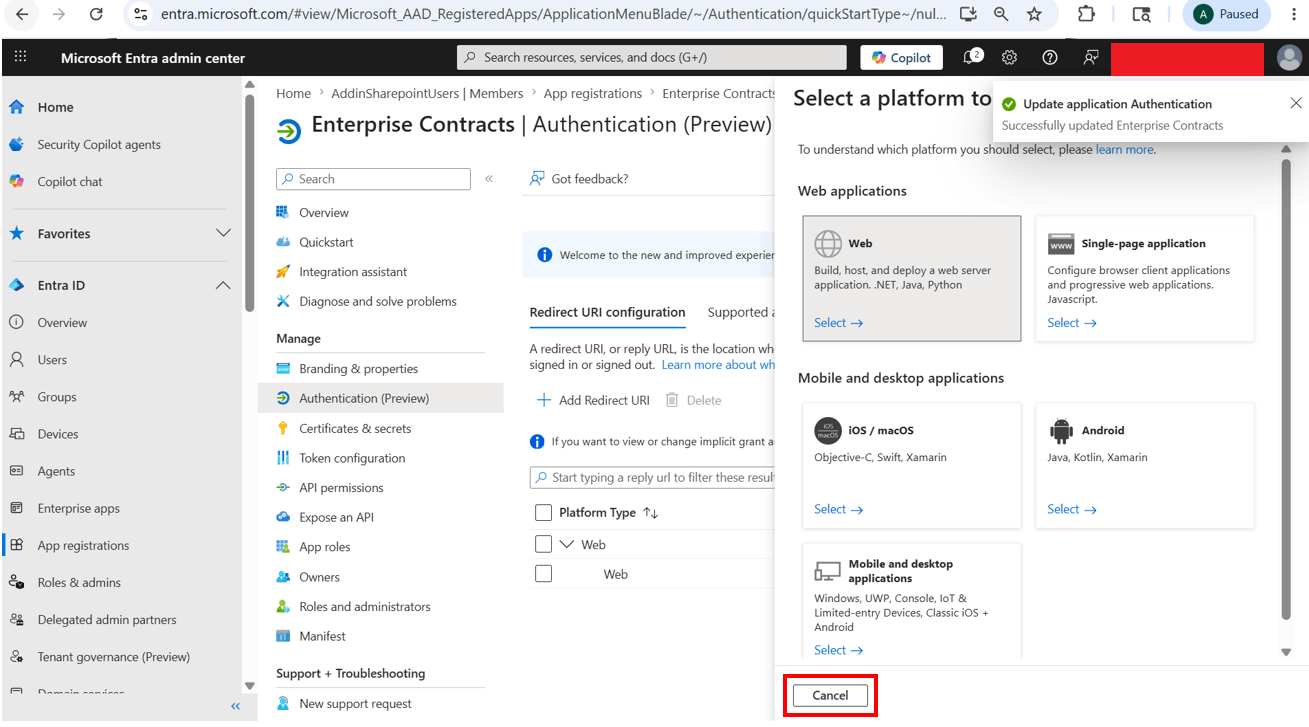
Click on Cancel
-
- Click Settings.
-
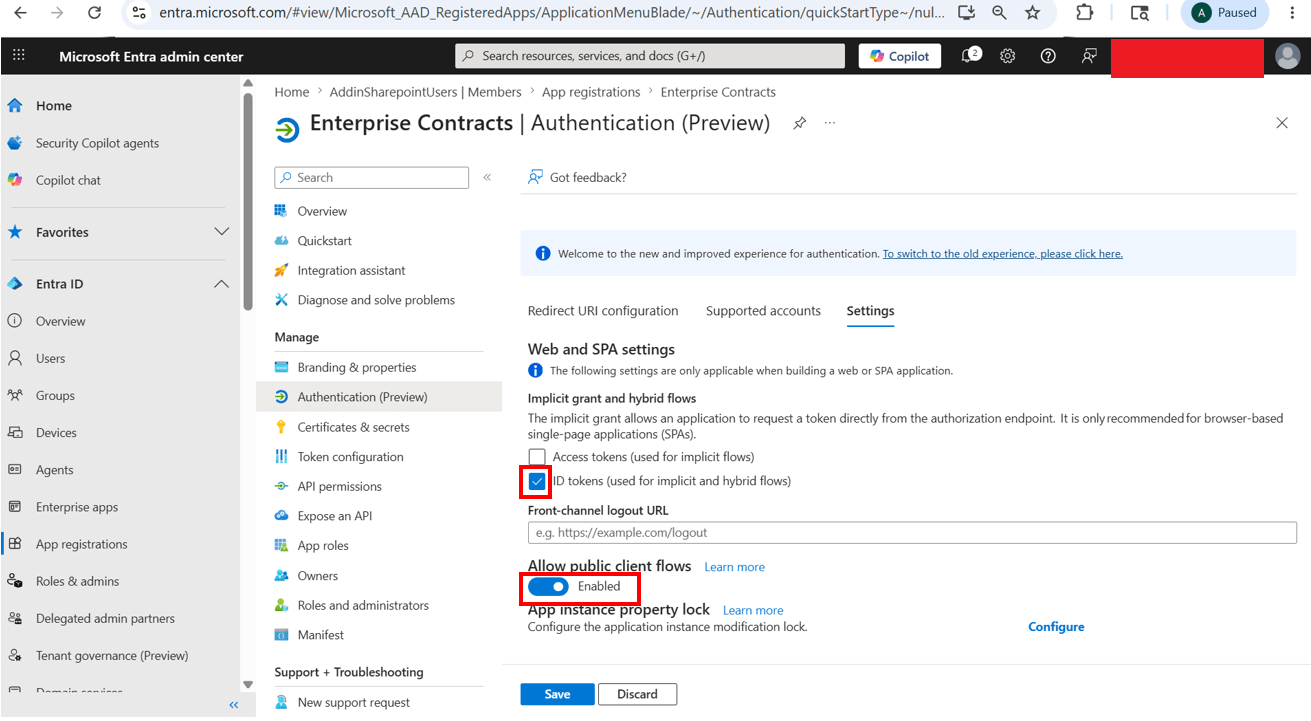
Checkmark ID Tokens and Enable Allow Public client flows from Settings tab
-
- Make sure ID tokens (used for implicit and hybrid flows) is selected.
- Allow public client flows is enabled
- Click Save.
Specify Client Secret and Expiry
- In the navigation pane, click Certificates & secrets.
- On the Certificates & secrets page, in the Client secrets section, click New client secret.
-
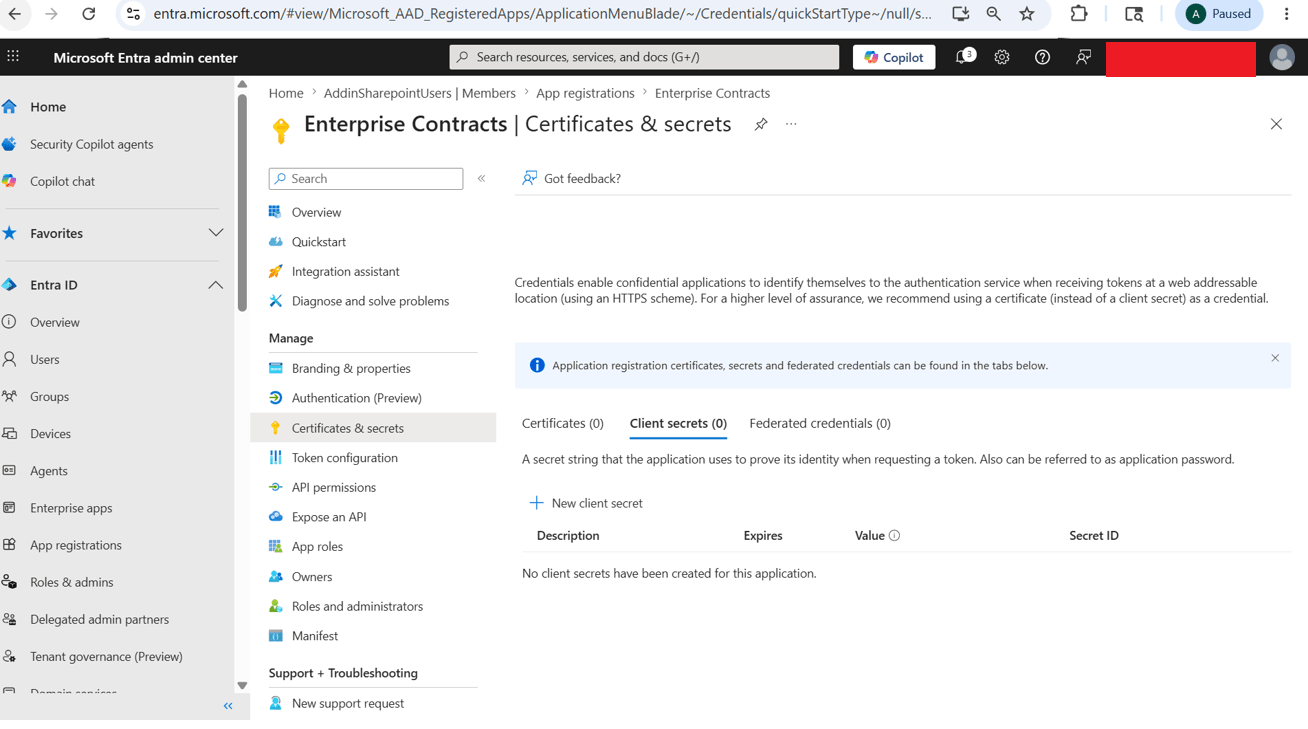
Go to Client Secrets from Certificates & Secrets
-
- In the Add a client secret window, enter this description: Eg: Contract Addin client secret
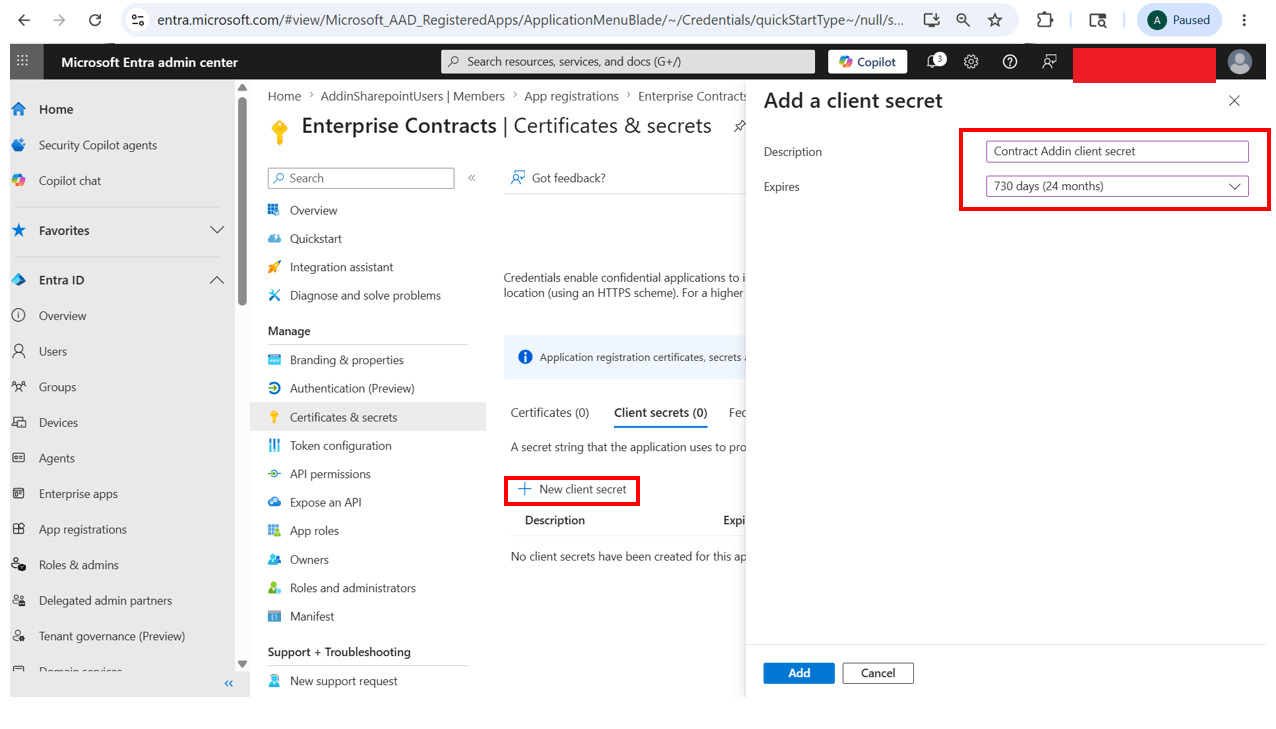
Click on New client secret and add description, expiry details
- Select a duration for the client secret expiration. Recommended duration: 24 months
- If you select Custom, enter the start and end dates. The dates must be within a 24-month time span.
- Click Add.
- Copy the generated string from the Value field. This is the Client Secret Value. Save it for later use.
-
Note: Copy the client secret value immediately after it is generated. This value is visible only once. If you view it later, it appears as a masked entry and can’t be retrieved.
-
- Copy the Client Secret Expires date. Save this date for later use.
-
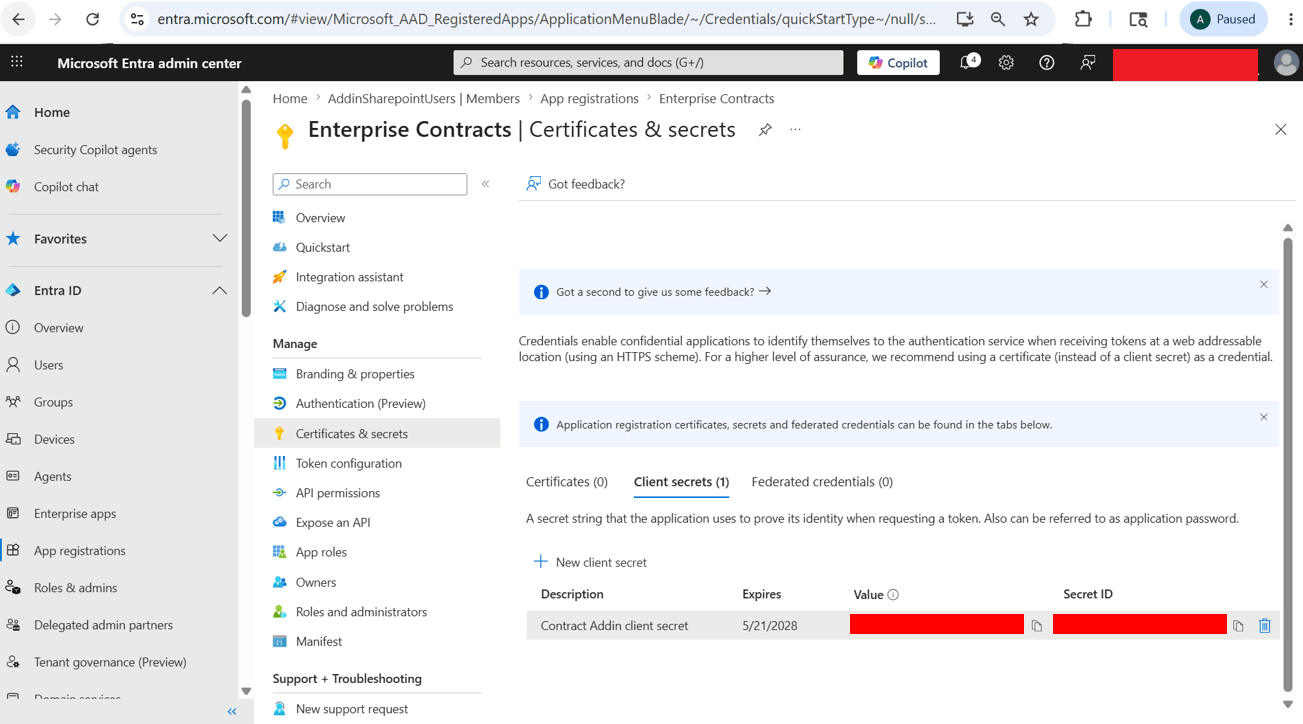
Copy and Save Expiry date and value
-
Add API Permissions
- In the navigation pane, click API permissions.
- Click Add a permission.
-
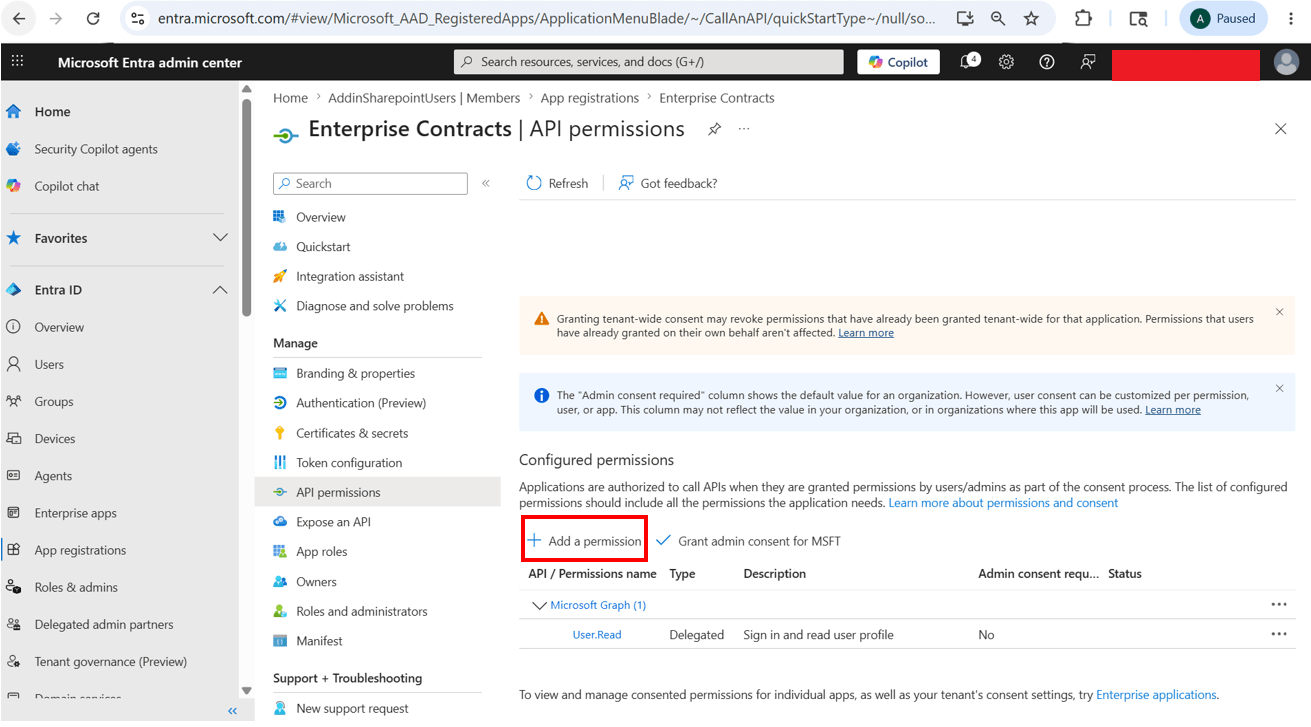
Click on Add a Permission from API Permissions
-
- On the Request API permissions page, on the Microsoft APIs tab, select Microsoft Graph.
-
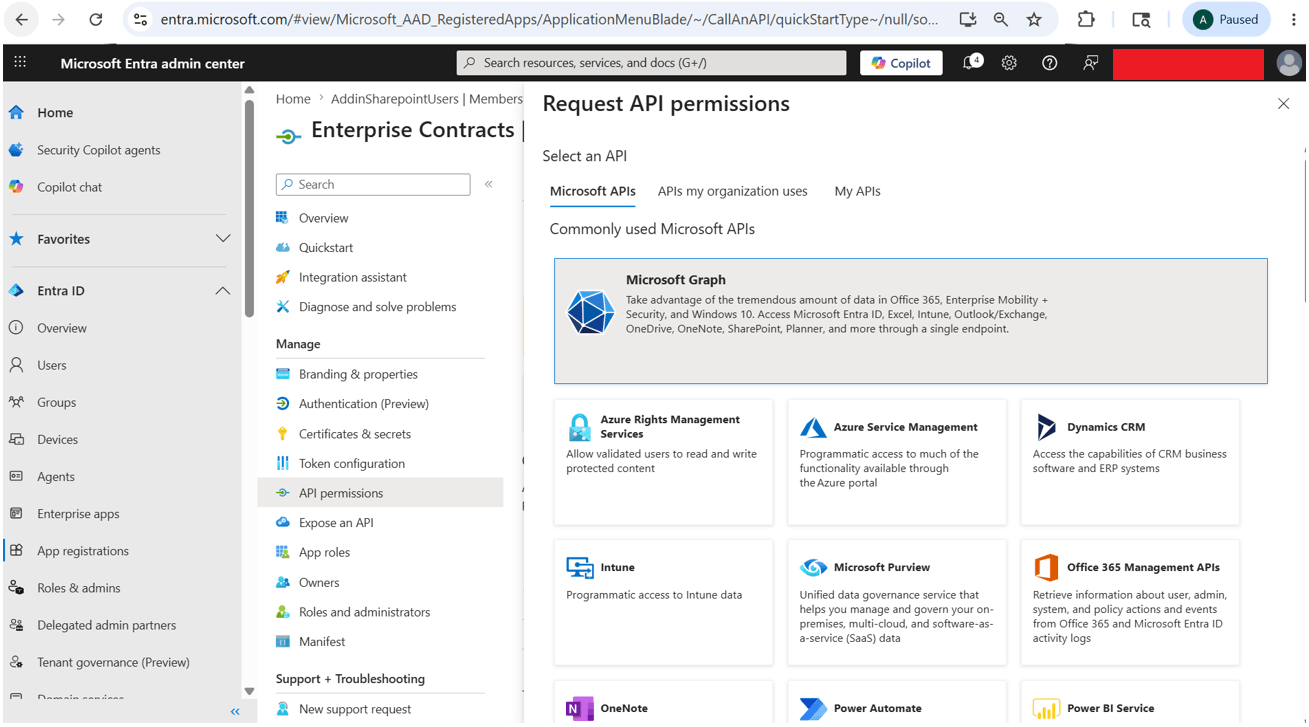
Click on Microsoft Graph
-
- Click Delegated permissions.
-
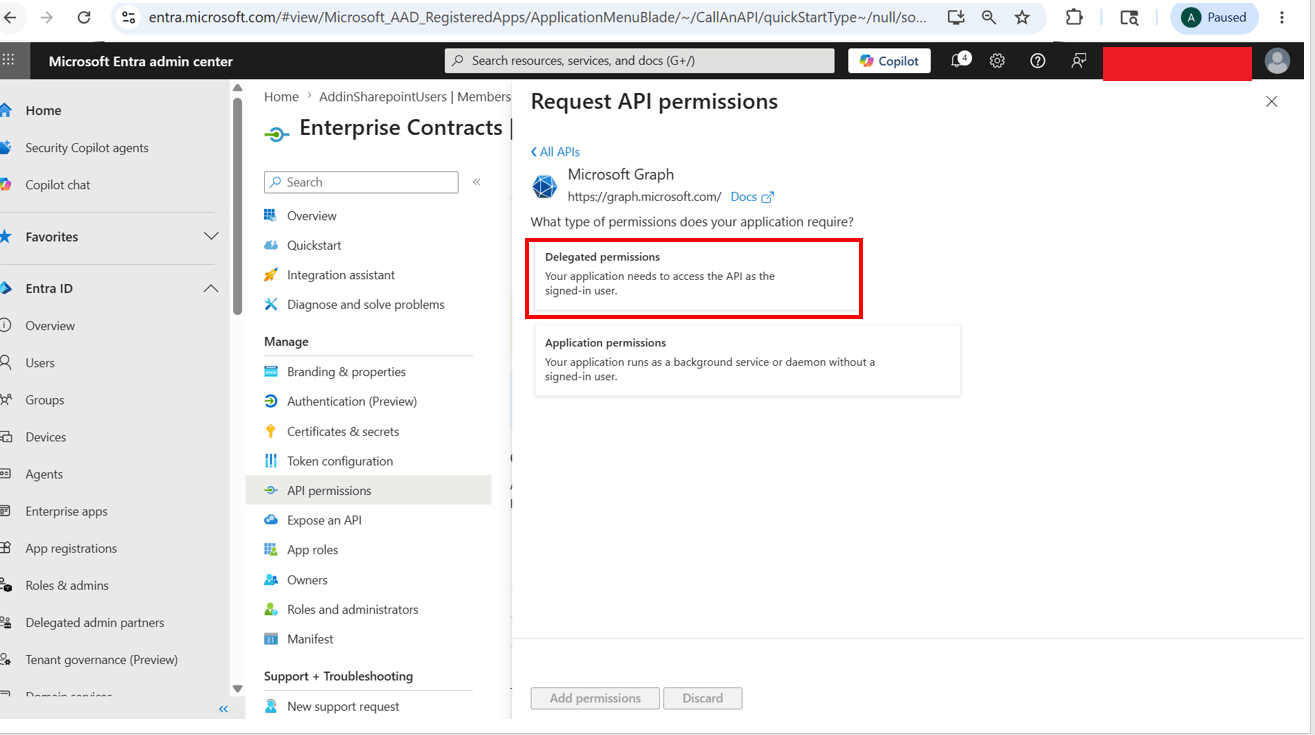
Select Delegated Permissions
-
- Add these permissions:
Permissions to be added
| Permission | Description |
|---|---|
| openid | Sign users in |
| View users' email address | |
| profile | View users' basic profile |
|
Sites.ReadWrite.All |
Edit or delete items in all site collections |
|
Files.ReadWrite |
Have full access to user files |
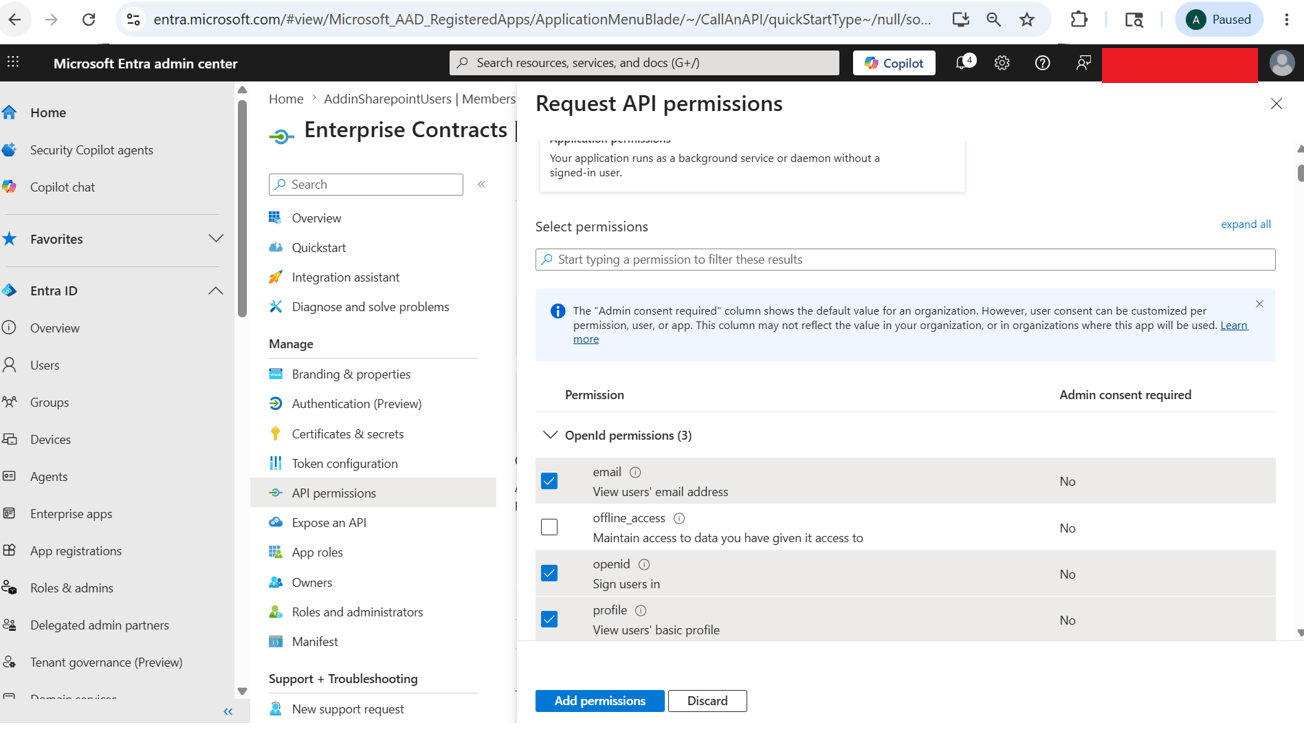
Search and Add the required permissions
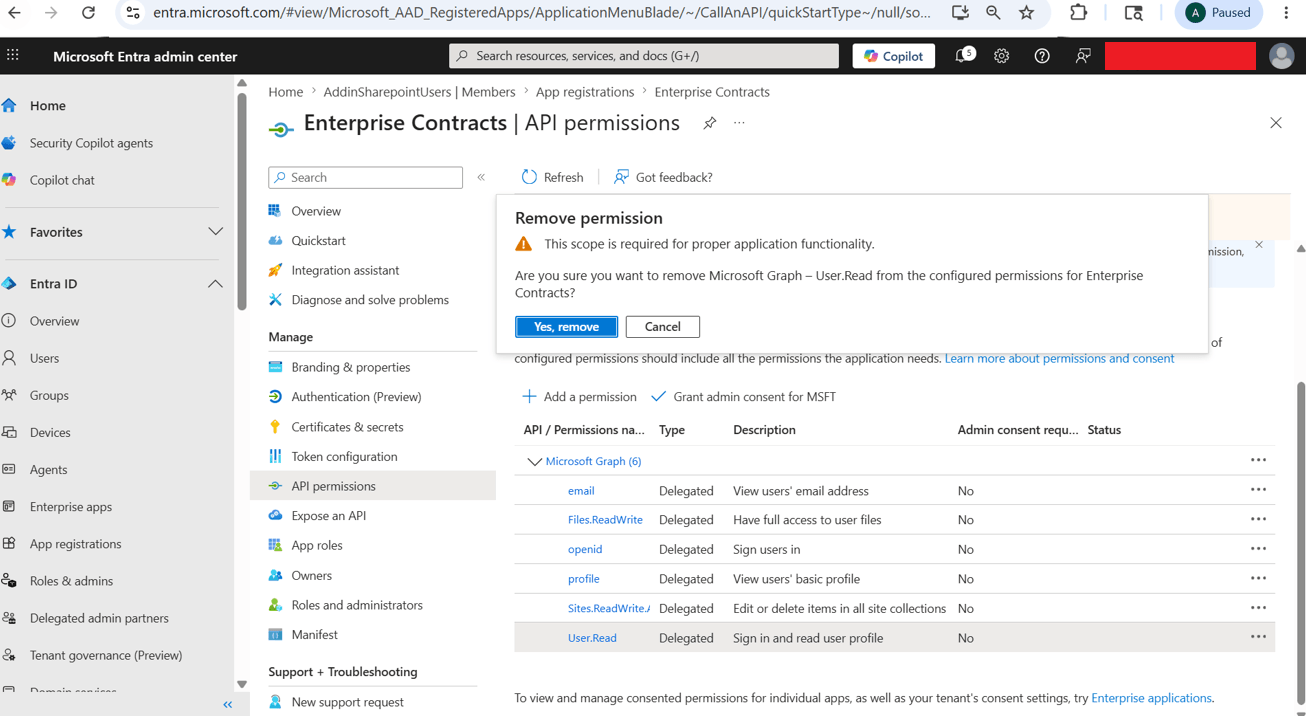
Remove User.read permission if it is added by default
- Click Add Permissions.
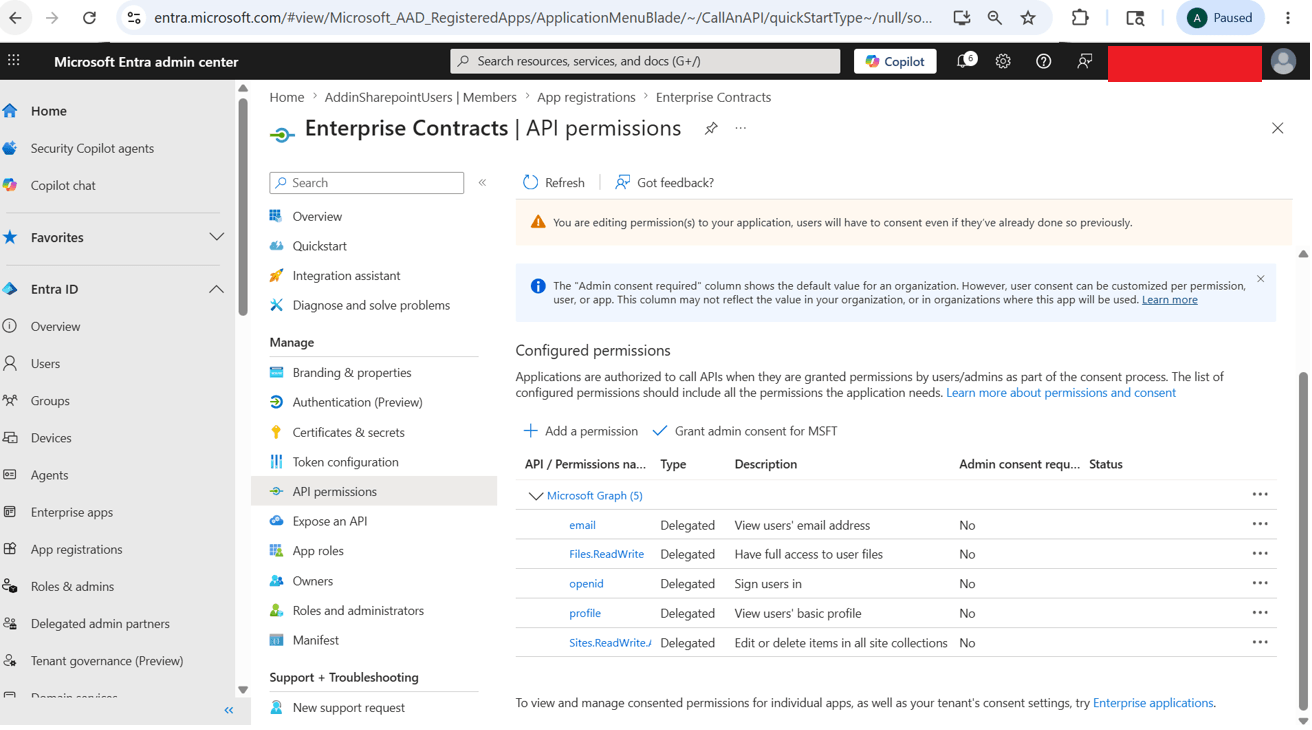
Review the added permissions
- On the API permissions page, in the Configured permissions section, click Grant admin consent.
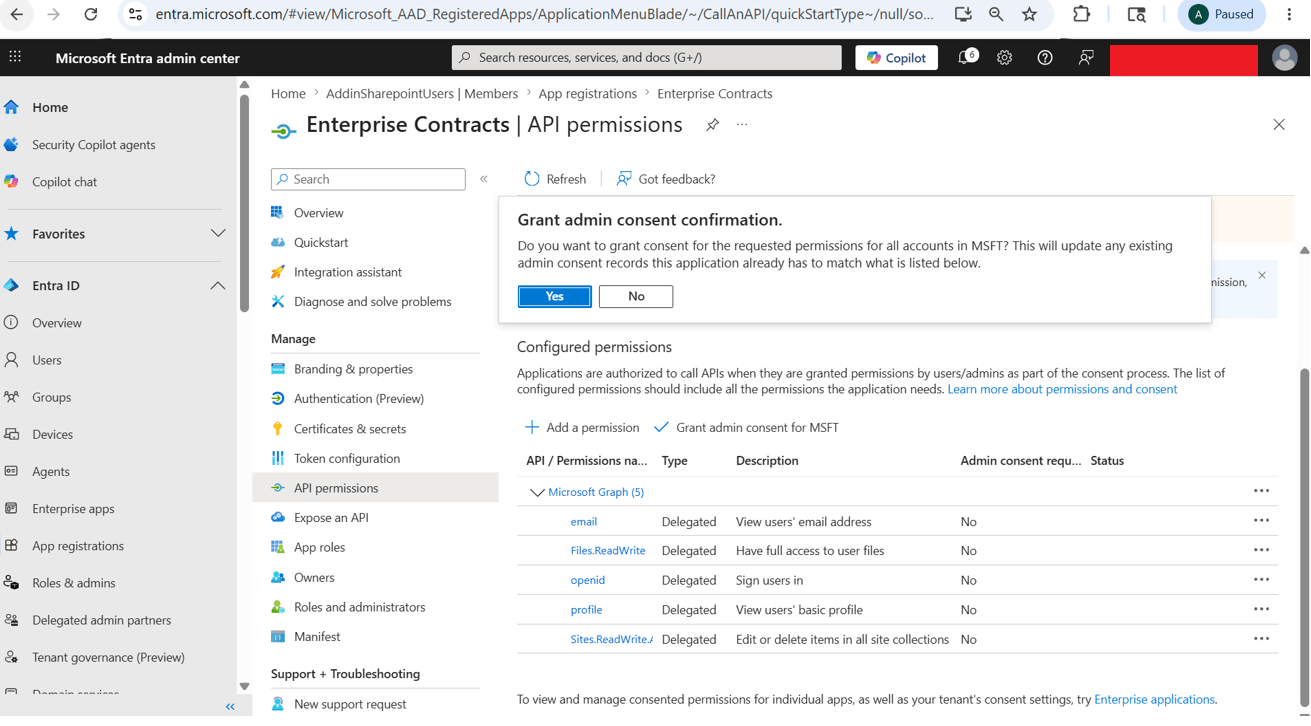
Click on Grant admin consent for MSFT
-
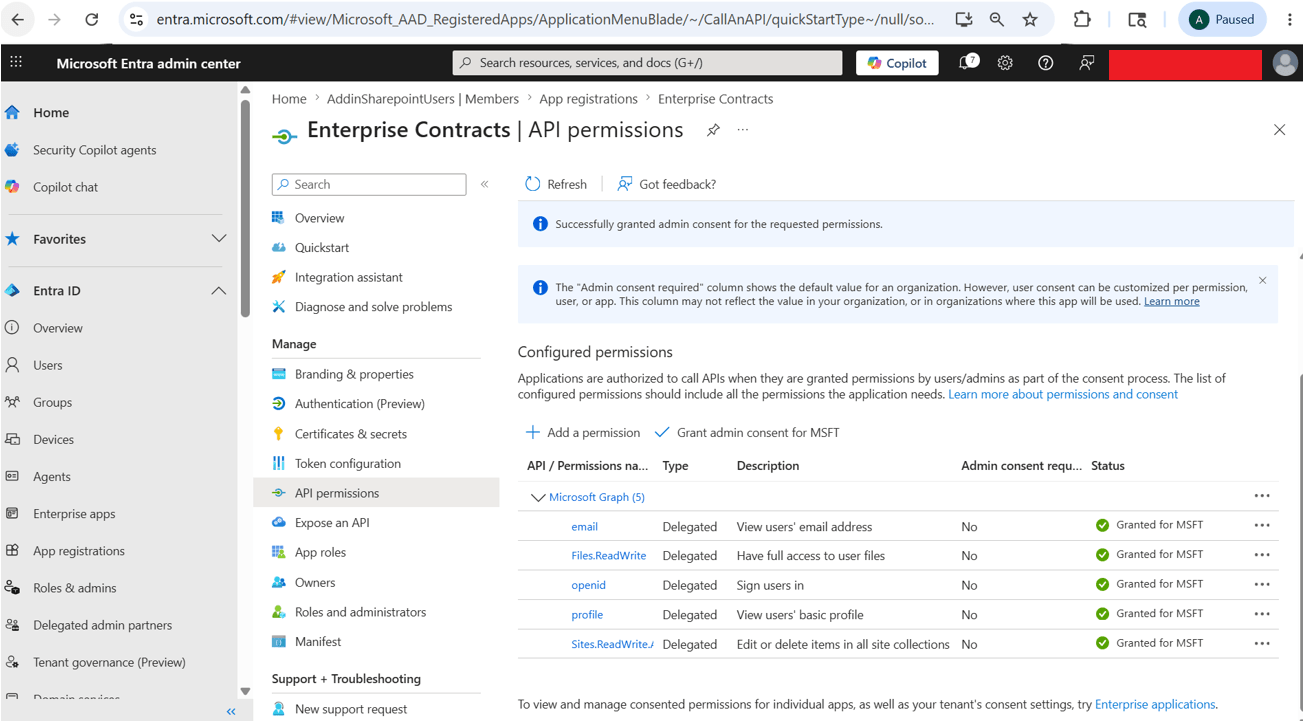
Make sure the status for each permission is getting updated to Granted for MSFT
Step 2:
Enable the Contract Collaboration Opt-in
- Go to Setup and Maintenance.
- Click Change Feature Opt In.
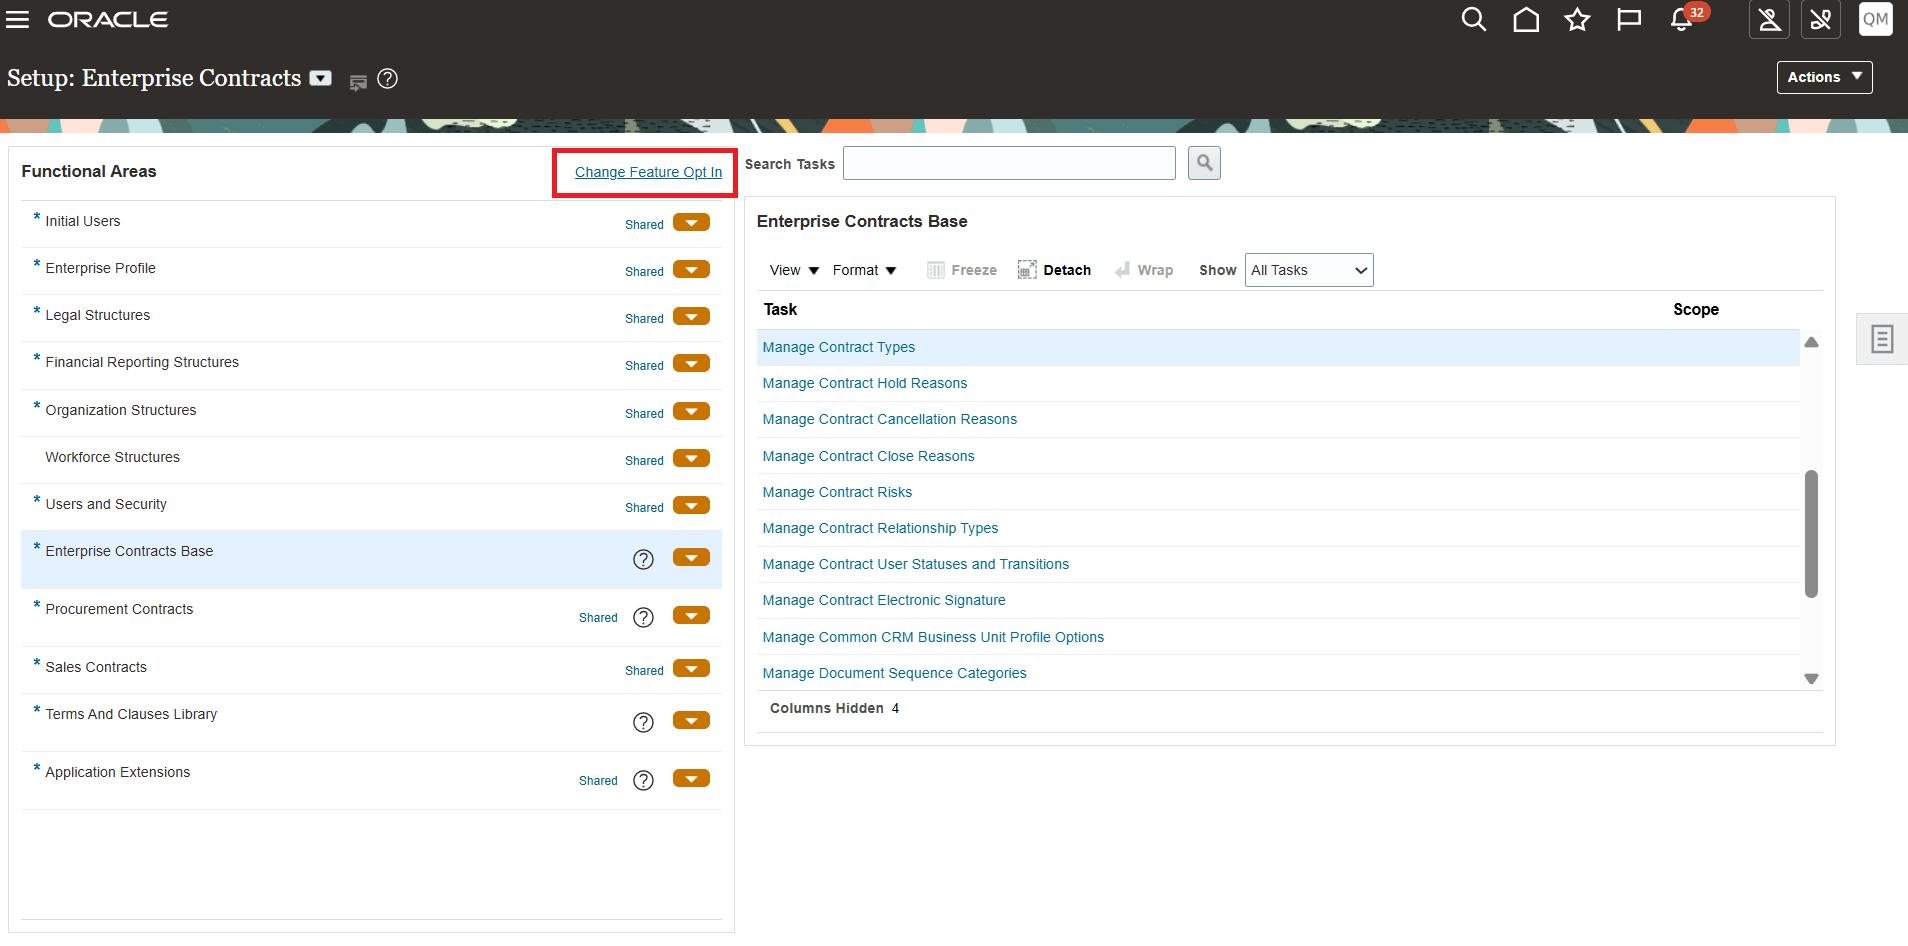
Change Feature Opt-in
- On the Opt In : Enterprise Contracts page, click the edit icon for Enterprise Contracts.
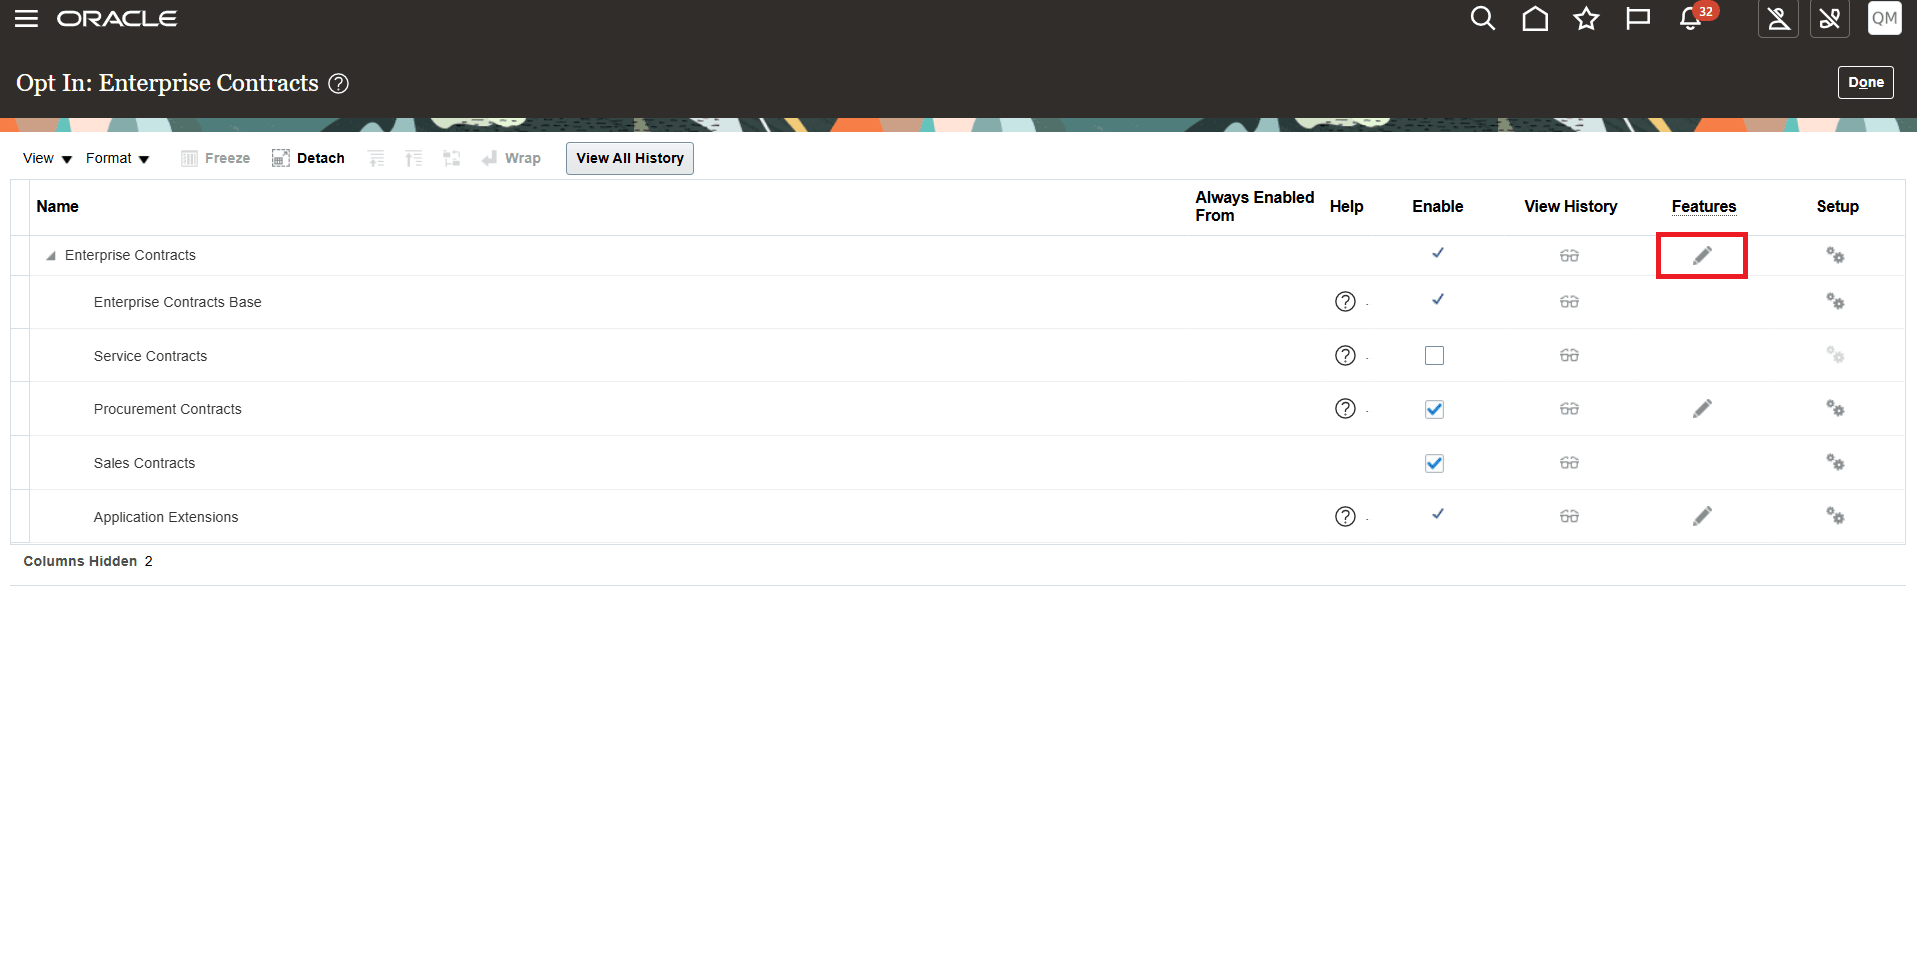
Enterprise Contracts Features
- In the feature list, locate Contract Collaboration.
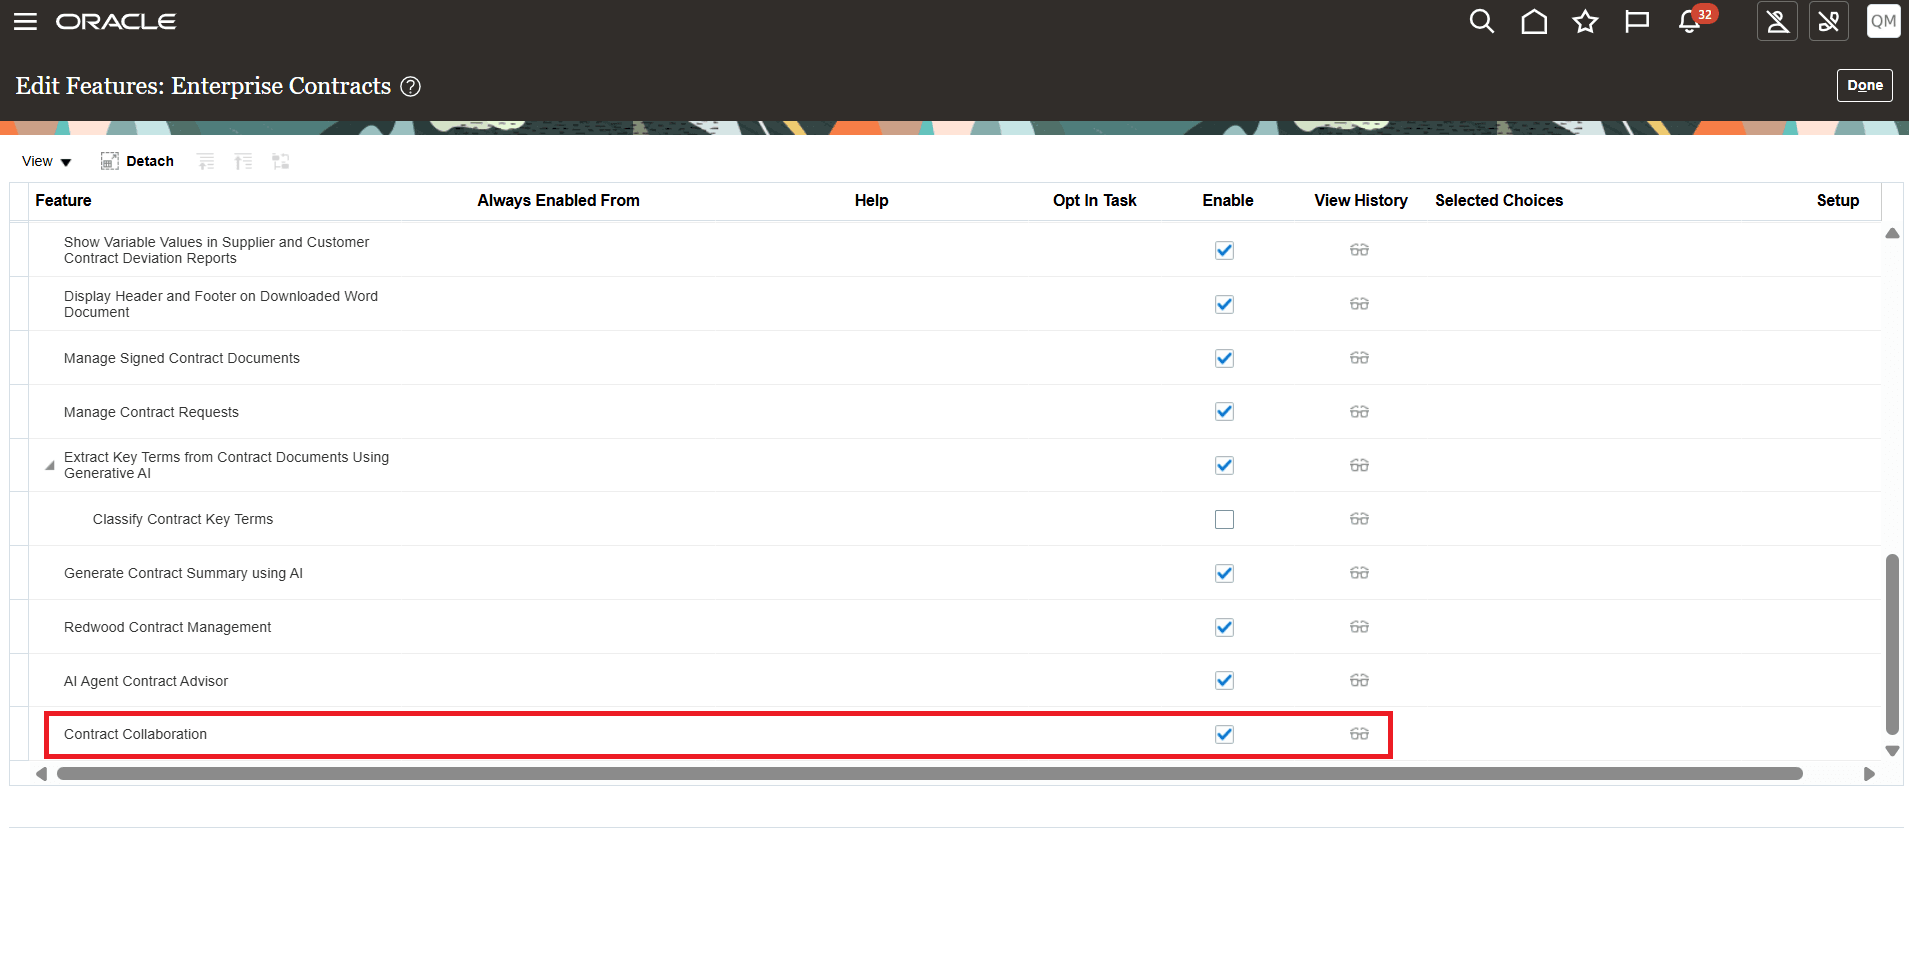
Checkmark Contract Collaboration Opt-in
- Select the Enable check box for Contract Collaboration.
- Click Done.
Step 3:
Setup the Integration in Application Composer
- Sign in to the Sales application.
- Navigate to Configuration > Application Composer.
- Navigate to Word Add-in Registration.
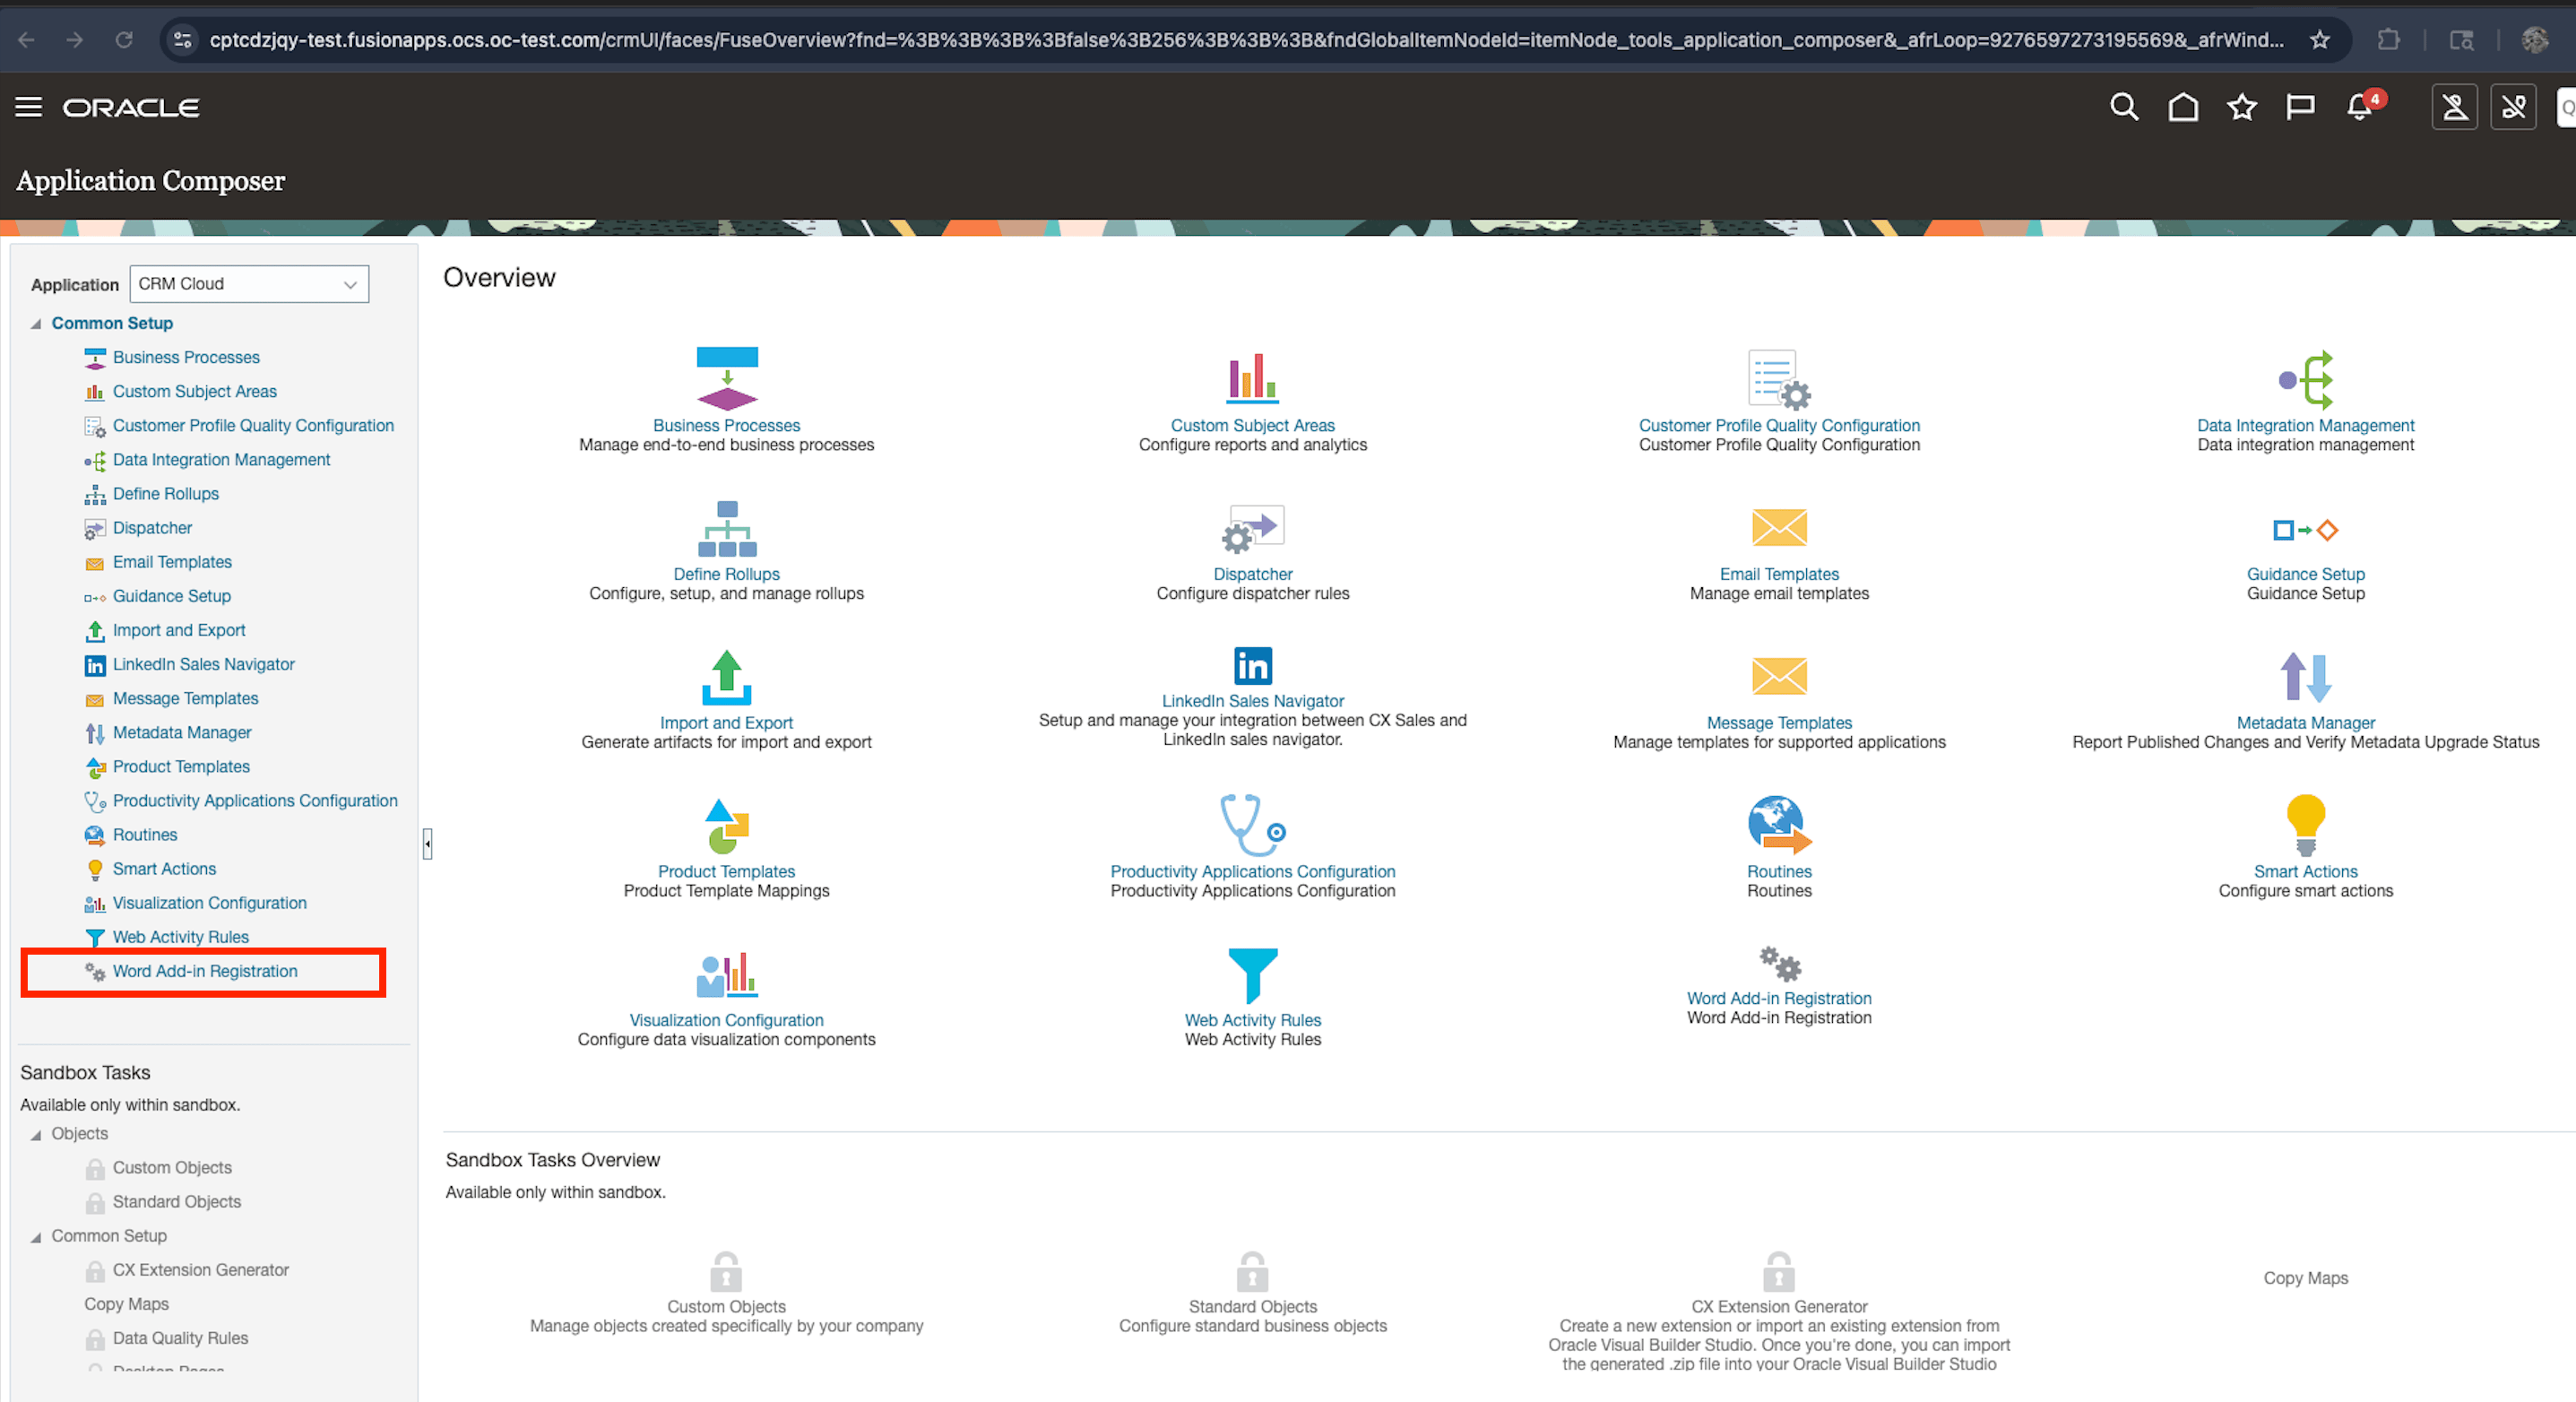
Word Add-in Registration from Application Composer
- Enter the values captured from the Azure Portal setup:
-
Enter the values from Azure Portal Setup
Field Value to Enter Application (client) ID Enter the Application Client ID copied from Azure. Client Secret Value Enter the client secret value generated in Azure. Primary Microsoft Domain Enter the primary Microsoft domain for the tenant. Directory (tenant) ID Enter the Directory Tenant ID copied from Azure. Client Secret Expires Enter the client secret expiration date copied from Azure. Alternate Microsoft Domains Optional and not needed for now. Scope openid email profile Sites.ReadWrite.All Files.ReadWrite Microsoft Login Domain https://login.microsoftonline.com
Primary SharePoint Domain https://<Tenant-Name>.sharepoint.com
Example: https://wftmh.sharepoint.com
-
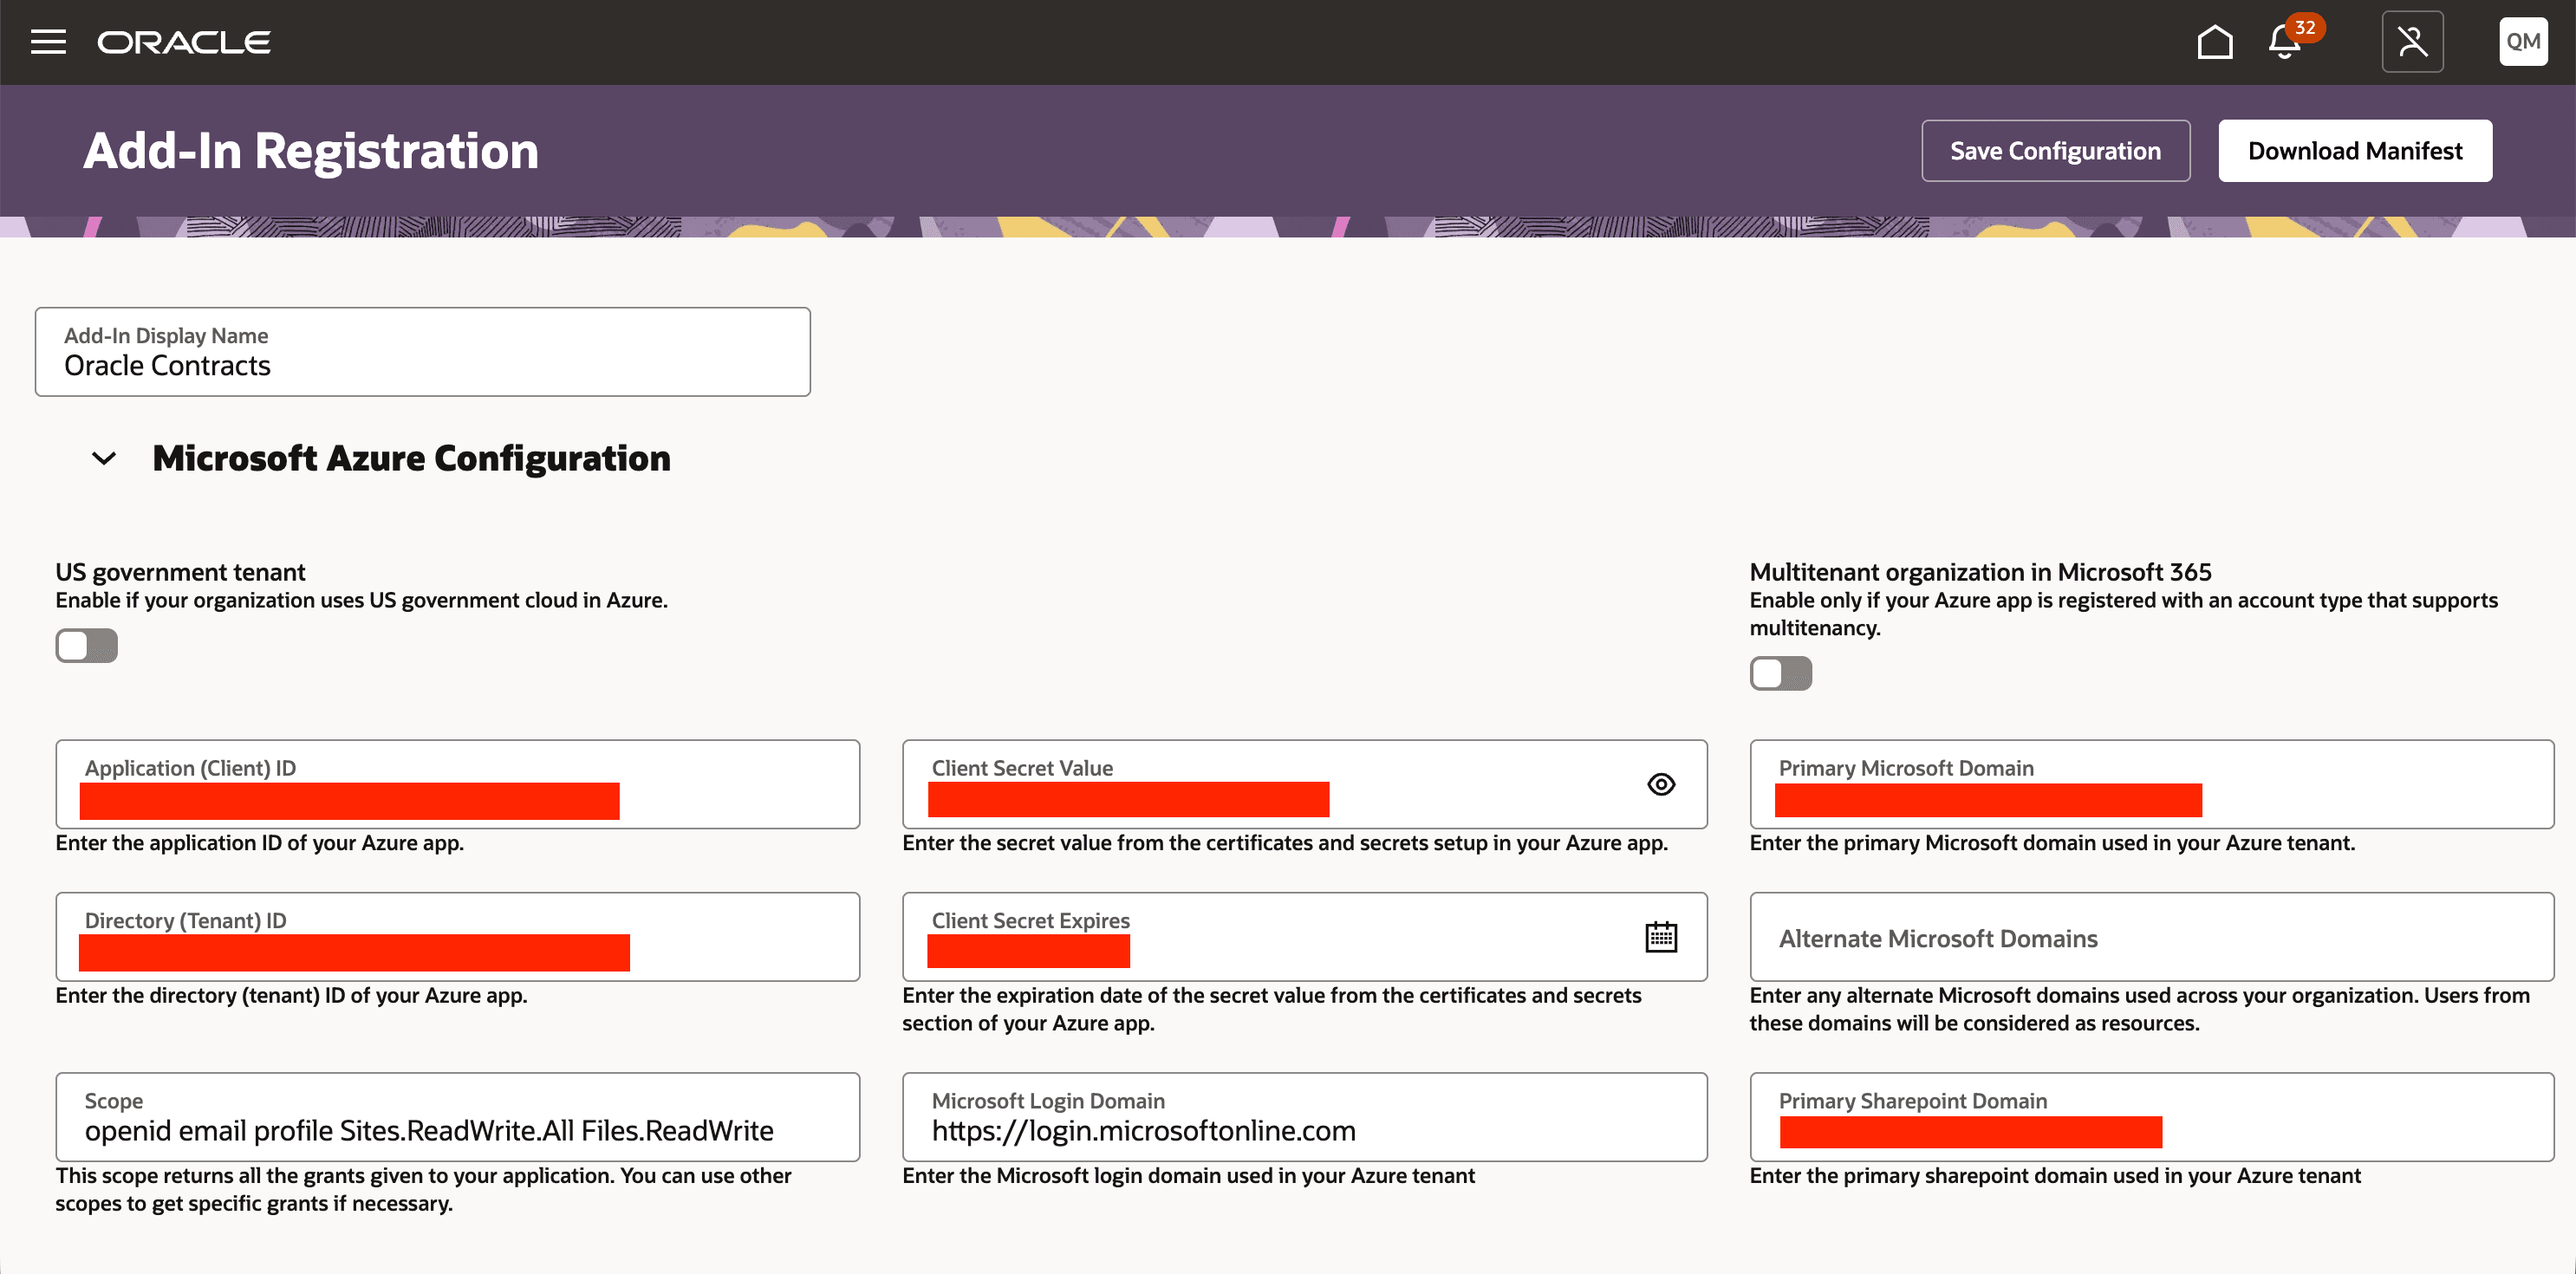
Configuration in Application Composer
- Save your changes.
Step 4:
Create a SharePoint Site for Contract Collaboration
Before you configure the SharePoint Site URL in Contracts application, create a Microsoft SharePoint site where contract terms files will be stored during collaboration.
- Sign in to Microsoft SharePoint with an admin account that has permission to create sites.
Microsoft SharePoint Login
- On the SharePoint home page, click Create.
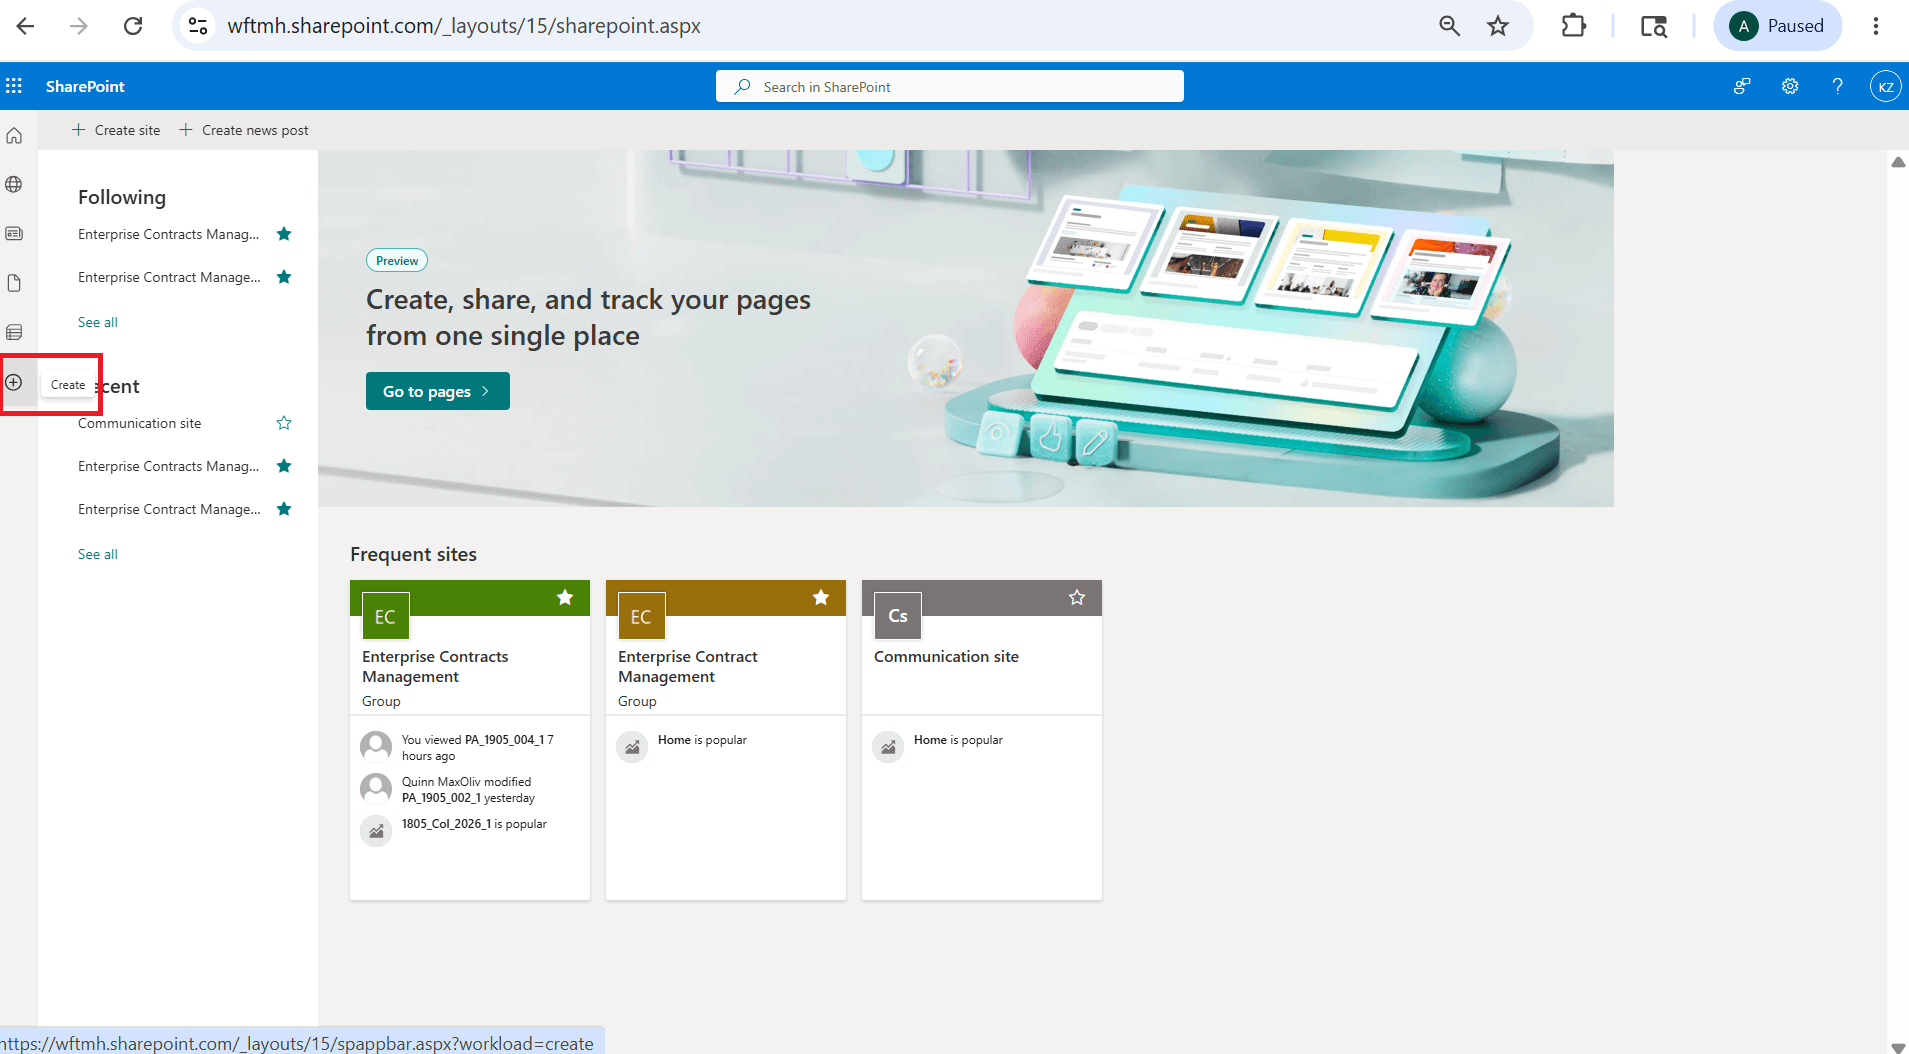
Click on Create
- In the Create panel, select Site.
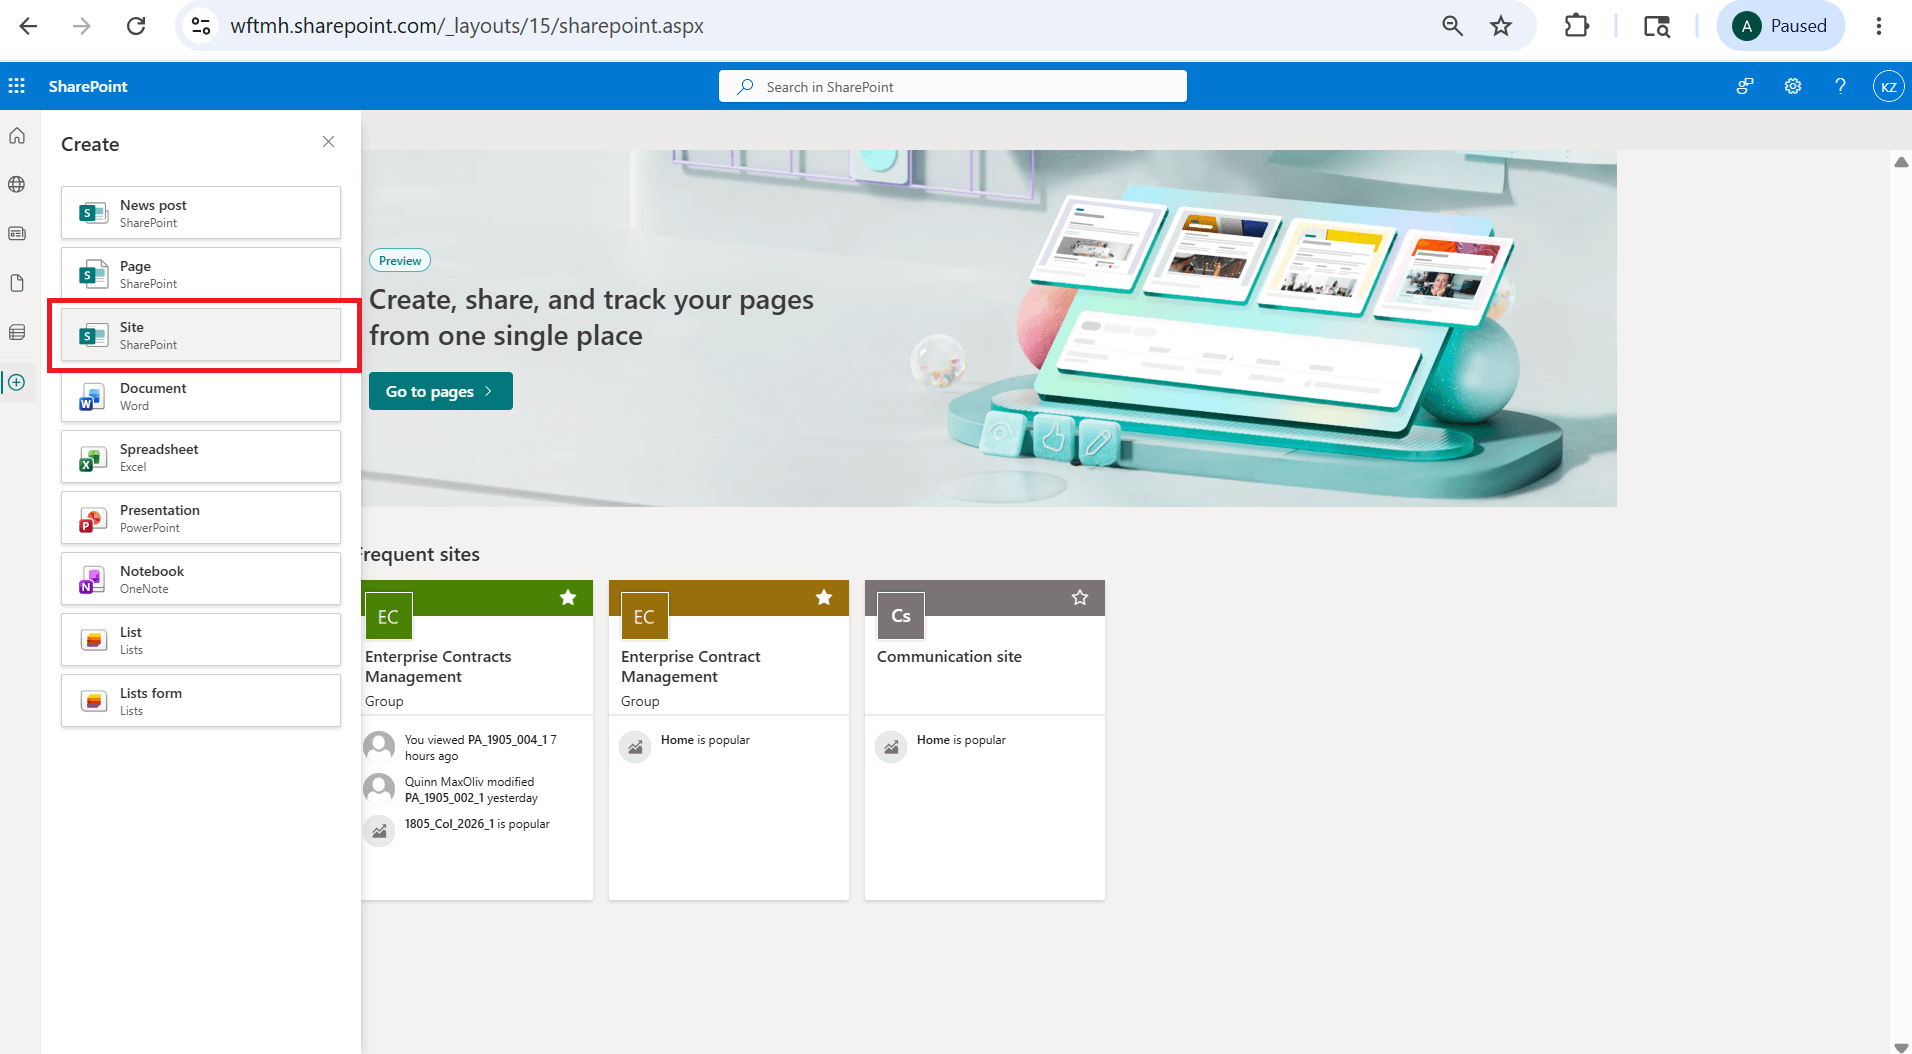
Select Site
- On the Create a site: Select the site type page, select Team site.
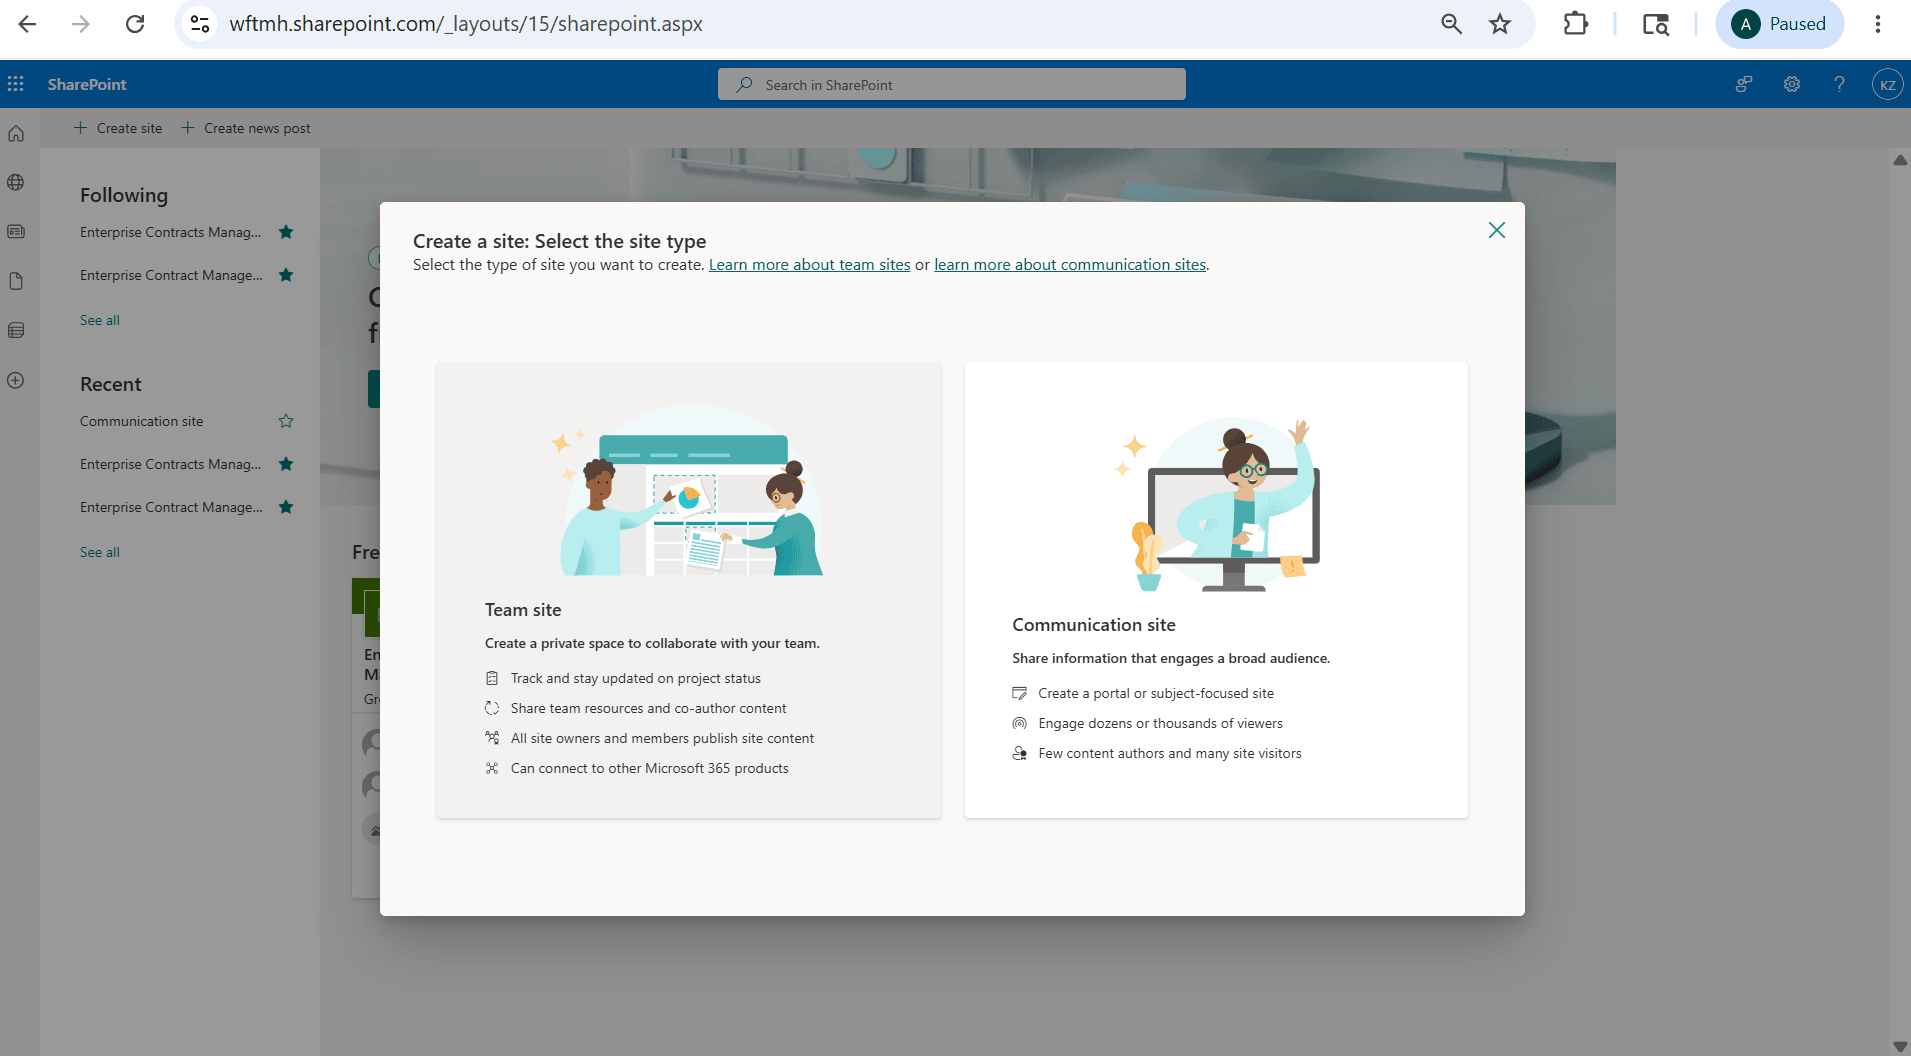
Select Team Site
- On the Select a template page, select Standard team.
-
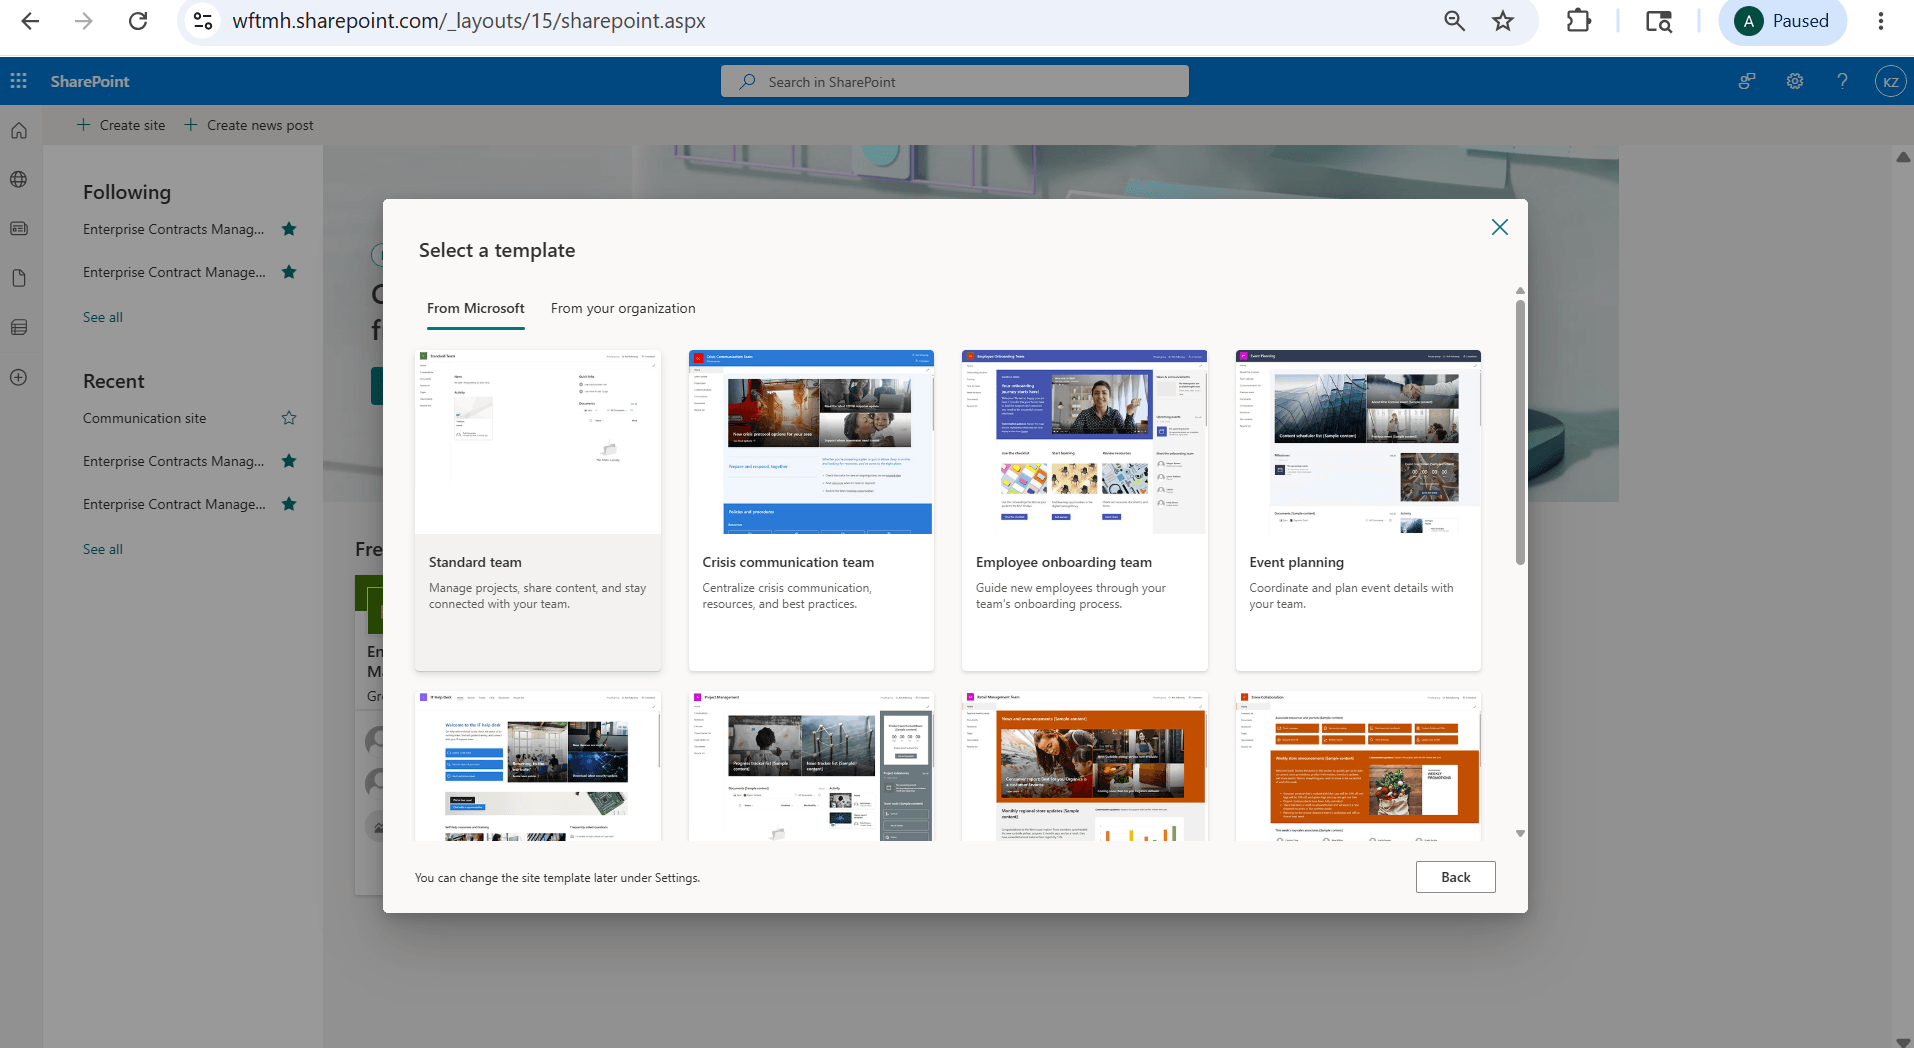
Select Standard Team
-
- On the Preview and use ‘Standard team’ template page, click Use template.
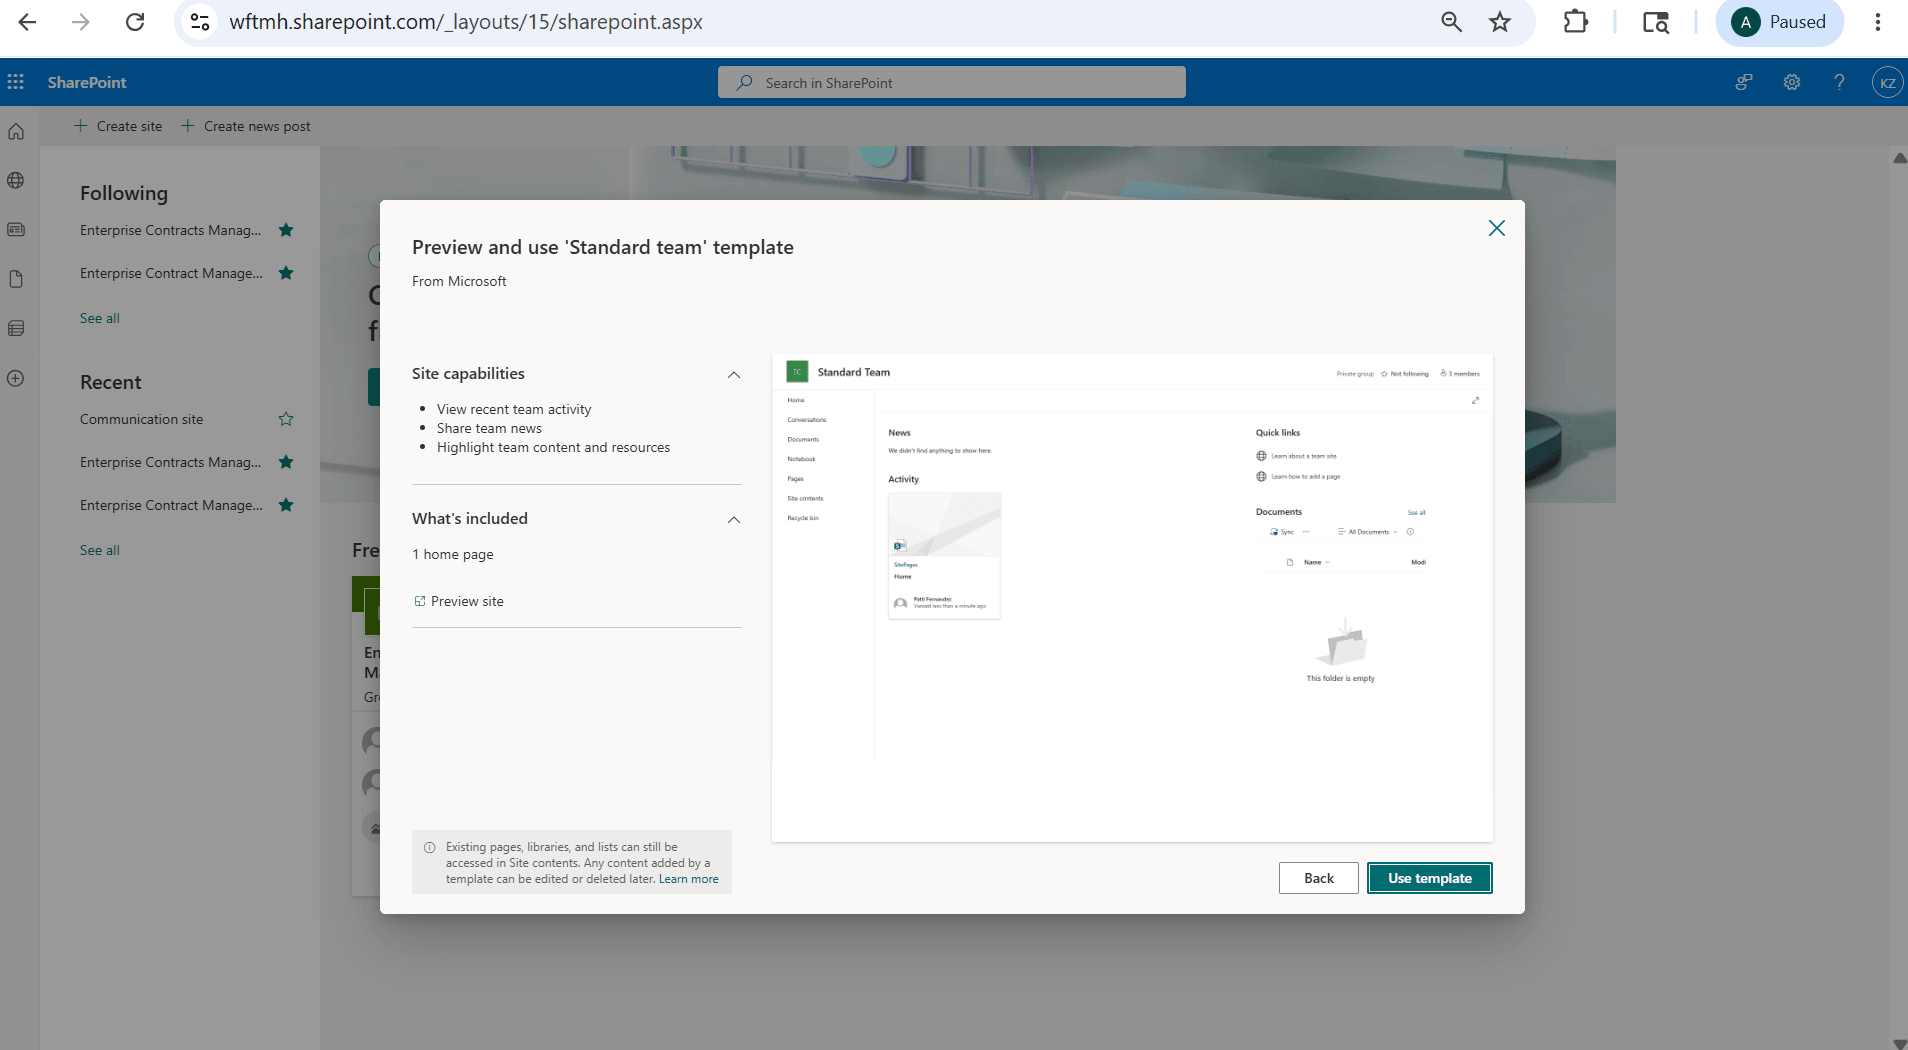
Click on Use Template
-
On the Give your site a name page, enter the site details:
-
Site name: Enter a name for the site, Eg: Contracts or Enterprise Contracts
-
Site description: Optionally enter a description.
-
Group email address: Optionally review or update the generated group email address.
-
Site address: Optionally review or update the generated site address.
-
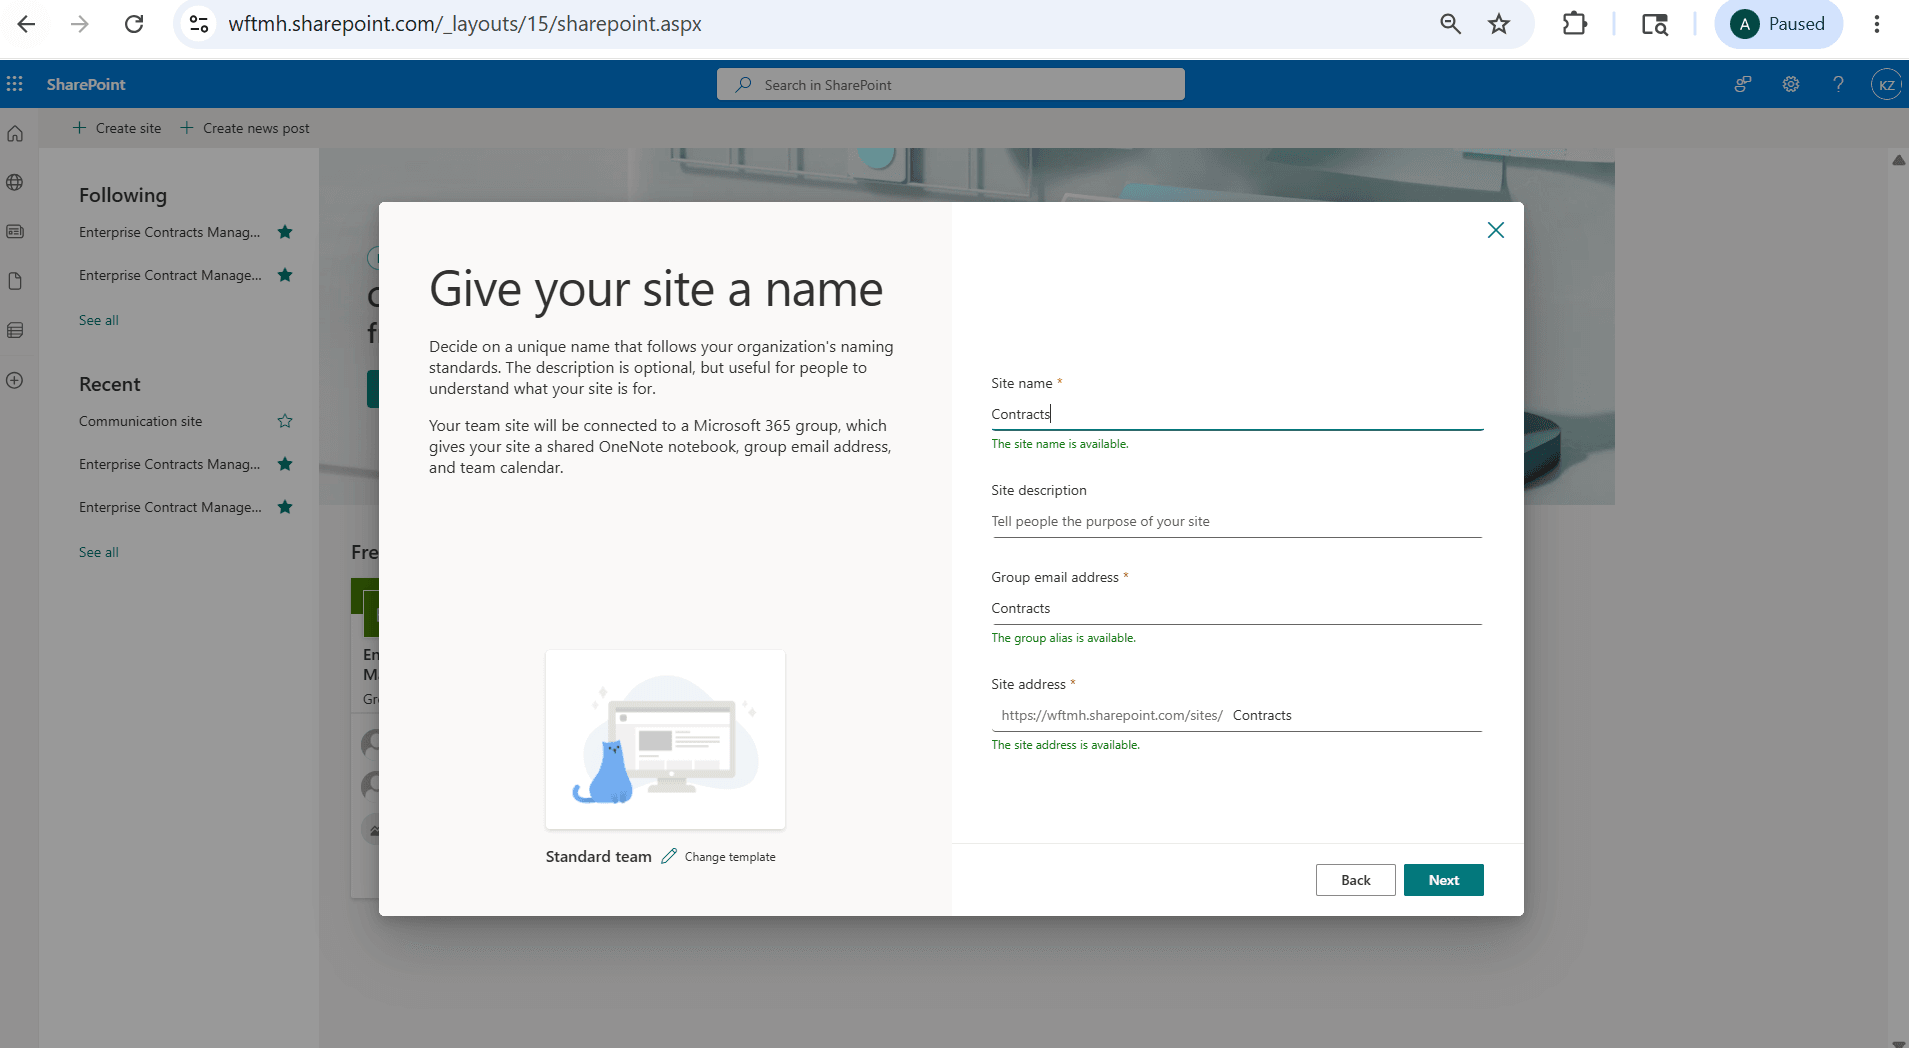
Site Details
-
- Click Next.
- On the Set language and other options page, select the privacy and language options:
- Privacy settings: Select Private - only members can access this site.
- Select a language: Select the site language.
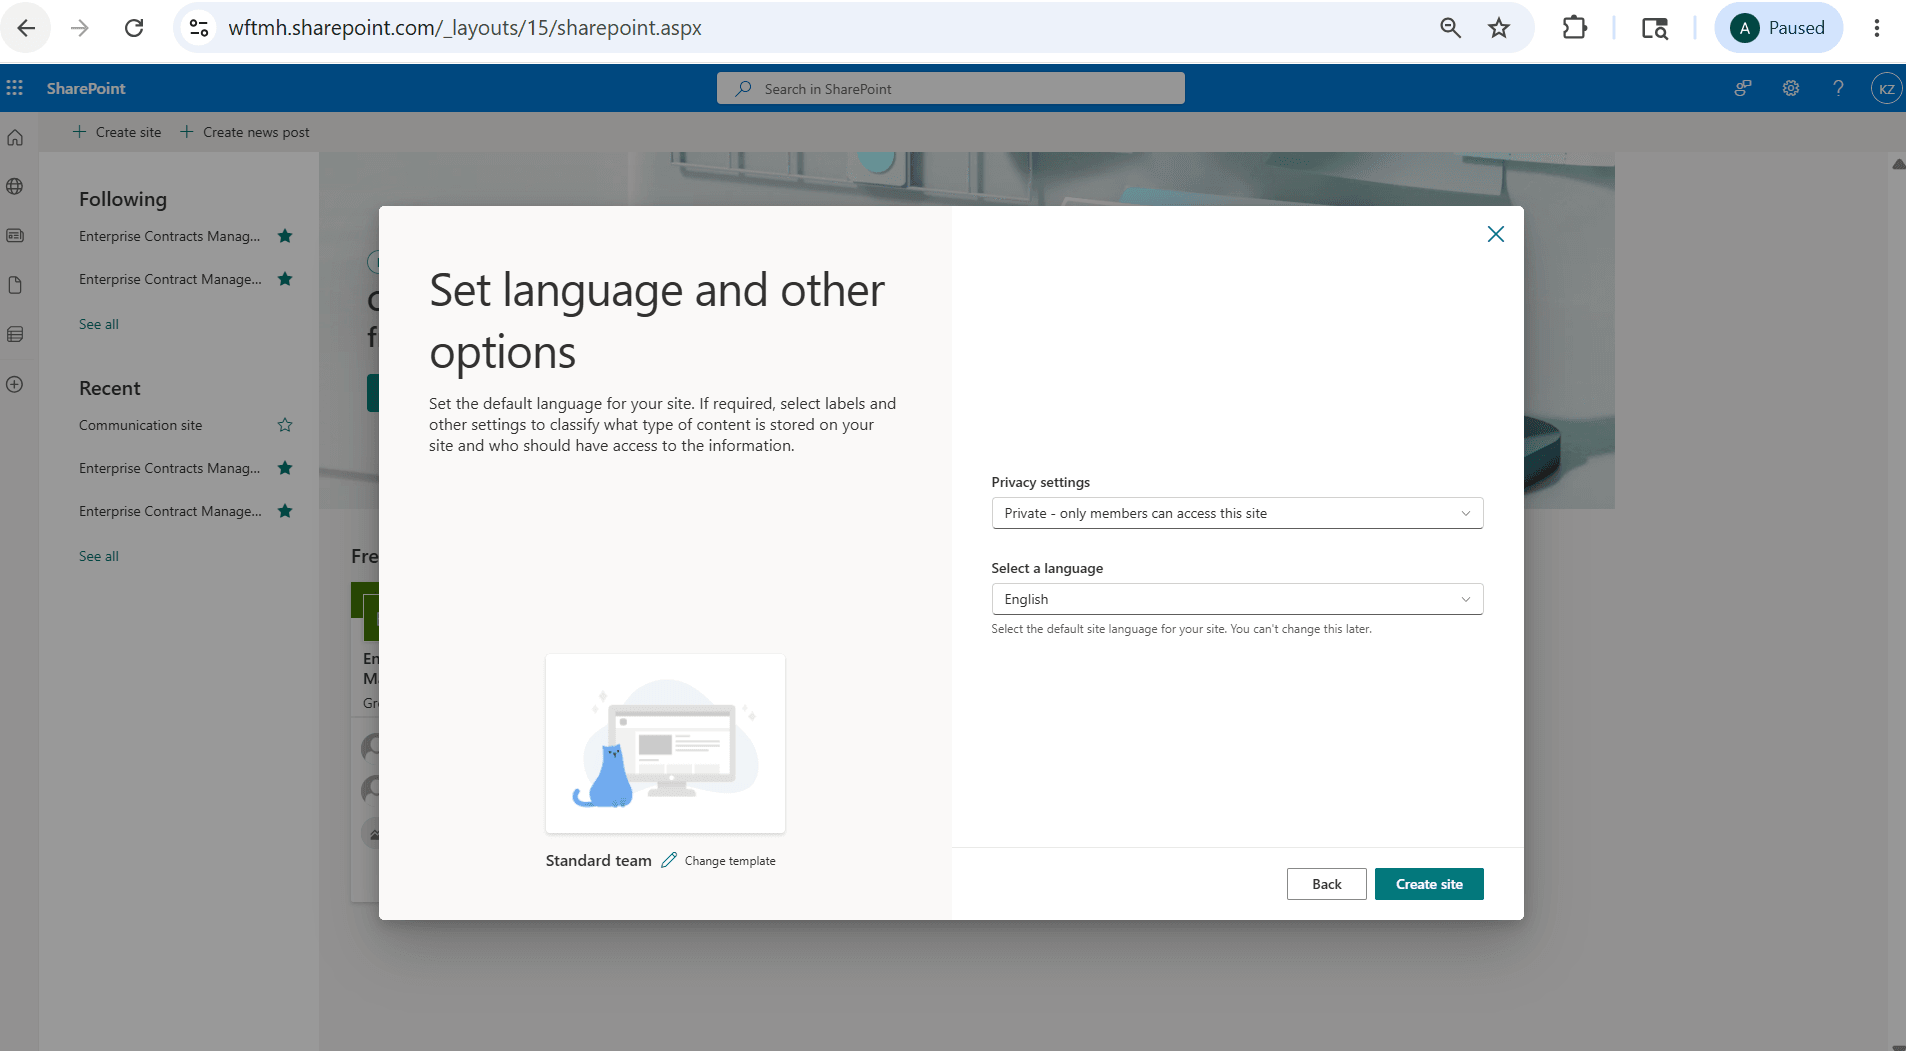
Privacy and Language Settings
- Click Create site.
-
On the Add site owners and members page, add site members only if required.
-
You can skip adding members at this stage.
-
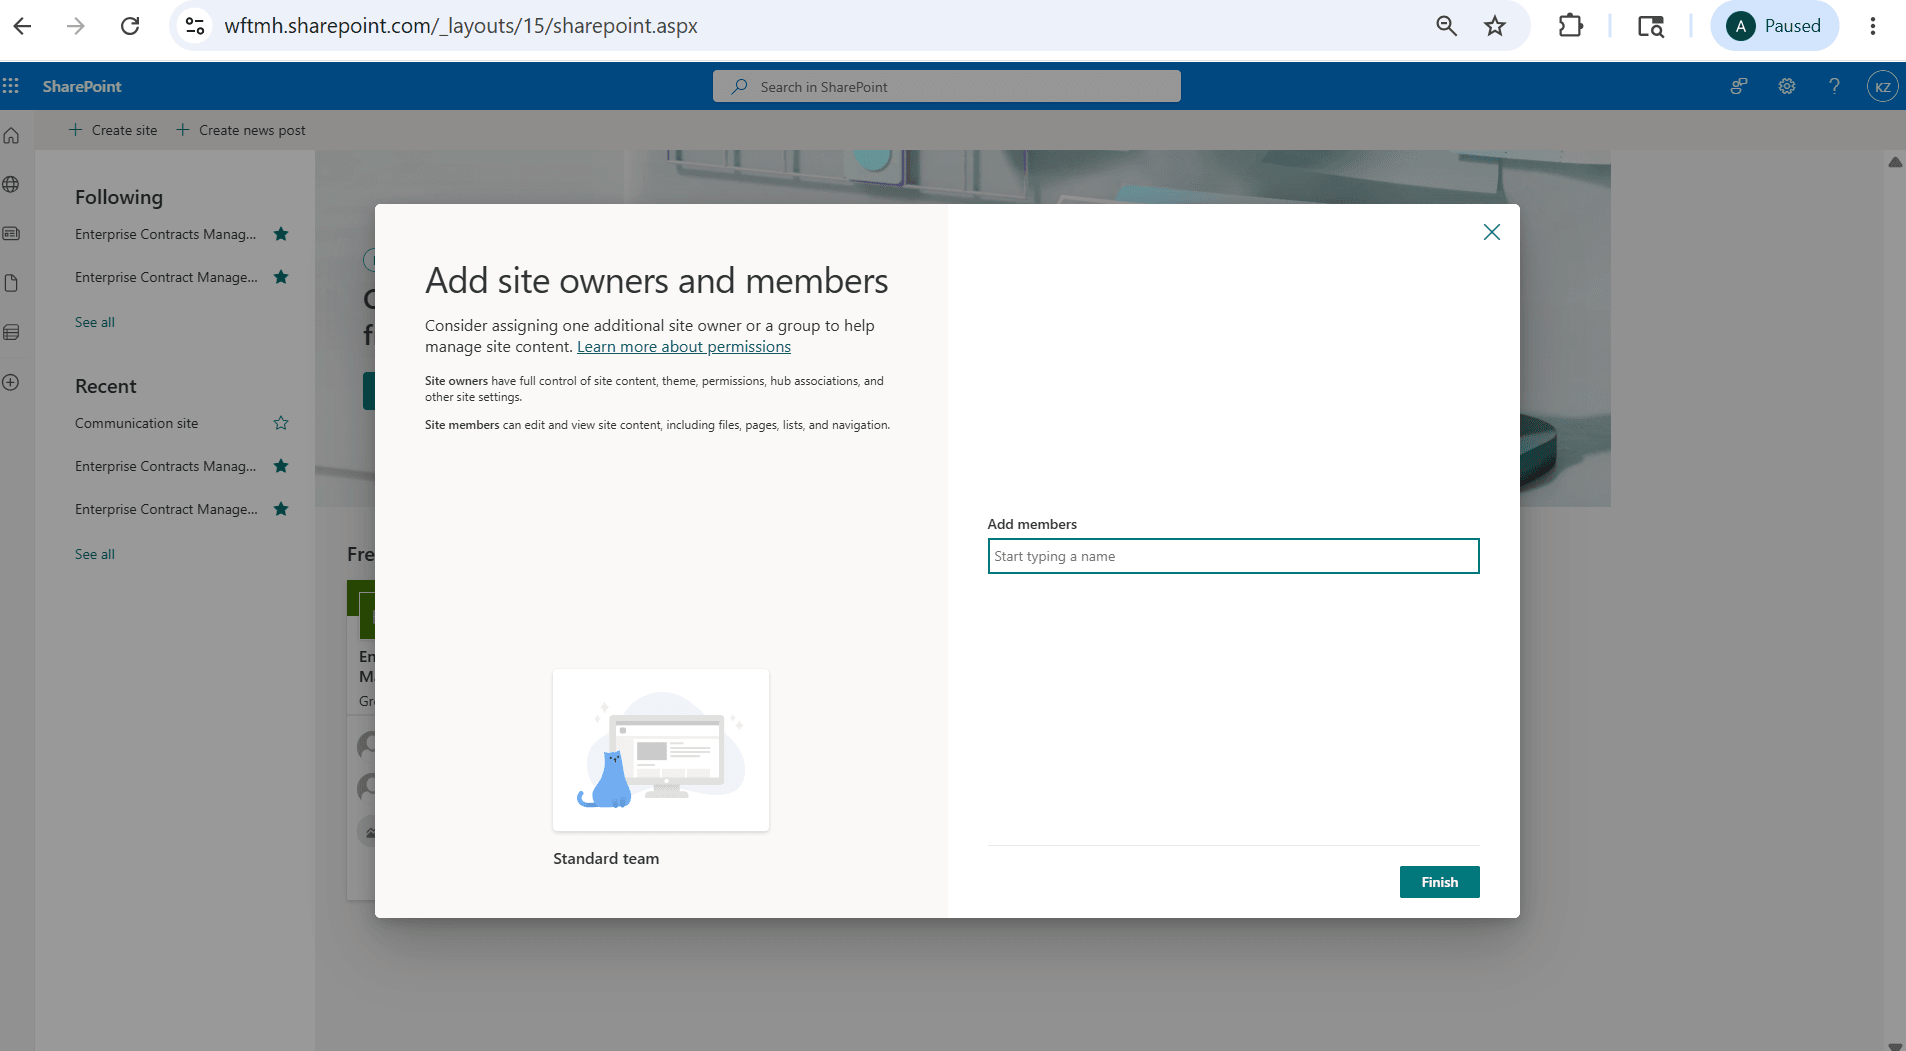
Skip adding Members
-
- Click Finish.
- After the site is created, open the site
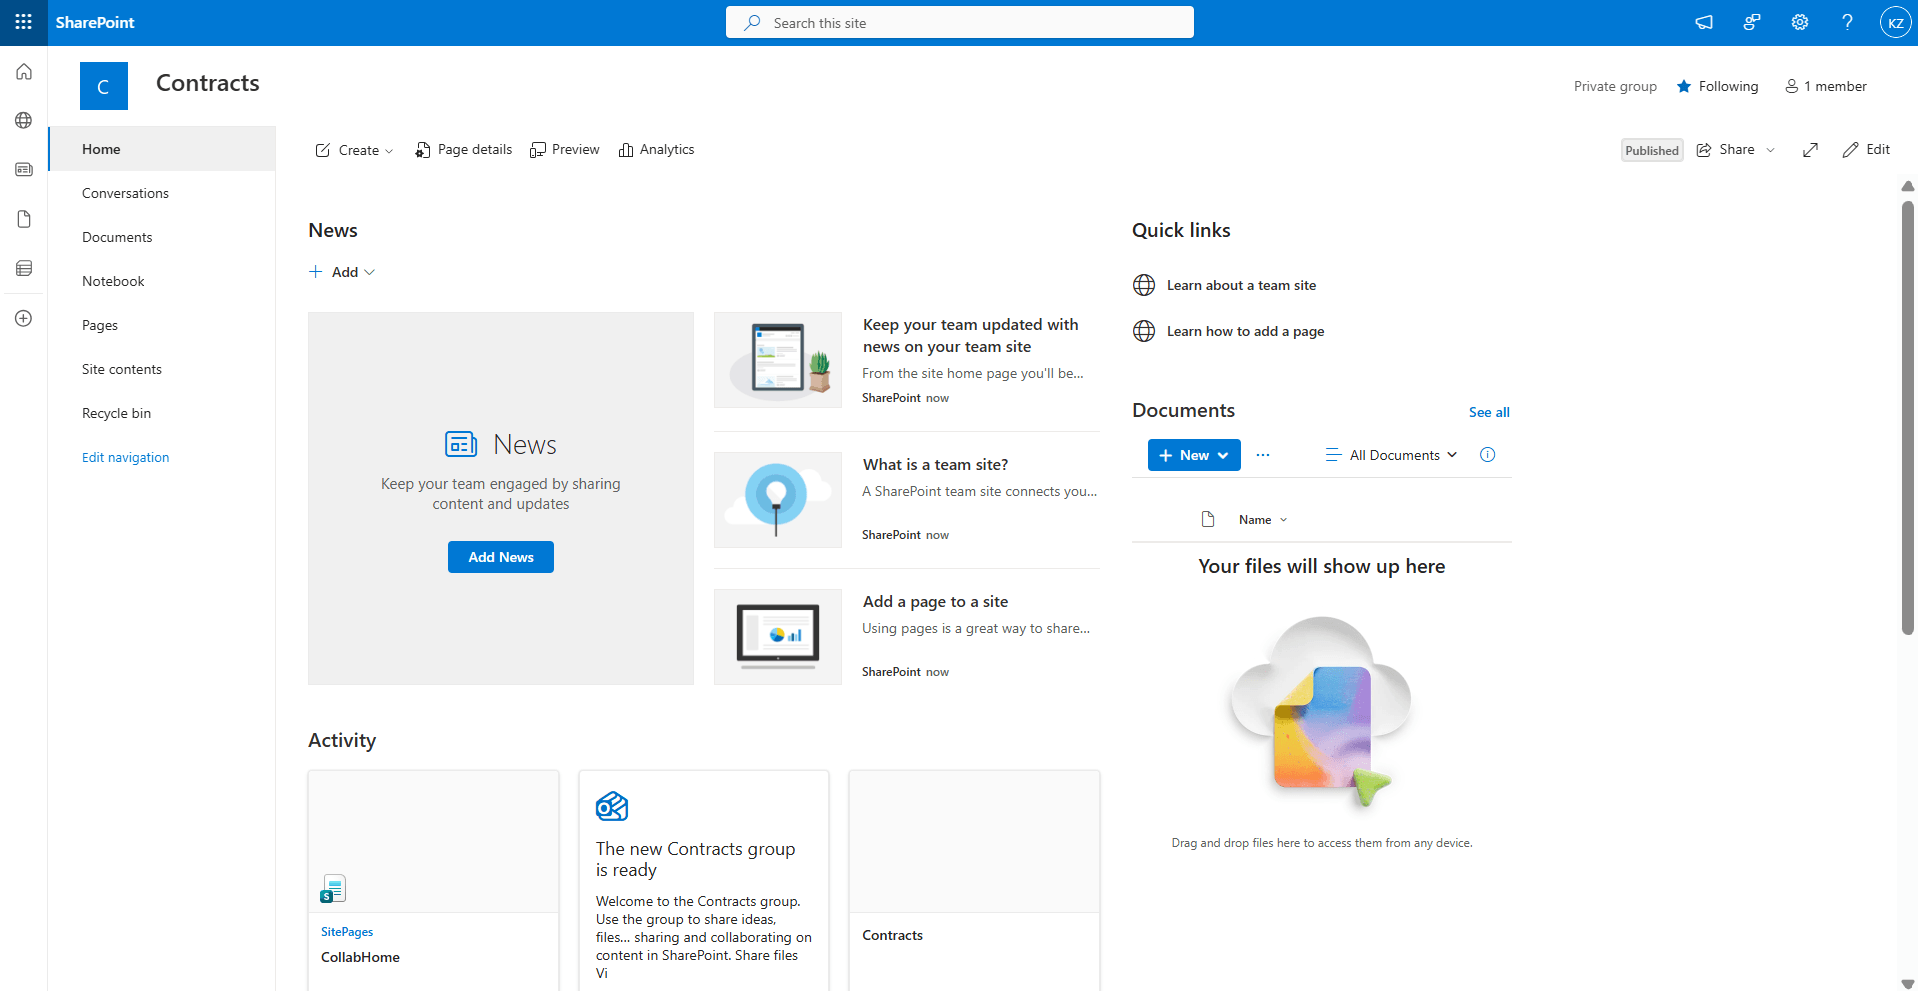
SharePoint Site
- Copy the site URL from the browser address bar. You’ll use this URL when configuring SharePoint Site URL in Enterprise Contracts application at Contract Type or Business Function Level.
Step 5:
Configure SharePoint Collaboration Setup
After you enable the Contract Collaboration opt-in, you can configure the Microsoft SharePoint site used for contract terms collaboration.
You can configure SharePoint collaboration at either of these levels:
- Contract Type
- Business Function
Contract Type setup takes precedence over Business Function setup. If a SharePoint site is configured for the contract type, that site is used. If it isn’t configured for the contract type, the application uses the SharePoint site configured for the applicable business unit and business function. If SharePoint isn’t configured at either level, users can’t start collaboration from the Word Add-in.
- Configure the SharePoint Site URL for a Contract Type
- Go to Setup and Maintenance.
- In the Search Tasks field, search for Manage Contract Types.
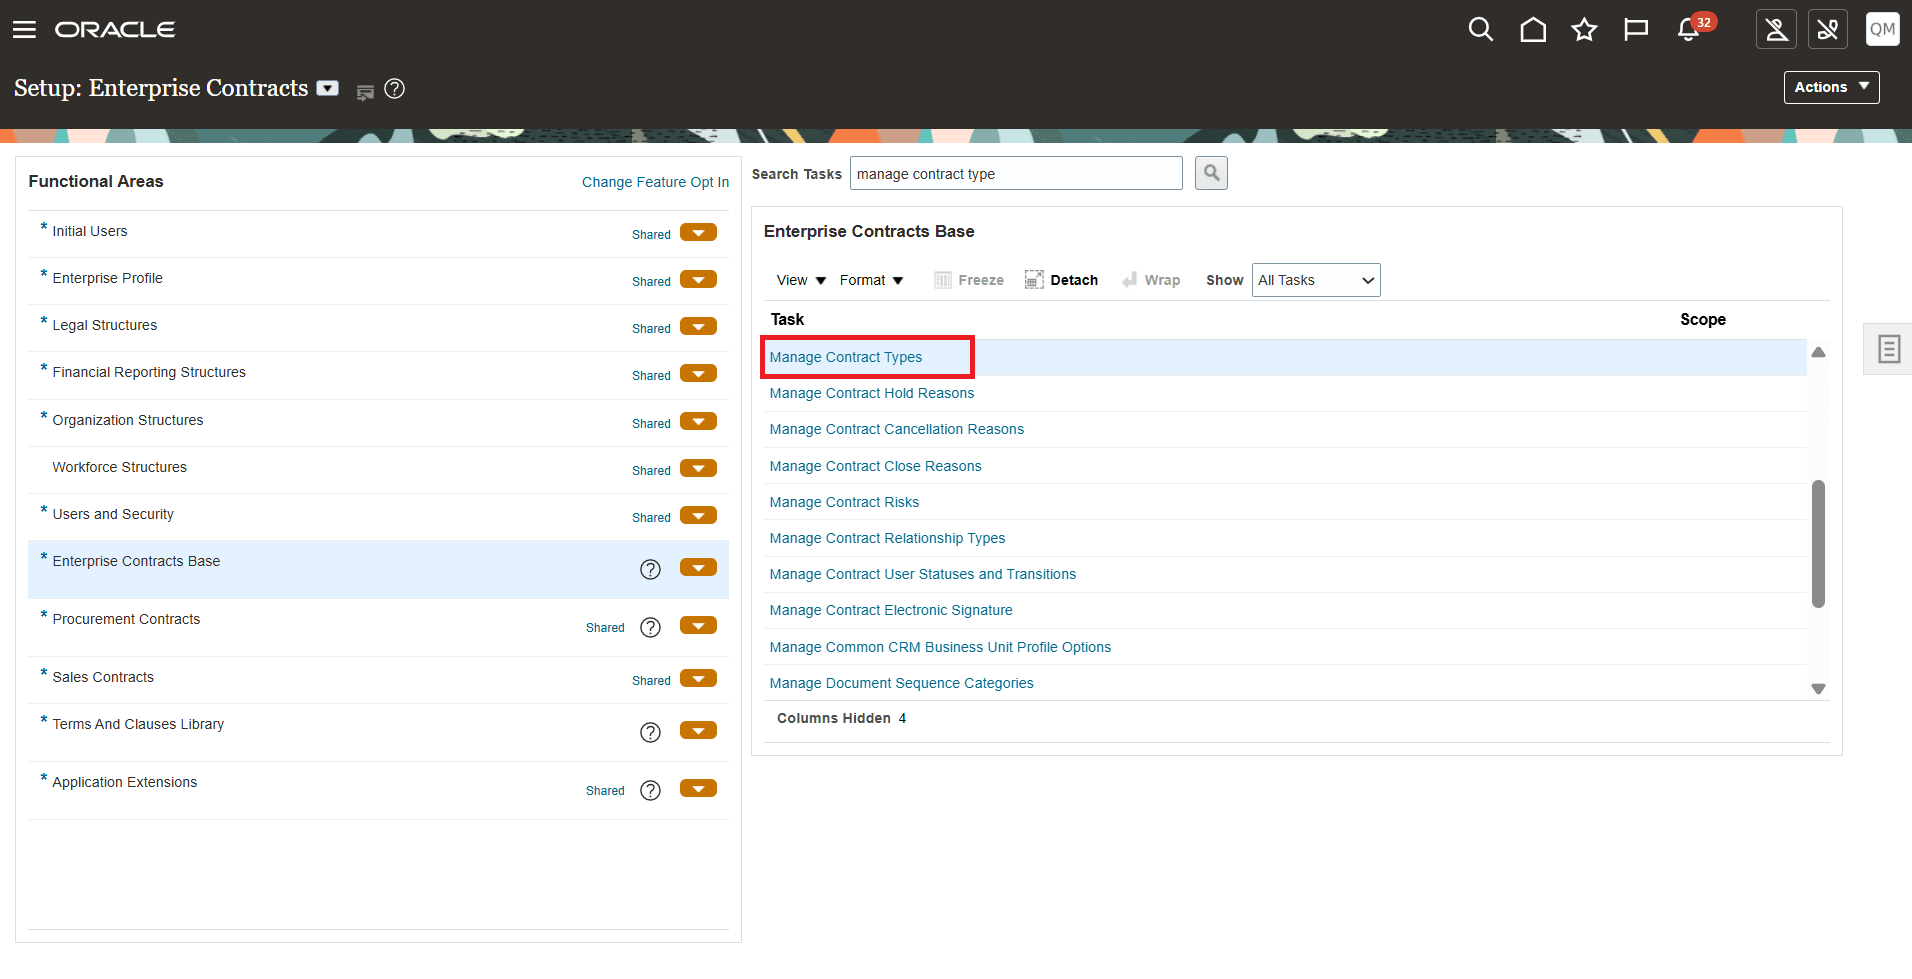
Manage Contract Types Selection
- Click Manage Contract Types.
- Search for and select the contract type where you want to configure SharePoint collaboration.
- In the Contract Type Options section, go to the Advanced Authoring Options tab.
- Make sure Enable terms authoring is selected.
-
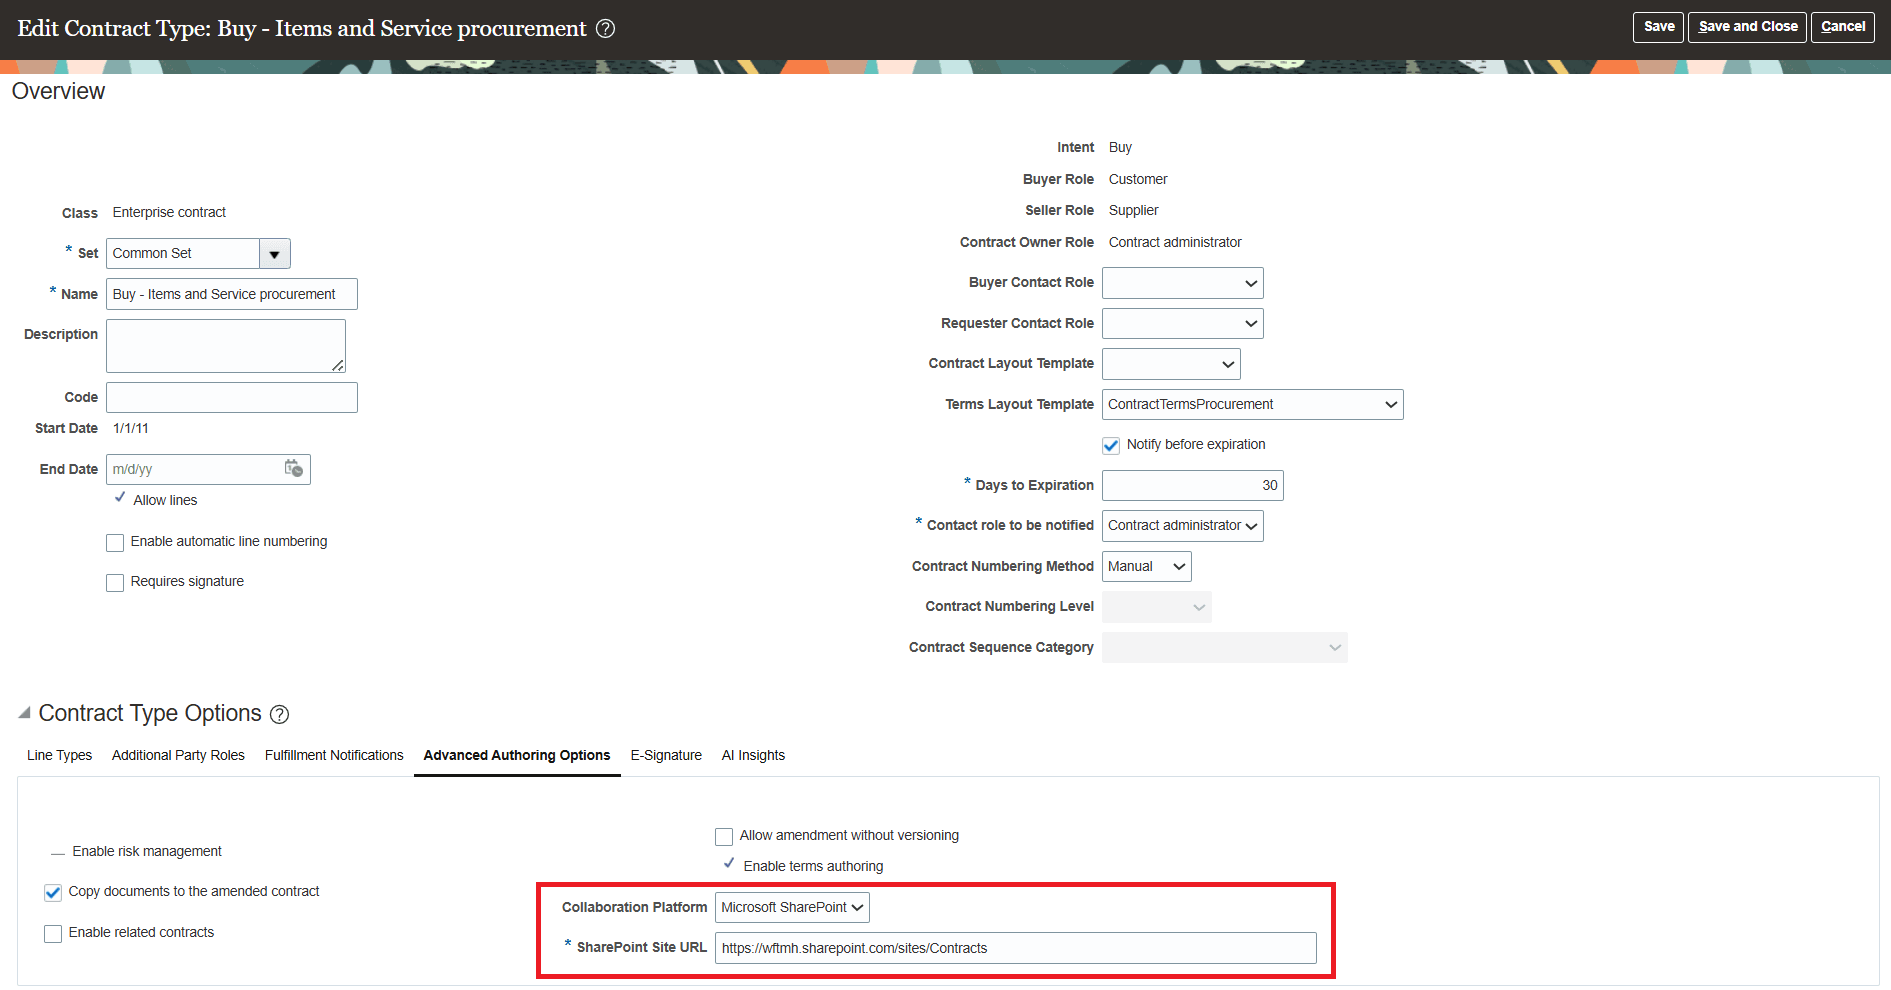
SharePoint URL at Contract Type level
-
- In the Collaboration Platform field, select Microsoft SharePoint.
- In the SharePoint Site URL field, enter the SharePoint site URL.
- Example: https://your-company.sharepoint.com/sites/Site-Name
- The SharePoint Site URL must:
- Start with https://
- Contain sharepoint.com t
- Use a valid SharePoint site format, such as: https://<tenant>.sharepoint.com/sites/<site-name>
- If the URL is missing or incorrectly formatted, the application displays a validation error.
- Click Save or Save and Close.
-
Configure SharePoint Collaboration for a Business Function
-
Use this setup when you want SharePoint collaboration to apply to contracts for a specific business function.
-
You can configure the SharePoint site independently for:
-
Customer Contracts
-
Supplier Contracts
-
-
The SharePoint URL configured for Customer Contract Management Business Function isn’t reused for Supplier Contract Management Business Function, even when both are configured for the same business unit. Follow the below steps:
- Go to Setup and Maintenance.
- In the Search Tasks field, search for one of these tasks:
- Specify Customer Contract Management Business Function Properties
- Specify Supplier Contract Management Business Function Properties
- Select the task for the business function that you want to configure.
- Select the Business Unit.
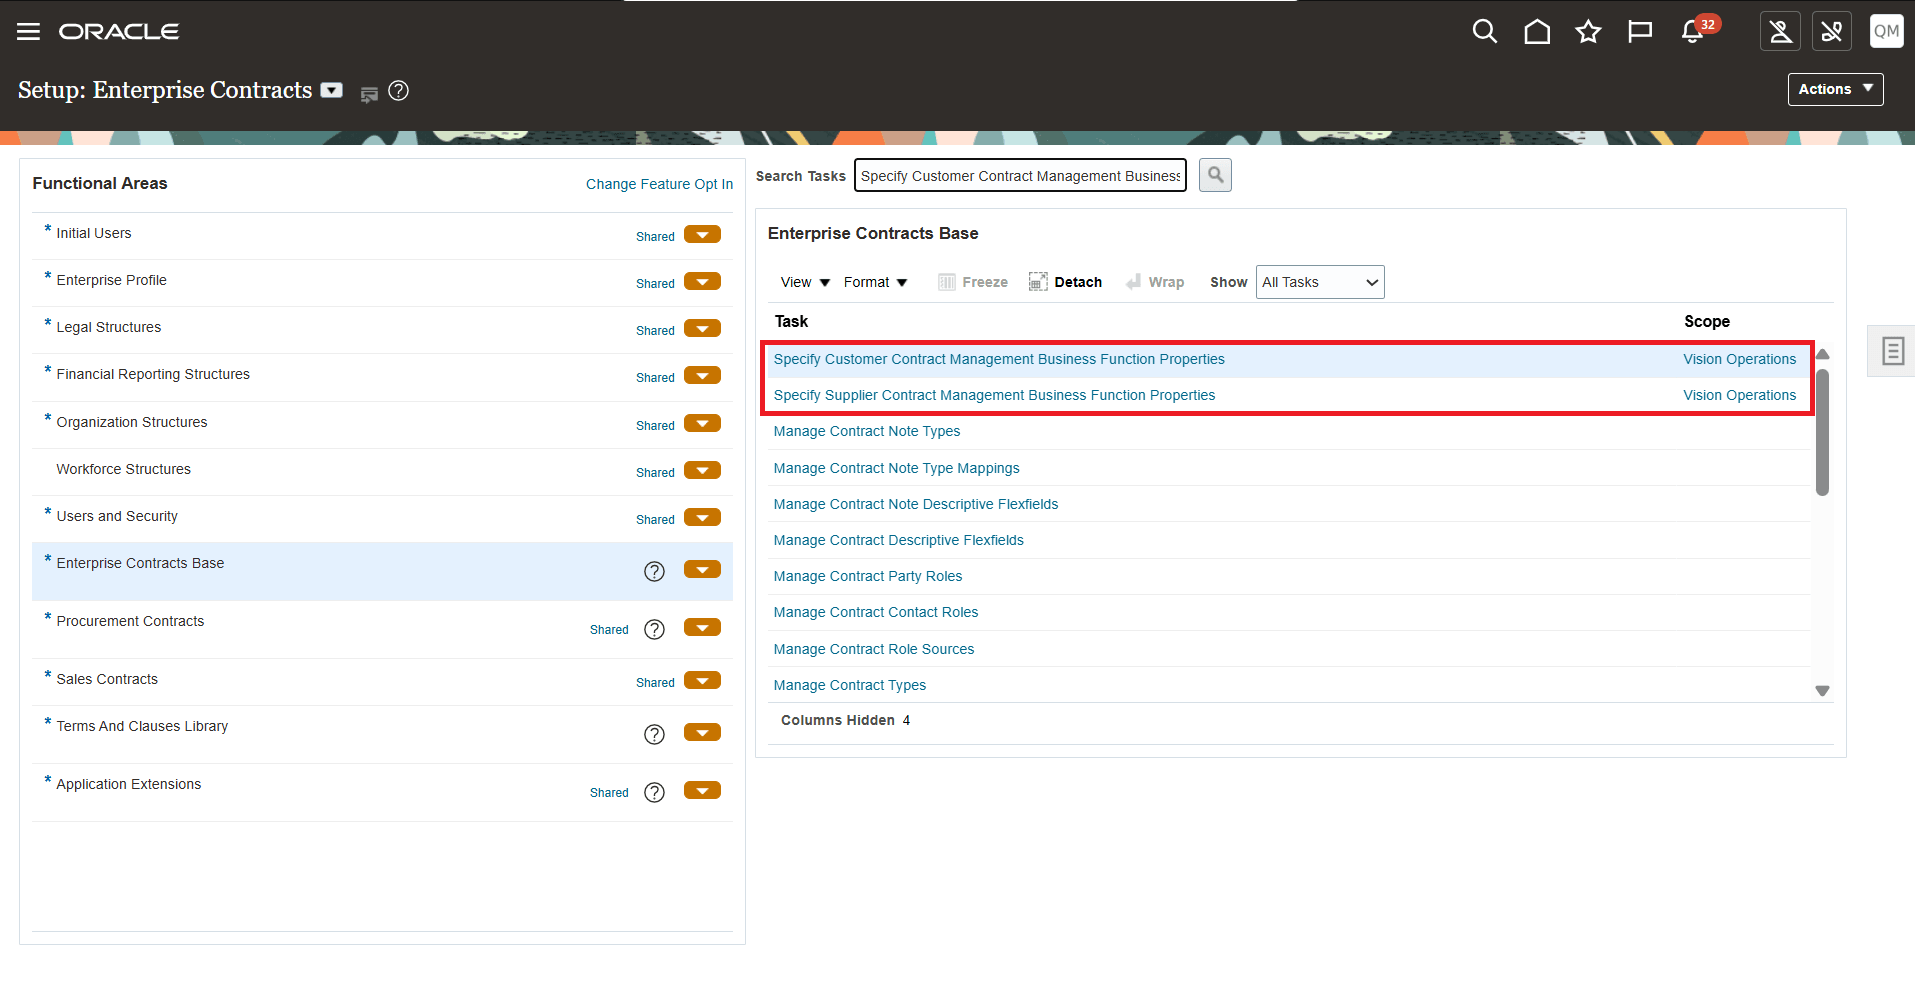
Business Function Task
- In the Collaboration section, select Microsoft SharePoint from the Collaboration Platform dropdown
-
In the SharePoint Site URL field, enter the SharePoint site URL.
-
Example:
https://your-company.sharepoint.com/sites/Site-Name
-
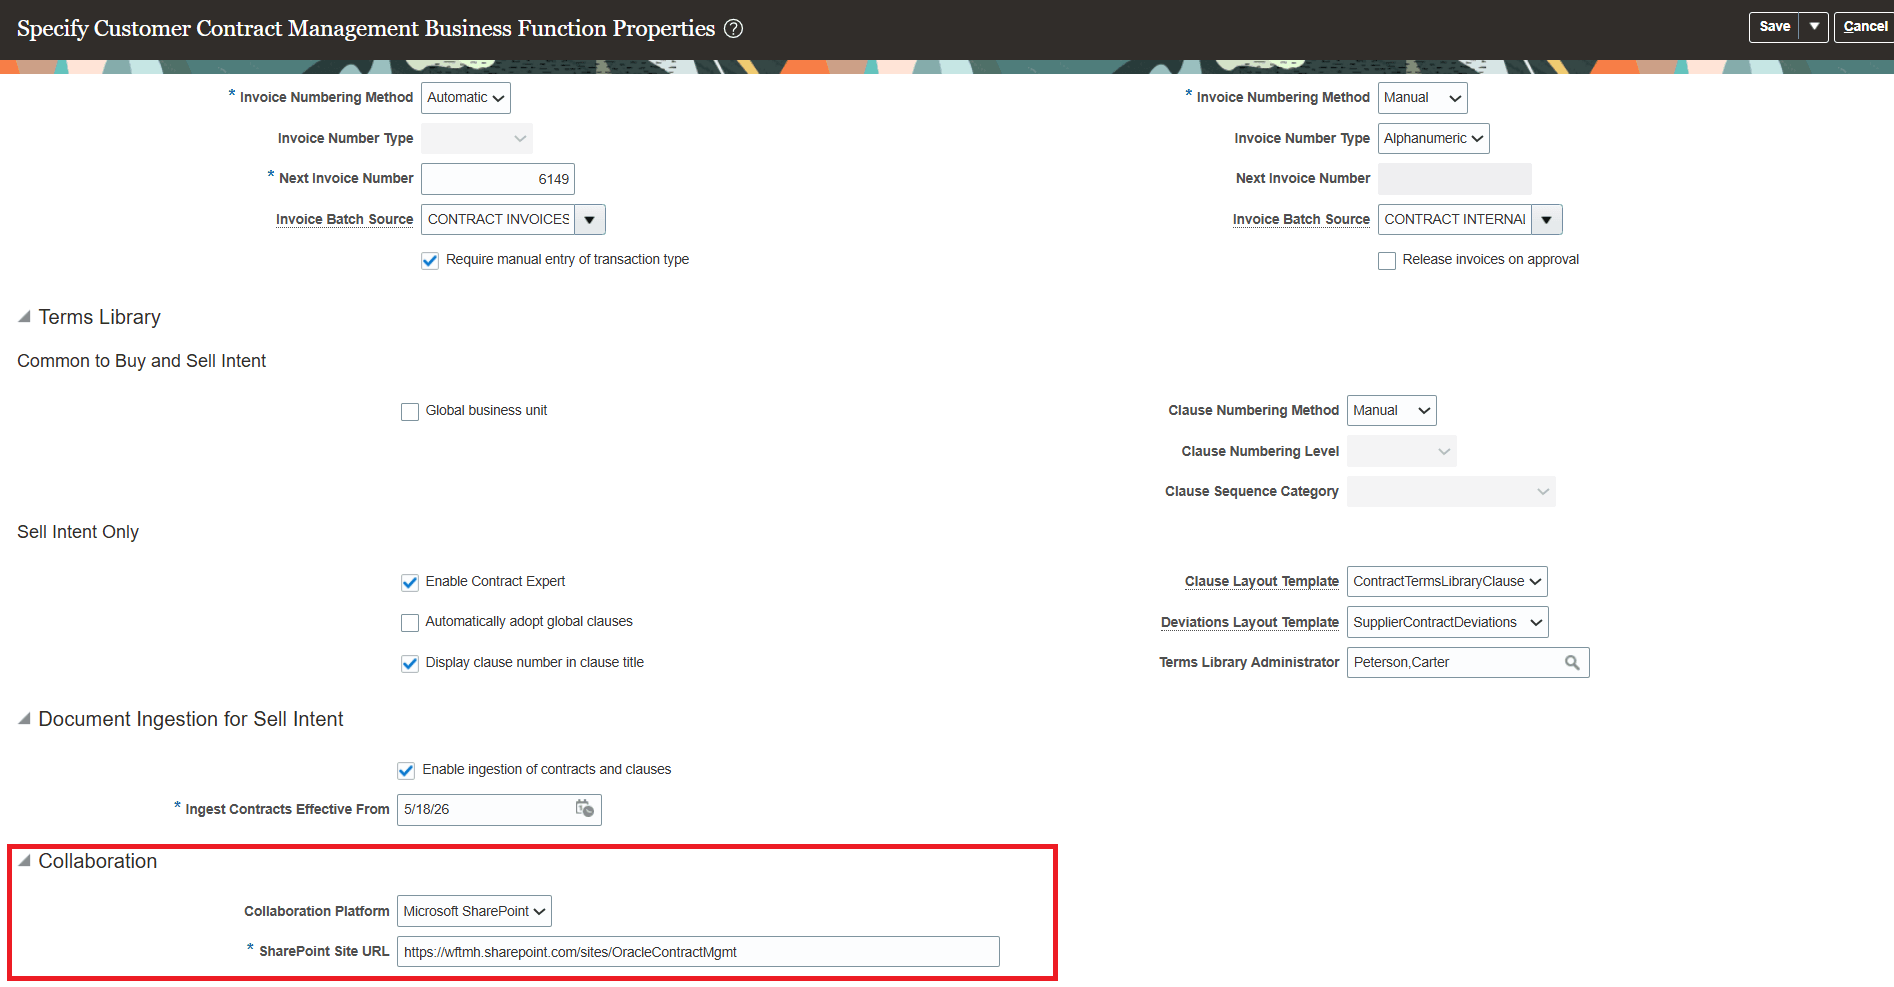
Configuring SharePoint URL at Business Function Level
-
- Click Save.
-
Step 6:
Create a Microsoft 365 Group in Microsoft Entra
Create a Microsoft 365 group in Microsoft Entra and add the users who will participate in contract collaboration. This group is used later in the Power Automate flow to assign the required SharePoint permissions.
-
Go to the Microsoft Entra admin center: https://entra.microsoft.com
-
Sign in with an admin account that has permission to create groups.
-
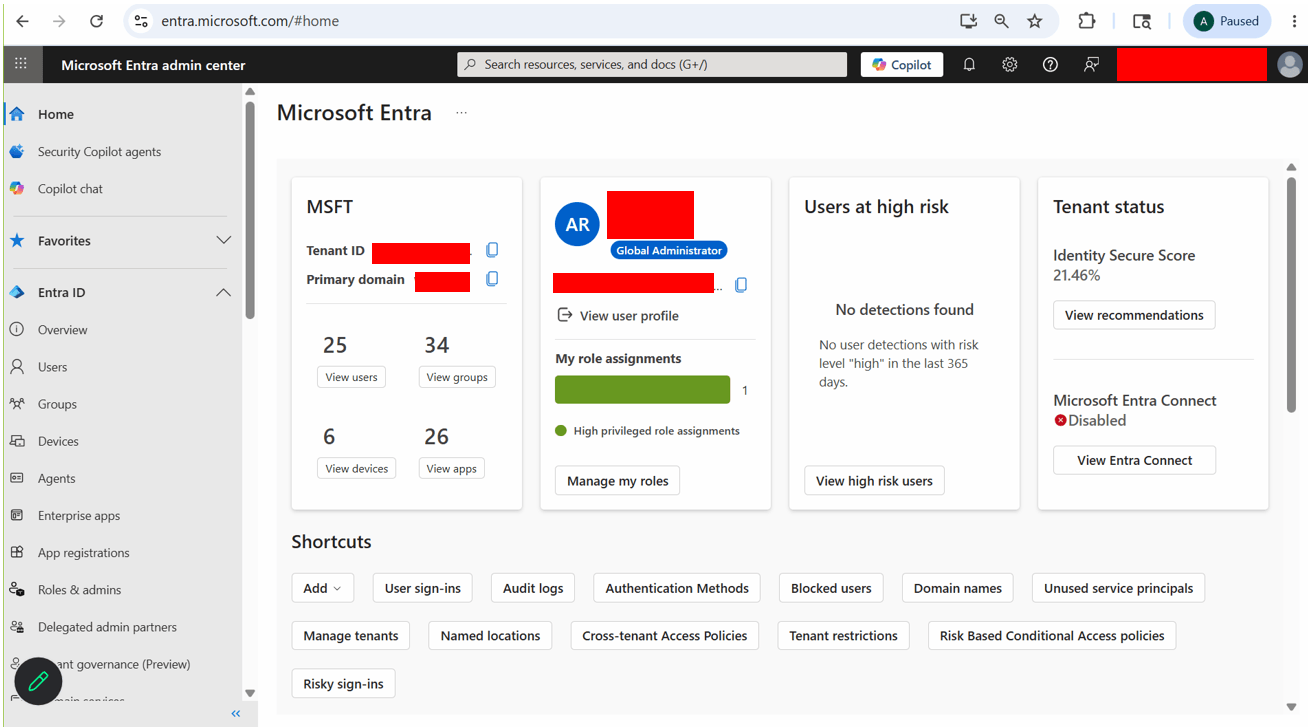
Entra Admin Center Home Page
-
- In the left navigation pane, click Groups.
- On the Groups | Overview page, click New group.
-
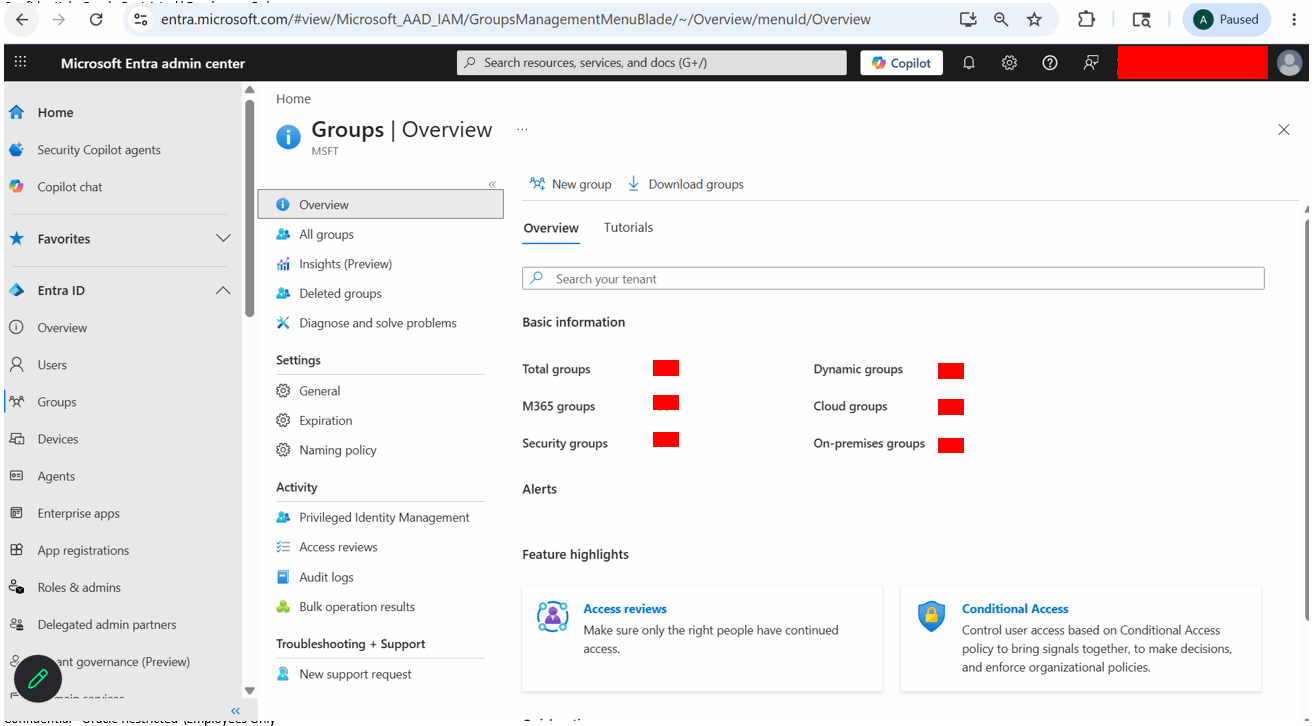
Groups
-
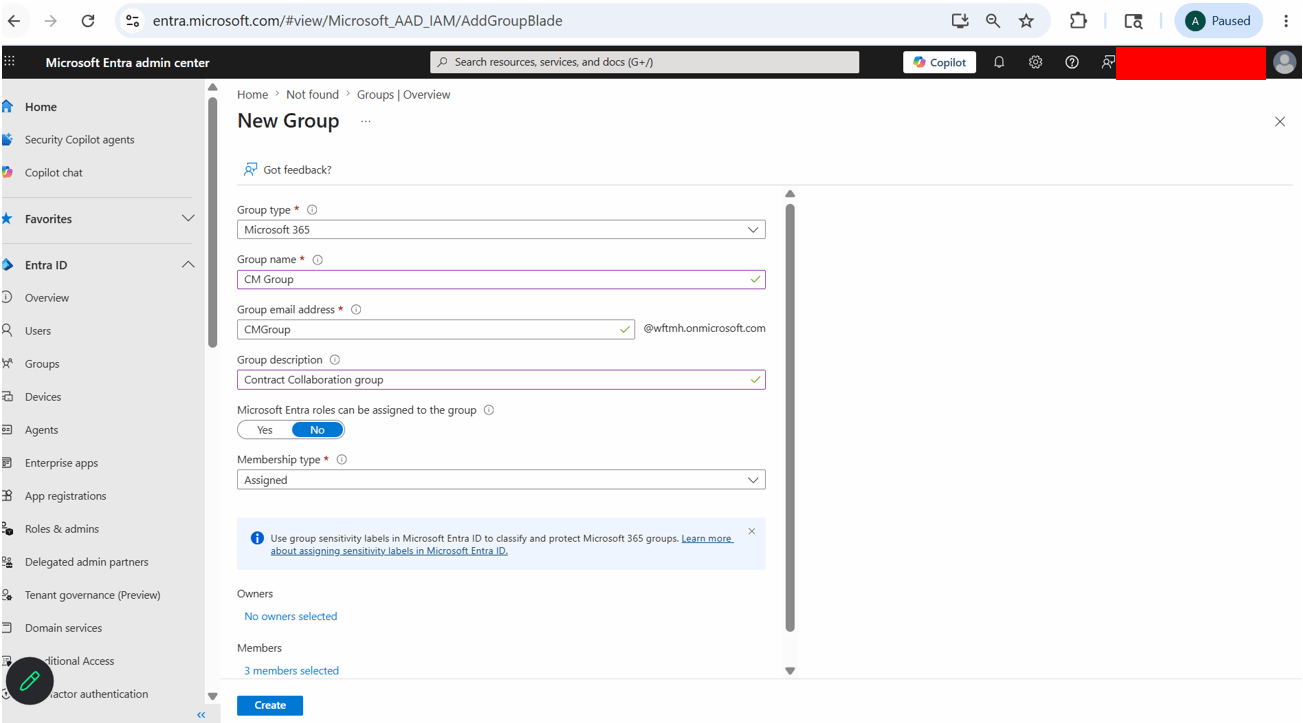
- On the New Group page, enter the group details
-
New Group Creation Details
Field Value Group type Select Microsoft 365. Group name Enter a name for the group, such as CM Group
Group email address System generated. Recommendation is to leave it as is. Group description Enter a description, such as Contract Collaboration group
Microsoft Entra roles can be assigned to the group Select No. Membership type Select Assigned. 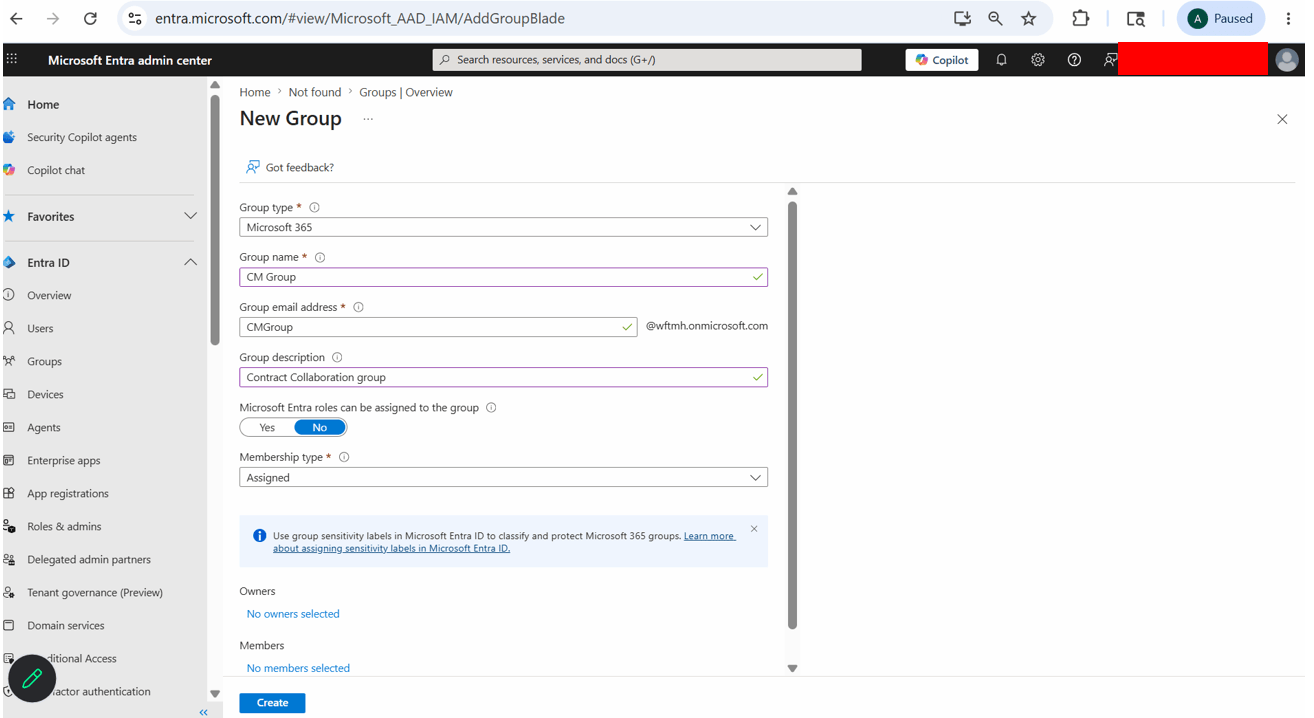
Enter Group Creation Details
-
- In the Members section, click No members selected.
- In the Add members drawer, search for and select the users who will participate in contract collaboration.
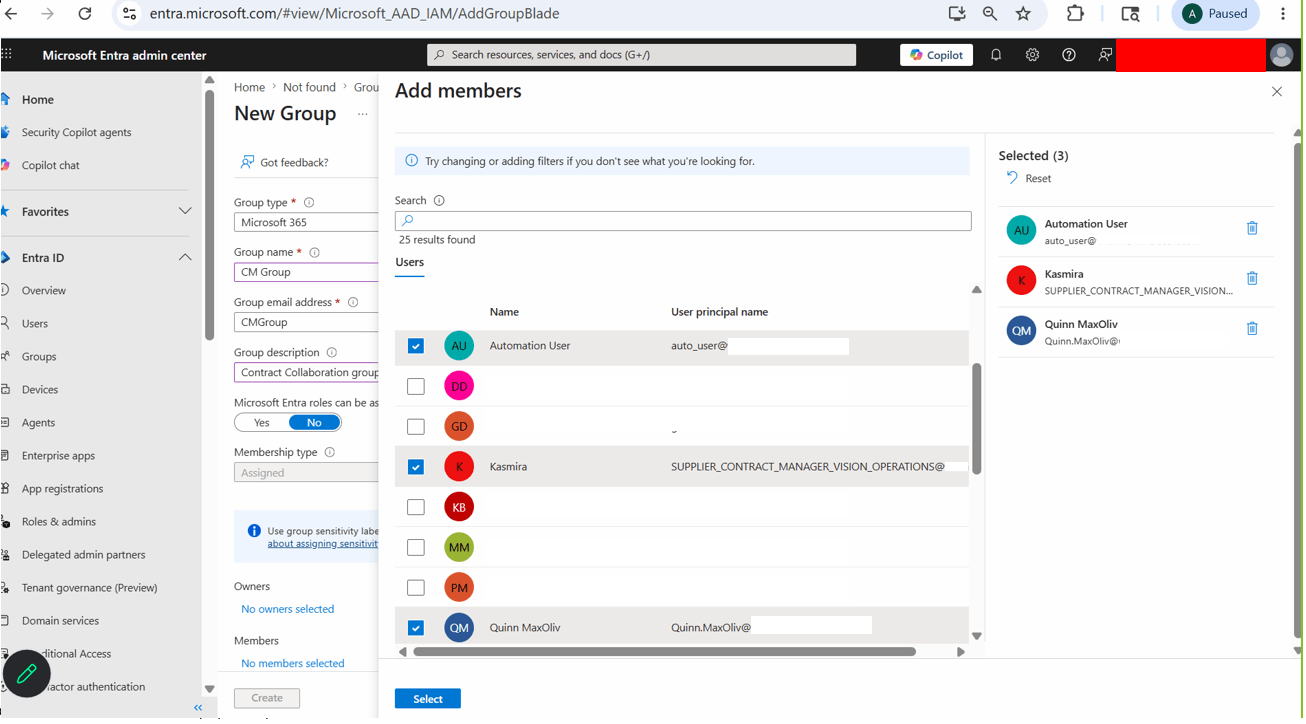
Add Members Drawer
- Click Select.
- Confirm that the selected members are listed in the Members section.
Group Members Added
- Click Create.
-
After the group is created, copy the group’s Object ID. You’ll need this value when running the Power Automate flow.
- In Microsoft Entra, go to Groups > All groups.
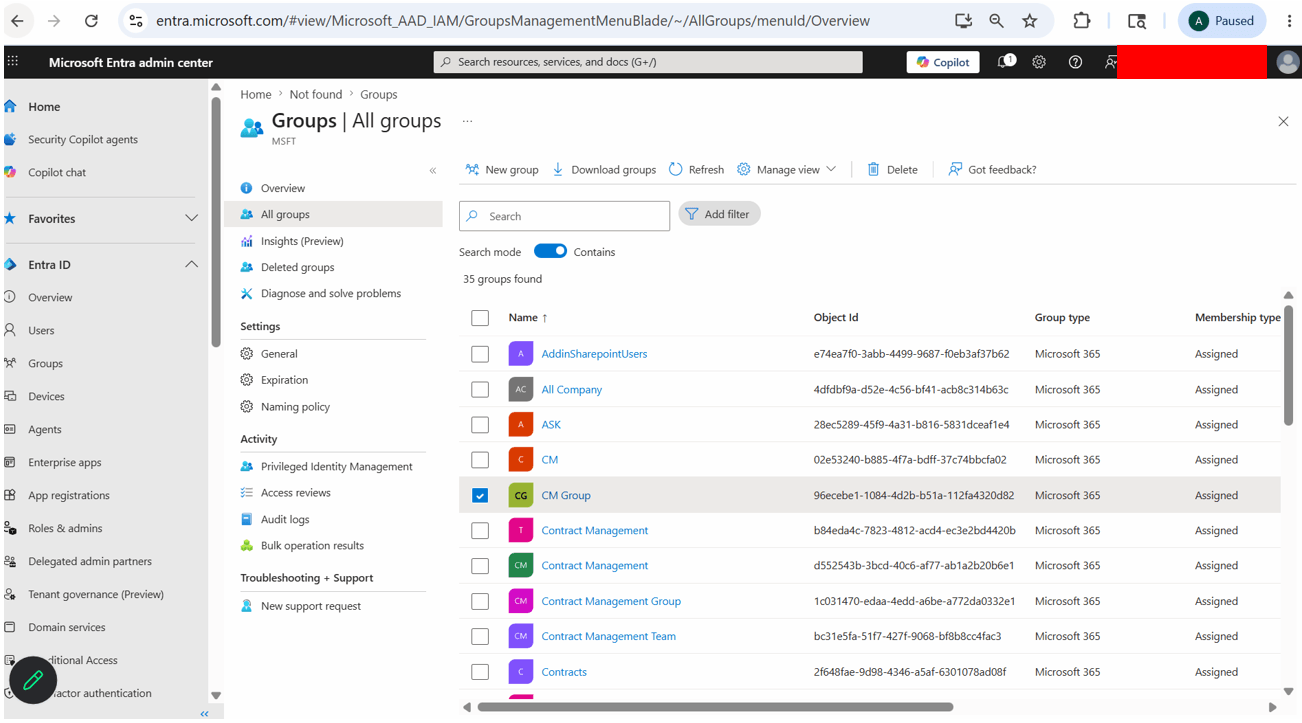
Open the Group from All Groups
- Search for and select the group you created.
-
On the group Overview page, copy the Object ID.
-
Example: 96ecebe1-1084-4d2b-b51a-112fa4320d82
-
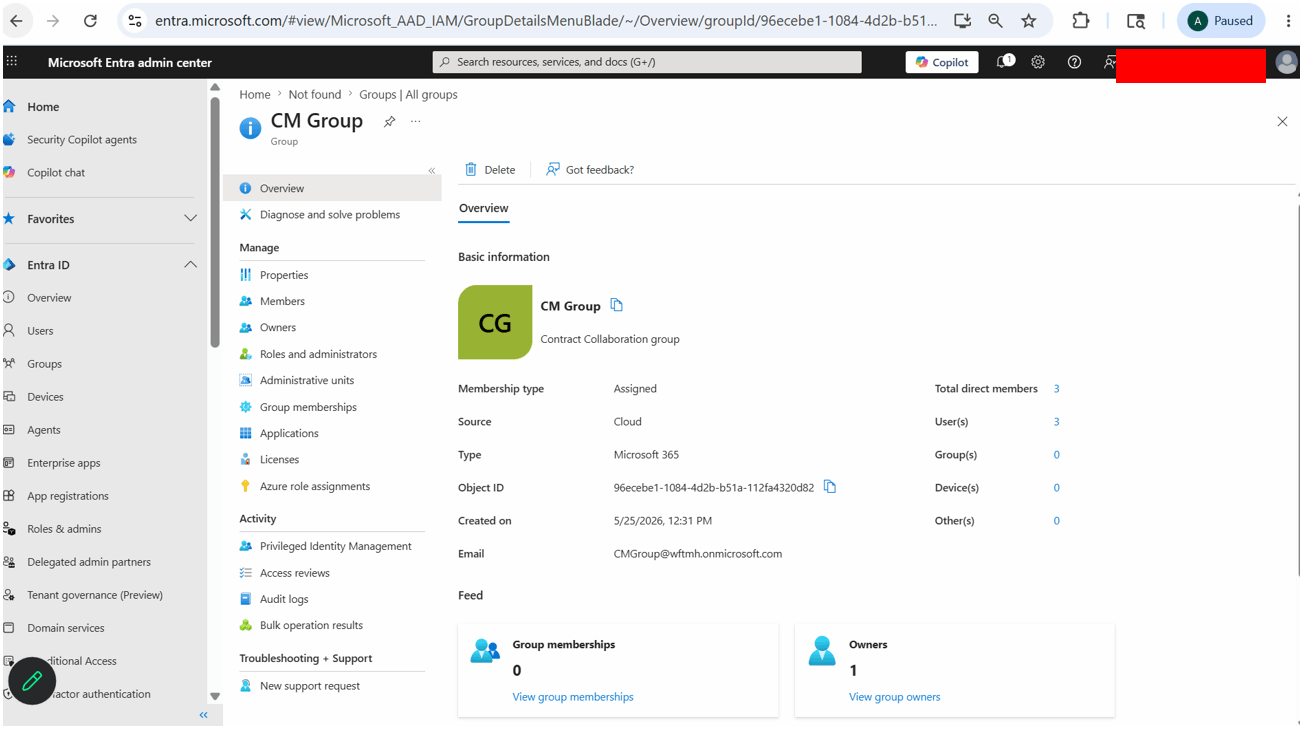
Copy Object ID for future reference
-
-
Save the Object ID. This is the value to enter as EntraGroupID when you run the Power Automate flow.
- In Microsoft Entra, go to Groups > All groups.
Step 7:
Create a Power Automate Flow
Prerequisites: Before running the Power Automate flow, complete these prerequisites: Create a Microsoft 365 group in entra.microsoft.com. The Microsoft 365 group should contain all users who will participate in contract collaboration. After you complete the prerequisites, follow these steps to create the Power Automate flow
- Go to https://make.powerautomate.com/
- Click on My flows option in the left toolbar.
- Click on Instant cloud flow option in the New flow dropdown.
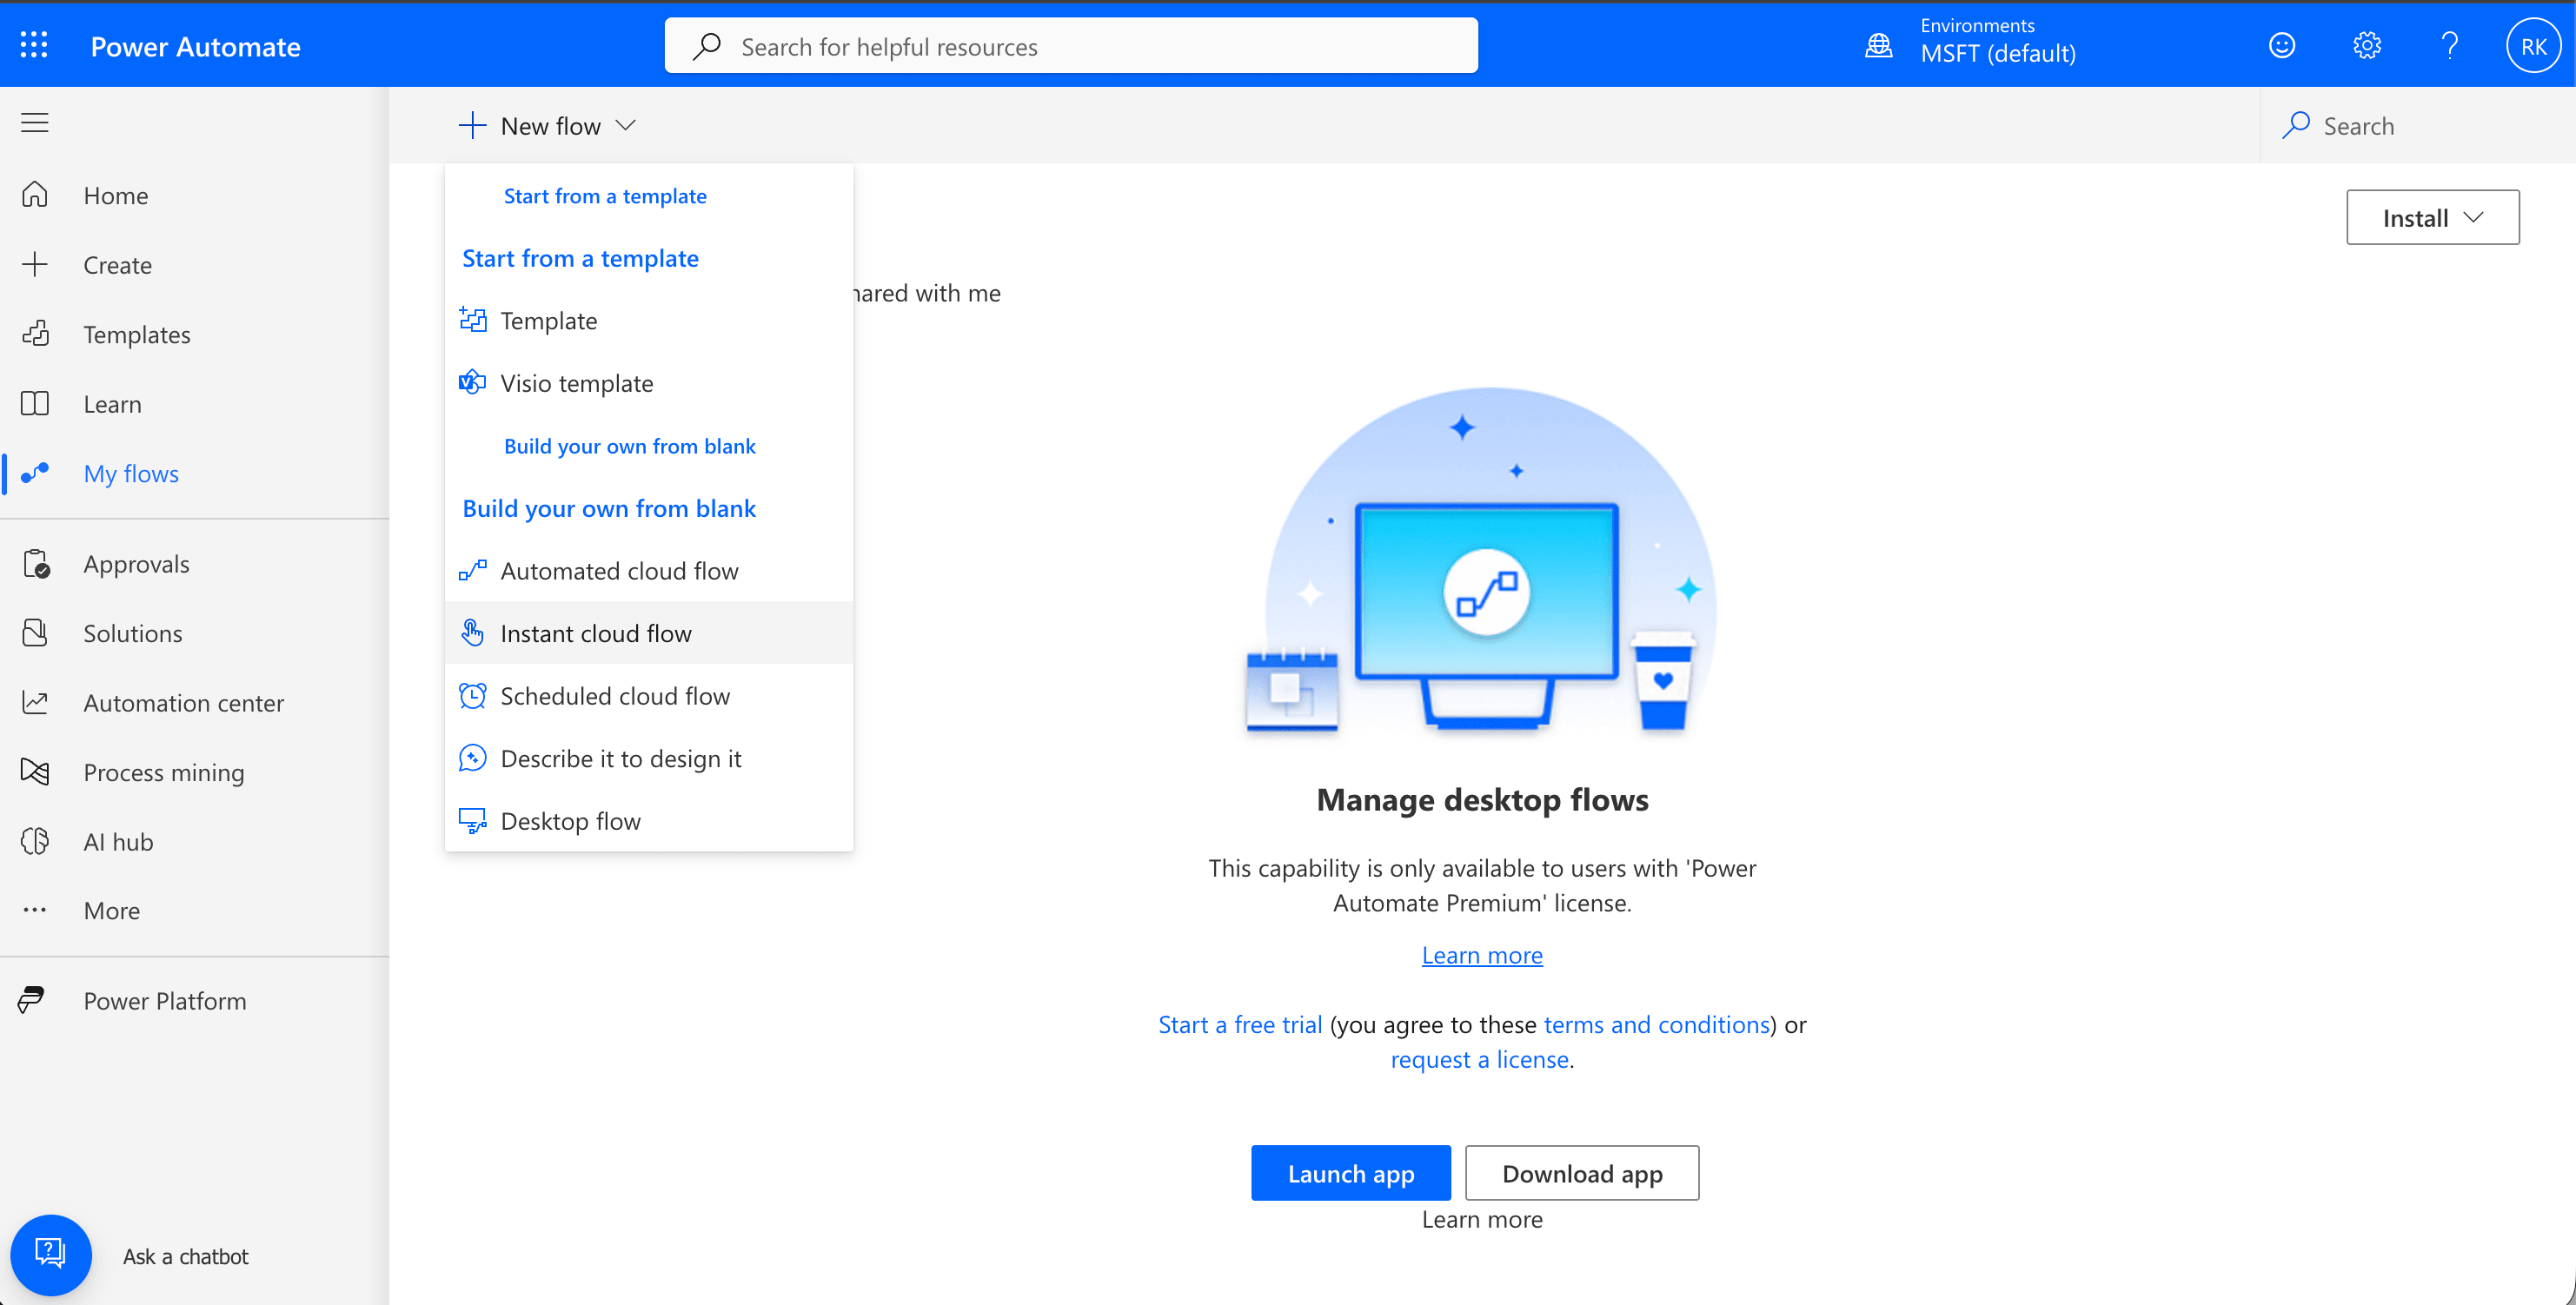
Select Instant Cloud Flow from My Flows
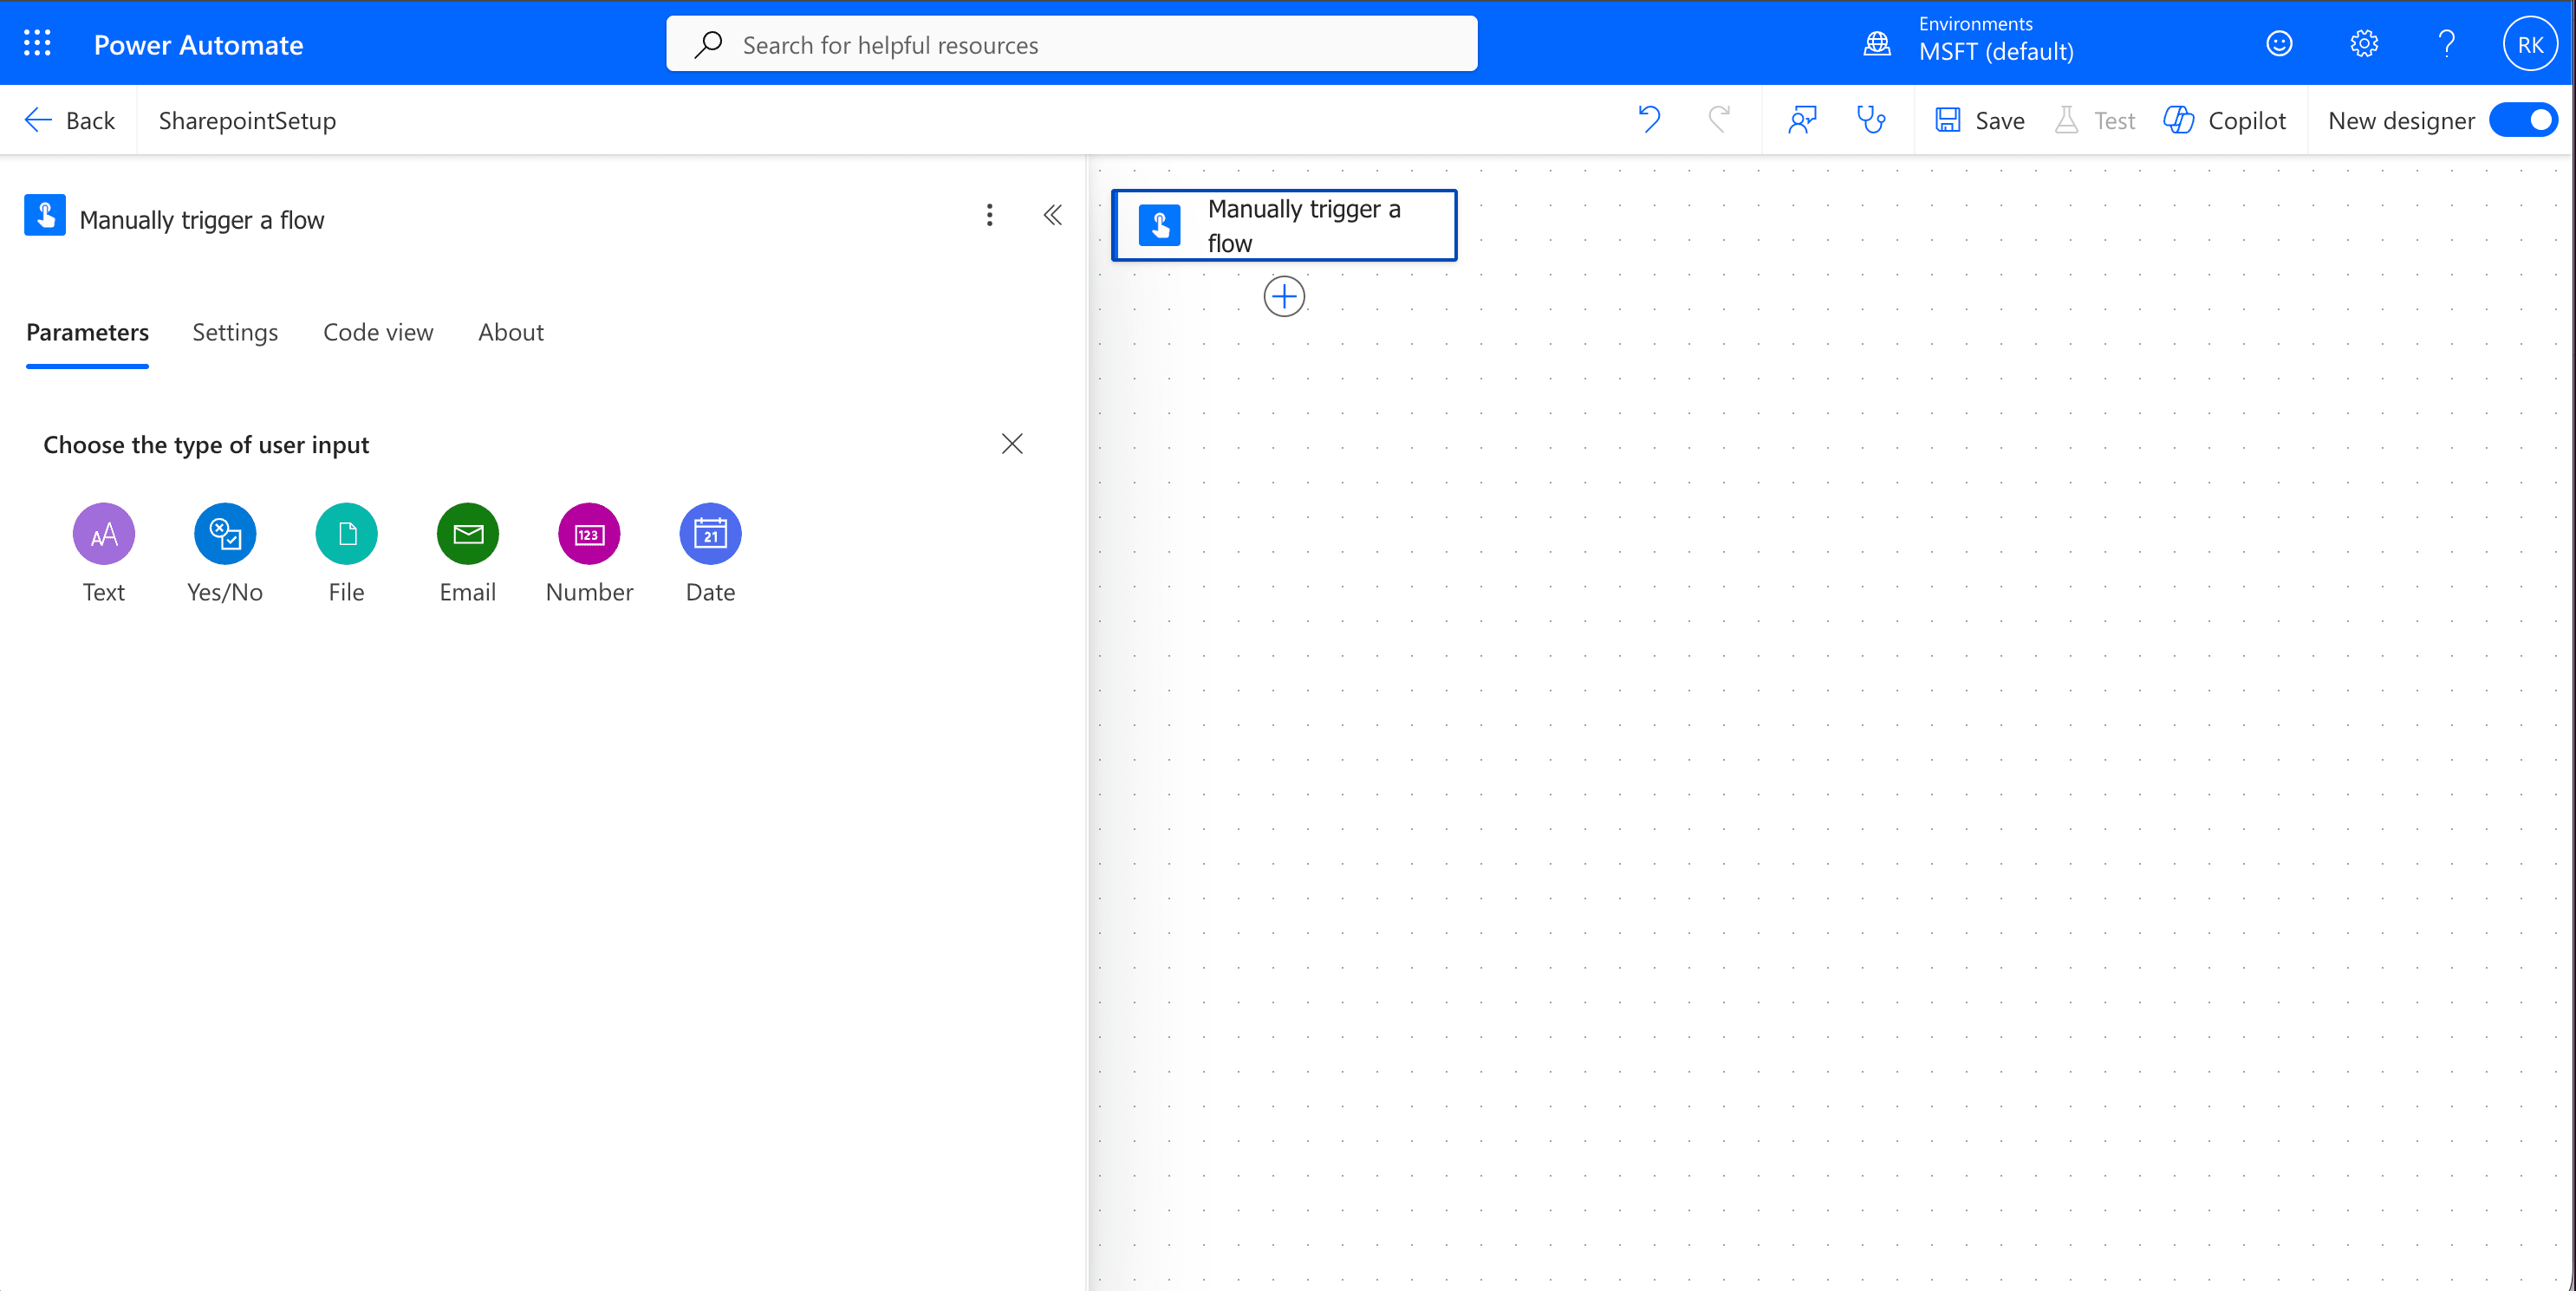
- Select Manually trigger a flow option and give a Flow Name.
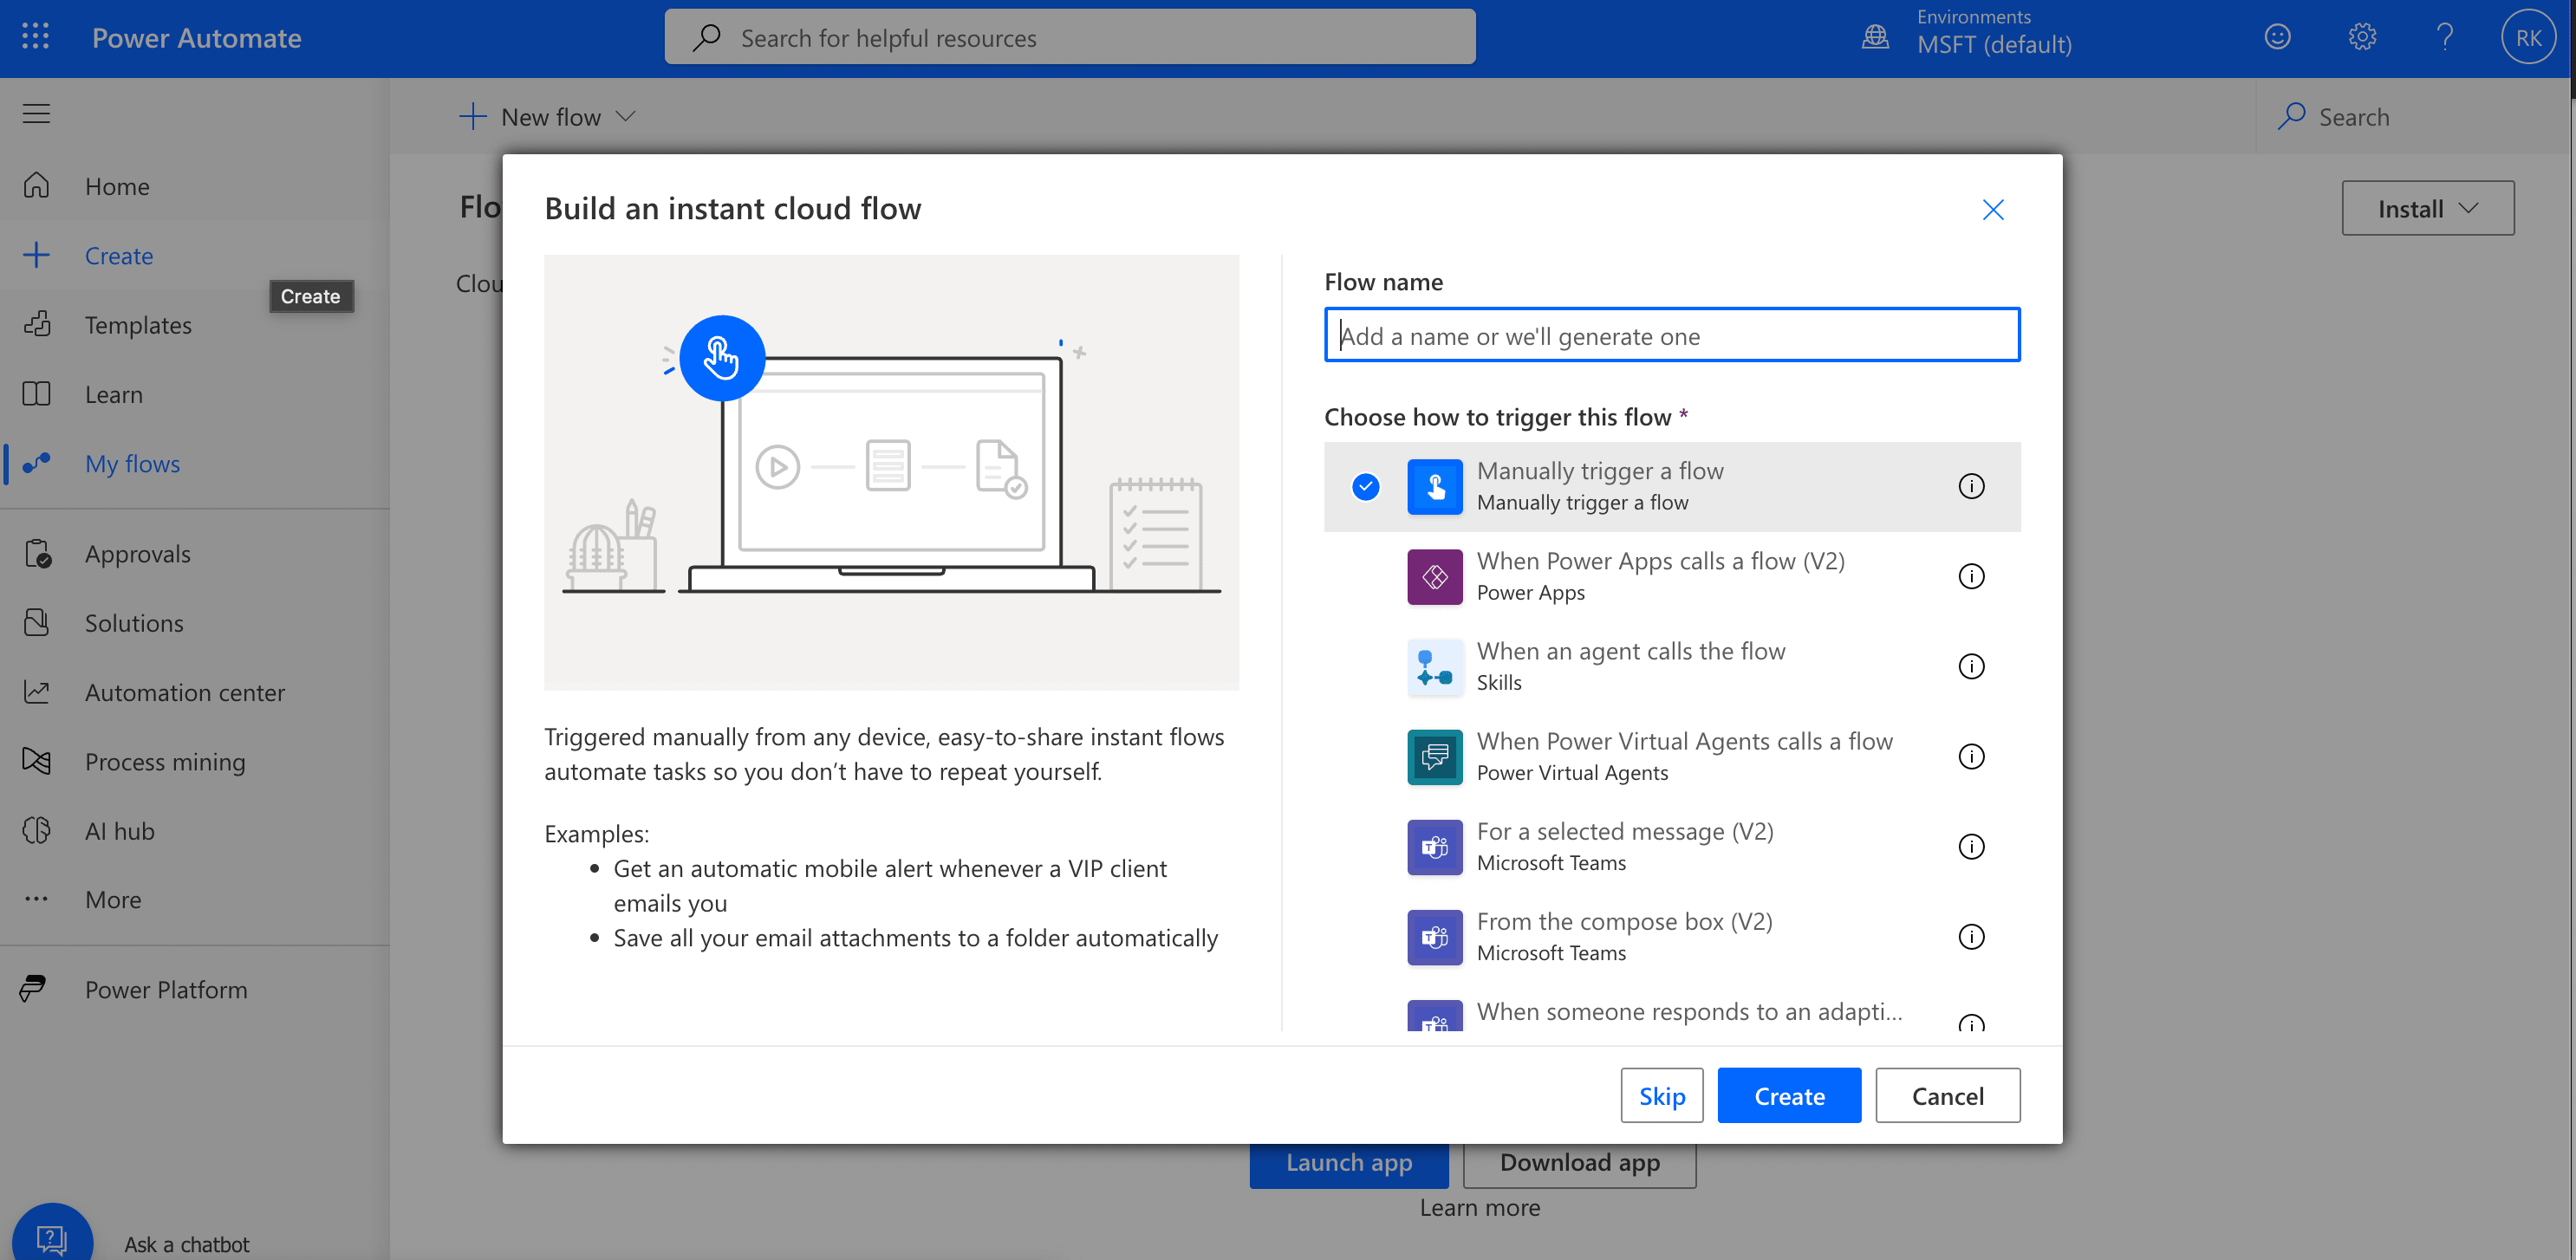
Choose manually Trigger a flow
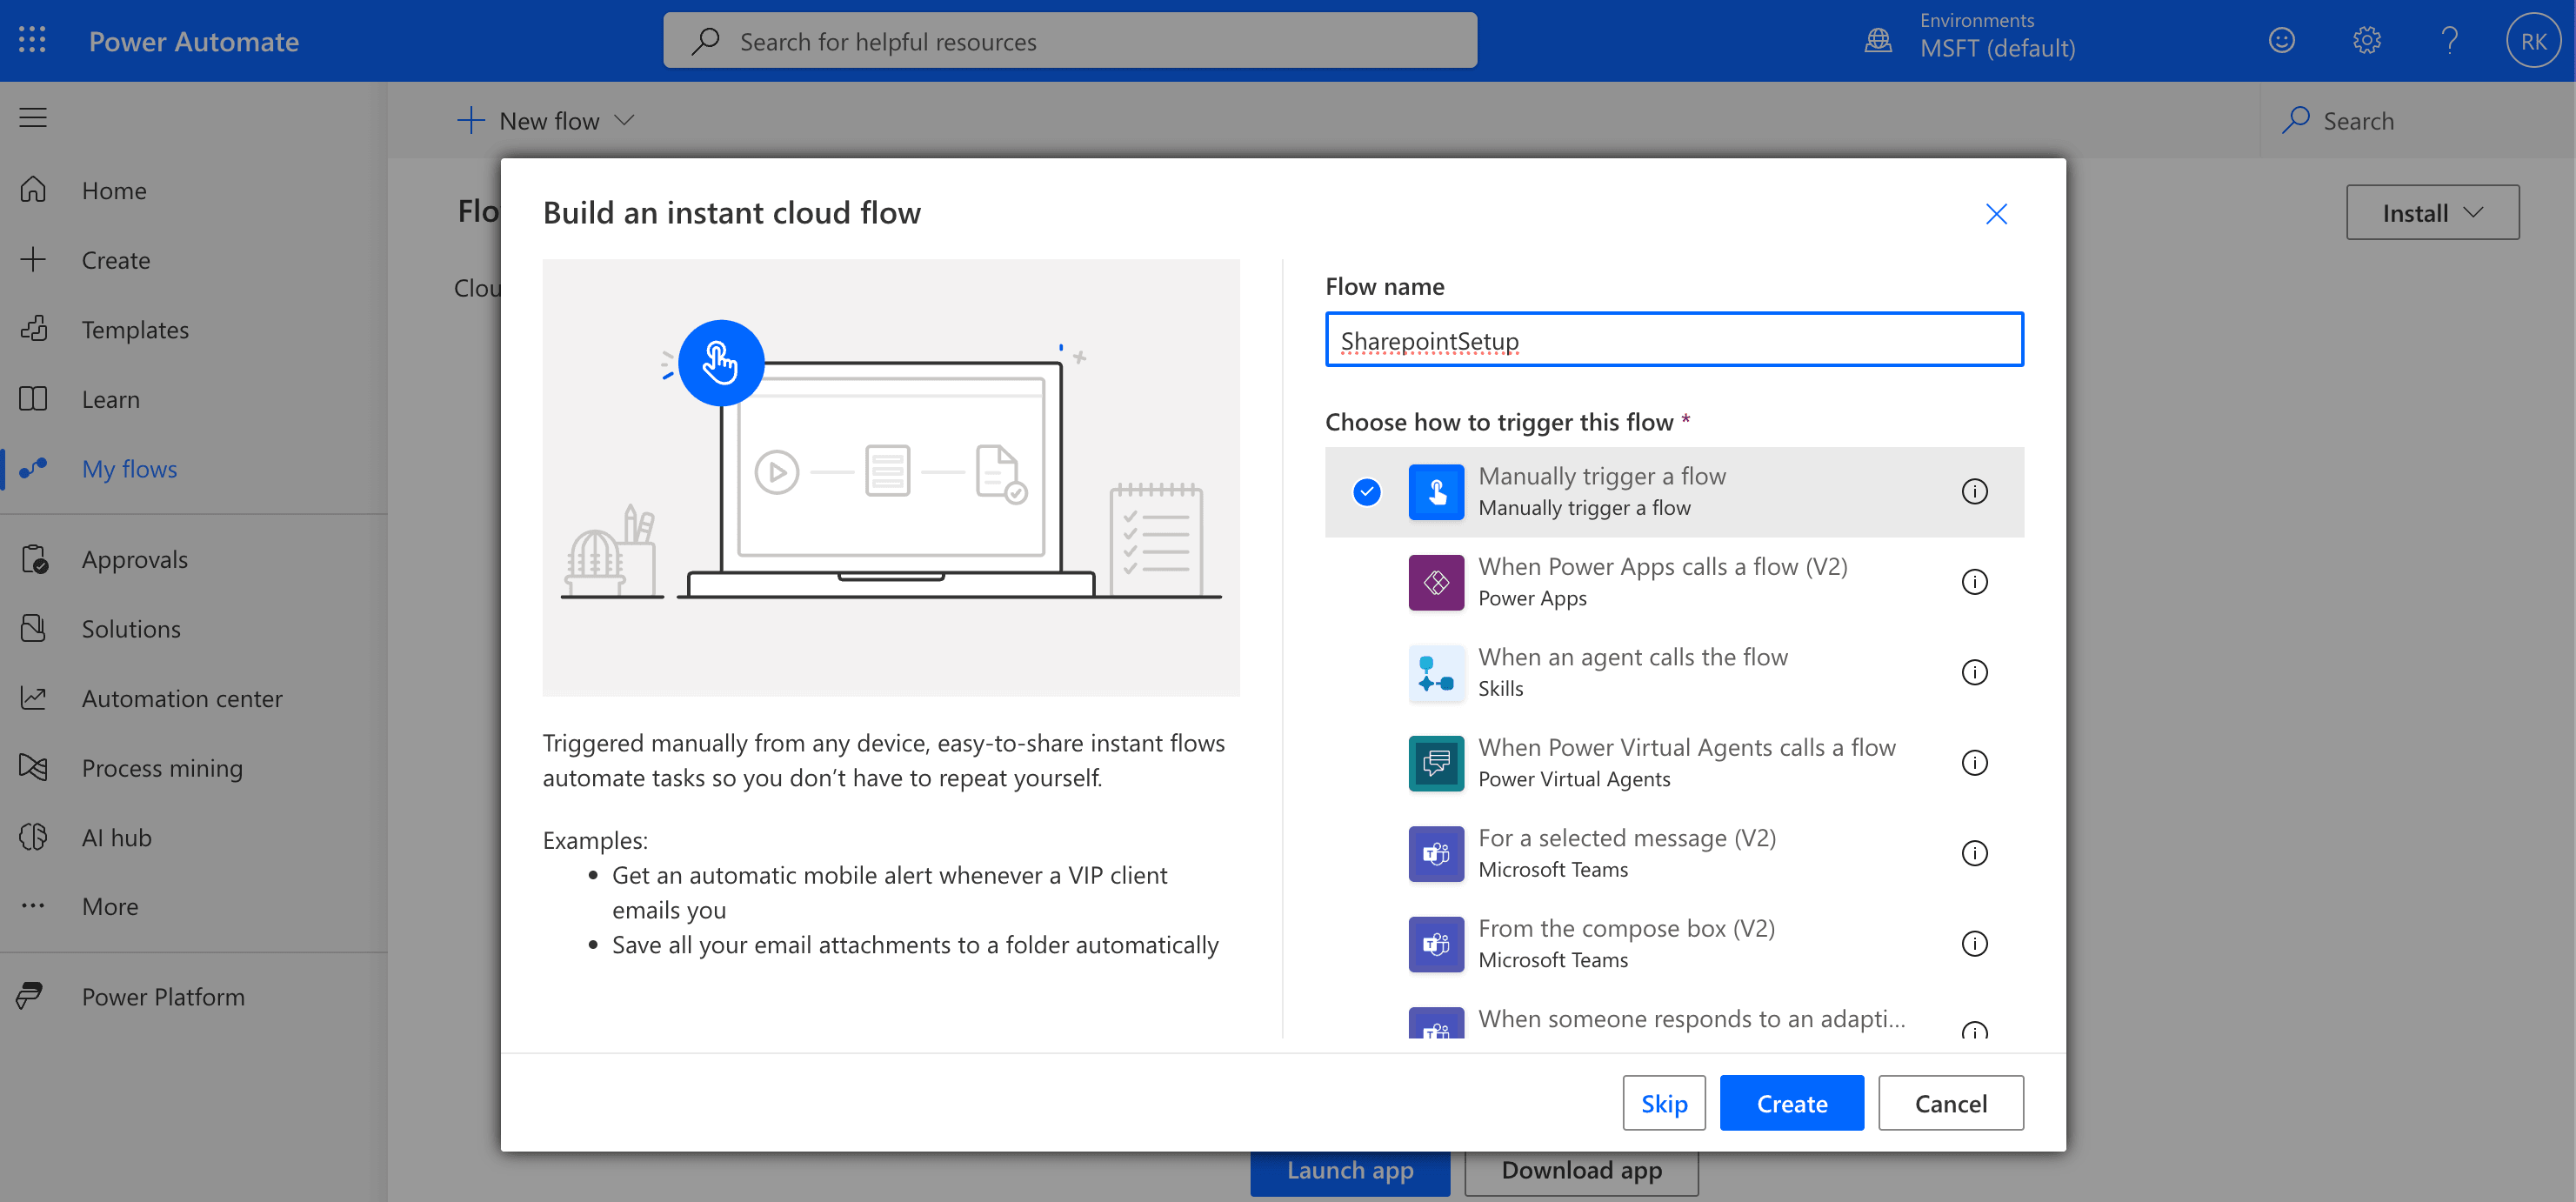
Enter Flow Name
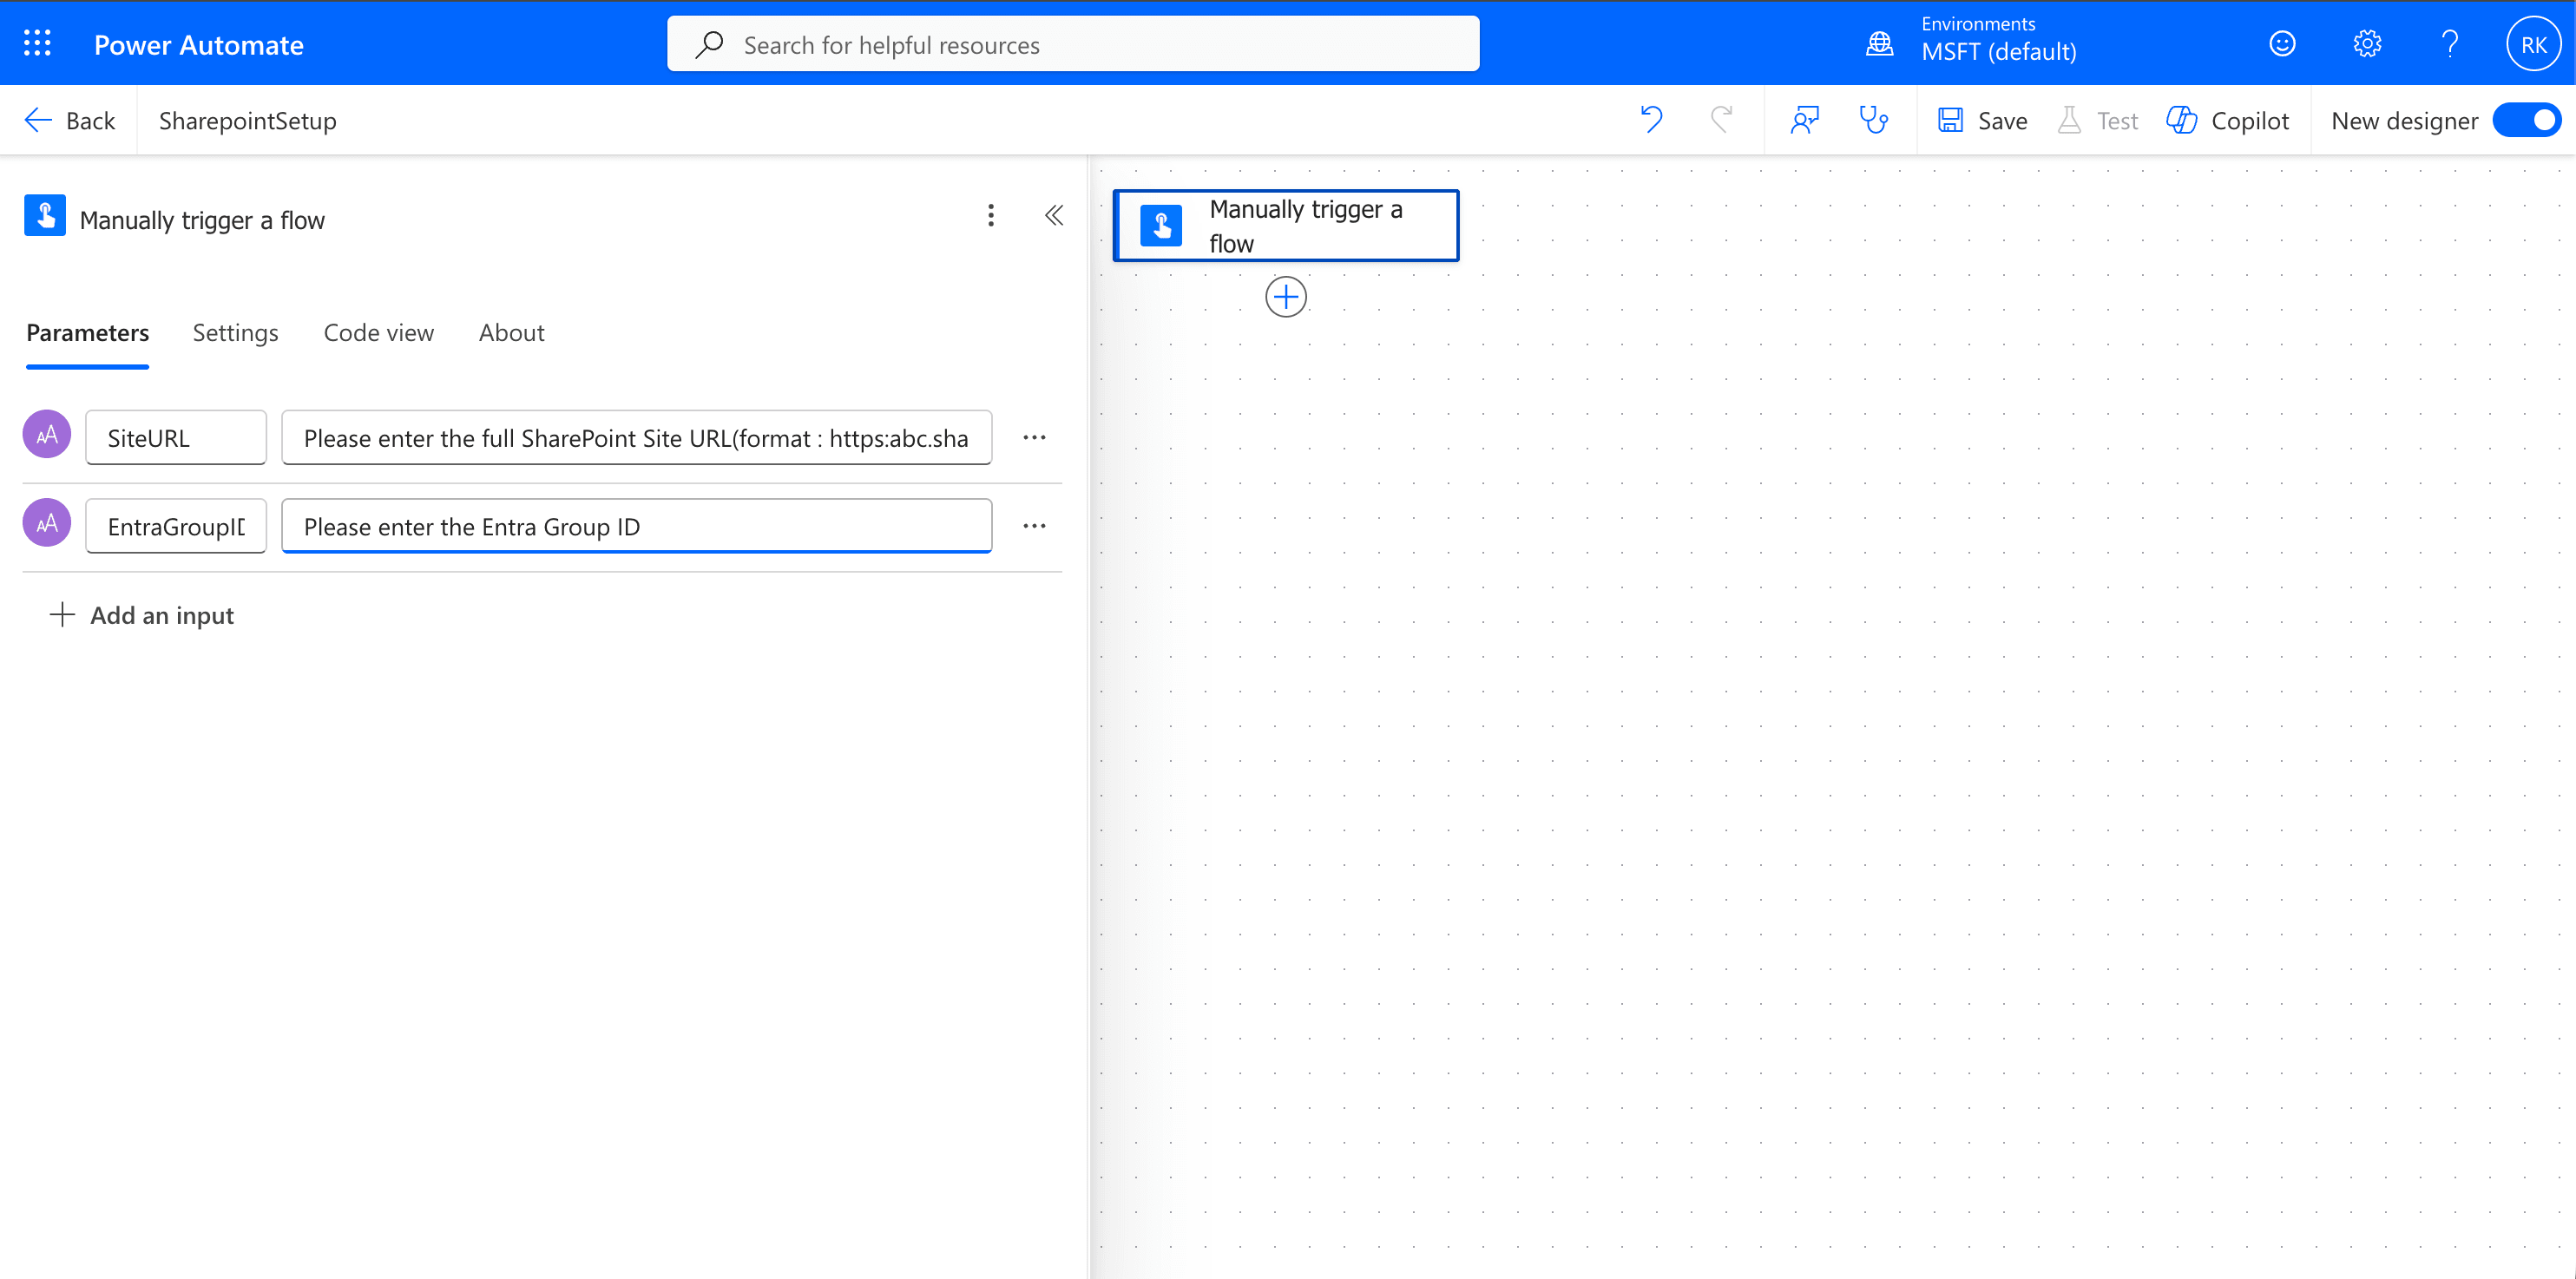
- In the Manually trigger a flow action, add two parameters(Click on Add an input button and select Text as the type of user input) :
- SiteURL - Please enter the full SharePoint Site URL(format : https:abc.sharepoint.com/sites/Test)
- EntraGroupID - Please enter the Entra Group ID
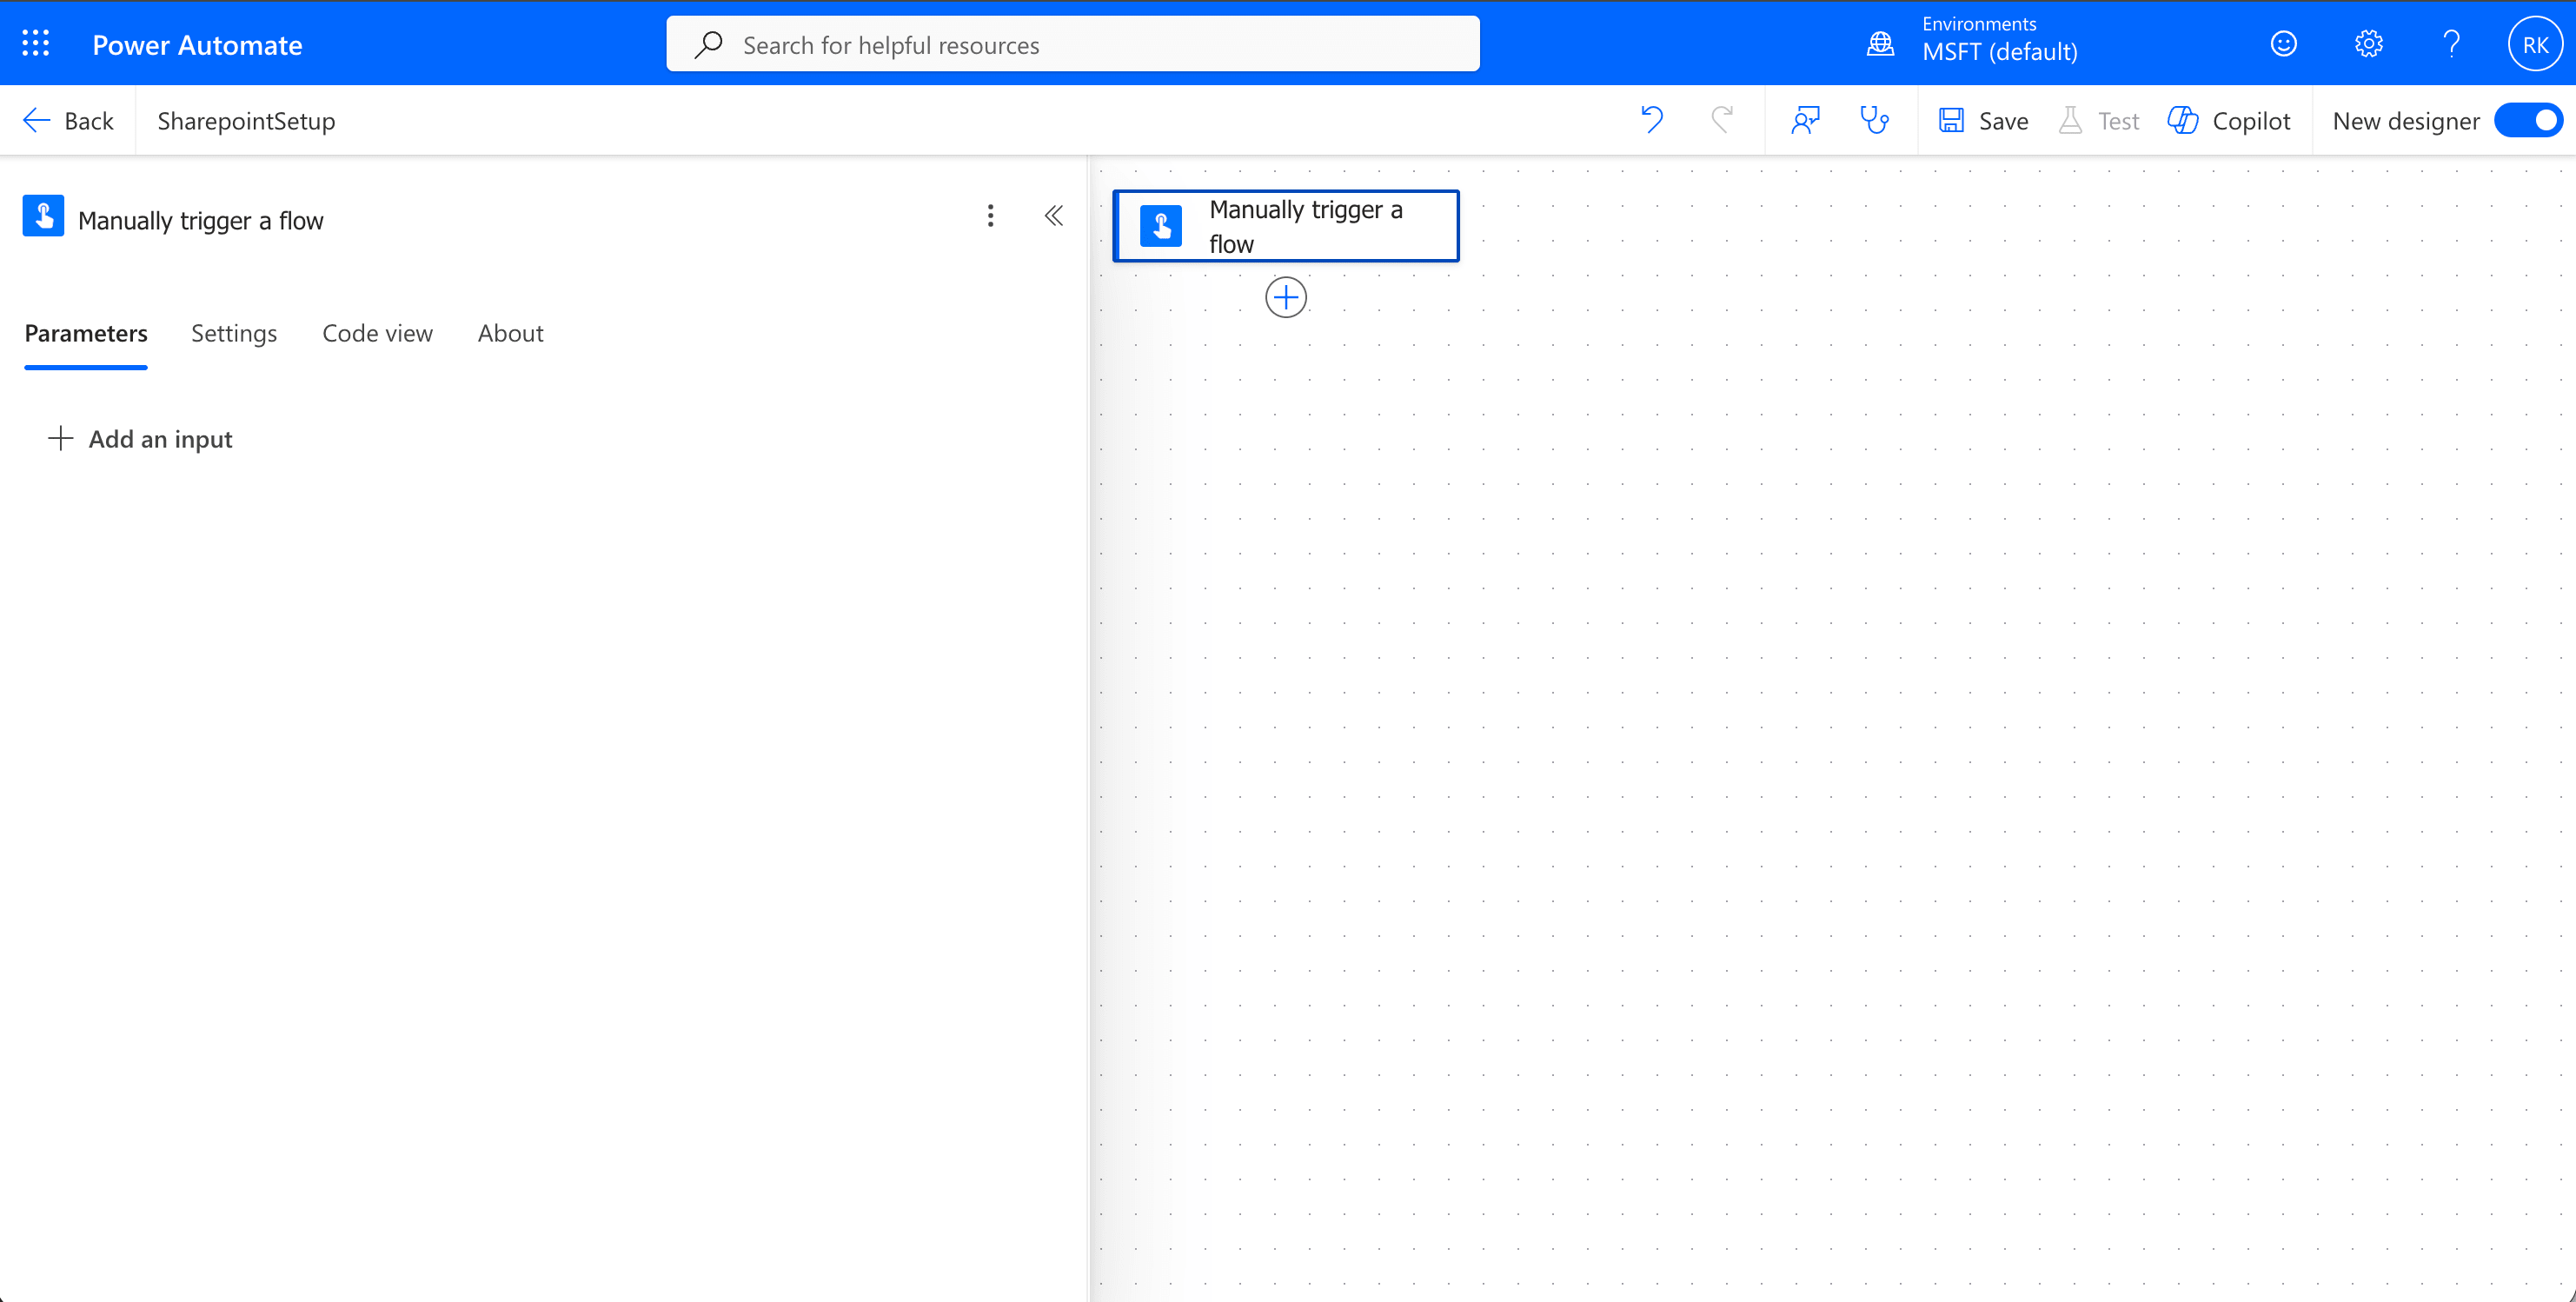
Add Parameters by Clicking on Add an input
Select Text
Add Parameters
- Add a new action by clicking on the plus(+) icon - Initialize variable
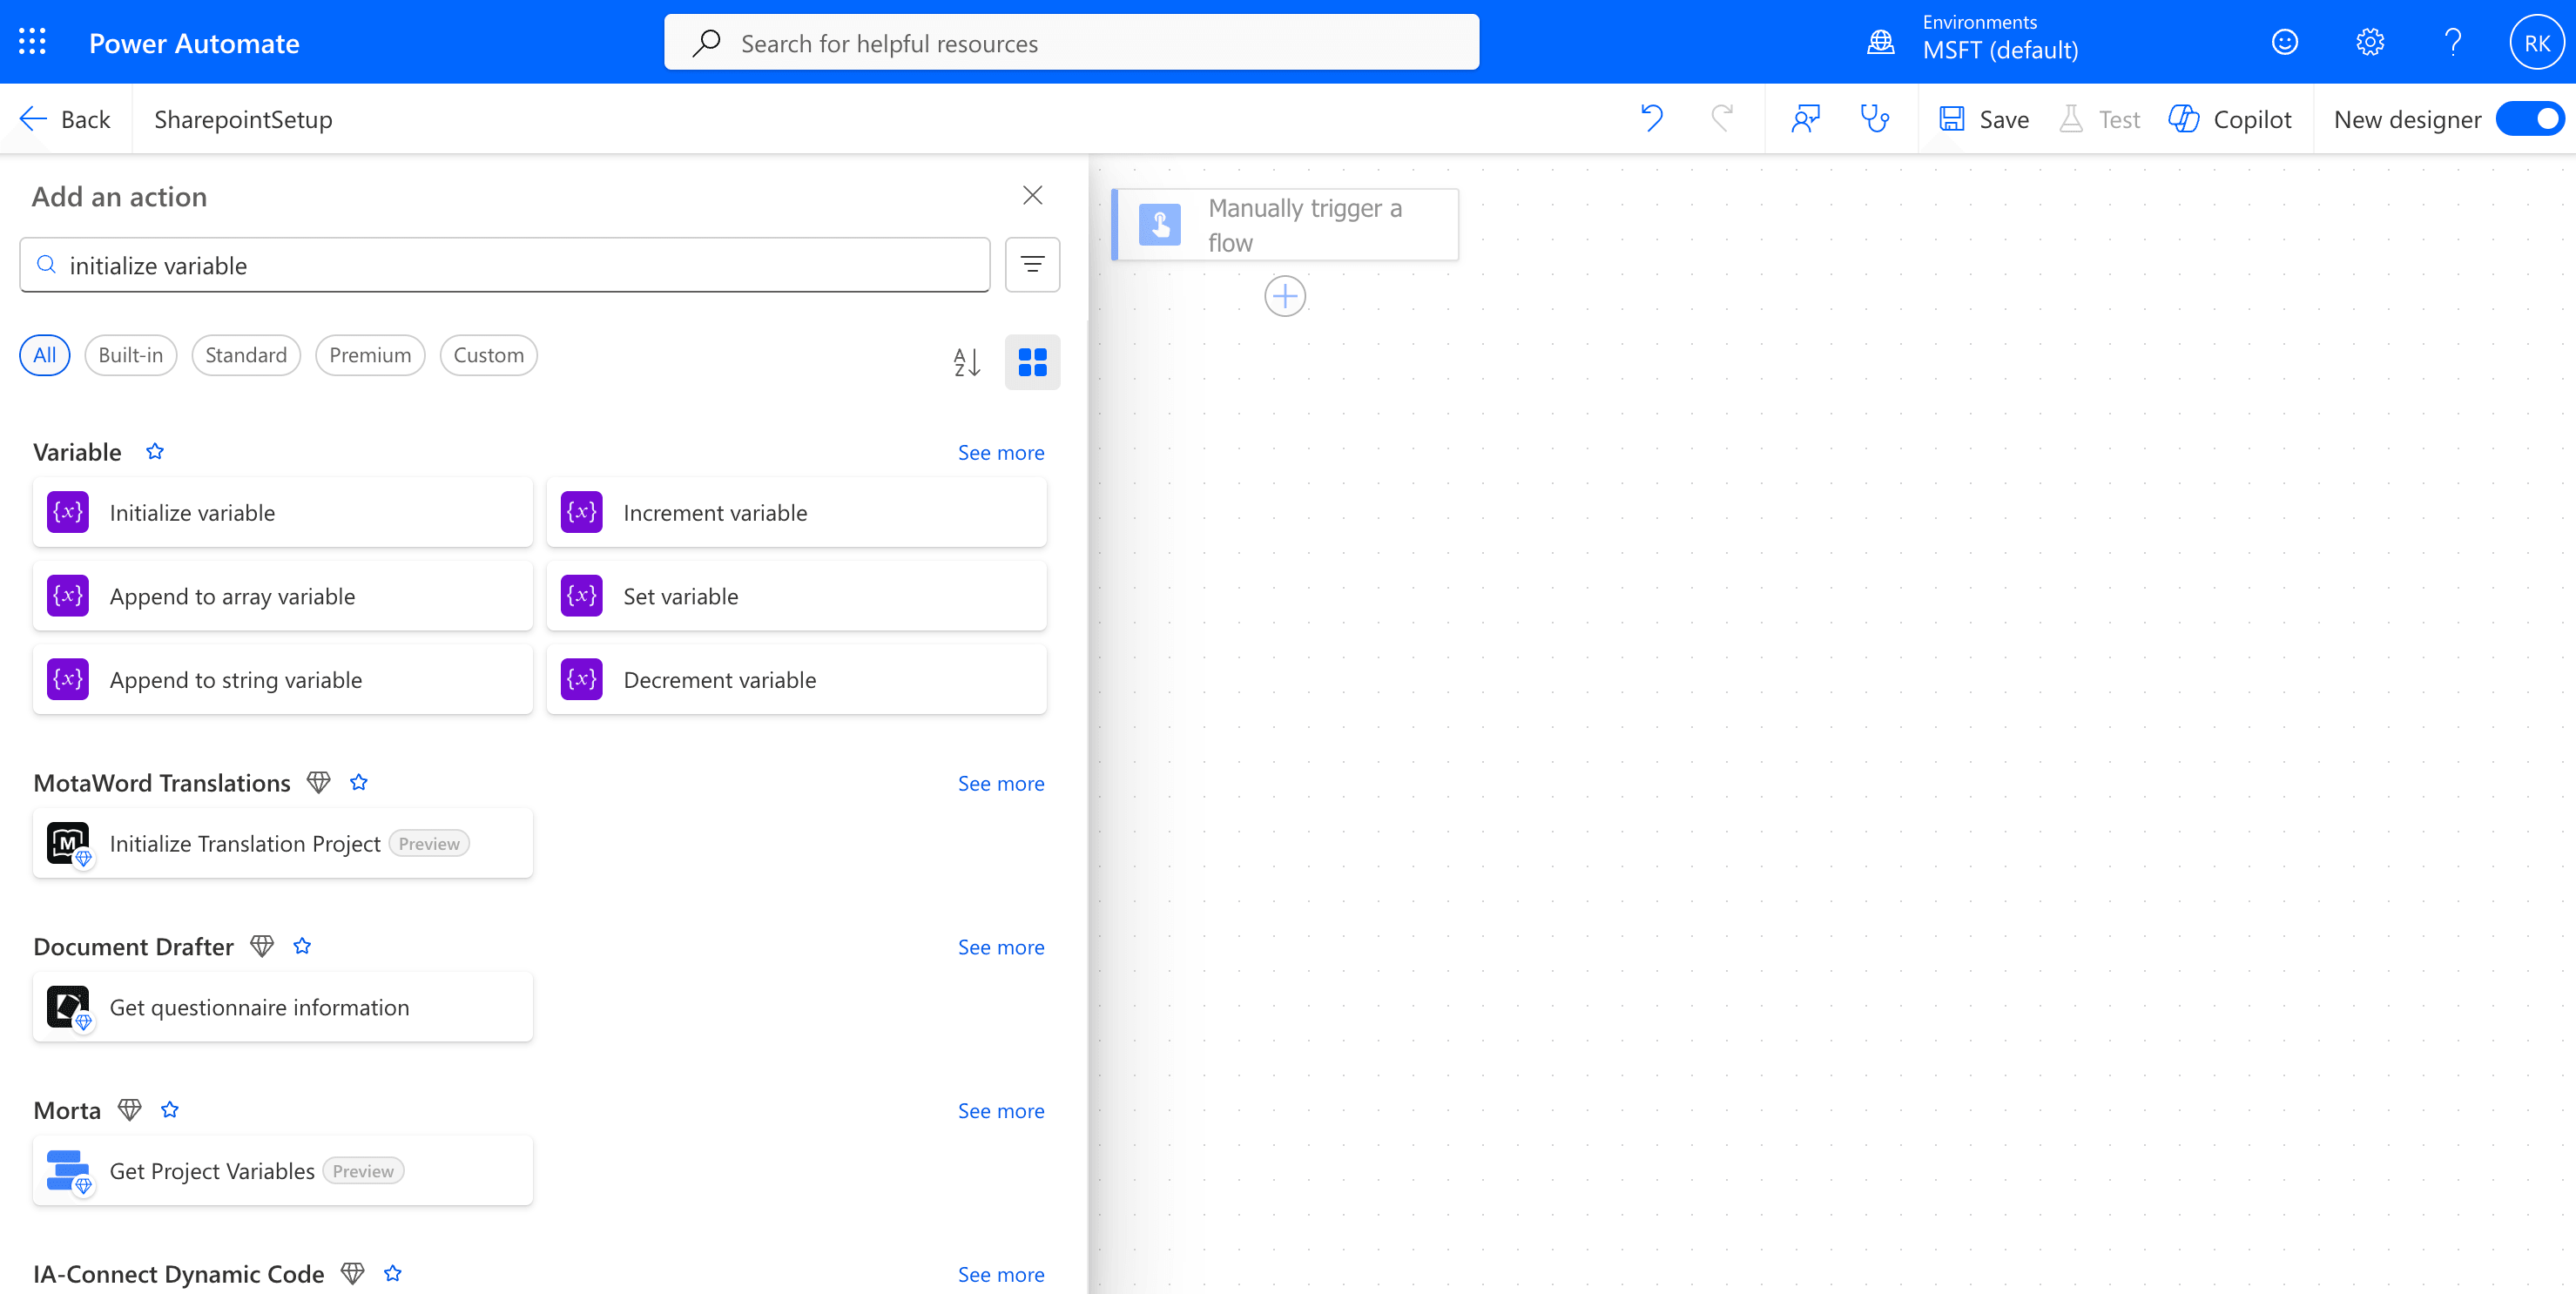
Initialize Variable
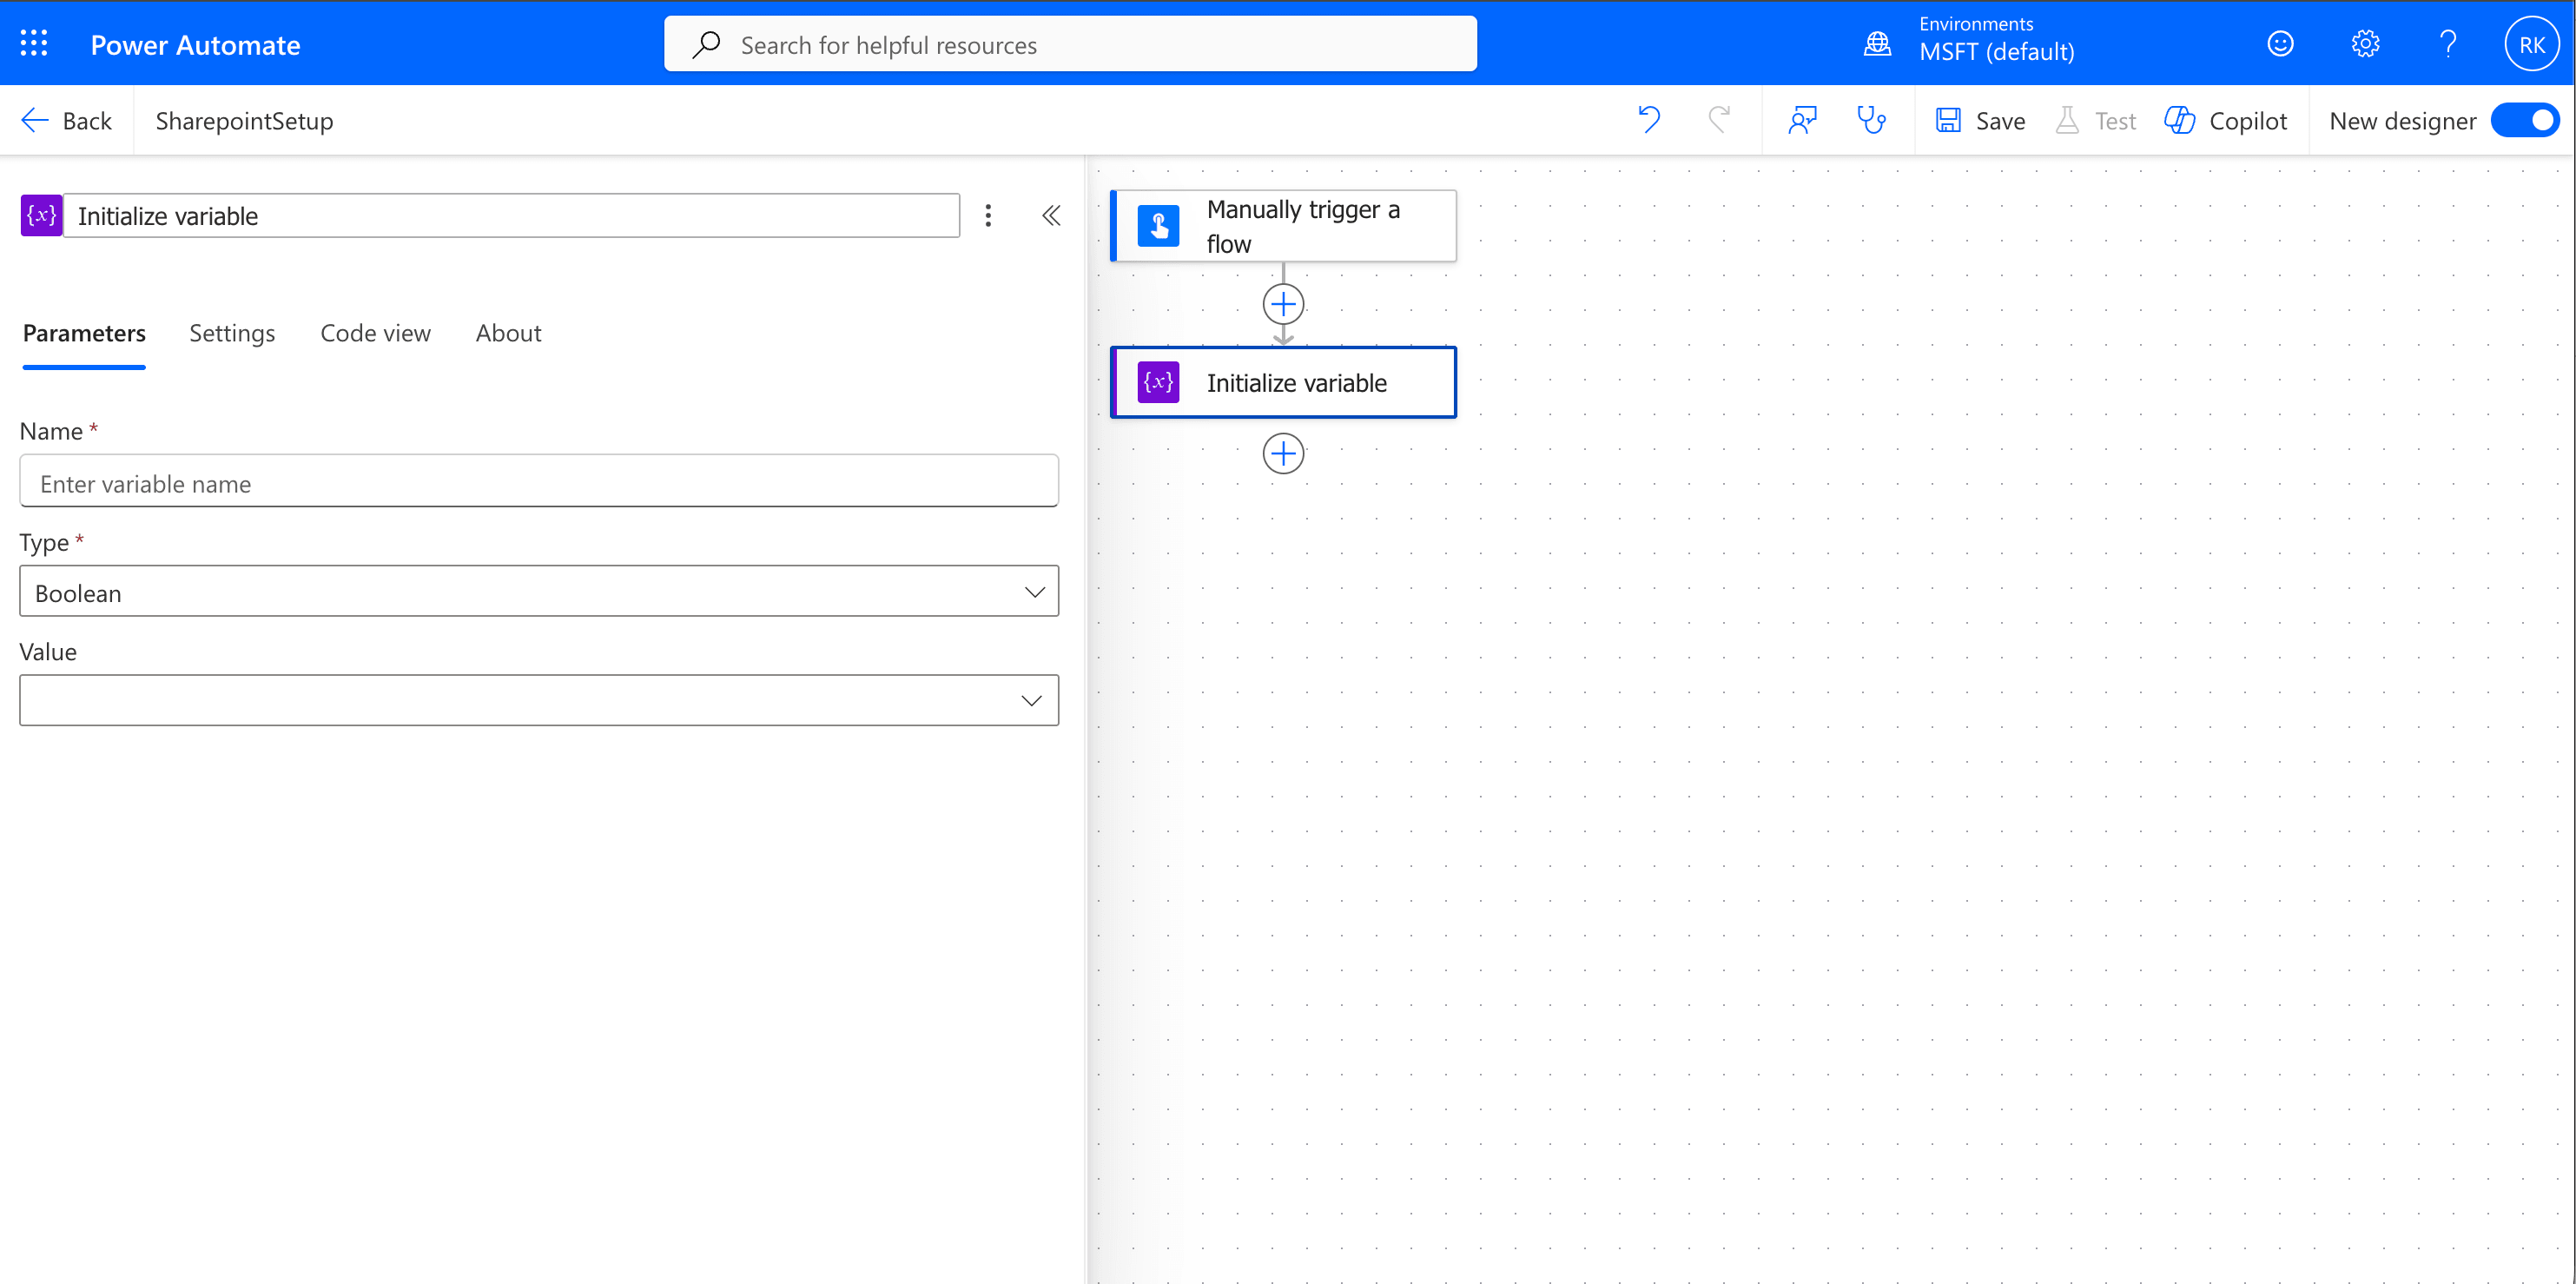
Modify Initialize Variable
-
- Rename action to Initialize Sharepoint Site URL
- Enter varSiteUrl in the Name field - This is the variable which will be used to refer to the Sharepoint site in the subsequent actions.
- Select Type as string.
- In the Value field, click and select the top option Dynamic Content and pick SiteURL
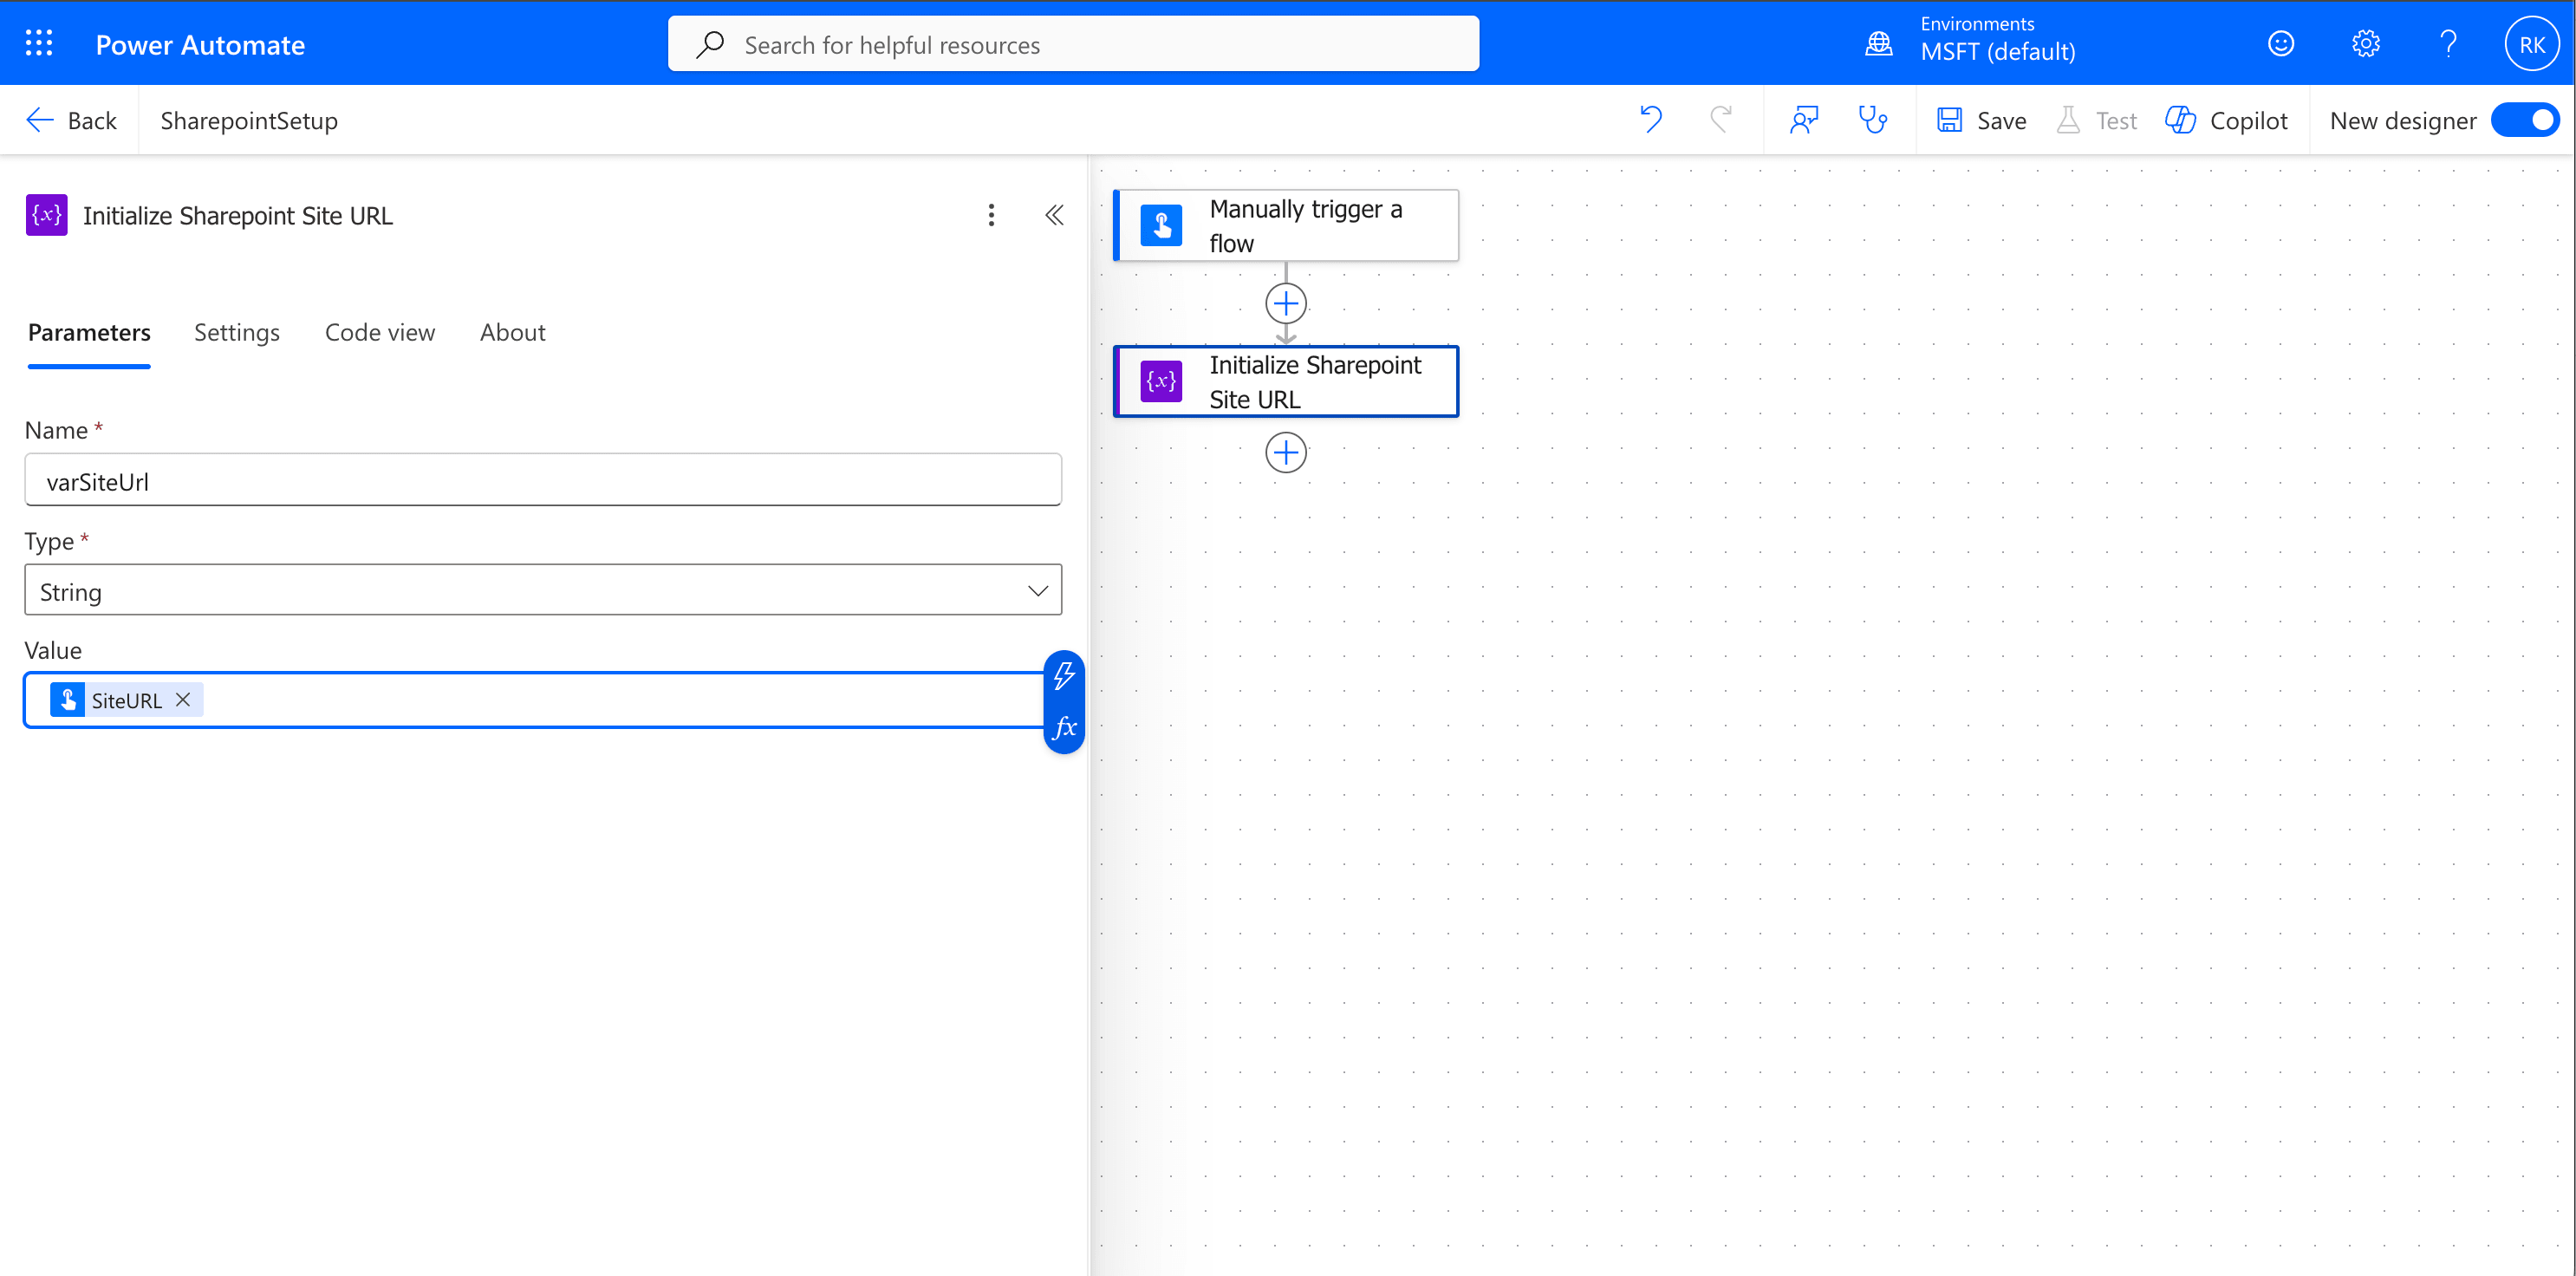
Add Initialize SharePoint Site URL
- Add a new action by clicking on the plus(+) icon - Initialize variable
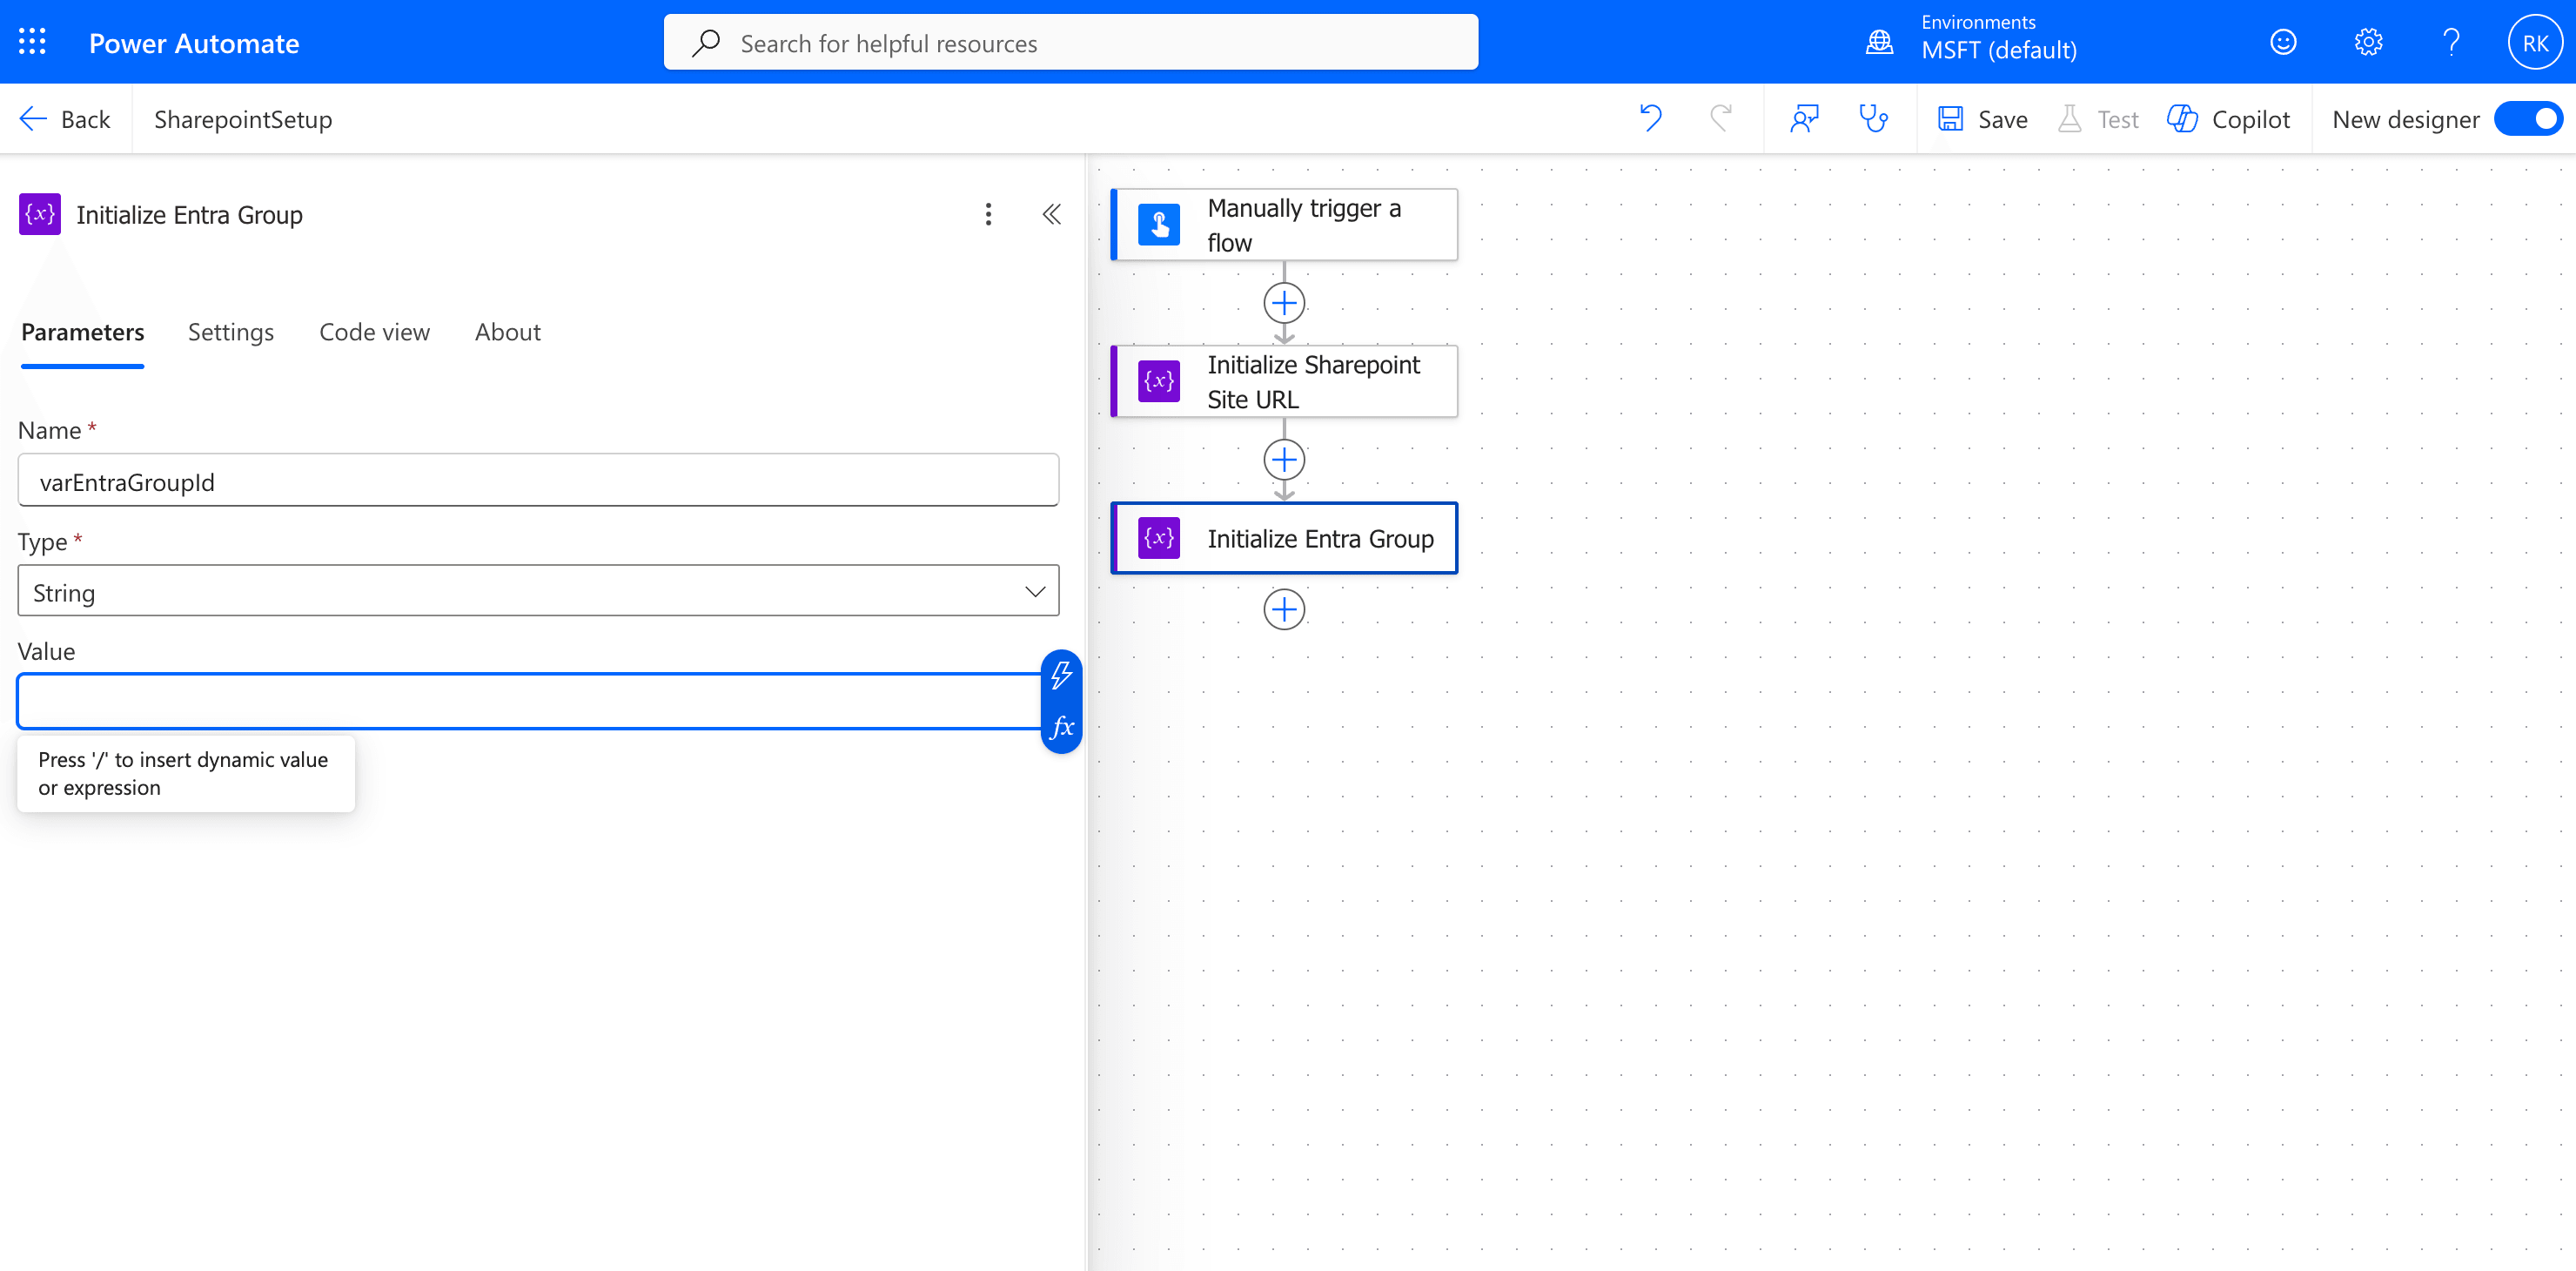
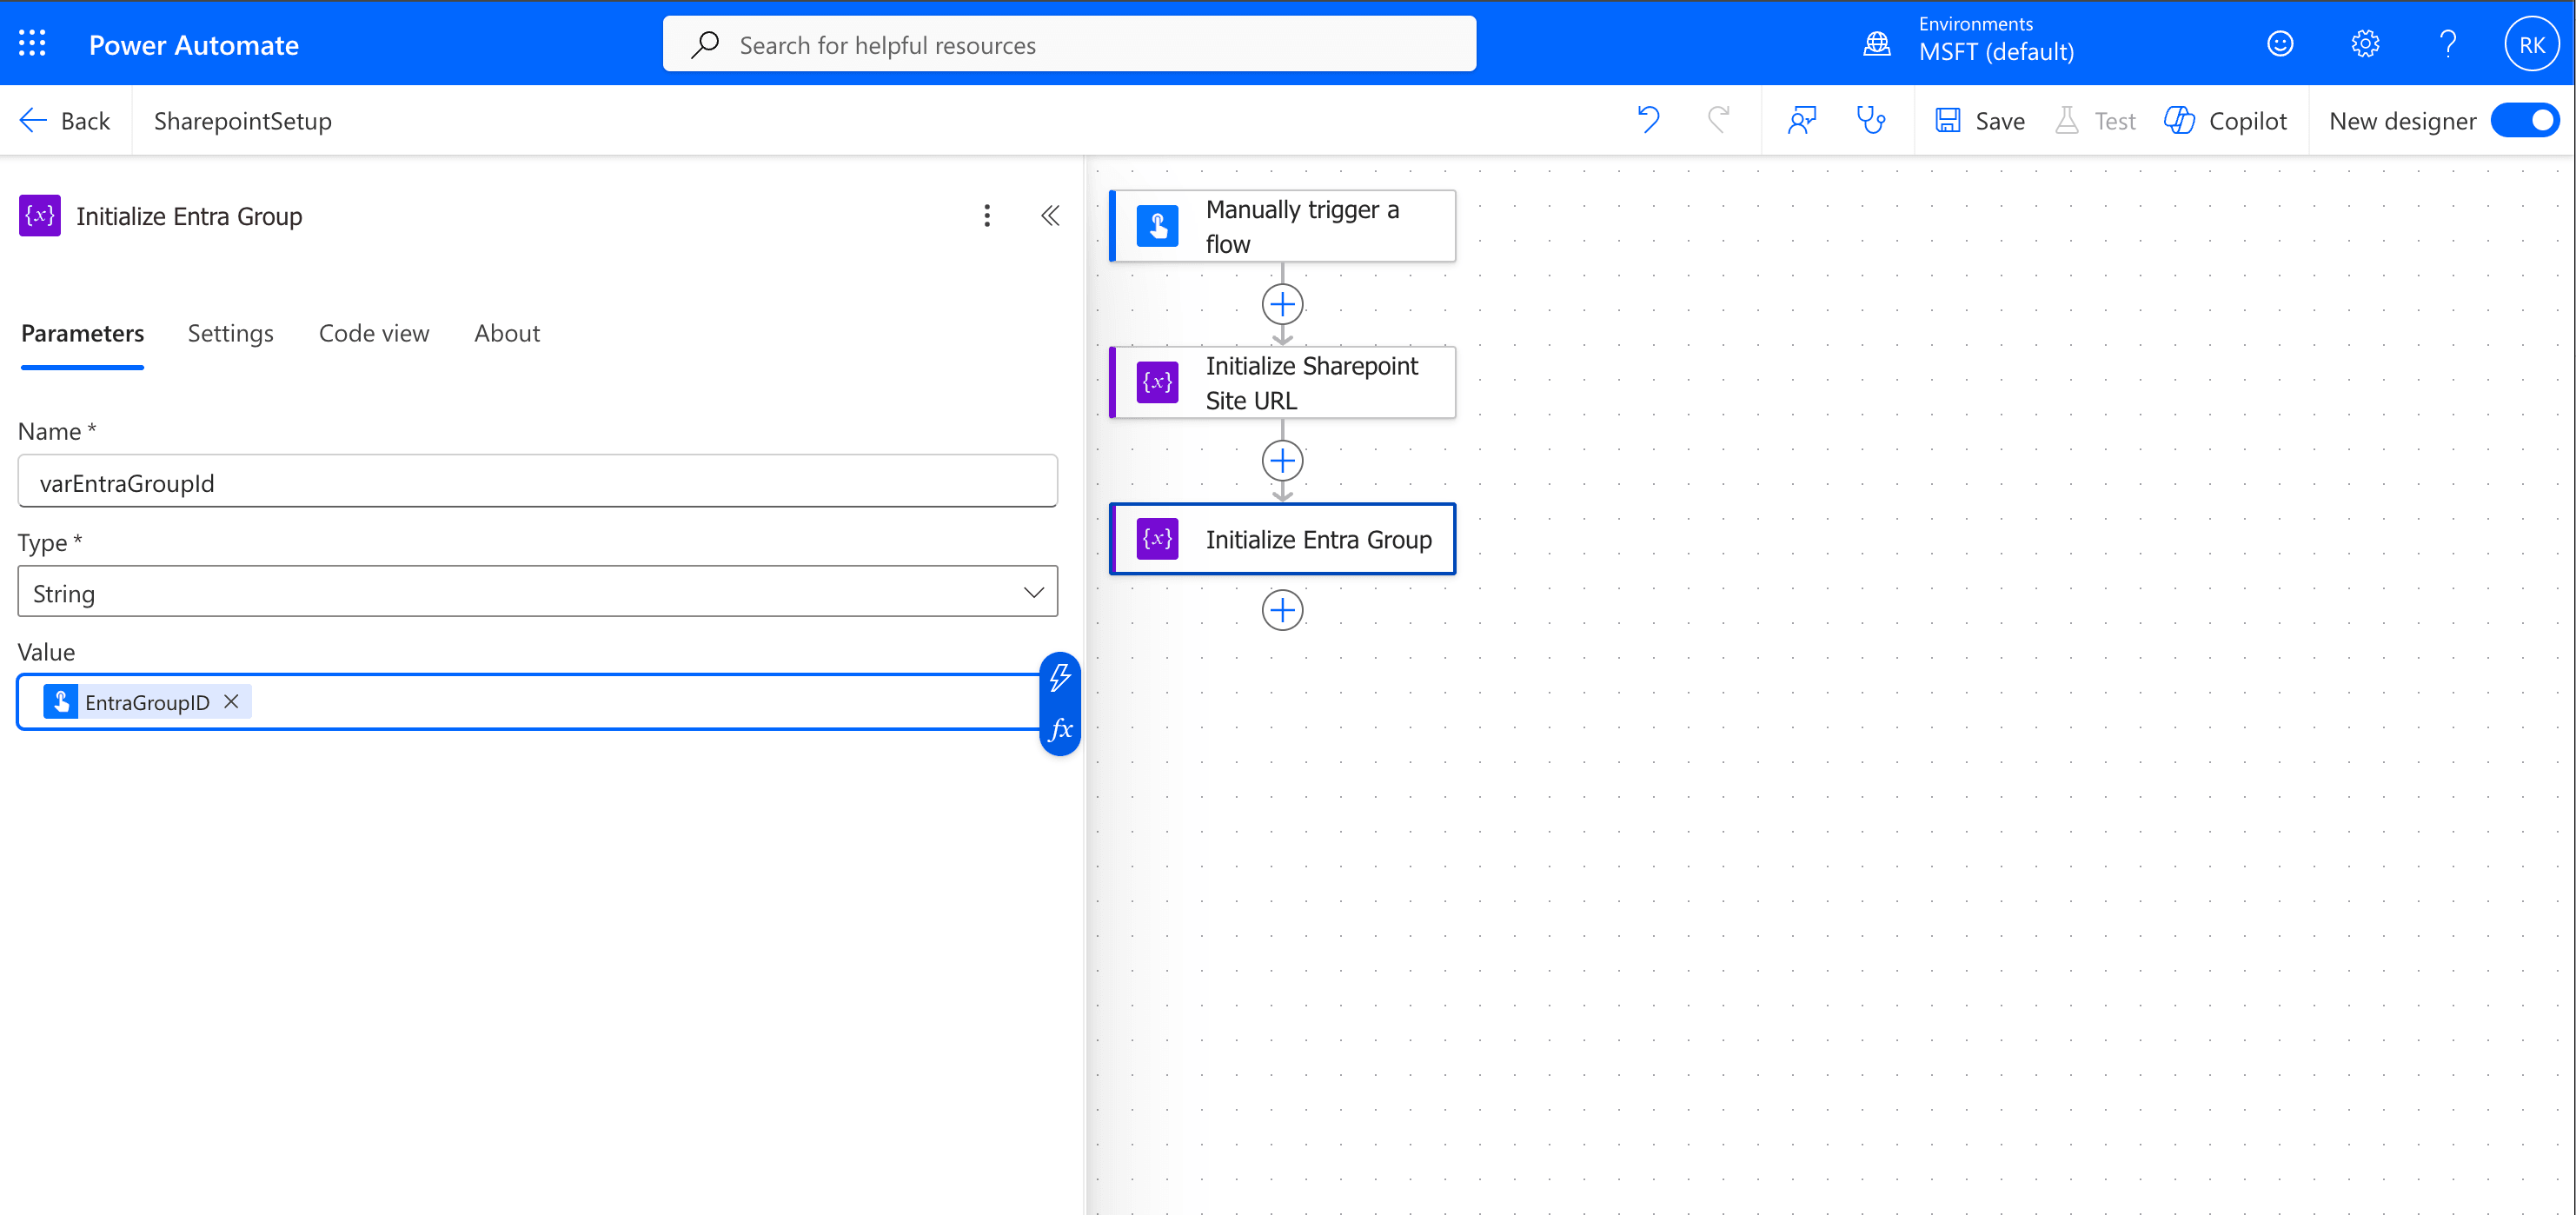
Initialize Entra Group
- Rename action to Initialize Entra Group.
- Enter varEntraGroupId in the Name field - This is the Entra group's object id value which can be fetched by searching in entra.microsoft.com.
- Select Type as string.
- In the Value field, click and select the top option Dynamic Content(there will be another option Expression below Dynamic Content).

Enter Name Type and Value
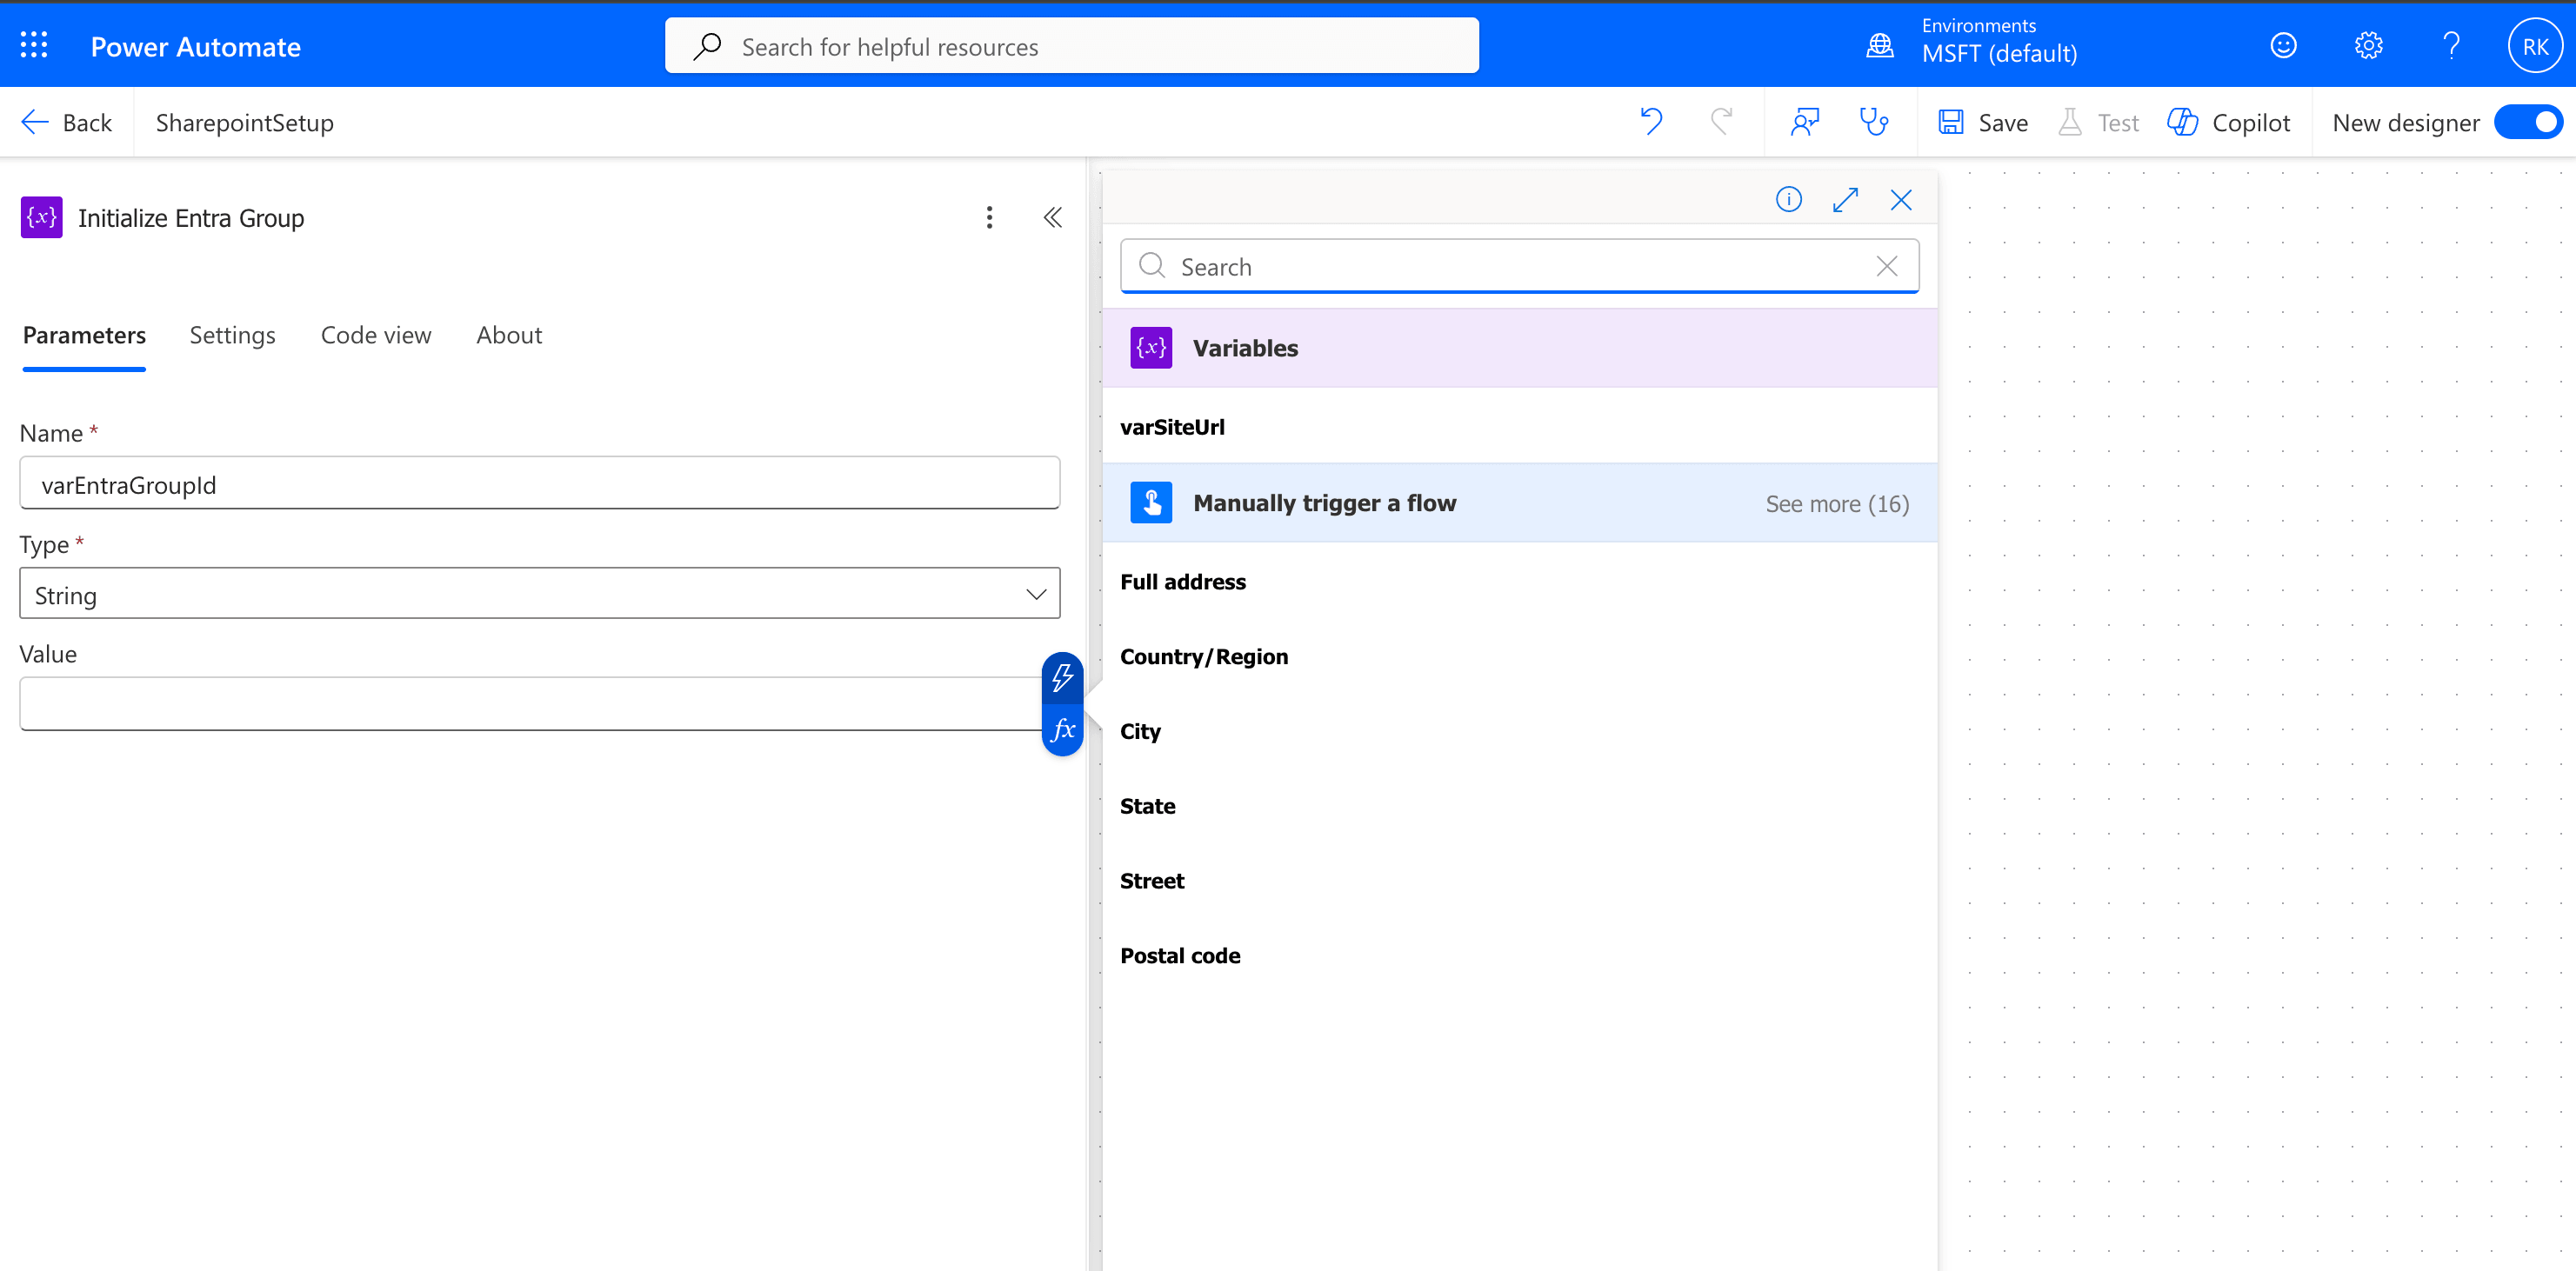
Search for EntraGroupID
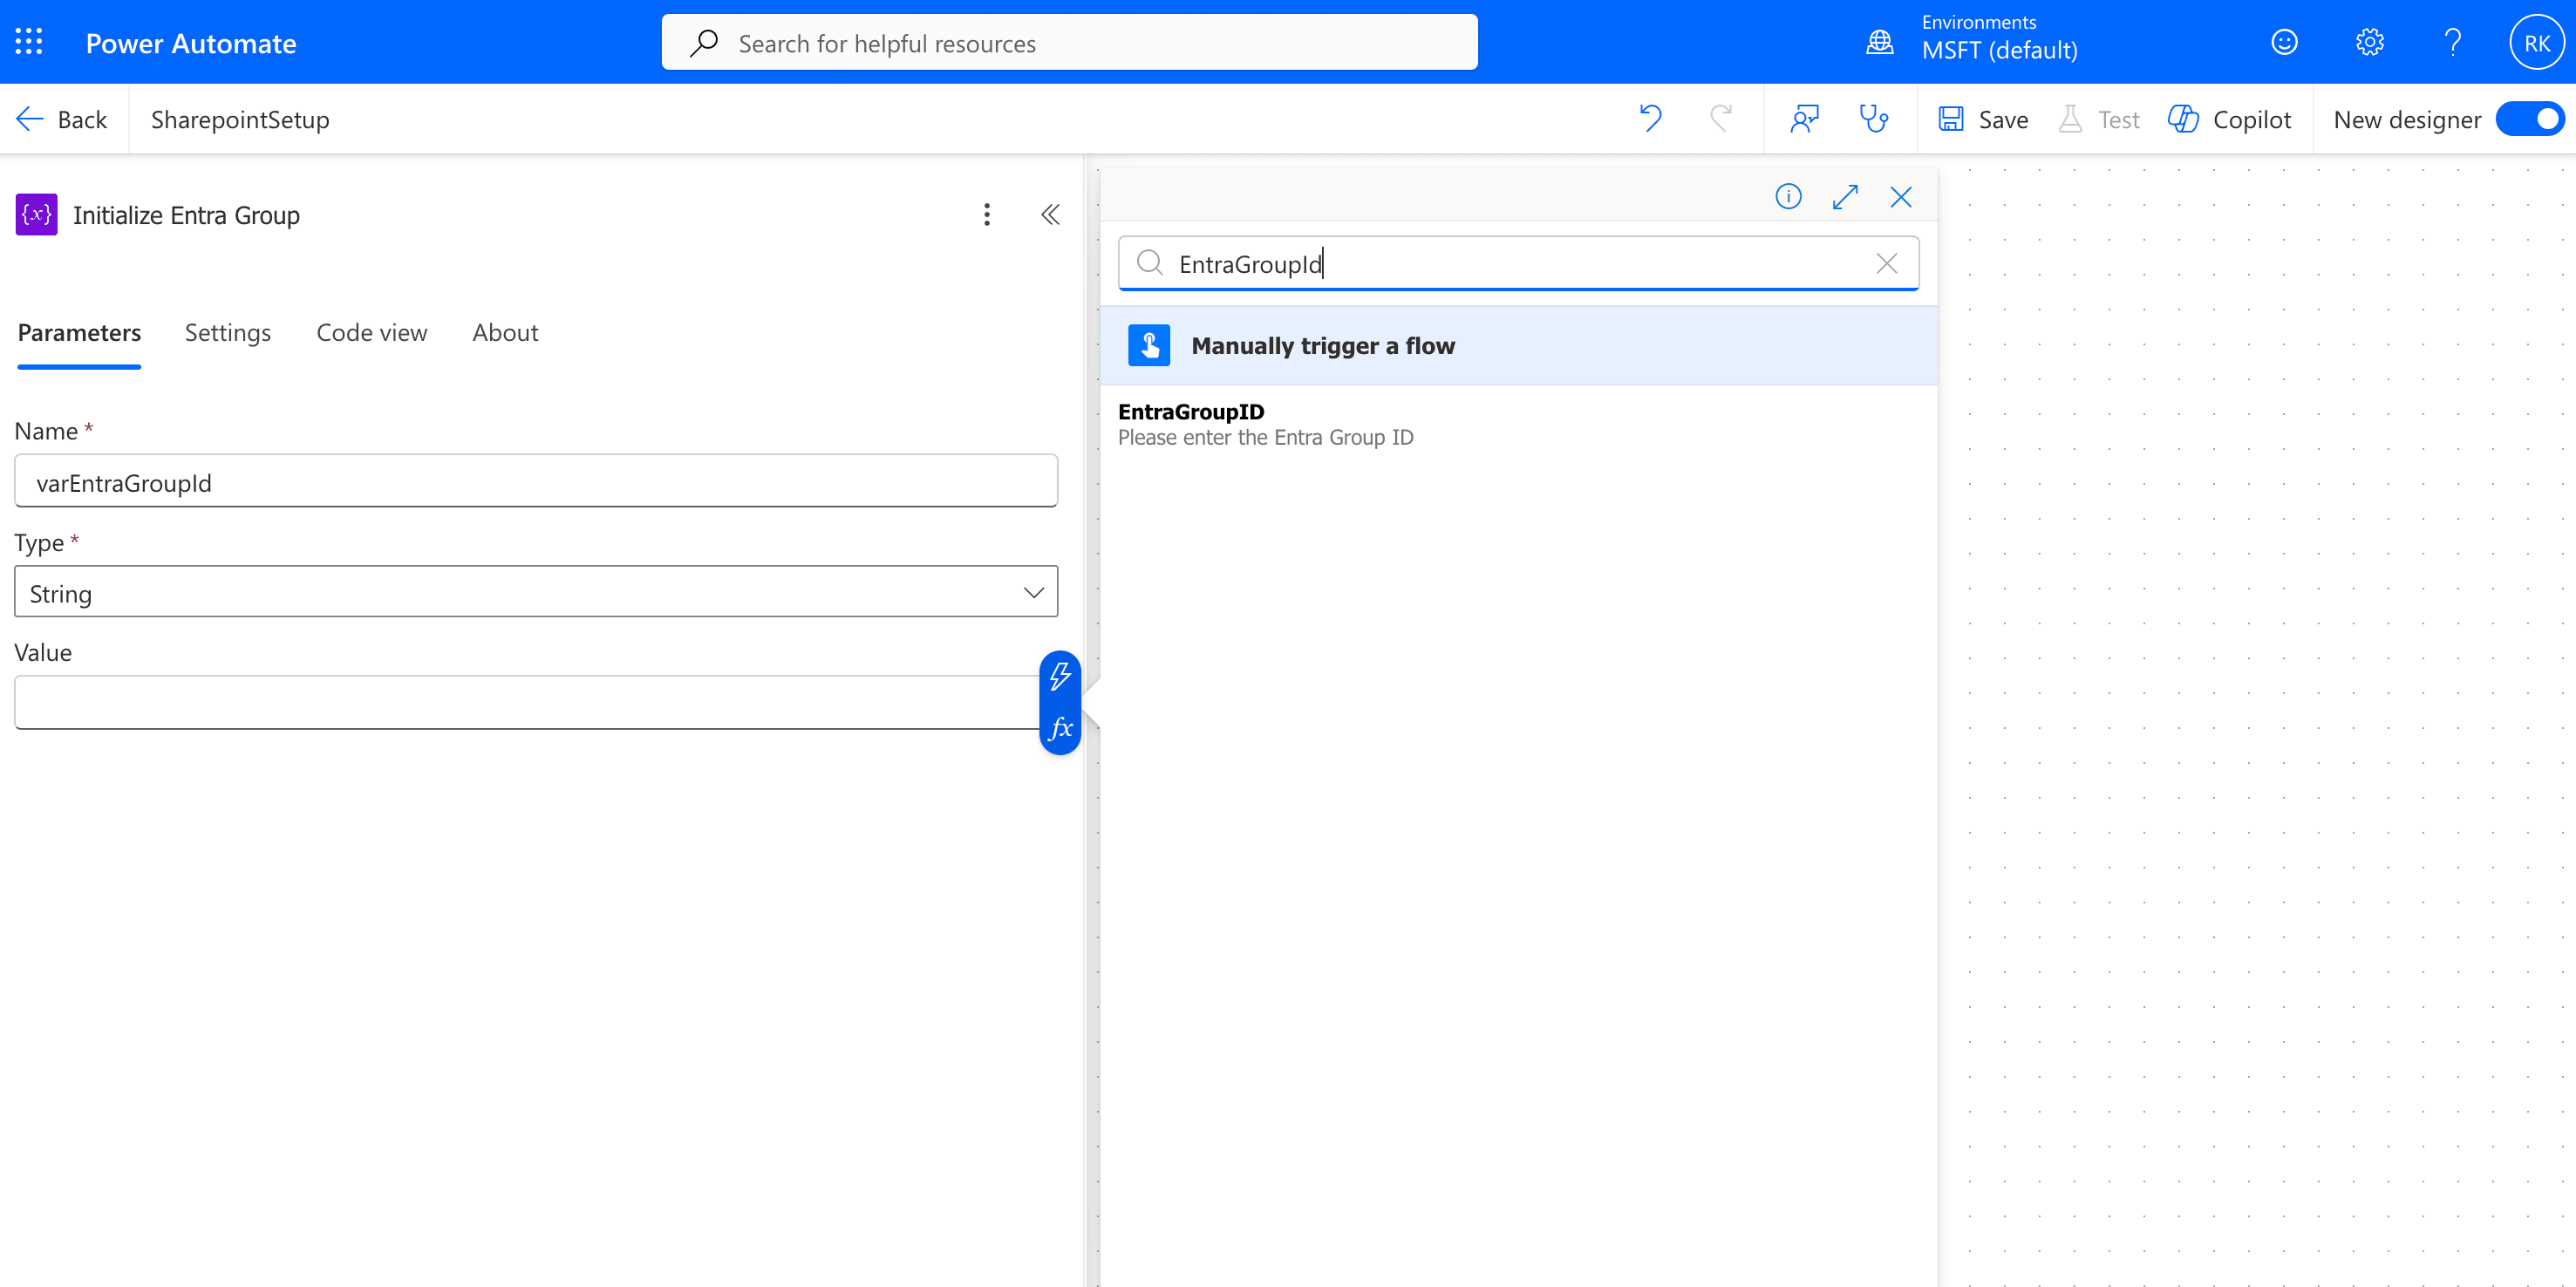
Select EntraGroupID as Value
-
EntraGroupId is added as the variable
- Add a new action by clicking on the plus(+) icon - Send an HTTP request to SharePoint
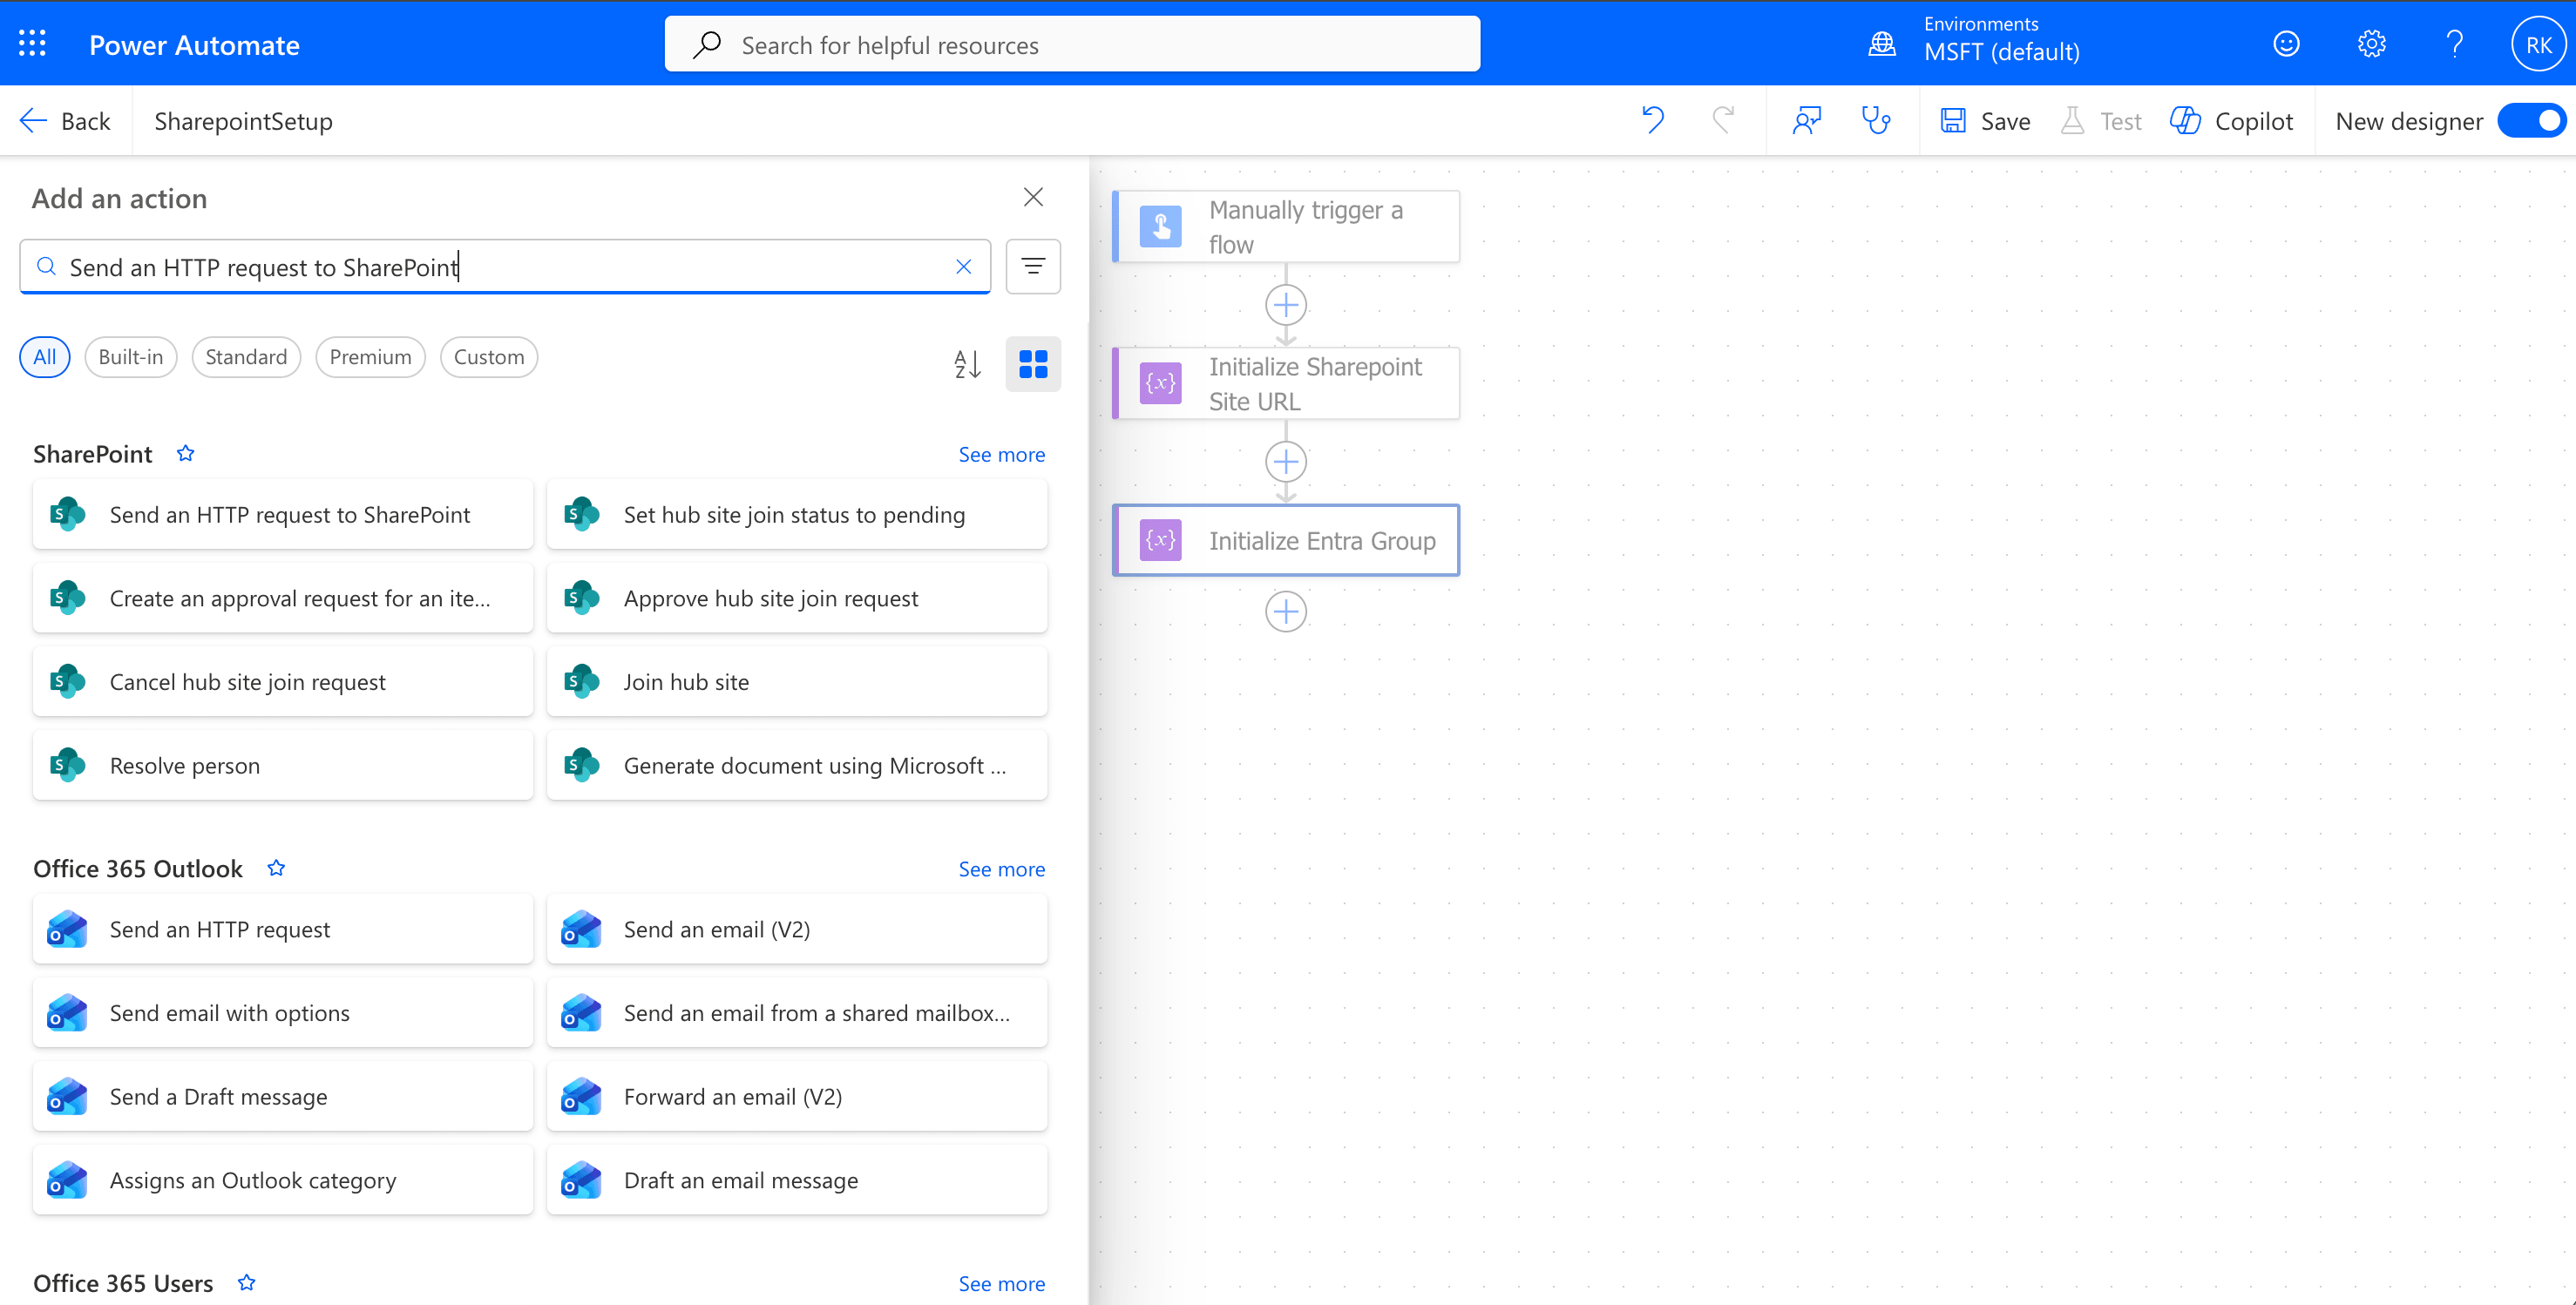
Select Send and HTTP request to SharePoint Action
- Rename the action to Create Custom Role.

Create Custom Role
- In the Site Address, click and select the option "Enter custom value" and then select the top option Dynamic Content - Select varSiteUrl from the window.
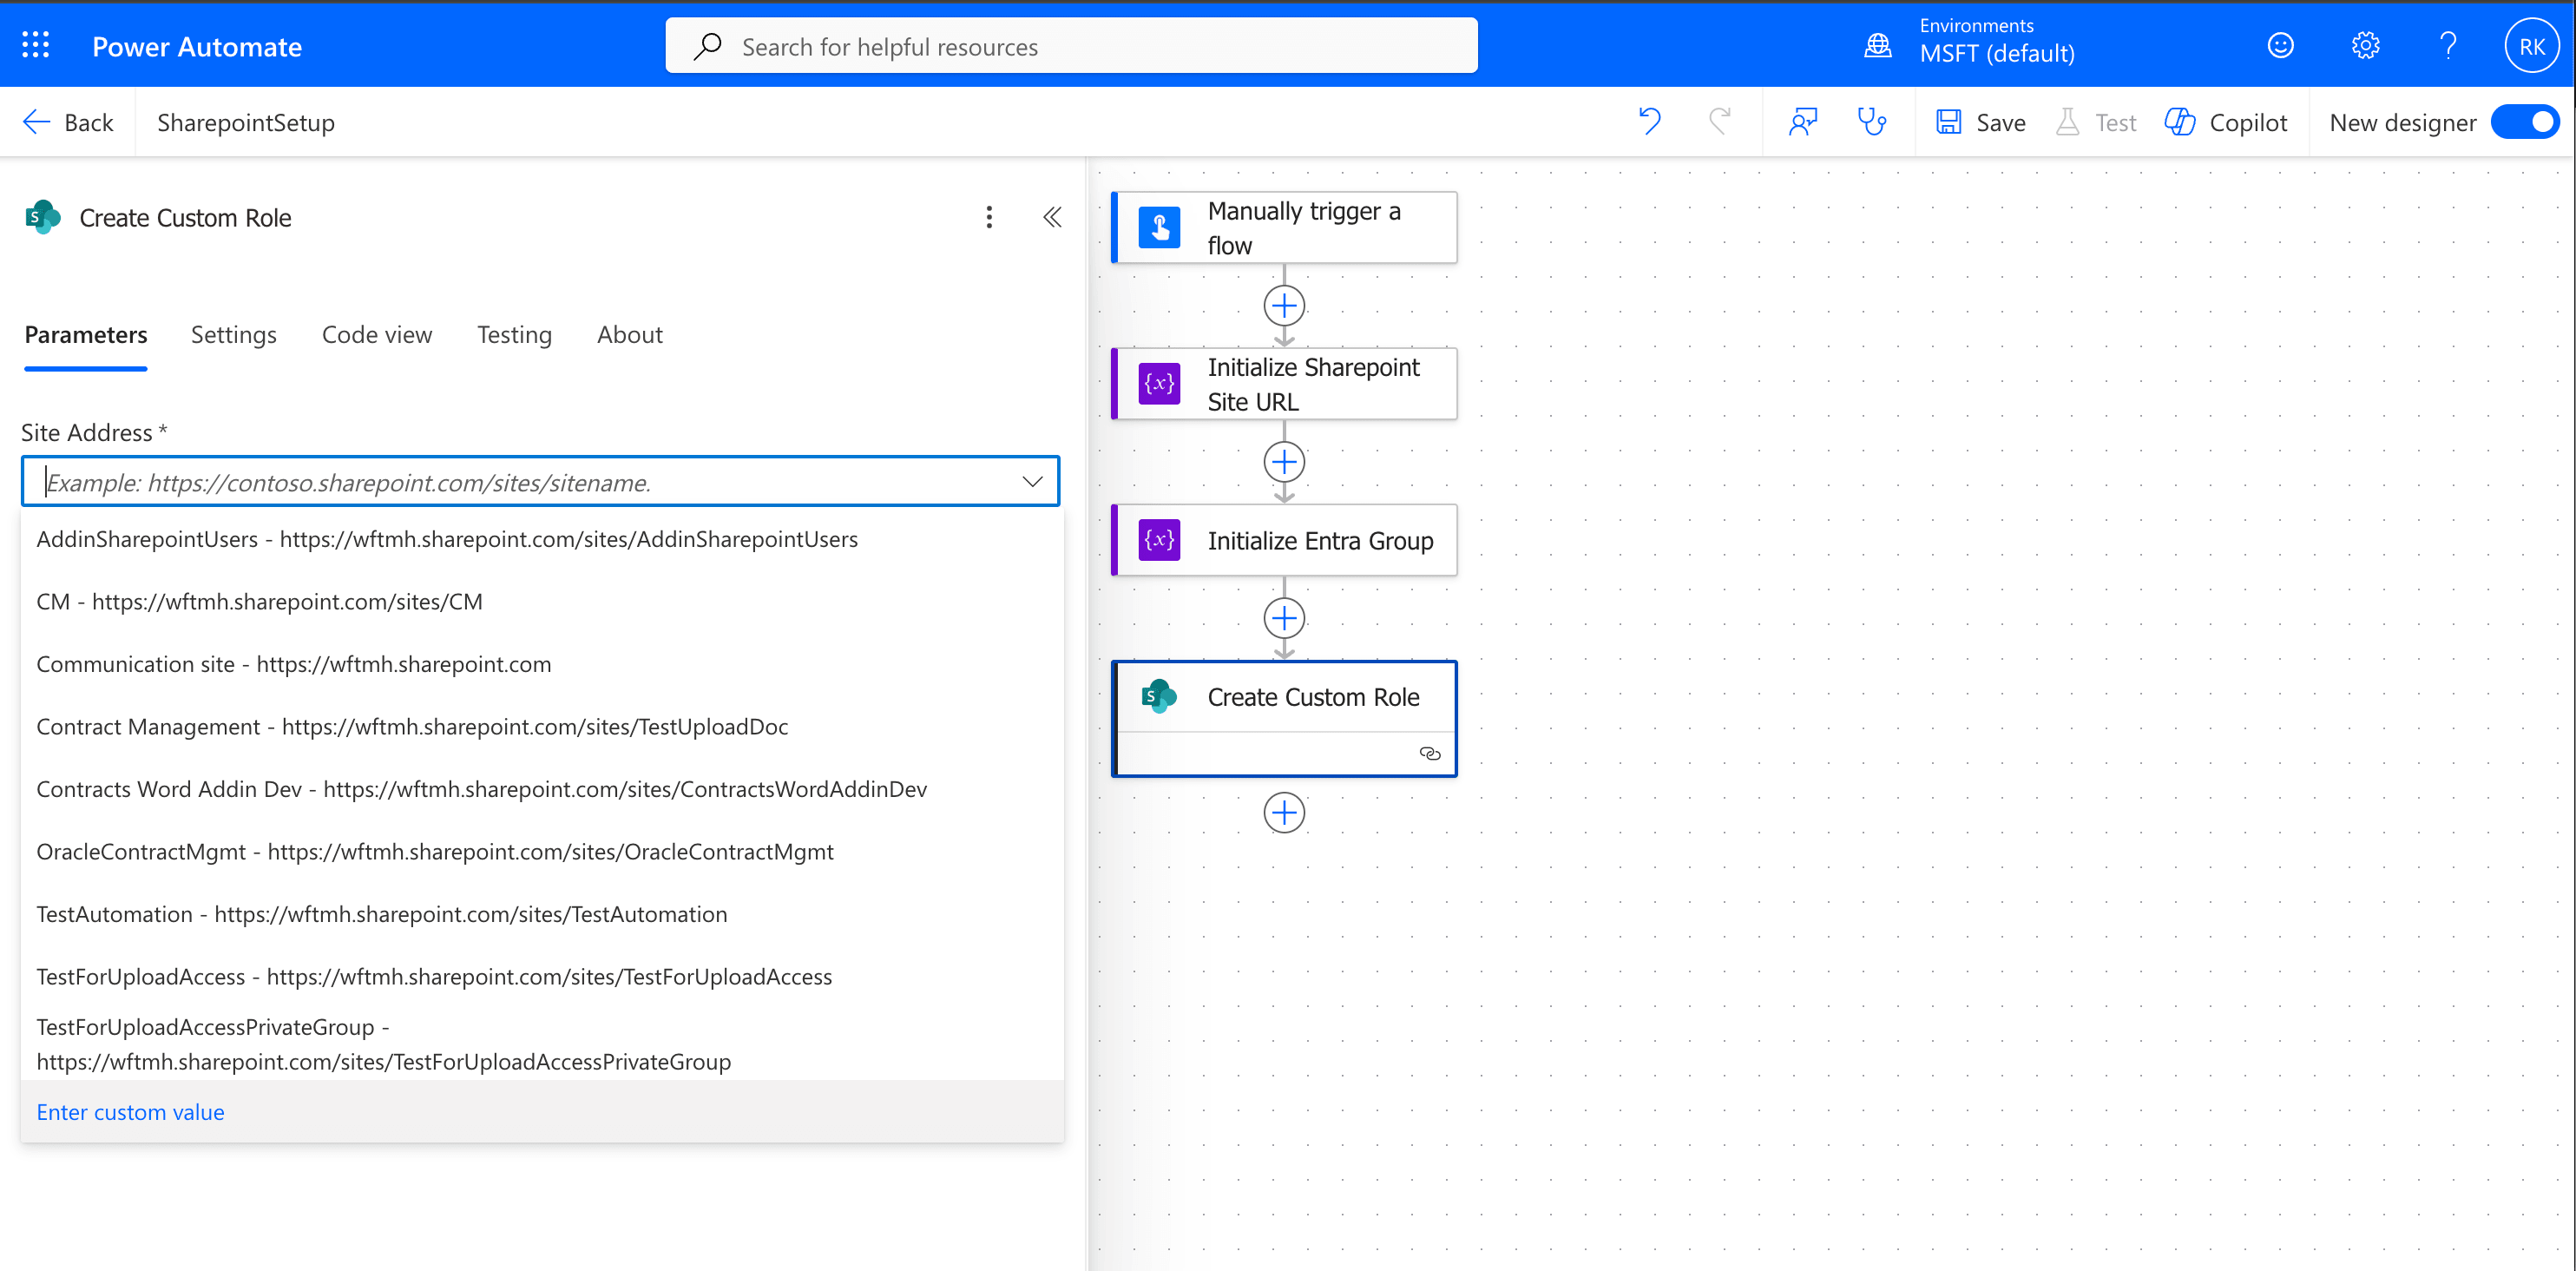
Click on Enter Custom Value
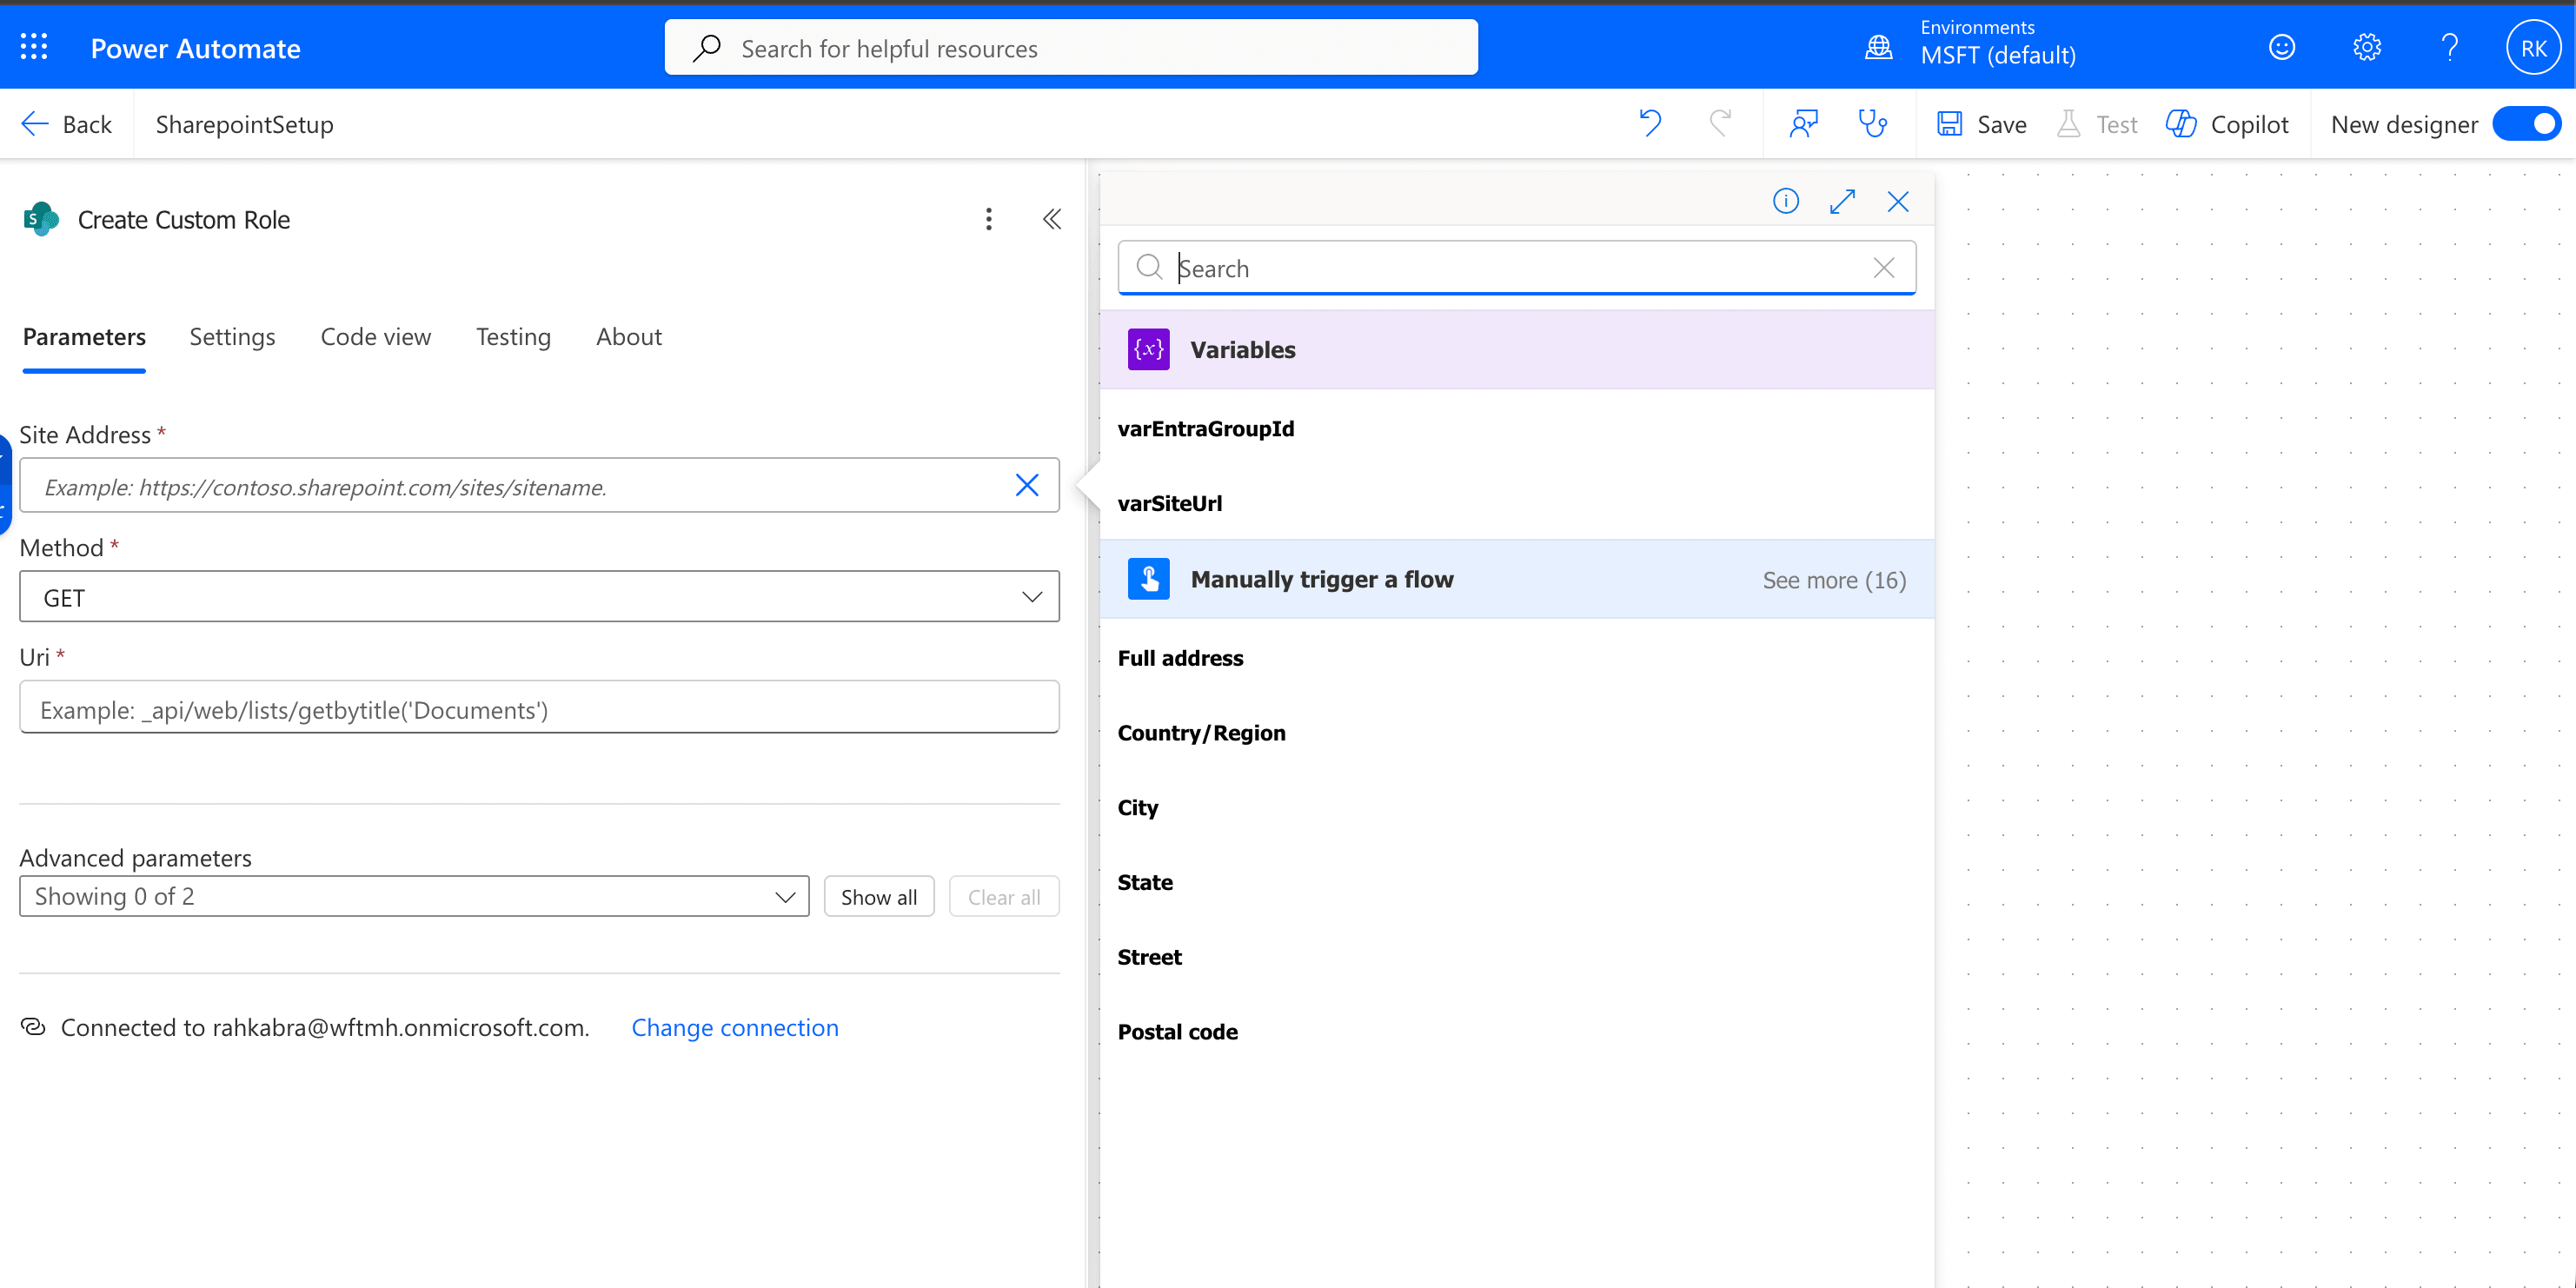
Search for VarSiteURL
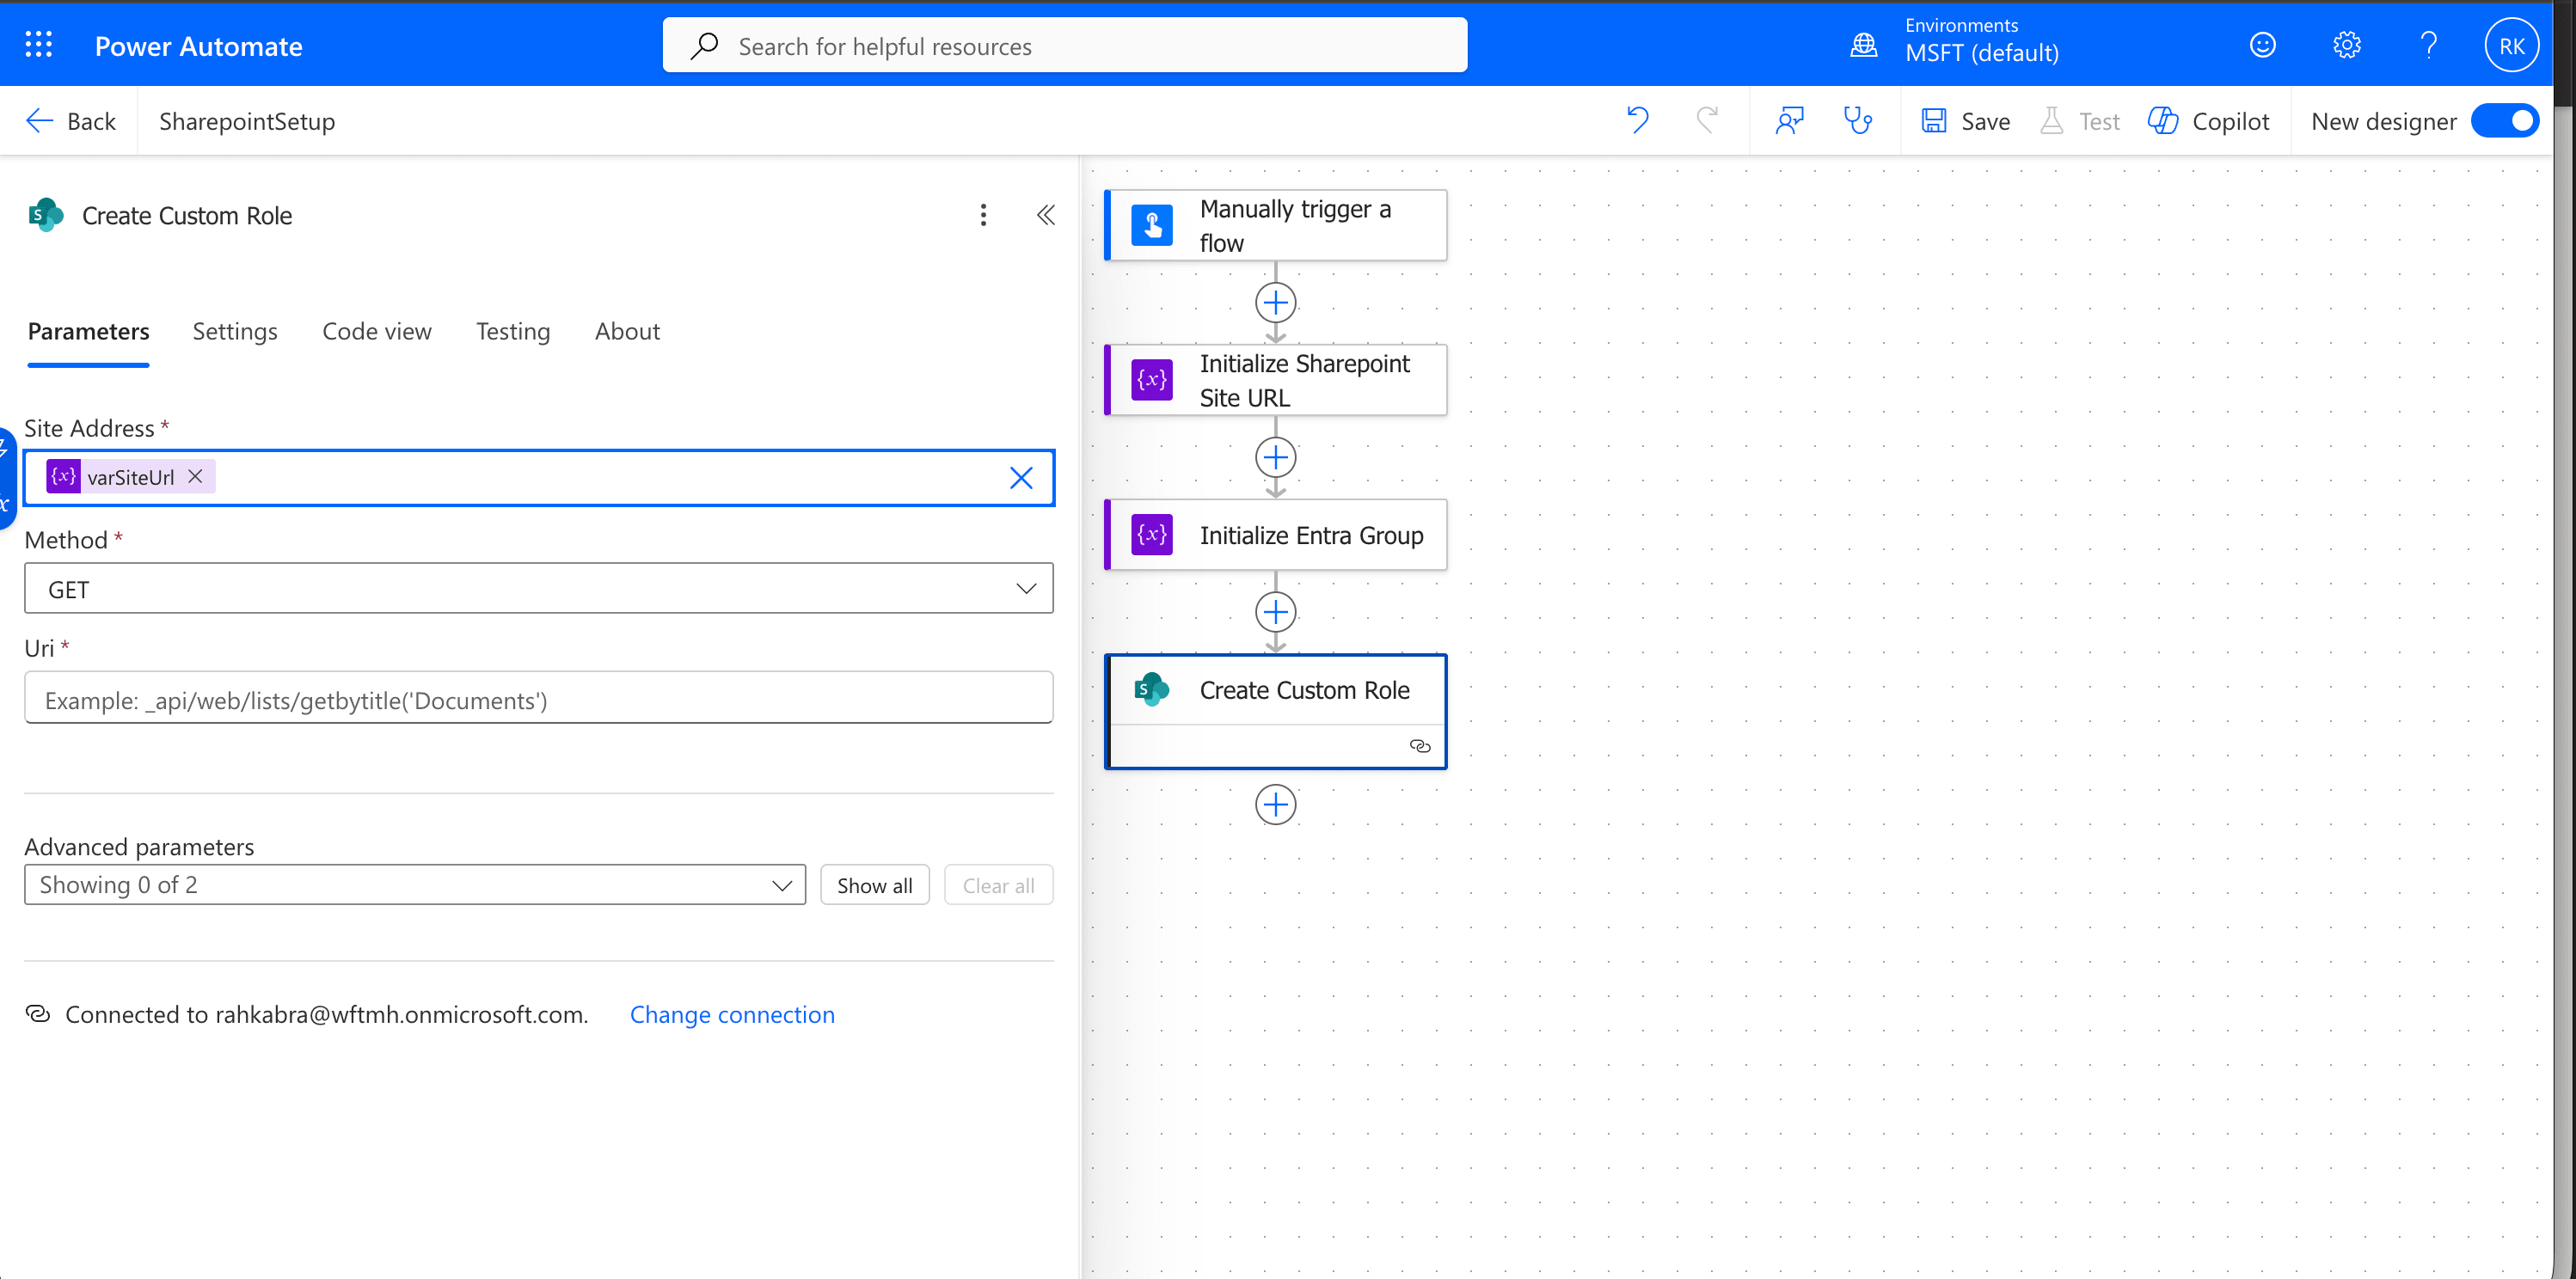
Select VarSiteURL as Site Address
- Select Method as POST and enter the following in the Uri field –
- _api