Configure view of object relationships
Help Desk Administrators can now use Visual Builder Studio extensibility to configure which object relationships are shown as options when creating a relationship, and also the order in which they are shown.
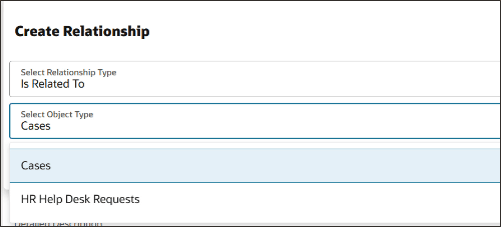
Create Relationships
This allows a way to limit the types of relationships shown to the agents, so that only those relationships that are desired by the business can be selected. It also allows the most commonly used relationship(s) to be presented at the top of the list. Relationships can either be defined commonly for all of Help Desk or a variable can be used to set the relationship configuration based on whether it is an HR Help Desk Request or an Internal Help Desk Request.
Steps to enable and configure
Leverage the Visual Builder Studio to expose your applications. To learn more about extending your application using Visual Builder, visit Oracle Help Center > your apps service area of interest > Books > Configuration and Extension.
To change the order or limit the types of relationships shown, the change must be done in Visual Builder Studio.
- Under the Navigator, go to Configuration -> Visual Builder.
- Navigate to Customer Experience (CX) -> HelpDesk -> helpdesk -> agent -> service-request-detail-start.
- Click on the Variables tab.
- Do you want the relationship options to be shown consistently across both HR Help Desk and Internal Help Desk?
- If YES (or if you are not using both at this time), you can update a variable directly to define the order and options shown.
- Click on objectTypeValuesForRelationships.
- Set the value to include only those relationships that are desired, as in the example shown below:
{

        "value": "case",

        "label": "Case"

        },

        {

        "value": "hrHelpDeskRequests",

        "label": "HR Help Desk Request"

        },

        {

        "value": "internalServiceRequests",

        "label": "Internal Help Desk Request"

} - Edit the options, order, and labels as desired.
- If NO and you want the order or options to be different for HR Help Desk than for Internal Help Desk, you will need to create an event listener with an action chain to set the value of the constant based on a variable that you'll create.
- Click on + Variable to create a new variable with the following suggested values:
- ID = relationshipTypes
- Type = Array
- Click on the Event Listener tab.
- Create a new Event Listener of type vbEnter.
- Next, Create Page Action Chain.
- Click Finish
- Click Go to Action Chain and give it a description, such as "Changes relationships."
- To the Action Chain, add the Assign Variable action.
- Choose the Variable relationshipTypes (or whatever you named it above).
- Set the value to be what is desired based on the stripe code. For instance, you can specify the order in the context of the stripe, as shown below.
The order for HR Help Desk being:
- Case
- HR Help Desk Request
- Internal Help Desk Request
- If YES (or if you are not using both at this time), you can update a variable directly to define the order and options shown.
While in the context of Internal Service Request, it is:
- Internal Help Desk Request
- Case
- HR Help Desk Request.
The example Code for this is:
{
    value: $base.page.variables.stripeCode === 'ORA_SVC_HRHD' ? 'case' : undefined,
    label: $base.page.variables.stripeCode === 'ORA_SVC_HRHD' ? "Case" : undefined,
},
{
    value: $base.page.variables.stripeCode === 'ORA_SVC_HRHD' ? 'hrHelpDeskRequests' : undefined,
    label: $base.page.variables.stripeCode === 'ORA_SVC_HRHD' ? "HR Help Desk Request" : undefined,
},
{
    value: $base.page.variables.stripeCode === 'ORA_SVC_HRHD' ? 'internalServiceRequests' : undefined,
    label: $base.page.variables.stripeCode === 'ORA_SVC_HRHD' ? "Internal Help Desk Request" : undefined,
},
{
    value: $base.page.variables.stripeCode === 'ORA_SVC_ISR' ? 'internalServiceRequests' : undefined,
    label: $base.page.variables.stripeCode === 'ORA_SVC_ISR' ? "Internal Help Desk Request" : undefined,
},
{
    value: $base.page.variables.stripeCode === 'ORA_SVC_ISR' ? 'case' : undefined,
    label: $base.page.variables.stripeCode === 'ORA_SVC_ISR' ? "Case" : undefined,
},
{
    value: $base.page.variables.stripeCode === 'ORA_SVC_ISR' ? 'hrHelpDeskRequests' : undefined,
    label: $base.page.variables.stripeCode === 'ORA_SVC_ISR' ? "HR Help Desk Request" : undefined,
},
- Save
- Click on the Variables tab.
- Click on the constant objectTypeValuesForRelationships.
- Set the value to be the array relationshipTypes variable.
Preview the changes to validate that the relationships are being shown properly before publishing your changes.
Tips and considerations
When an extension is used to assign a variable array to the constant objectTypeValuesForRelationships, the variables are defined starting with $base.page.variables.
Also, note that it is not a misprint that there is a comma at the end of each line when defining the objects in the array.
Key resources
A video showing how to configure the feature is found at Configure Options and Order of Object Relationships (WN 25A) - Oracle Video Hub.
Access requirements
Anyone with Visual Builder Studio access can configure this change.
The change to the Relationships will be seen by anyone having agent privileges, which includes the privilege to manage relationship links, as shown:
- SVC_VIEW_OBJECT_LINK
- SVC_CREATE_OBJECT_LINK
- SVC_DELETE_OBJECT_LINK
No changes to current privileges are required.