Send employee satisfaction surveys after a Help Desk request is resolved
Employee feedback through satisfaction surveys can now be gathered for Help Desk in the Redwood Experience.
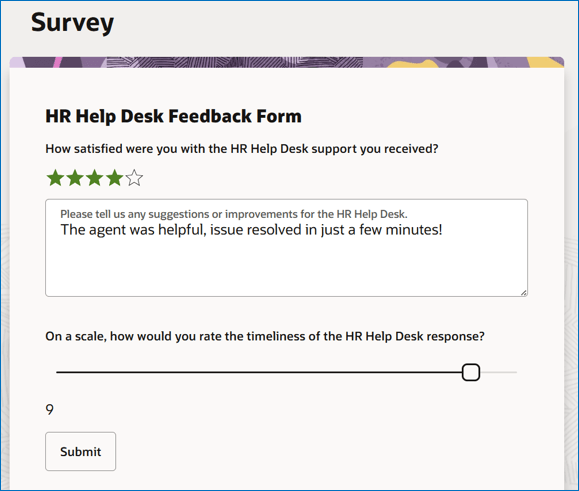
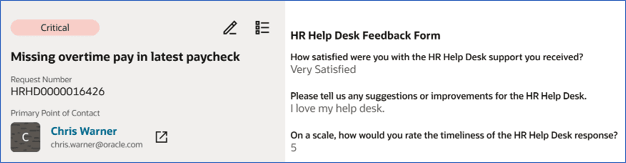
Sample Help Desk Survey
The basic process is outlined below:
- Administrators: use the Survey Authoring Agent Team in AI Studio to create a Help Desk satisfaction survey template.
- Employees: receive an invitation to complete a survey using a configured communication channel (such as email or bell notification) and submit responses which are associated with the originating Help Desk request.
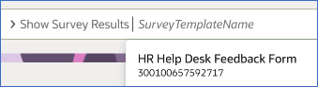
- Agent: authorized agents can view submitted survey responses using the 'Show Survey Results' SmartAction.
- Administrators: responses can be analyzed in Oracle Transactional Business Intelligence (OTBI).
Help Desk surveys can provide important feedback on the effectiveness of an individual Help Desk request as well as generally identify service trends, improving Help Desk support quality.
Steps to enable and configure
Use the following steps to create and send employee satisfaction surveys when HR Help Desk requests are resolved.
Before You Begin
Complete this configuration in a test environment before deploying it to production. You need access to AI Agent Studio and permission to activate and publish a sandbox, create object event triggers, and create web services in Application Composer.
1. Enable Surveys
- Navigate to Setup and Maintenance.
- Select the Service offering.
- Click Change Feature Opt In.
- Scroll to Surveys.
- Select Enable.
- Click Done.
2. Create a Survey
- From the Navigator, select AI Agent Studio.
- If you are using the new AI Agent Studio user interface, select Monitoring and Evaluation to open the traditional AI Agent Studio interface.
- Select the Supervisor Agent tab.
- Search for Survey.
- Locate the Survey Authoring Agent team.
- Click on the eye (view) icon to open the Survey Authoring Agent team.
- Click the Play icon to start a conversation to create a survey.
- Select Service Request.
- Select HR Help Desk Request as the request type.
- Describe the survey’s purpose. For example: Assess employee satisfaction after an HR Help Desk request is resolved.
- Review the proposed survey and request changes as needed. For example, you can instruct the agent to:
- Add a question.
- Change the response type for an existing question.
- Remove questions.
- Reword questions.
- When the survey is complete, give confirmation to the agent to create the survey.
- Copy and save the returned Survey ID. You will use it in the object event trigger.
3. Create and Enter a Sandbox
- Return to the Home page.
- Create or open a publishable sandbox.
- When creating a sandbox, enter a meaningful name and description. For example, use a description such as Set up employee satisfaction surveys.
- Select Application Composer as the tool.
- Click Create and Enter.
4. Create the Object Event Trigger
- In the sandbox, select Tools > Application Composer.
- Expand Standard Objects.
- Select HR Help Desk Request for HR request surveys; for Internal/Operational Help Desk surveys, select Internal Service Request instead.
- Select Server Scripts.
- Open the Triggers tab.
- From the Actions menu, select Create New.
- For the trigger type, select Before Update in Database.
- Enter a meaningful trigger name, such as Send HRHD Survey.
- Enter a description, such as Send an HR Help Desk survey to the primary contact when the request is resolved.
- Enter the following script. Replace [your surveyID] and [your server] with your values.
if (isAttributeChanged('StatusCd') && StatusCd == 'ORA_SVC_HRHD_RESOLVED') {
   try {
       def srId = SrId
       def primaryContactPartyId = PrimaryContactPartyId
       def assigneeResourceId = AssigneeResourceId
       def objectTypeCd = 'ORA_SVC_SERVICE_REQUESTS_HRHD'

       // Hardcoded SurveyId
       def surveyId = "[your surveyID]"

       def createSurveyWS = adf.webServices.CreateSurveyRequestWS

       createSurveyWS.requestHTTPHeaders = [
           'Content-Type': 'application/json',
           'Accept'      : 'application/json'
       ]

       def surveyRequestPayload = [
           SurveyId      : surveyId,
           ObjectId      : srId,
           ObjectTypeCd  : objectTypeCd,
           PartyId       : primaryContactPartyId,
           RespondedFlag : 'N',
           OwnerId       : assigneeResourceId
       ]

       def surveyRequestResponse = createSurveyWS.POST(surveyRequestPayload)

       if (!surveyRequestResponse) {
           println("Error: Survey Request response is null.")
           return
       }

       def surveyRequestId = (surveyRequestResponse as Map)?.SurveyRequestId?.toString()

       if (!surveyRequestId) {
           println("Error: Failed to retrieve SurveyRequestId.")
           return
       }

       def surveyUrl = "https://[your server]/fscmUI/redwood/helpdesk/employee/survey?surveyRequestId=${surveyRequestId}"

       def emailMessage = """ Your Help Desk request has been resolved. We value your feedback. Please take a moment to complete a survey by clicking this link: ${surveyUrl}. Thank you! """.trim()

       def notificationMap = [
           ObjectId         : srId,
          MessageText      : emailMessage,
          RecipientPartyId : primaryContactPartyId,
           Channels         : ['ORA_SVC_EMAIL', 'ORA_SVC_BELL']
       ]

       adf.util.sendNotification(adf, notificationMap)
       println("Survey notification sent successfully.")

   } catch (Exception e) {
       println("Error: ${e.getMessage()}")
       e.printStackTrace()
   }
}
-
Optional: Modify the script to send surveys only for selected categories, during certain dates or times, or at a chosen frequency.
-
Click Save and Close.
-
Confirm that unrelated edits to a Help Desk request do not send a survey invitation.
5. Create the Survey Request Web Service
- In Application Composer, collapse Objects.
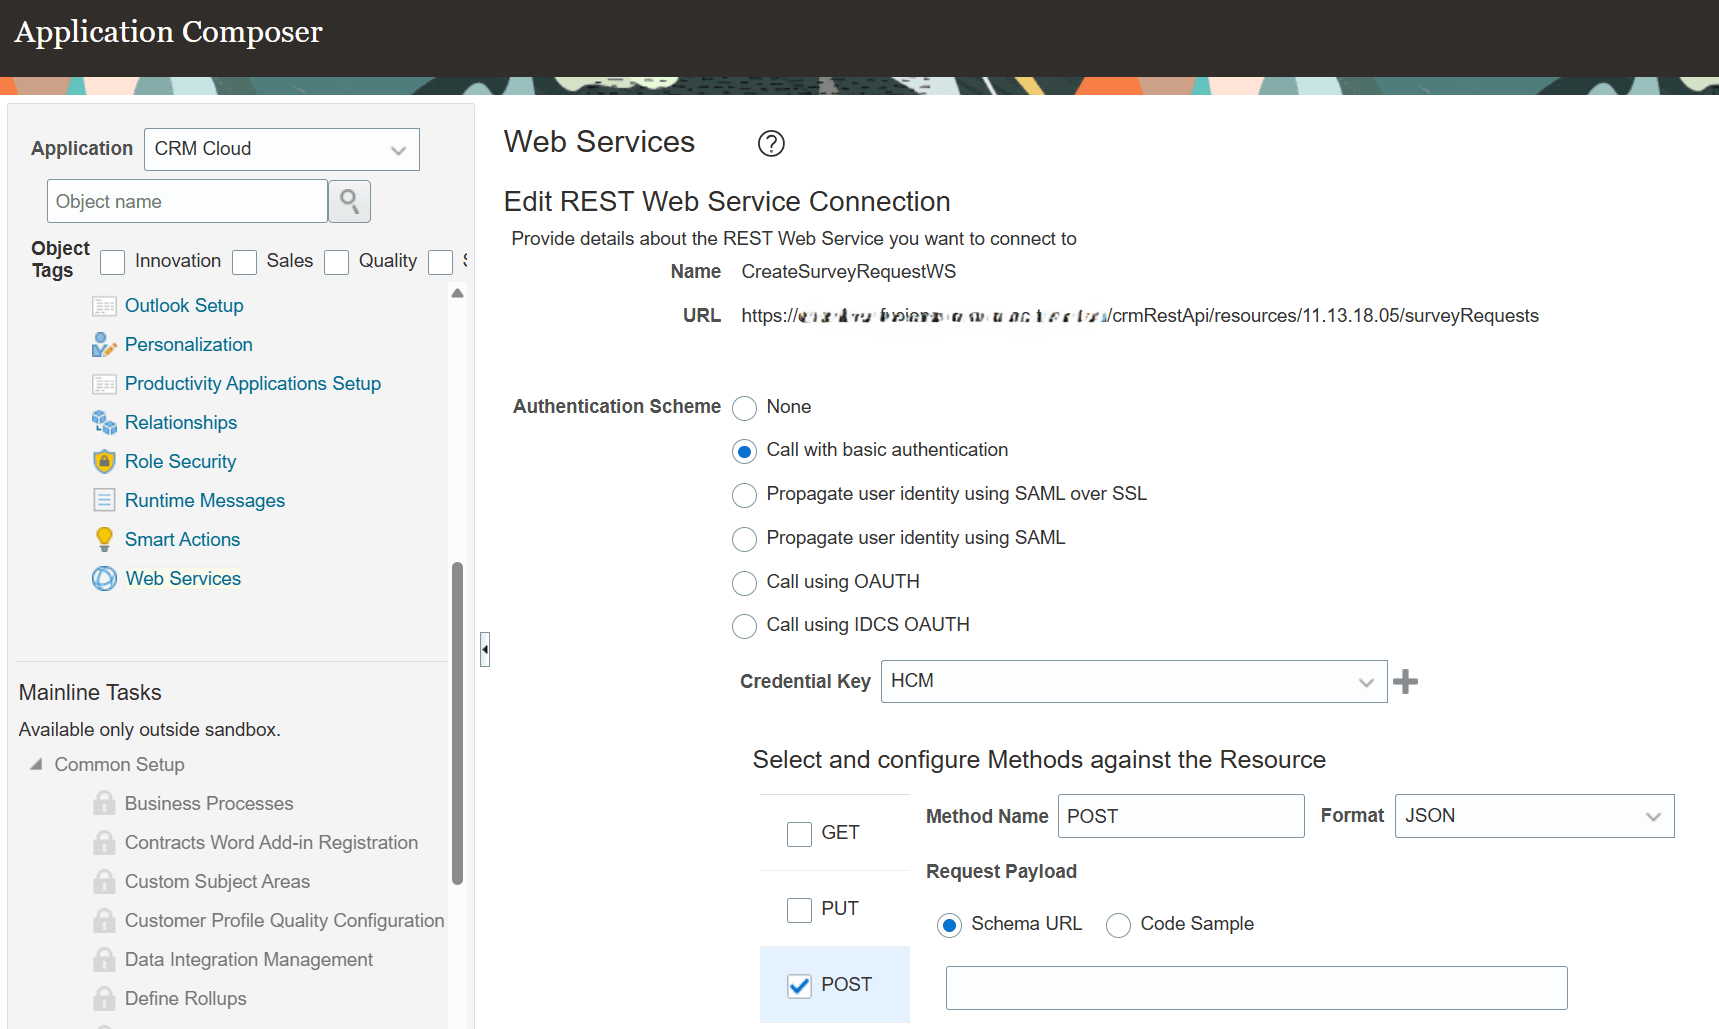
- Under Common Setup, select Web Services.
- Click Create.
- Set Connection Type to REST.
- Enter CreateSurveyRequestWS as the name. (NOTE: You will need to use this exact name if you used the example code above.)
- Enter the following URL, replacing [your server] with your environment server name:
https://[your server]/crmRestApi/resources/latest/surveyRequests - Under Authentication Scheme, select Propagate user identity using SAML over SSL.
- Check POST as the method. (Use JSON as the Format.)
- Under Request Payload, click Code Sample, and enter the following:
{"SurveyId": 300100205501361, "ObjectId": 300100111024246, "ObjectTypeCd": "ORA_SVC_SERVICE_REQUESTS", "PartyId": 100010025532672, "RespondedFlag": true,"OwnerId": 300180909101}
- Under Response Payload, click Code Sample, and enter the following:
{ "SurveyRequestId": 300100205501367, "SurveyId": 300100205486361, "ObjectId": 300100111024263, "ObjectTypeCd": "ORA_SVC_SERVICE_REQUESTS", "PartyId": 100010025532672, "CreationDate": "2020-04-08T09:25:28+00:00", "CreatedBy": "SALES_ADMIN", "LastUpdateDate": "2020-04-08T09:25:28.077+00:00", "LastUpdatedBy": "SALES_ADMIN", "LastUpdateLogin": "A2695E930113EAC9E0533CFDF40AD639", "ObjectVersionNumber": 1, "RespondedFlag": false, "ResponseDate": null, "VendorRequestId": "300100205501367", "OwnerId": null, "SurveyTemplateName": "Yearly Survey", "links": [ { "rel": "self", "href": "https://servername.fa.us2.oraclecloud.com/crmRestApi/resources/11.13.18.05/surveyRequests/300100205501367", "name": "surveyRequests", "kind": "item", "properties": { "changeIndicator": "ACED0005737200136A6176612E7574696C2E41727261794C6973747881D21D99C7619D03000149000473697A65787000000001770400000001737200116A6176612E6C616E672E496E746567657212E2A0A4F781873802000149000576616C7565787200106A6176612E6C616E672E4E756D62657286AC951D0B94E08B02000078700000000178" } }, { "rel": "canonical", "href": "https://servername.fa.us2.oraclecloud.com/crmRestApi/resources/11.13.18.05/surveyRequests/300100205501367", "name": "surveyRequests", "kind": "item" }, { "rel": "child", "href": "https://servername.fa.us2.oraclecloud.com/crmRestApi/resources/11.13.18.05/surveyRequests/300100205501367/child/responses", "name": "responses", "kind": "collection" } ] }
- Save and close the web service.
6. Enable the Survey Results SmartAction
- In Application Composer, open the configuration for the applicable Help Desk request object.
- Enable the Show Survey Results SmartAction.
- Save your changes.
7. Test and Publish
- As an agent, update a test HR Help Desk request to Resolved (or whatever status will trigger your survey invitation).
- Confirm that the survey invitation:
- Uses your configured invitation text.
- Is delivered to the expected recipient.
- Is sent through the configured notification channels.
- As the employee, open the survey invitation and submit a response.
- Confirm that the same invitation cannot be submitted again by the same employee.
- On the Help Desk request, as an agent, use the SmartAction Show Survey Results to choose the survey results to show.
- Confirm that the submitted response is saved and associated with the originating request.
- Publish the sandbox after successful testing.
Viewing a Survey Response in a Help Desk Request
Report on the Results
All Survey responses are saved to OTBI. The Subject Areas for survey reporting is one of:
- Help Desk - HR service Request Survey Responses Real Time
- Help Desk - Internal Service Request Survey Responses Real Time
More information is available is here: https://docs.oracle.com/en/cloud/saas/sales/faoec/Service-CRM-Survey-Responses-Real-Time-SA-142.html.
Tips and considerations
At this time surveys are only available for Help Desk requests and are not generated for chat or phone interactions or other channels where a request is not generated.
The Survey Authorization Team can only be run from the traditional AI Studio UI in 26C. If you are using the new Agentic UI, you will need to go to Monitoring and Evaluation in order to be able to run the agent to create surveys.
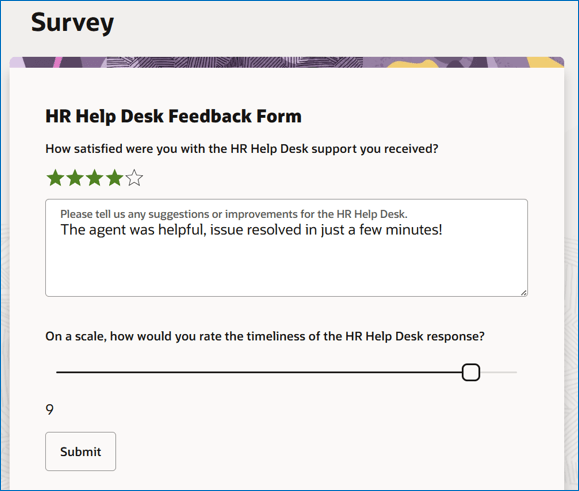
The following shows the question Types that are supported:
CHECKBOX Type
DATE Type
DROP_DOWN Type
MULTI_LINE_TEXT Type
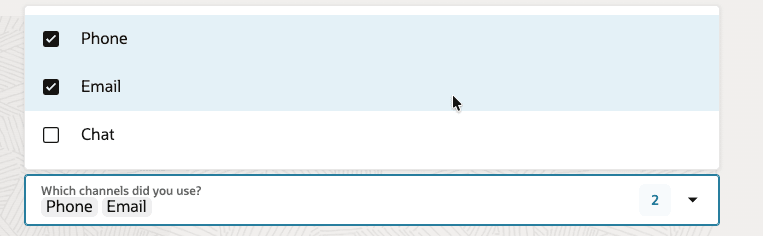
MULTI_SELECT Type
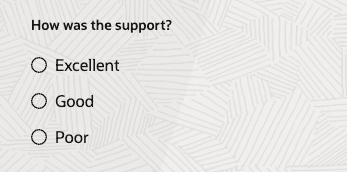
RADIO_BUTTON

RATING Type

SLIDER Type
Key resources
The Survey Authoring Agent team is described in more detail here: https://docs.oracle.com/en/cloud/saas/readiness/service/26a/bsvc-26a/26A-b2b-service-wn-f43393.htm#Steps-to-enable-and-configure
Access requirements
The following privileges are required to support Survey functionality.
- Manage Survey Requests - granted to administrators, to allow creation of survey templates
- View Survey Integration Framework Template - granted to agents and administrators
- View Survey Requests - granted to agents and administrators
These are given to the out-of-the-box roles, as outlined below.
HR Help Desk duty roles and associated privileges
HR Service Request Administration
- Manage Survey Requests
- View Survey Integration Framework Template
- View Survey Requests
HR Service Request Analysis
- View Survey Integration Framework Template
- View Survey Requests
HR Service Request Management
- View Survey Integration Framework Template
- View Survey Requests
Internal/Operations Help Desk duty roles and associated privileges
Internal Service Request Administration
- Manage Survey Requests
- View Survey Integration Framework Template
- View Survey Requests
Internal Service Request Analysis
- View Survey Integration Framework Template
- View Survey Requests
Internal Service Request Management
- View Survey Integration Framework Template
- View Survey Requests
Employees: Survey data, survey request, and survey integration framework grants are provided for the standard Help Desk employee duty roles, including HR Service Request Creation and Internal Service Request Creation. Consider adding these to any custom roles you are using. ZZZZ
Administrators who configure surveys will also need access to AI Agent Studio and the published Survey Authoring Agent Team.
If your organization uses custom roles, review those roles and add the required survey privileges and data security policies as needed.